
WhatsApp Business — Source Integration
Connect your WhatsApp Business Account with CustomerLabs 1PD Ops to automatically capture and send user interaction and conversion data from WhatsApp into CustomerLabs — without writing any code.
This guide walks you through the complete setup process step by step, helping you track leads and conversions from WhatsApp conversations and use them effectively across your marketing stack.
Overview
Section titled “Overview”WhatsApp Business enables businesses to engage with users through messages, forms, and automated flows.
By integrating WhatsApp Business with CustomerLabs, you can:
- Automatically capture lead and conversion events originating from WhatsApp.
- Centralize WhatsApp data inside CustomerLabs for analytics and attribution.
Before you begin
Section titled “Before you begin”Ensure you have the following access before starting the setup:
- Admin access to the CustomerLabs Dashboard.
- Admin access to your WhatsApp Business Account.
- Access to Meta Business Manager (for WhatsApp Business configuration).
Initial setup
Section titled “Initial setup”Navigate to WhatsApp source integration
Section titled “Navigate to WhatsApp source integration”-
Log in to your CustomerLabs account.
-
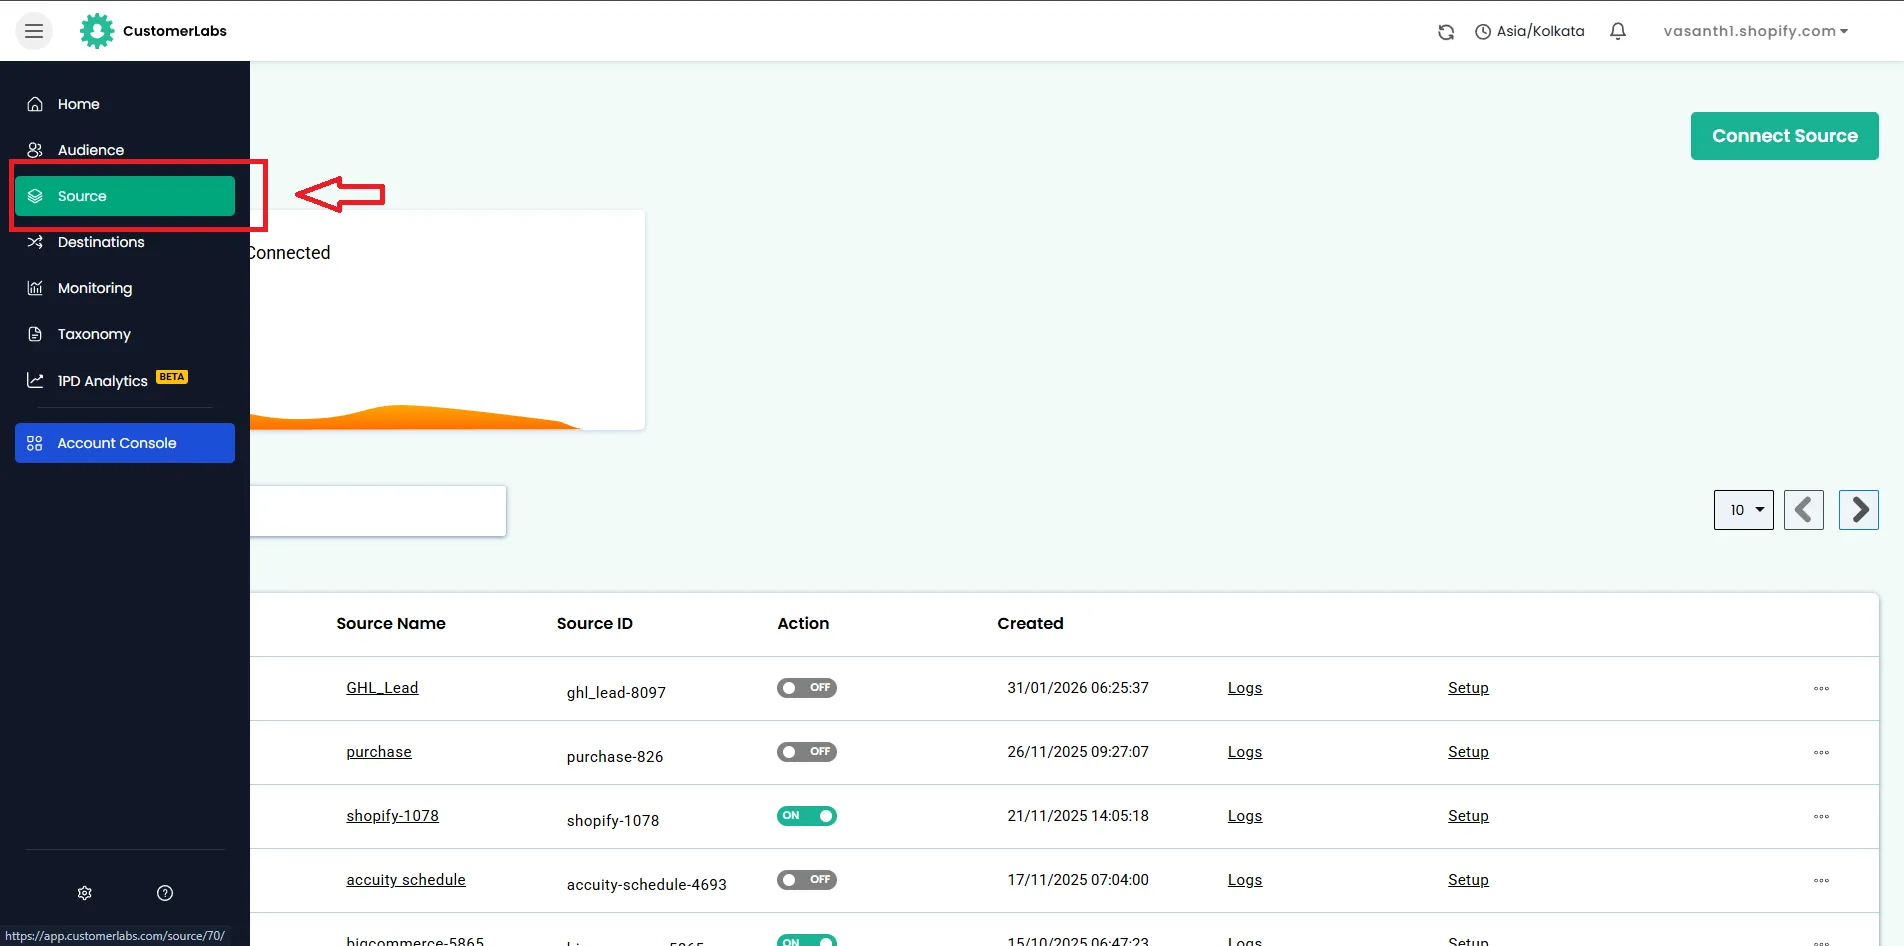
From the left navigation menu, click Sources.
-
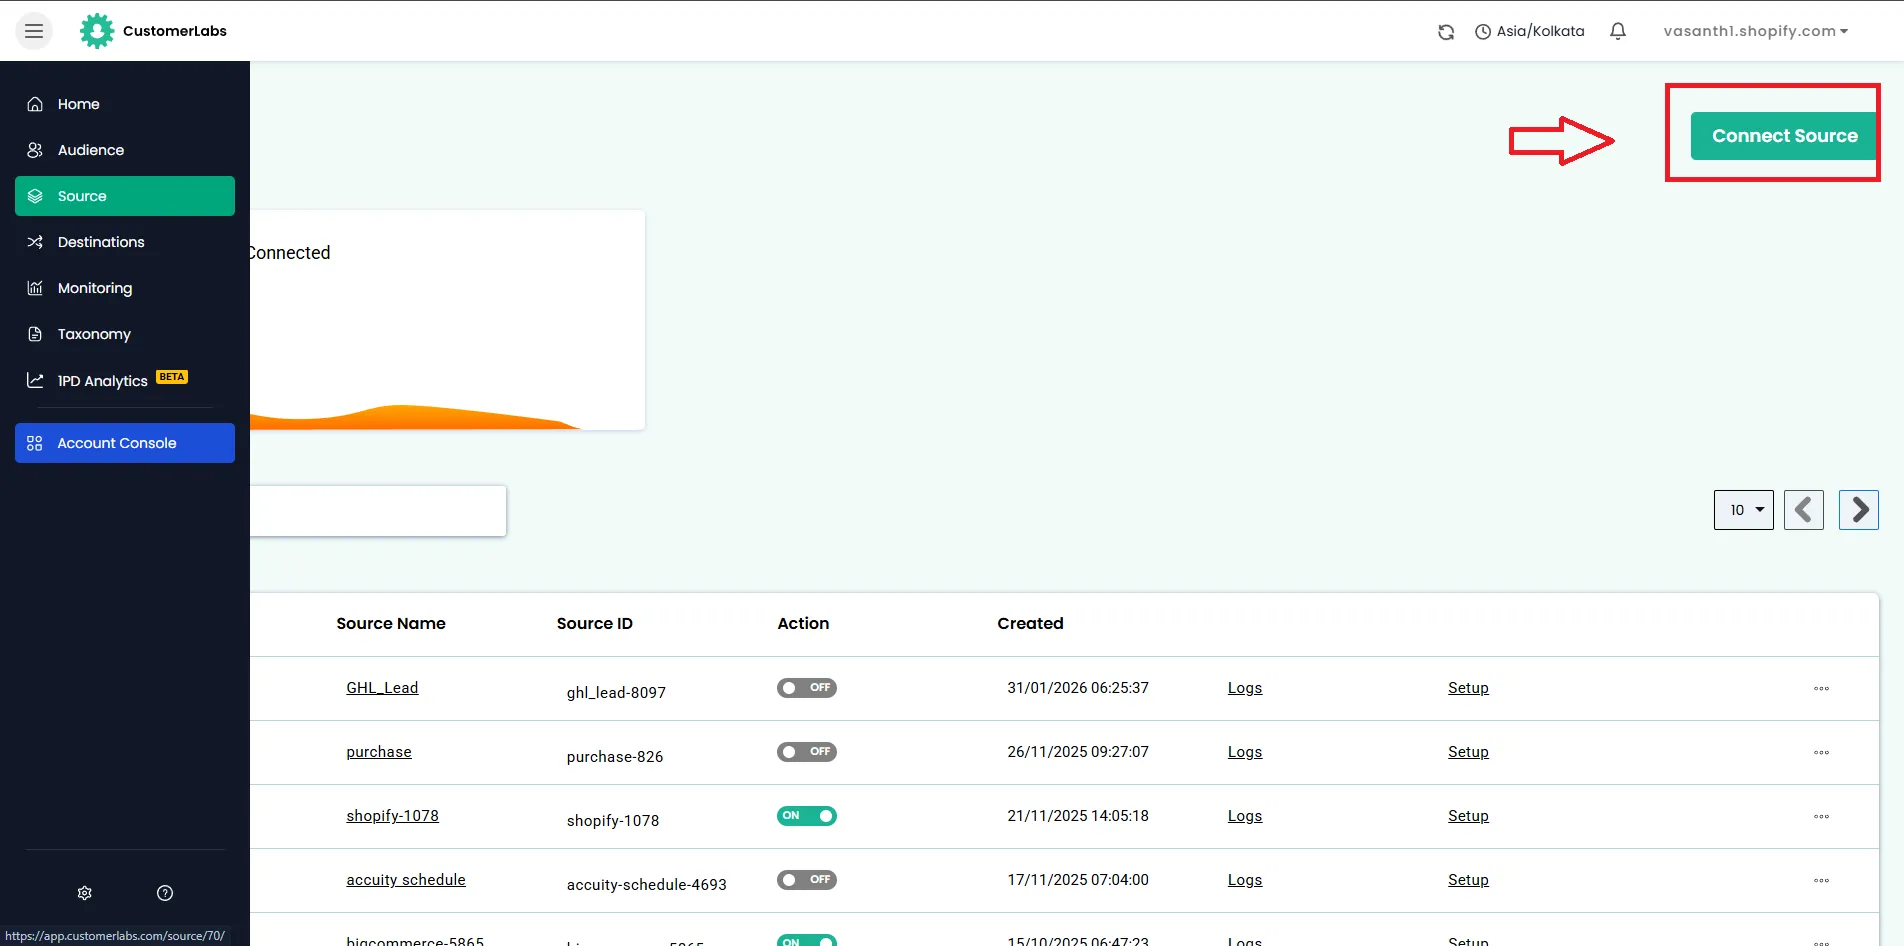
In the top-right corner, click Connect Source.
-
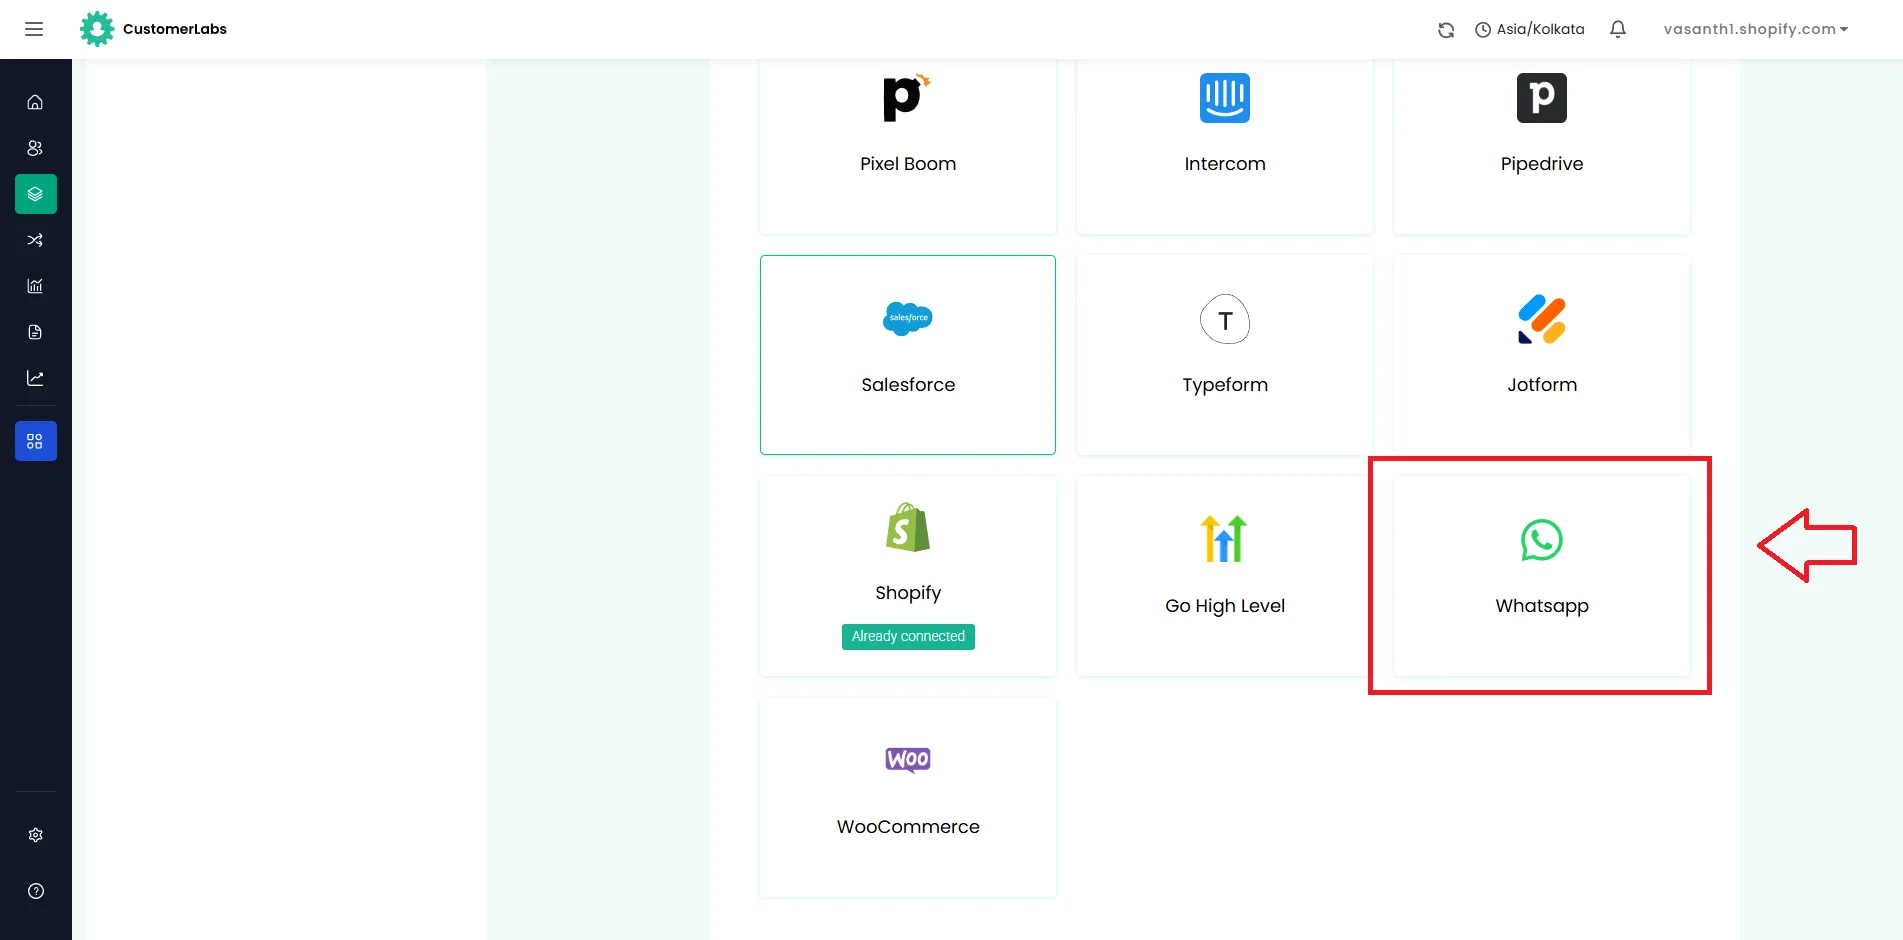
Scroll through the list of available sources and select WhatsApp.
-
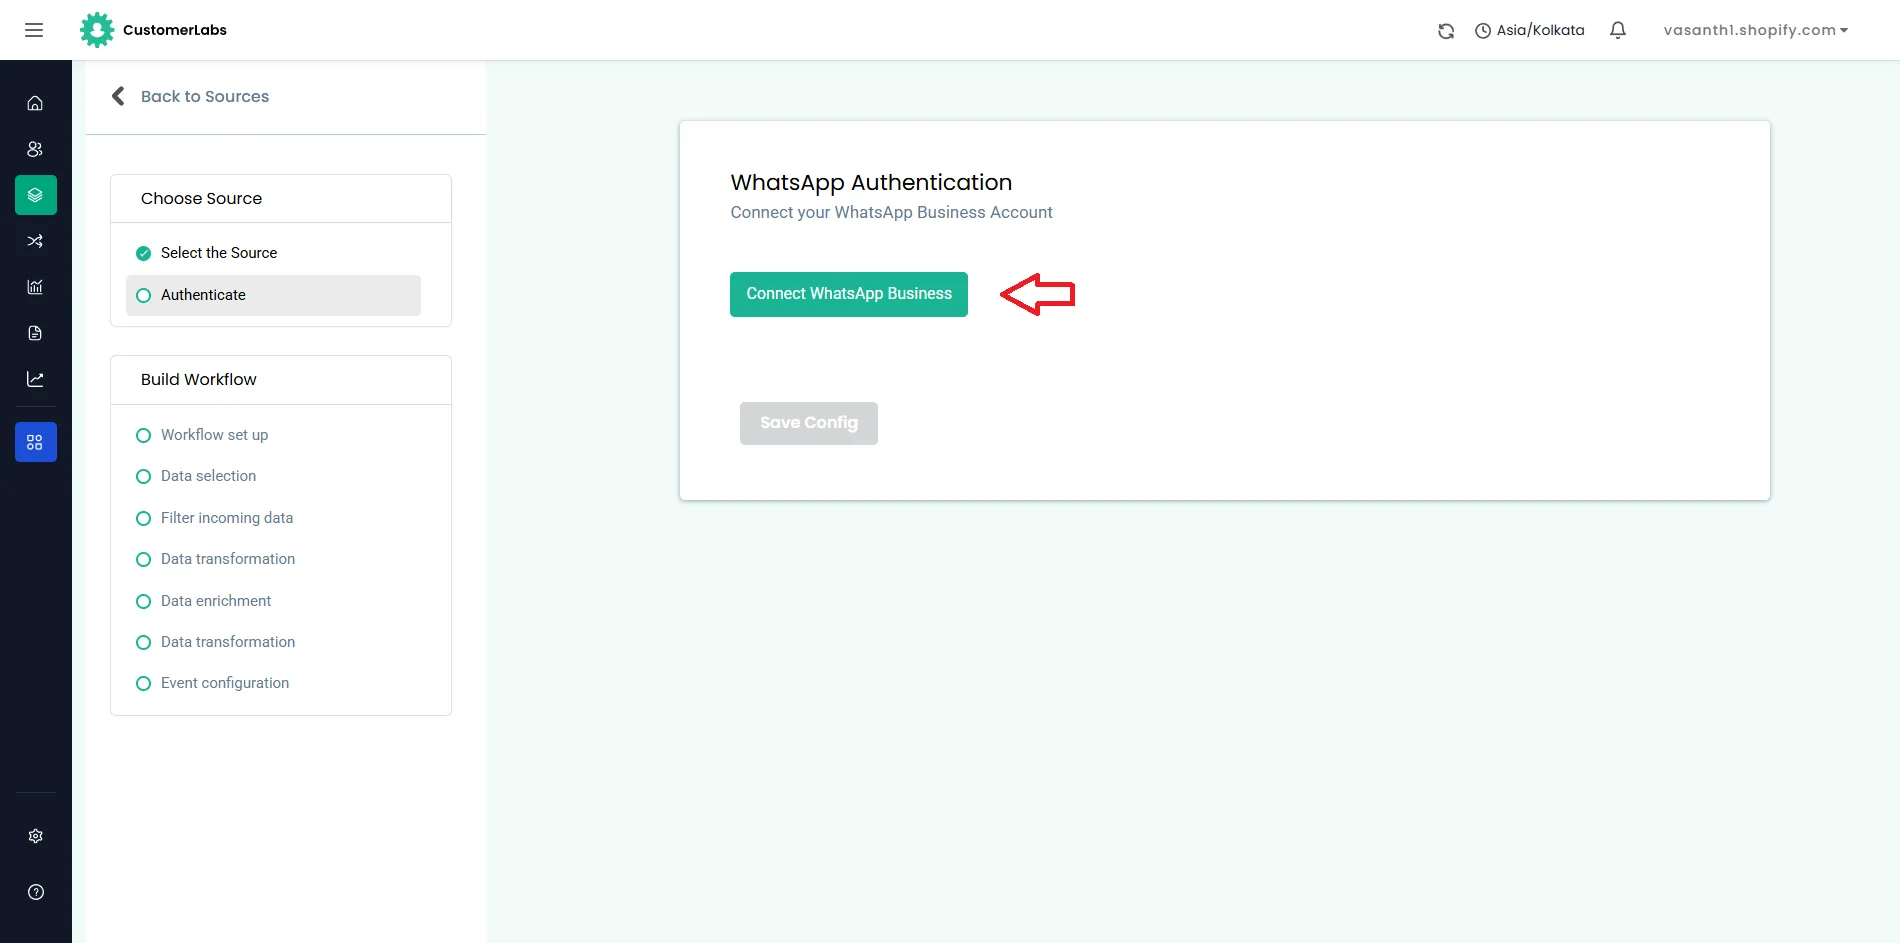
Click Connect WhatsApp Business, then click Continue on the pop-up screen.
Authenticate WhatsApp Business account
Section titled “Authenticate WhatsApp Business account”During the authentication flow, you’ll be prompted to enter and confirm the following details:
-
Business Portfolio
-
WhatsApp Business Account
-
Facebook Page
-
Ad Account
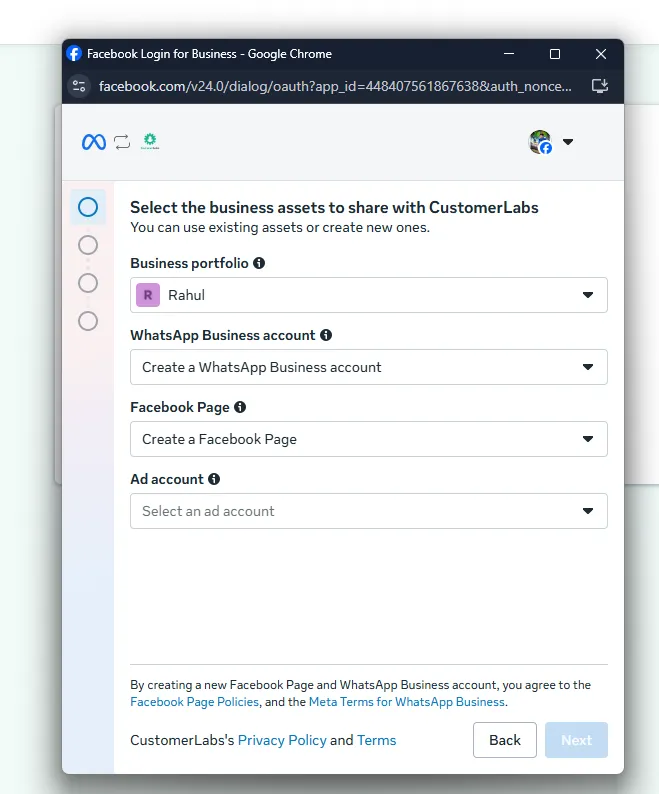
If you are creating a new asset, you will be taken to another page where you need to fill in the following information:
-
Name
-
Category
-
Country
-
Website
-
Timezone
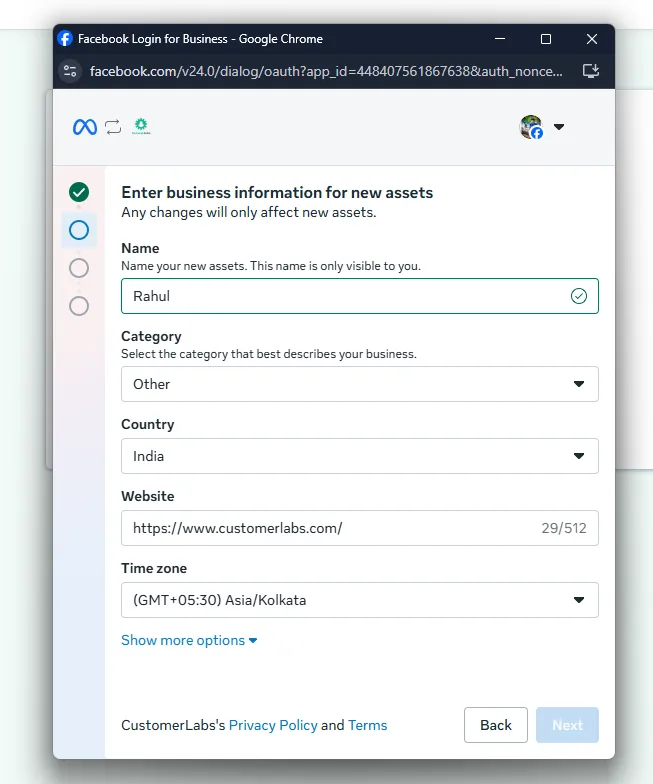
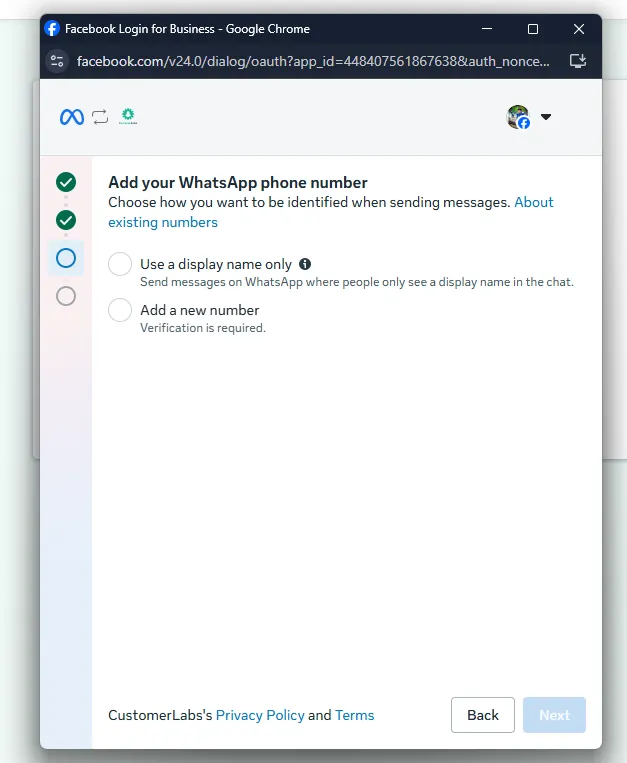
-
Select an option to identify yourself before sending messages.
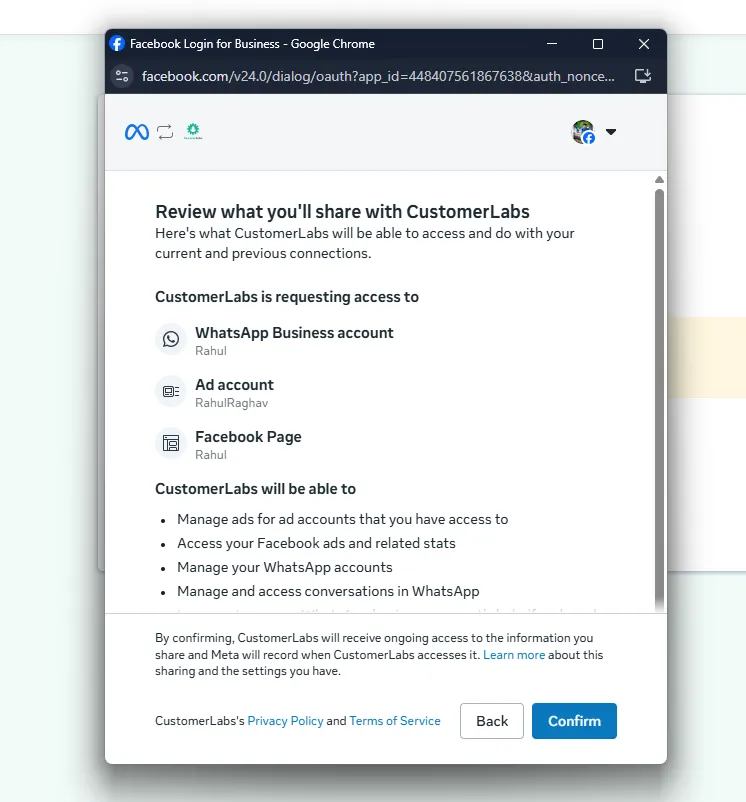
-
Review all selected details on the Review Details screen. Click Confirm to proceed.
-
Once confirmed, click Finish to complete the authentication.
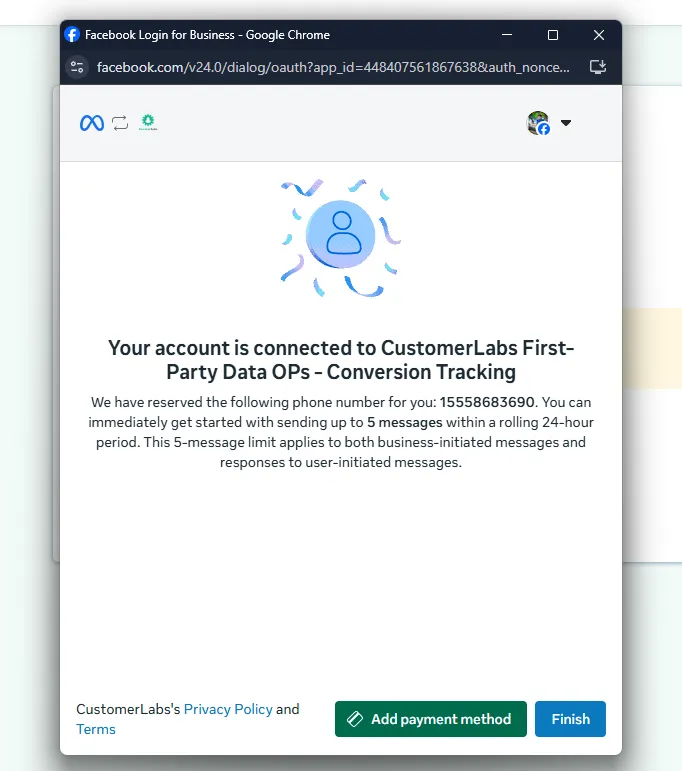
Verify WhatsApp account connection
Section titled “Verify WhatsApp account connection”After successful authentication:
-
Your Phone Number ID and WhatsApp Business Account ID will be displayed in the CustomerLabs interface.
-
Confirm that the correct WhatsApp account is connected.
-
Click Save Configuration to complete the setup.
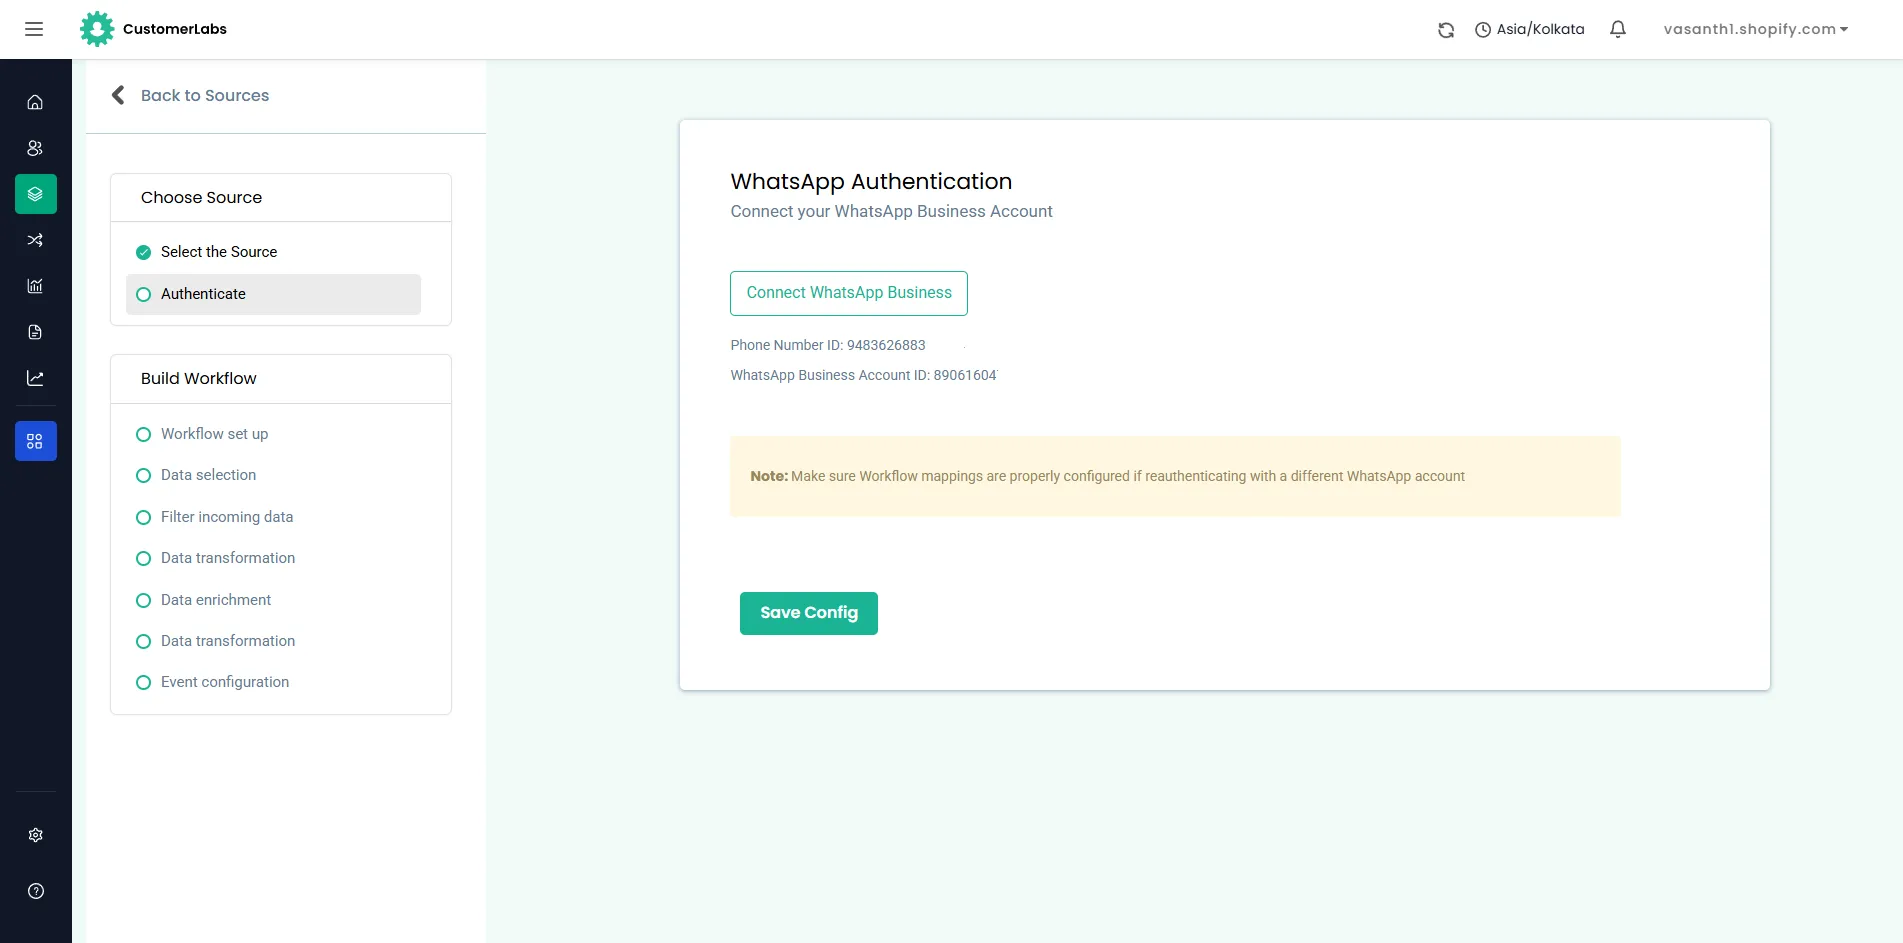
At this stage, WhatsApp is successfully connected as a Source in CustomerLabs.
Event & Workflow Configuration
Section titled “Event & Workflow Configuration”Once WhatsApp is connected:
- Navigate to Workflows in CustomerLabs.
- Create workflows for the events you want to track – Response, Purchase.
Verification and testing
Section titled “Verification and testing”Verify data ingestion
Section titled “Verify data ingestion”- Go to CustomerLabs Dashboard → Sources → WhatsApp.
- Check if incoming events are visible in the Events section.
- Confirm that event payloads contain the expected parameters.
Test with live WhatsApp activity
Section titled “Test with live WhatsApp activity”- Trigger a test interaction or lead via WhatsApp.
- Verify that the event appears inside CustomerLabs.
- Confirm timestamps and event attributes are correct.
Troubleshooting
Section titled “Troubleshooting”If data does not appear,
- Ensure WhatsApp authentication is active.
- Verify that workflows are enabled and properly configured.
- Recheck account permissions in Meta Business Manager.