Google Data Manager (Google Ads)
The Data Manager API is Google’s unified integration for sending audiences and conversion events to Google’s advertising platforms. Instead of configuring separate APIs for audiences and conversions, you send both through a single connection and route the data to the appropriate product (Google Ads, DV360, and others).
In the Data Manager API, a product refers to the Google advertising platform you send data to — such as Google Ads, Google Analytics, or Display & Video 360 (DV360). This guide covers connecting Google Data Manager to Google Ads in CustomerLabs.
Step 1: Add Google Data Manager as a destination
Section titled “Step 1: Add Google Data Manager as a destination”-
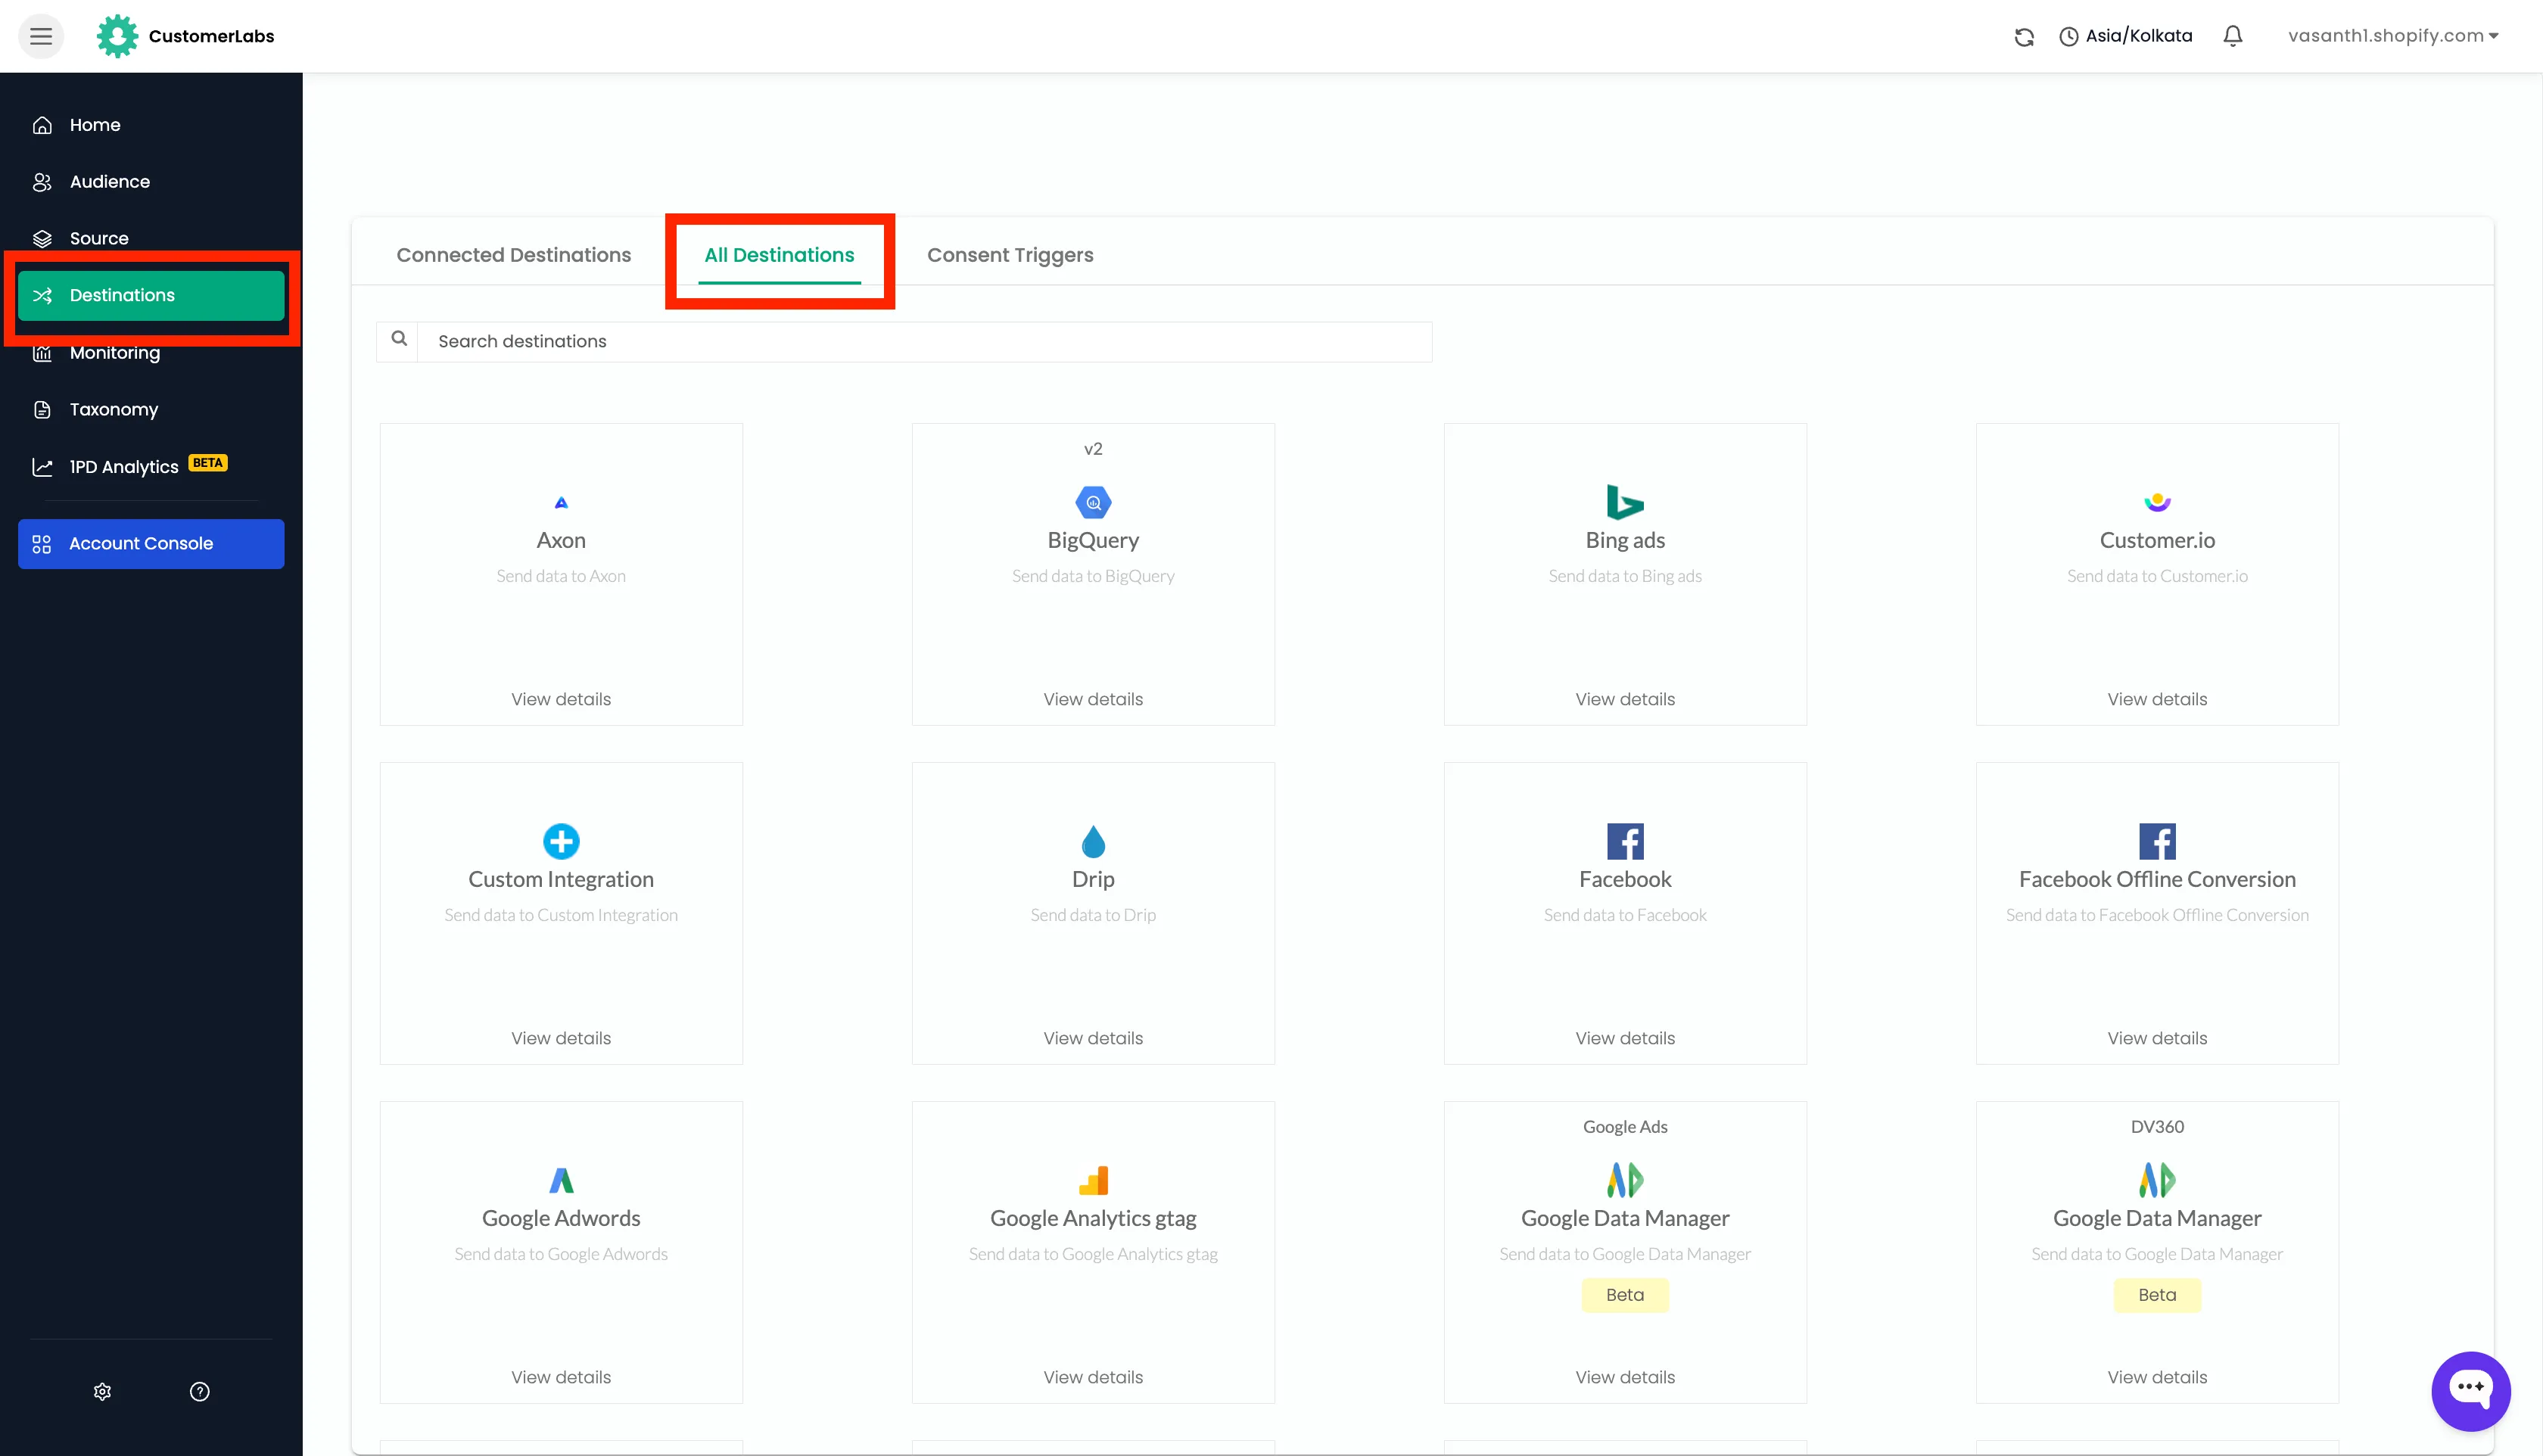
Log in to your CustomerLabs account and navigate to Destinations from the left-hand menu.
-
Open the All Destinations tab.
-
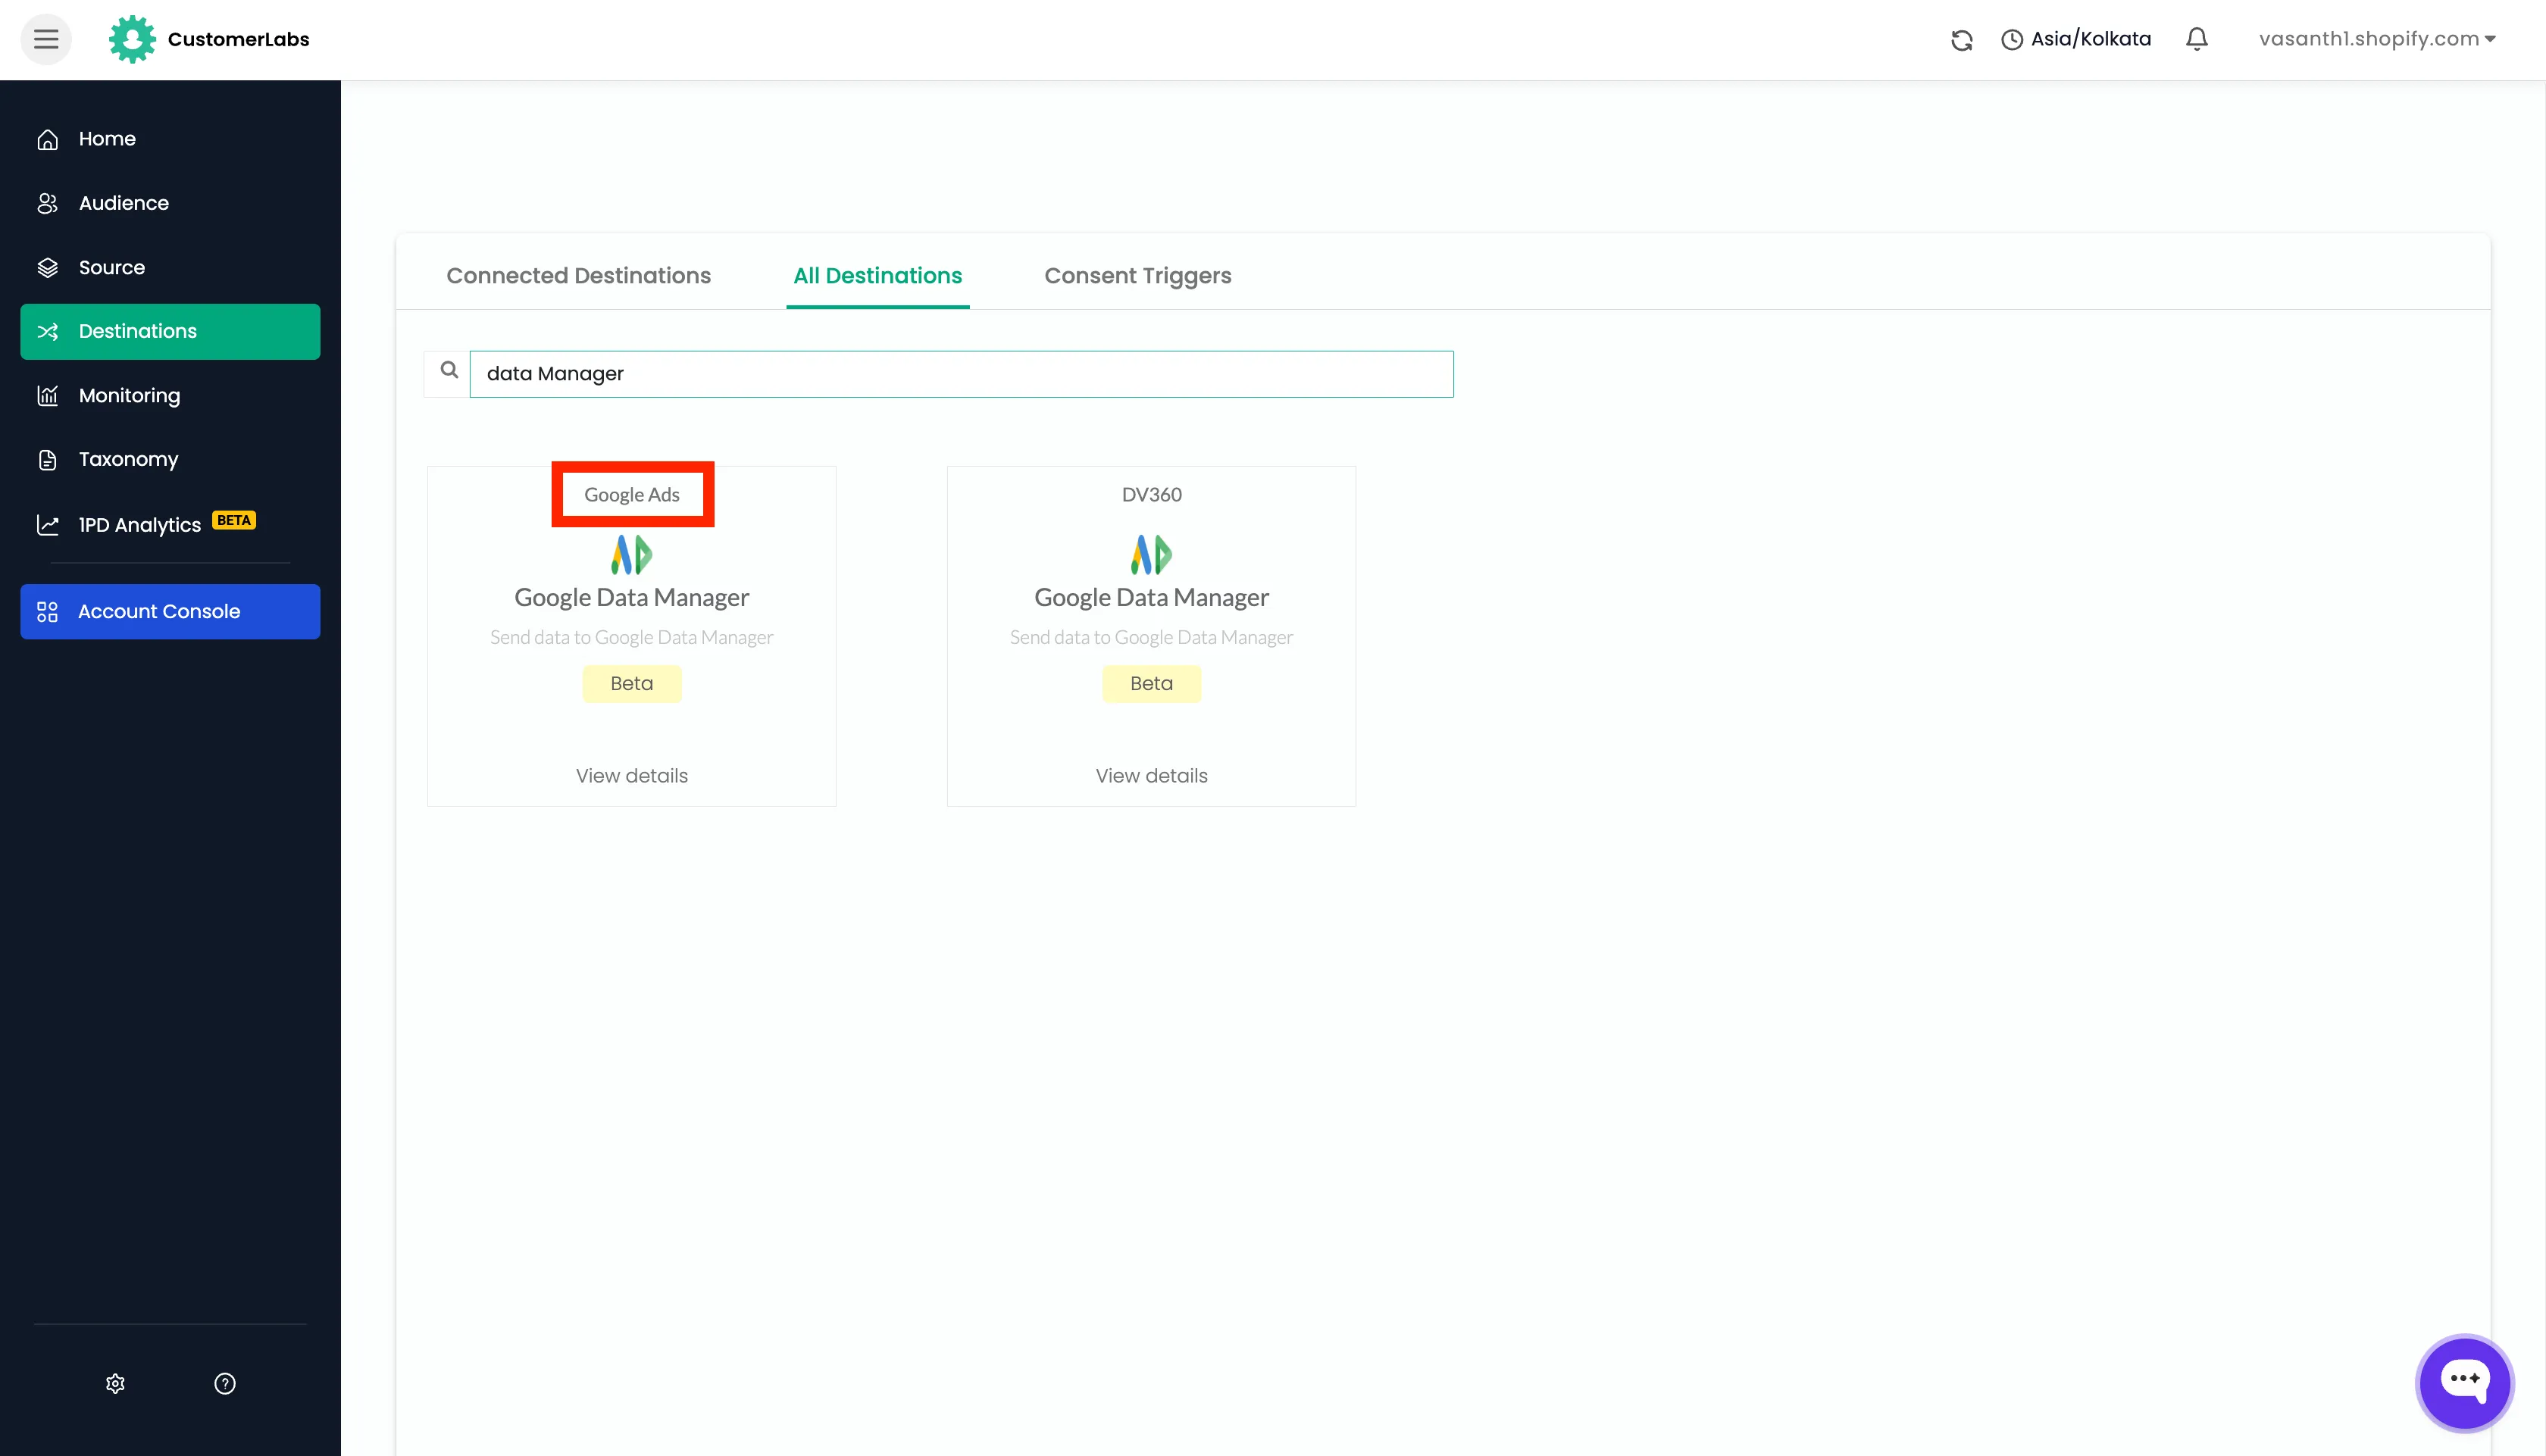
Search for Google Data Manager in the search bar and select the Google Ads card from the list.
Step 2: Enter the Destination ID
Section titled “Step 2: Enter the Destination ID”-
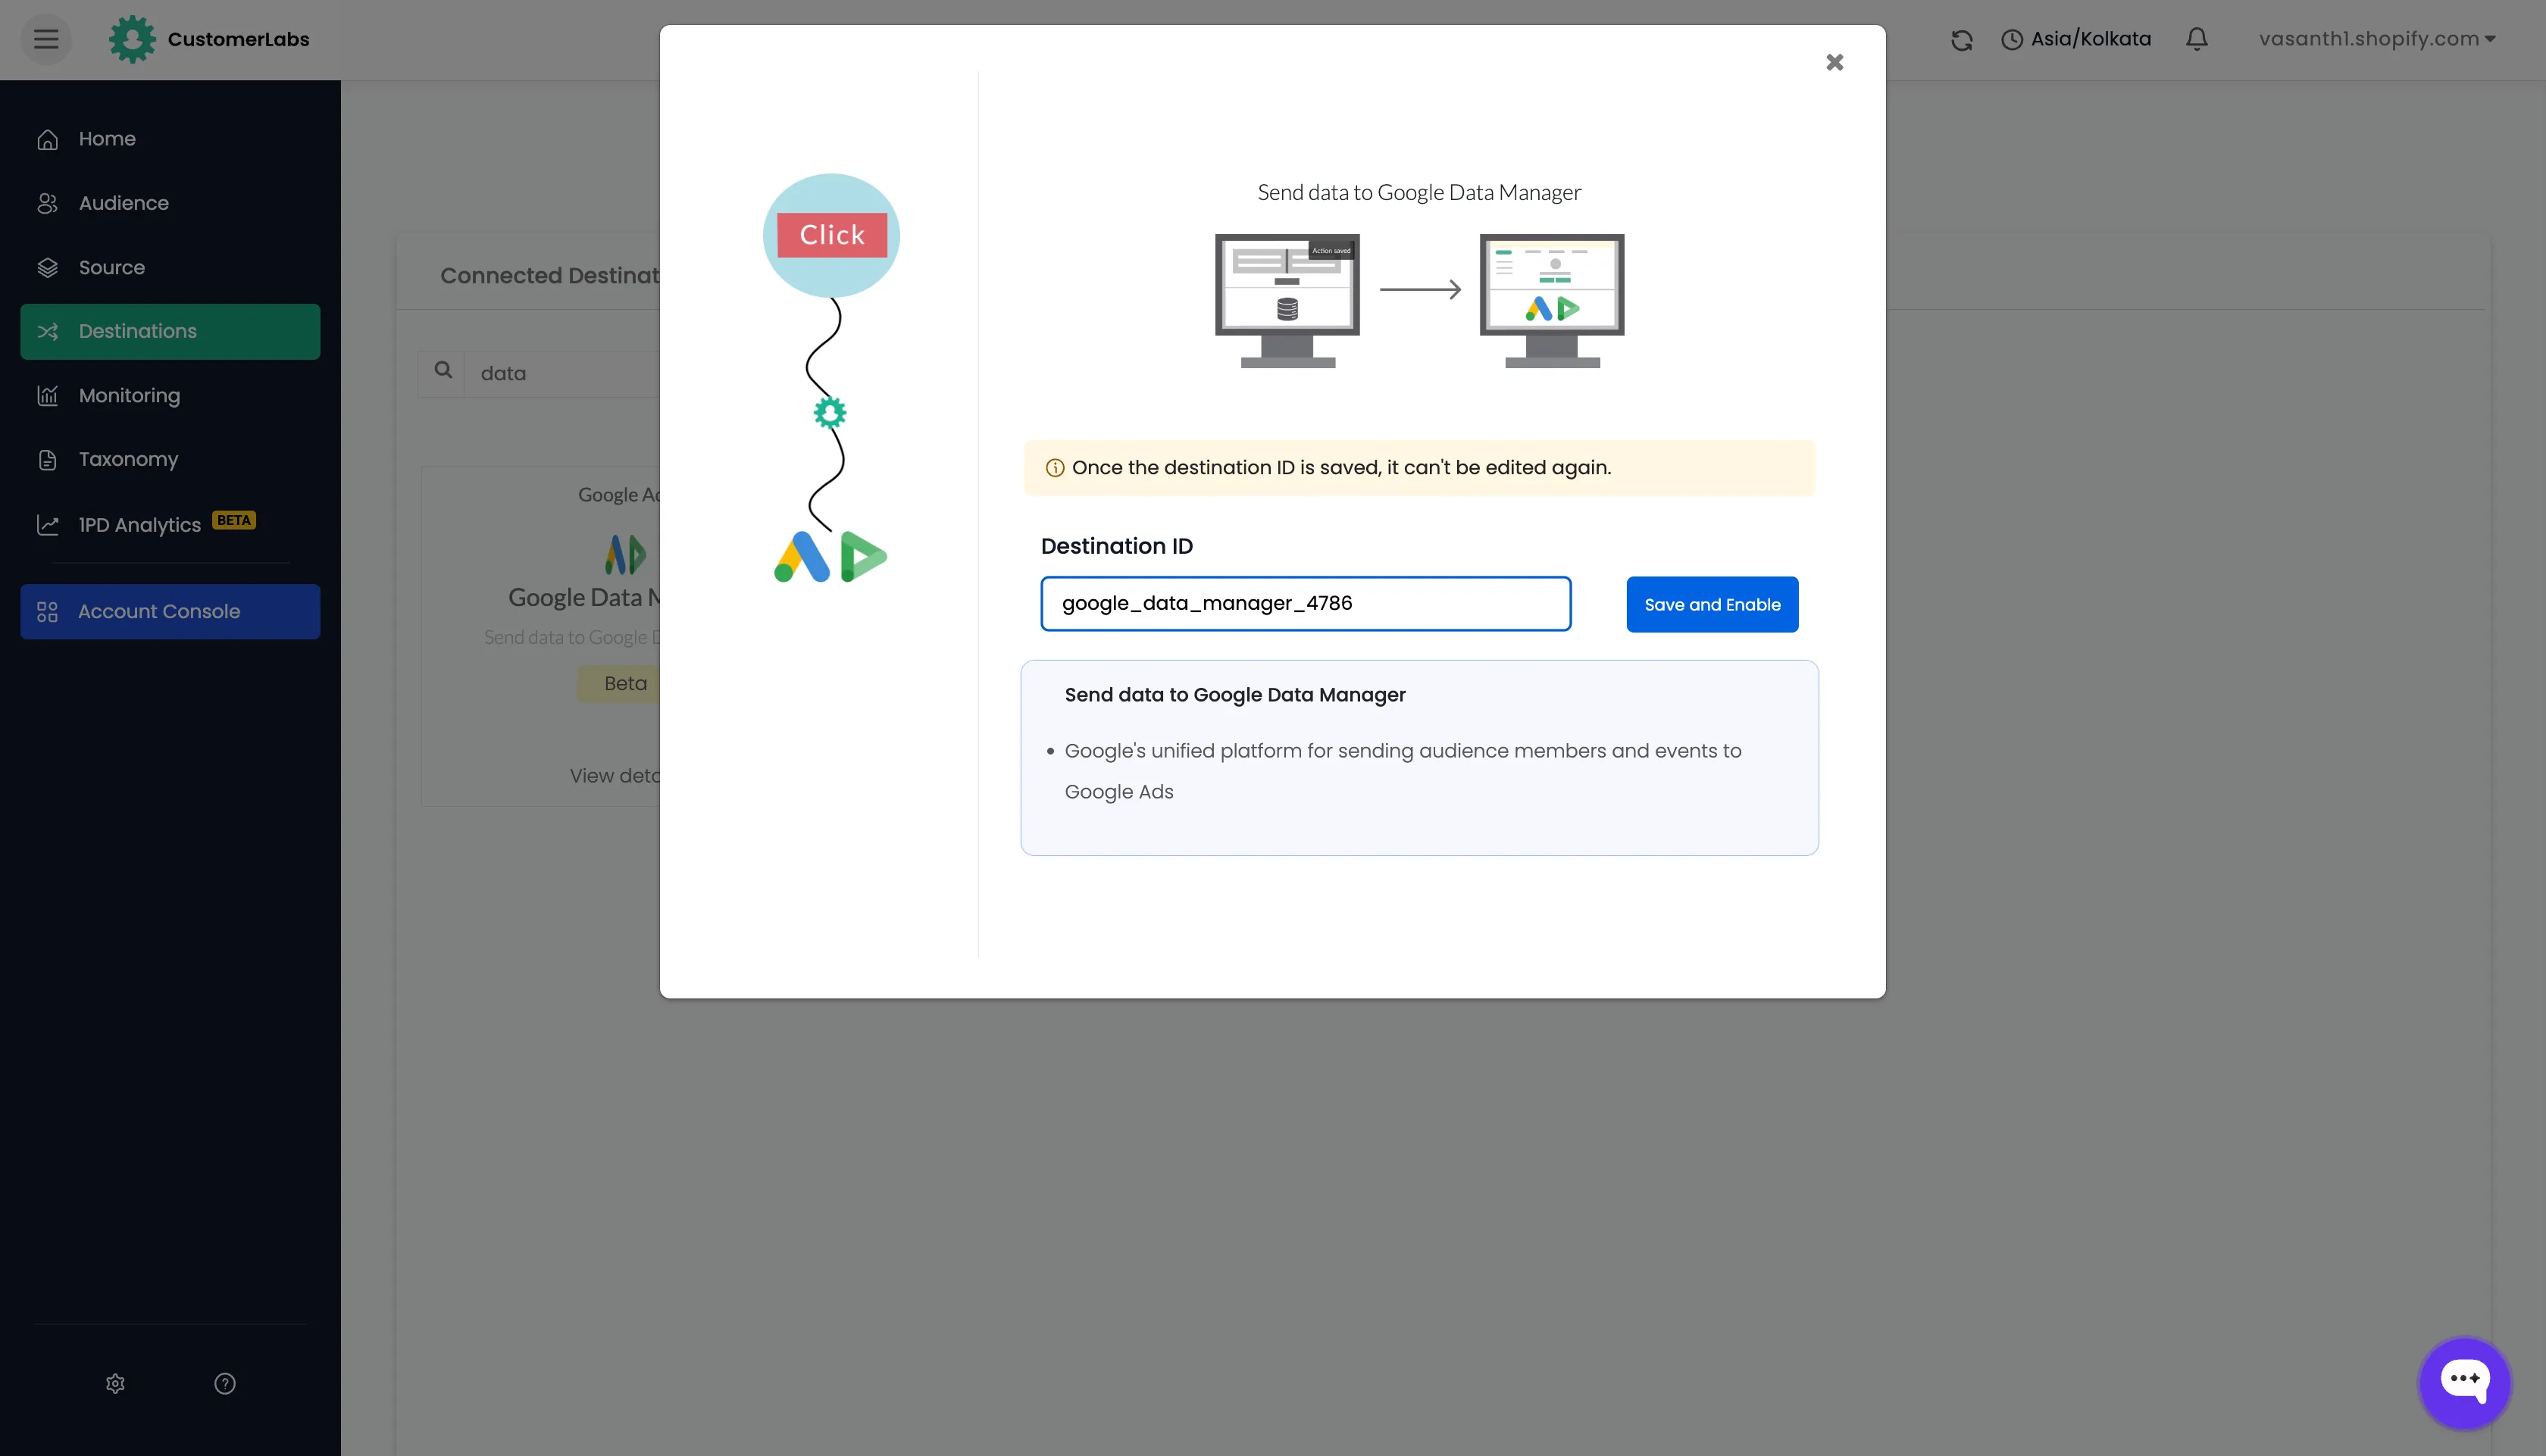
On the setup screen, you will see an auto-generated Destination ID field.
-
Although the system generates a default ID, it is recommended to use the last four digits of your Google Ads Account ID as the Destination ID.
Using the last four digits as a naming convention:
- Helps identify the destination across multiple ad accounts.
- Maintains consistent naming.
- Reduces confusion during troubleshooting.
Example: If your Account ID is
123-456-7890, use7890as your Destination ID. -
Click Save and Enable to proceed.
Step 3: Enable configuration settings
Section titled “Step 3: Enable configuration settings”-
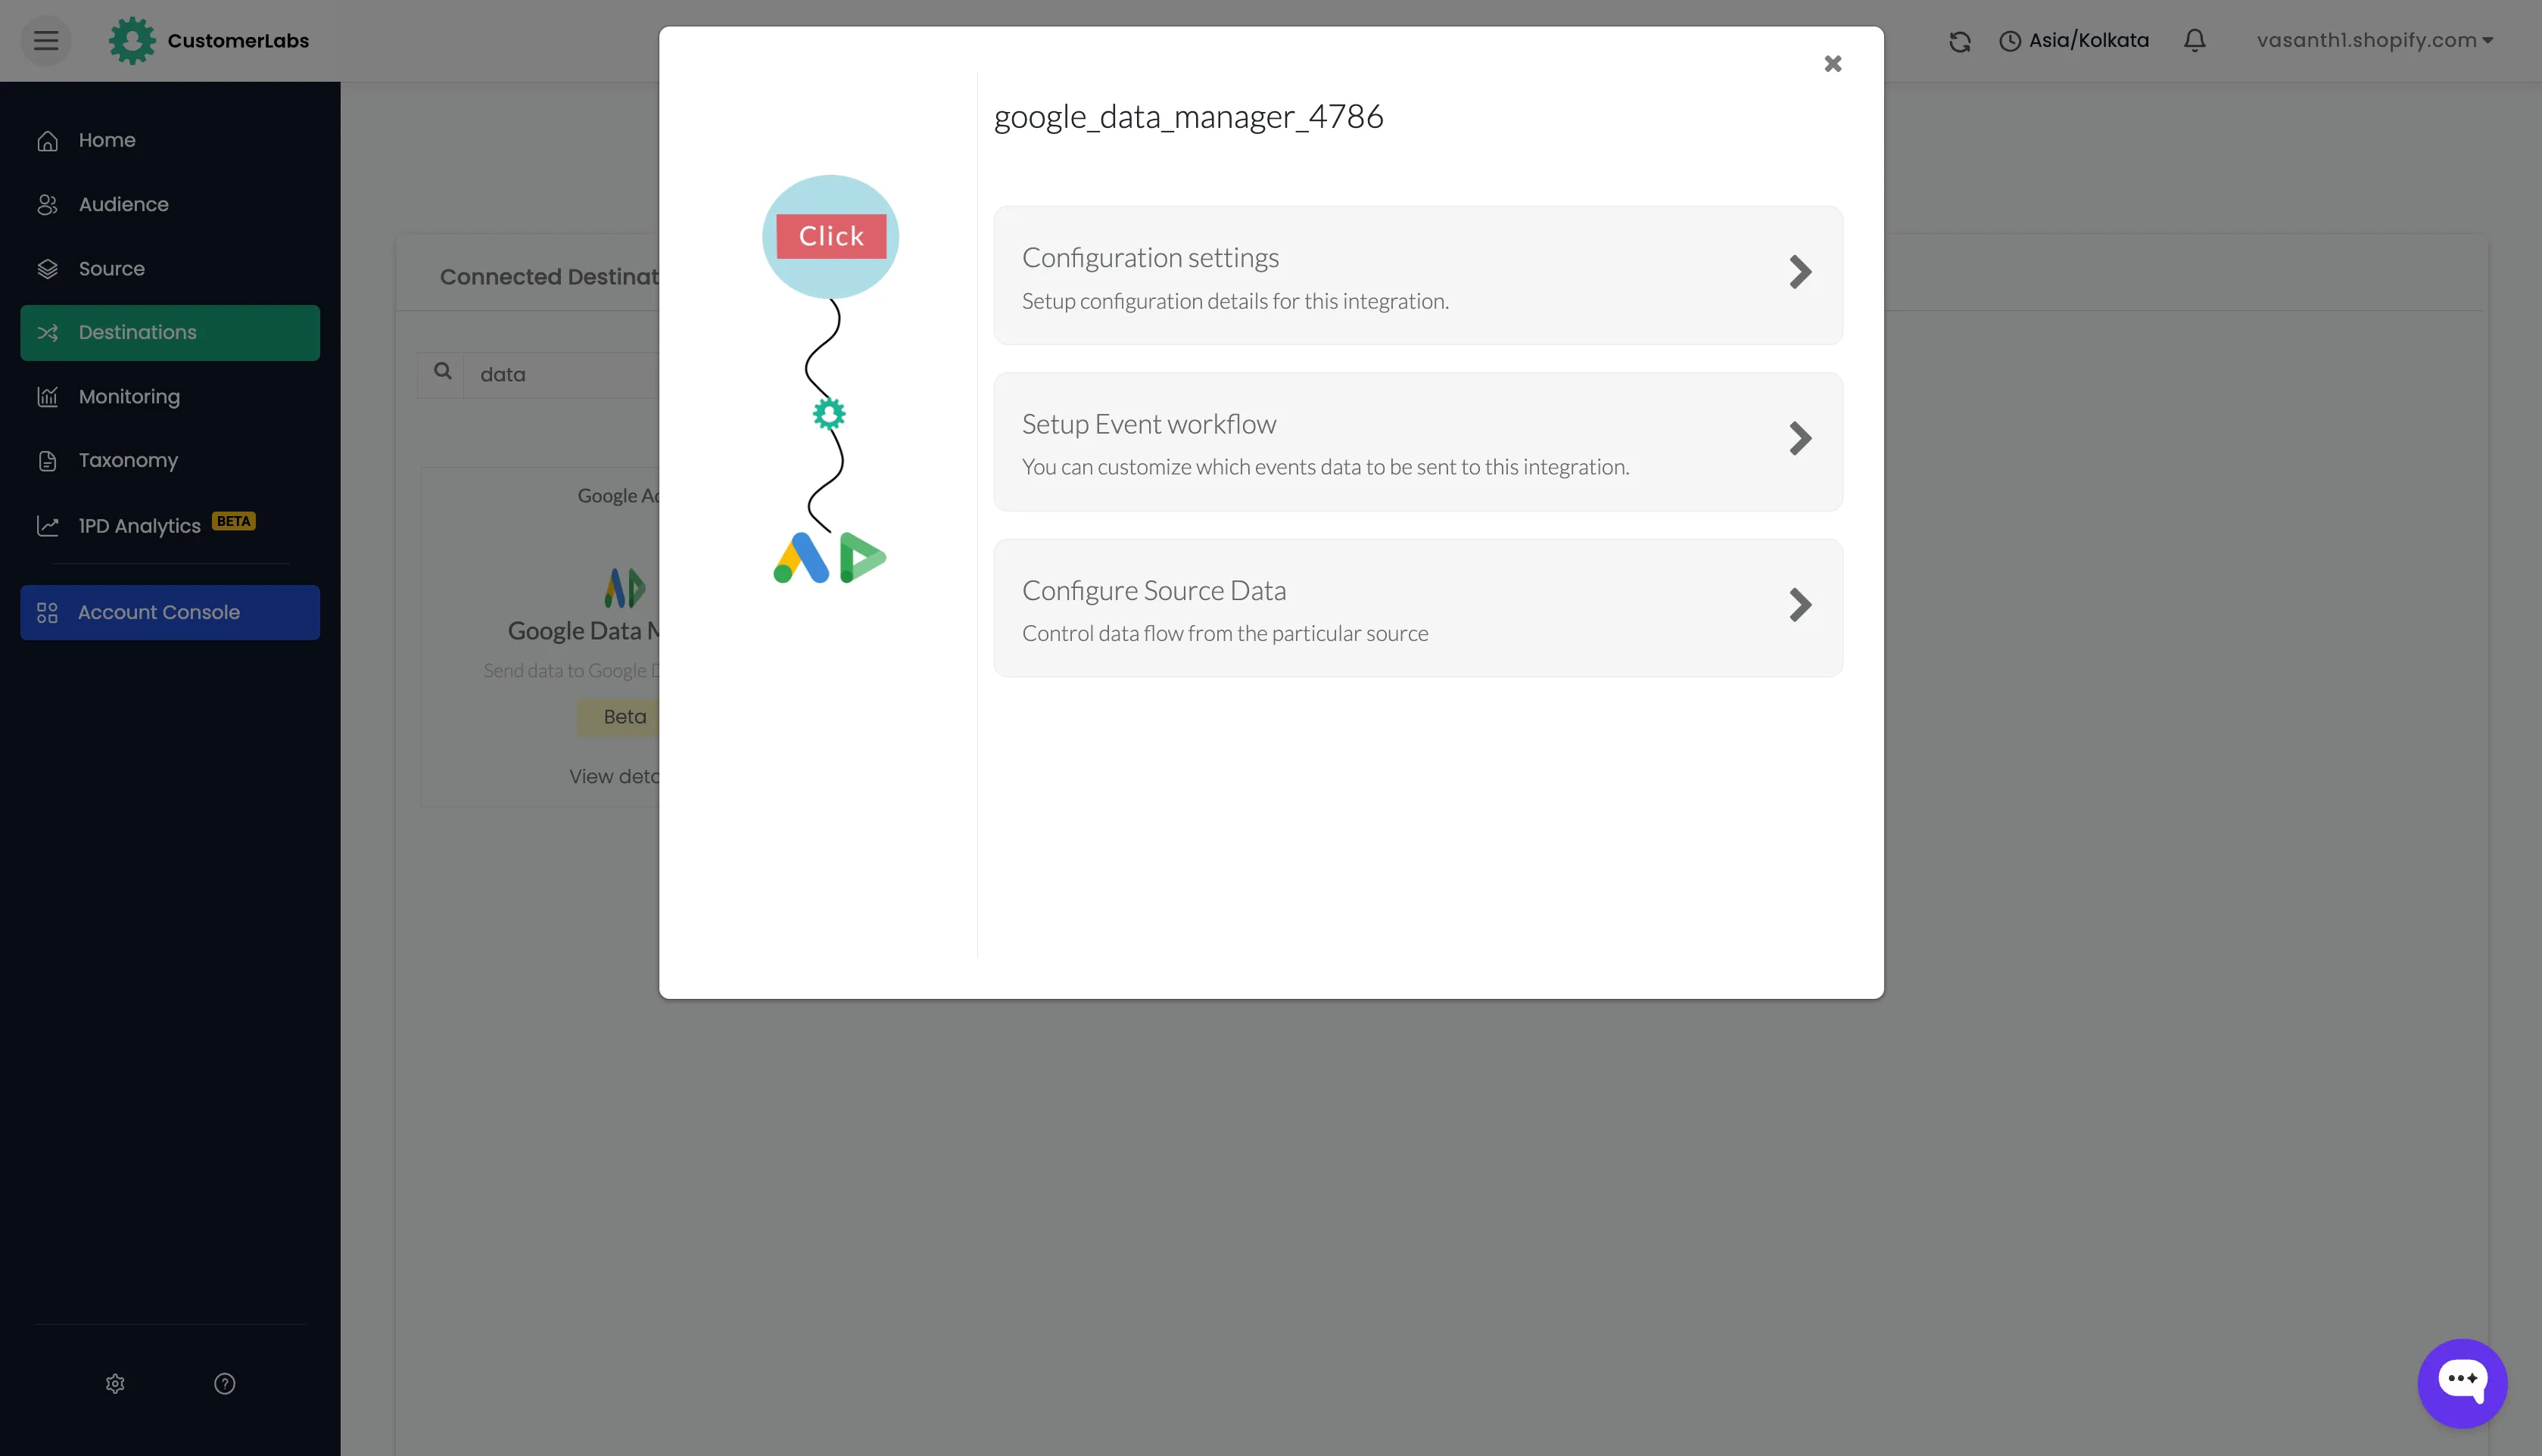
On the destination detail screen, click Configuration settings.
-
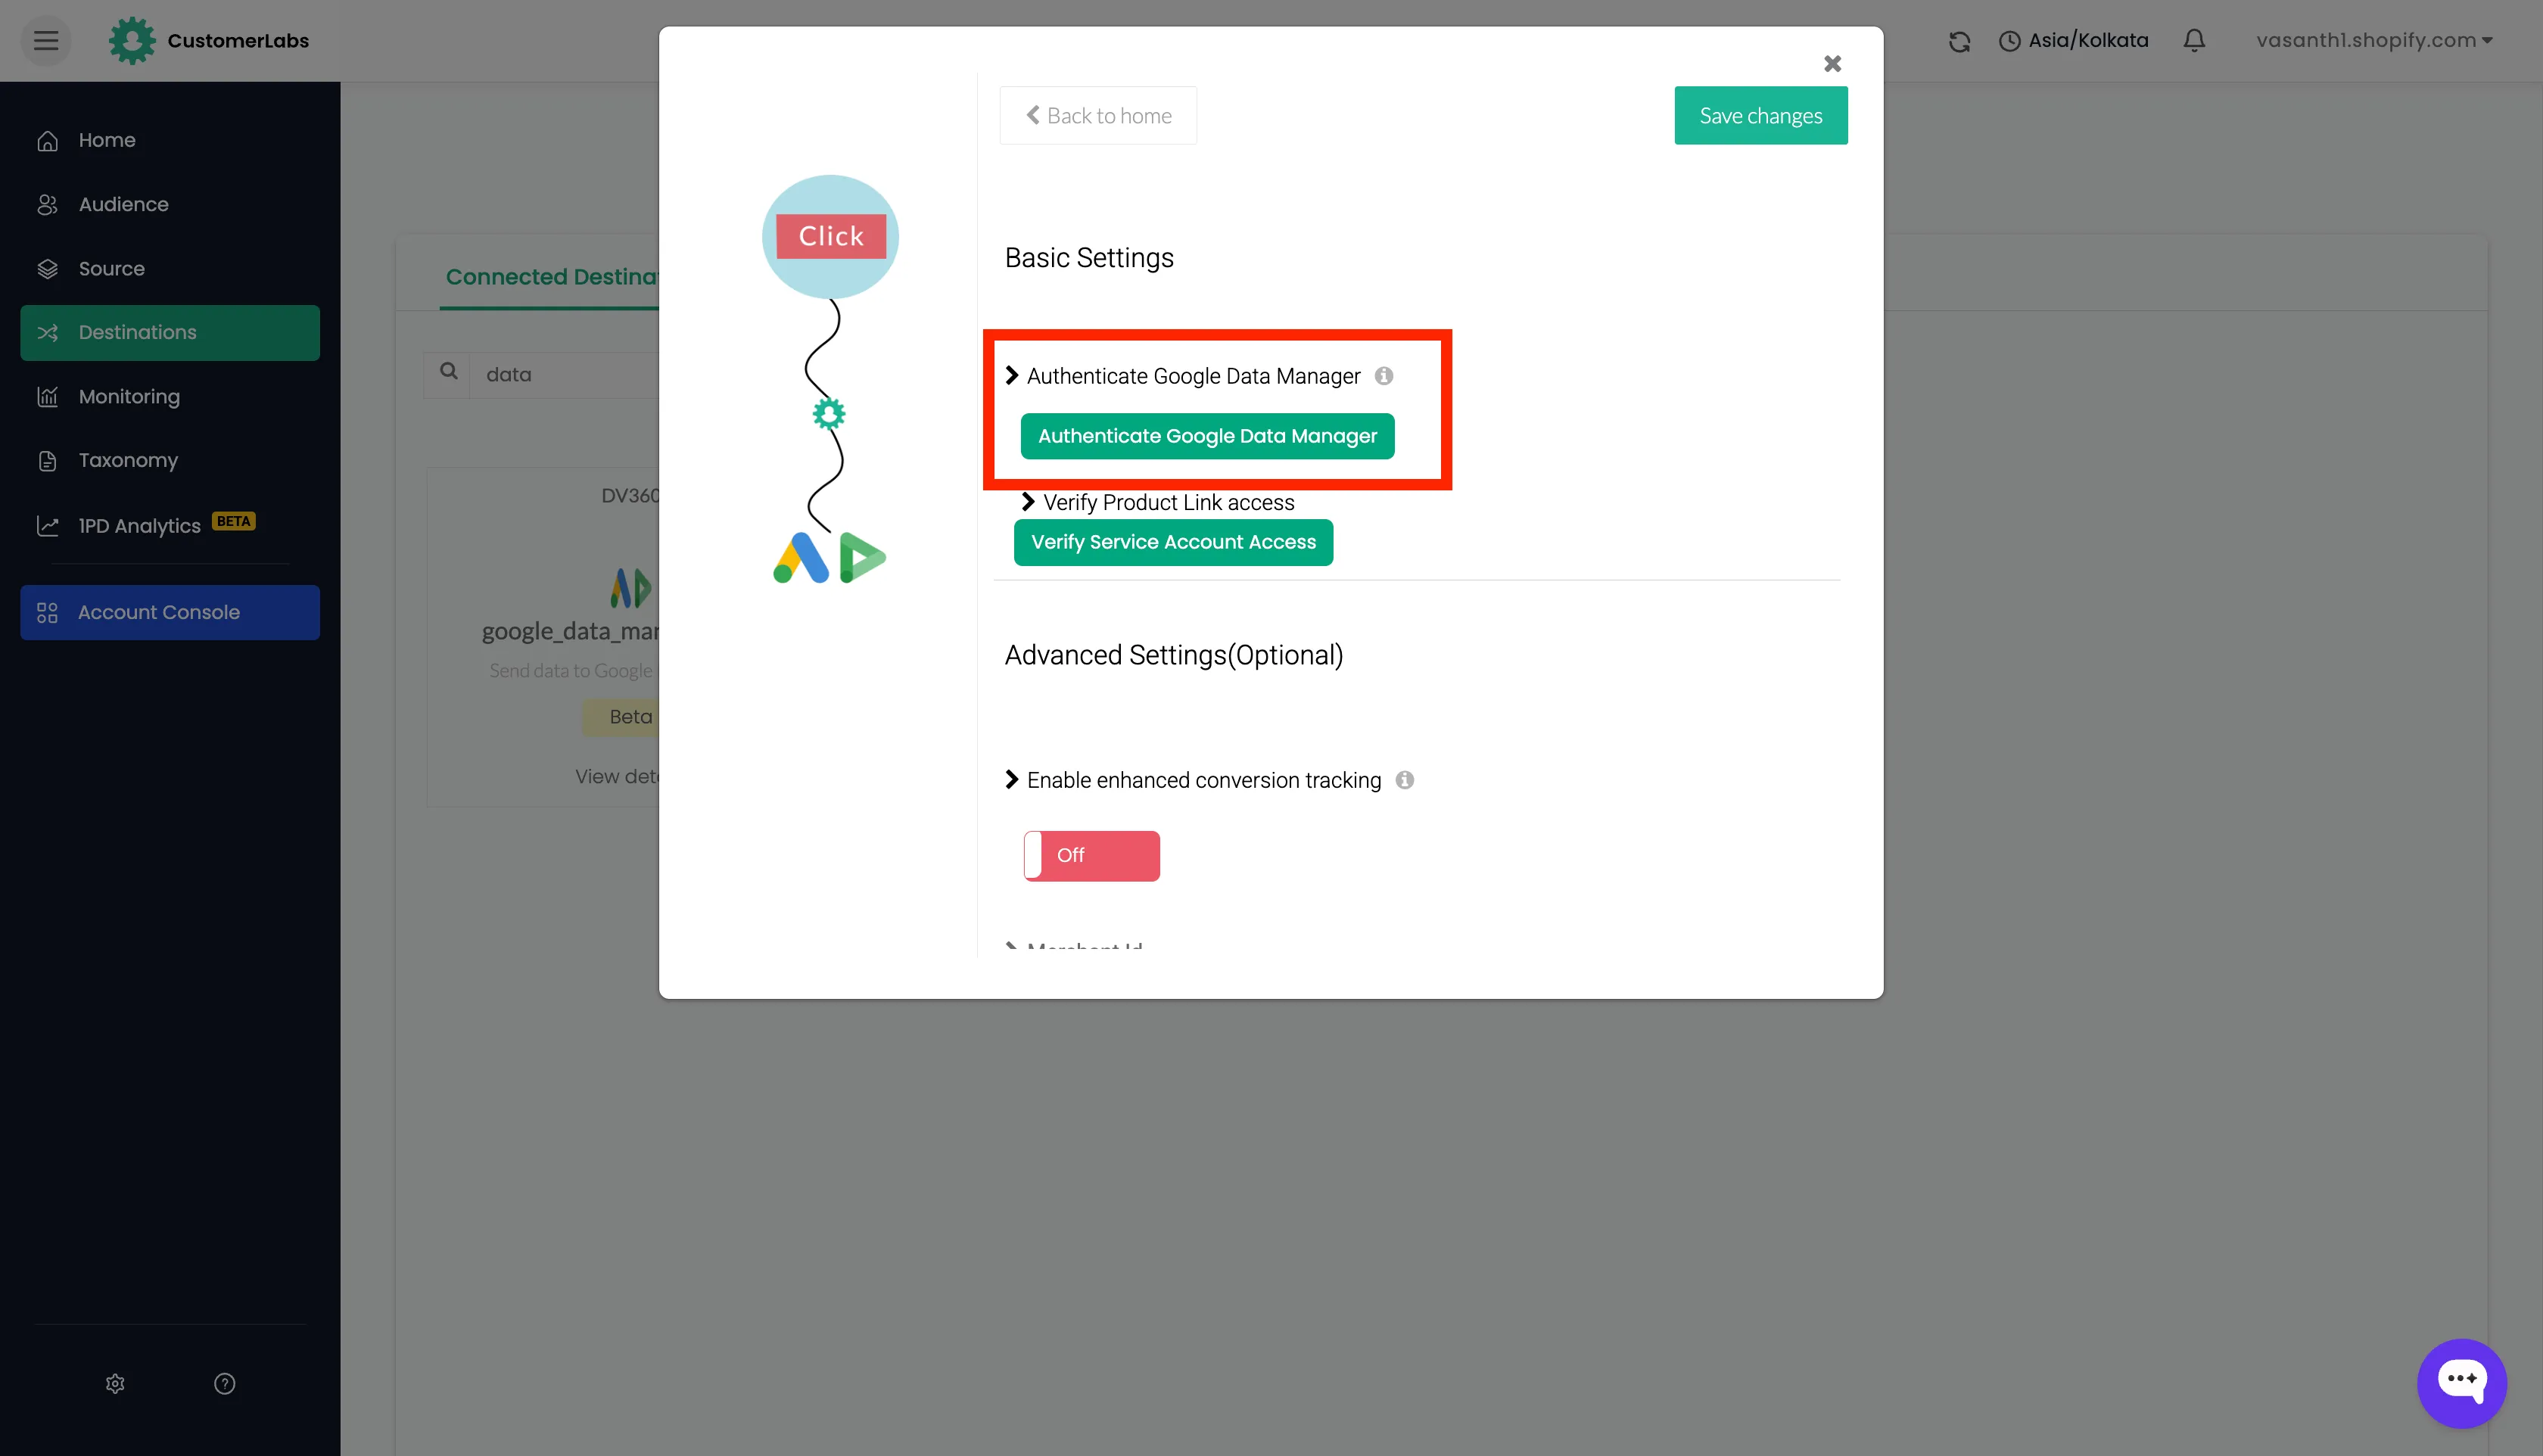
In the Basic Settings section, click Authenticate Google Data Manager to start the authorization process. You will be prompted to sign in and grant the required permissions.
-
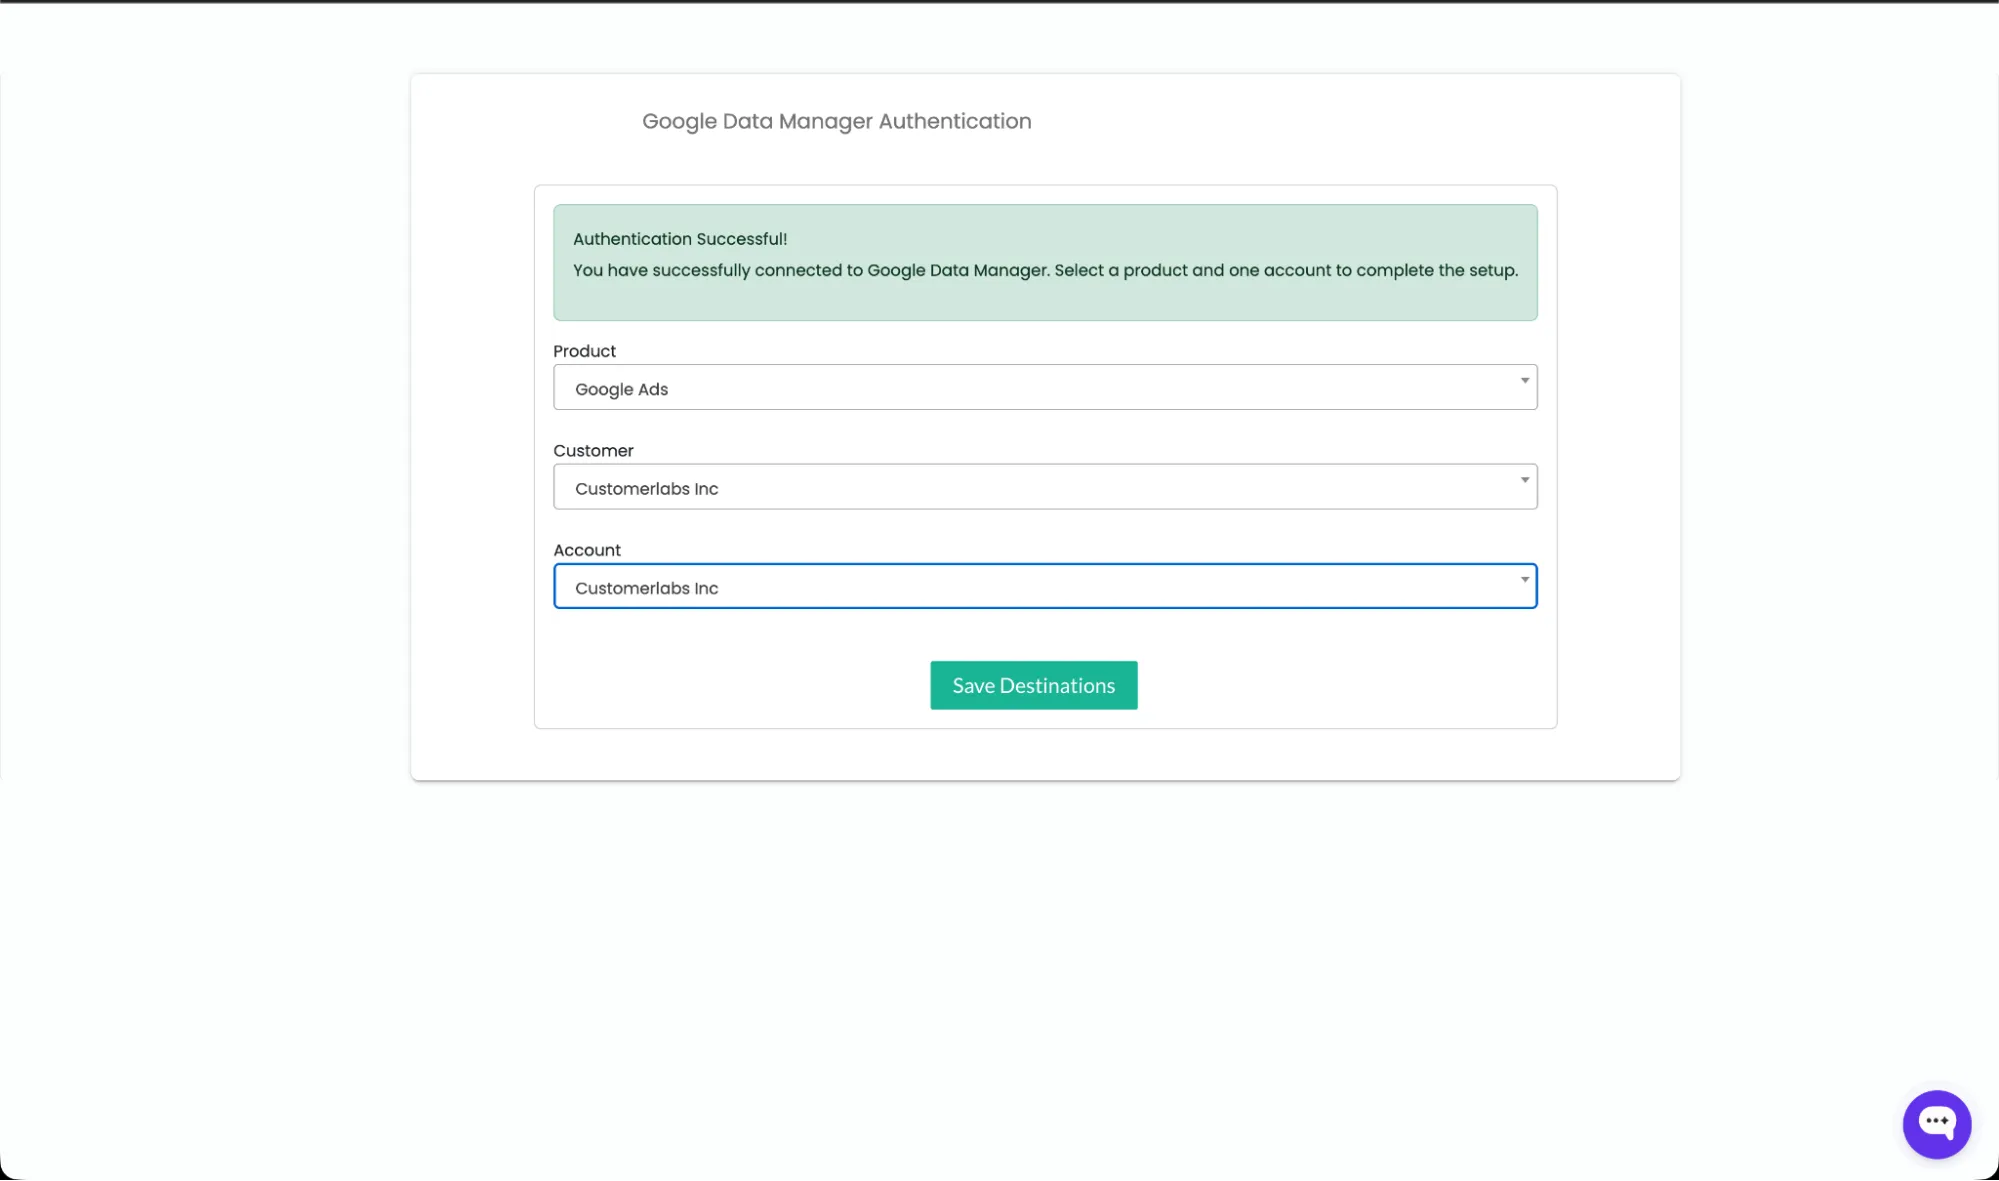
After authentication succeeds, select the Product (Google Ads), the Customer, and the Account, then click Save Destinations.
-
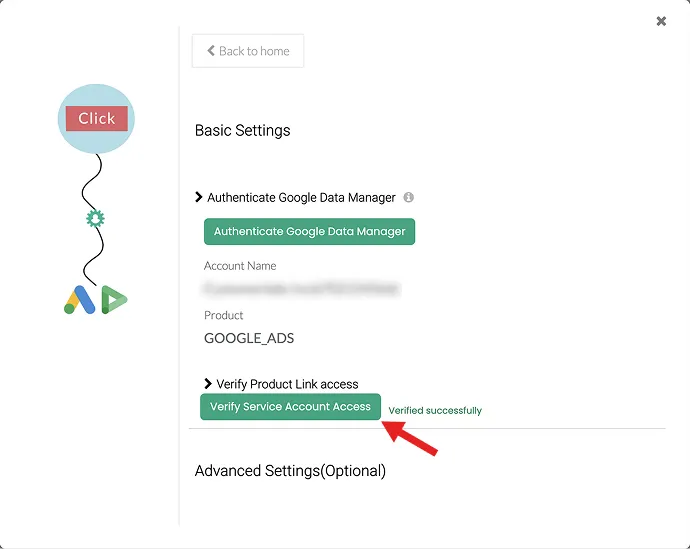
Back in the Basic Settings section, click Verify Service Account Access to confirm the integration. On success, a Verified successfully message appears.
Step 4: Create a conversion action in Google Ads
Section titled “Step 4: Create a conversion action in Google Ads”You can set up an offline conversion action in Google Ads and map the offline events tracked in CustomerLabs to it. Complete these steps in your Google Ads account.
-
Sign in to your Google Ads account and select the account where you want to set up the conversion action.
-
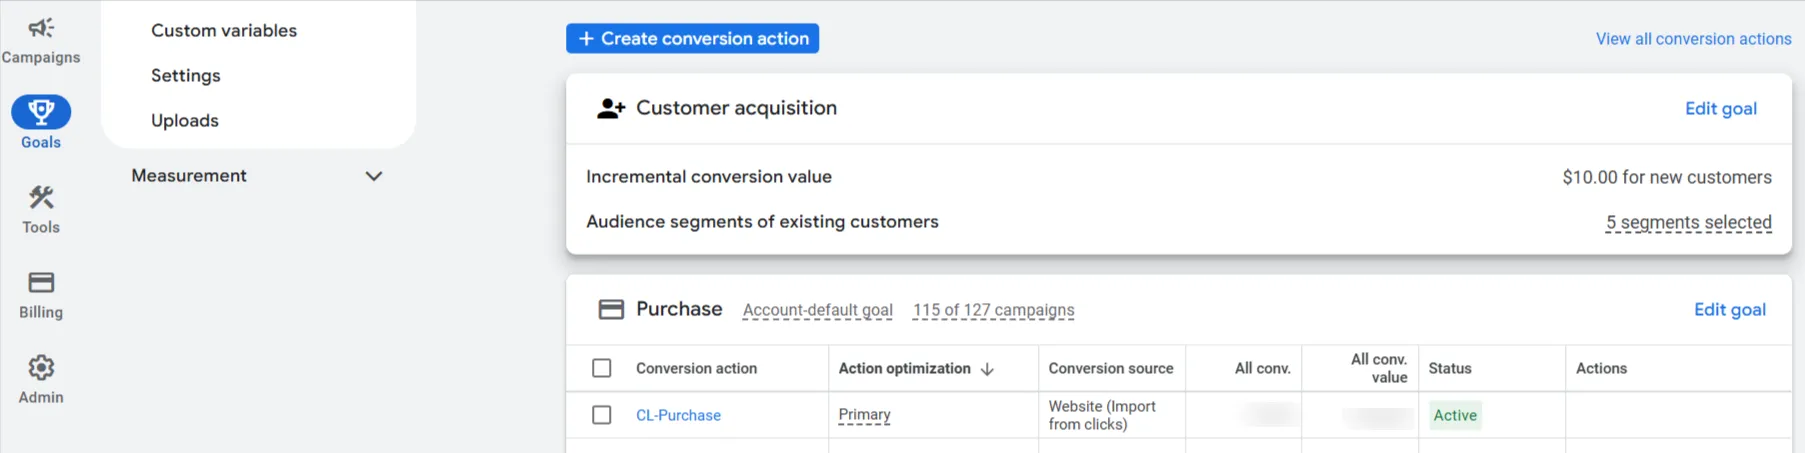
Go to Goals and click Summary.
-
Under Summary, click + Create conversion action.
-
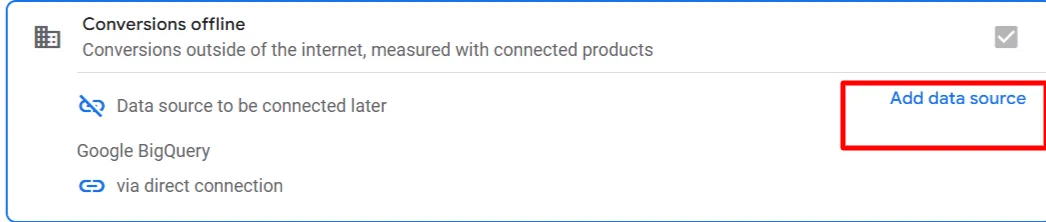
Select Conversions offline and click Add data source.
-
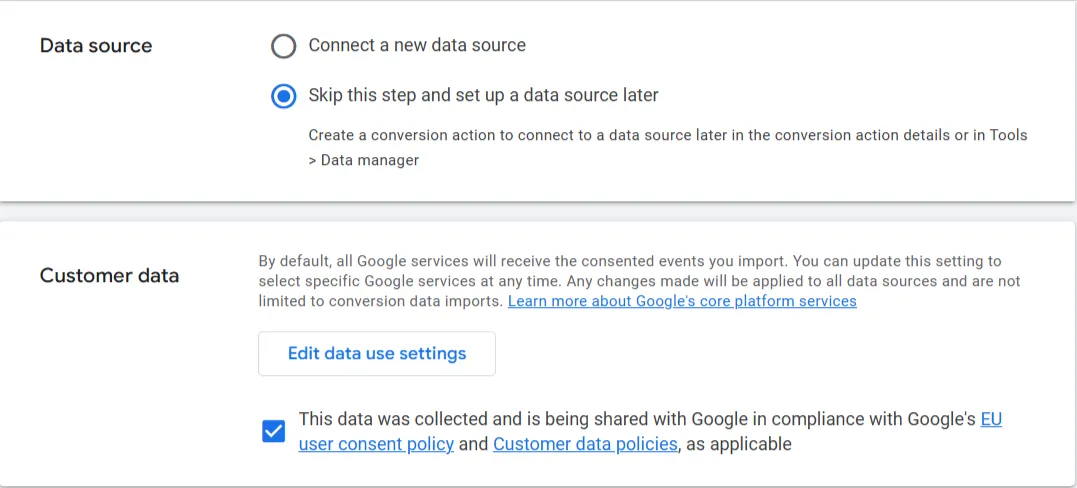
Select Skip this step and set up a data source later, then enable the Customer data toggle.
-
Once the toggle is enabled, you are prompted with a screen similar to the one below.

-
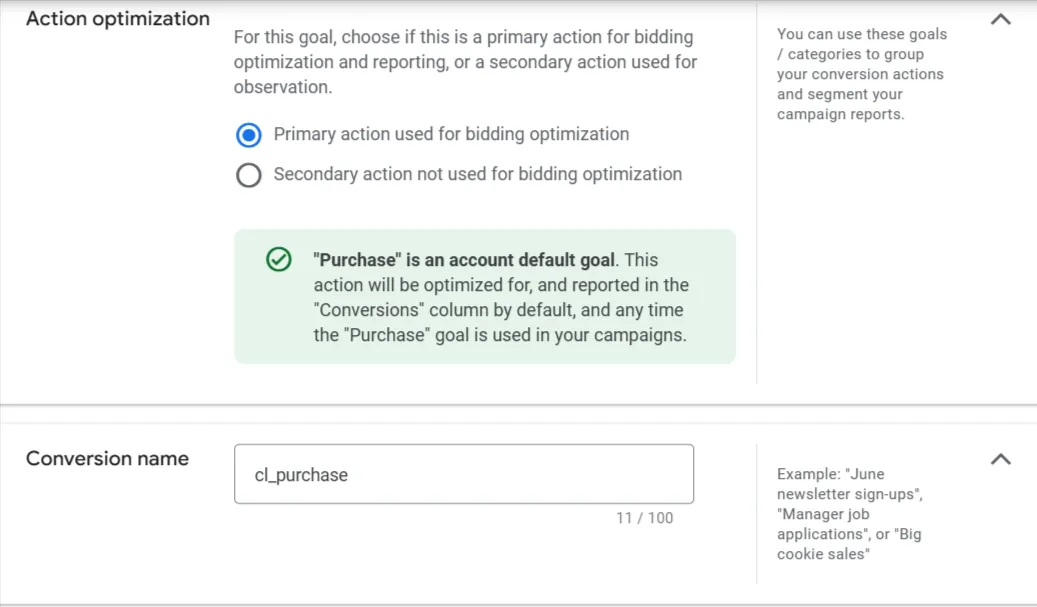
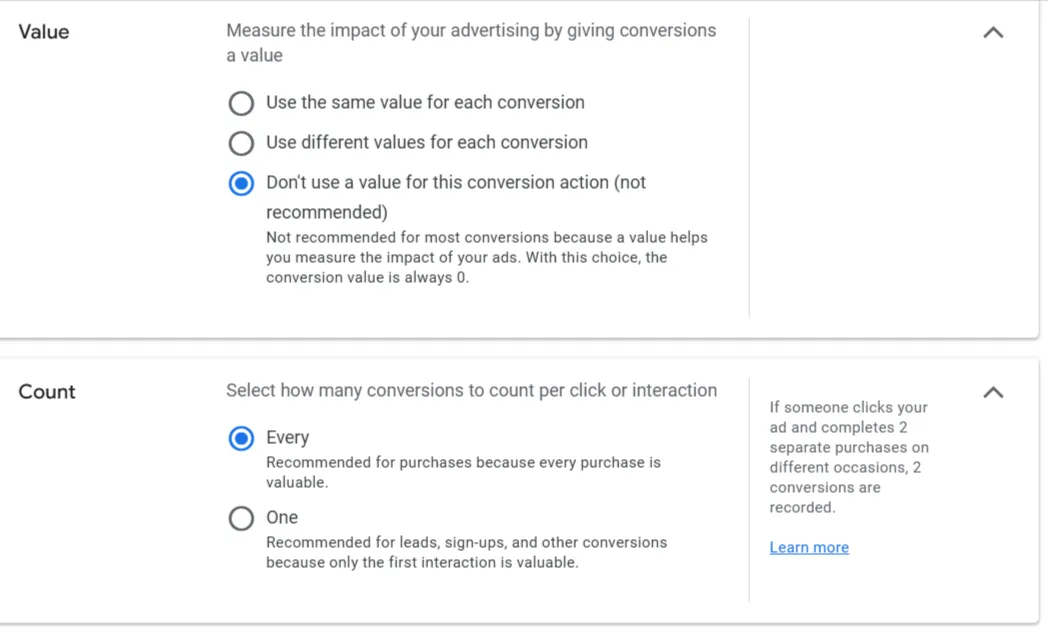
Click Settings and configure the conversion action:
- Set Action optimization to Primary action used for bidding optimization.
- Set Conversion name to
cl_purchase.
- Under Value, select Don’t use a value for this conversion action.
- Under Count, select Every for e-commerce or One for lead generation.
-
You will be redirected to enter the remaining conversion details (Goal, conversion name, and so on). See Part 1 of Google’s documentation for setting these up.
-
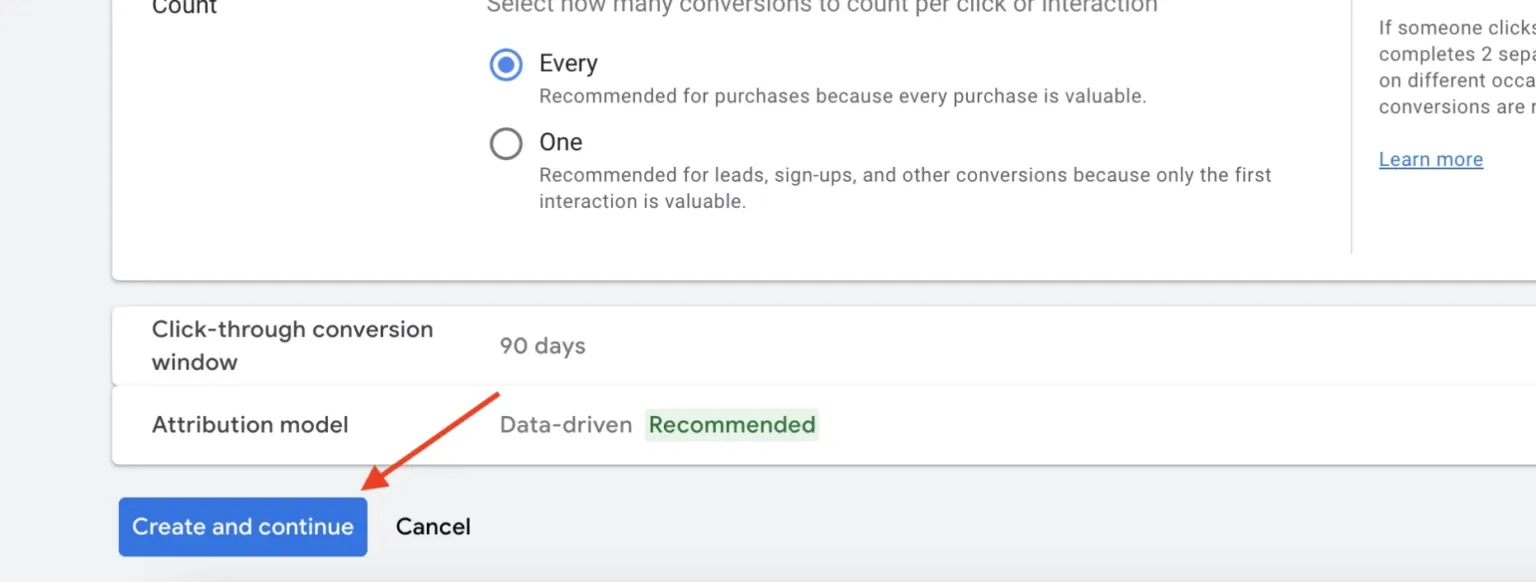
After completing the setup, click Create and continue.
-
Click Done. You have now created an offline conversion action.
Step 5: Map conversion actions in CustomerLabs
Section titled “Step 5: Map conversion actions in CustomerLabs”Once the conversion actions are created in Google Ads, map them to CustomerLabs events.
-
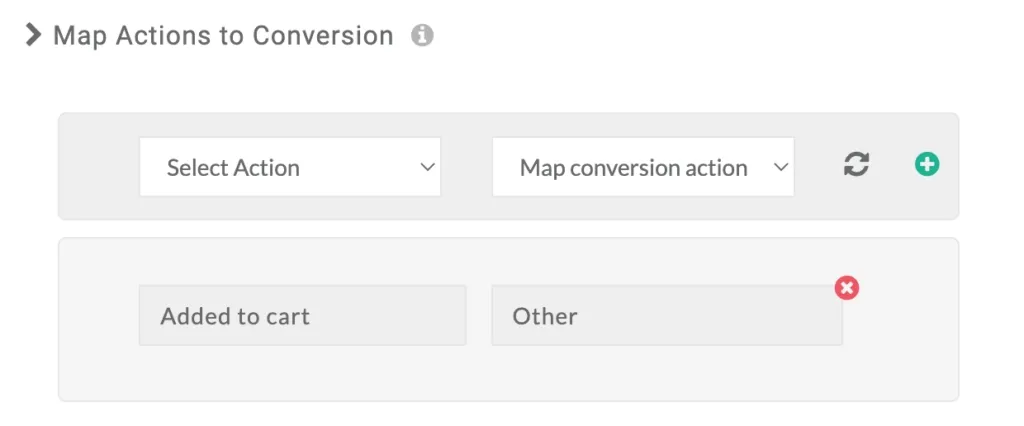
Go to Destinations → Google Data Manager → Configuration settings → Map Actions to Conversion.
-
Click Fetch Conversion to retrieve the actions from your Google Ads account.
-
Map each Google Ads Conversion Action to the corresponding CustomerLabs Event.
-
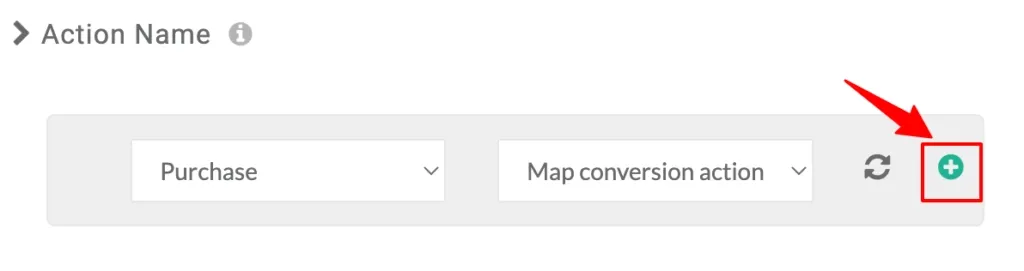
Click the + icon to add the mapping to the list.
-
Click Save Changes.
Step 6: Enable the event workflow
Section titled “Step 6: Enable the event workflow”Enable the sync for the mapped events.
- Navigate to Setup Event workflow from the Google Data Manager destination in CustomerLabs.
- Toggle ON the events you want to sync.
- Click Save Changes.
Step 7: Enable enhanced conversions
Section titled “Step 7: Enable enhanced conversions”Enhanced conversions improve measurement accuracy by matching hashed first-party data (such as email or phone) from your website with Google-logged-in accounts.
Enable in Google Ads
Section titled “Enable in Google Ads”-
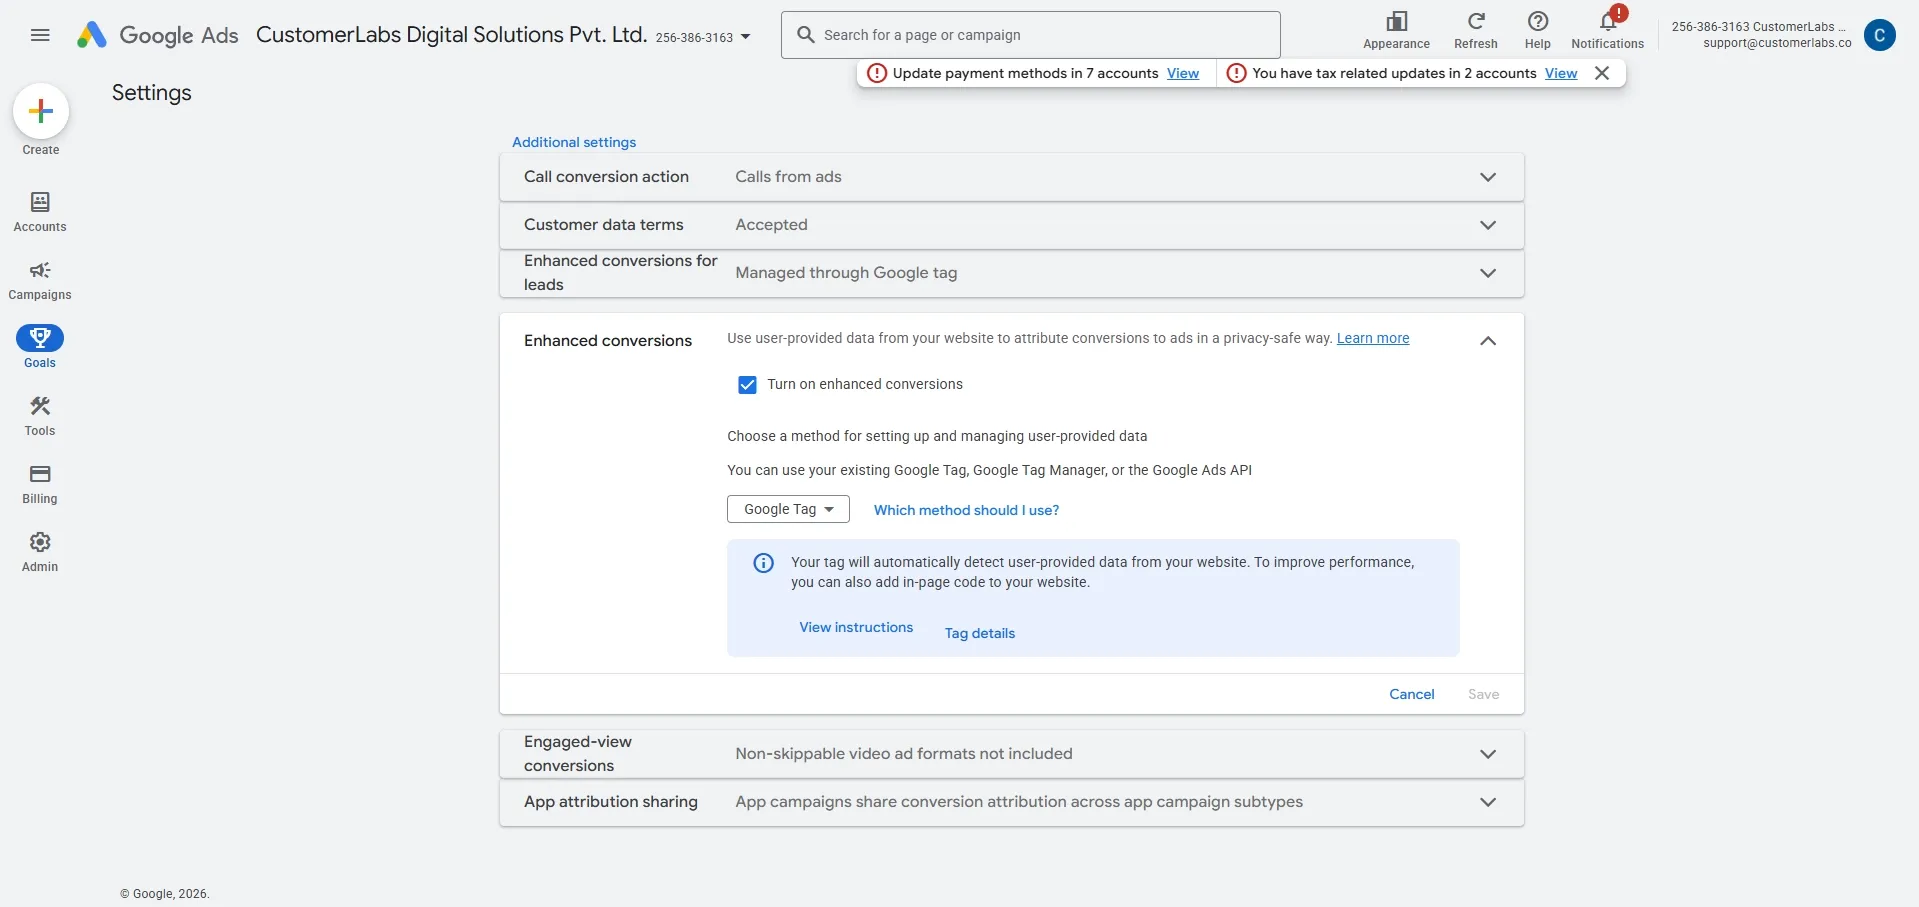
In your Google Ads account, navigate to Goals → Settings → Customer data terms.
-
Accept the terms and click Save.
-
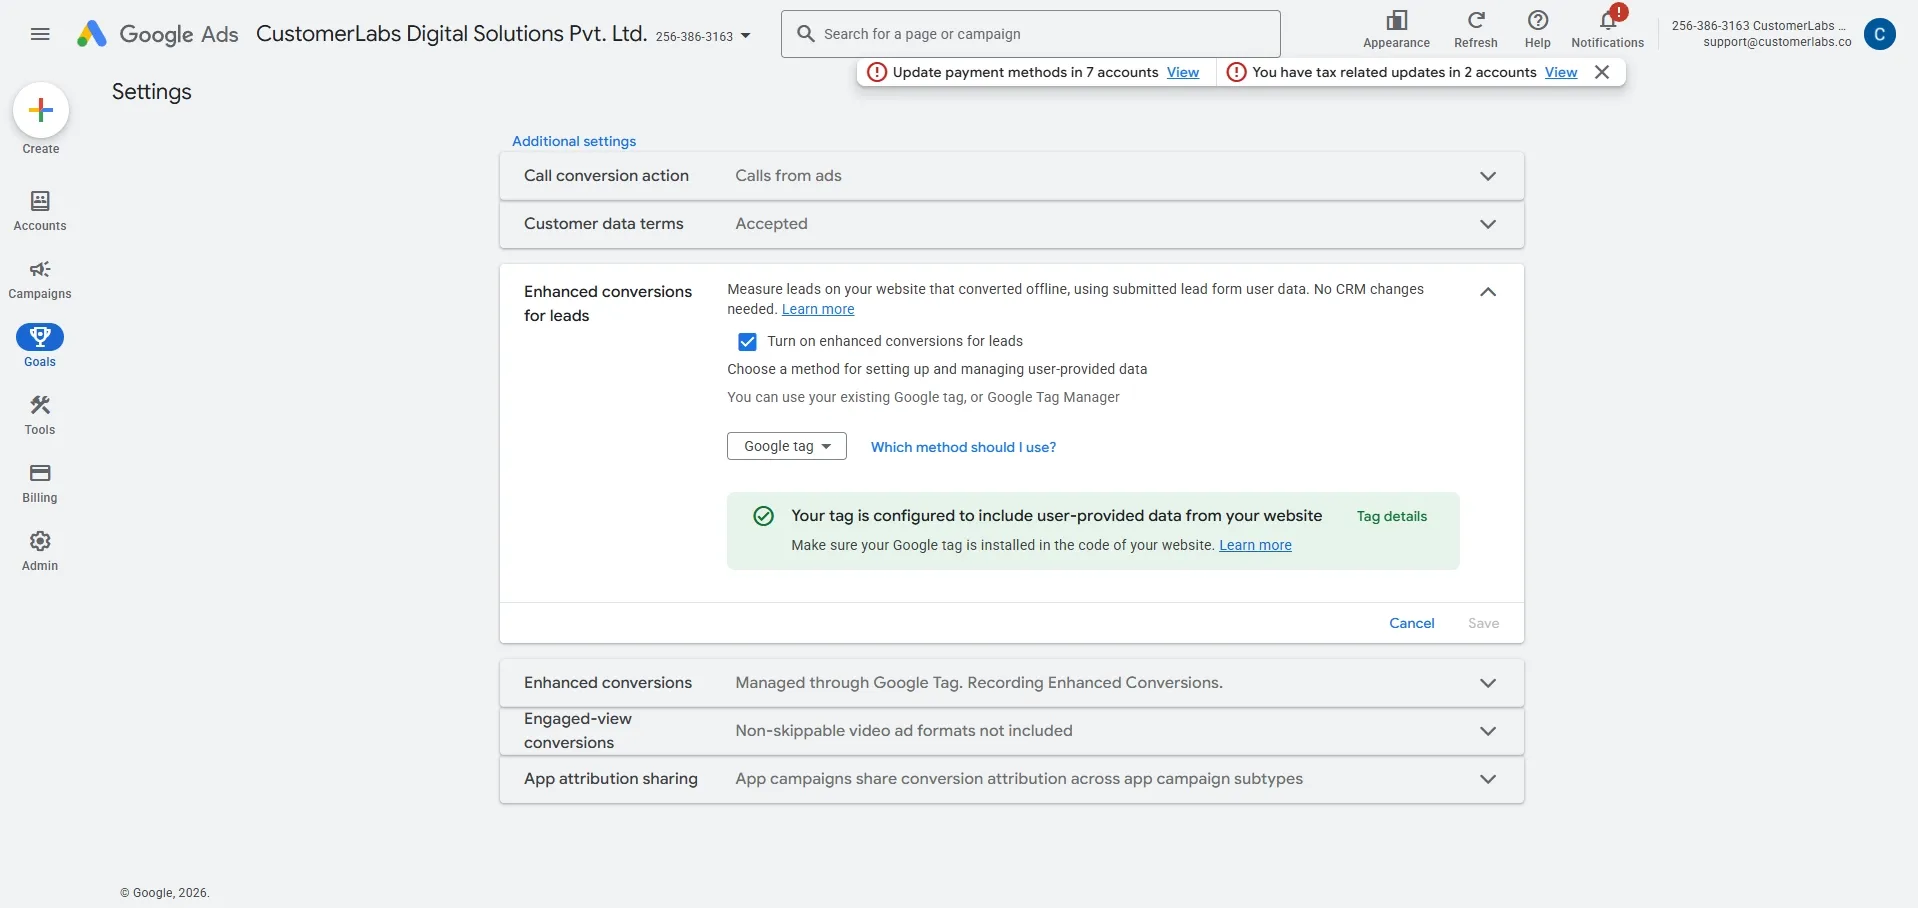
Go to Converted leads or Conversions, depending on your use case.
-
Turn on Turn on enhanced conversions for leads and Enhanced conversions.
-
Choose Google tag as the method and click Save.
Enable in CustomerLabs
Section titled “Enable in CustomerLabs”-
In CustomerLabs, go to Destinations → Google Data Manager → Configuration settings.
-
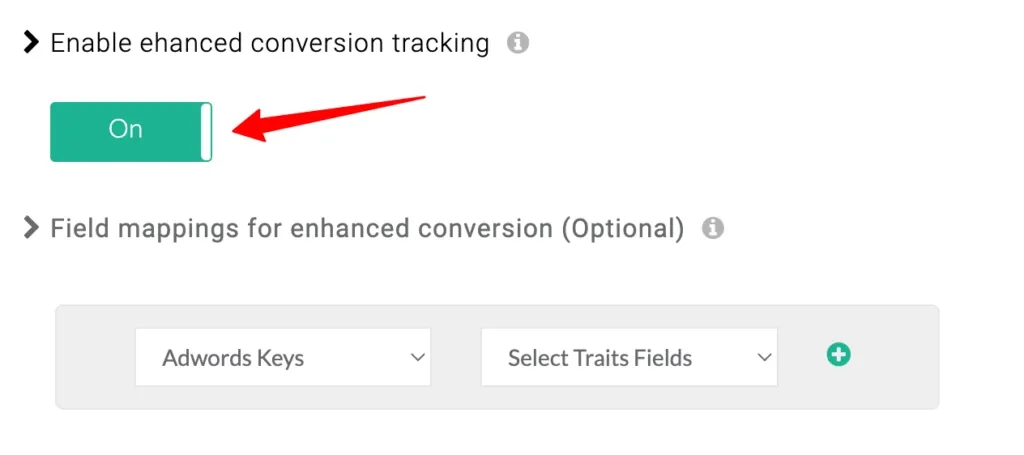
Scroll to Advanced Settings and locate Enable enhanced conversion tracking.
-
Toggle it ON.
-
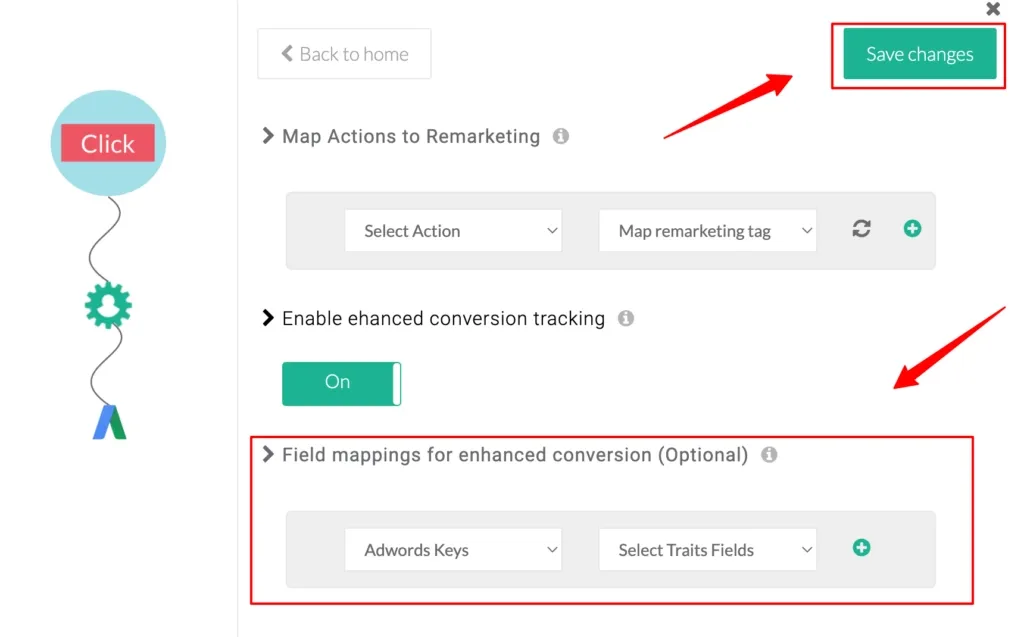
(Optional) Map specific fields for enhanced data. CustomerLabs maps standard fields like email and phone automatically.
-
Click Save Changes.