Google Ads Integration
Connect CustomerLabs to Google Ads to track user behavioral actions — such as button clicks, page views, category views, product views, and form submissions — and sync these details for conversion tracking, remarketing, and audience targeting.
With this integration, you can:
- Track Conversions: Sync both online and offline conversions automatically.
- Enabled Enhanced Conversions: Improve measurement accuracy by sending hashed first-party data.
- Implement Remarketing: Re-engage users based on their website activity.
- Sync Audiences: Direct sync of first-party audience segments for personalized targeting.
Authenticate Google Ads in CustomerLabs
Section titled “Authenticate Google Ads in CustomerLabs”To begin, you need to connect your Google Ads account with CustomerLabs.
-
Log in to your CustomerLabs account.
-
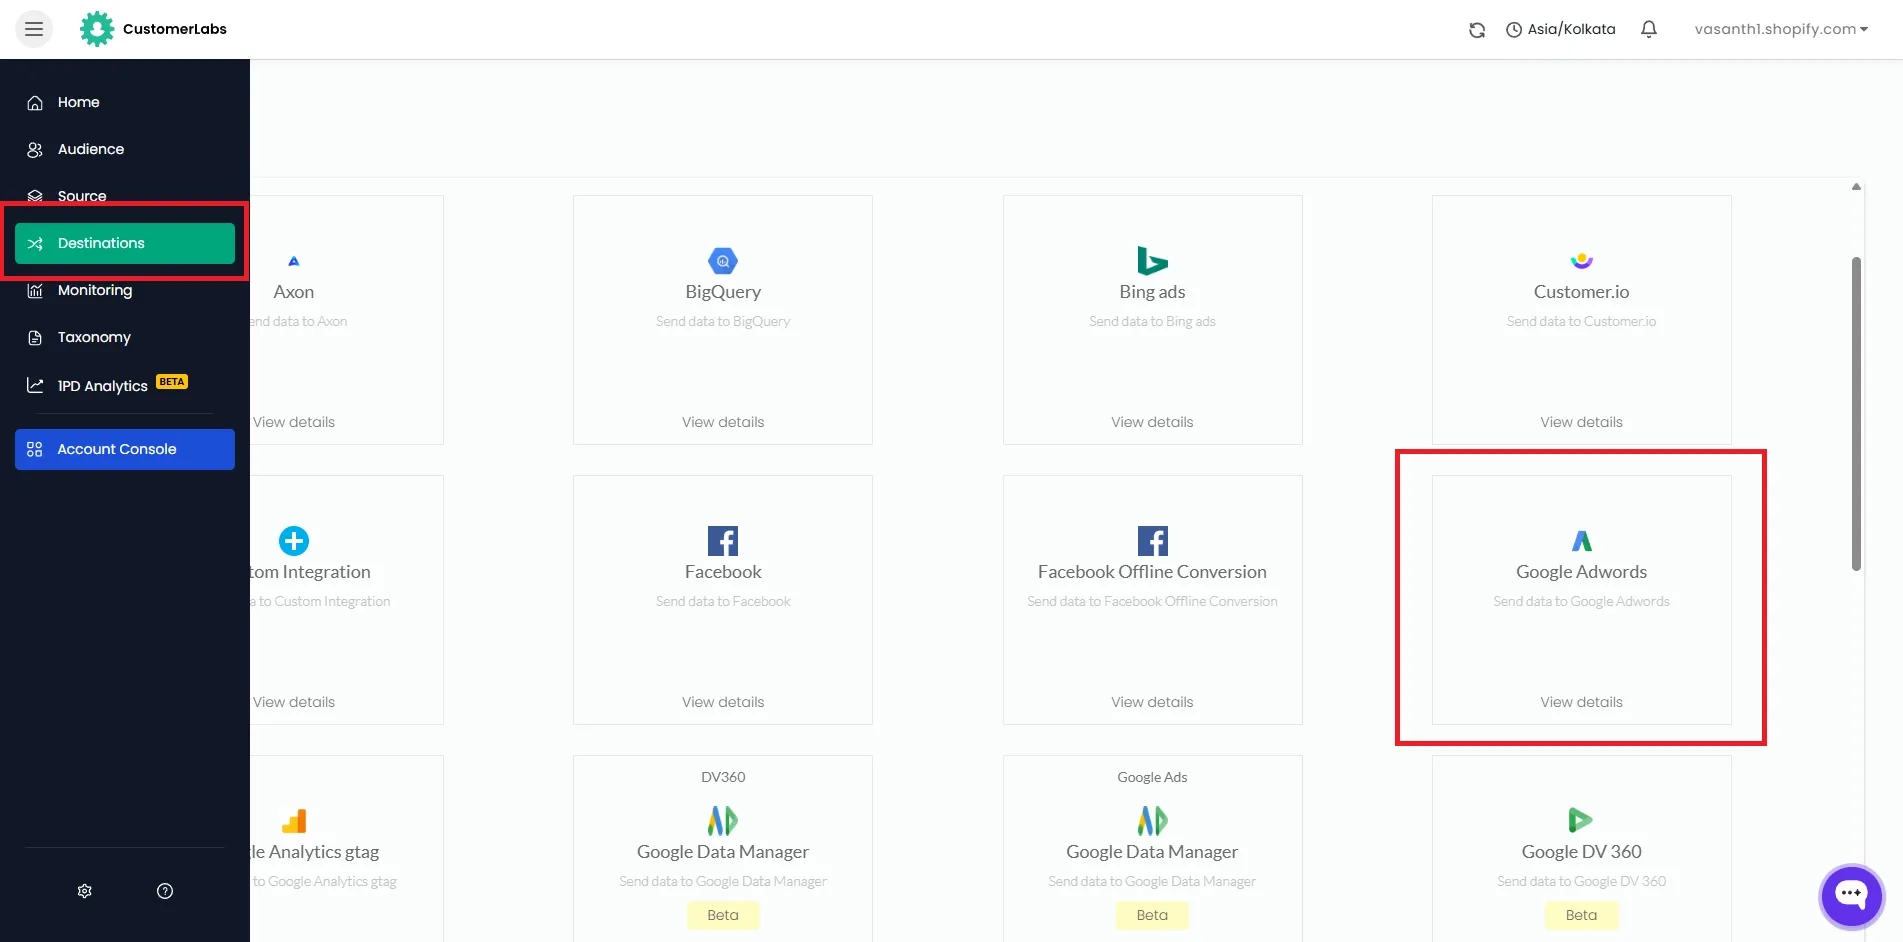
Navigate to Destinations from the left-hand menu.
-
Search for and select Google Adwords from the list of available destinations.
-
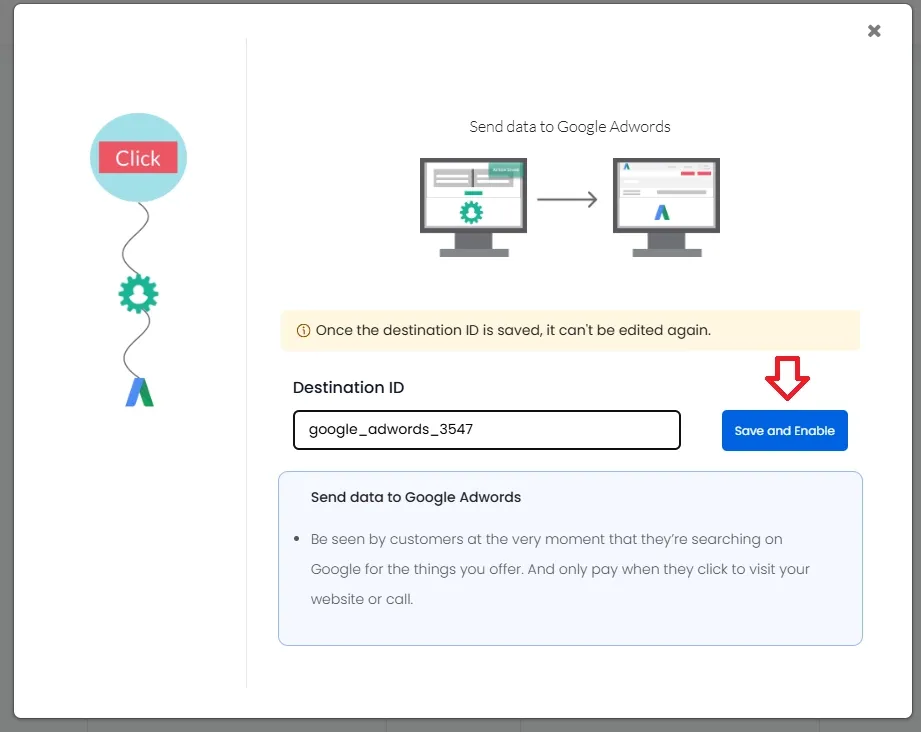
Provide a name for the destination and click Save and Enable.
-
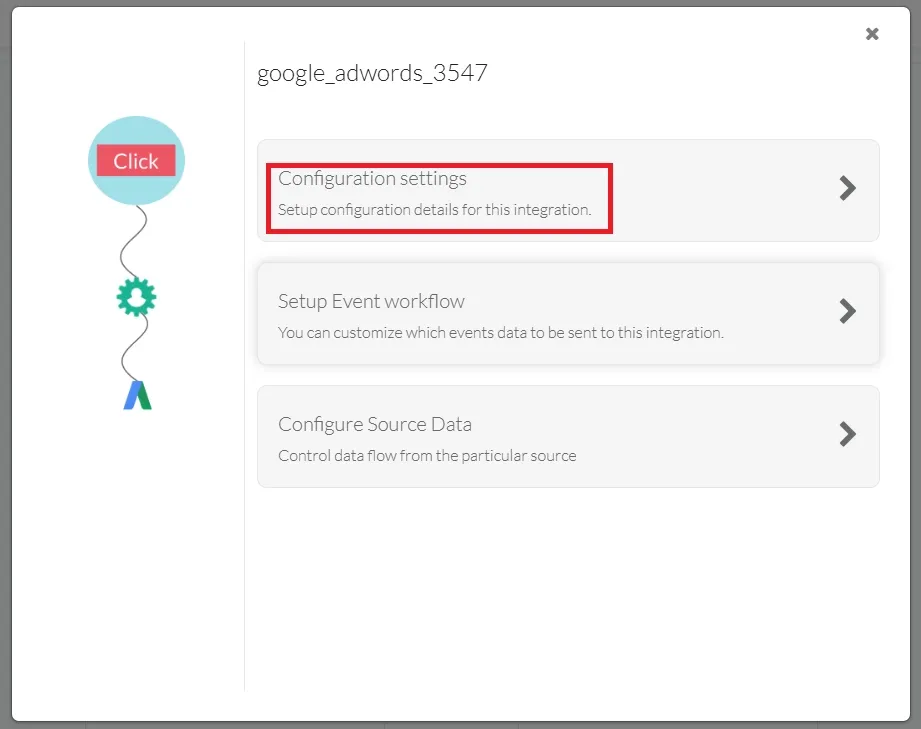
Click on Configuration Settings.
-
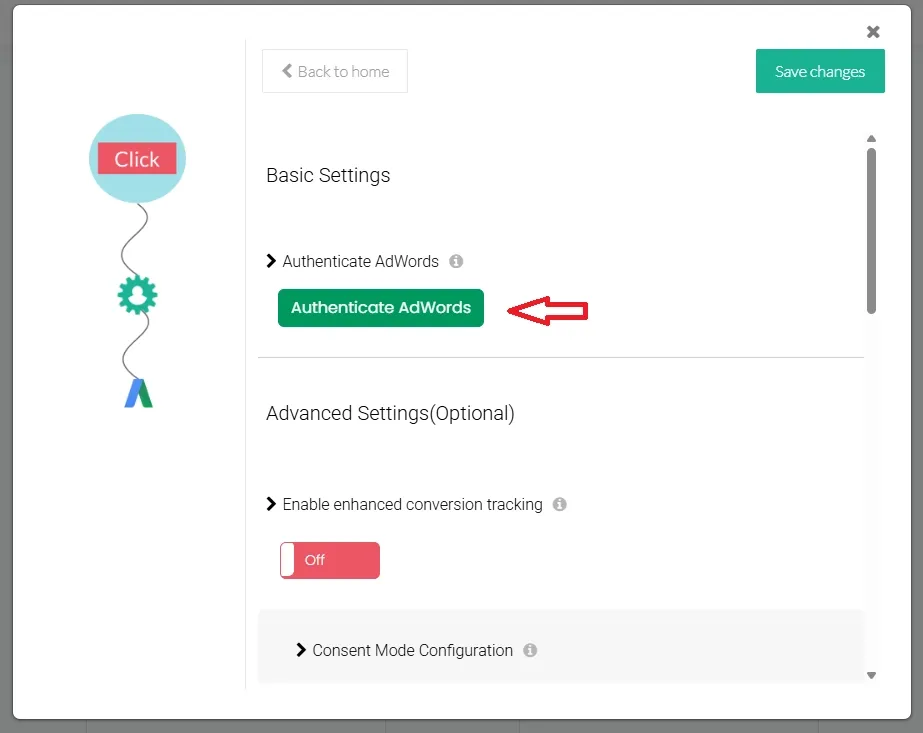
In the Basic Settings section, click Authenticate AdWords.
-
Follow the prompts to sign in and authorize CustomerLabs to access your Google Ads account.
Tracking Website Conversions
Section titled “Tracking Website Conversions”You can map website events tracked in CustomerLabs to conversion actions in Google Ads to measure the effectiveness of your campaigns.
1. Set Up Conversion Actions in Google Ads
Section titled “1. Set Up Conversion Actions in Google Ads”Before mapping in CustomerLabs, ensure the conversion actions are created in your Google Ads account.
-
Sign in to your Google Ads account.
-
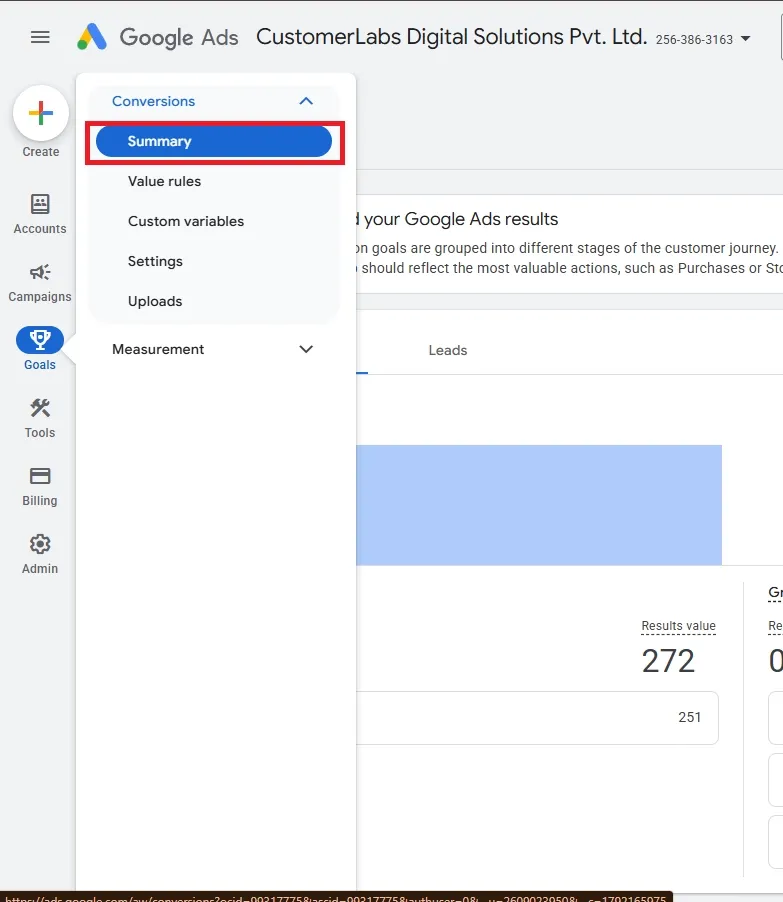
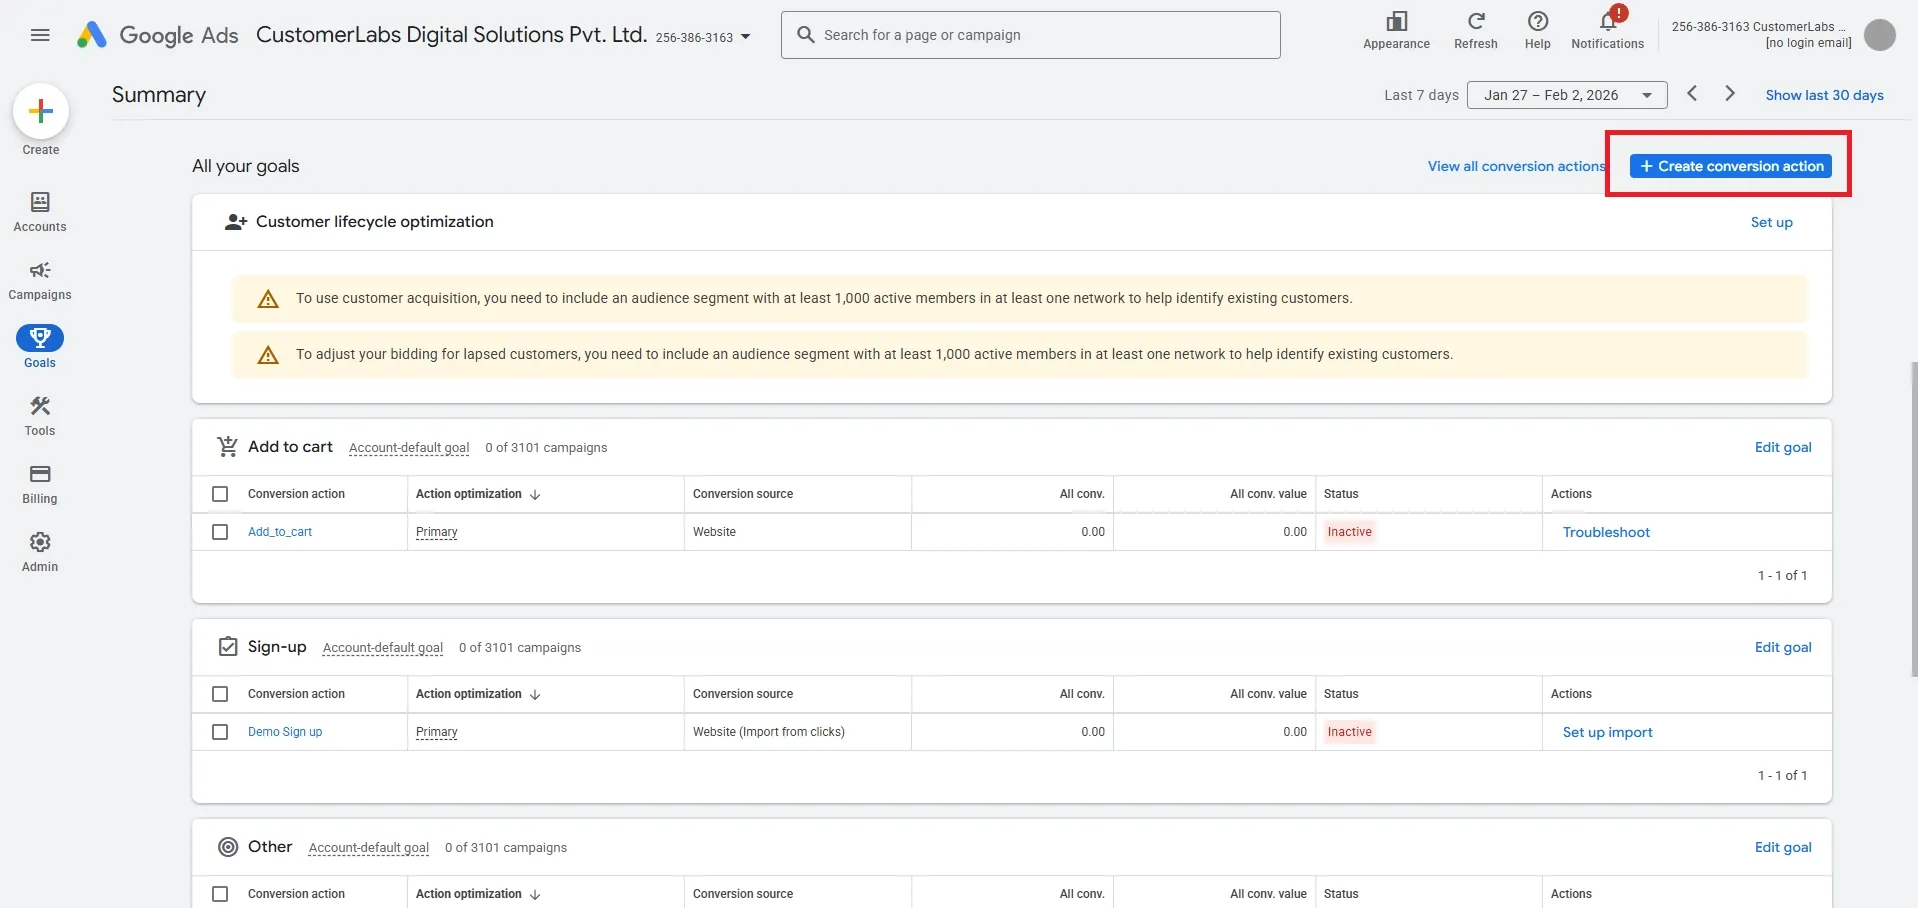
Navigate to Goals → Conversions → Summary.
-
Click + New conversion action.
Setting up Website Conversions
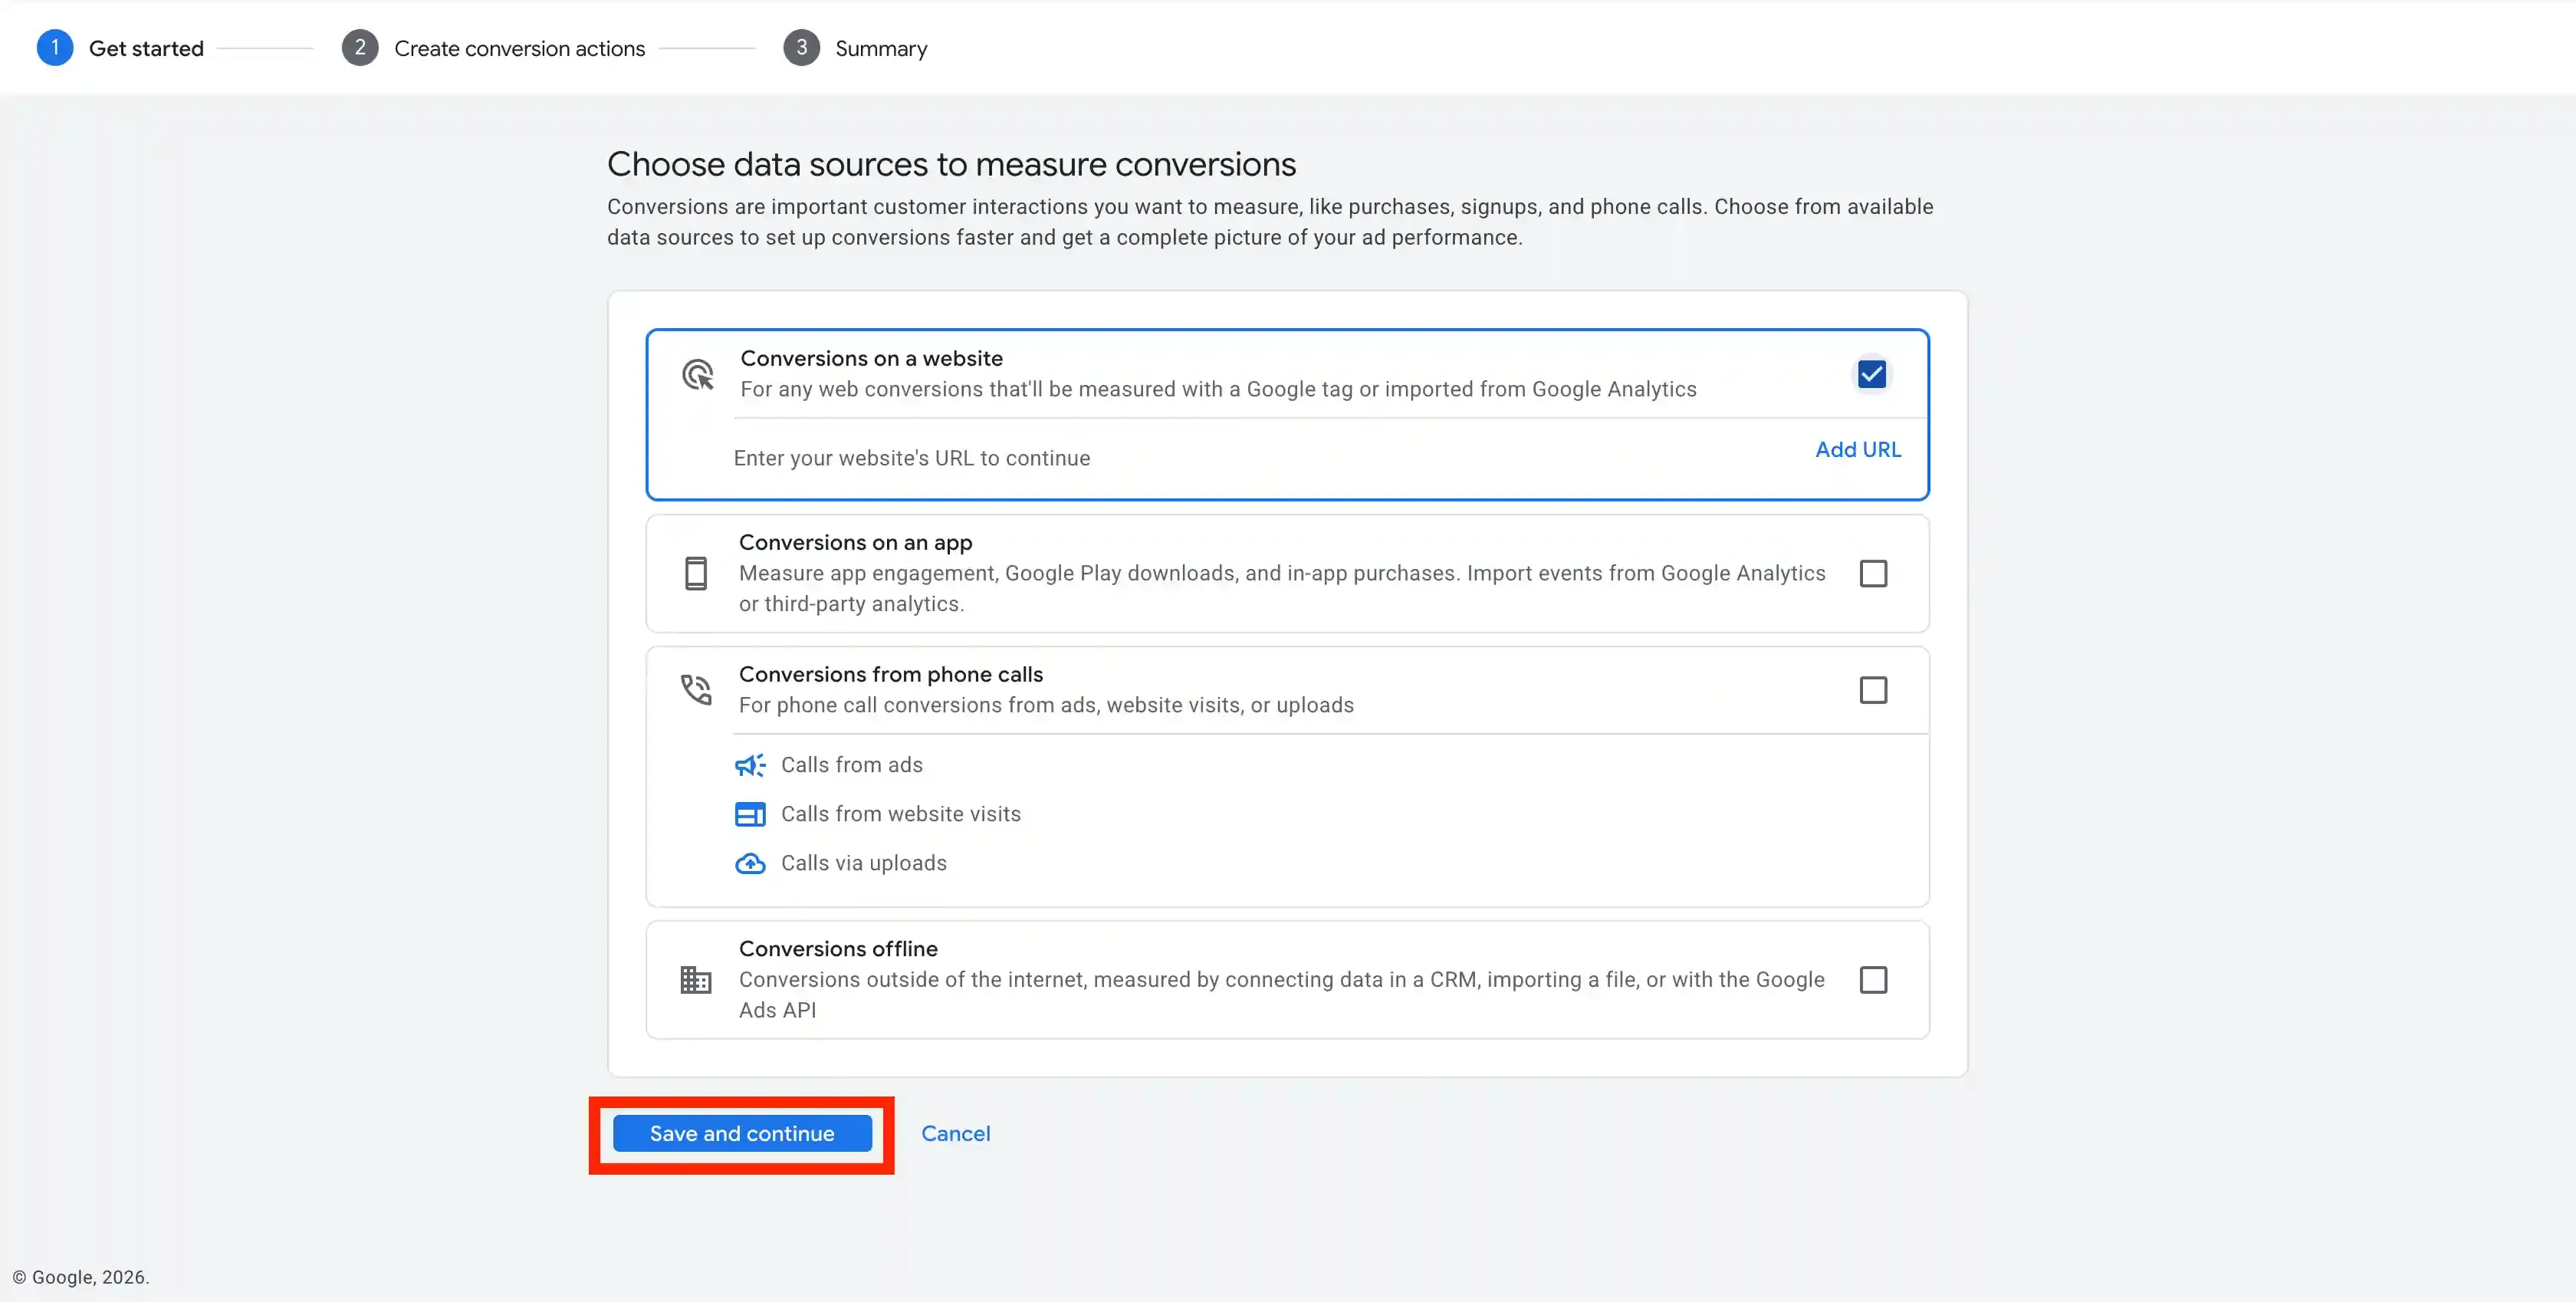
Section titled “Setting up Website Conversions”-
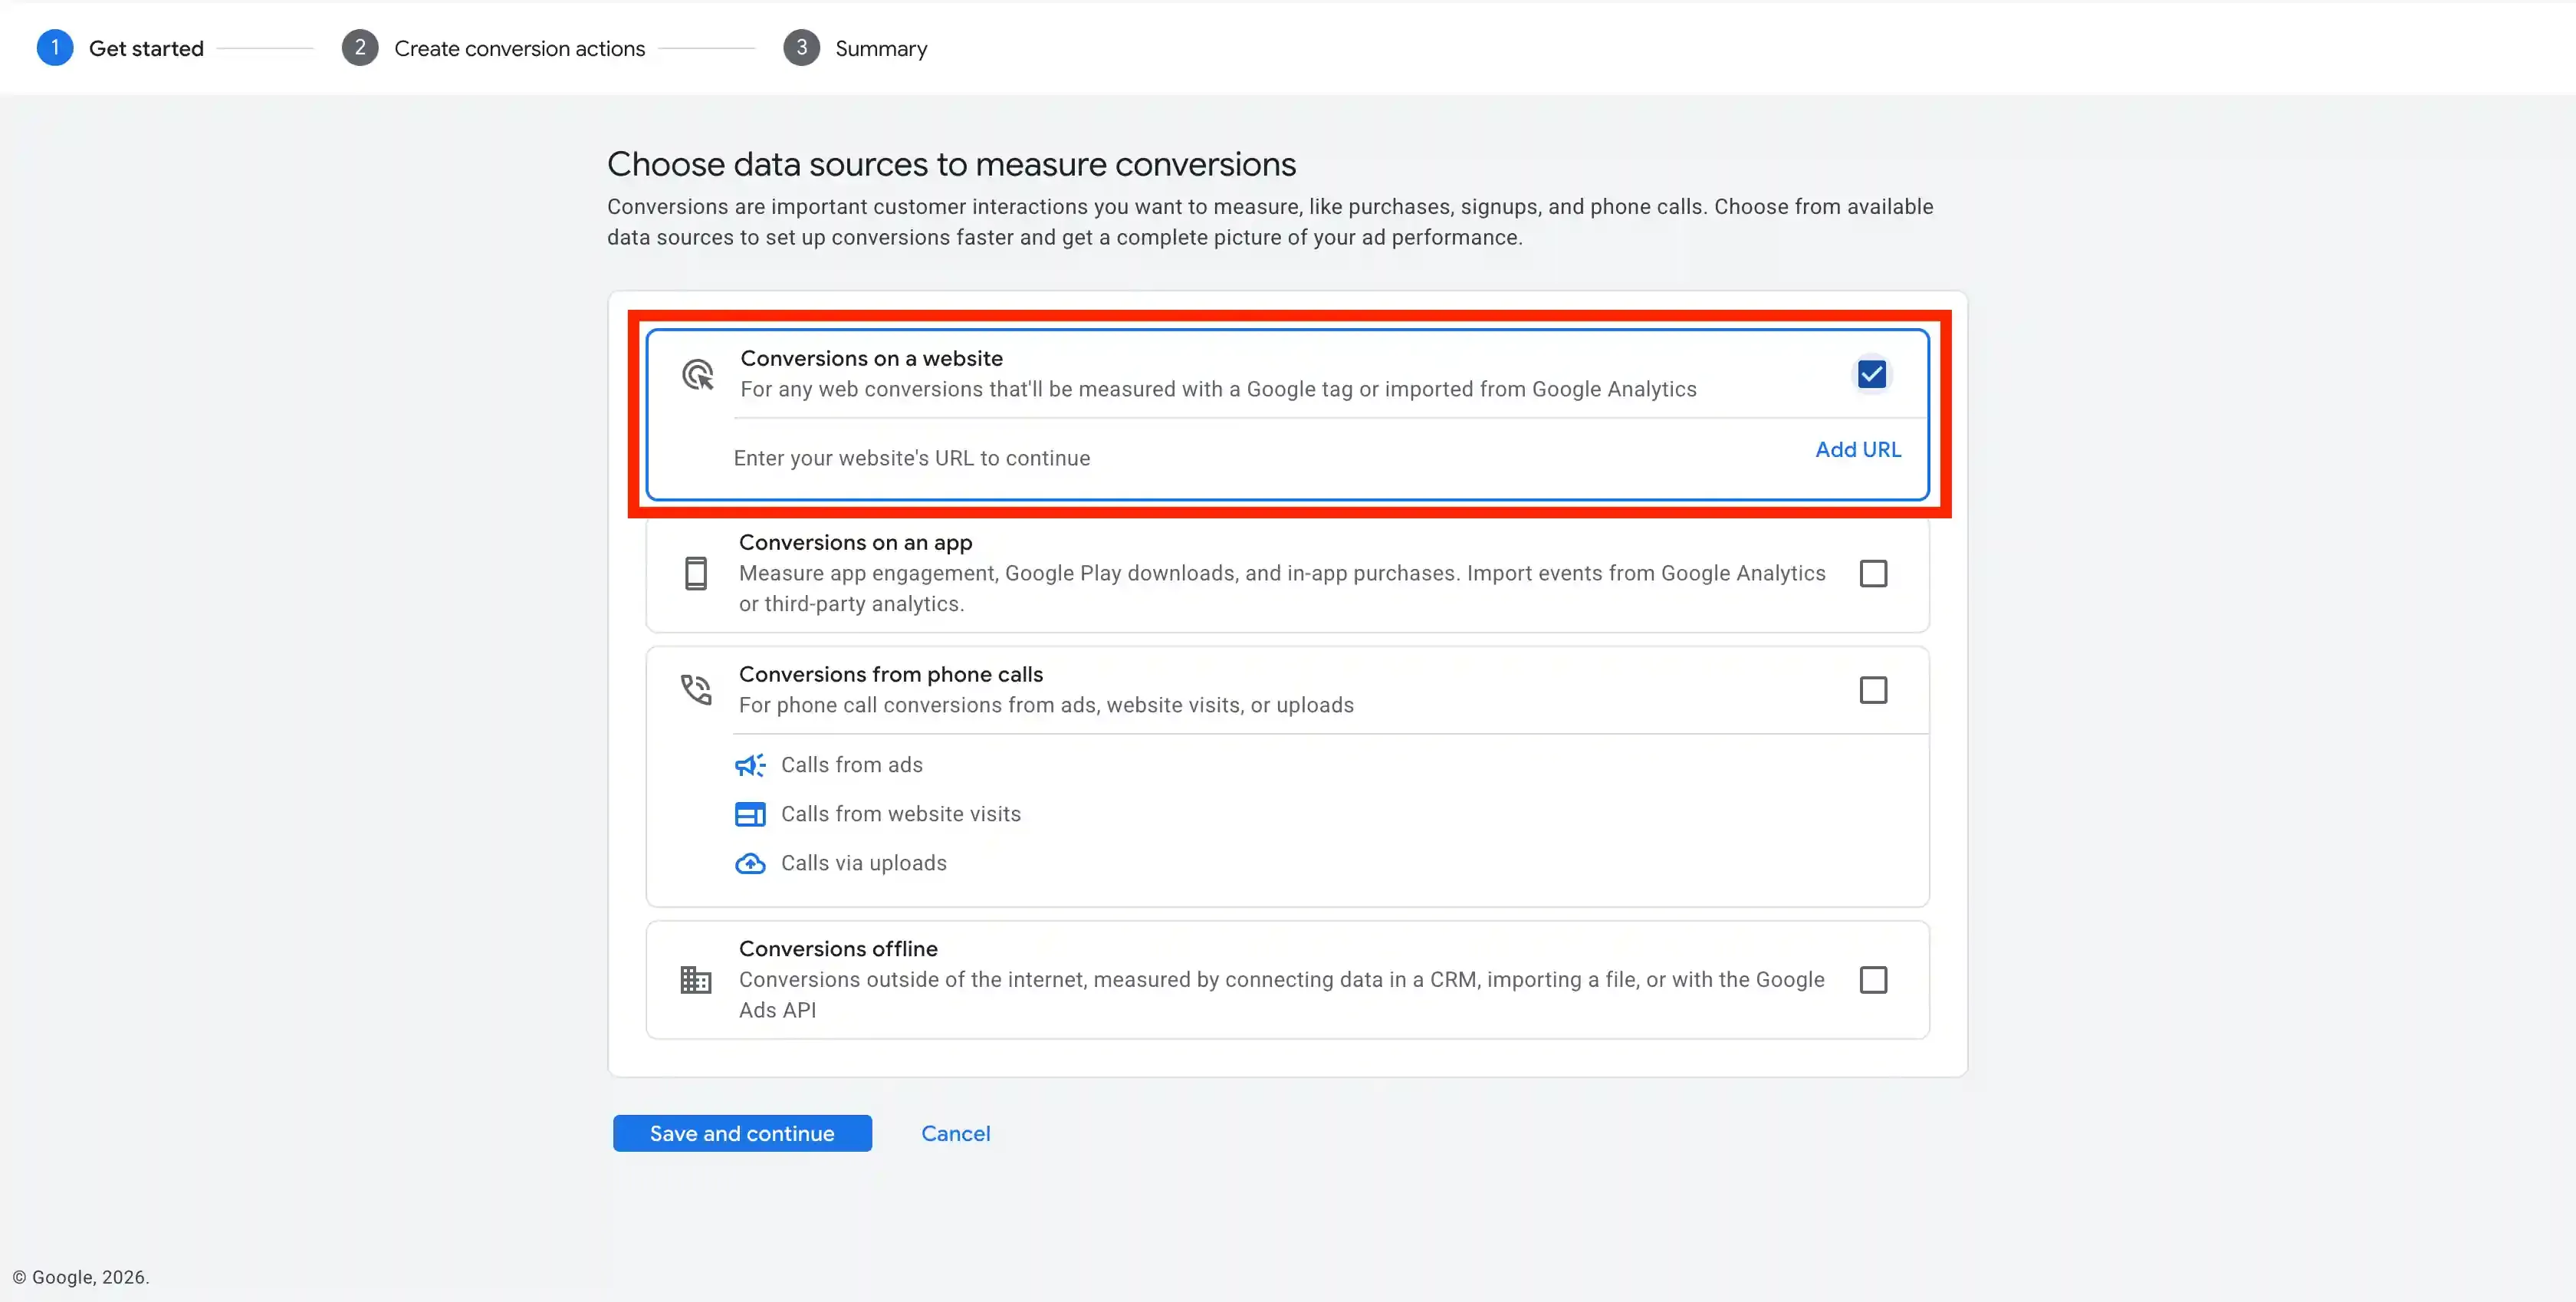
For tracking via Website Conversions, select Conversions on a Website.
-
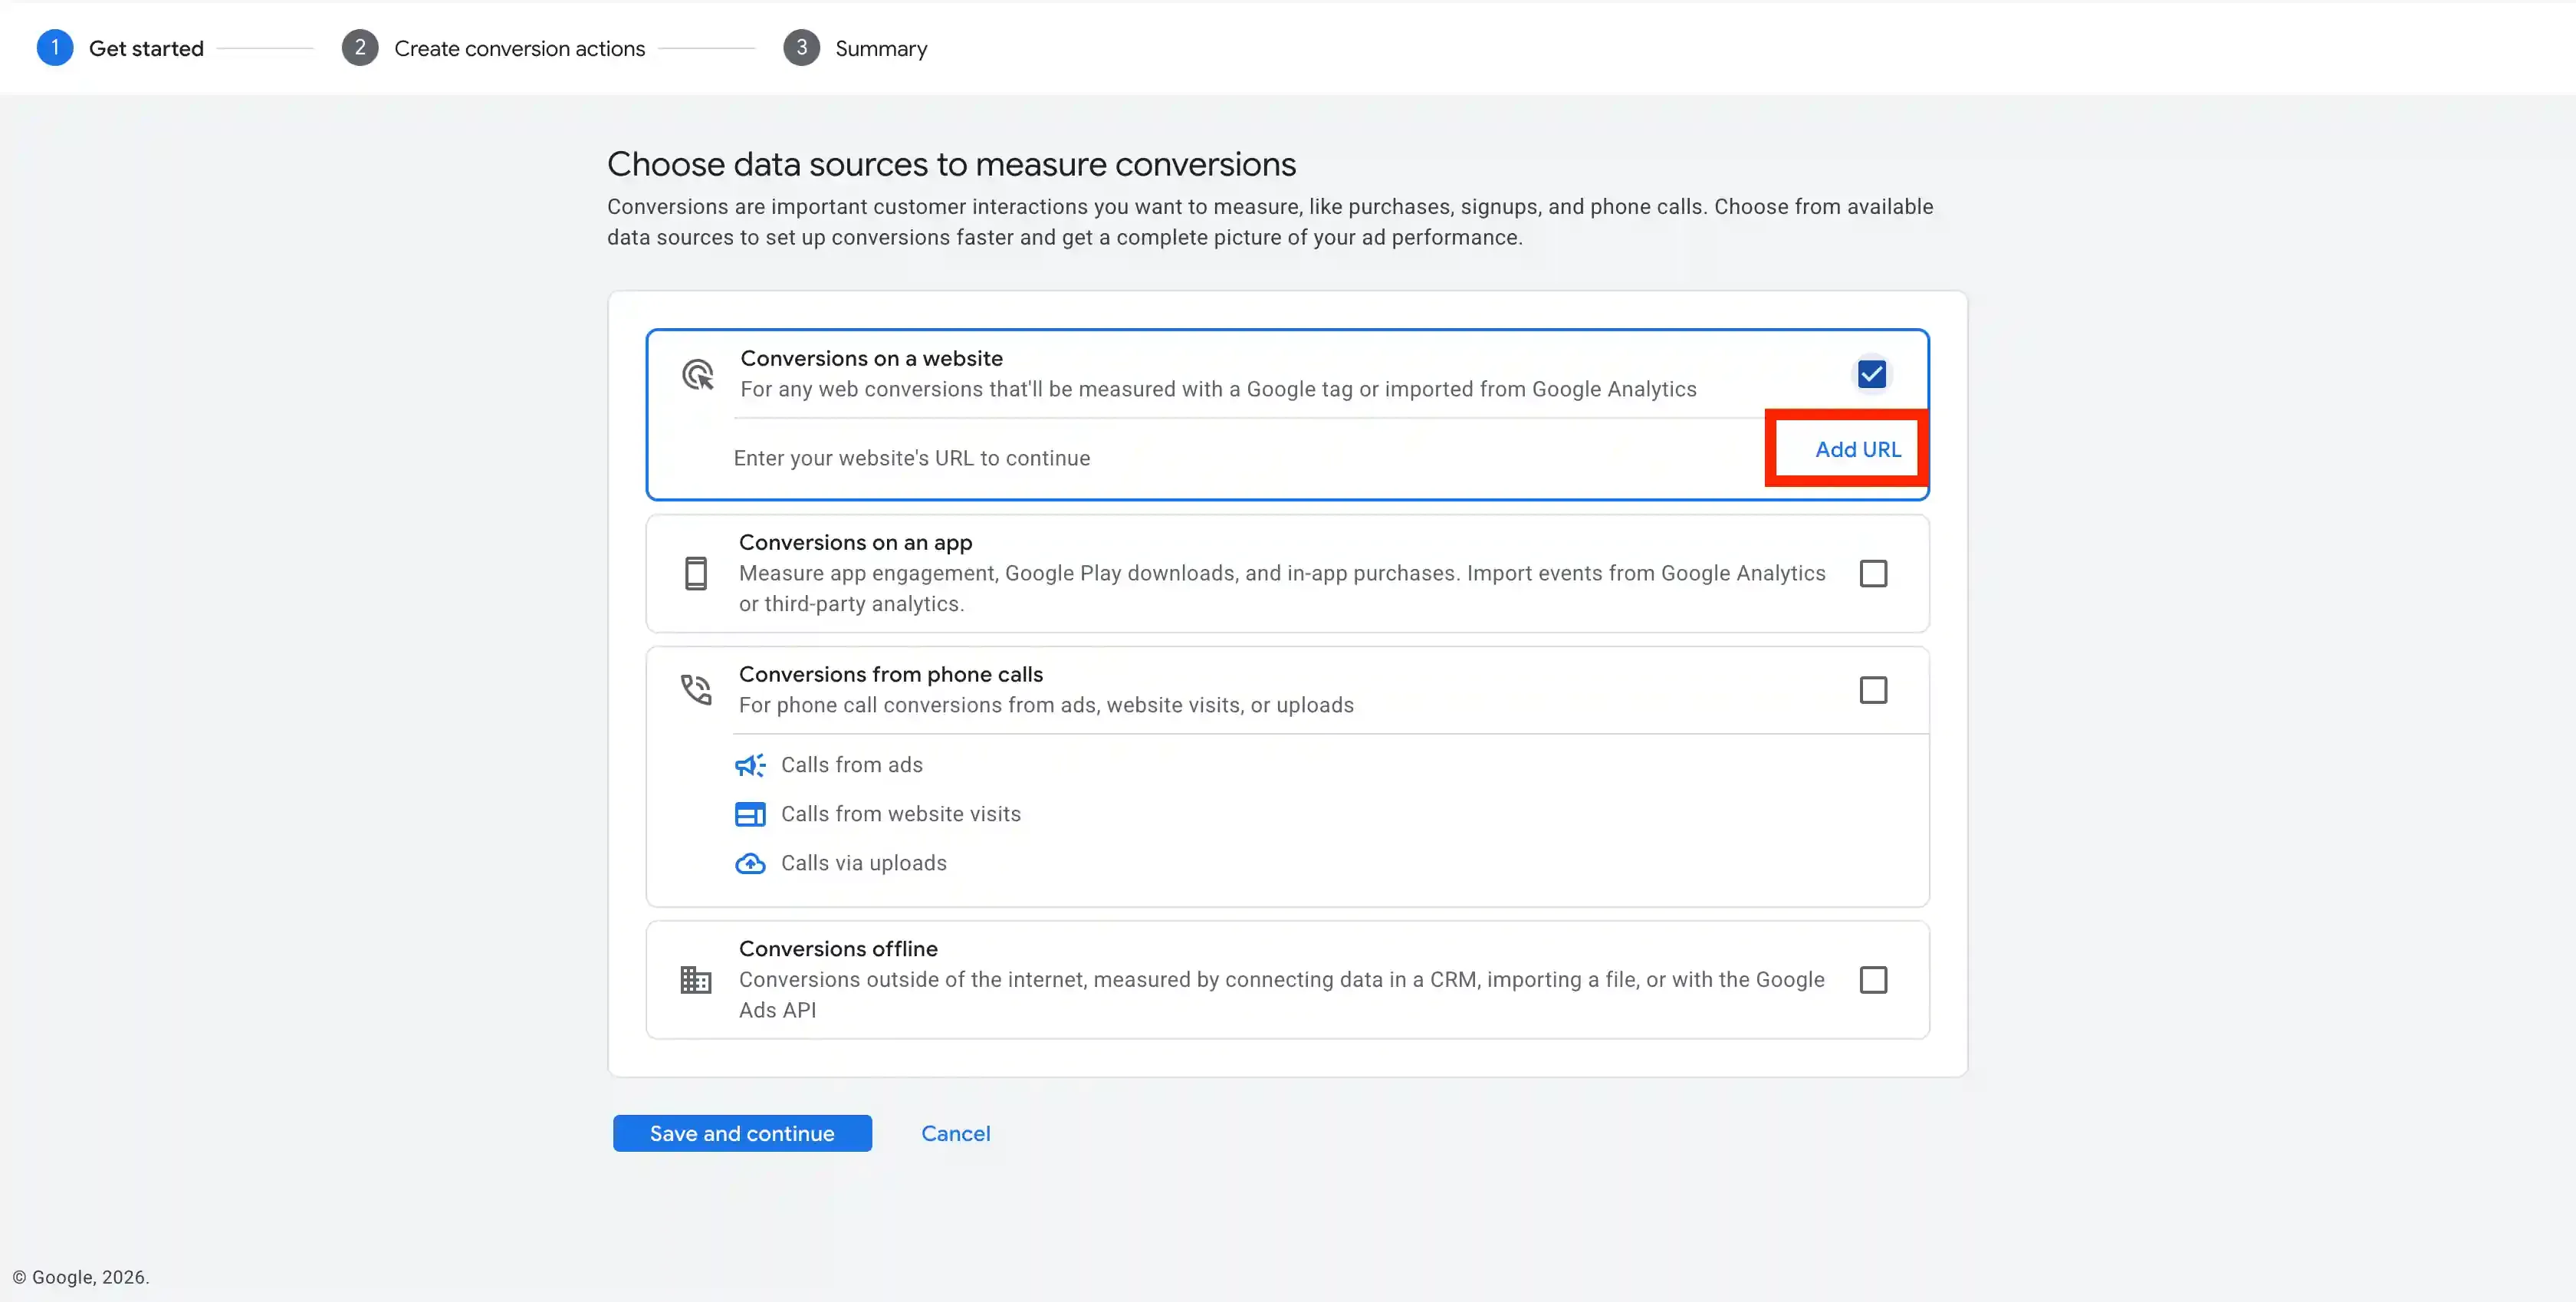
If you are setting up for the first time, you will be required to enter the URL of your website. Click Add URL. If you have already set up Google Tag, choose Google tag as data Source.
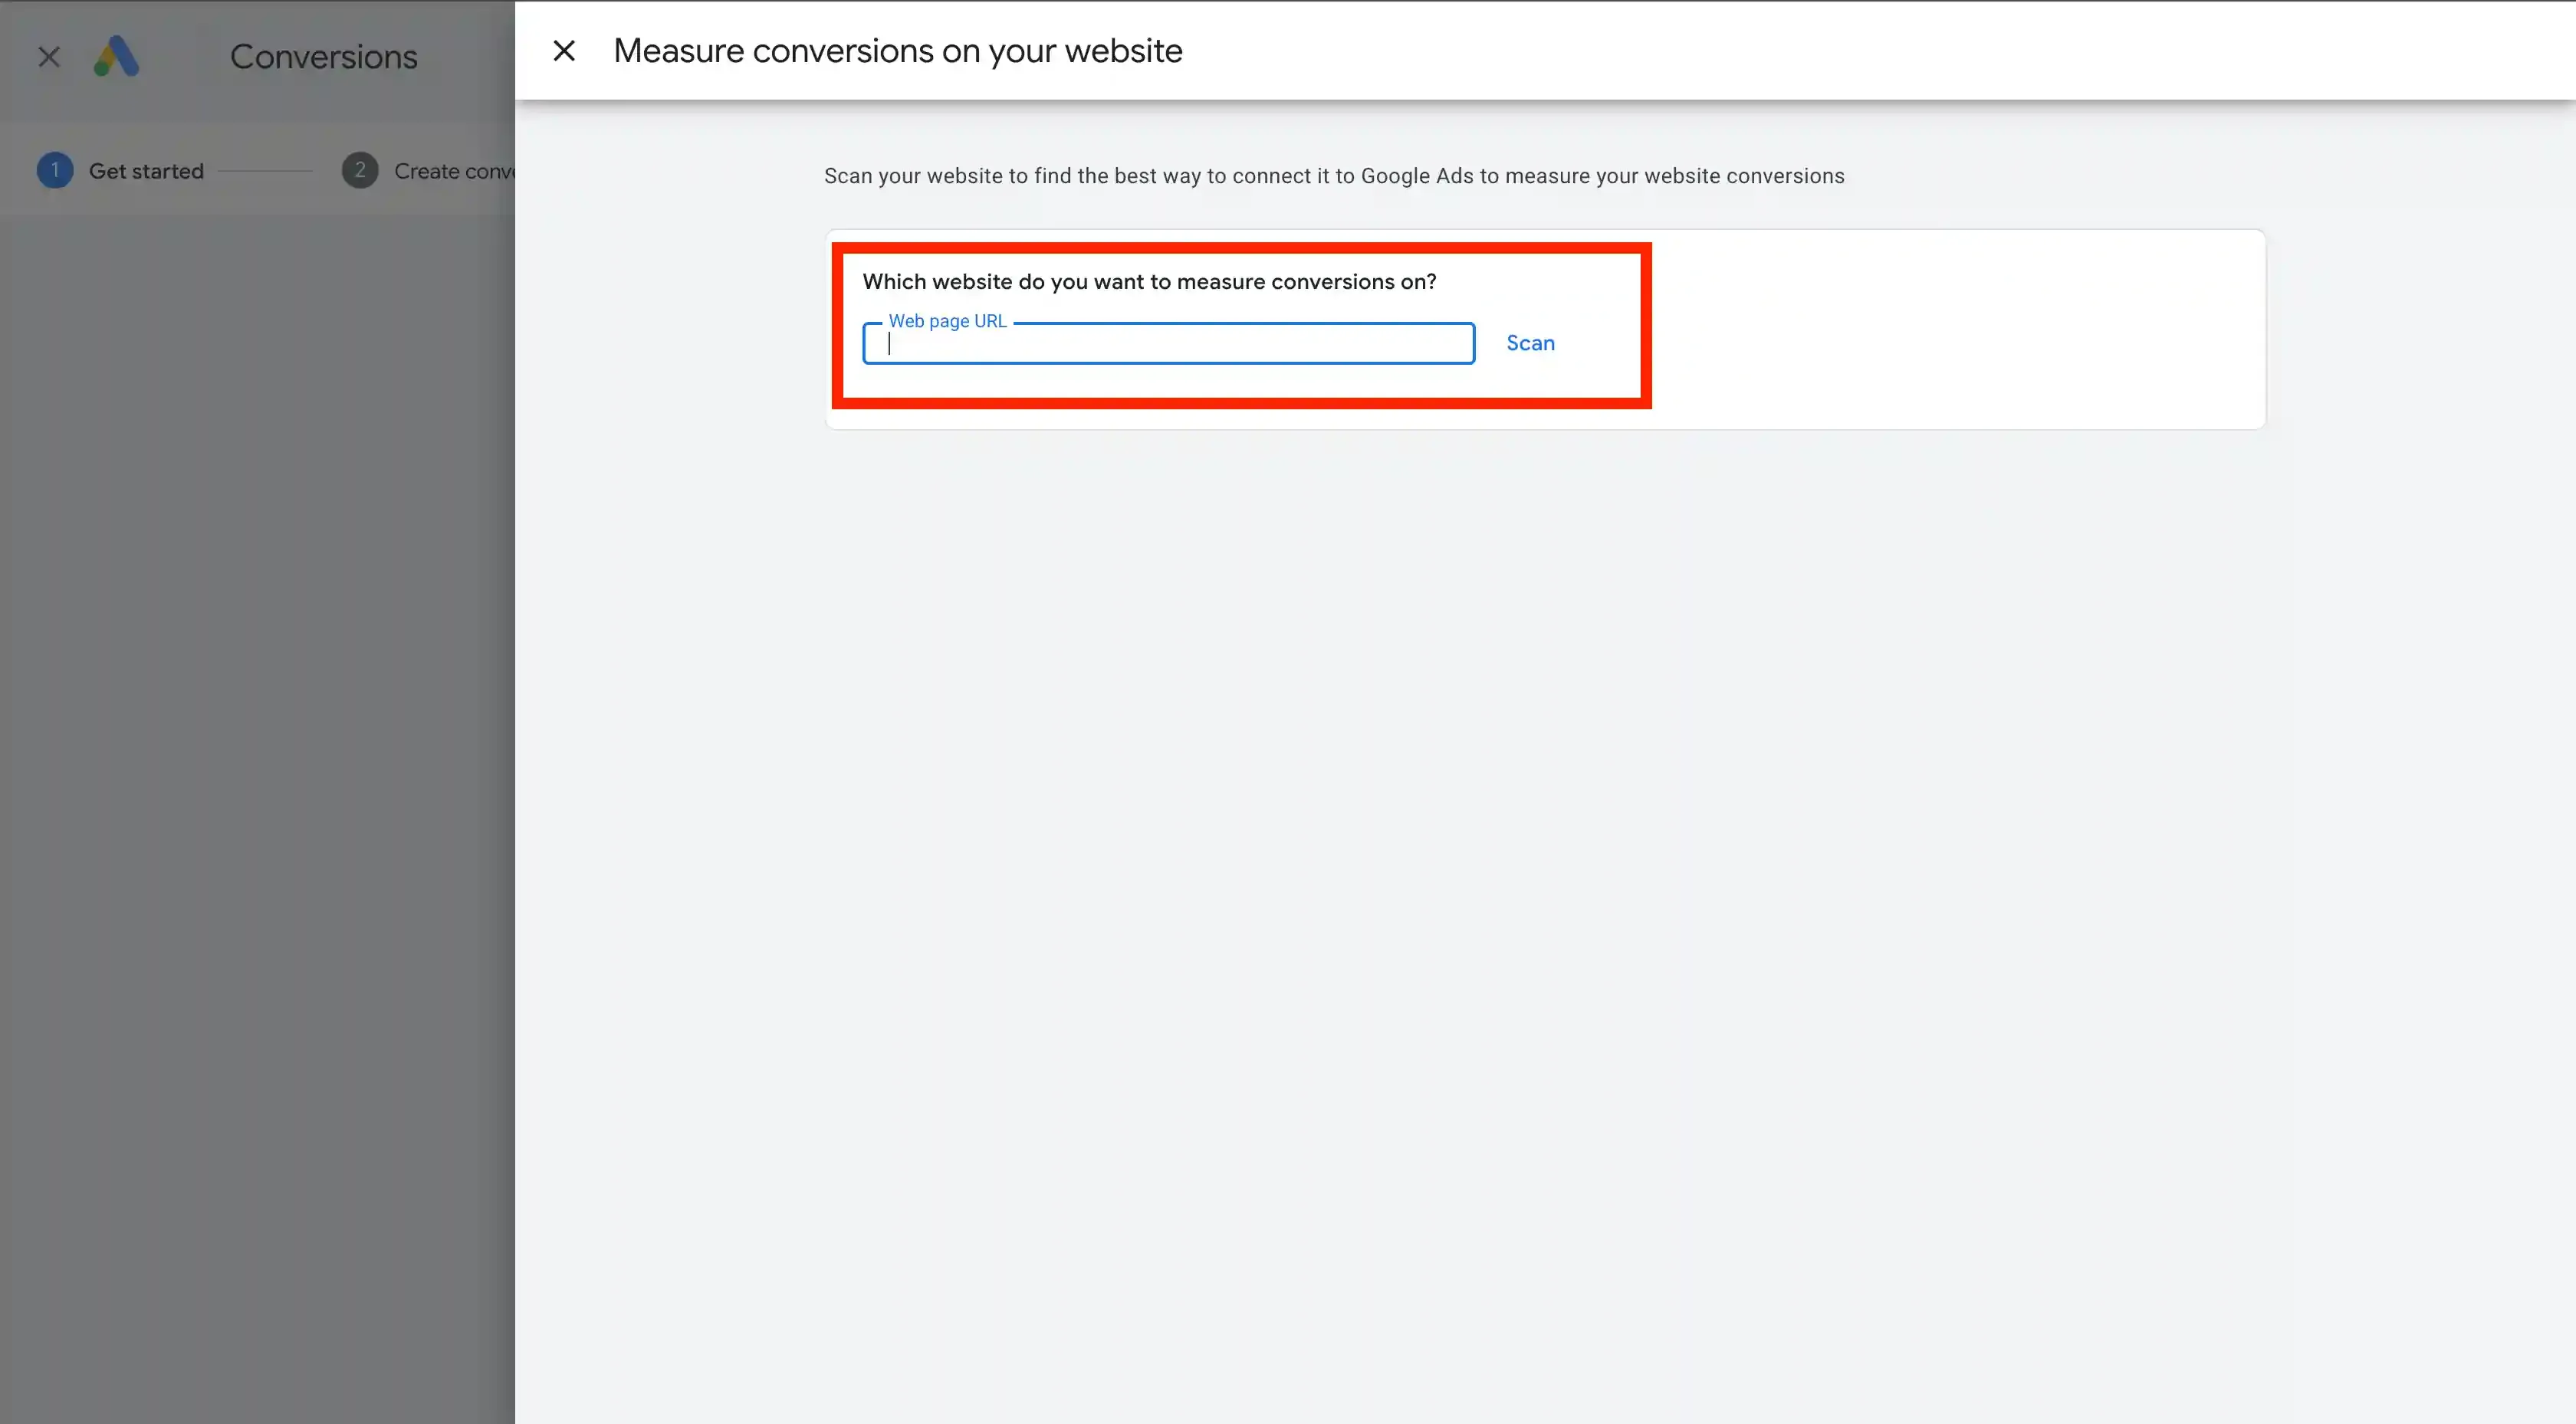
-
Enter Webpage URL and Click Scan.
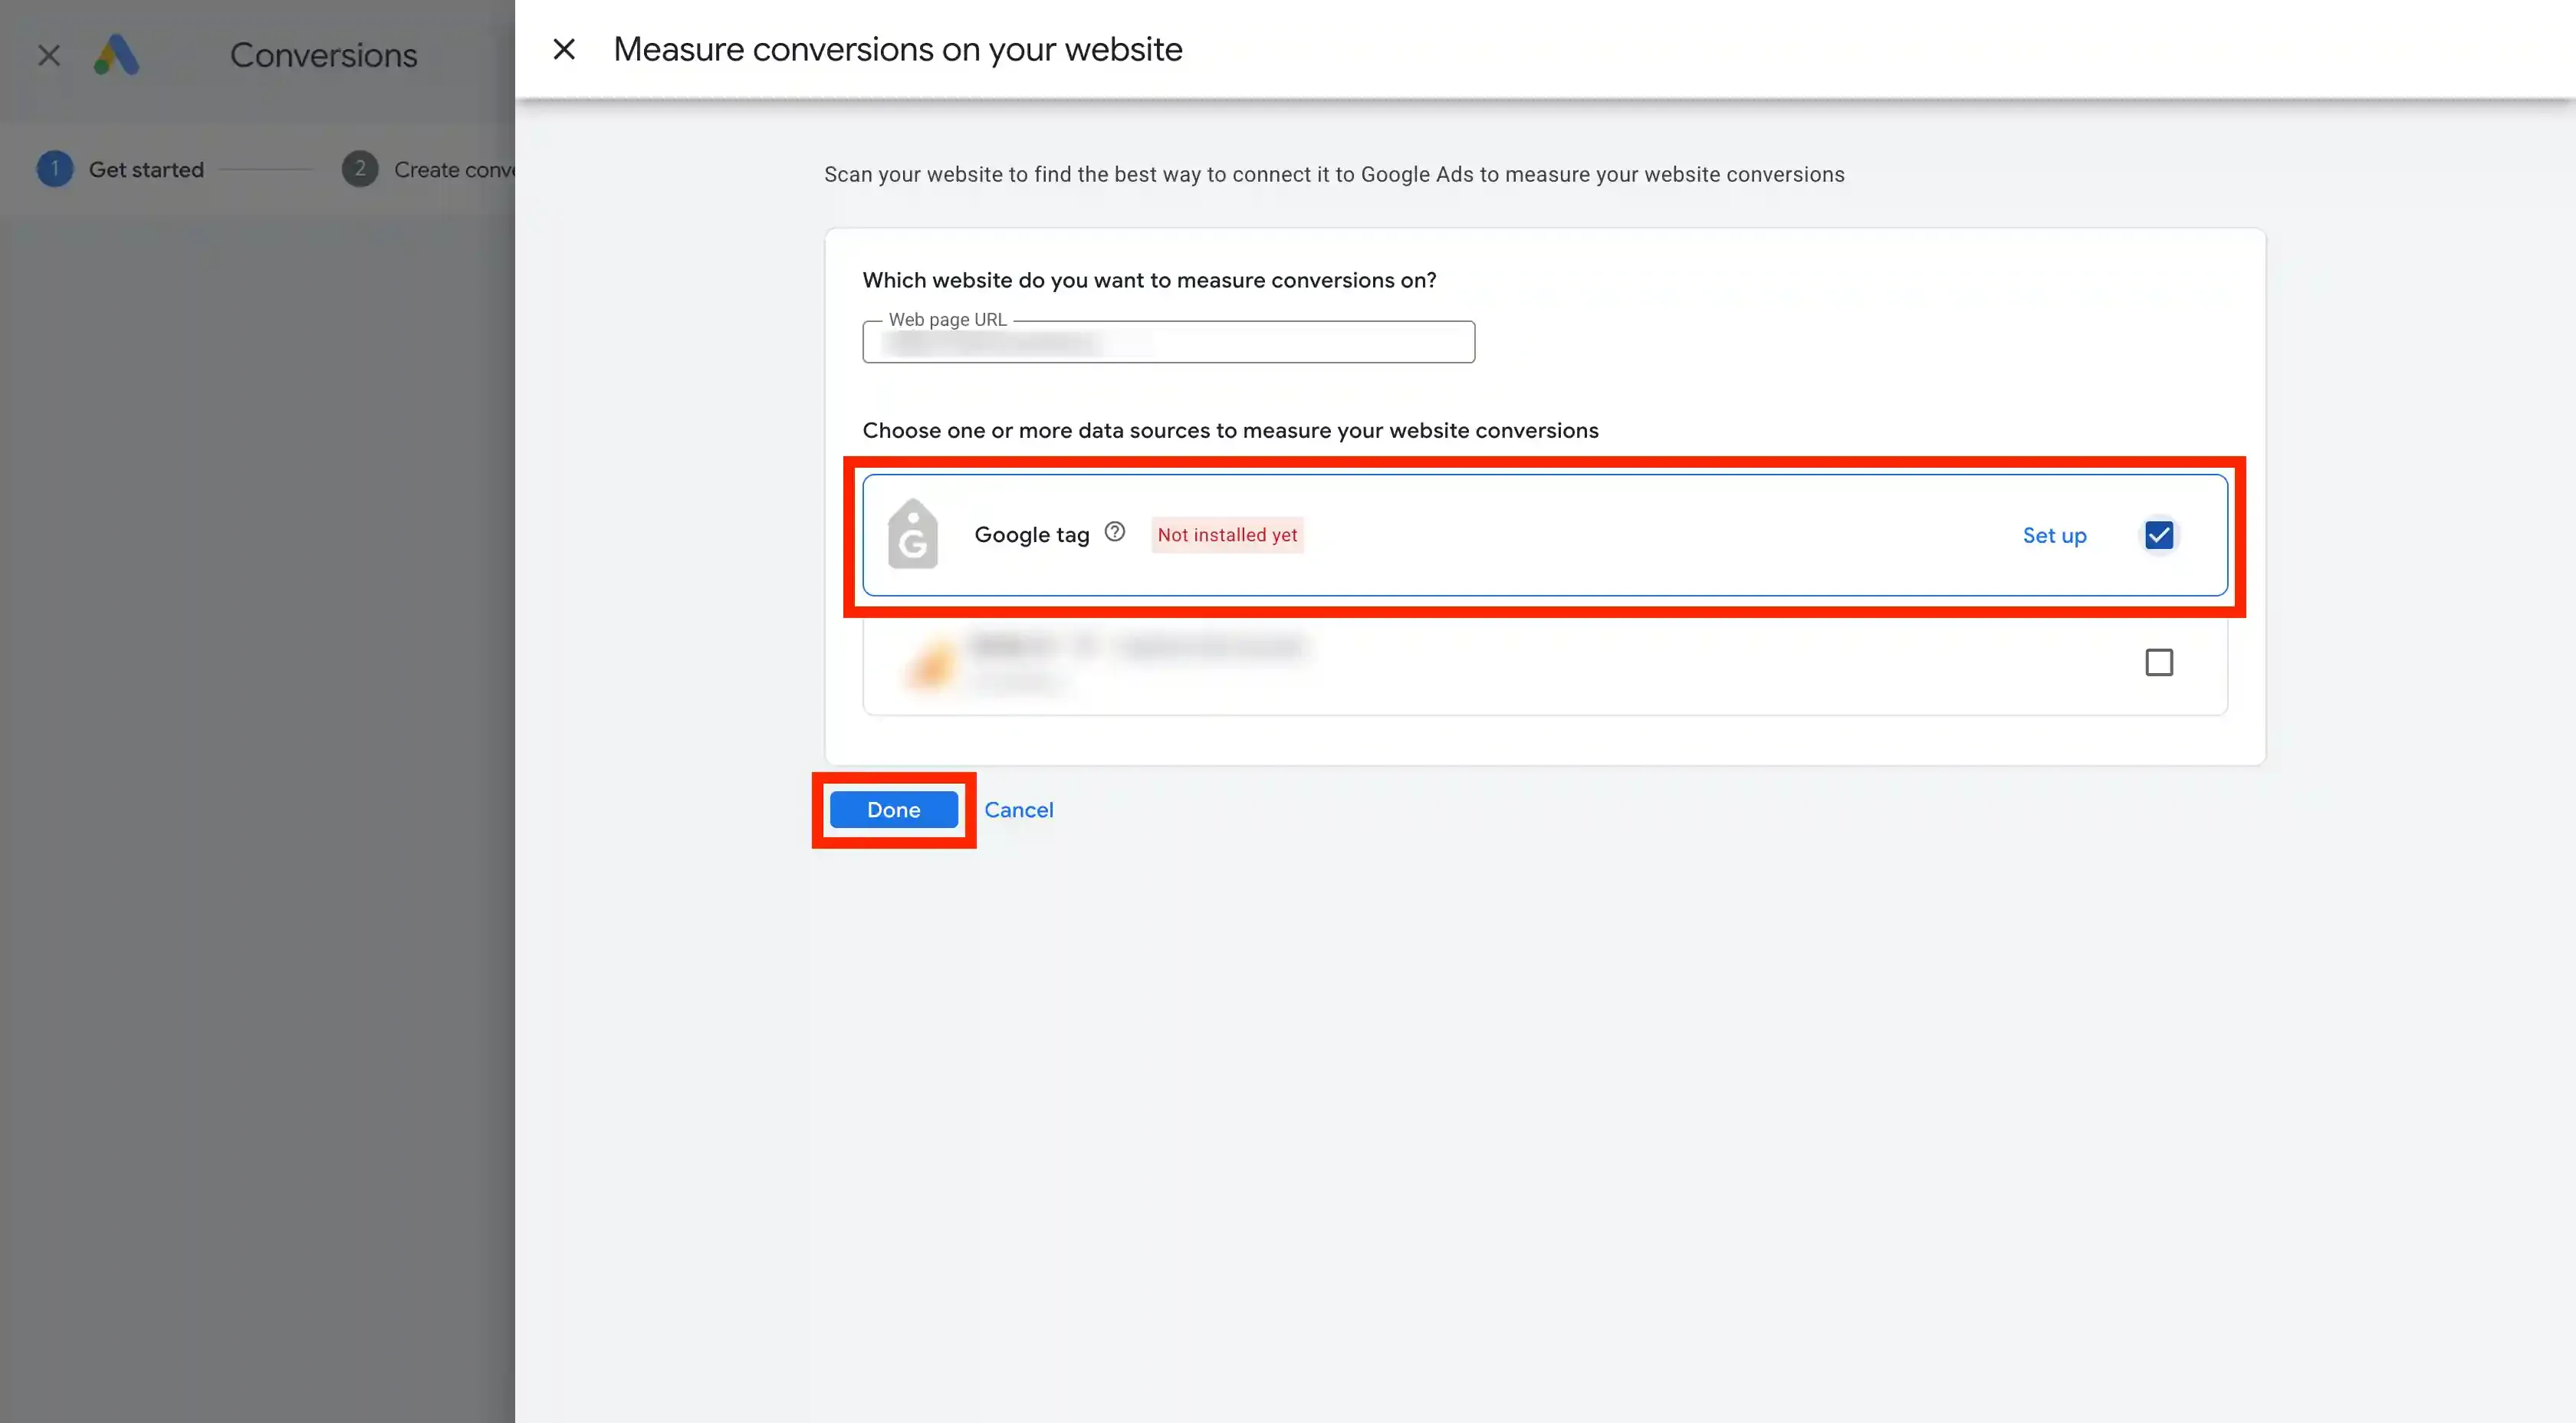
-
Choose Google Tag as the method of conversion tracking.
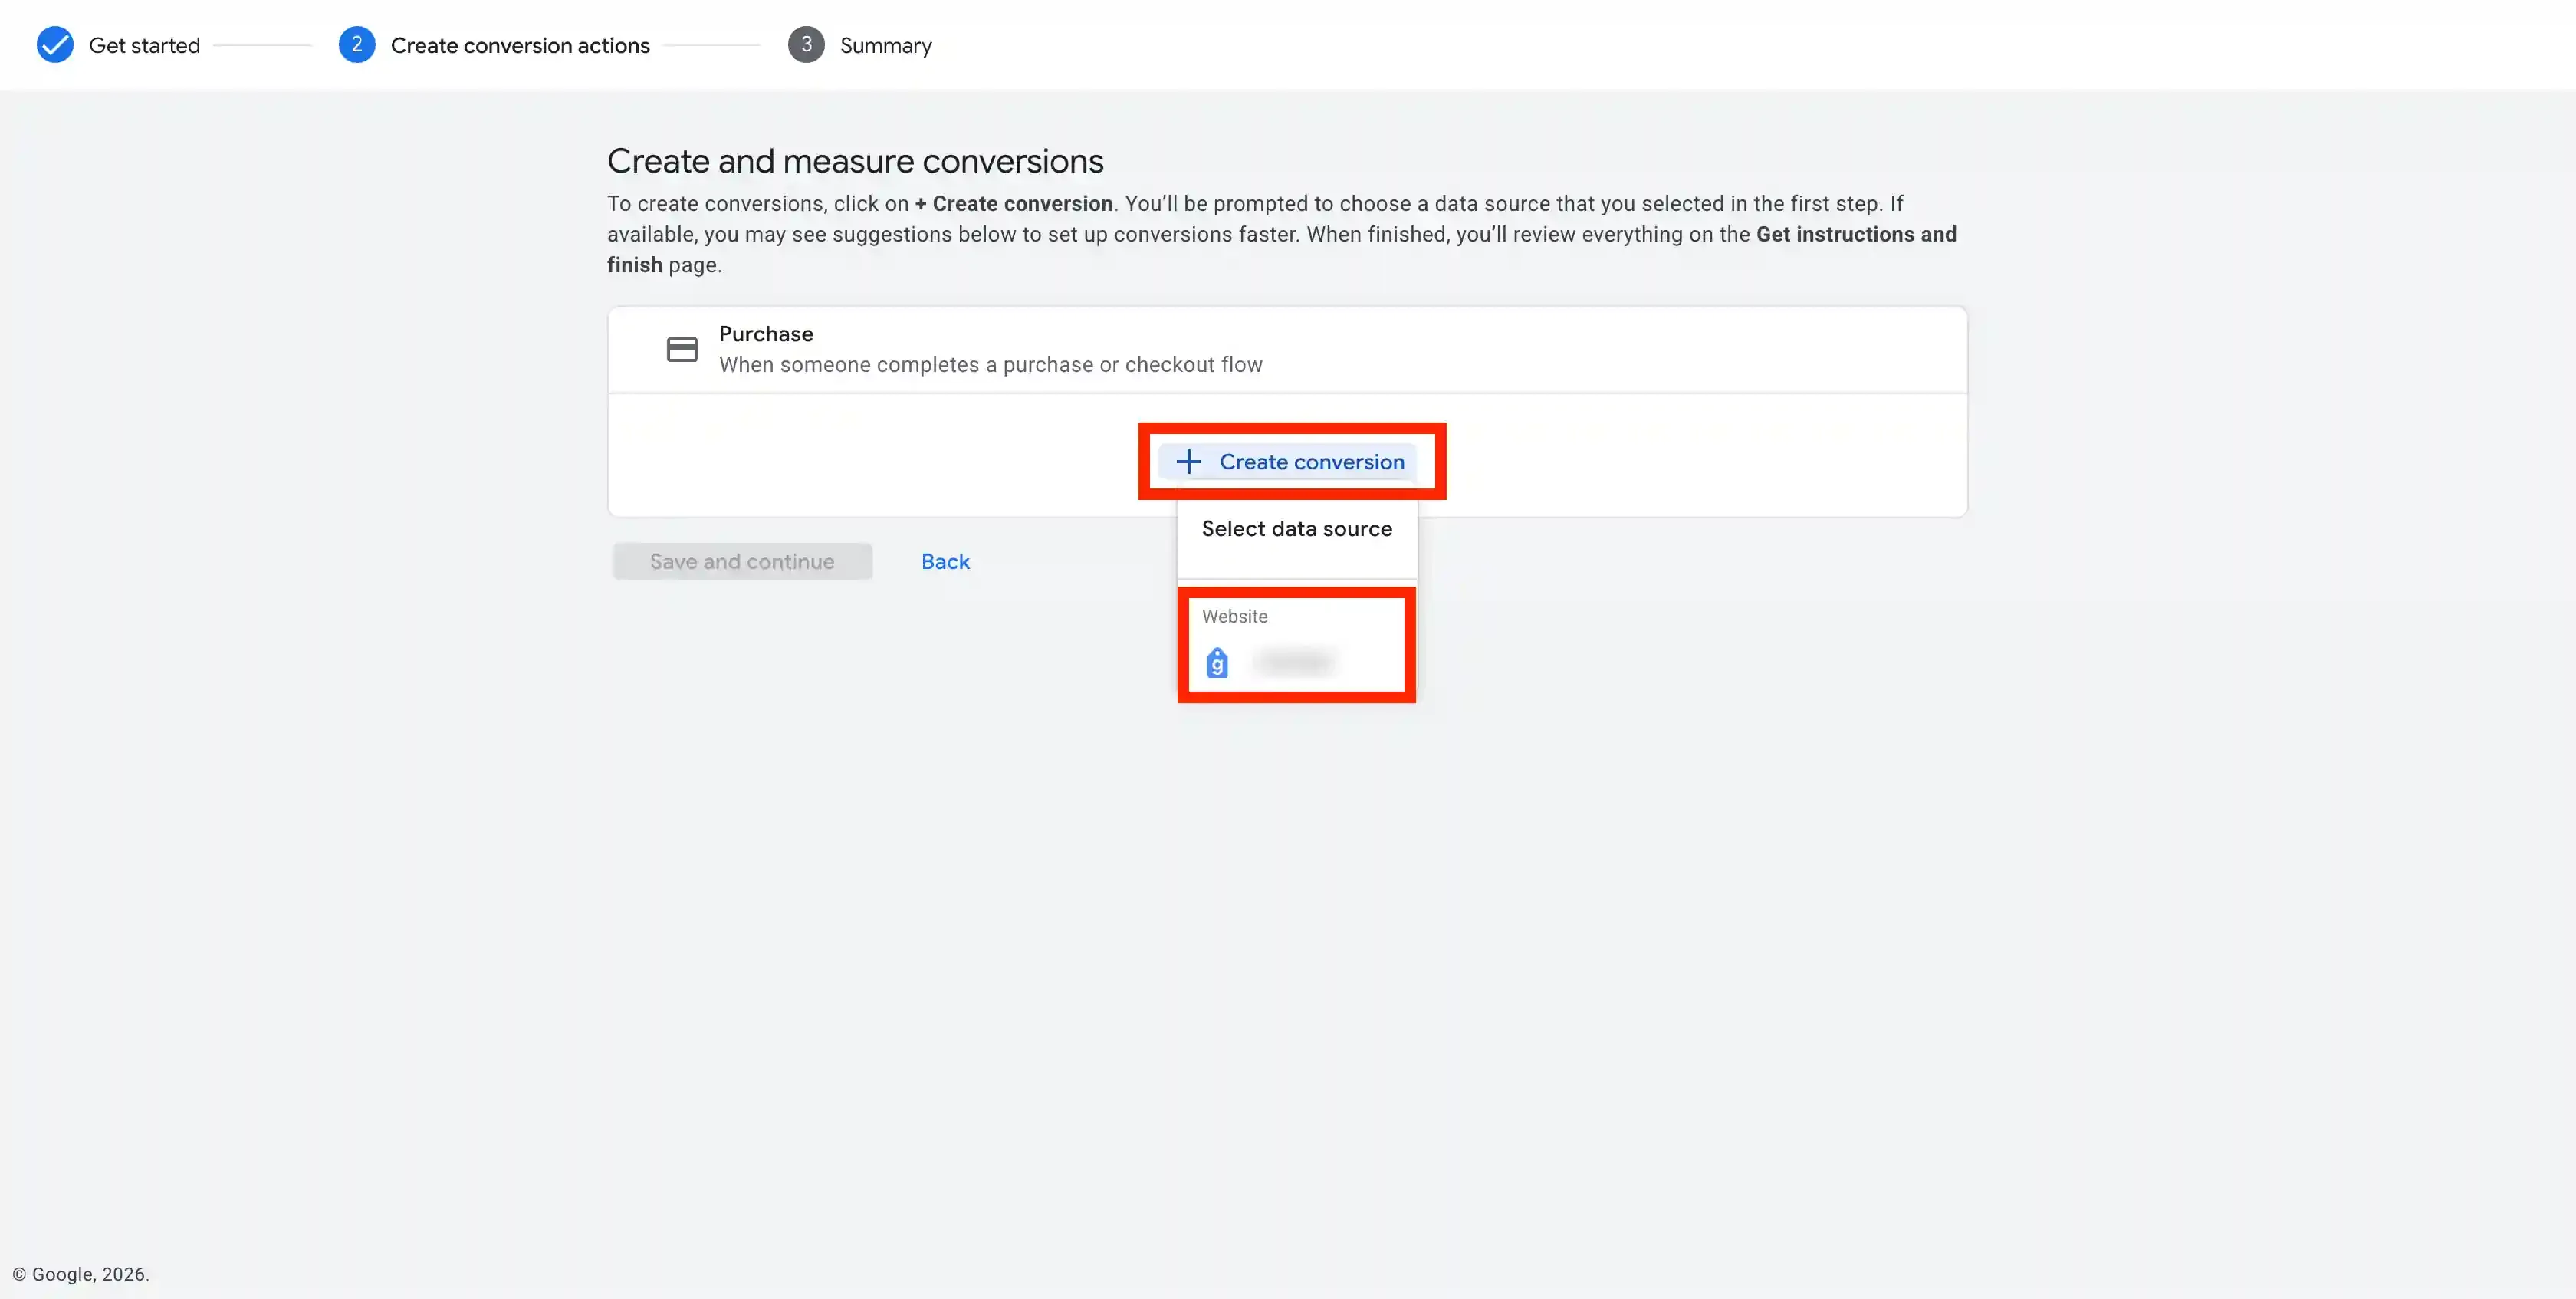
-
Choose the Category of the Conversion. Click on Create Conversion and choose the Google Tag.

-
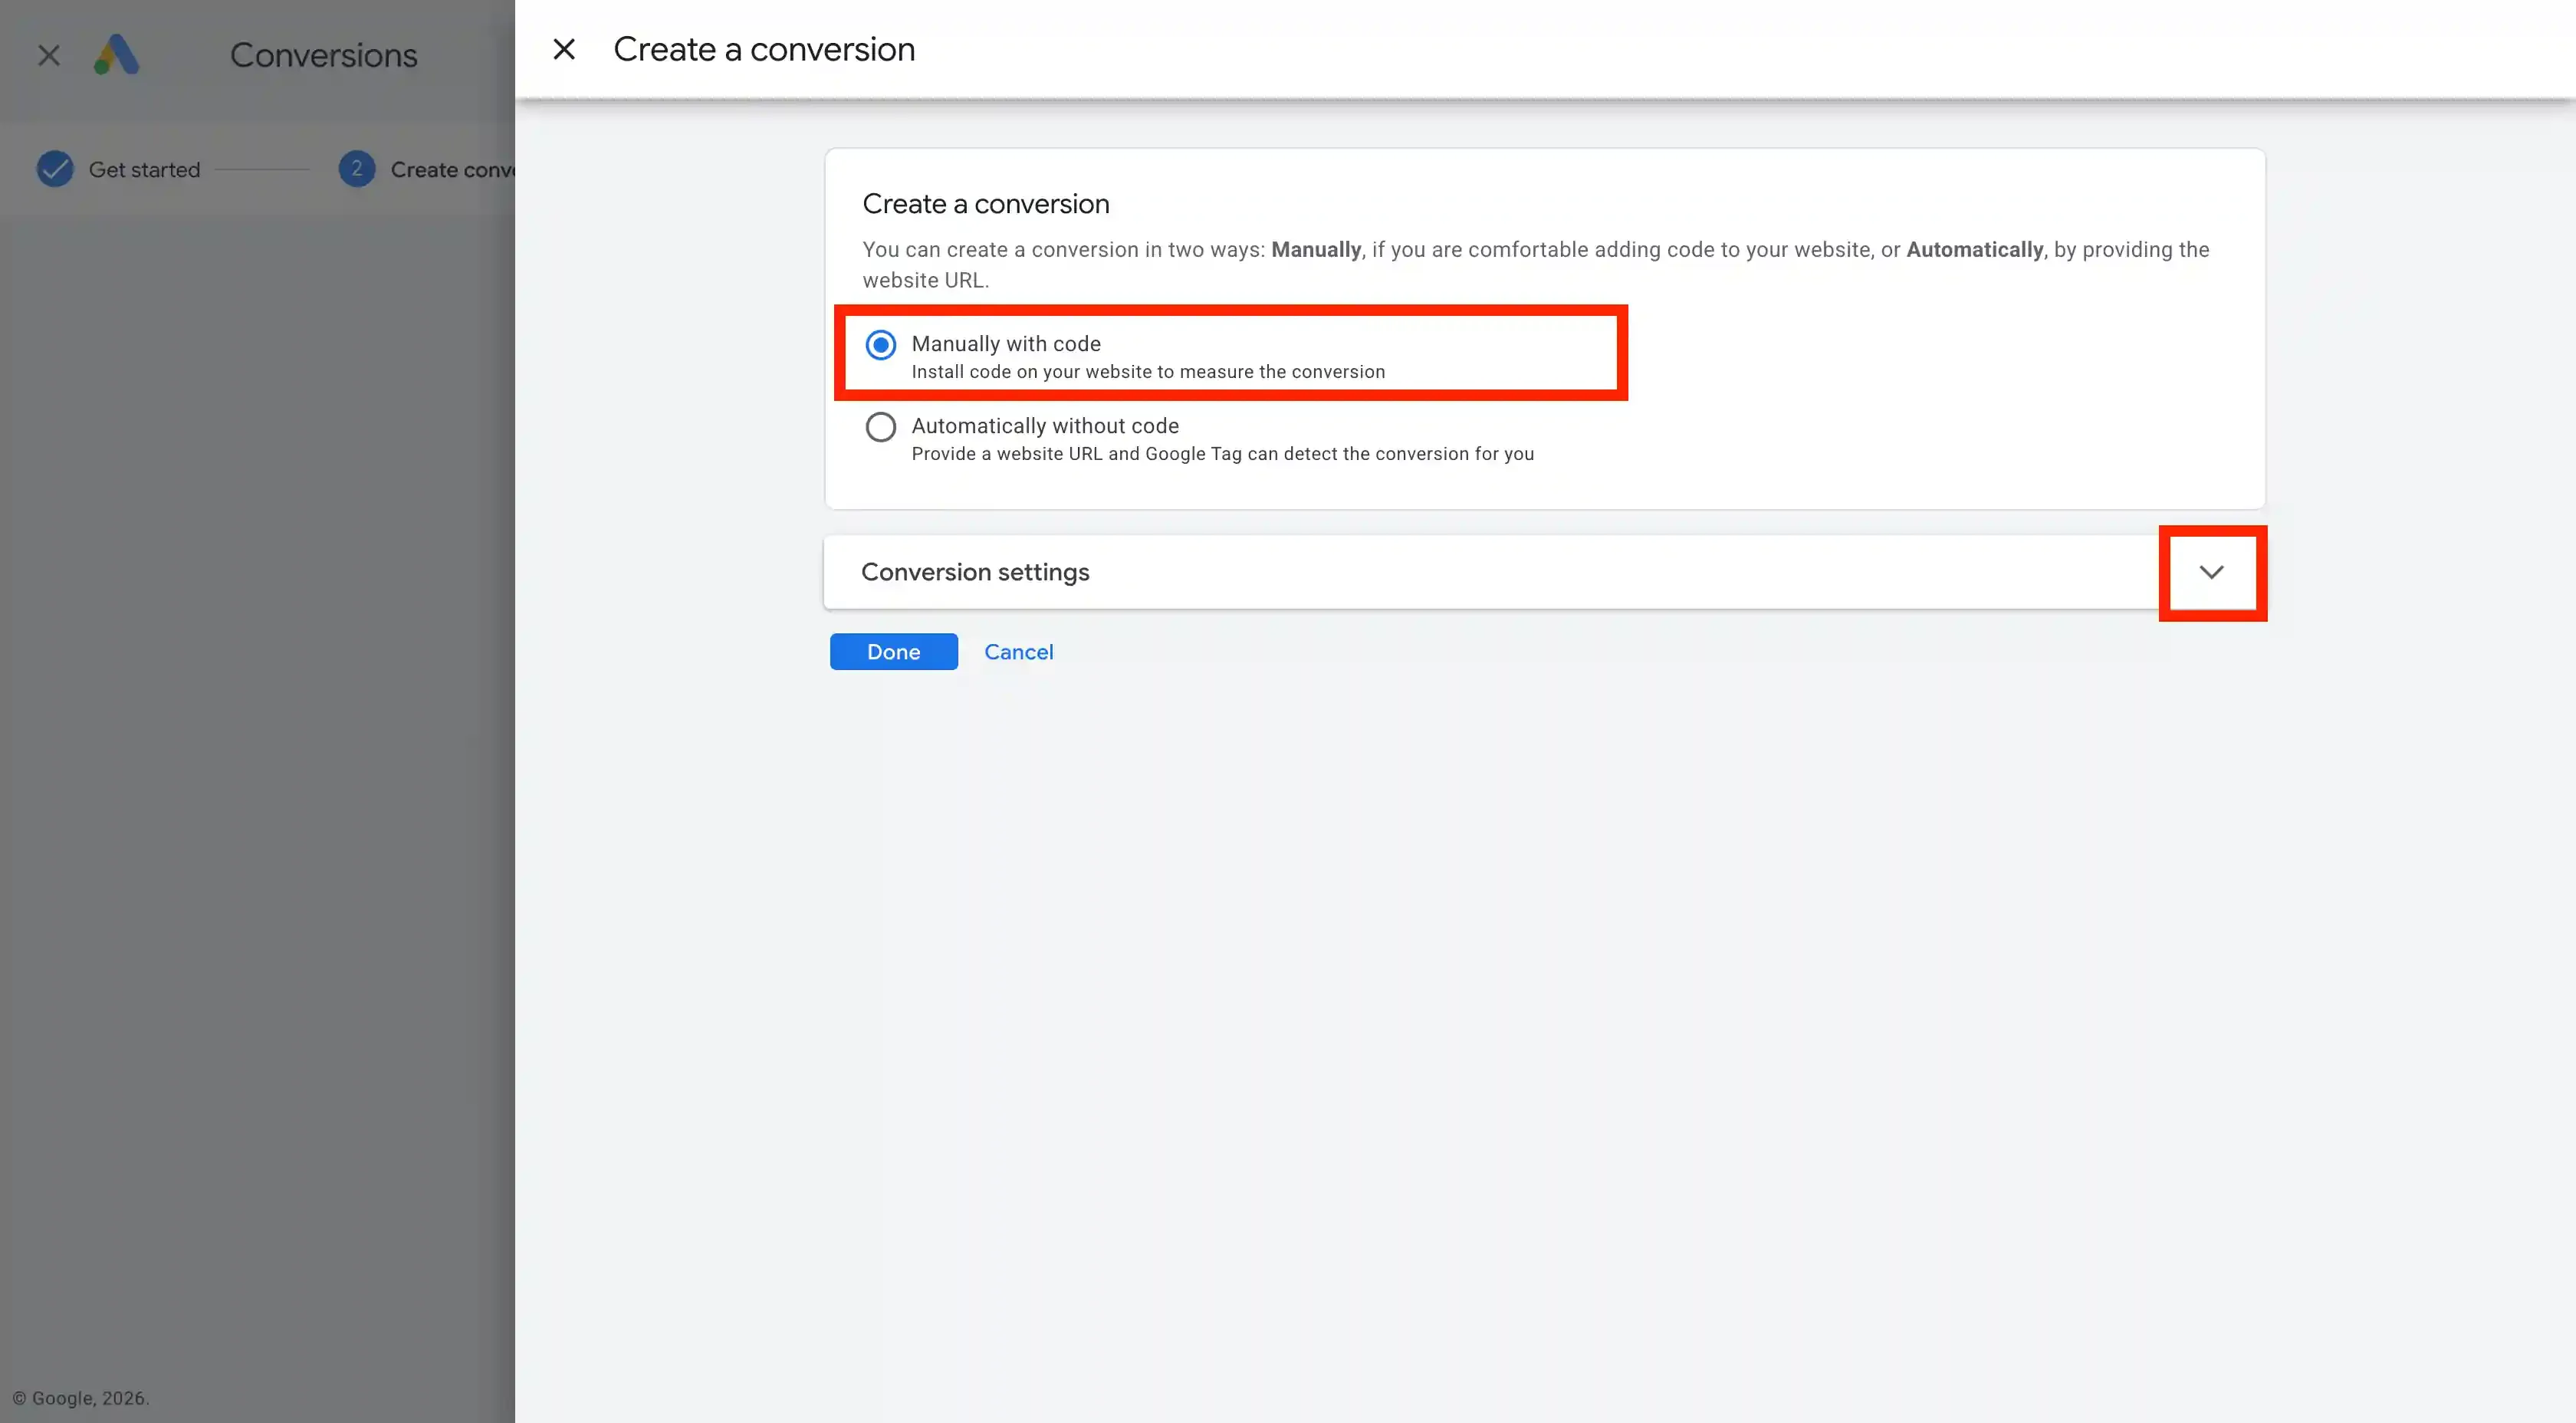
Choose Manually with Code and click on Conversion Settings.
-
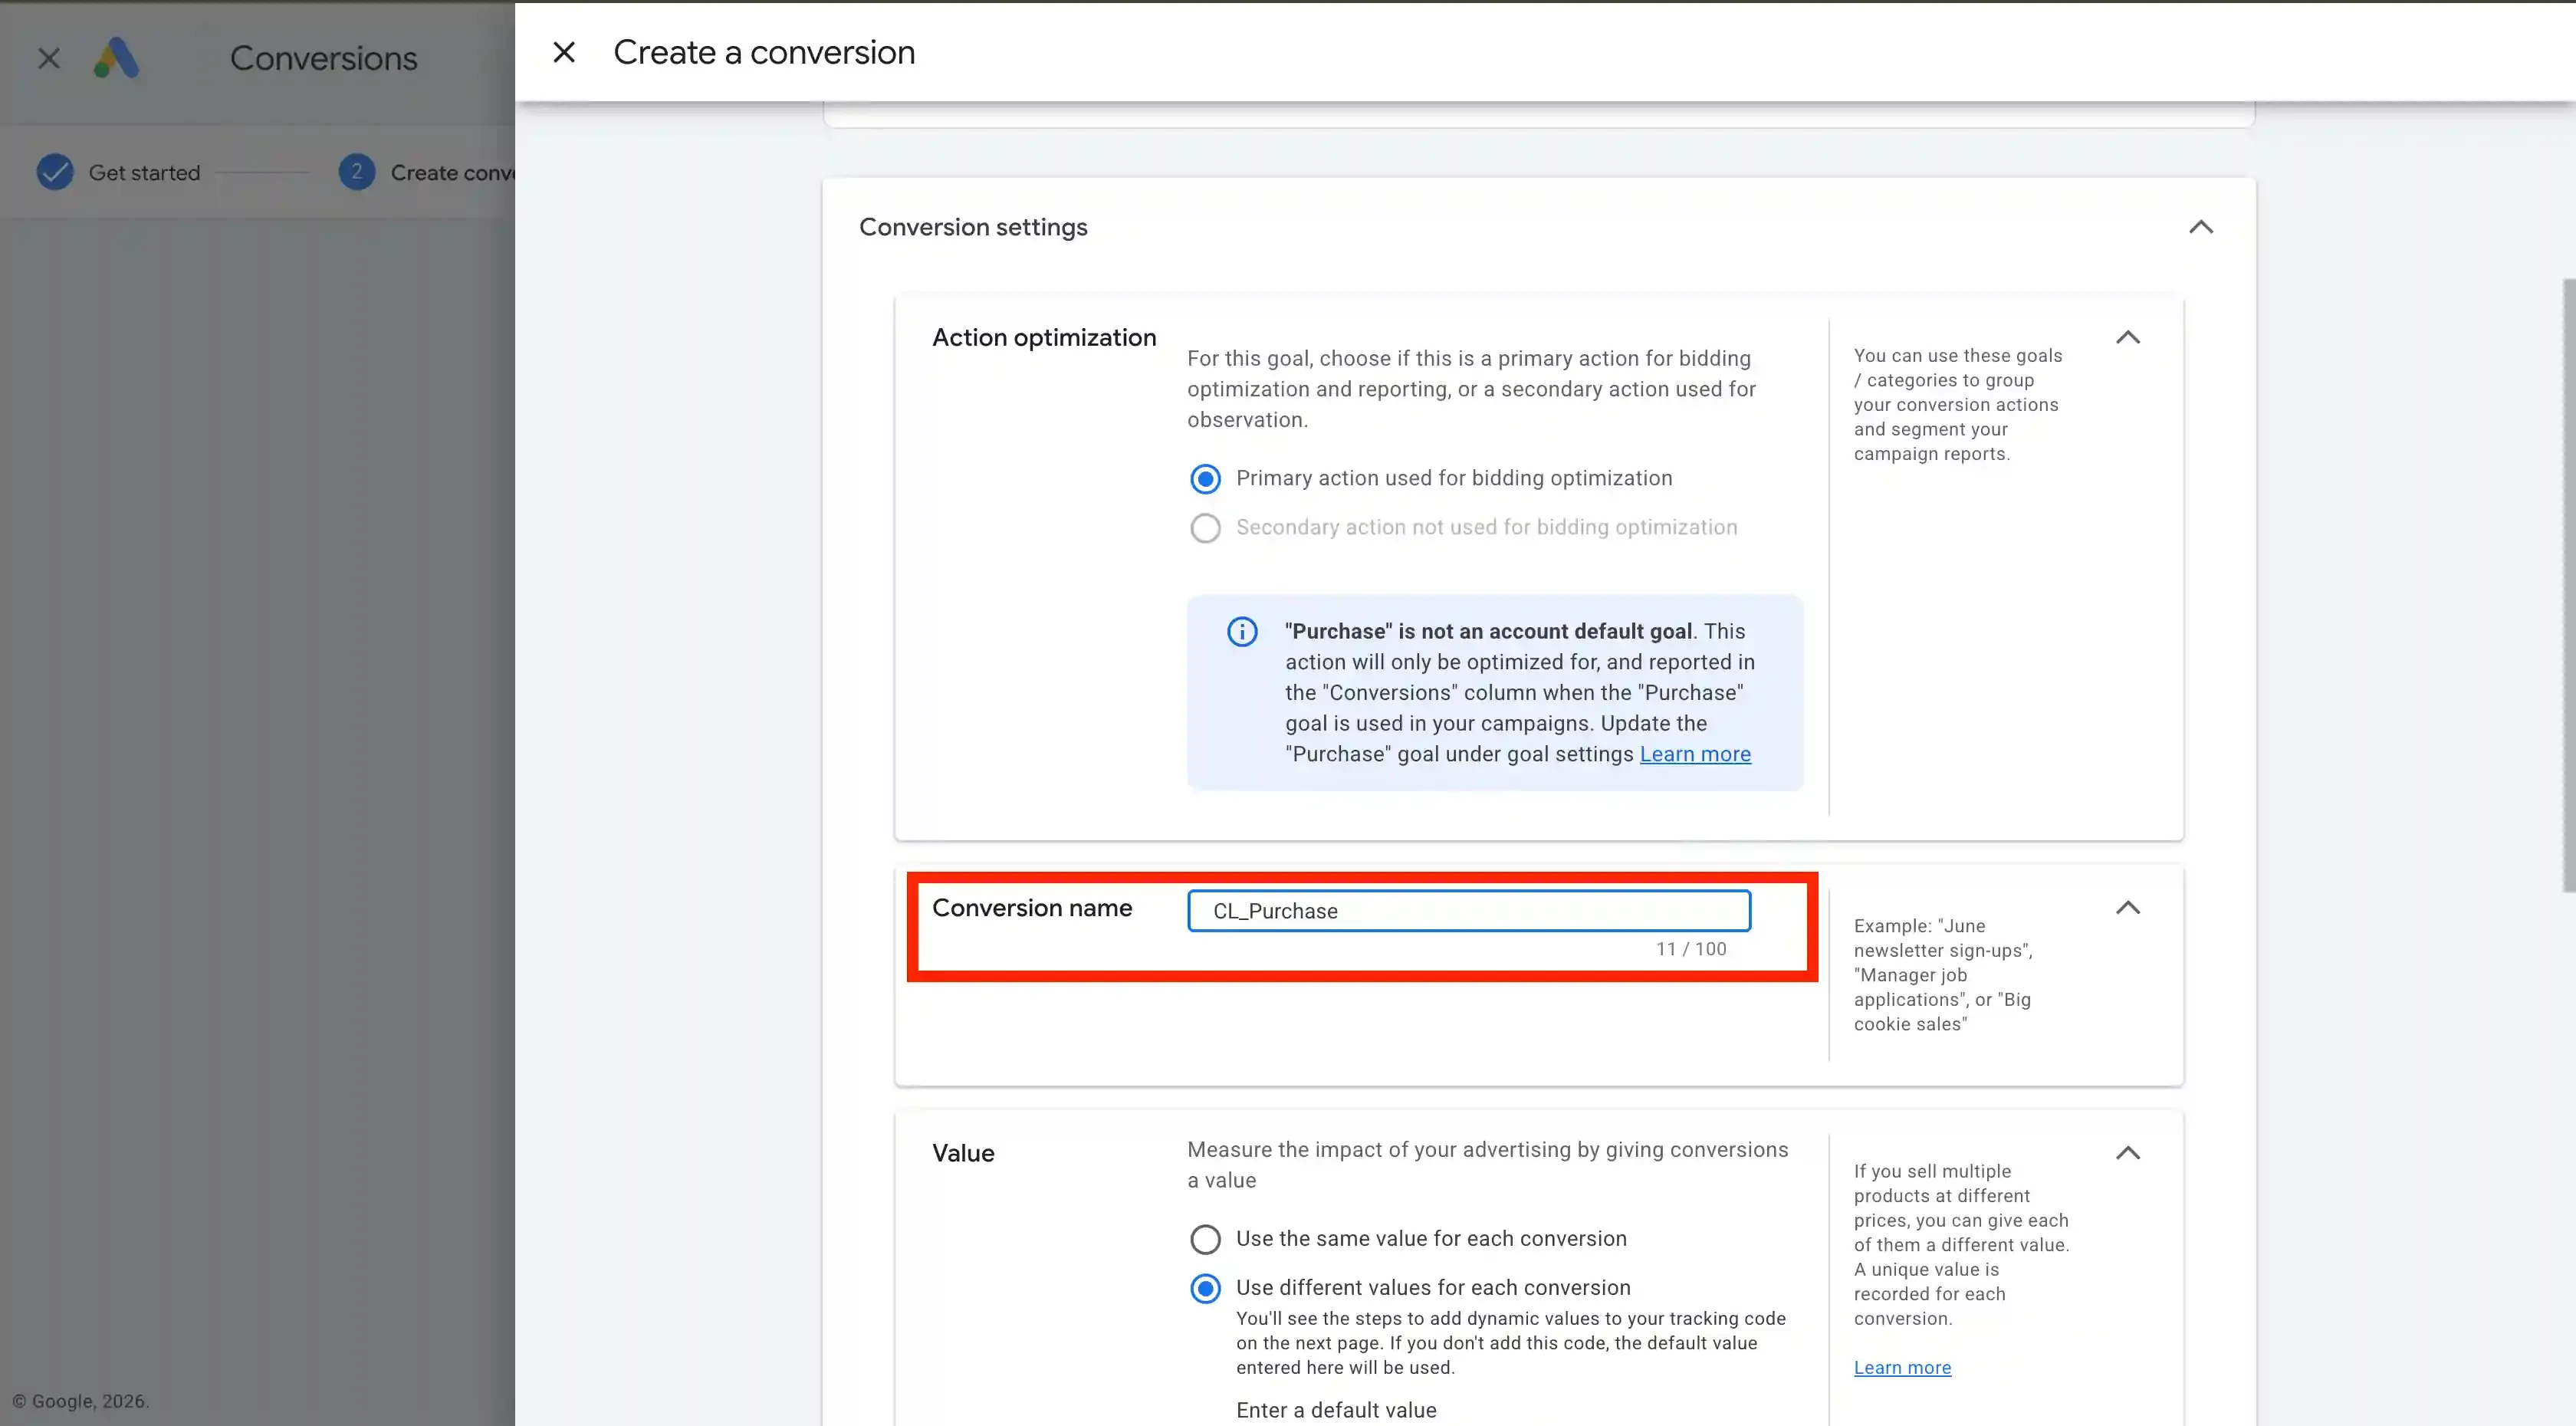
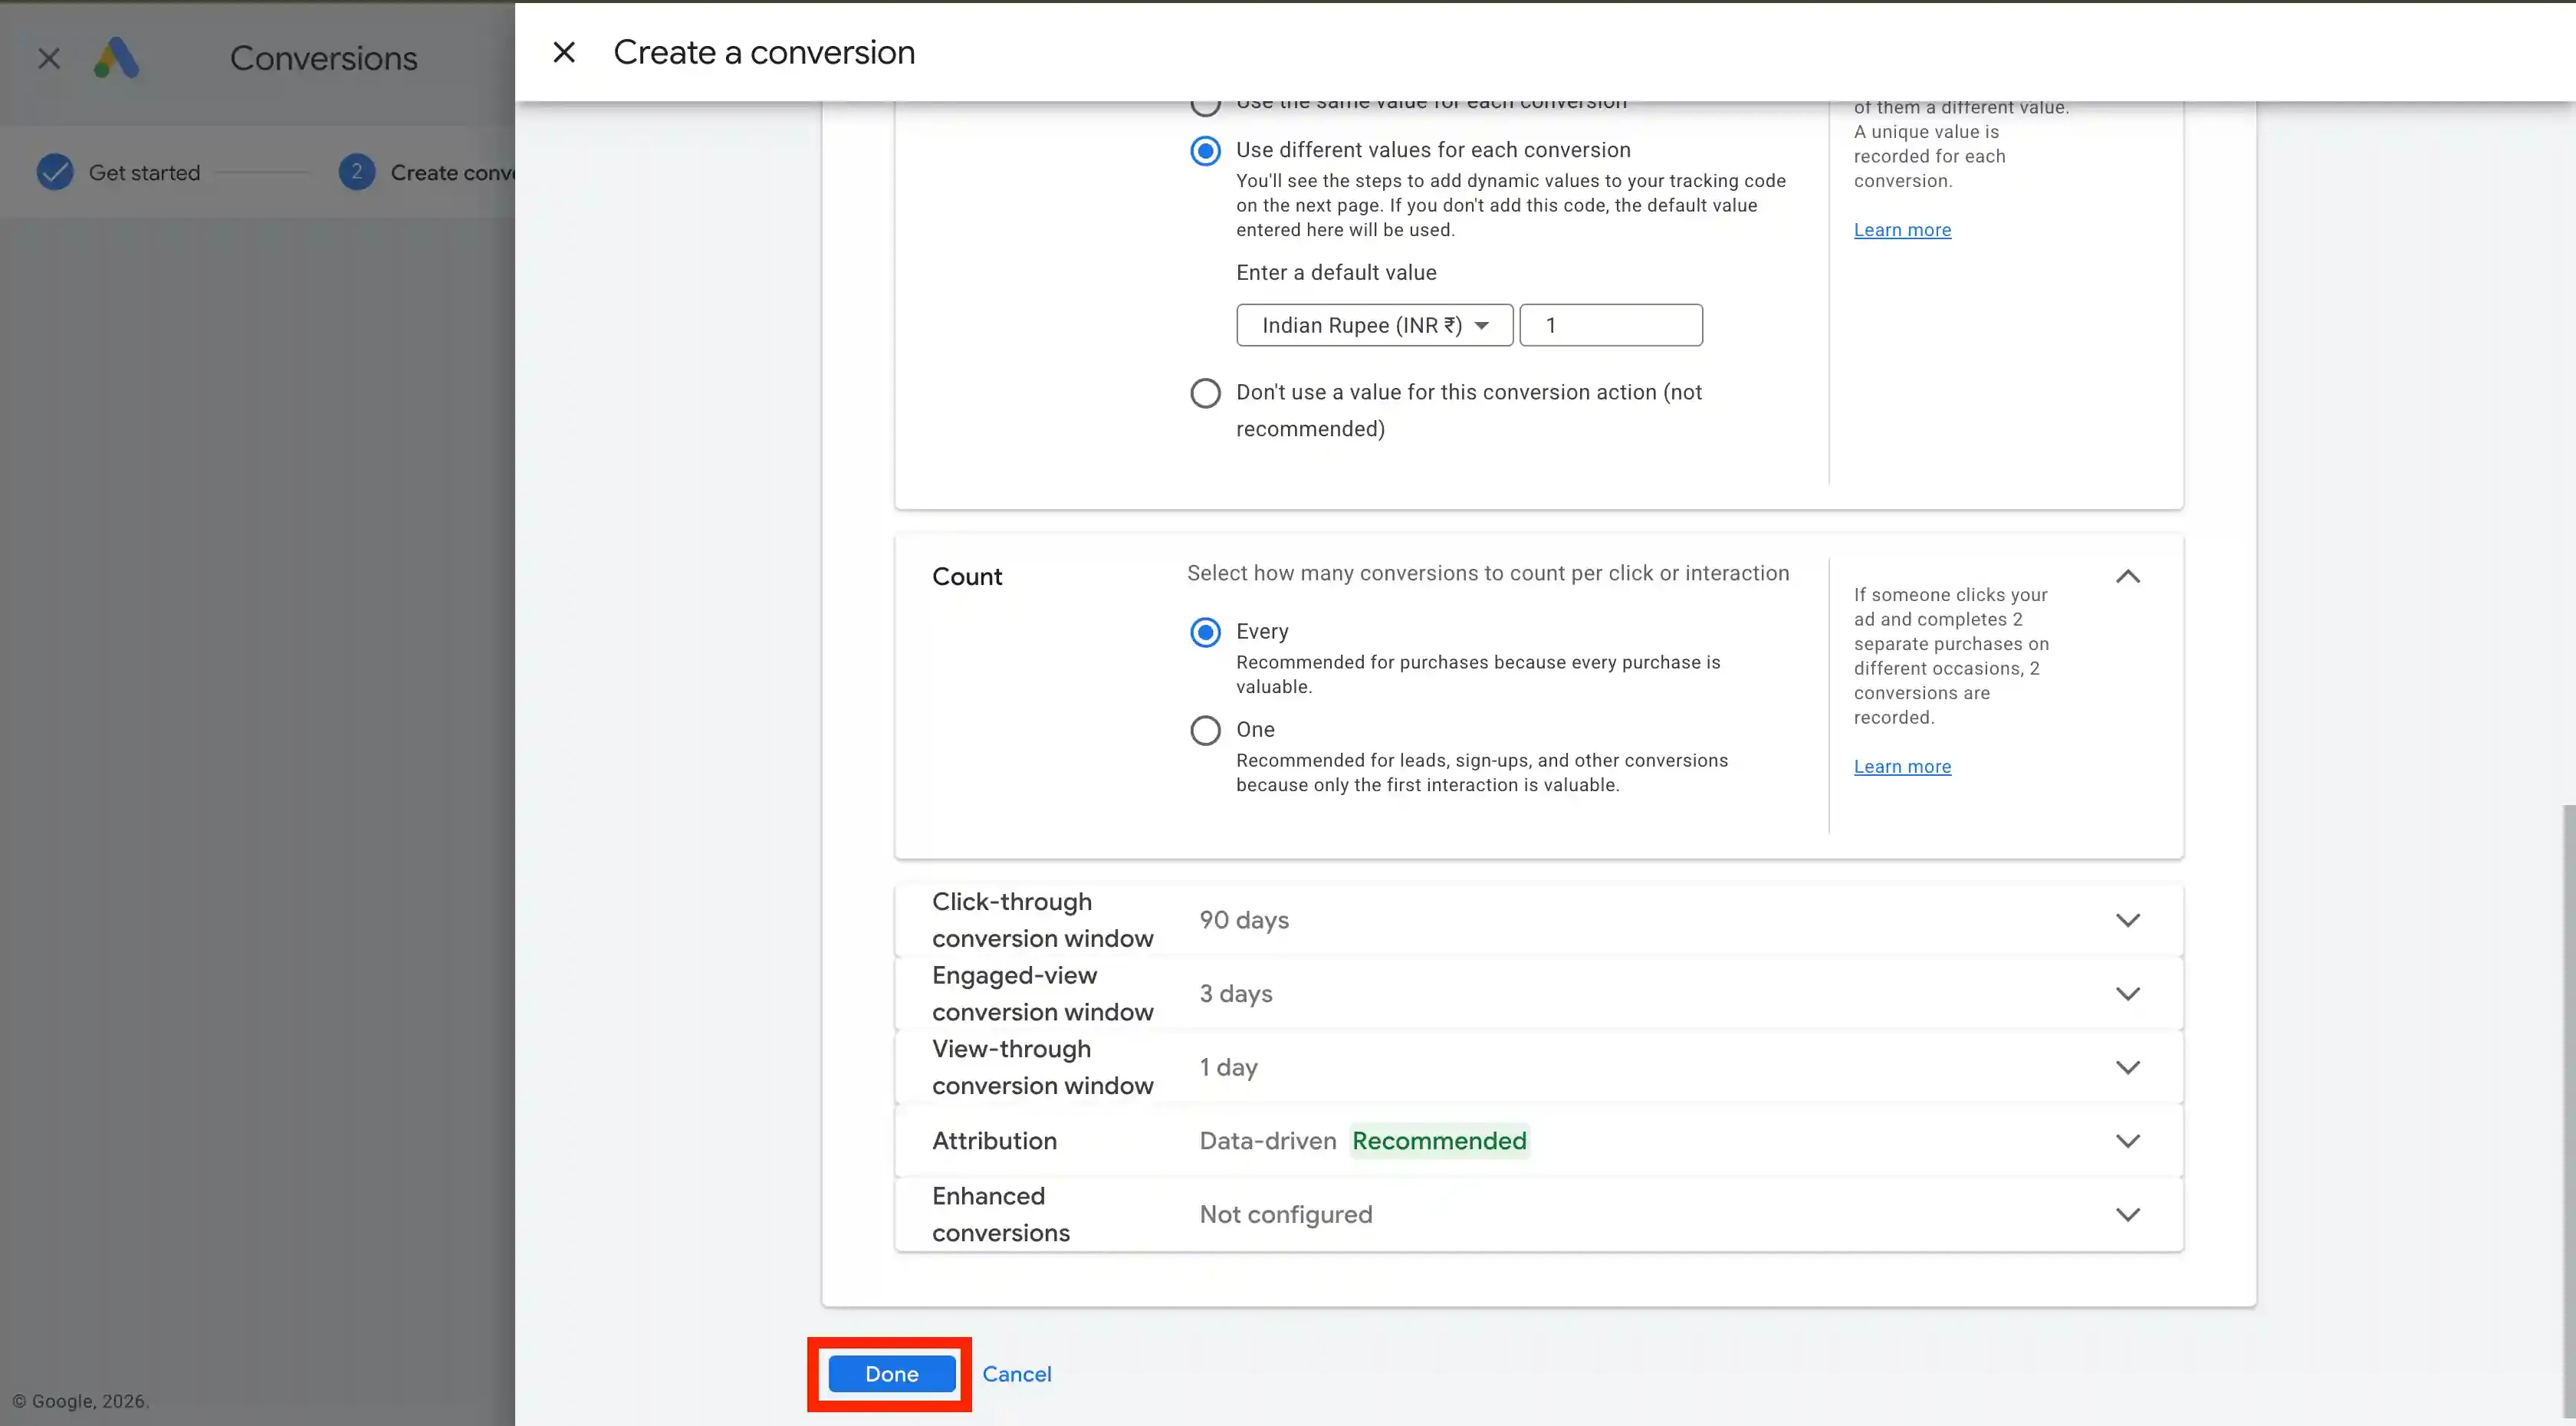
Enter the Conversion name, Value, and Count of the conversion. Choose the approriate attribution options. Click Done.
-
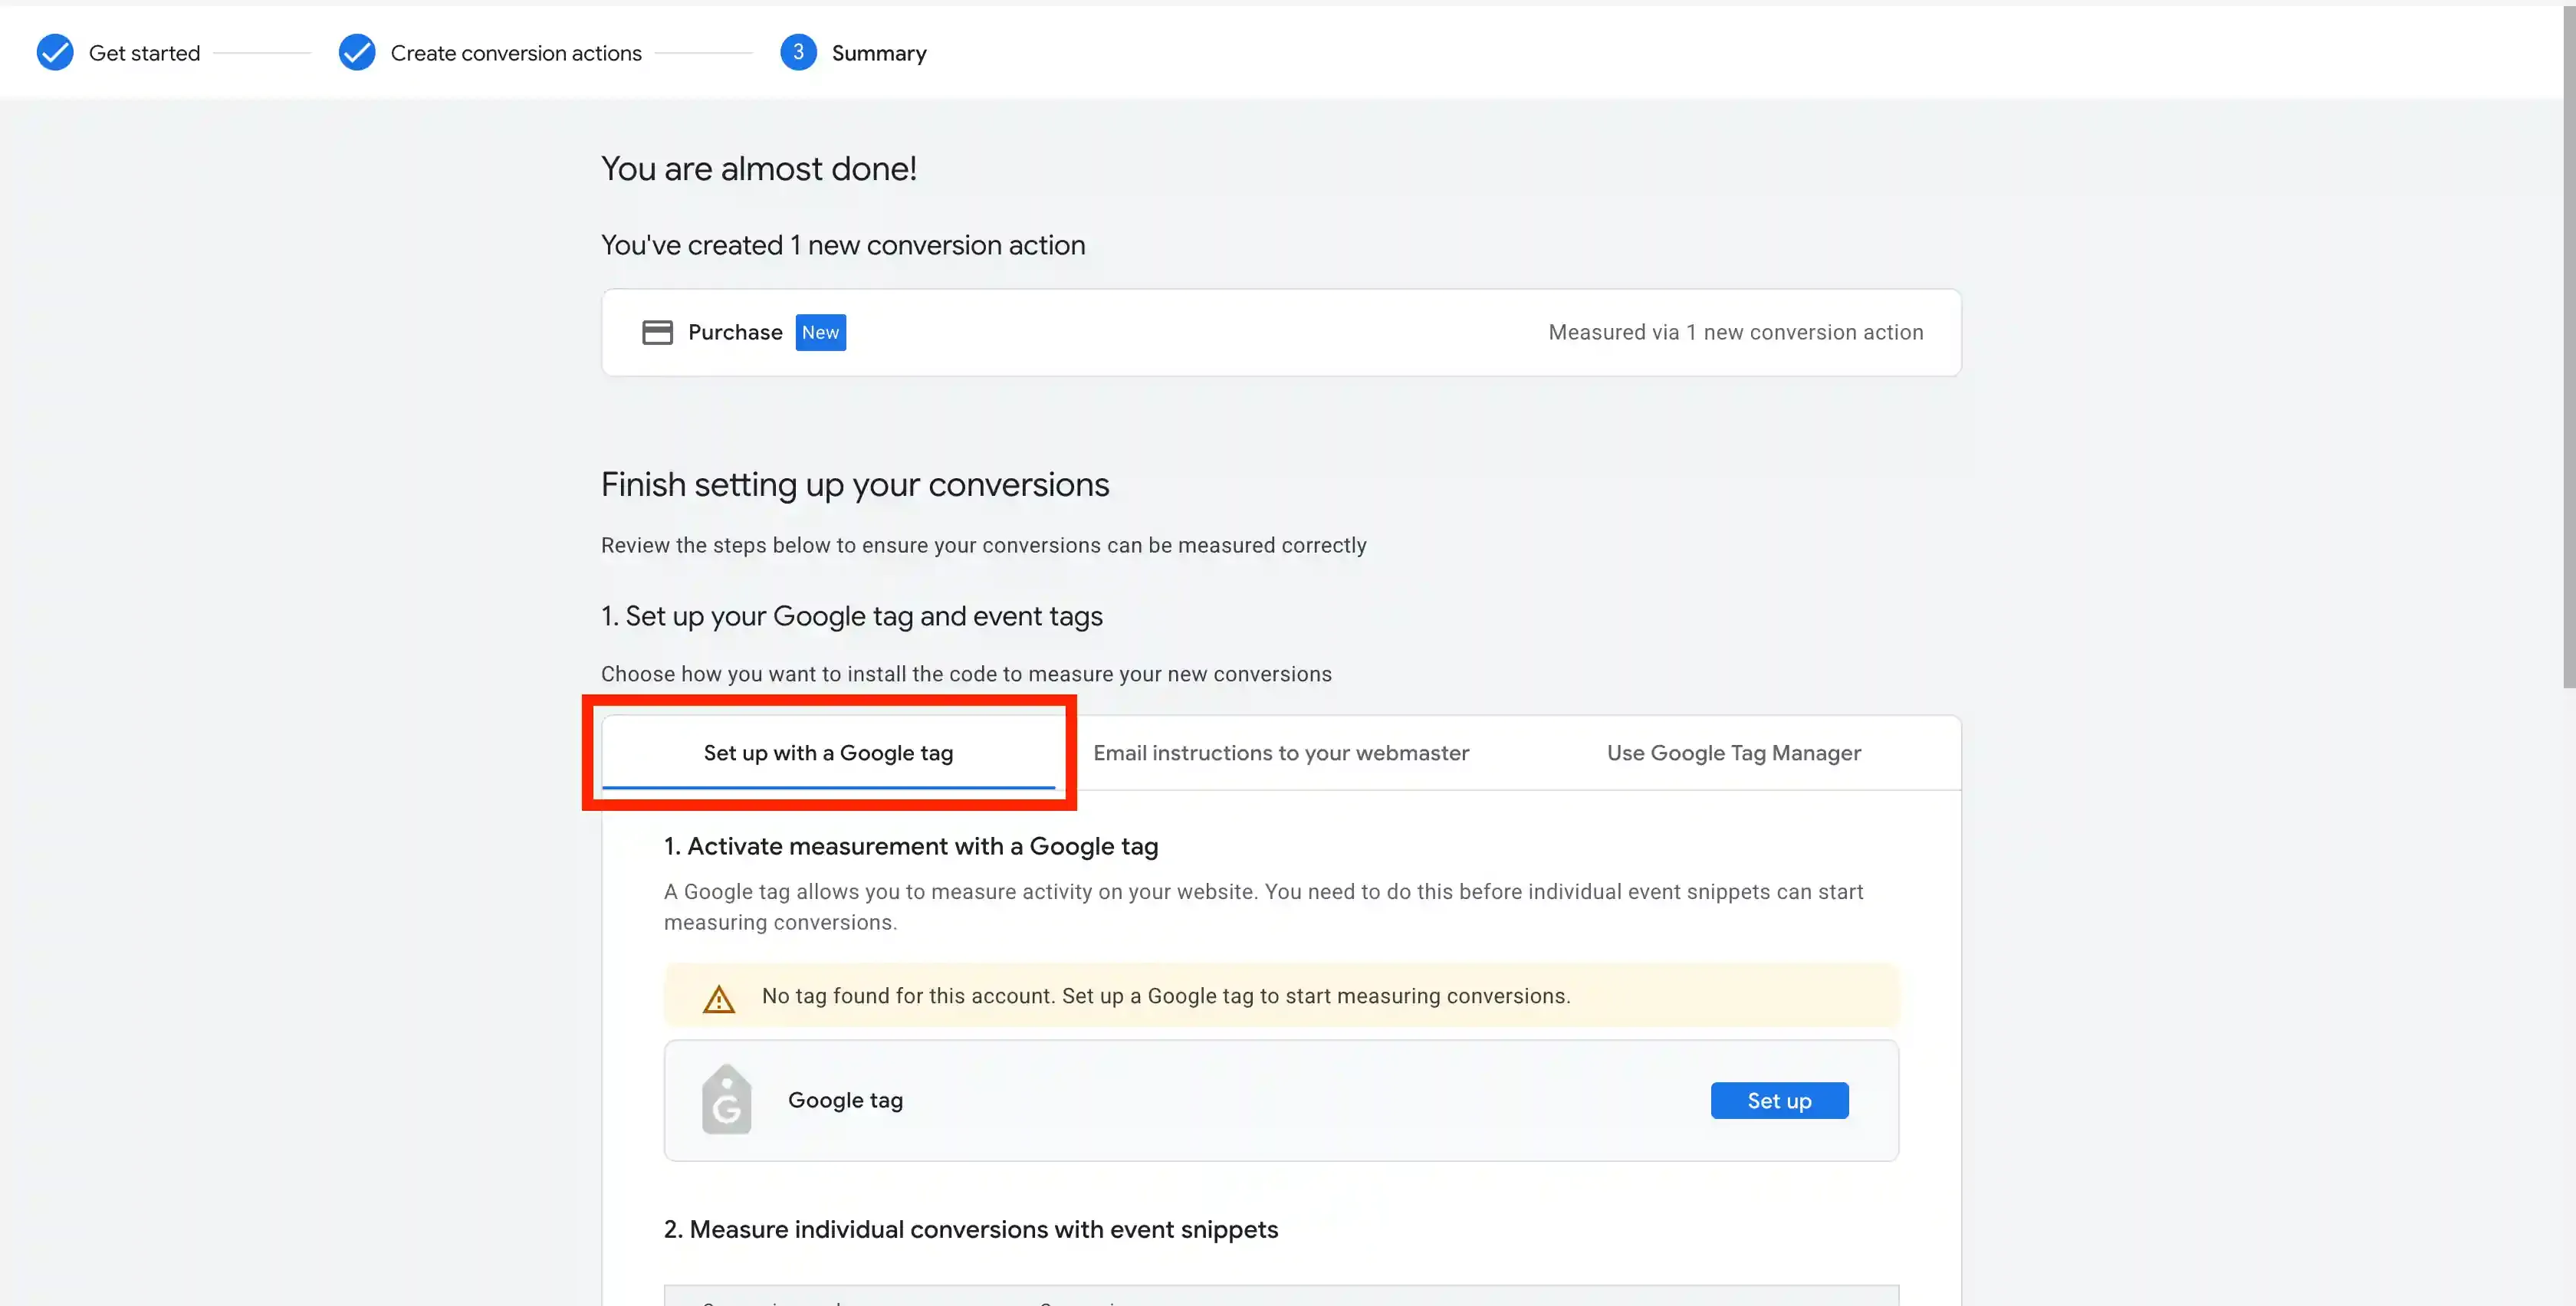
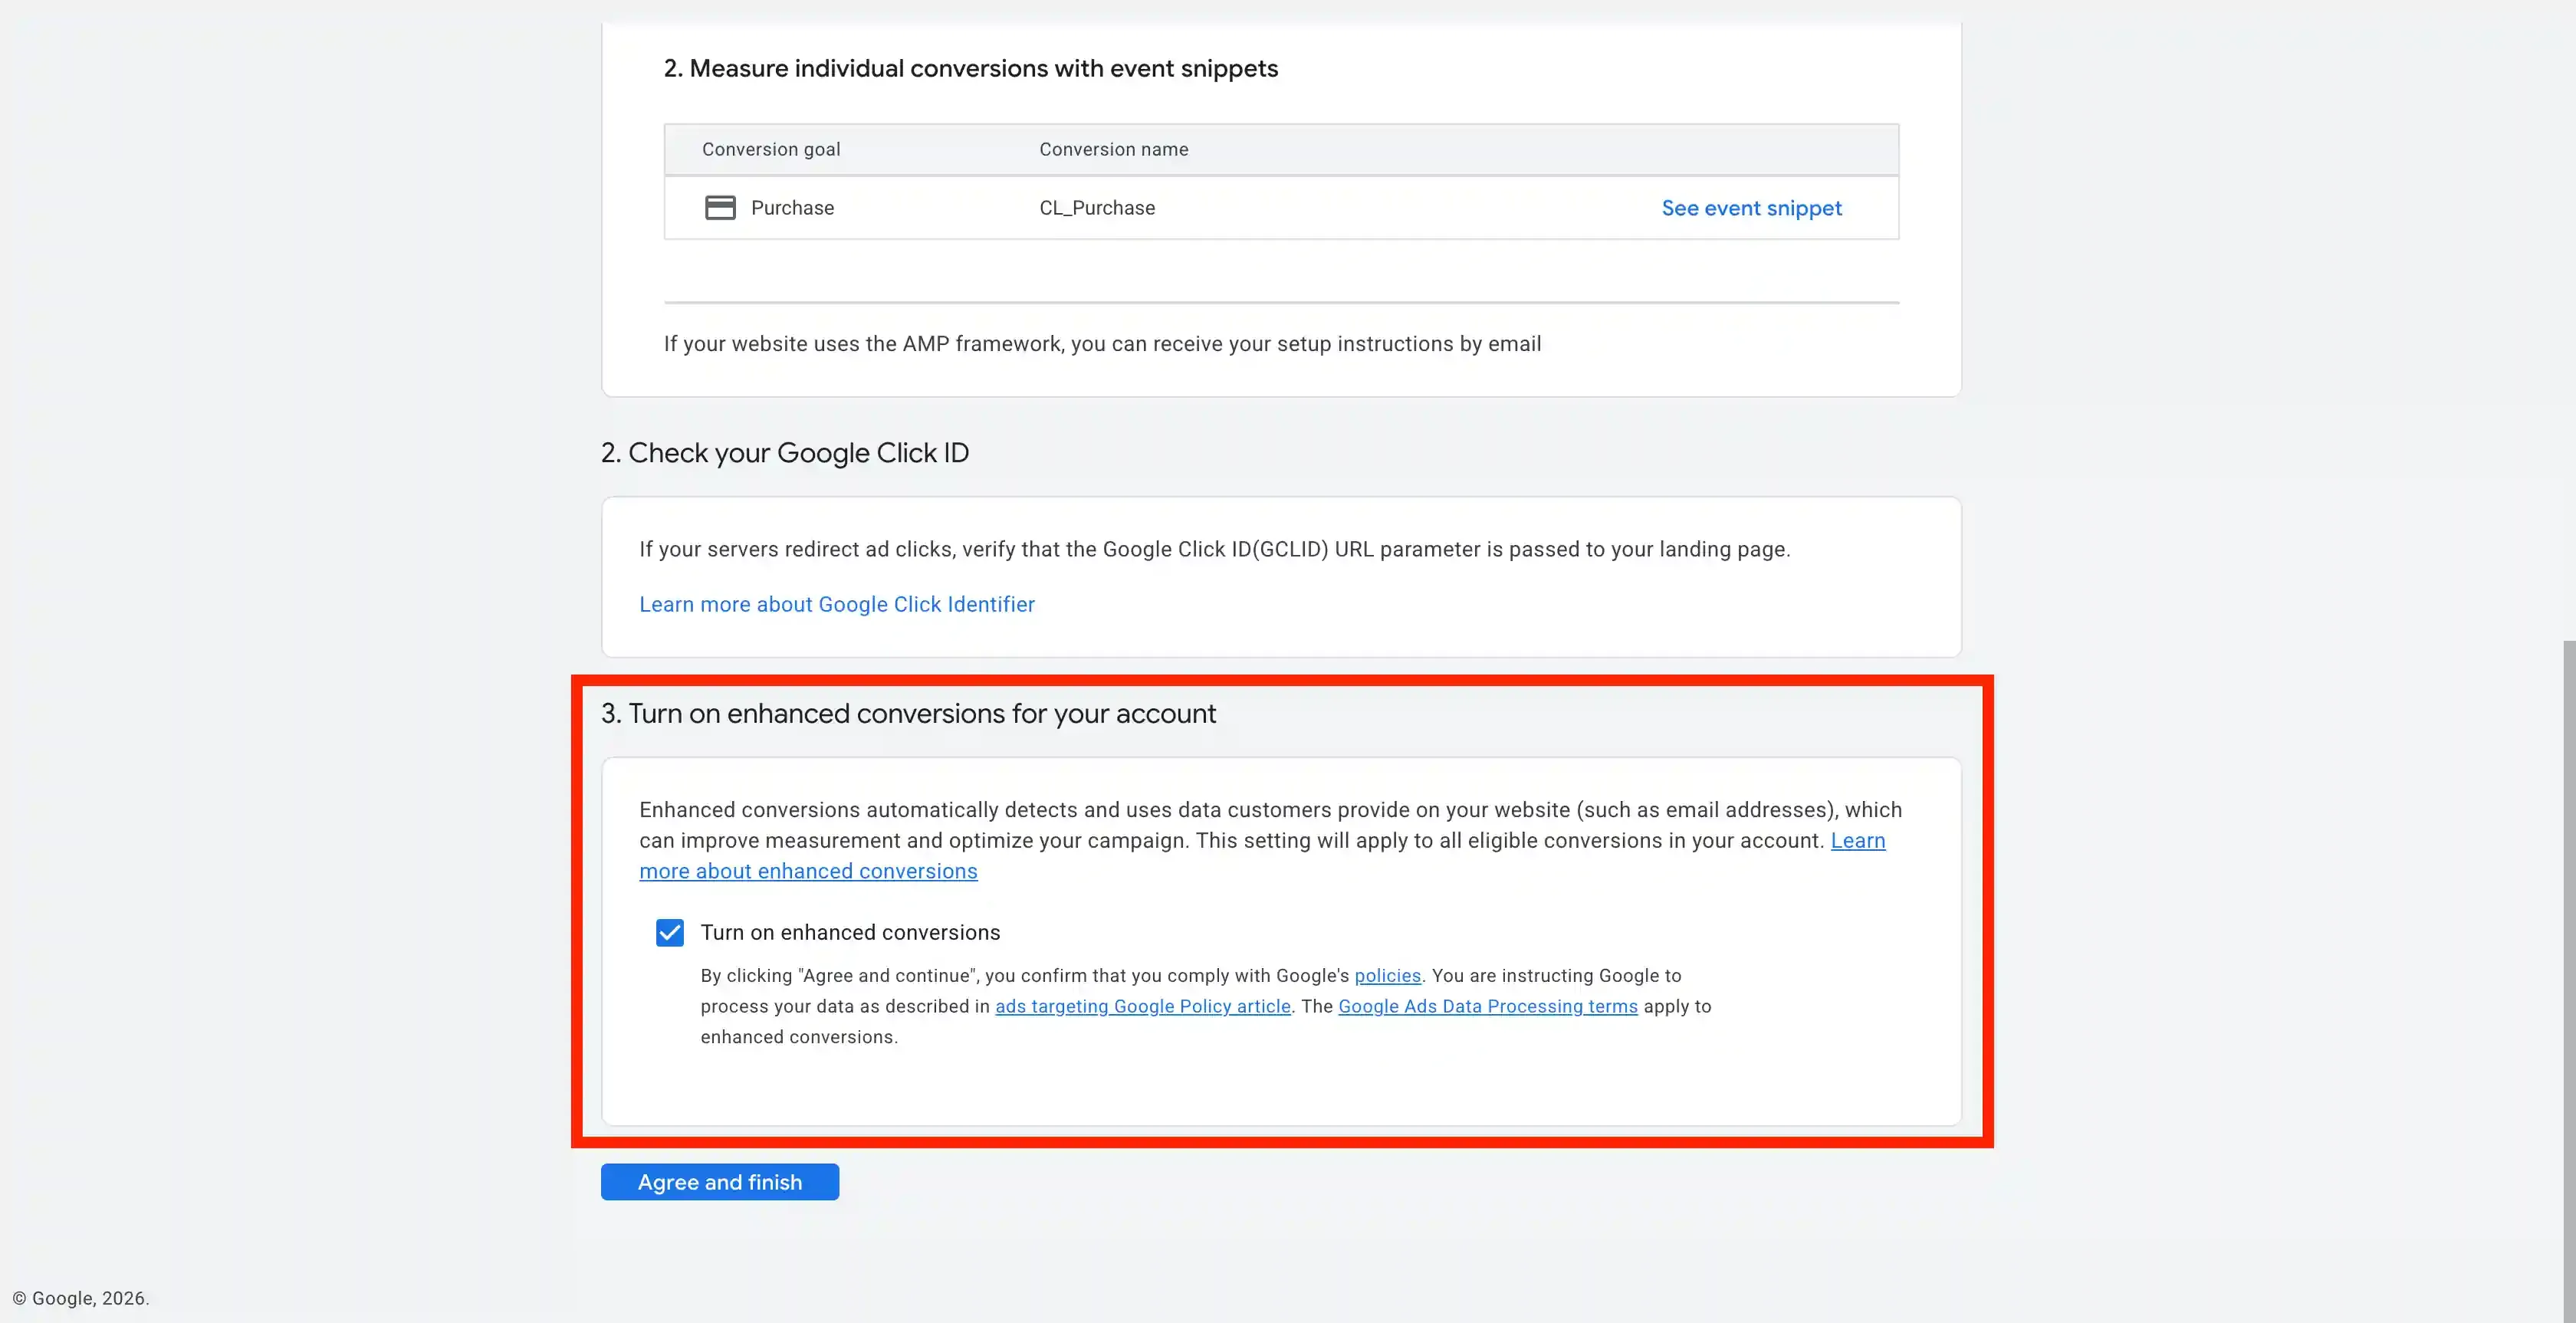
Click on Set up with a Google tag and Check the Turn ON enchanced Conversion option. Click Agree and finish.
Setting up Offline Conversions
Section titled “Setting up Offline Conversions”-
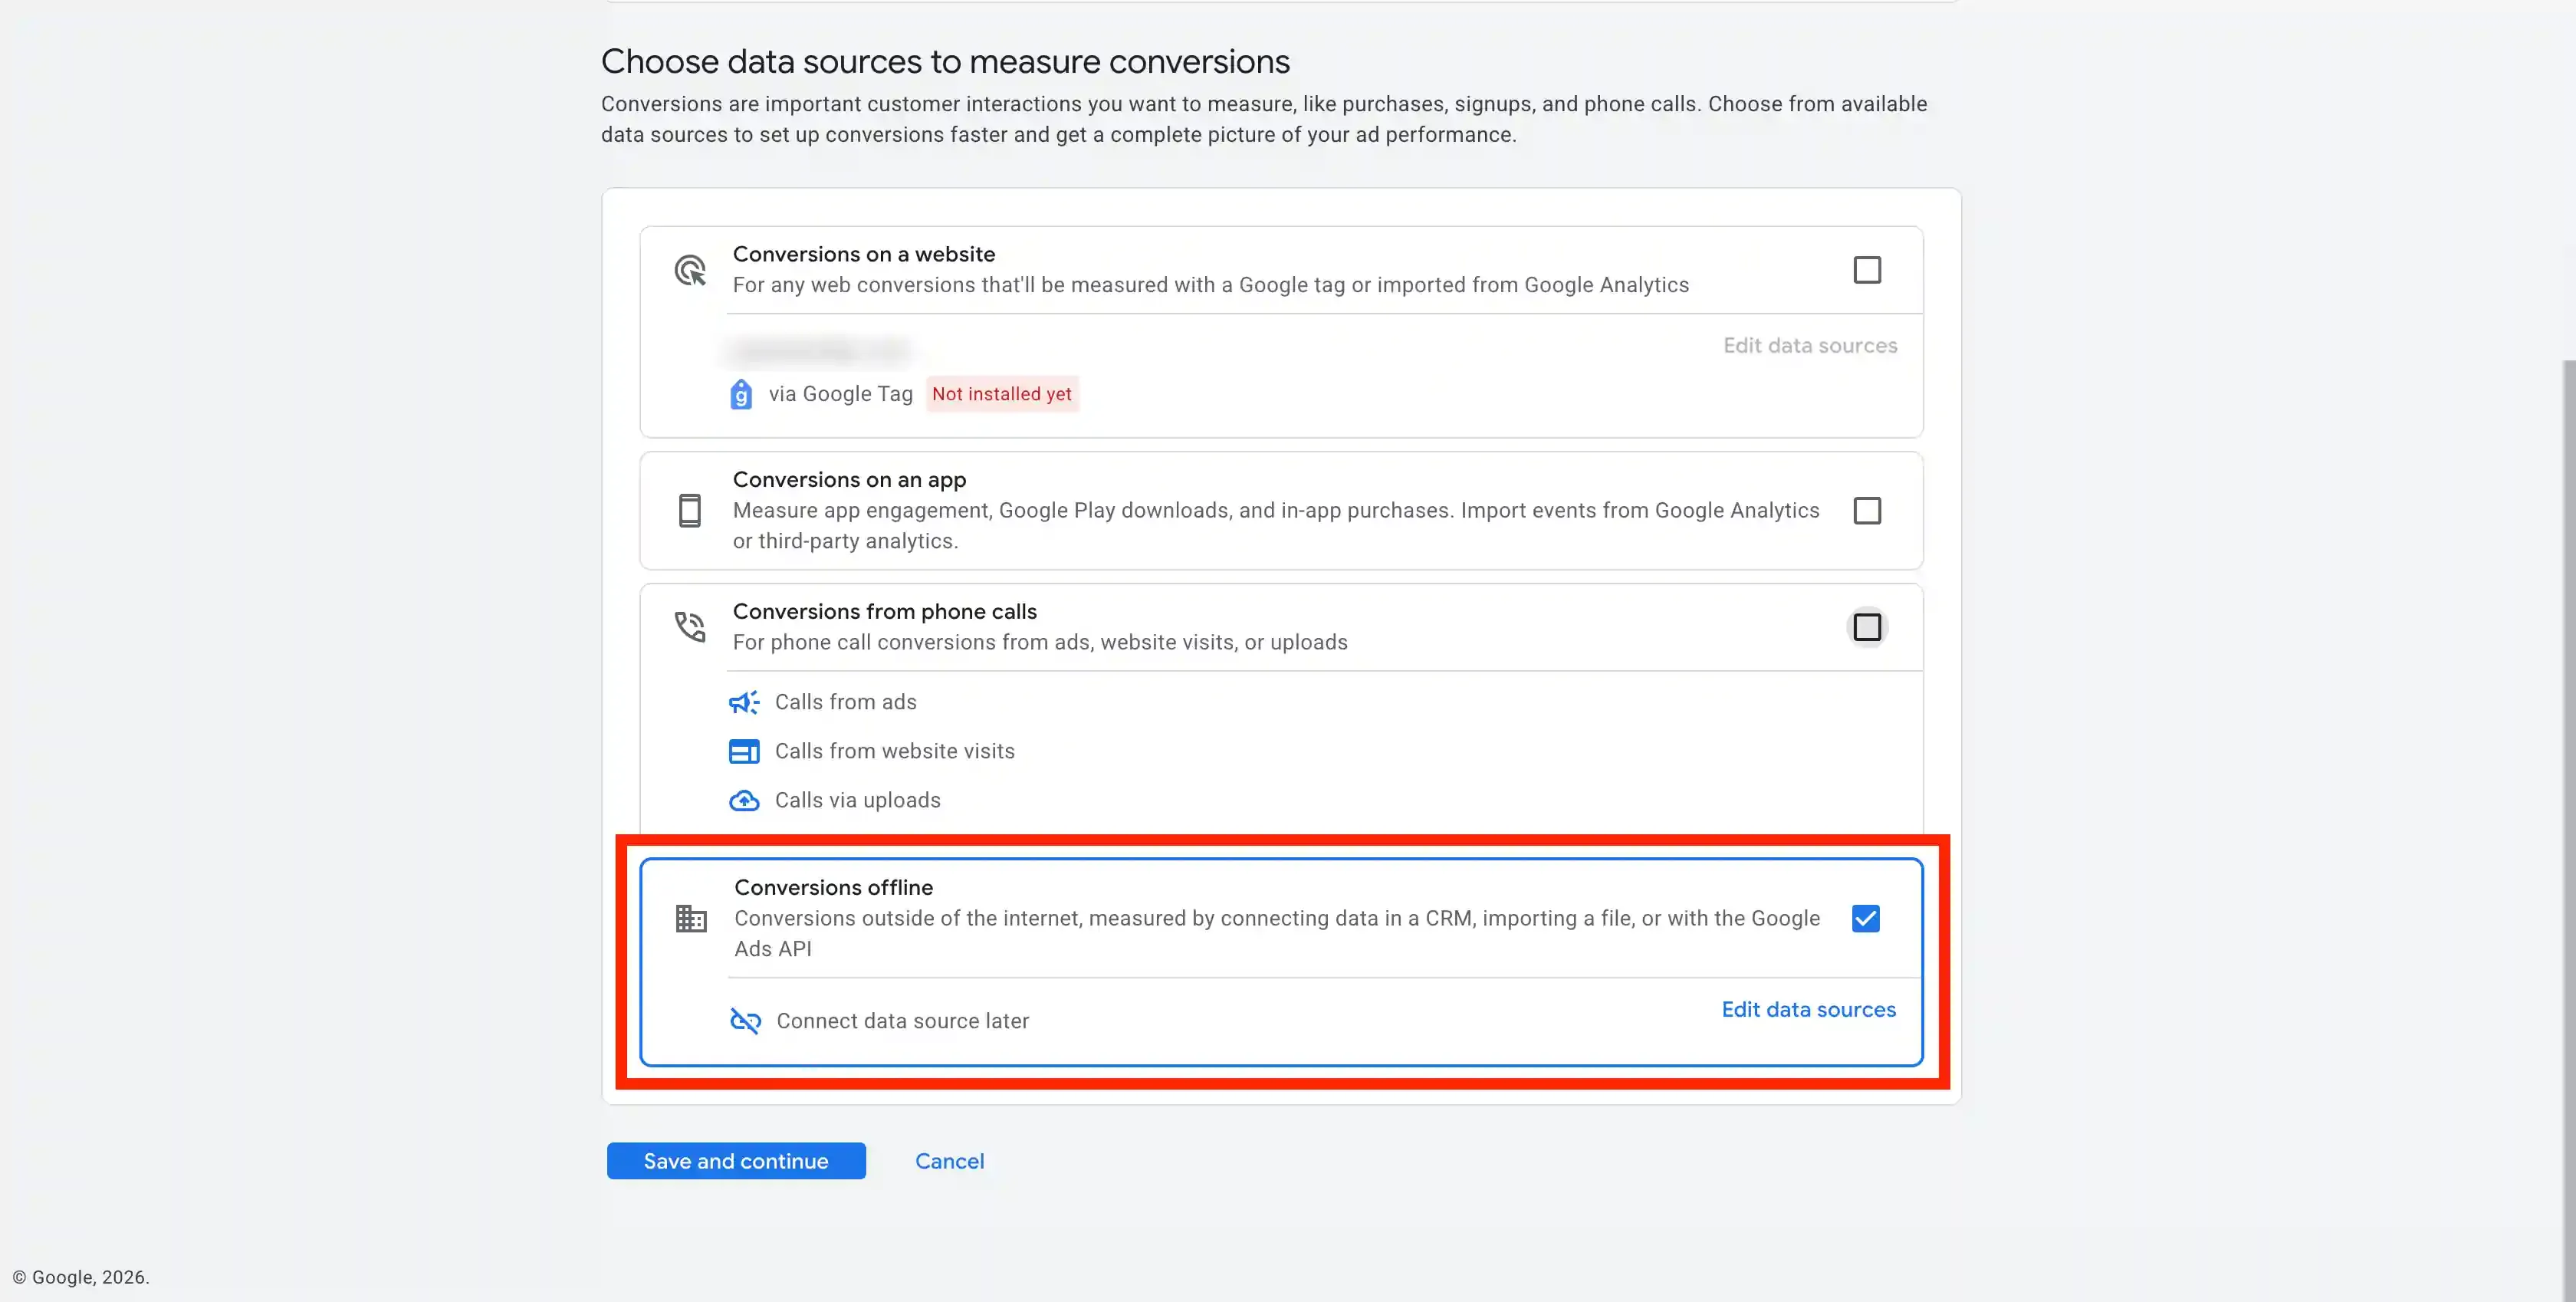
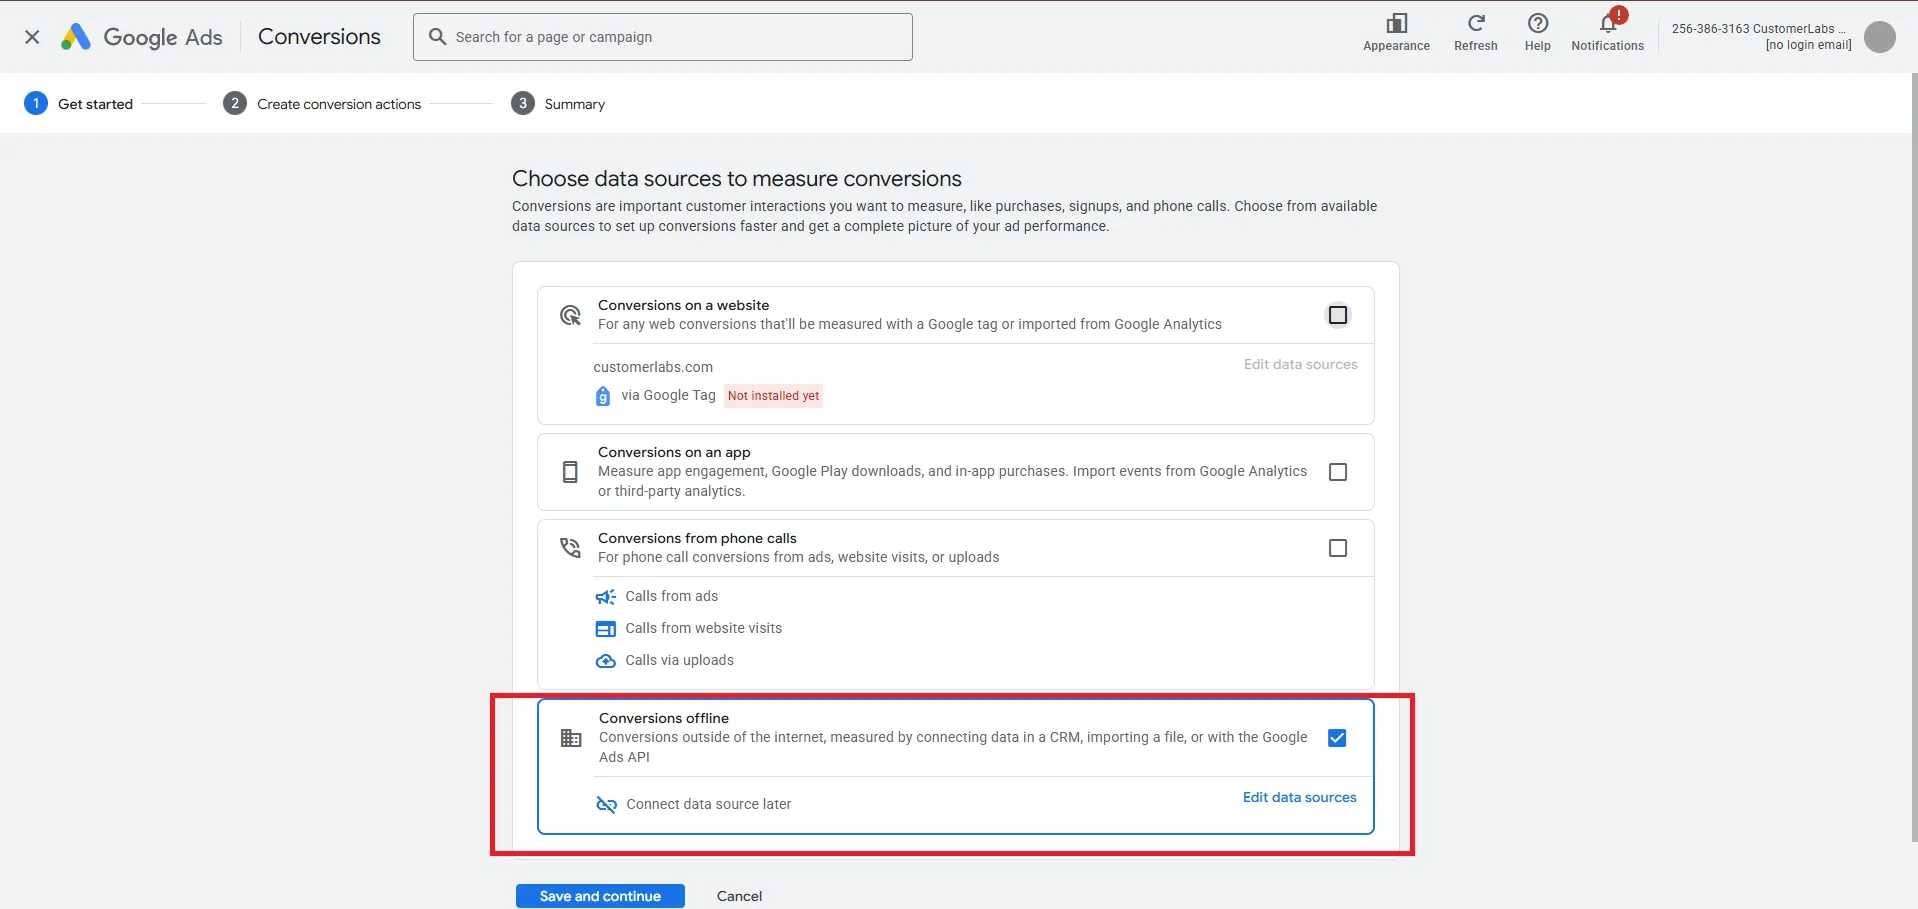
For tracking via Offline Conversions, select Conversions offline.
-
Choose Connect data source later.
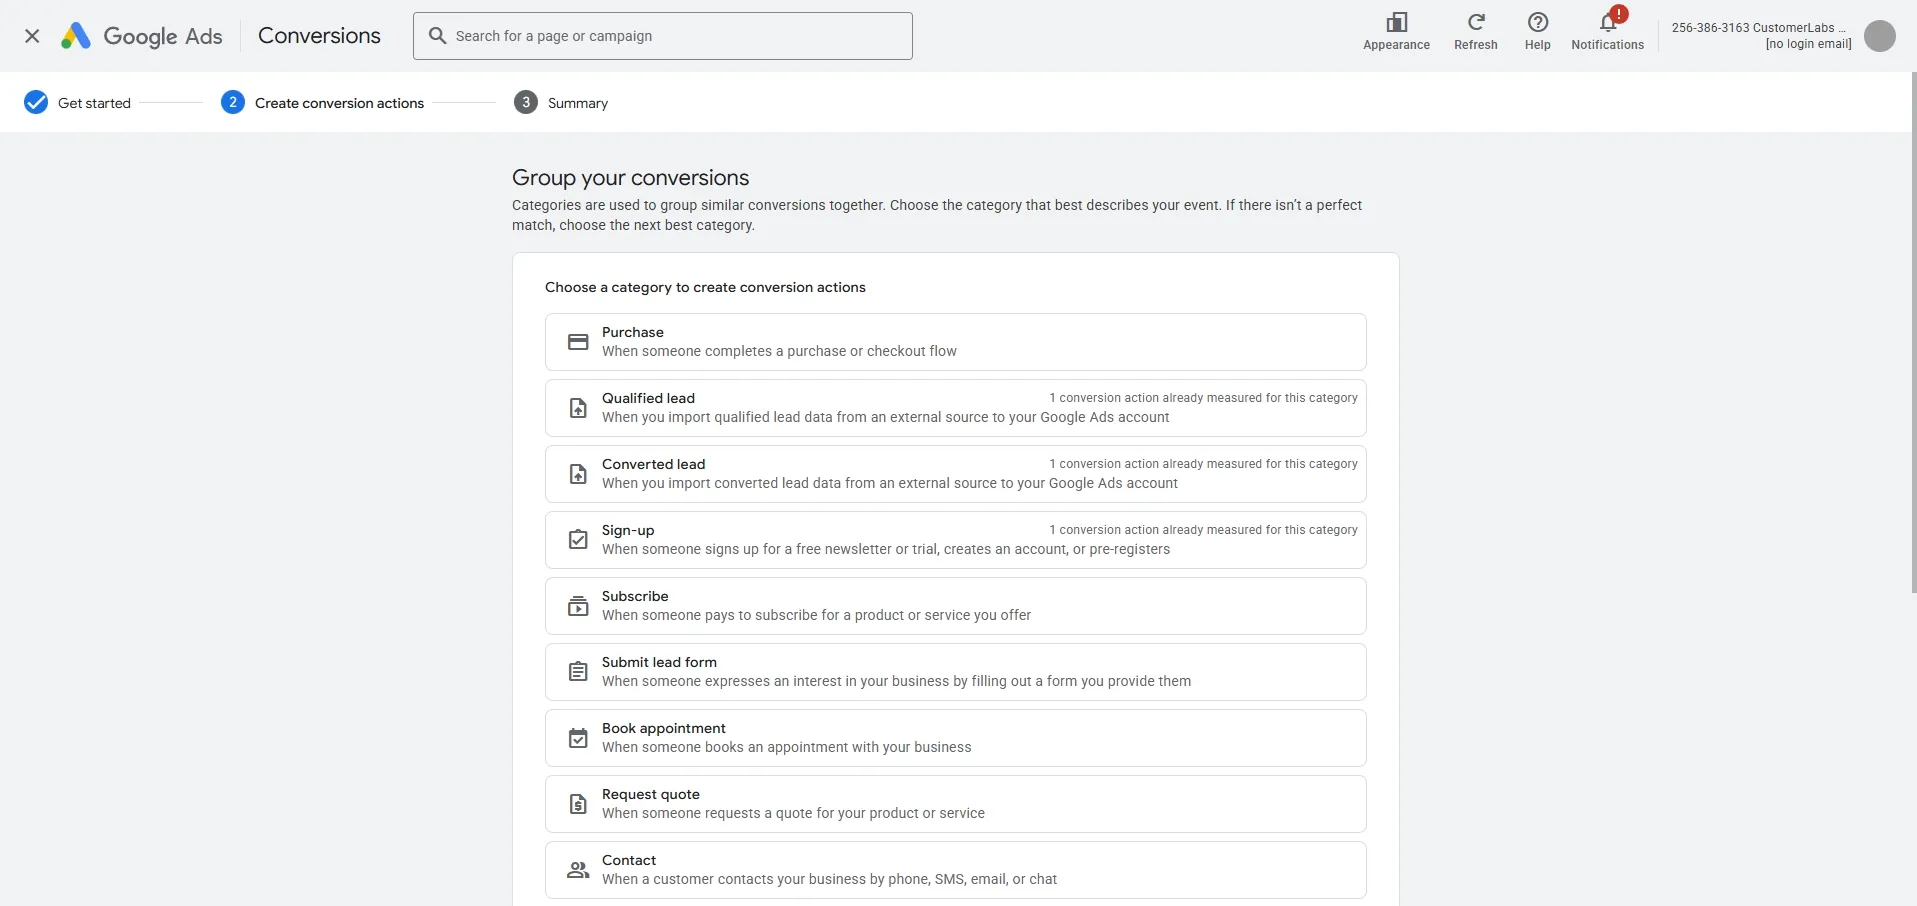
-
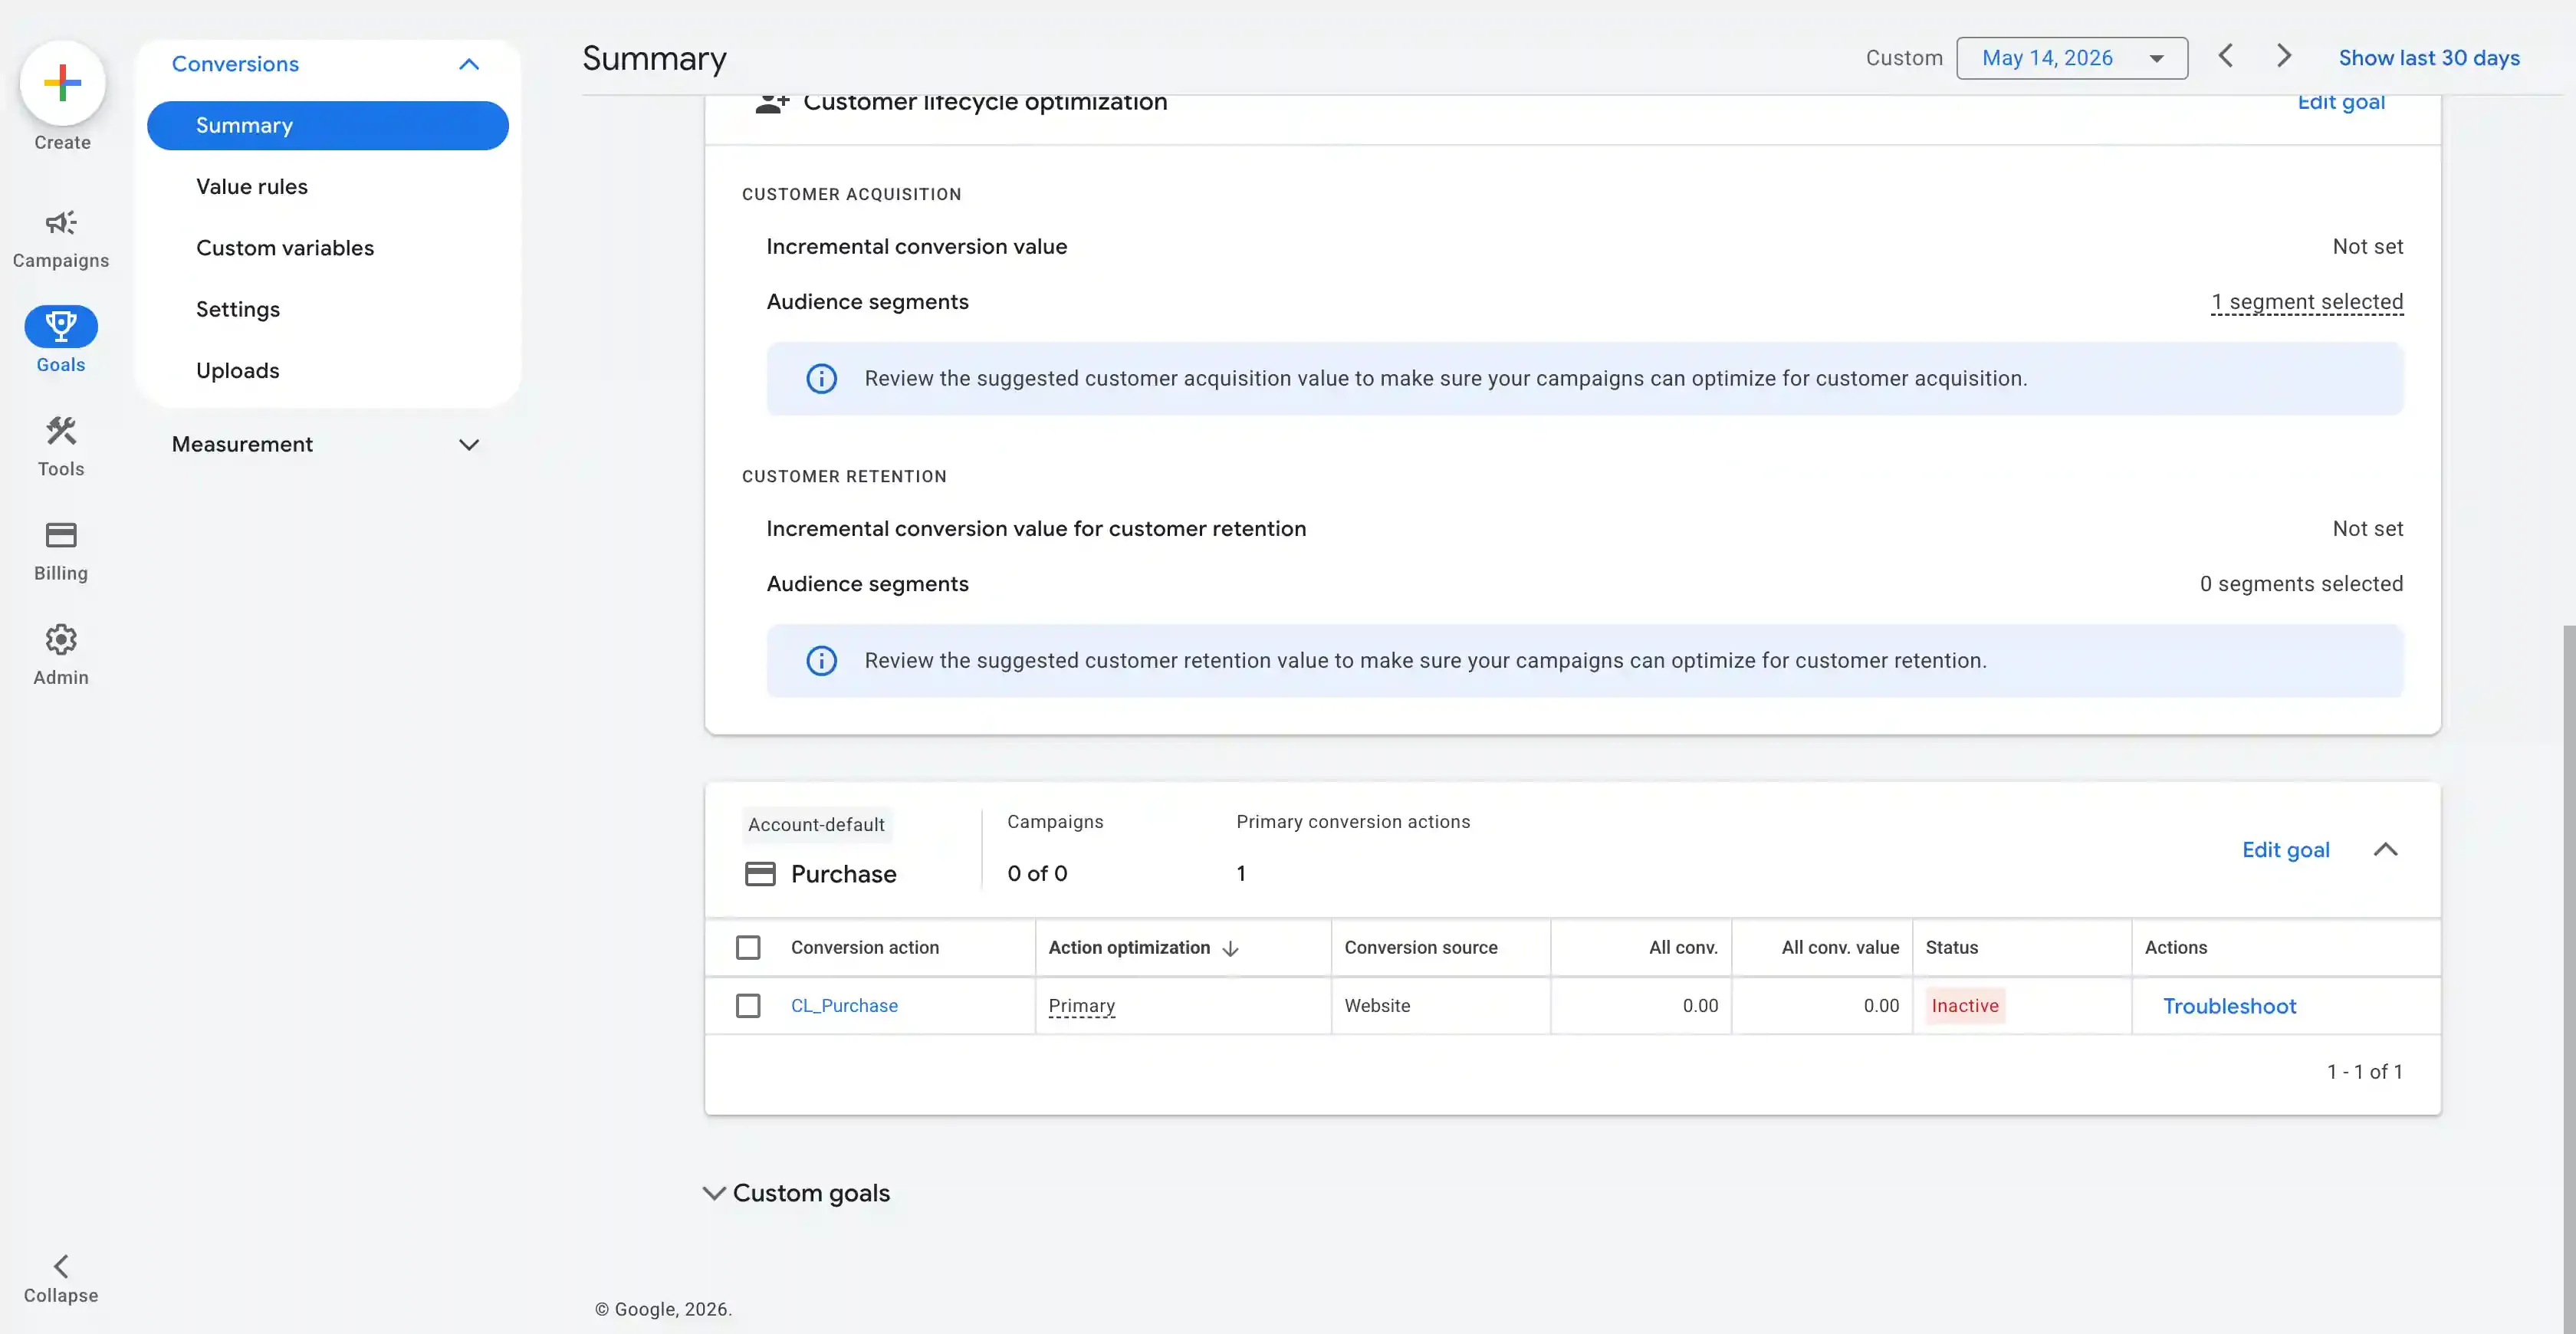
Choose a category for your conversion (e.g., Purchase, Lead, Sign-up).
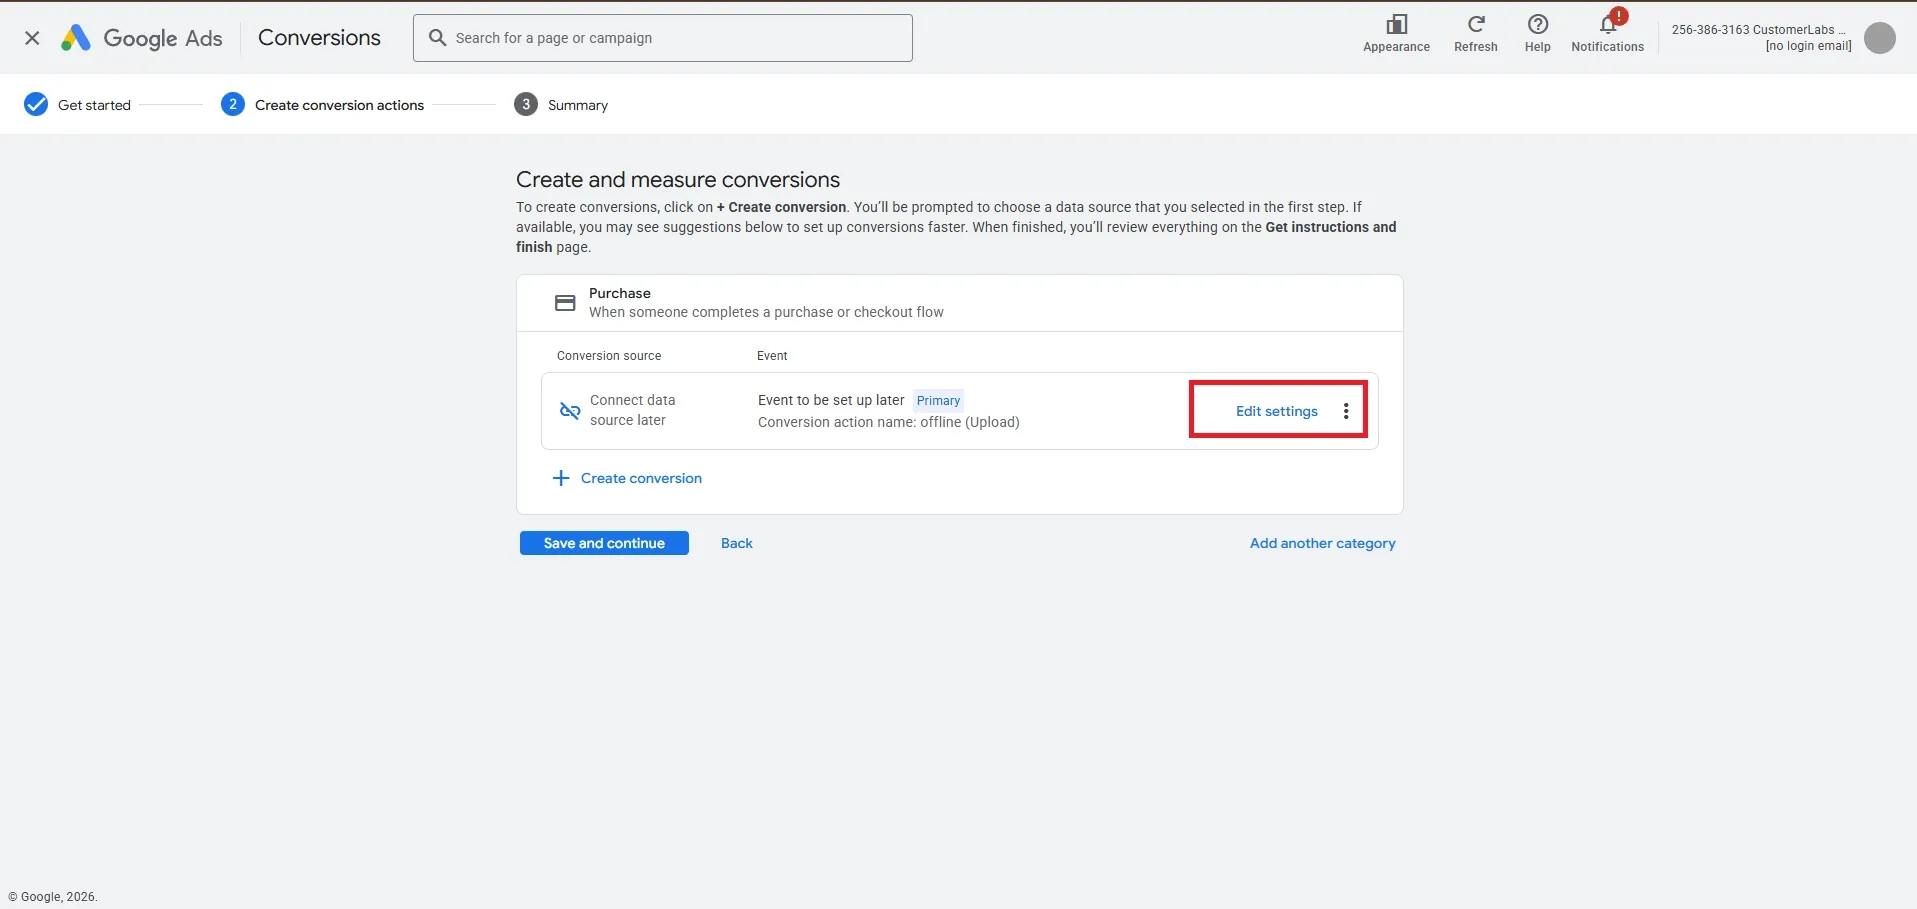
-
Click Edit Settings (or the menu icon next to the conversion) to configure the action optimization.
-
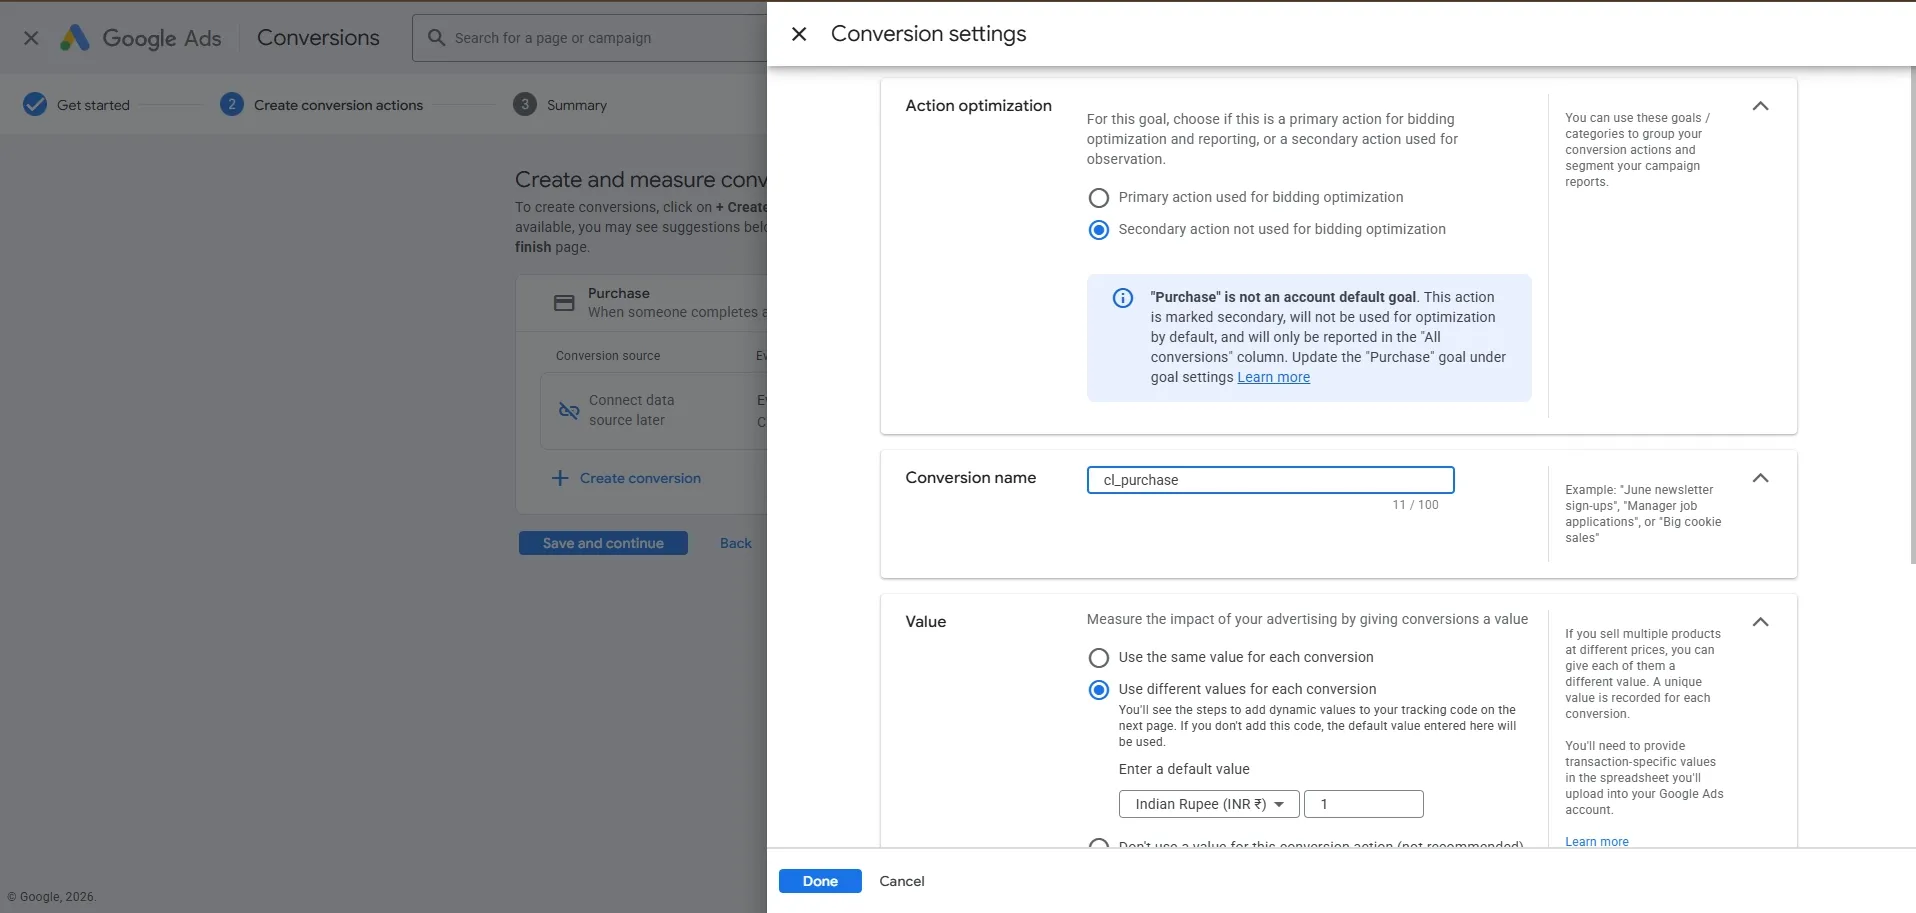
Recommended Settings:
- Action optimization: Set to Secondary if you are testing, then switch to Primary once verified.
- Conversion name: Rename to match the CustomerLabs event (e.g.,
cl_purchasefor Purchase). - Value: Select Use different values for each conversion to capture transaction values.
- Count: Select Every for purchases or One for leads.
-
Click Done and then Save and Continue.
2. Map Actions in CustomerLabs
Section titled “2. Map Actions in CustomerLabs”Once the conversion actions are created in Google Ads, map them in the CustomerLabs dashboard.
-
Go to Destinations → Google Adwords → Configuration Settings → Map Actions to Conversion.
-
Click Fetch Conversion to retrieve the actions from your Google Ads account.
-
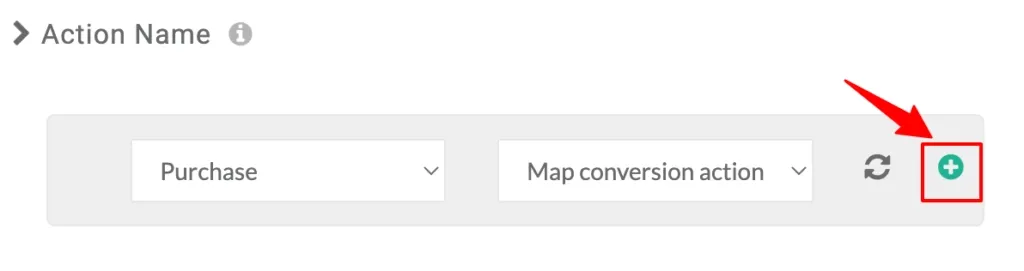
Map the Google Ads Conversion Action with the corresponding CustomerLabs Event.
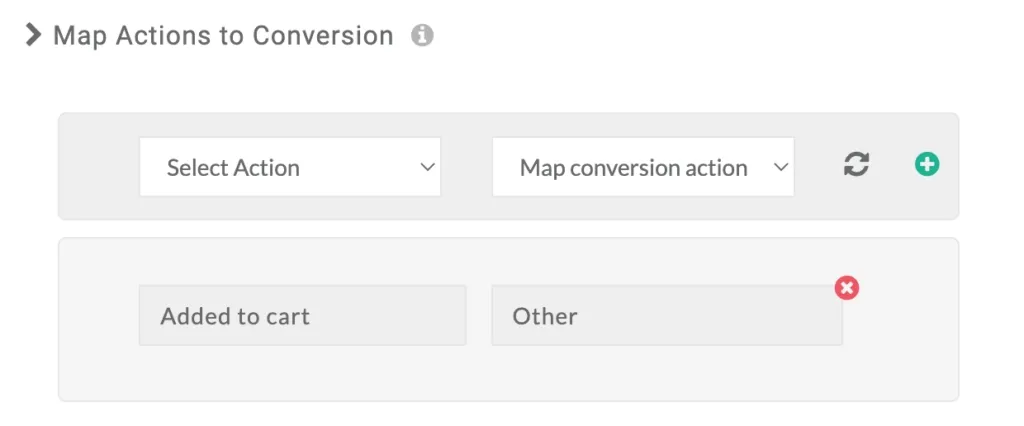
-
Click the ”+” icon to add the mapping to the list.
-
Click Save Changes.
3. Enable Event Workflow
Section titled “3. Enable Event Workflow”Finally, enable the sync for the mapped events.
- Navigate to Setup Event Workflow from the Google Adwords dashboard in CustomerLabs.
- Toggle ON the events you want to sync.
- Click Save Changes.
Enhanced Conversion Tracking
Section titled “Enhanced Conversion Tracking”Enhanced conversions improve measurement accuracy by matching hashed first-party data (like email or phone) from your website with Google-logged-in accounts.
Step 1: Enable in Google Ads
Section titled “Step 1: Enable in Google Ads”-
In your Google Ads Account, navigate to Goals → Settings → Customer data terms.
-
Accept the terms and click Save.
-
Go to Converted leads or Conversions depending on your use case.
-
Turn on Turn on enhanced conversions for leads and Enhanced conversions. Choose method as Google Tag.
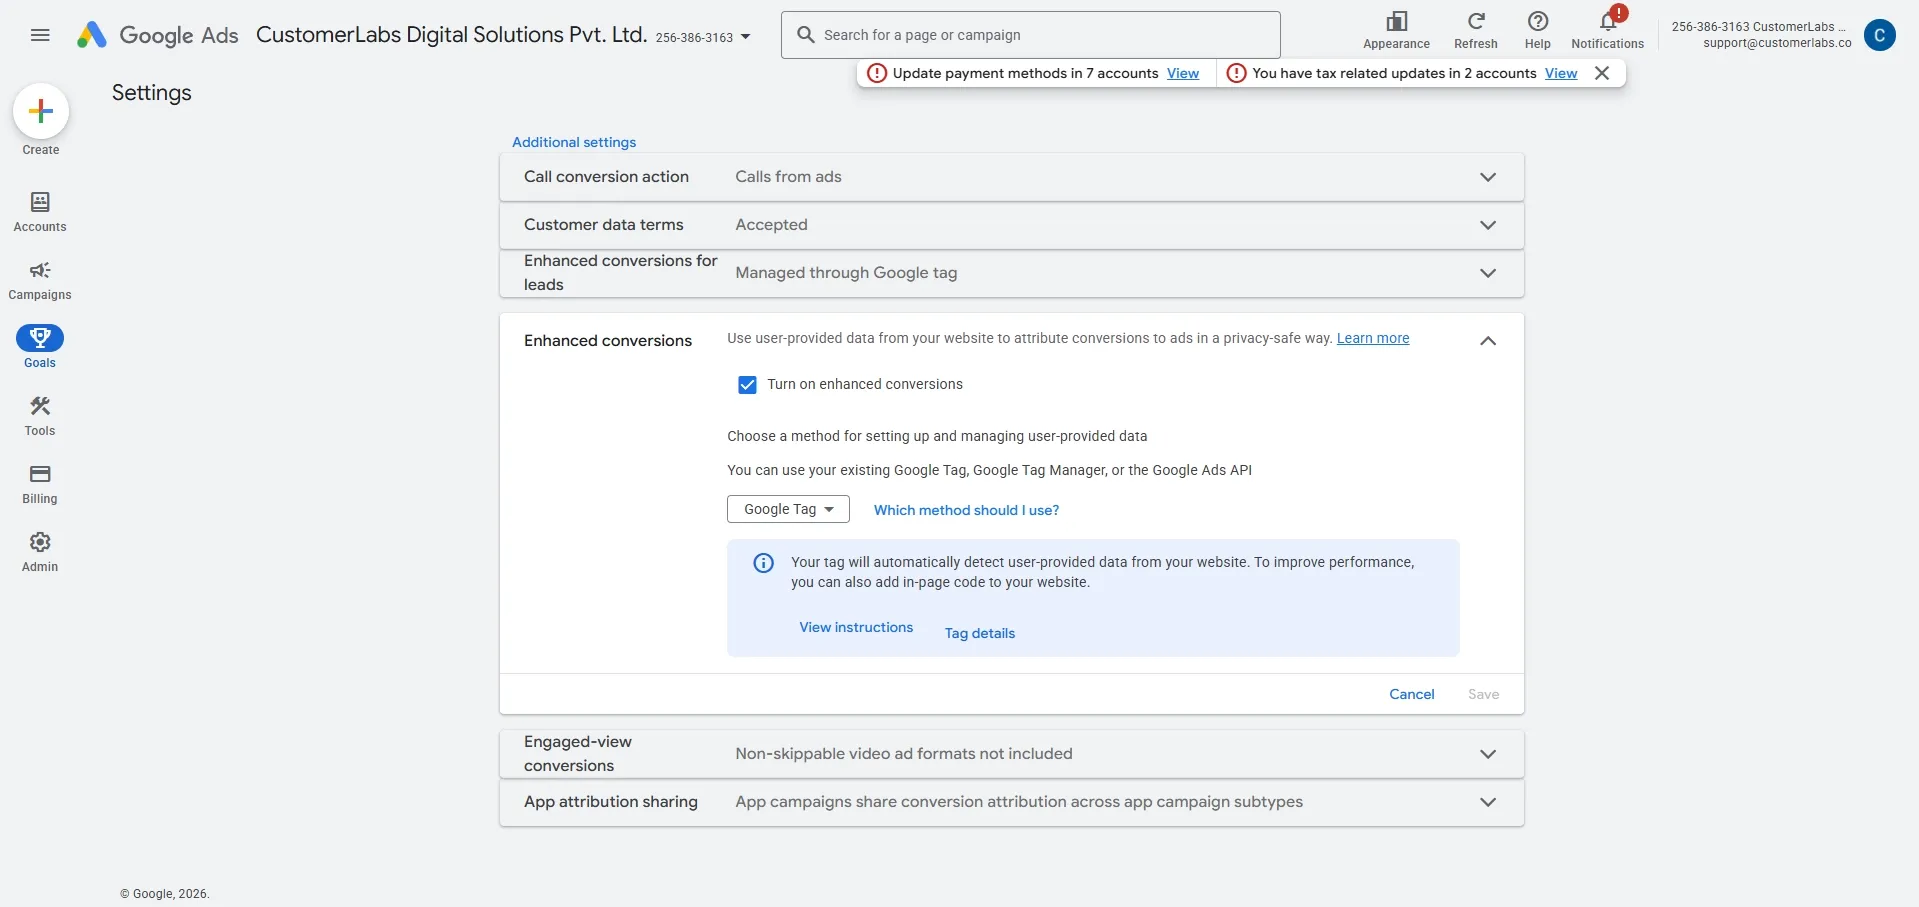
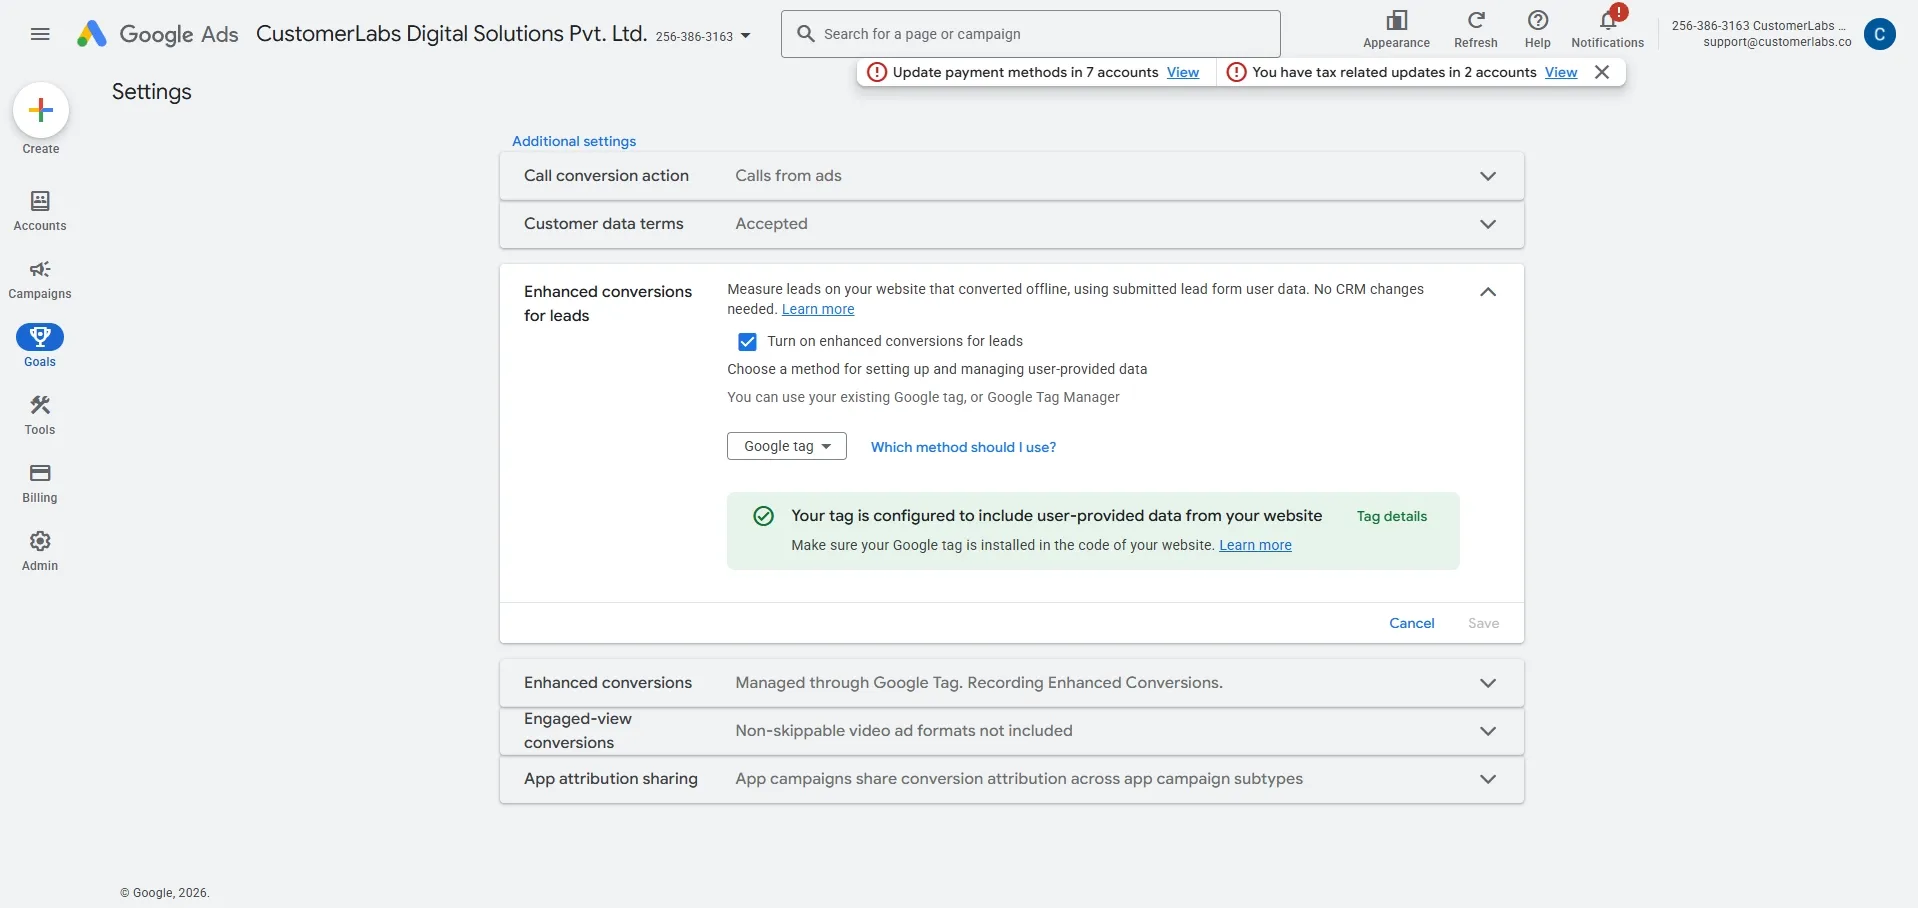
-
Choose Google tag as the method and click Save.
Step 2: Enable in CustomerLabs
Section titled “Step 2: Enable in CustomerLabs”- In CustomerLabs, go to Destinations → Google Adwords → Configuration Settings.
- Scroll to Advanced Settings and locate Enable enhanced conversion tracking.
- Toggle it ON.
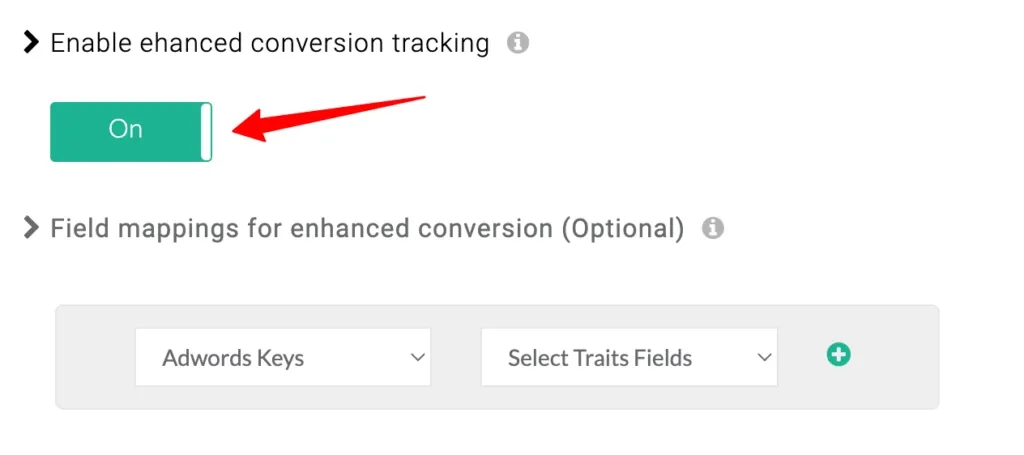
- (Optional) Map specific fields for enhanced data. CustomerLabs maps standard fields like email and phone automatically.
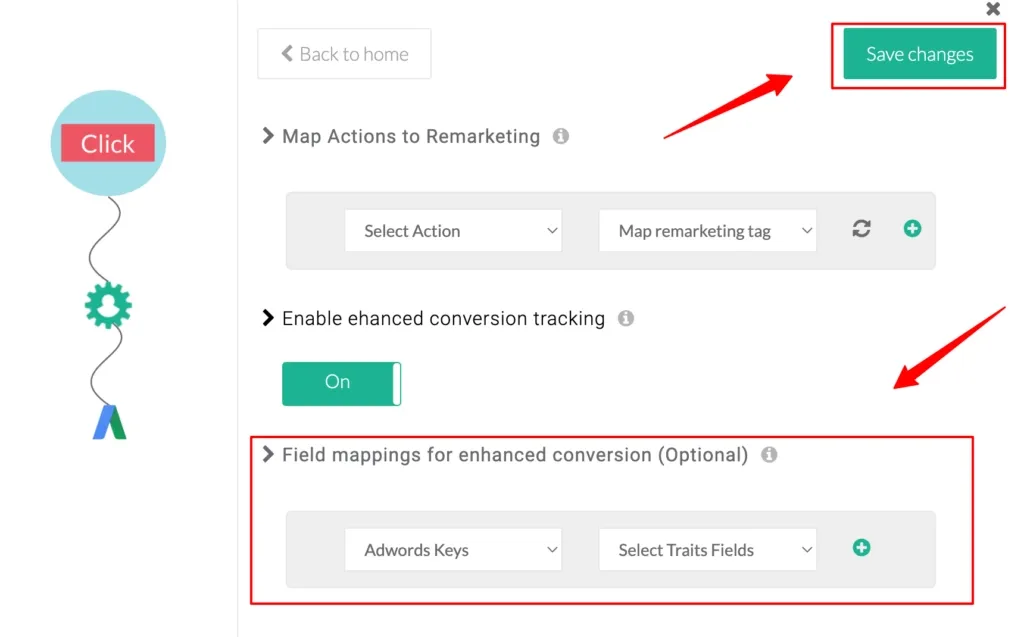
- Click Save Changes.
Consent Mode V2
Section titled “Consent Mode V2”To comply with the EU consent policy, Google requires end-user consent signals for ad personalization and analytics in the EEA.
Setup Steps
Section titled “Setup Steps”-
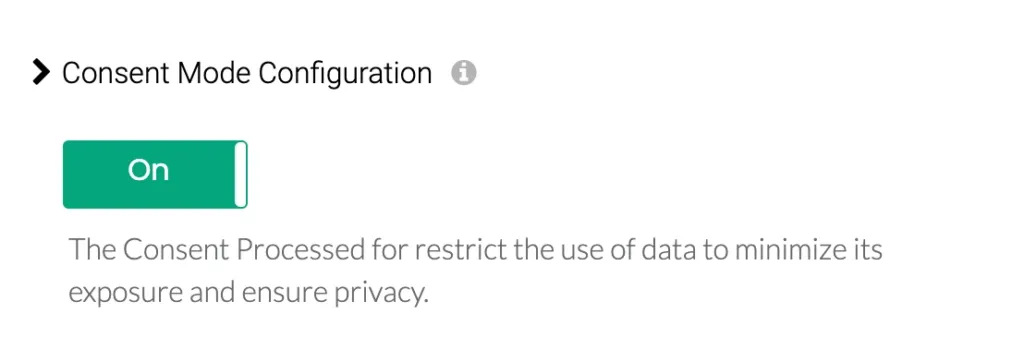
In CustomerLabs, go to Configuration Settings → Consent Mode Configuration.
-
Toggle the switch ON.
-
Set Default Values for consent parameters (
ad_storage,ad_user_data,ad_personalization). These will be used until a user makes a choice.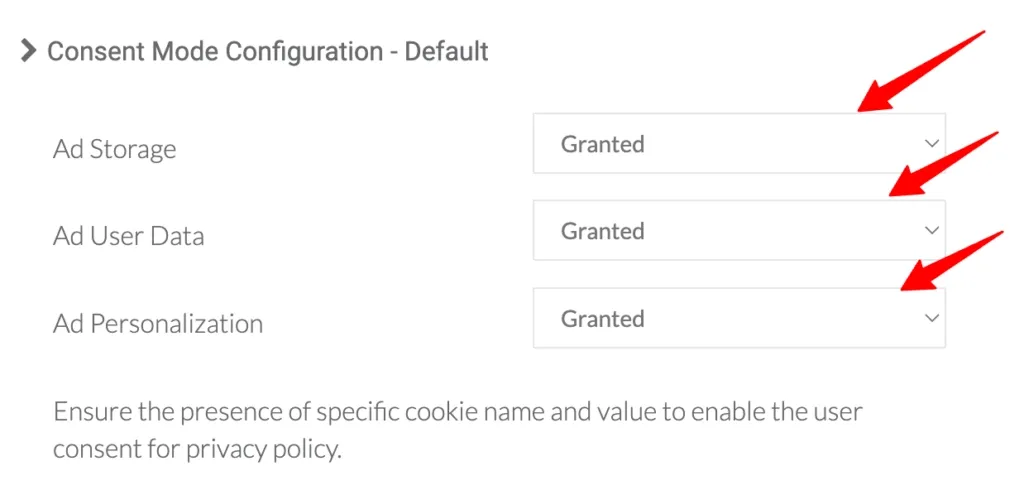
-
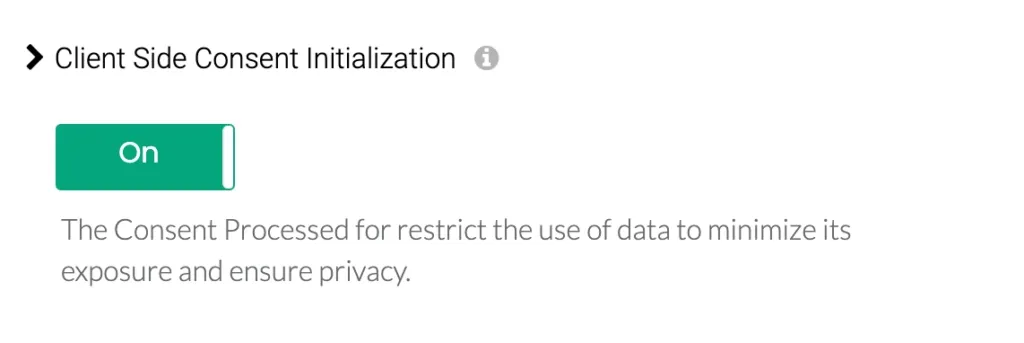
Client-Side Initialization: If you are NOT using a certified CMP to initialize flags, toggle Client Side Consent Initialization ON.
-
Click Save Changes.
Updating Consent Choice
Section titled “Updating Consent Choice”When a user interacts with your cookie banner, use the _cl.trackConsent() function to update their preferences:
_cl.trackConsent({ "ad_user_data": "granted", "ad_personalization": "granted", "ad_storage": "denied"});Remarketing Tags
Section titled “Remarketing Tags”Use remarketing tags to add users to segments based on their website activity without manual tag installation.
1. Create a Tag in Google Ads
Section titled “1. Create a Tag in Google Ads”-
Go to Tools and Settings → Shared Library → Audience Manager.
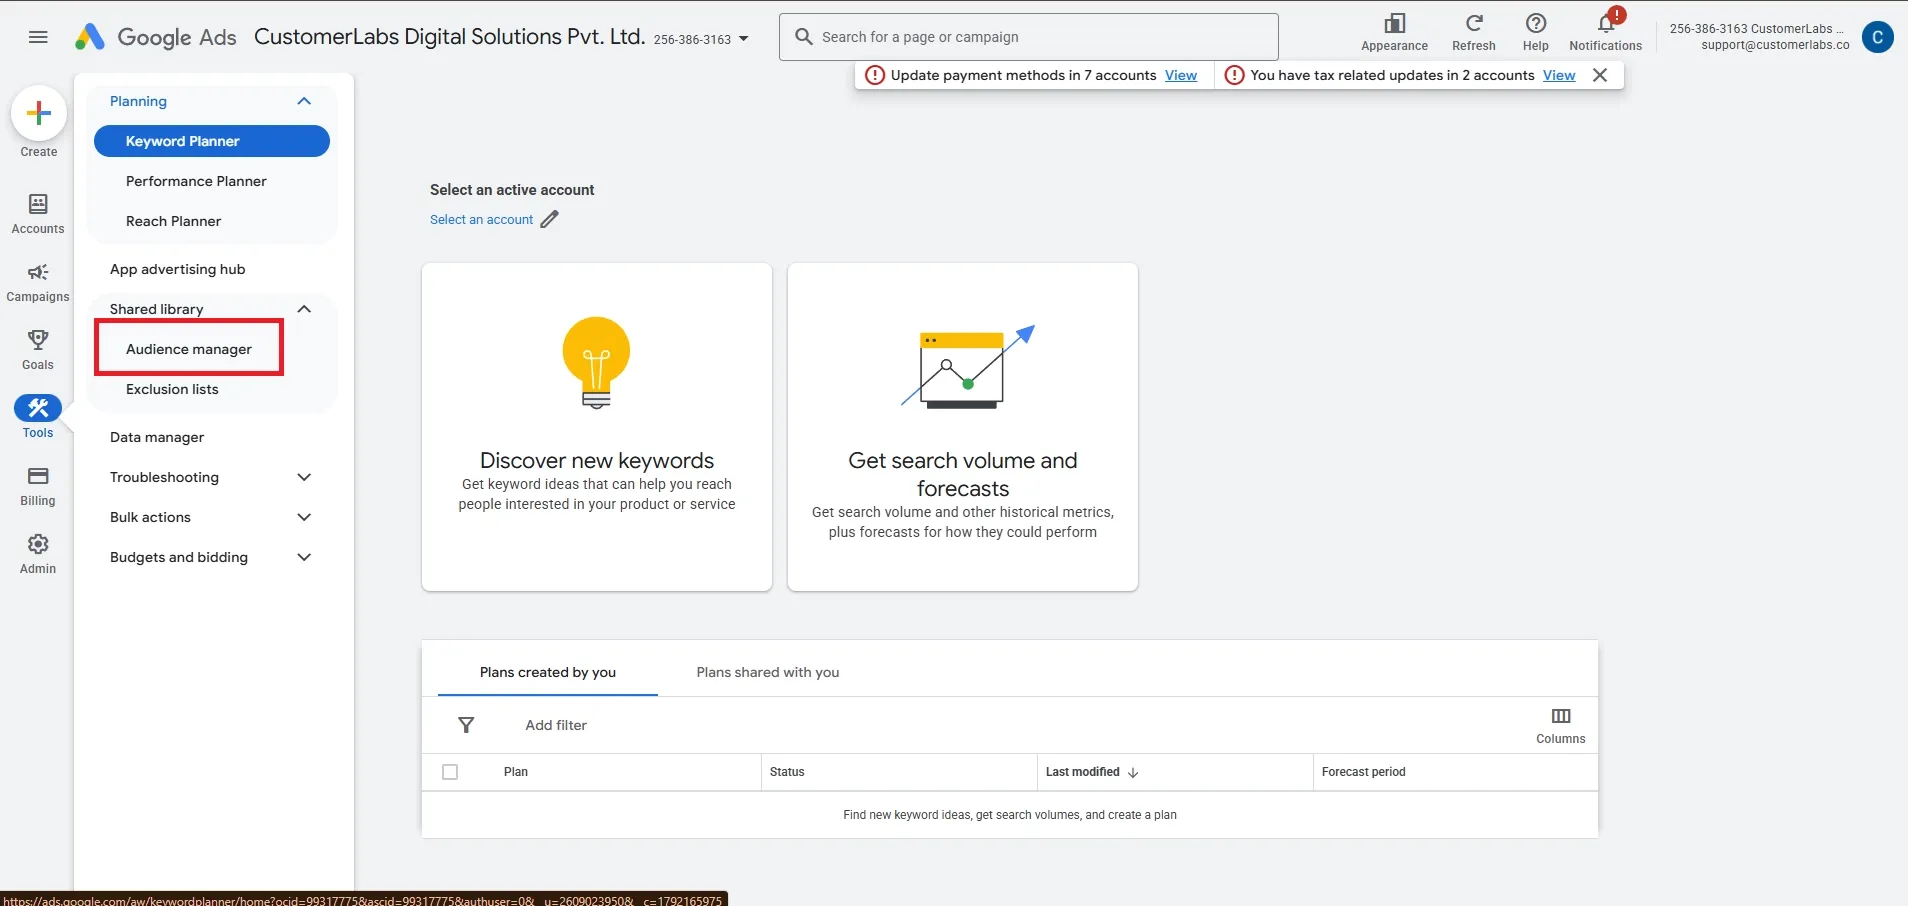
-
Click + and select Website visitors.
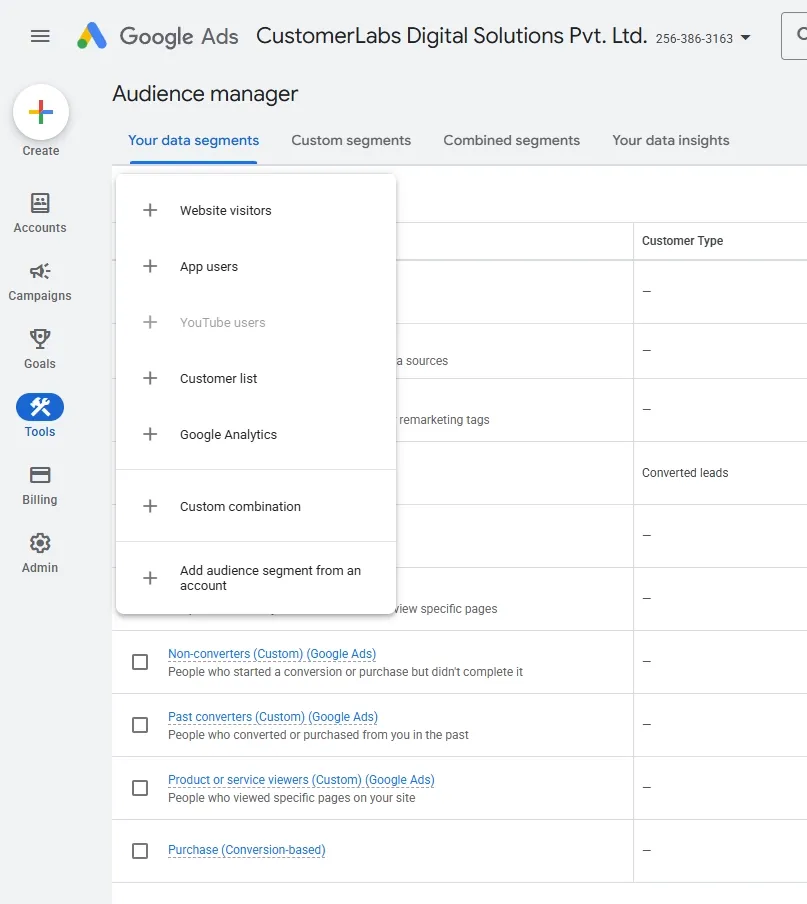
-
Under Segment members, choose Visitors of a page with specific tags.
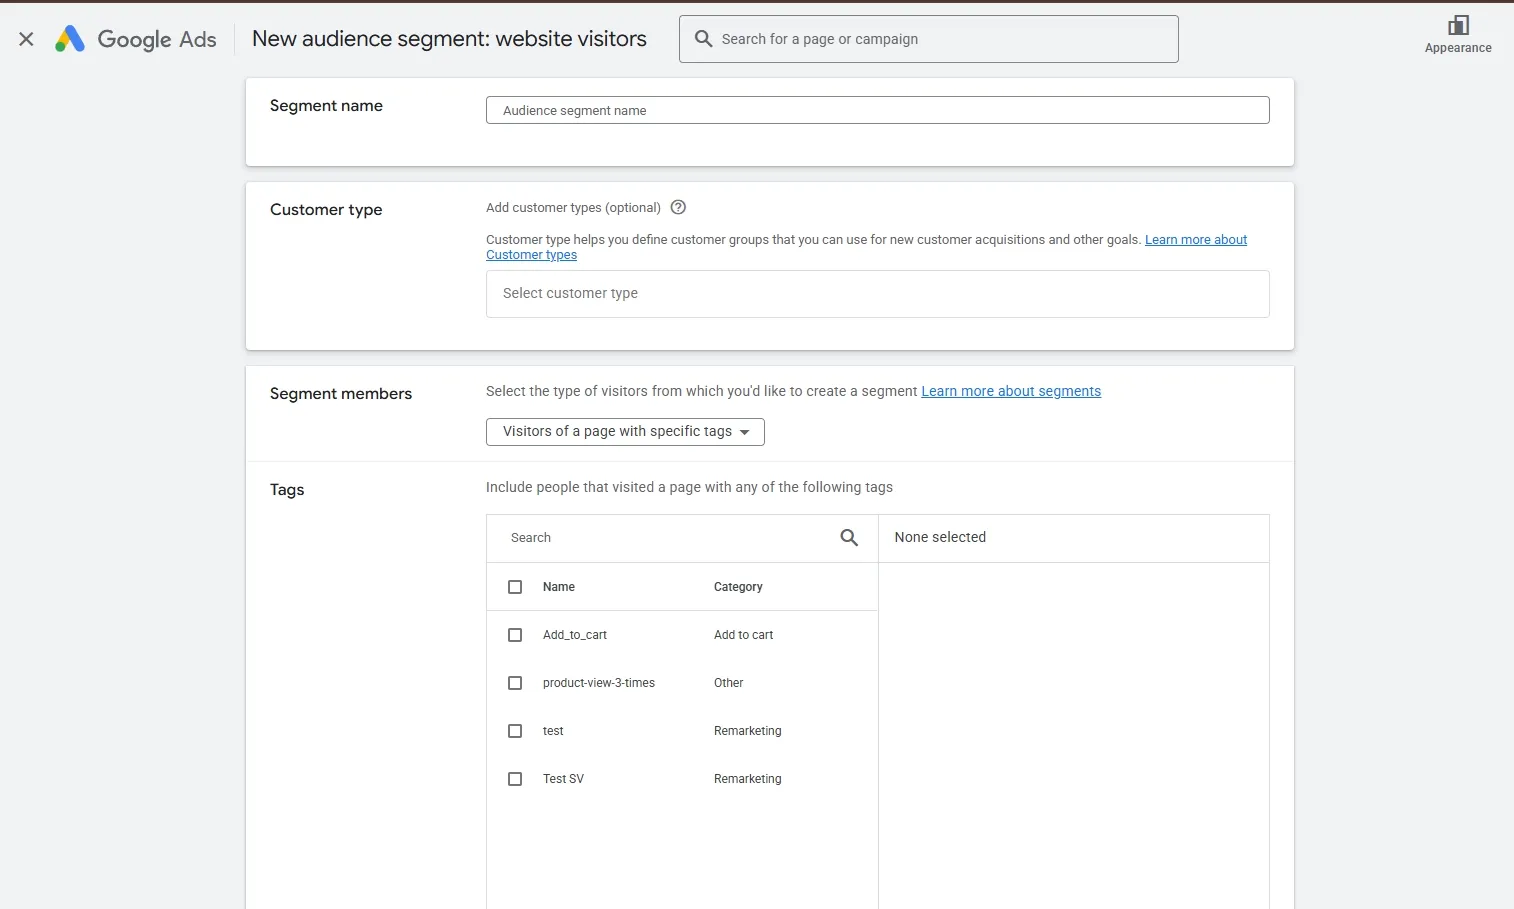
-
Click + New Tag, name it, and save.
2. Map in CustomerLabs
Section titled “2. Map in CustomerLabs”- In CustomerLabs, go to Configuration Settings → Advanced Settings → Map Actions to Remarketing.
- Map your CustomerLabs events to the newly created tag IDs.
- For Dynamic Remarketing, select the appropriate Business vertical from the dropdown.
- Click Save Changes.
Audience Sync
Section titled “Audience Sync”Sync your first-party audience segments directly from CustomerLabs to Google Ads for more effective retargeting.

Refer to the Audience Sync Documentation for detailed setup instructions.