CustomerLabs + Zapier Integration
CustomerLabs connects with over 1,500 applications through Zapier. Send your customer data to the tools you use every day and automate your workflows in minutes.
About Zapier
Section titled “About Zapier”Zapier is a cloud-based automation platform that connects multiple applications and automates everyday tasks without requiring any code.
Zapier uses Zaps — automated workflows that run between two or more apps. Each Zap consists of:
| Component | Description |
|---|---|
| Trigger | The event in the source app that starts the Zap (e.g., a new event in CustomerLabs). |
| Action | The task performed automatically in the destination app when the Trigger fires. |
For example, you can create a Zap where a new event captured in CustomerLabs (Trigger) automatically creates a record in Google Sheets (Action).
Prerequisites
Section titled “Prerequisites”Before you begin, make sure you have:
- An active CustomerLabs account.
- An active Zapier account.
- Access to the Destinations section in your CustomerLabs dashboard.
Step-by-Step Setup
Section titled “Step-by-Step Setup”Follow the steps below to connect CustomerLabs with Zapier.
Step 1 — Log In to CustomerLabs
Section titled “Step 1 — Log In to CustomerLabs”Log in to your CustomerLabs account.
Step 2 — Navigate to Destinations
Section titled “Step 2 — Navigate to Destinations”From the CustomerLabs home page, go to the Destinations section.
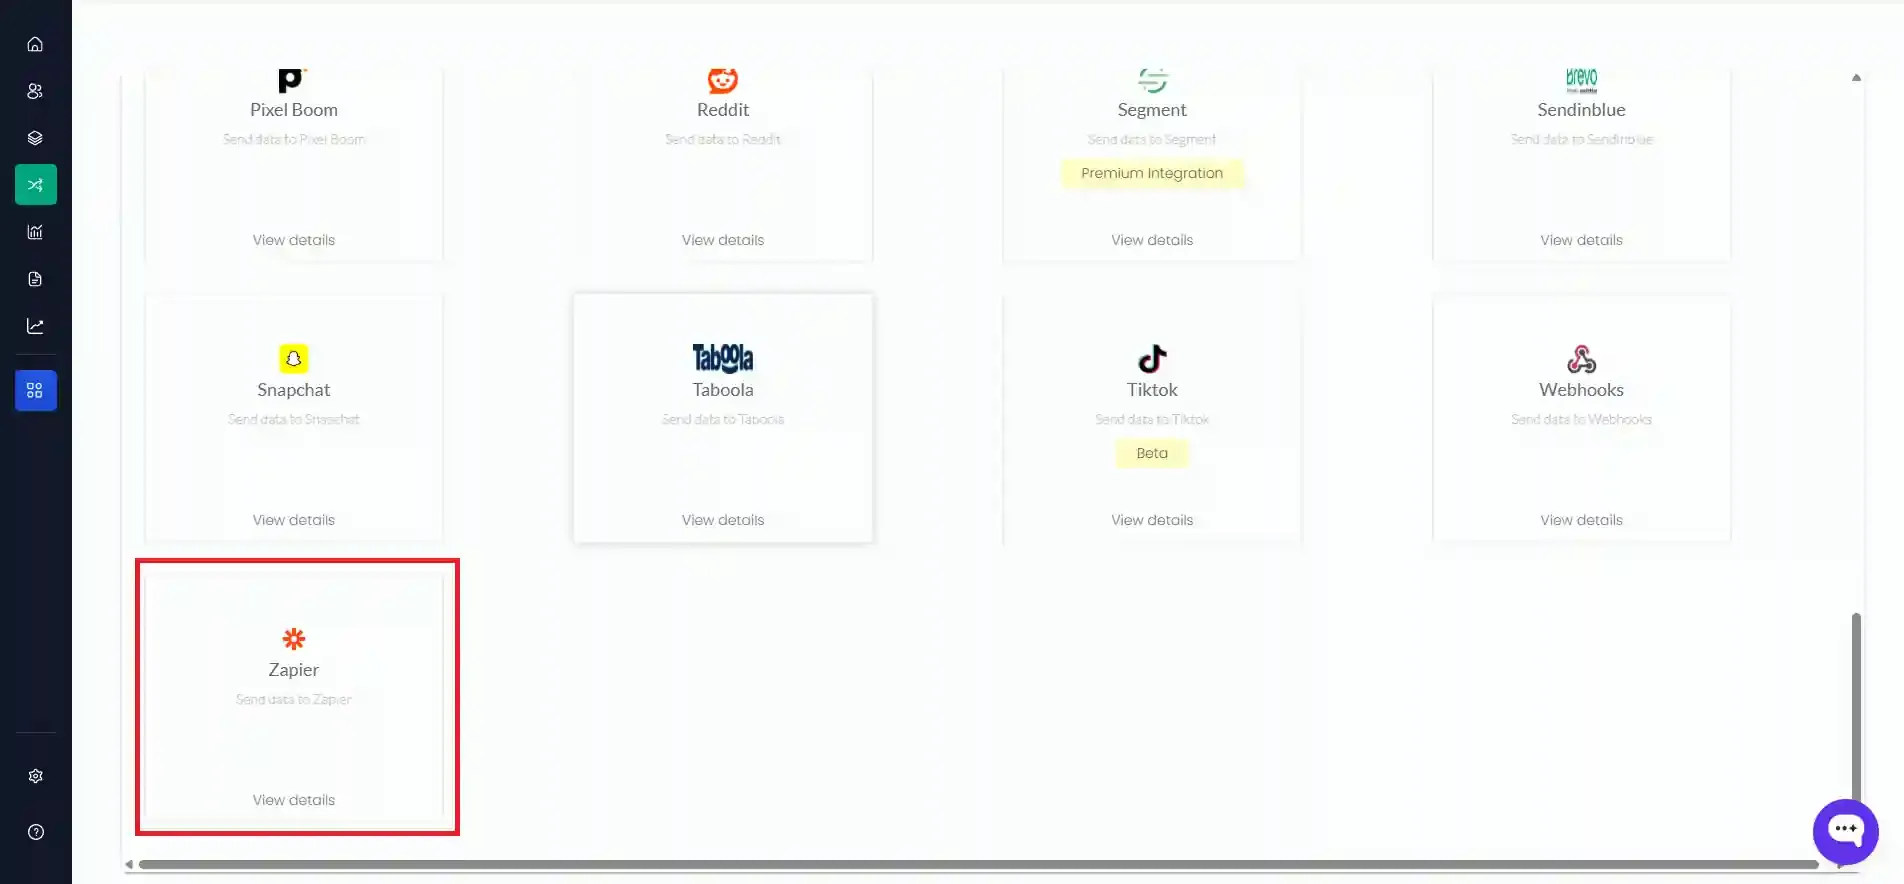
Step 3 — Select Zapier
Section titled “Step 3 — Select Zapier”In the All Destinations list, search for Zapier or scroll to the bottom of the list and click Zapier.
Step 4 — Enable the Integration
Section titled “Step 4 — Enable the Integration”A pop-up screen will appear. Click “Save and Enable” to activate the Zapier destination.

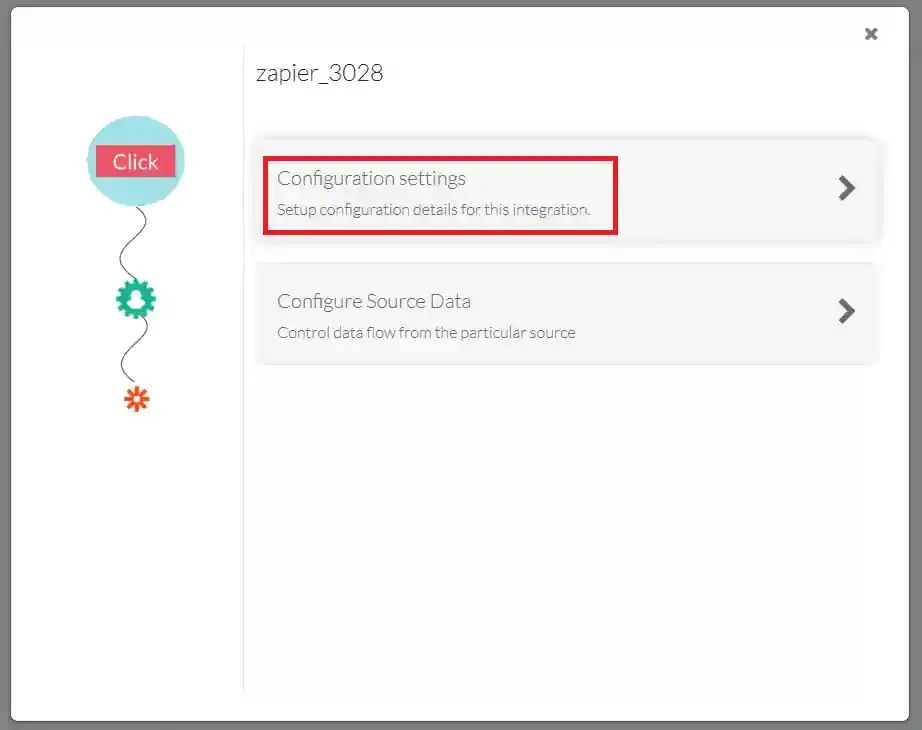
Step 5 — Open Configuration Settings
Section titled “Step 5 — Open Configuration Settings”After enabling, select “Configuration Settings” to access the API key setup.
Step 6 — Generate and Copy the API Key
Section titled “Step 6 — Generate and Copy the API Key”Click Generate to create a new API key. Copy the key — you will need it to authenticate Zapier with your CustomerLabs account.
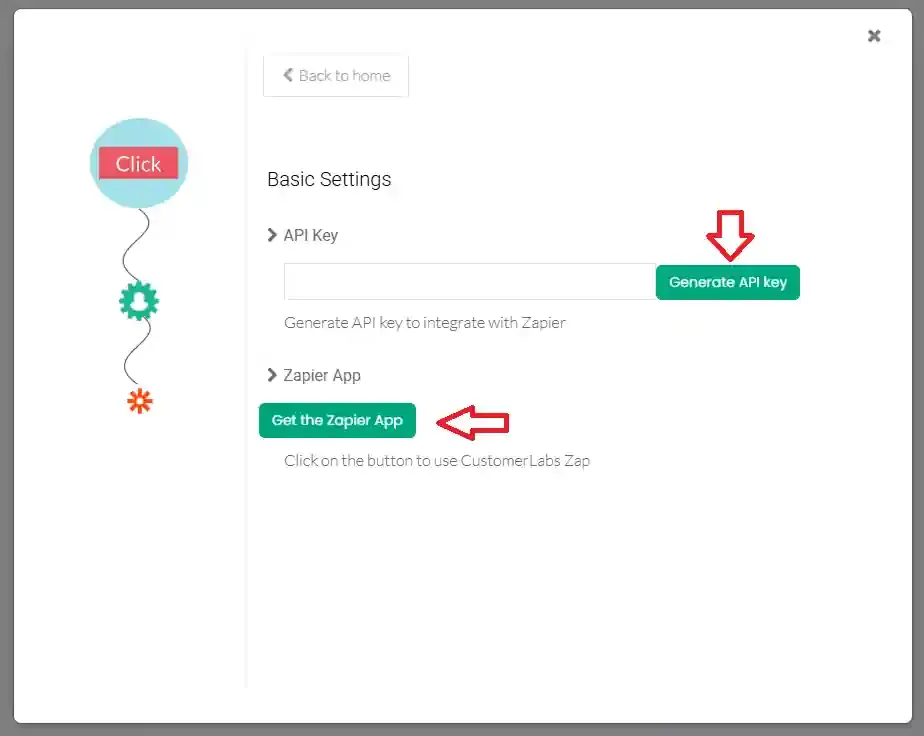
Step 7 — Get the Zapier App
Section titled “Step 7 — Get the Zapier App”Click “Get the Zapier App” to be redirected to Zapier.
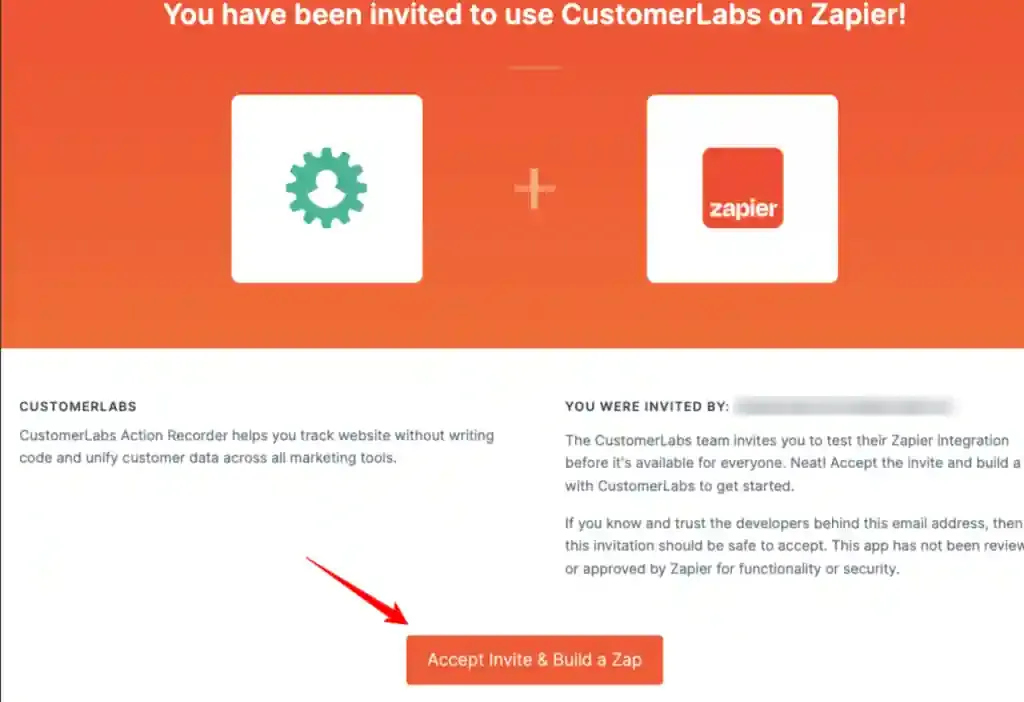
Step 8 — Accept the Invitation
Section titled “Step 8 — Accept the Invitation”If you are already logged in to Zapier, you will see an invitation screen from CustomerLabs. Click “Accept Invite & Build a Zap” to continue.
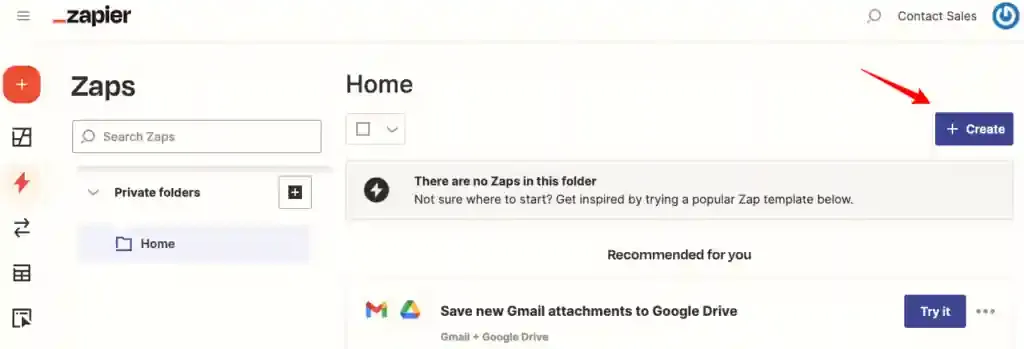
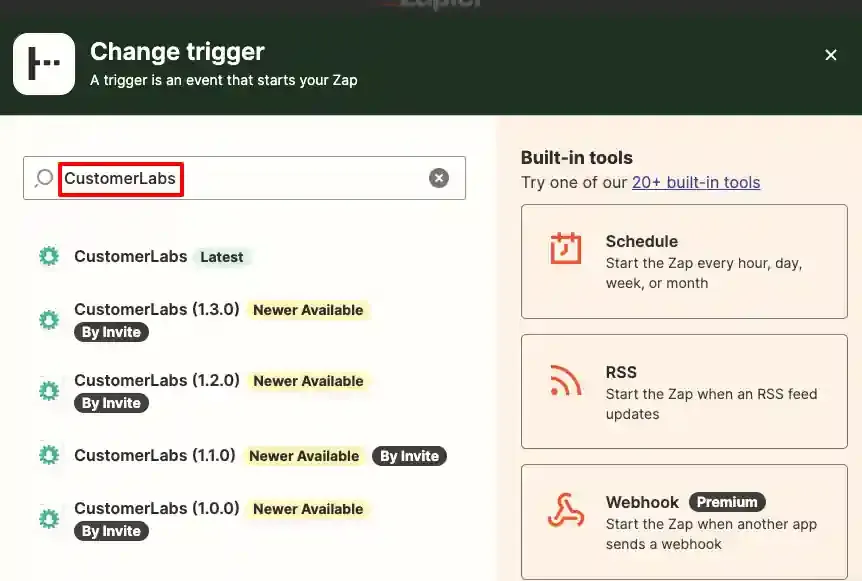
Step 9 — Create a New Zap
Section titled “Step 9 — Create a New Zap”In the Zapier dashboard, click “Create” and search for CustomerLabs in the app search bar. Select the latest version of the CustomerLabs app from the list.

Step 10 — Authenticate with Your API Key
Section titled “Step 10 — Authenticate with Your API Key”Click “Sign in” in the Zapier Zap editor. A pop-up will prompt you to enter your API key. Paste the API key you copied from CustomerLabs and click Continue.
Once authenticated, Zapier will have access to your CustomerLabs account and you are ready to build your Zap.
Authentication Reference
Section titled “Authentication Reference”The table below summarizes the authentication setup for this integration.
| Setting | Value / Action |
|---|---|
| Auth Type | API Key |
| Where to Get | CustomerLabs → Destinations → Zapier → Configuration Settings |
| Where to Use | Paste into the Zapier sign-in pop-up when creating or editing a Zap |
What You Can Do Next
Section titled “What You Can Do Next”After connecting CustomerLabs with Zapier, you can:
- Set up Triggers — Use CustomerLabs events (e.g., page views, sign-ups, purchases) as Triggers in your Zaps.
- Configure Actions — Automatically send data to any of Zapier’s 1,500+ supported apps.
- Build multi-step Zaps — Chain multiple Actions together to power complex workflows.
Troubleshooting
Section titled “Troubleshooting”| Issue | Solution |
|---|---|
| Zapier cannot find CustomerLabs | Ensure you accepted the invitation from Step 8 and are selecting the latest app version. |
| API key is not accepted | Re-generate the API key from CustomerLabs Configuration Settings and paste it again. |
| Events are not appearing in Zapier | Verify that the Zapier destination is enabled in CustomerLabs and that events are being tracked. |