Drift (Salesloft) + CustomerLabs
Drift is the Conversational Marketing platform that combines chat, email, video, and automation to remove the friction from business buying. With Drift, you can start conversations with future customers now, on their terms.
The CustomerLabs 1PD Ops + Drift integration will enable marketers to bring their all customer related data from Drift into CustomerLabs 1PD Ops in order to enrich existing user profiles, create targeted segments & sync them with other marketing tools to personalize engagement.
Getting Started
Section titled “Getting Started”Follow the steps below to connect your Drift account with CustomerLabs 1PD Ops—no coding required.
Step 1: Connect Drift to CustomerLabs
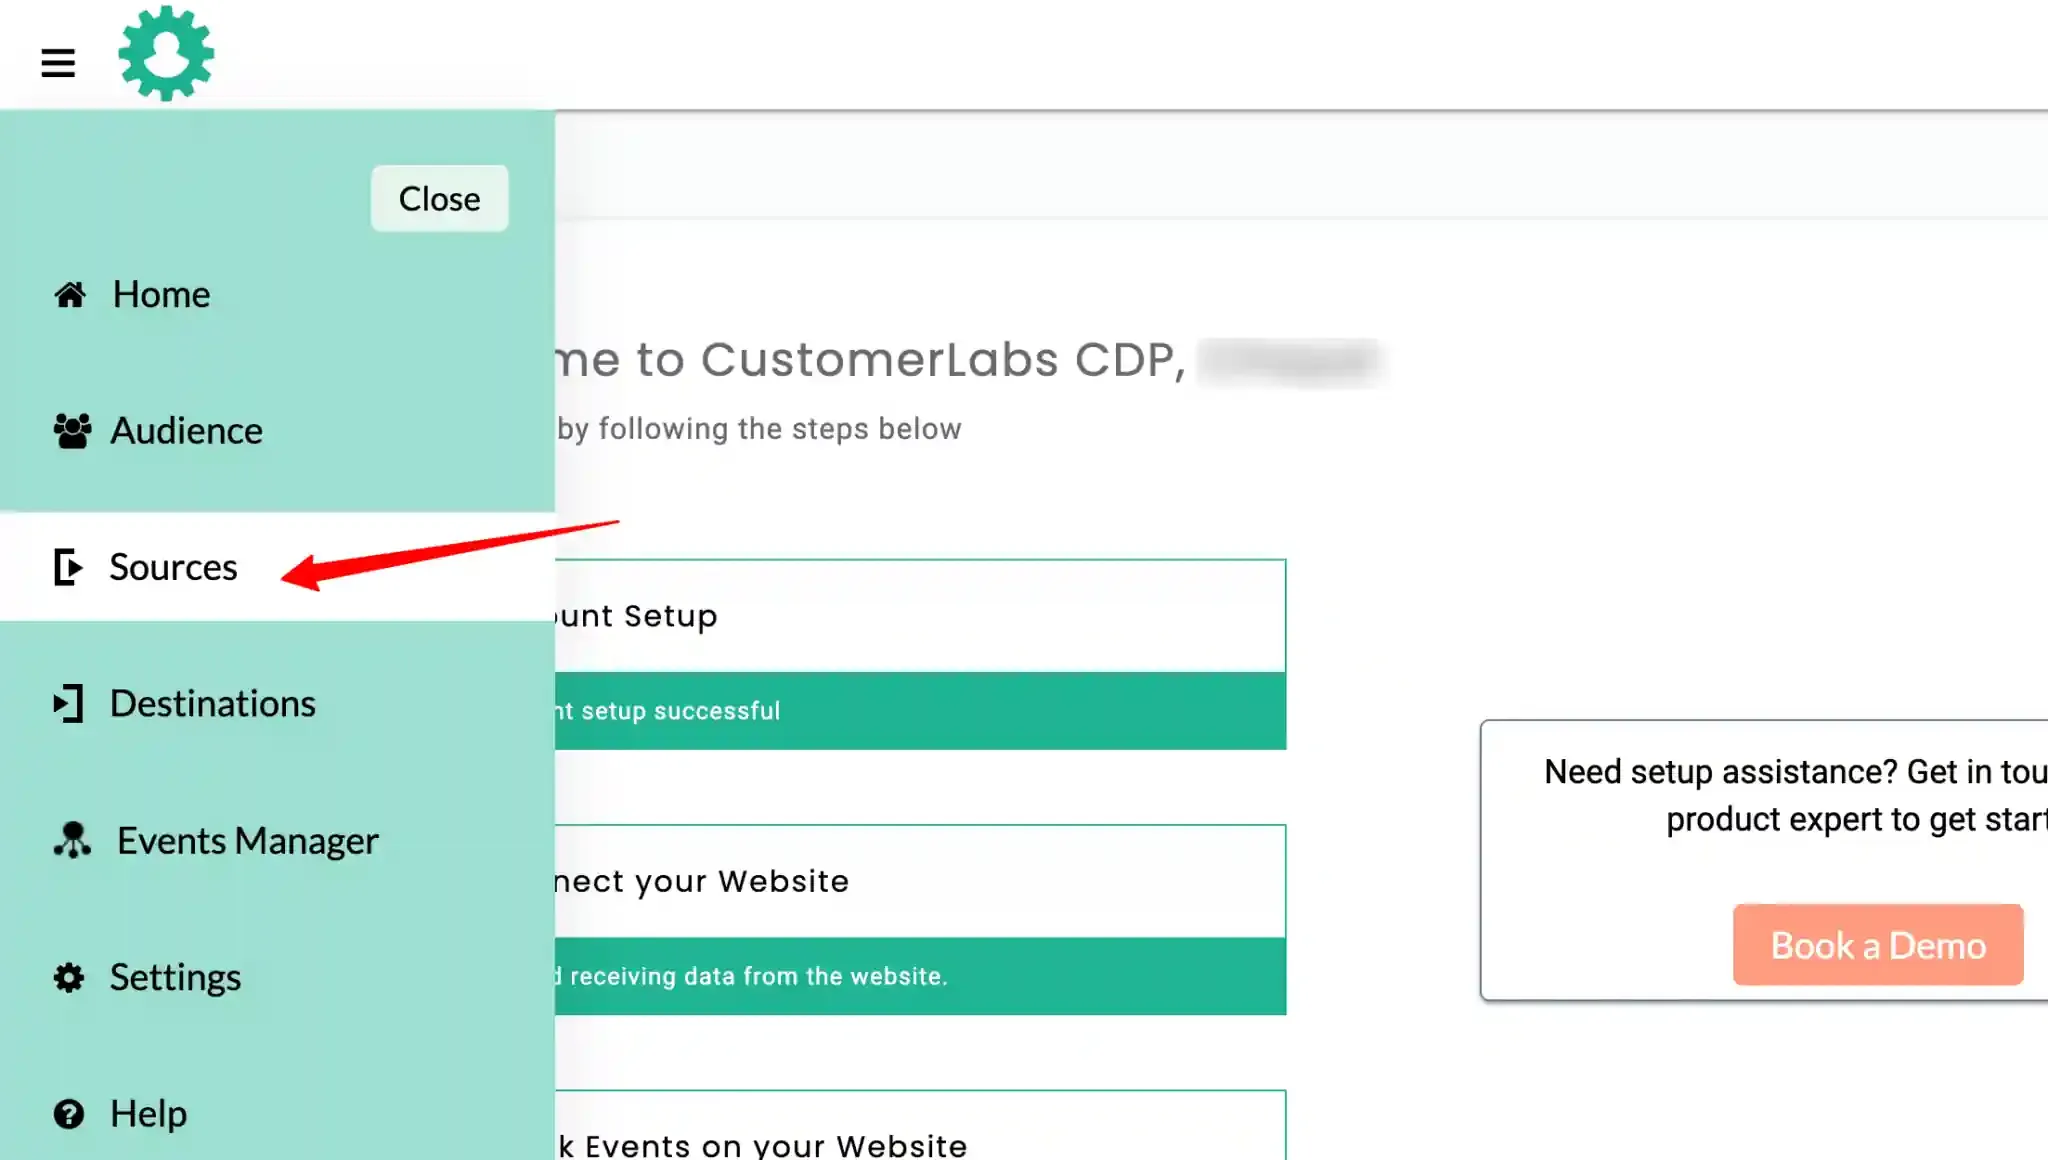
Section titled “Step 1: Connect Drift to CustomerLabs”- Log in to CustomerLabs 1PD Ops.
- Navigate to Sources.
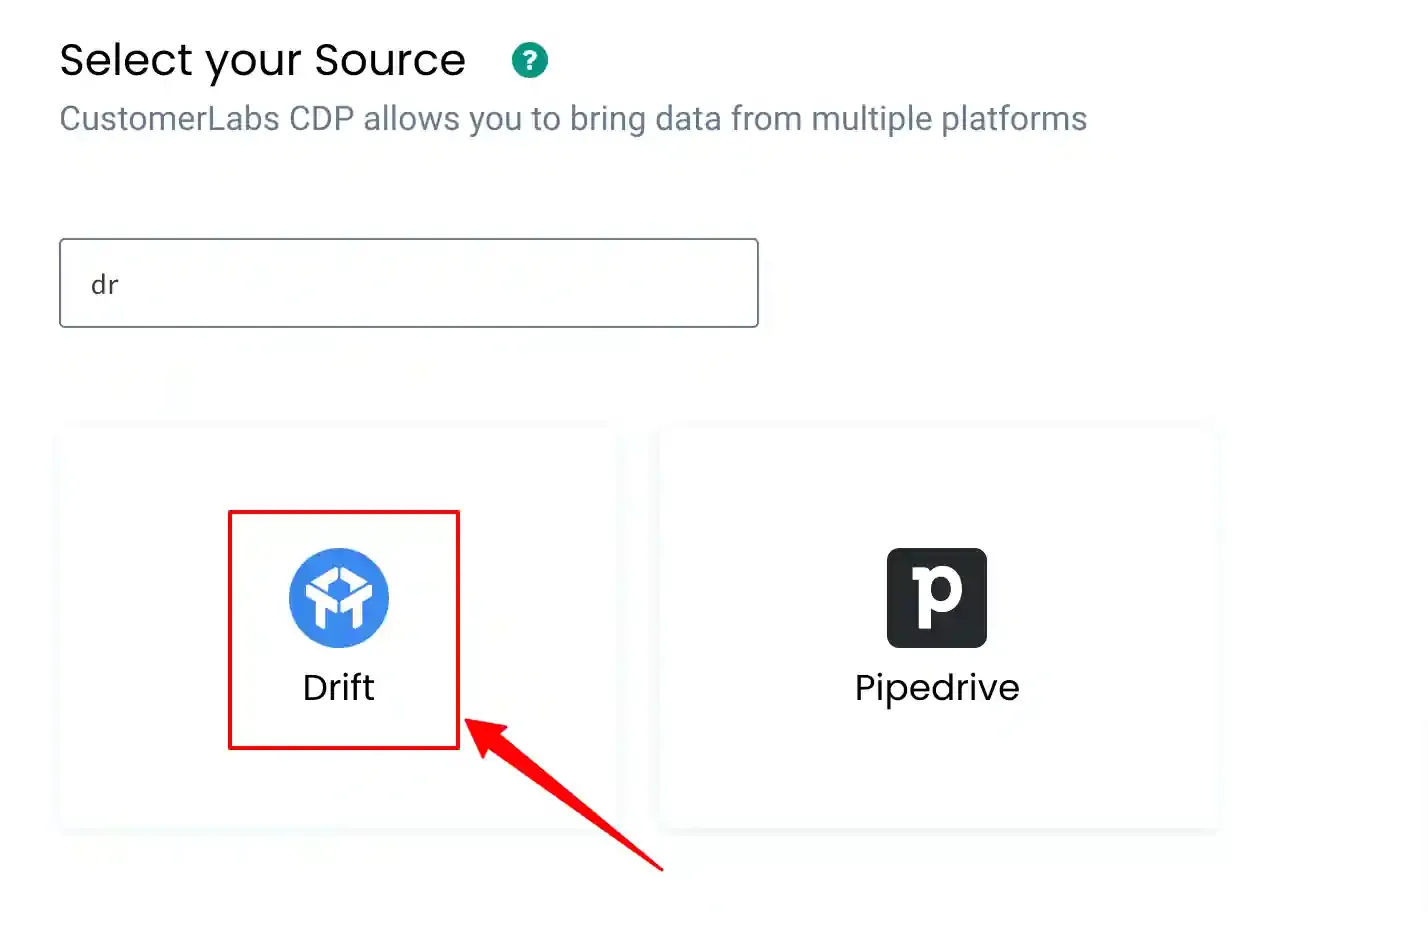
- Select Drift from the list of available sources.
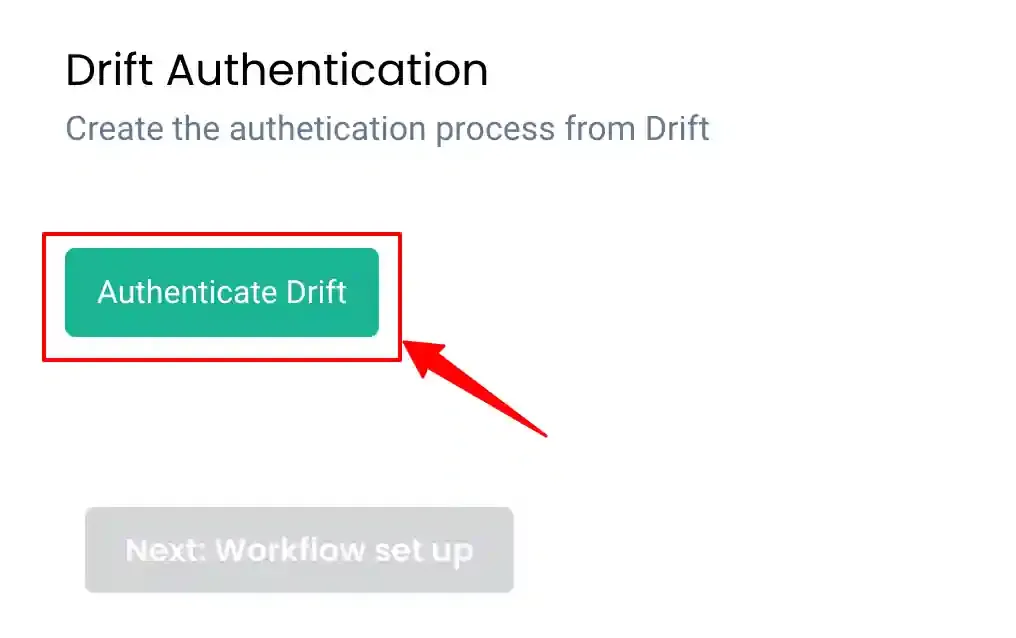
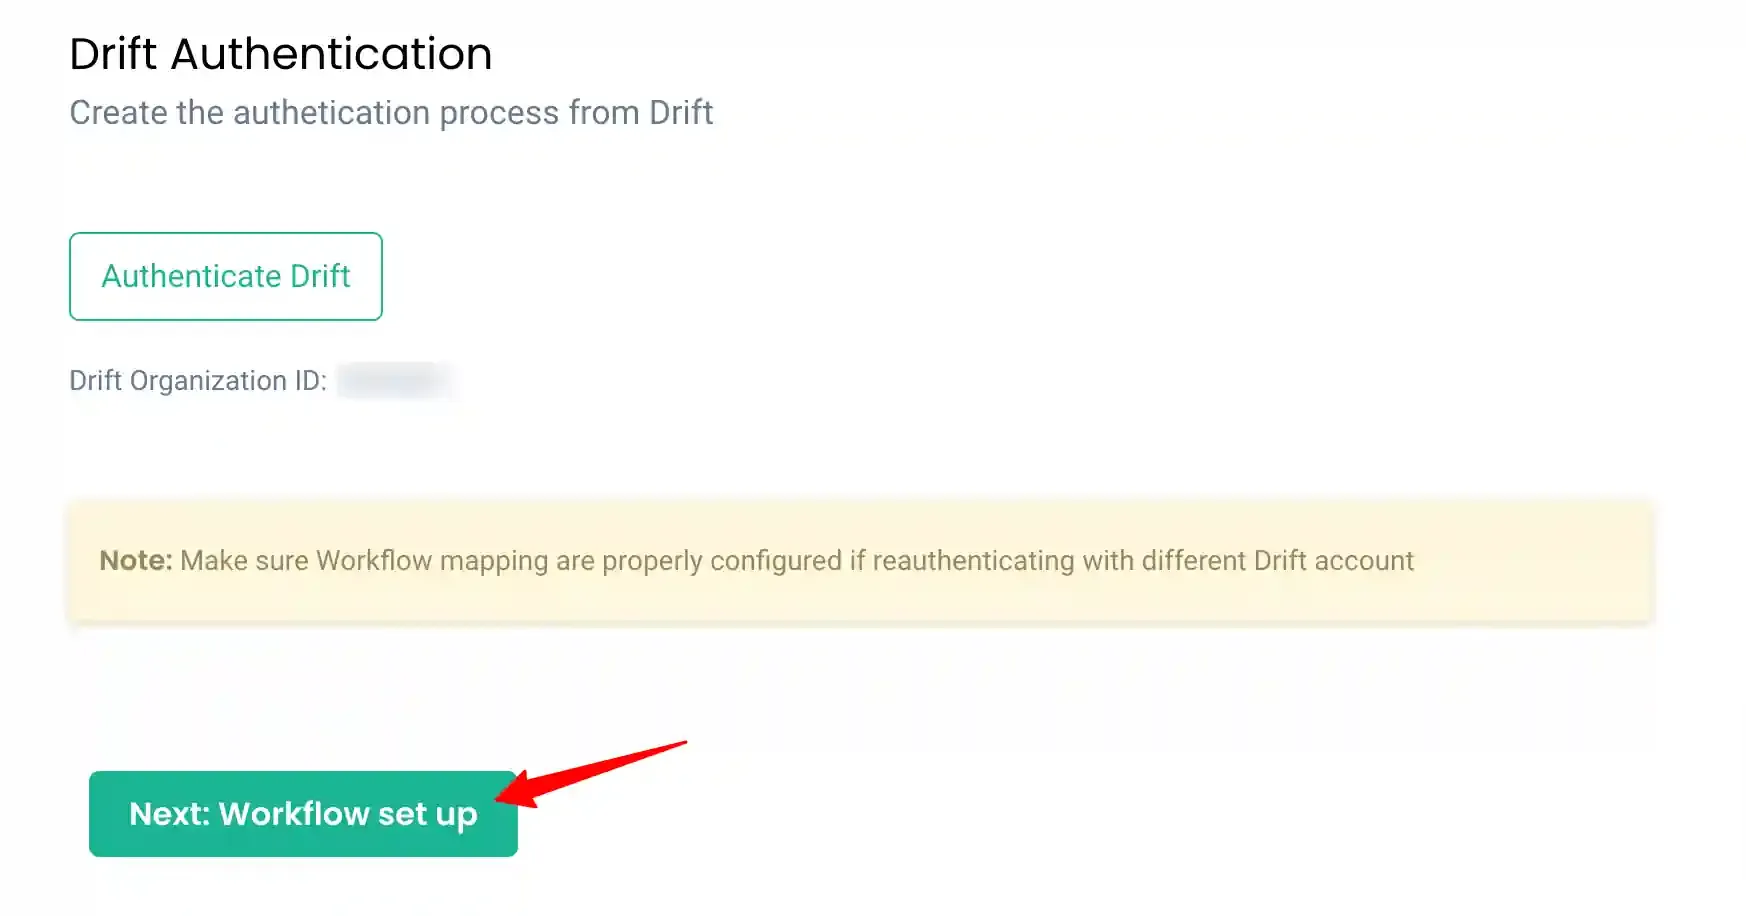
- Click on Authenticate Drift.
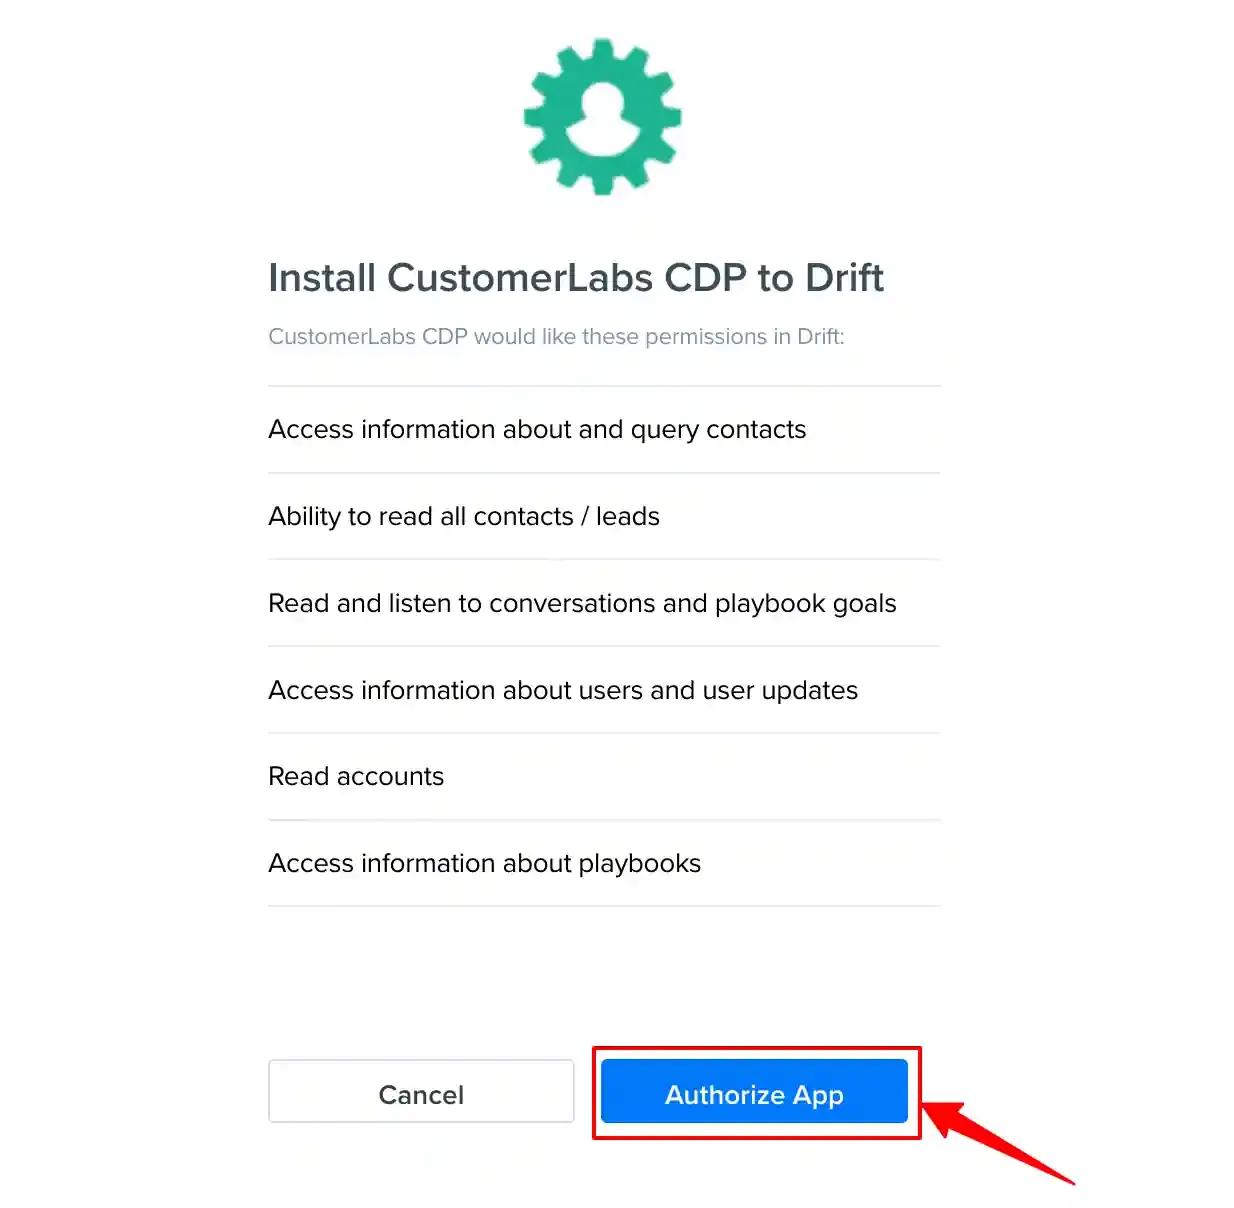
- You will be redirected to Drift:
- Log in to your Drift account.
- Authorize CustomerLabs to access your data.
- After authorization:
- Select the CustomerLabs account (if multiple accounts exist).
- Click Confirm.
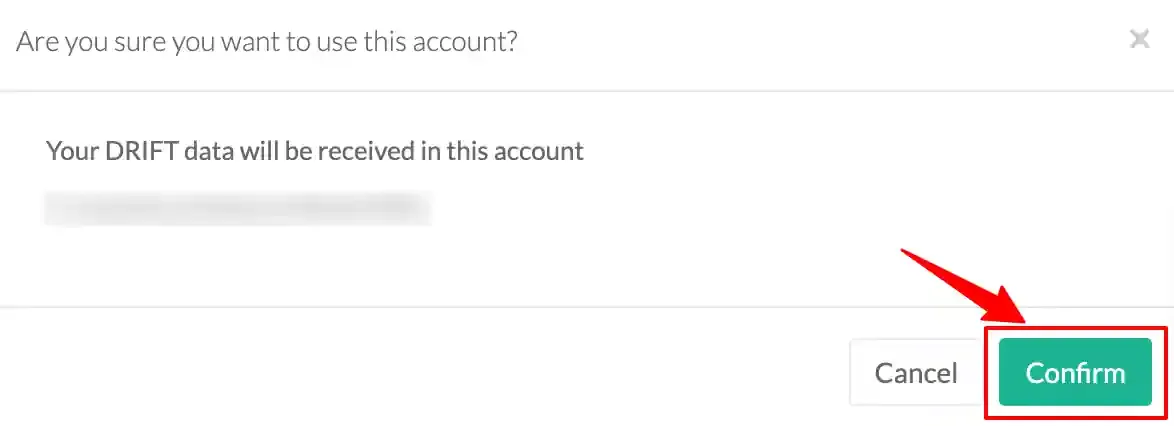
Success! Drift is now connected, and data will start flowing into CustomerLabs.
Click on Next: Workflow Setup to proceed.
Building Workflows in CustomerLabs
Section titled “Building Workflows in CustomerLabs”Workflows allow you to process incoming Drift data and convert it into meaningful events in real time.
Key Drift Event
Section titled “Key Drift Event”The primary event used is the Contact Update Subscriptions Webhook.
- Keeps CustomerLabs in sync with Drift contact updates.
- Works alongside the contact_identified webhook.
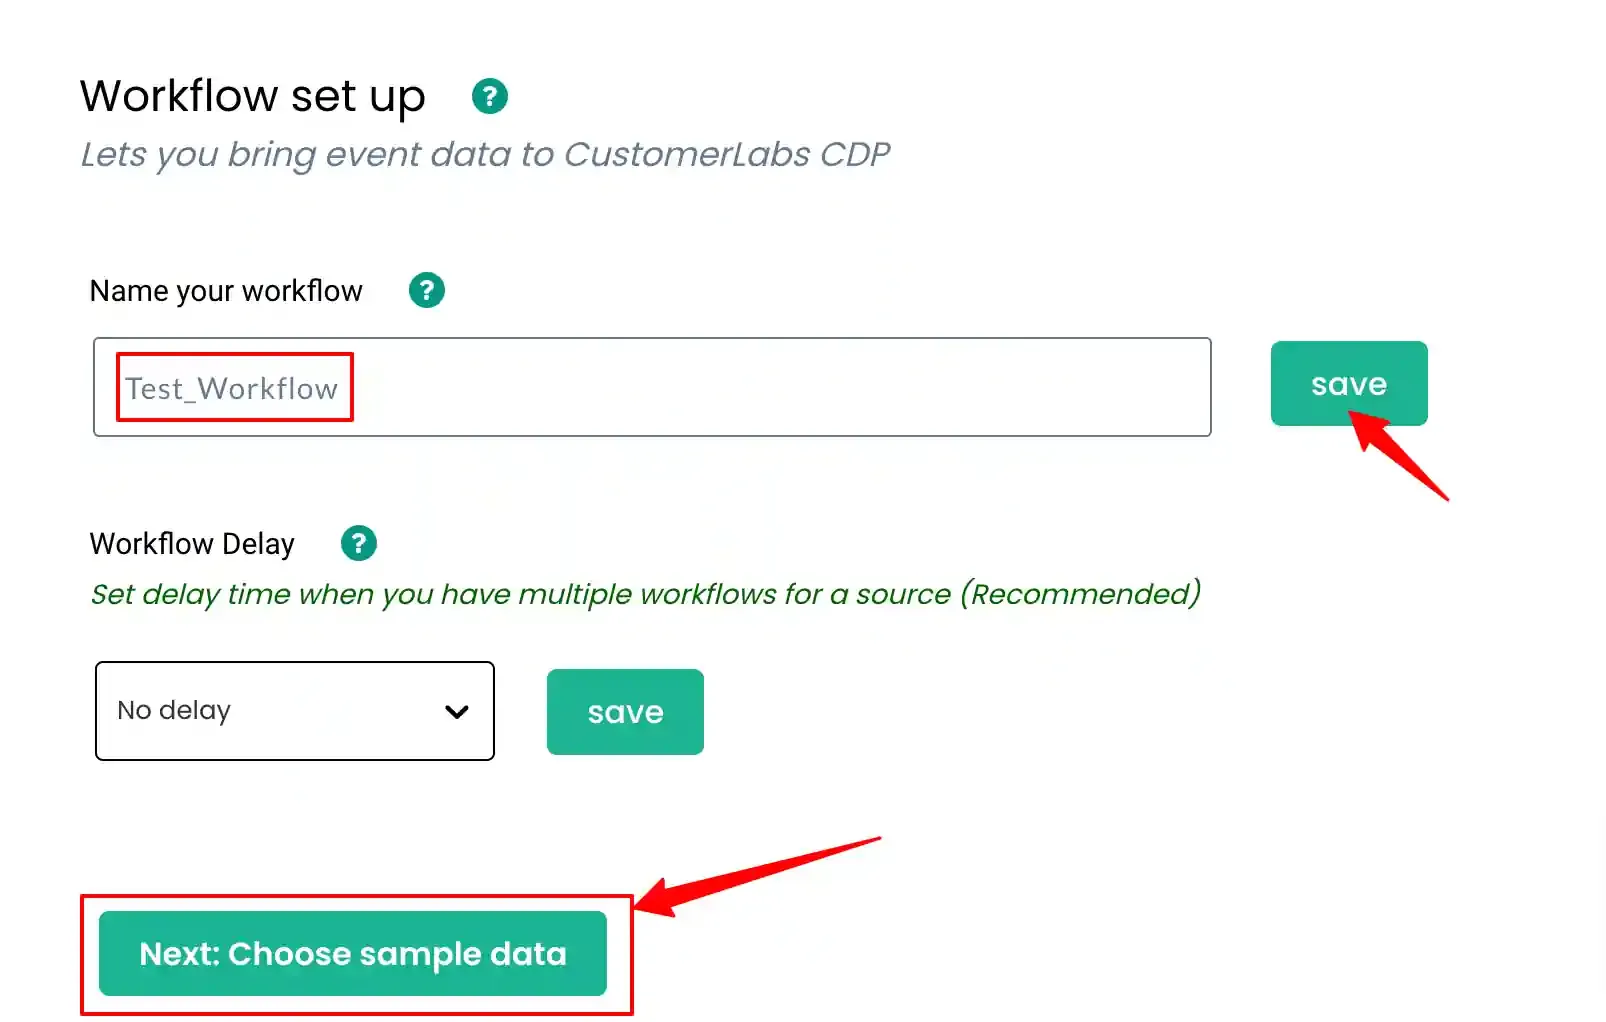
Workflow Setup: Capture Contact Data
Section titled “Workflow Setup: Capture Contact Data”Step 1: Create Workflow
Section titled “Step 1: Create Workflow”- Provide a workflow name (e.g.,
contact_updated). - Create a test contact in Drift to generate sample data.
- Click on Choose Sample Data.
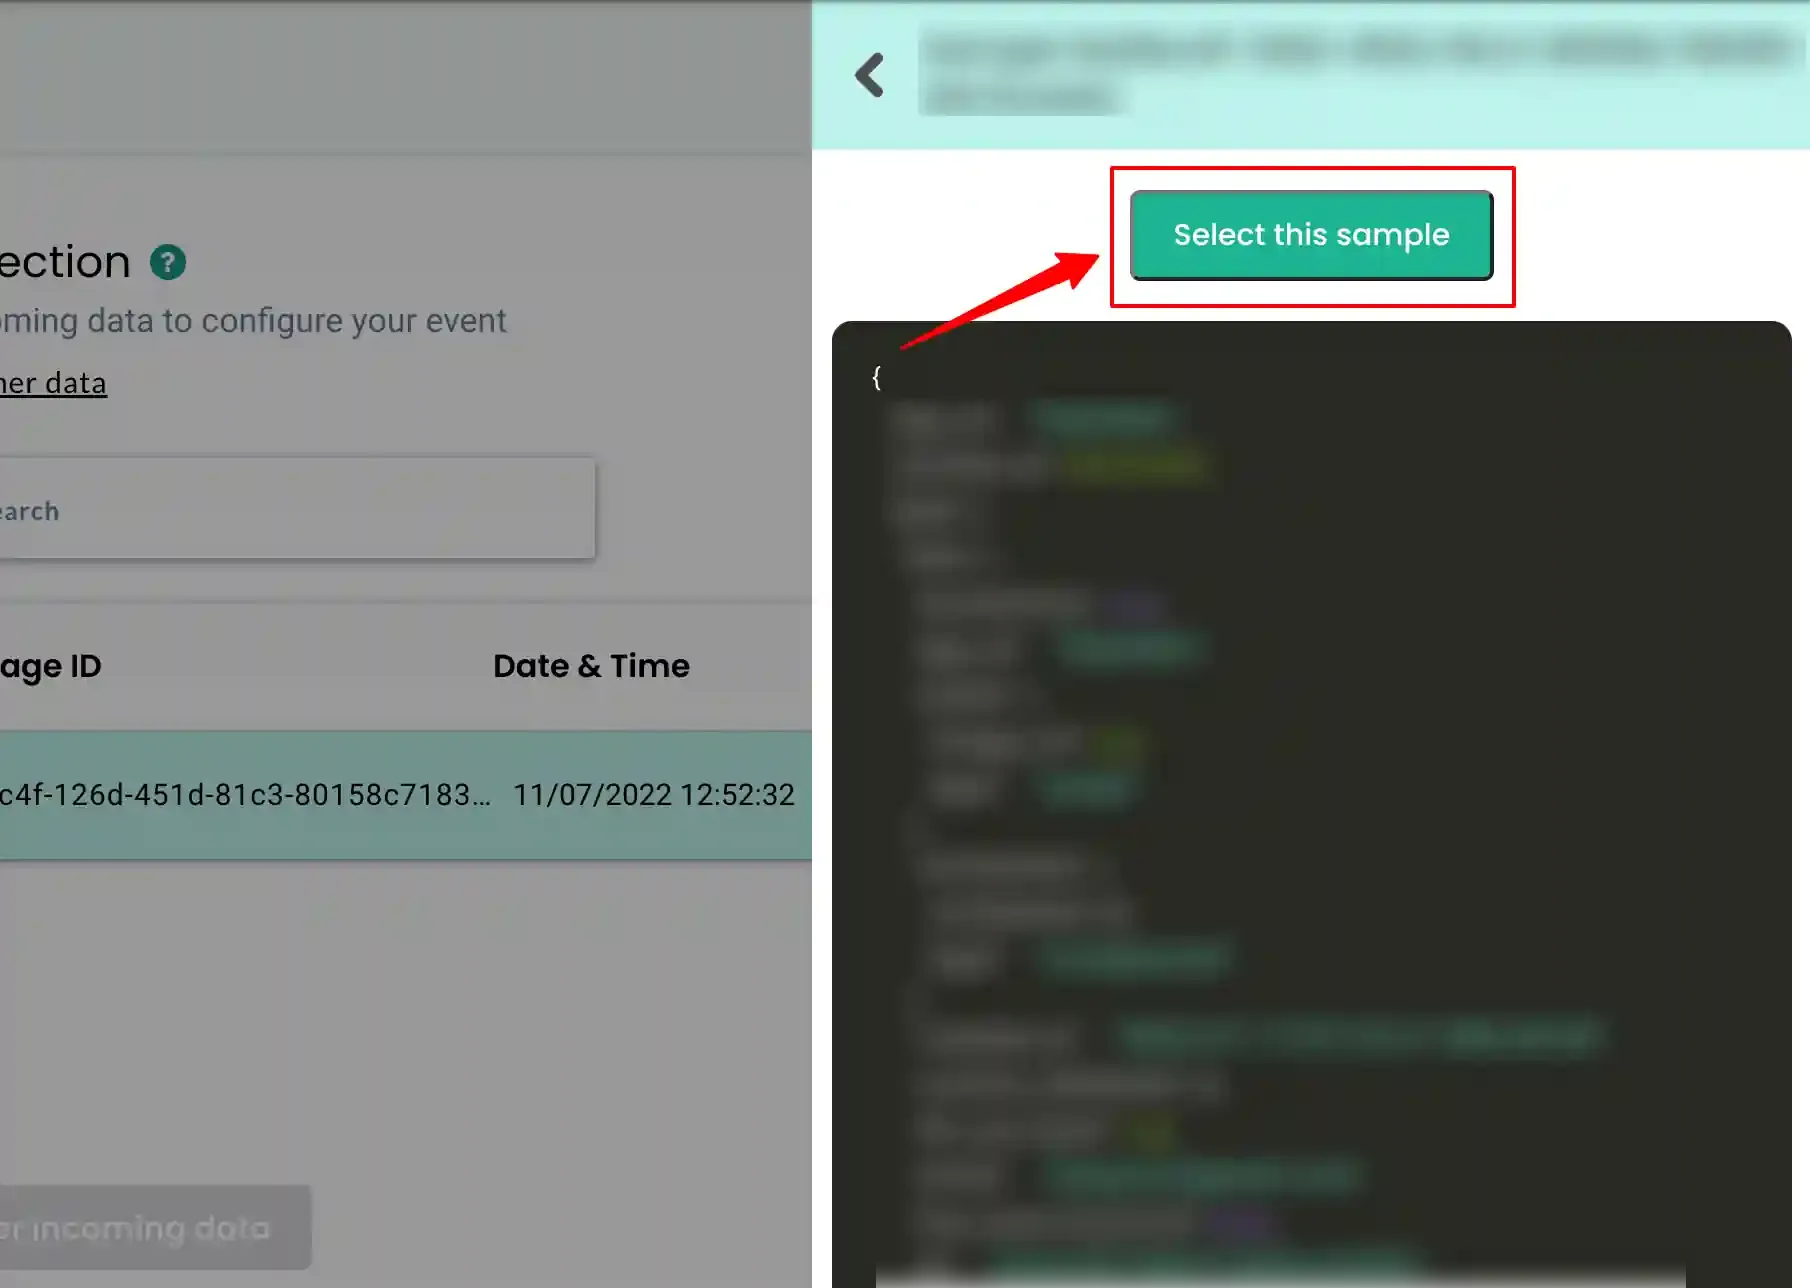
Step 2: Select Sample Data
Section titled “Step 2: Select Sample Data”- View incoming event samples.
- Click View Details to inspect data.
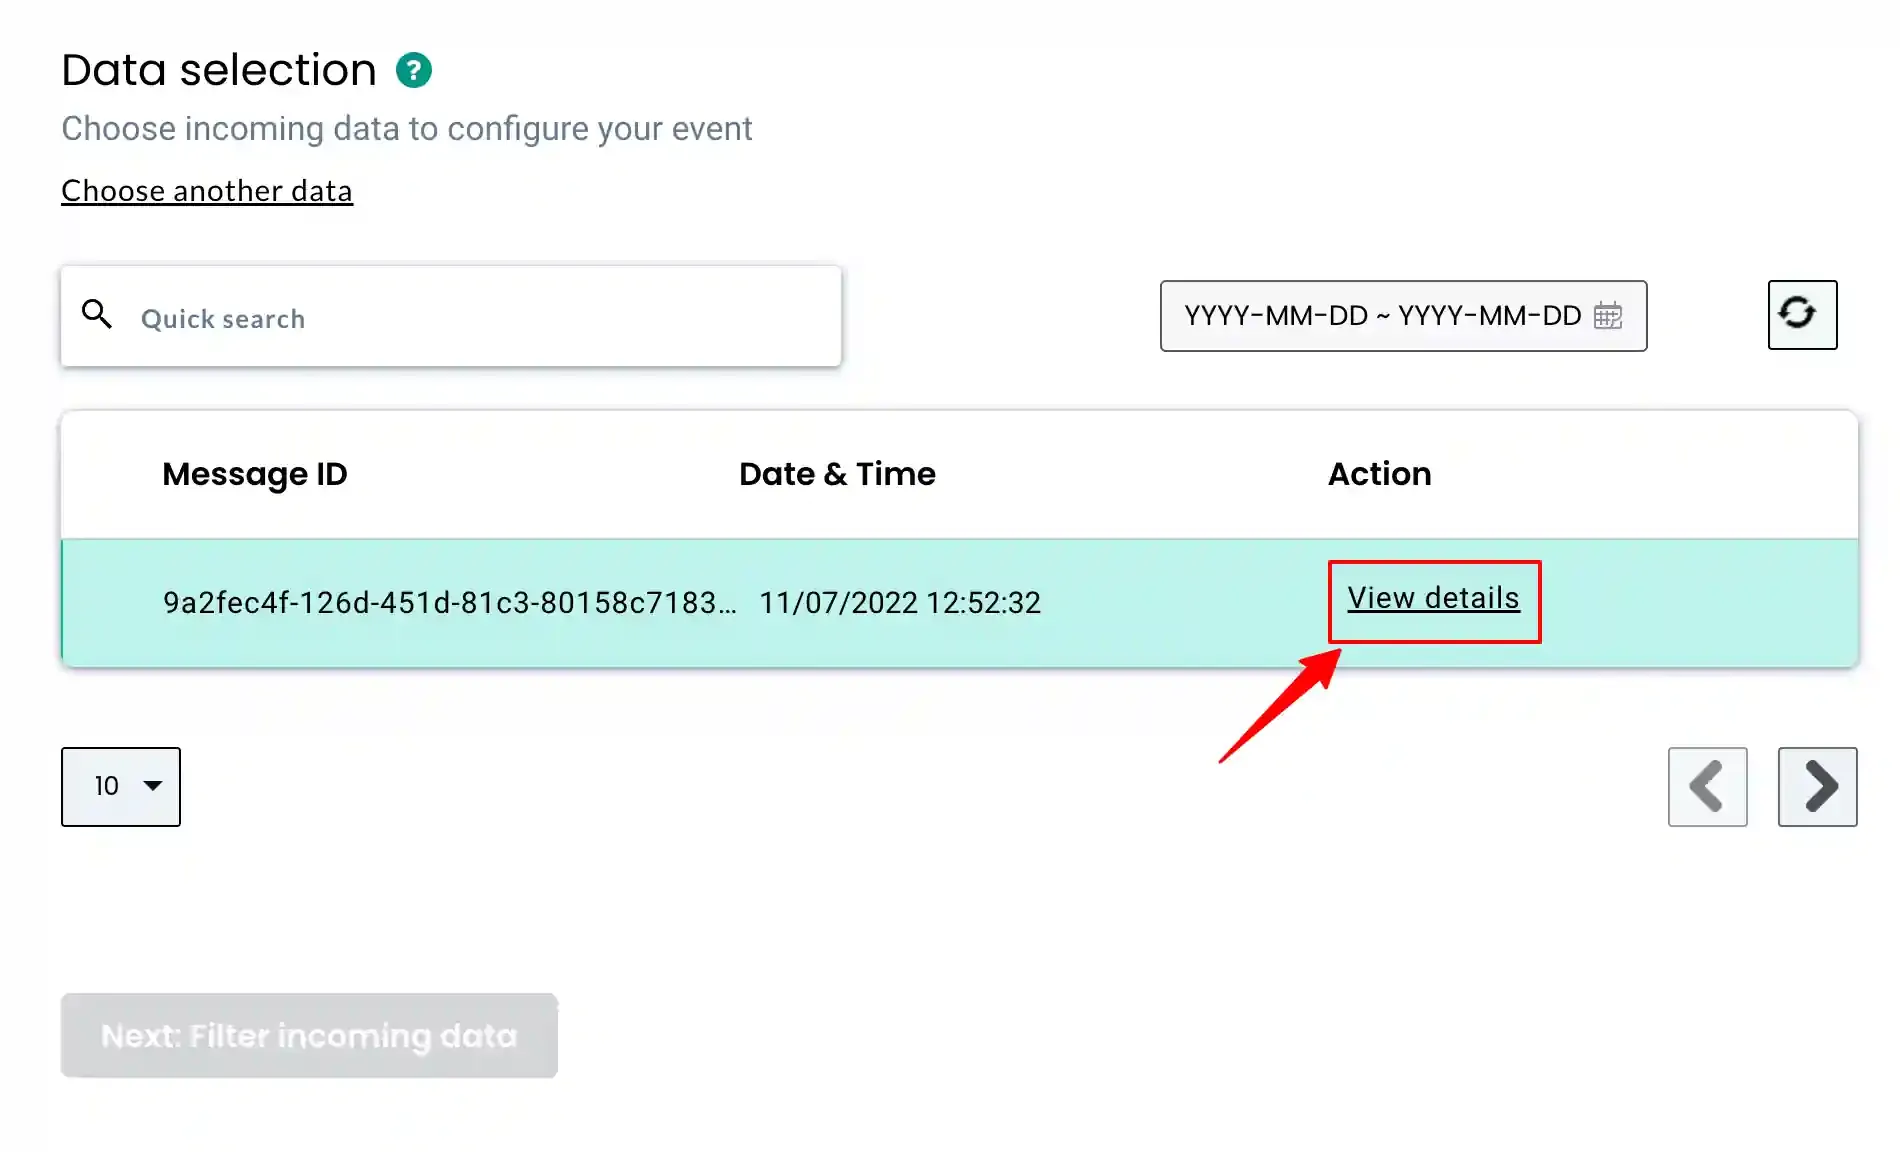
- Choose the most relevant sample.
- Click Select this sample.
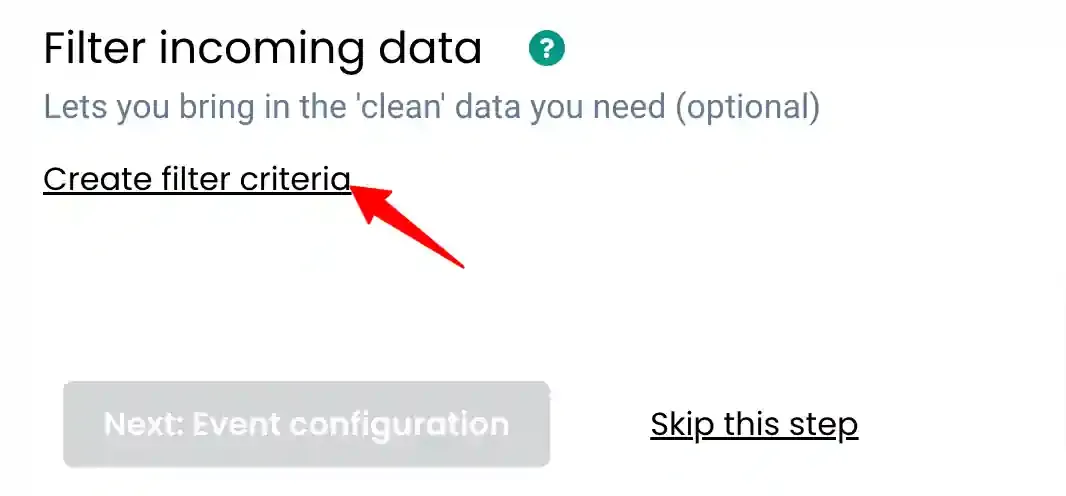
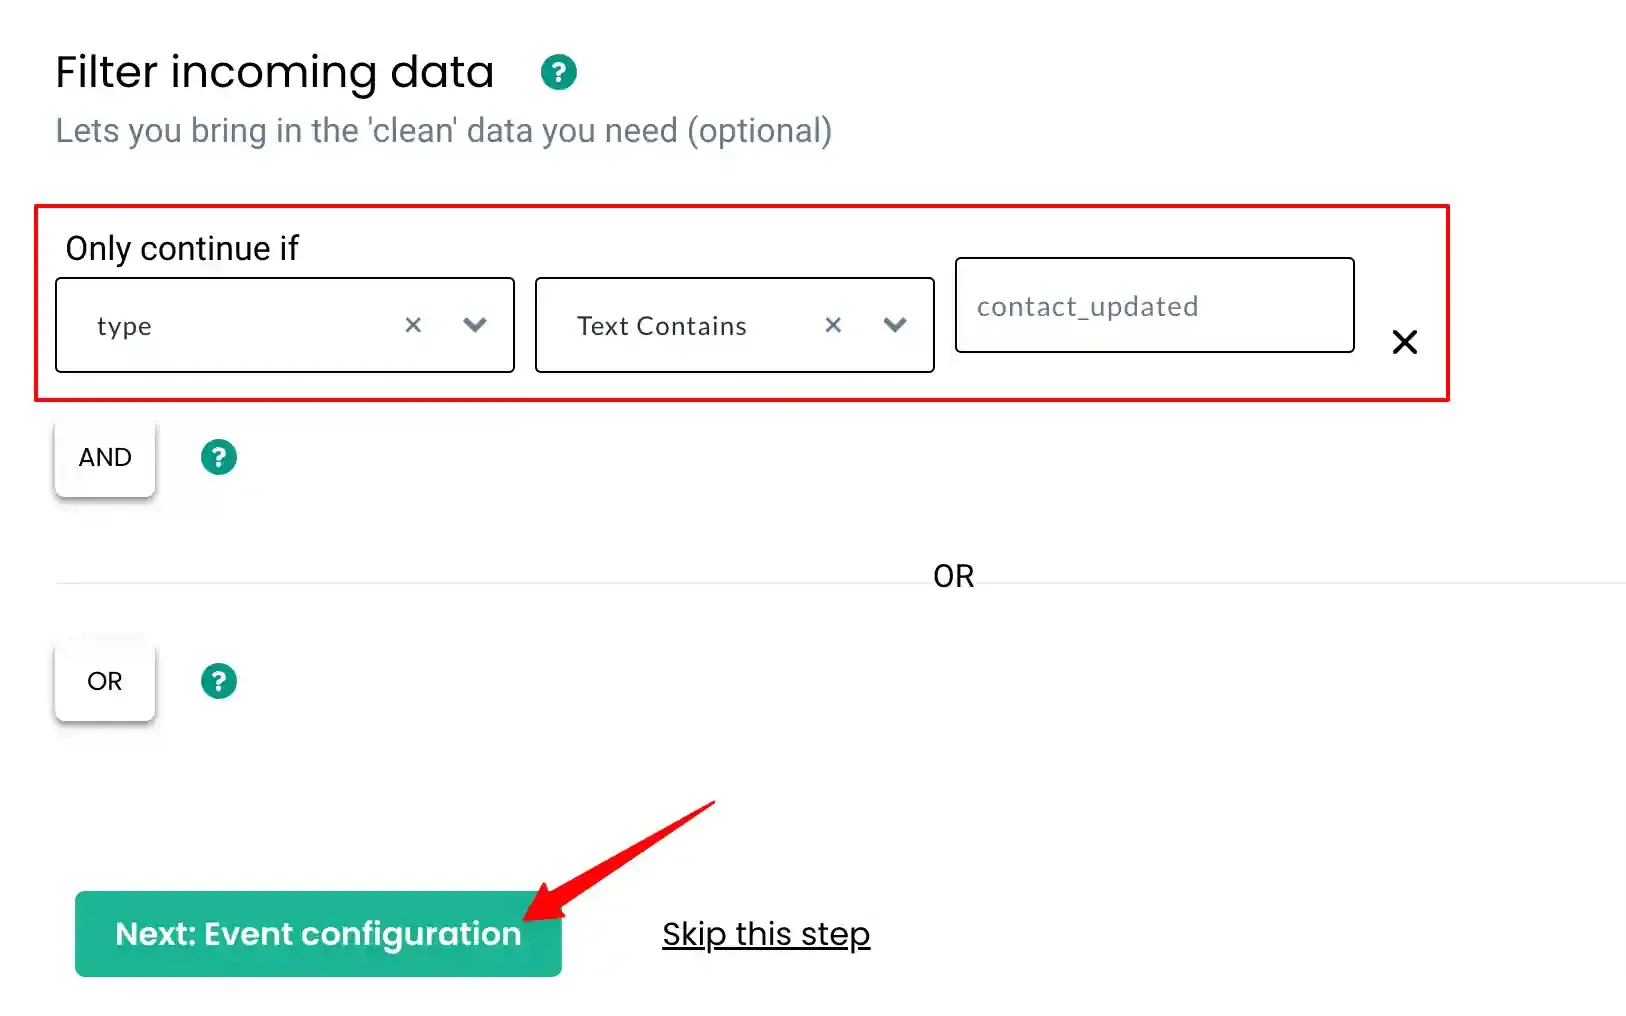
Step 3: Apply Filters
Section titled “Step 3: Apply Filters”- Click on Create Filter Criteria.
- Set conditions to allow only relevant events (e.g.,
contact_updated).
This ensures irrelevant data does not affect your workflows.
Step 4: Choose Event Type
Section titled “Step 4: Choose Event Type”- Select the event type from the dropdown.
- Click Next: Event Configuration.
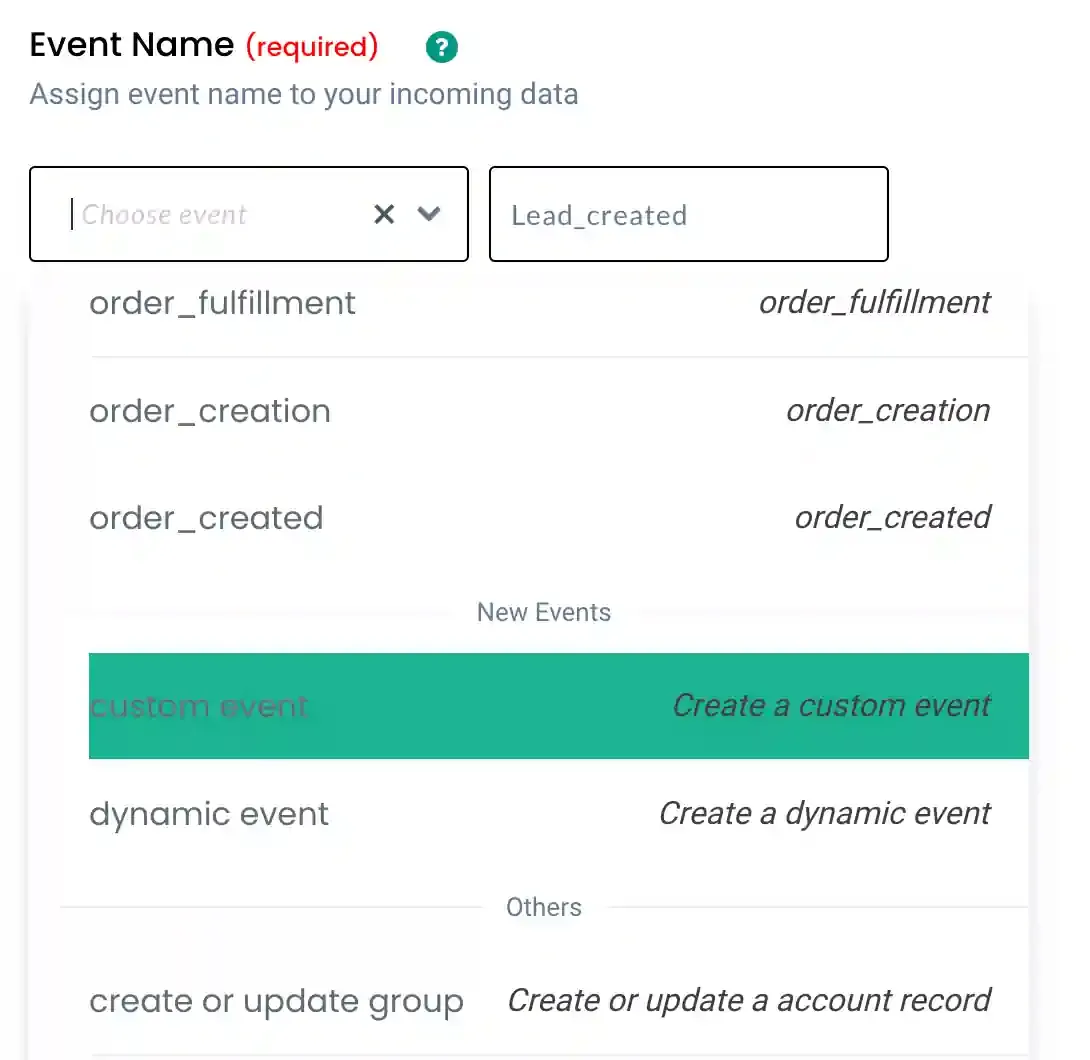
Step 5: Event Configuration
Section titled “Step 5: Event Configuration”Event Naming
Section titled “Event Naming”Choose from the following:
- Dynamic Event (uses incoming event name)
- Custom Event (define your own name)
- Predefined event
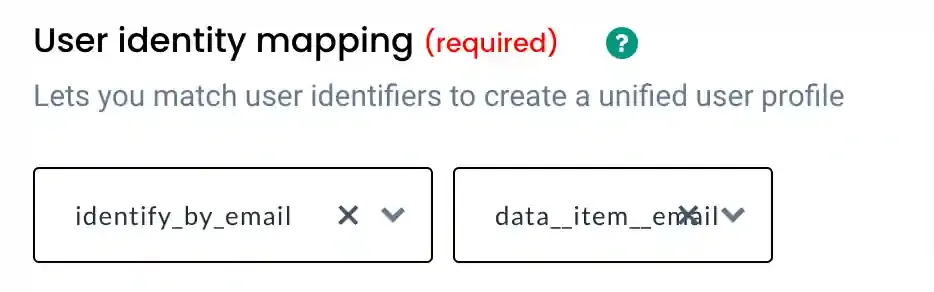
Step 6: User Identity Mapping
Section titled “Step 6: User Identity Mapping”- Map a unique identifier (e.g., email).
- This ensures proper user identification and data unification.
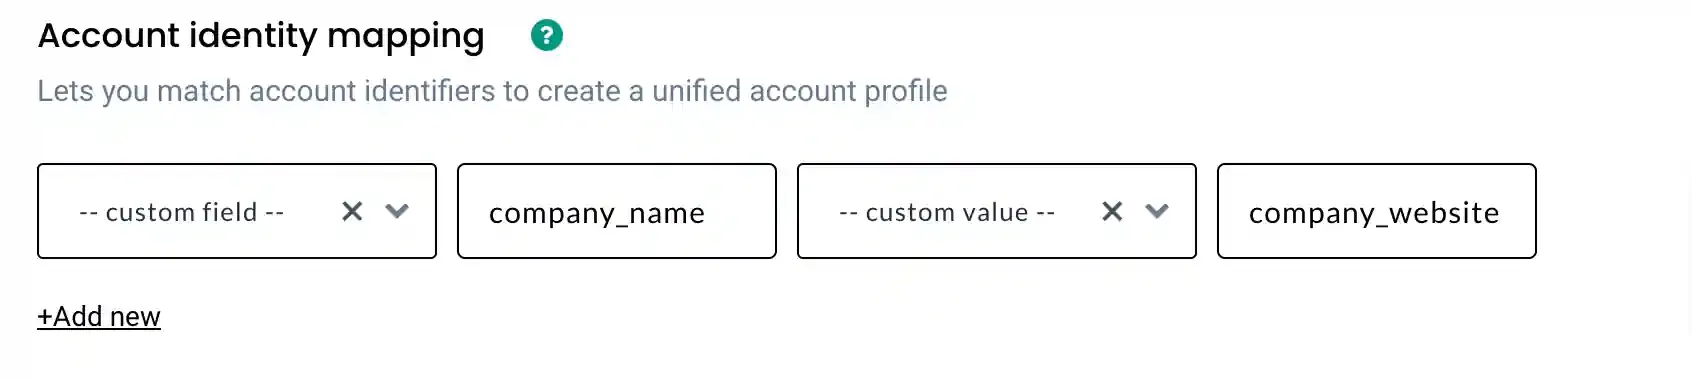
Step 7: Account Identity Mapping (Optional)
Section titled “Step 7: Account Identity Mapping (Optional)”- Map company-level identifiers (e.g., company name, website).
- Useful for B2B use cases.
Step 8: Attribute Mapping
Section titled “Step 8: Attribute Mapping”Map incoming data into:
- User traits
- Event properties
- Account attributes
Click Save Workflow once completed.

Destinations
Section titled “Destinations”You can send processed data from CustomerLabs to ads platform. This helps improve targeting and campaign performance.
Need Assistance?
Section titled “Need Assistance?”If you have any questions or need help with setup, feel free to reach out—we’re happy to assist you!