Setting up 1P Domain Tracking
Once you have subscribed to 1P Domain Tracking, you need to configure your domain settings depending on where your website is hosted.
Initial Steps
Section titled “Initial Steps”- Go to the account for which you’ve subscribed to 1P Domain Tracking.
- Navigate to Account Settings → 1P Domain Tracking and click + Add new domain.
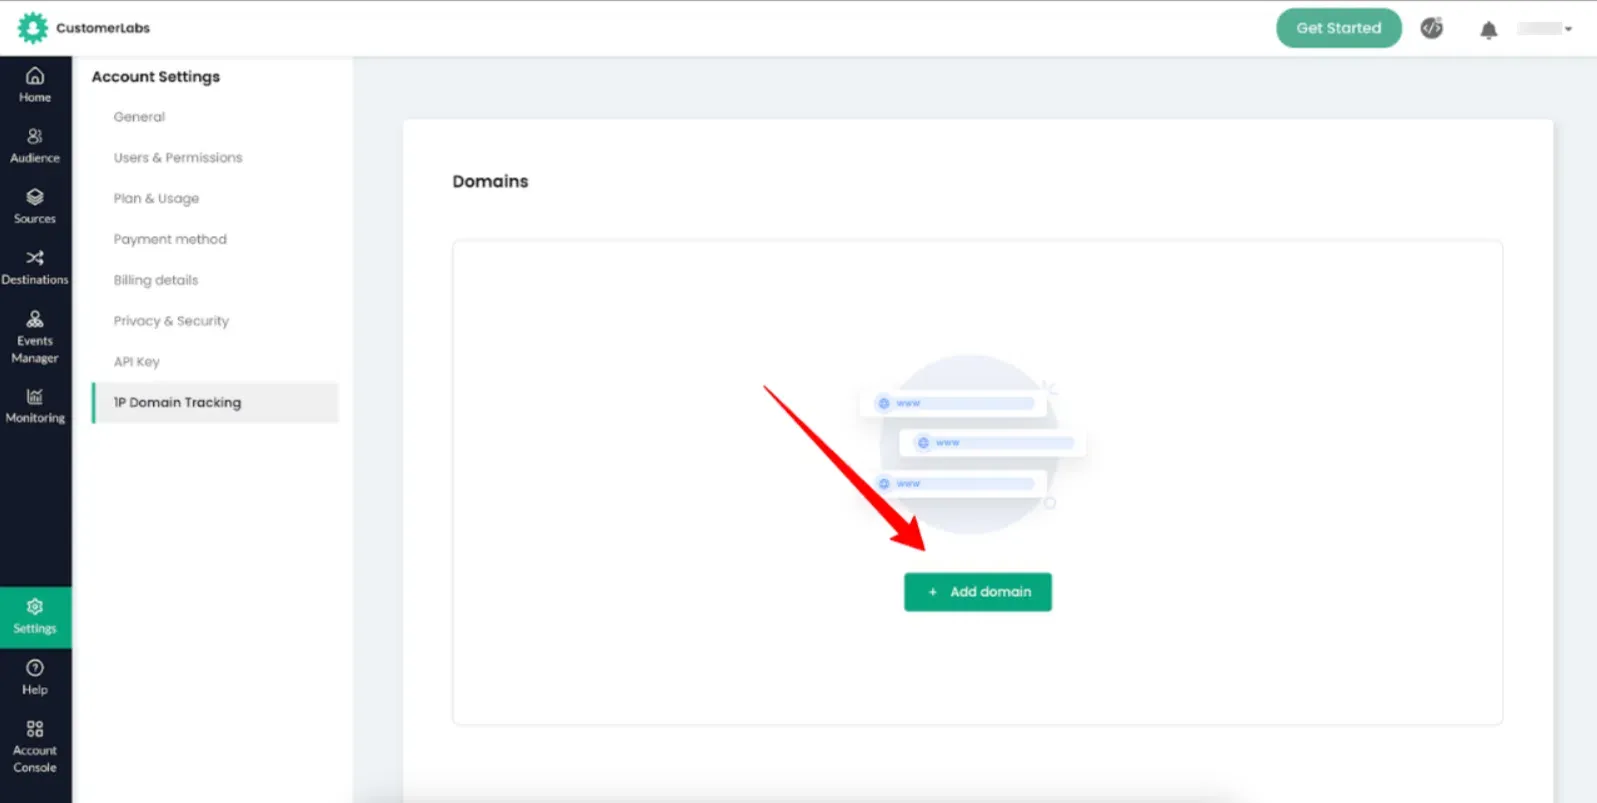
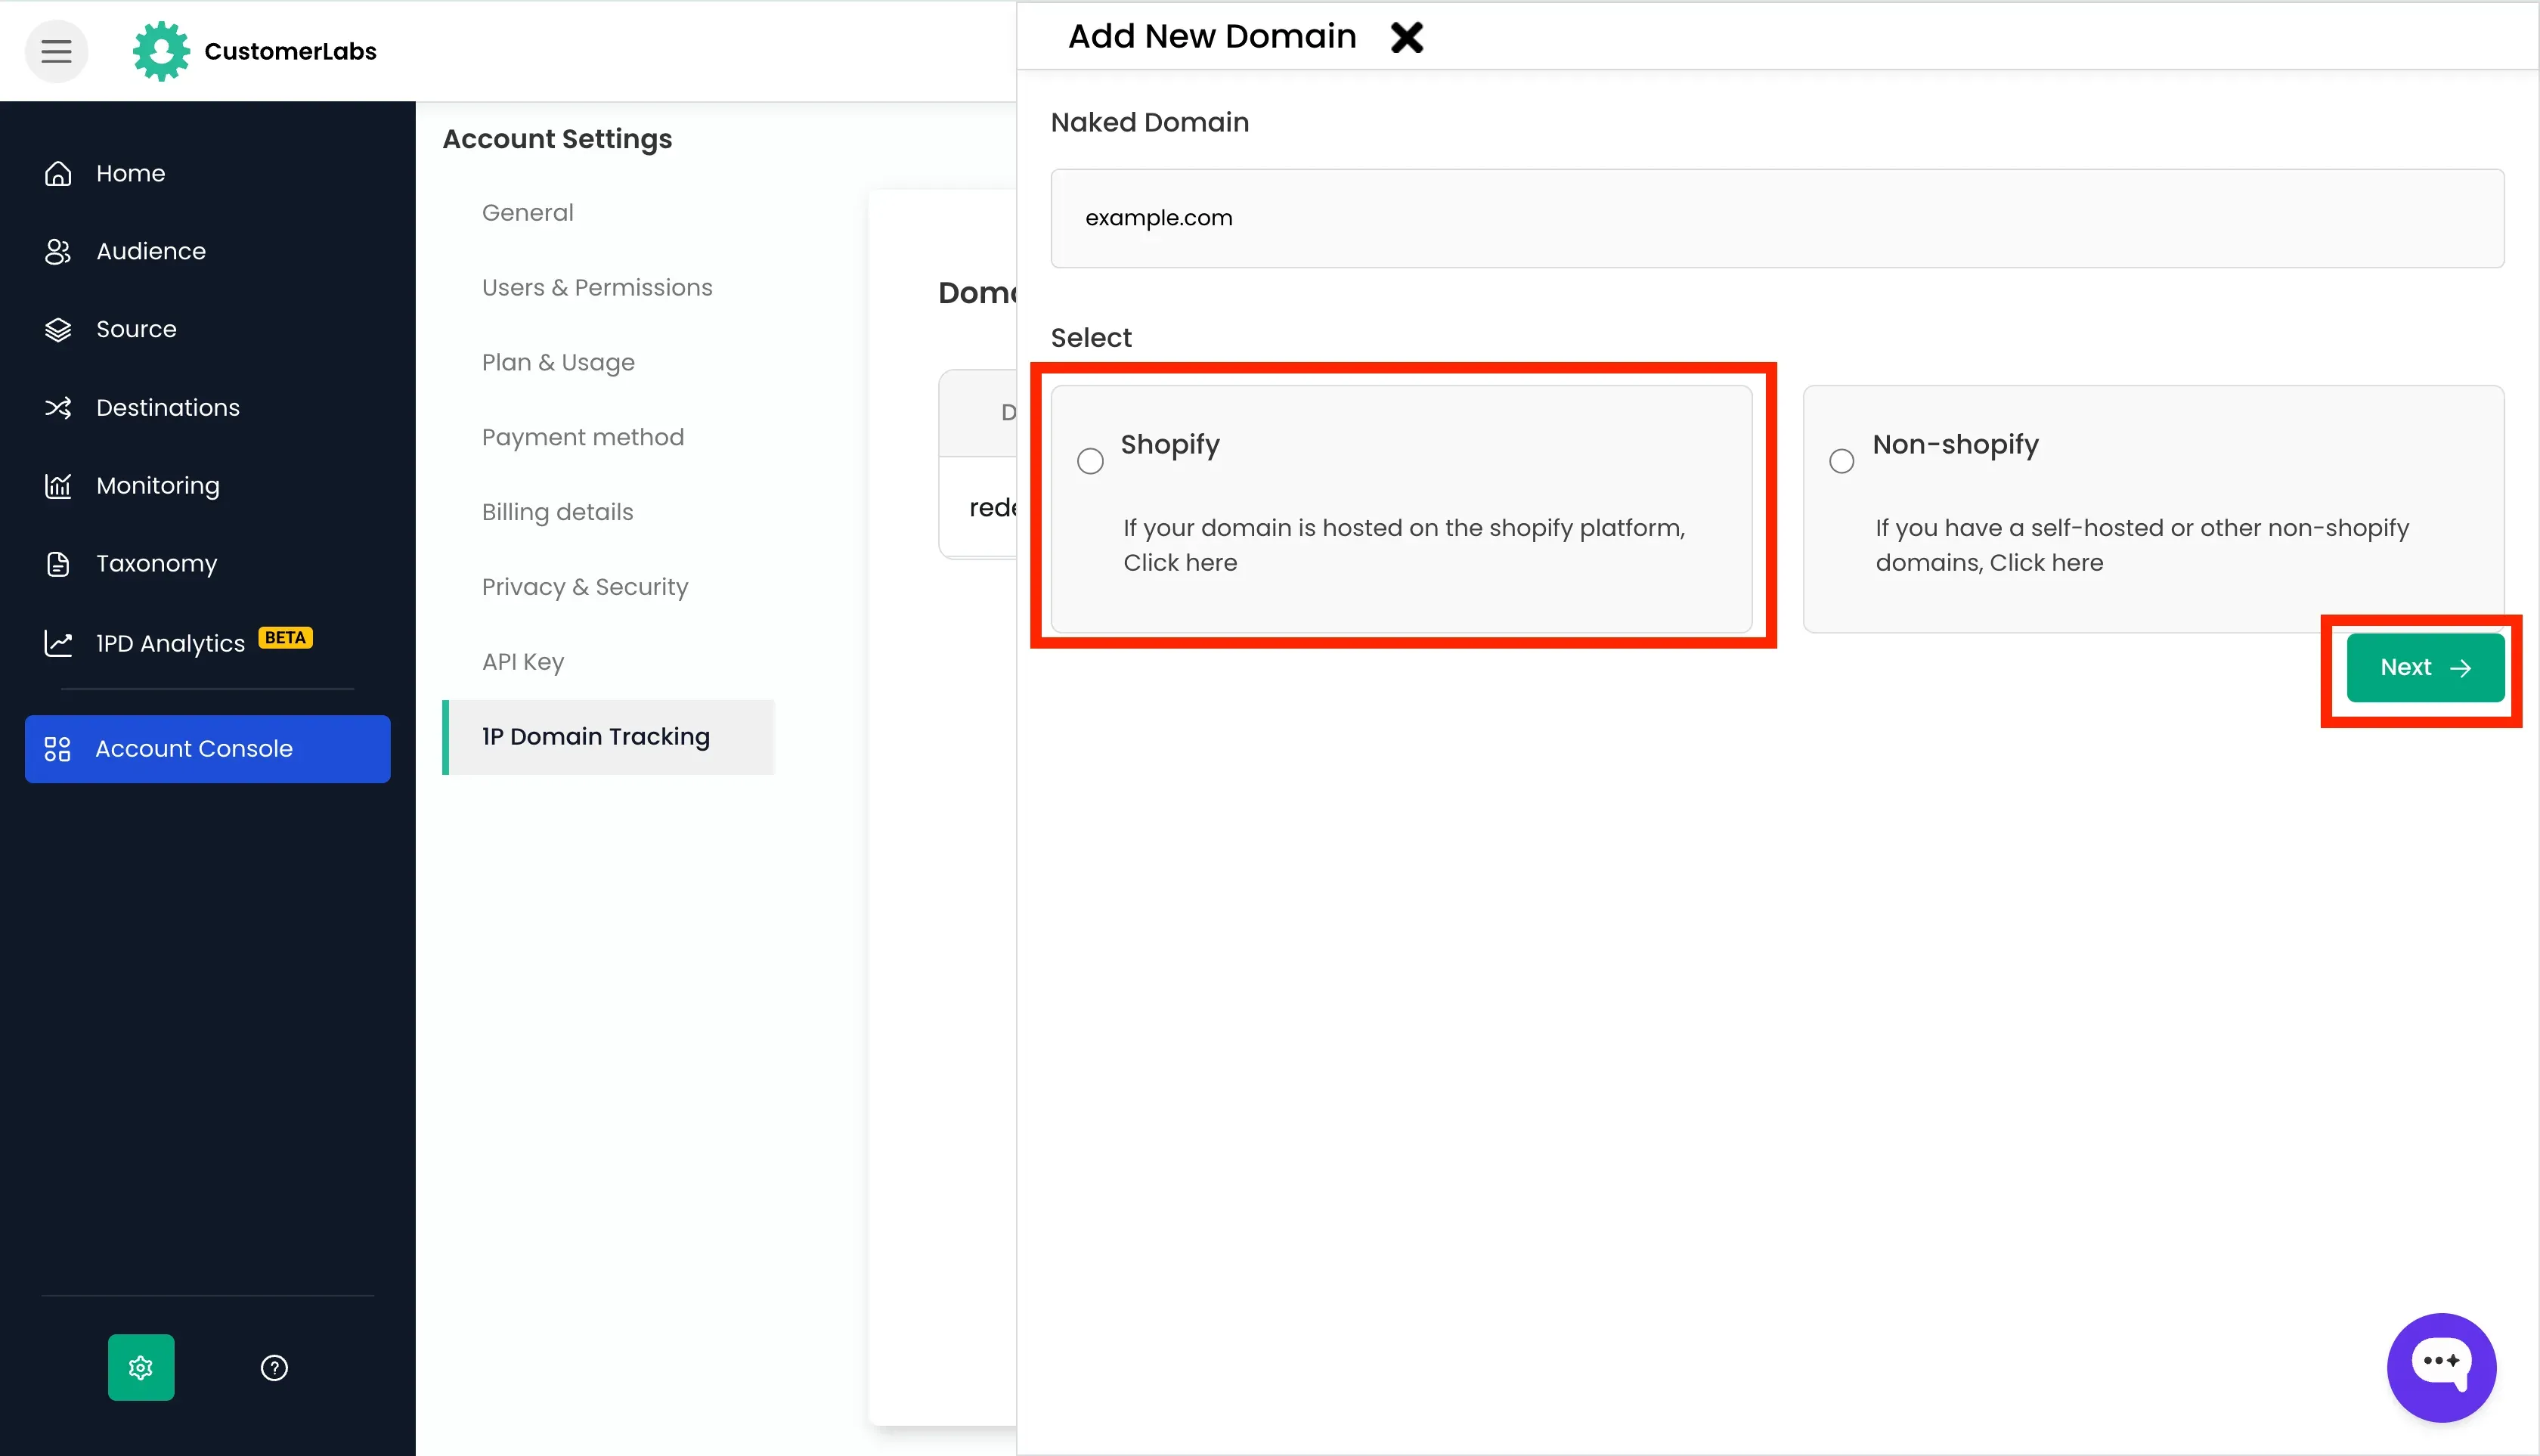
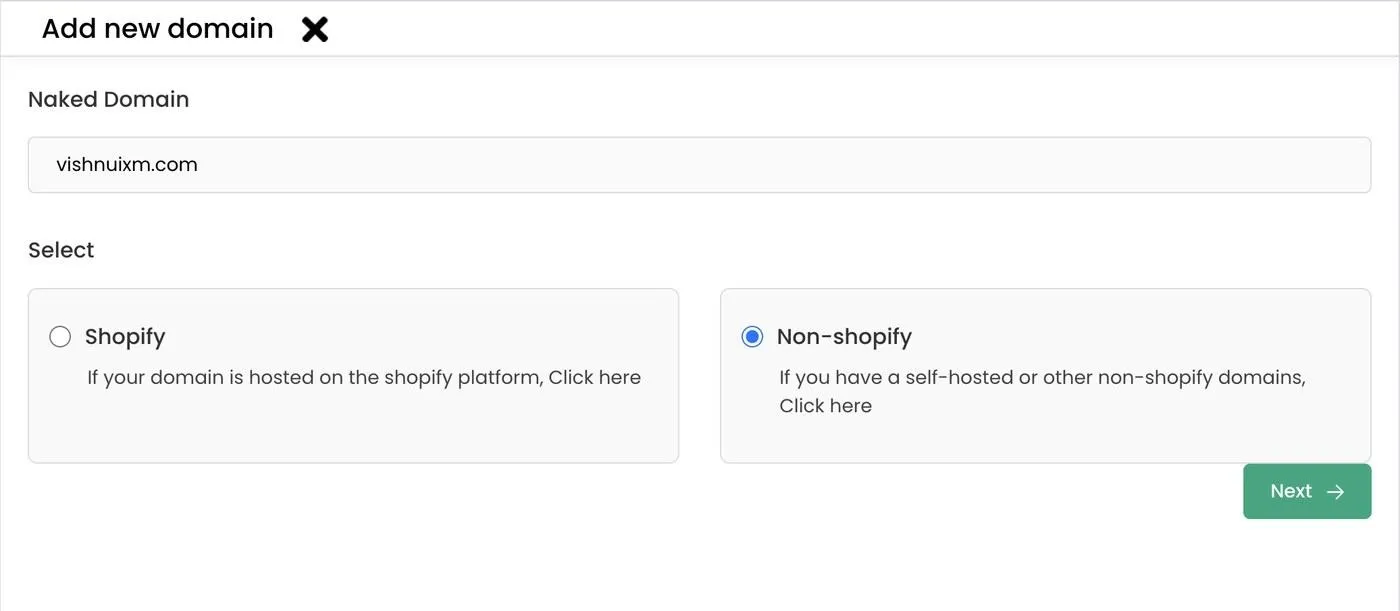
- Add a Naked Domain by entering the domain name without
http://,https://, orwwwand choose whether your website is a,
- Shopify hosted website
- Non-shopify hosted website
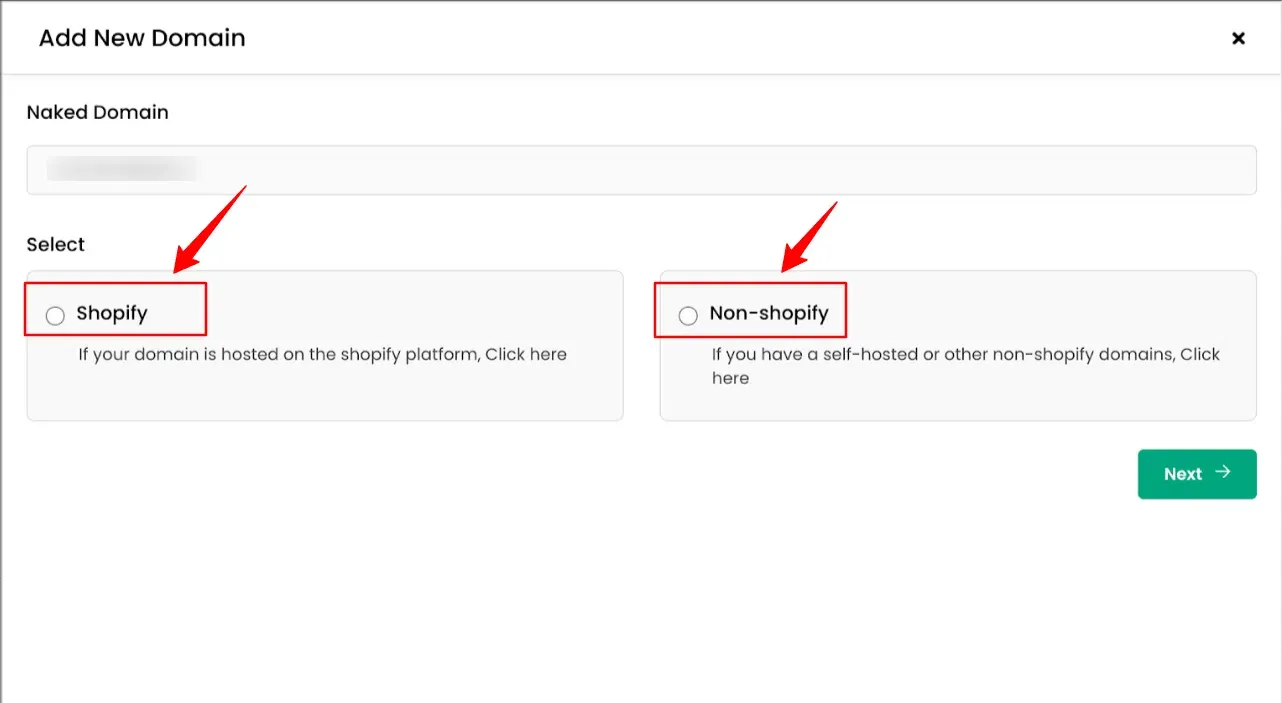
- Click Next.
Depending on your website platform, choose the appropriate setup procedure below.
Shopify Hosted Websites
Section titled “Shopify Hosted Websites”If your website/domain is hosted on the Shopify, follow these steps:
-
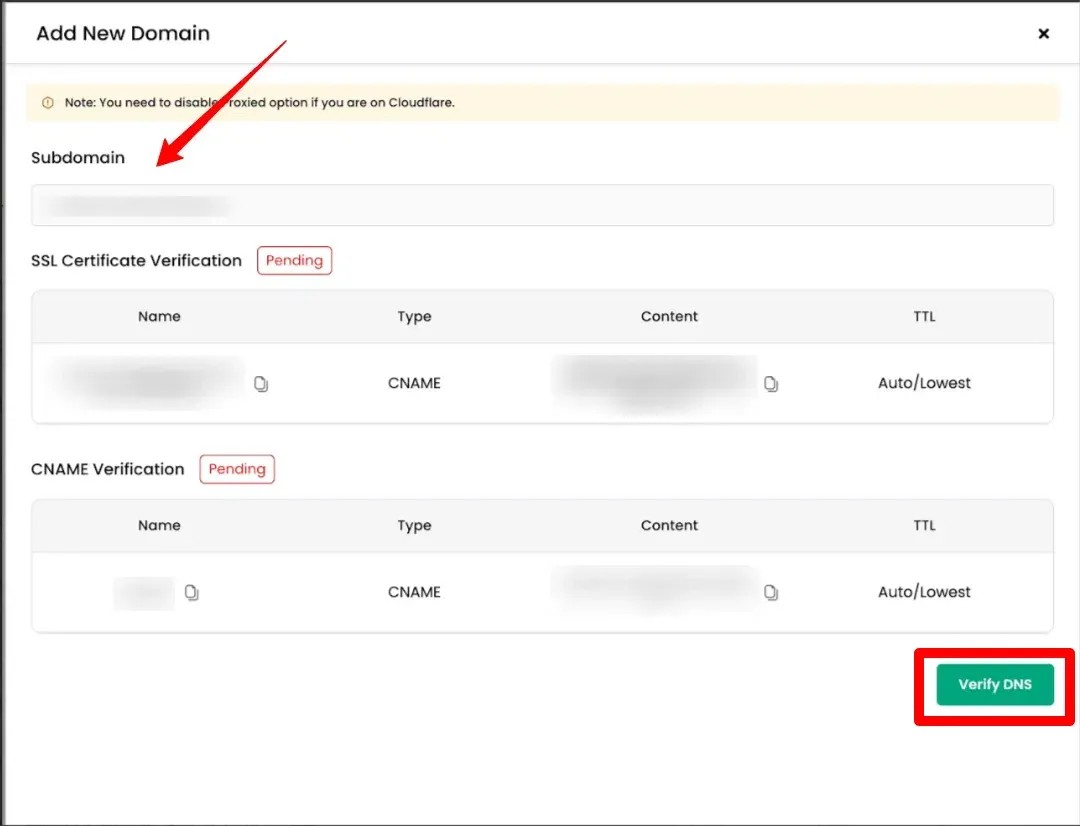
After the naked domain is added, the subdomain is auto-populated with other necessary details.
-
Log in to your DNS (Domain Name System) provider, Verify the
CNAMEandSSLcertificates. -
After the CNAME and SSL Certificate are added to your DNS provider, return to CustomerLabs and click Verify DNS to verify the domain.
-
After successful DNS verification, go back to the home screen.
-
Click on the 1P Domain Tracking Code tab, and click on the Shopify card.
-
Continue with the steps mentioned in the Shopify installation to complete the set up.
Non-Shopify Websites (Custom-built or other platforms)
Section titled “Non-Shopify Websites (Custom-built or other platforms)”If your website/domain is self-hosted, on WordPress, or any platform other than Shopify, 1P Domain Tracking is set up through Cloudflare Connect. You authorize CustomerLabs in your Cloudflare account and the setup runs automatically — there are no API tokens to create, copy, or paste, and no manual DNS configuration.
Prerequisites
Section titled “Prerequisites”- Your website’s domain must already be on Cloudflare (your DNS is managed there).
- The person who connects must be a Super Administrator or Administrator of your Cloudflare account. A read-only user cannot complete the connection.
- Use the sub-domains your website already has (for example
blog.yourstore.comorshop.yourstore.com). Do not create a new, dedicated sub-domain for CustomerLabs — tracking runs on your existing domain and sub-domains. They must already exist in your Cloudflare DNS; CustomerLabs only validates them and never creates DNS entries for you.
Connecting your Cloudflare account
Section titled “Connecting your Cloudflare account”-
After adding the naked domain, select Non-shopify and click Next.
-
Add the sub-domains you want to track on this domain (for example
blog,checkout,store). Use + Add another sub-domain to add more, then click Next.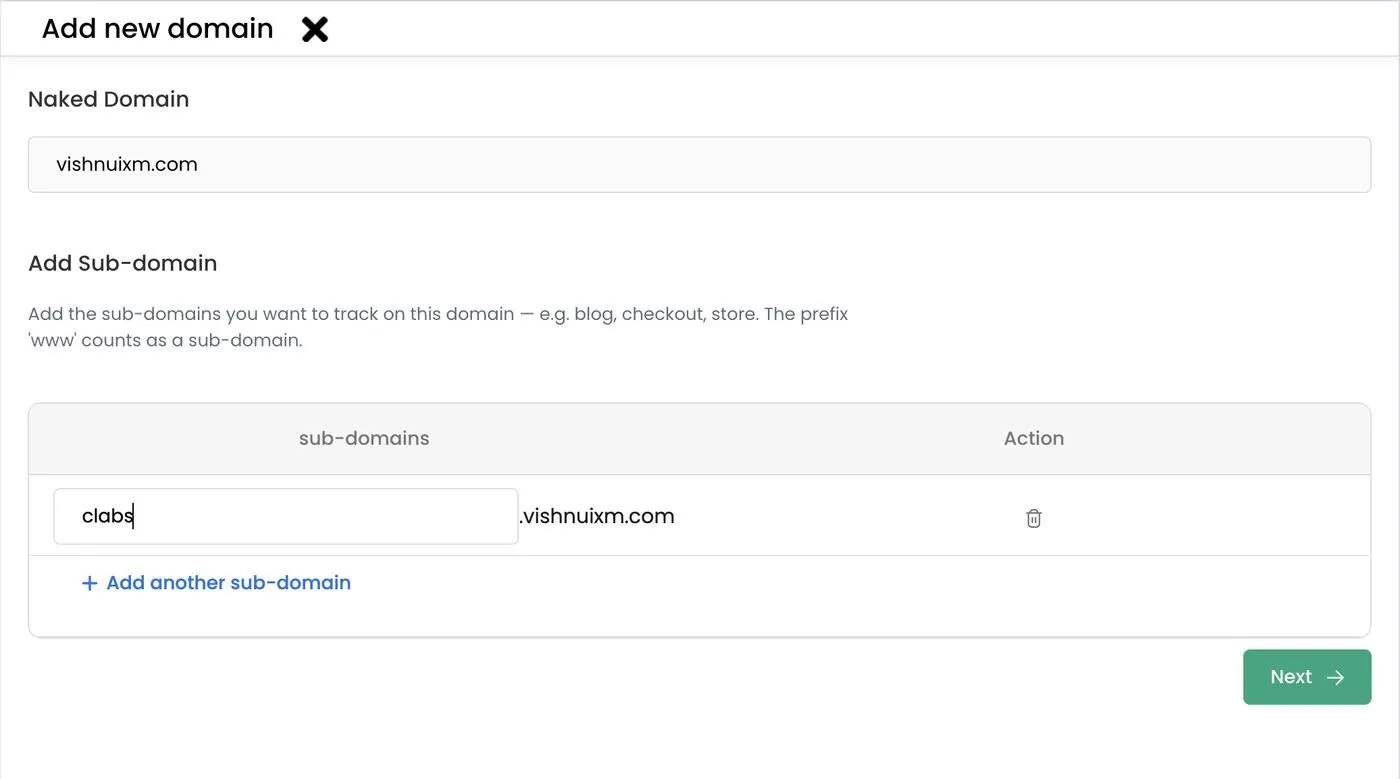
-
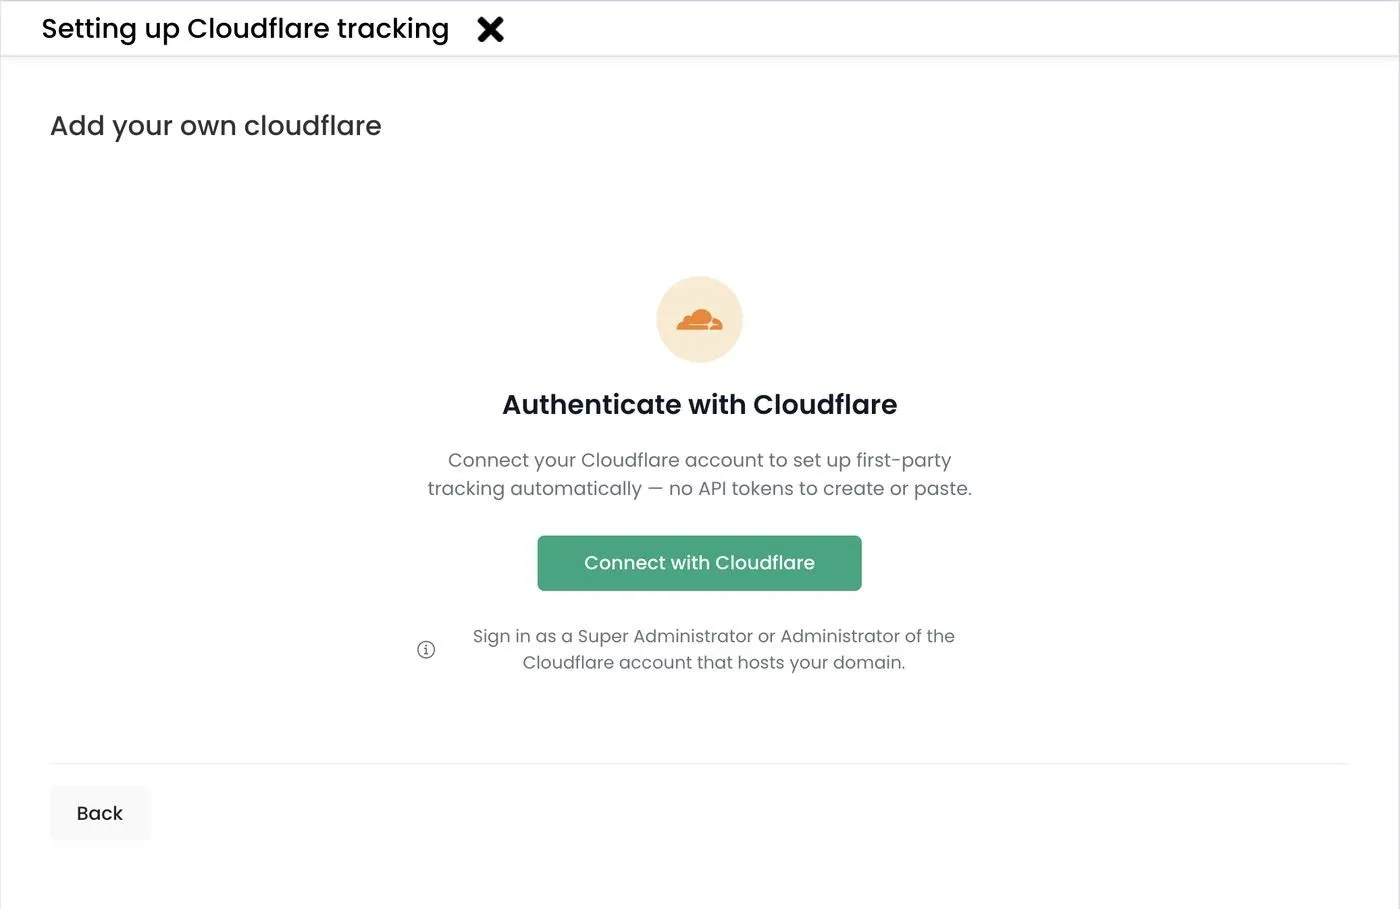
Click Connect with Cloudflare. You are redirected to Cloudflare’s login page. Sign in as a Super Administrator or Administrator of the Cloudflare account that hosts your domain.
-
Cloudflare shows the permissions CustomerLabs is requesting. Select the Cloudflare account that holds your website and click Allow.
-
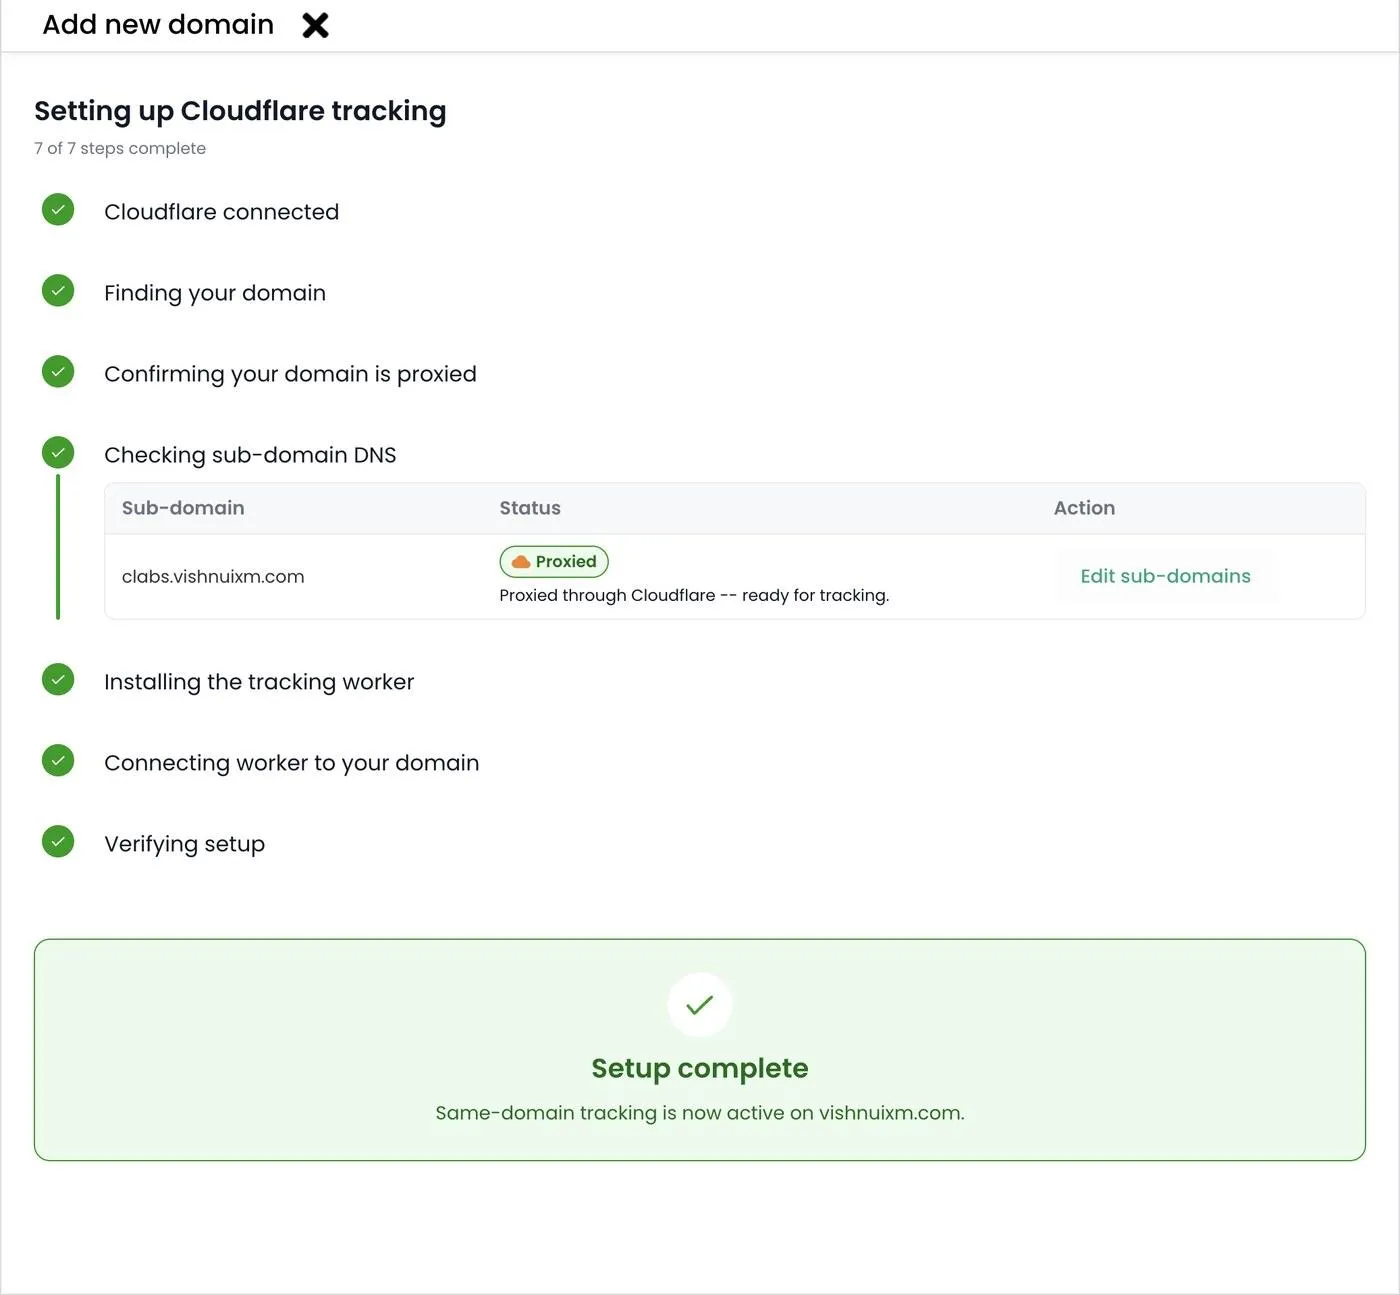
The setup runs automatically through seven steps: Cloudflare connected → Finding your domain → Confirming your domain is proxied → Checking sub-domain DNS → Installing the tracking worker → Connecting worker to your domain → Verifying setup.
-
When all seven steps complete, Setup complete is displayed and the domain shows as Verified.
Domain statuses
Section titled “Domain statuses”| Status | What it means | What to do |
|---|---|---|
| Setting up… | Setup is running, or was paused partway | Click View progress / Resume process, then Continue |
| Action needed | One of the setup steps needs your attention (see Action needed below) | Open the progress screen — the failed step shows an explanation and a button to retry after fixing it |
| Pending | Setup finished but the final check has not passed yet — usually a propagation delay | Wait (an automatic re-check runs about every 30 minutes) or click Verify now |
| Verified | Tracking is live | — |
| Disconnected | The Cloudflare connection was cancelled or expired | Click Reconnect (on the domain row, or in the settings flyout) and approve Cloudflare again |
Action needed
Section titled “Action needed”Action needed means the setup paused because one step needs something from you — nothing is lost. Open the progress screen: the failed step is highlighted with an explanation and a button to retry.
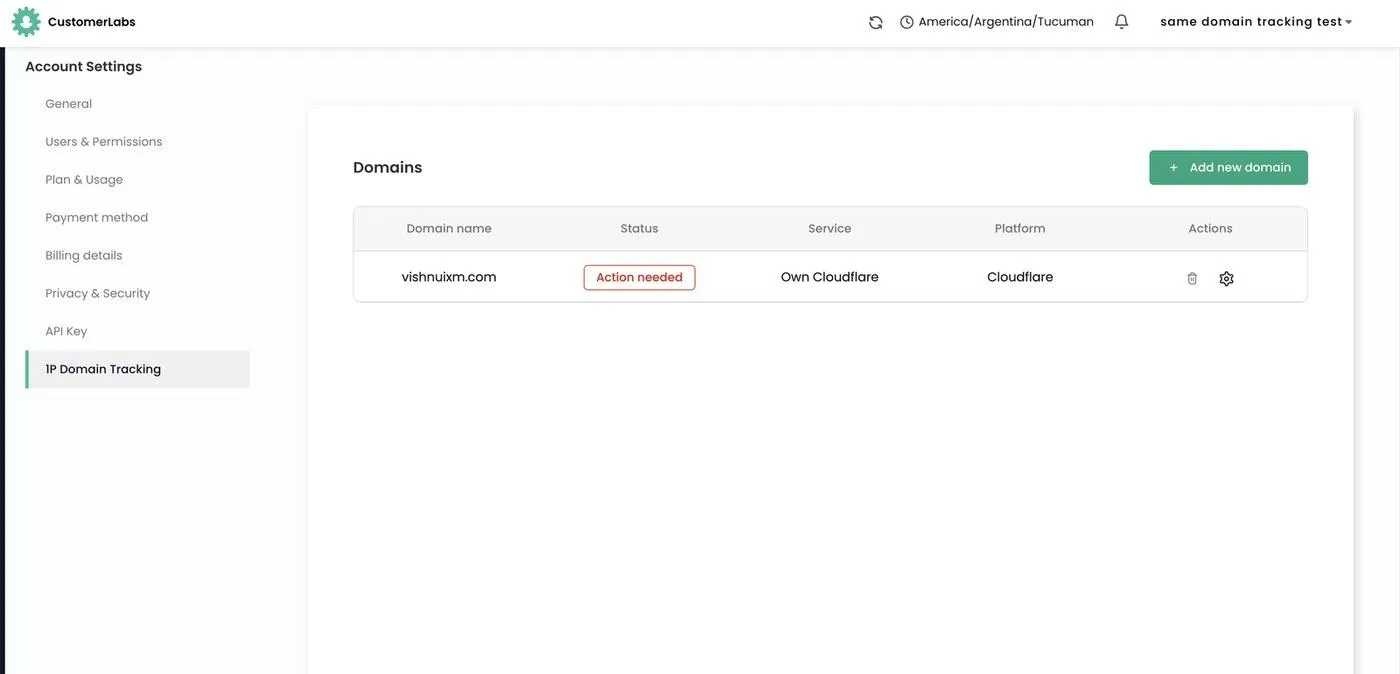
The most common causes:
| Why it appears | How to fix it |
|---|---|
| Your domain’s DNS record is not proxied (grey cloud) or missing | Click Proxy it for me on the failed step, or turn on the orange cloud in Cloudflare, then Retry |
| The domain was not found in the authorized Cloudflare account | Reconnect and select the Cloudflare account that holds the domain |
| The Cloudflare user did not have sufficient permissions | Have a Super Administrator or Administrator connect, then Retry |
| A Cloudflare error during worker install or connection | The step shows the exact error — Retry once the cause is fixed |
| Setup was started but not resumed for ~10 minutes | Nothing is wrong — open the progress screen and click Continue |
After fixing the cause, click Retry / Continue on the failed step. The setup resumes from that step; completed steps are never repeated.
Fixing “not proxied” warnings
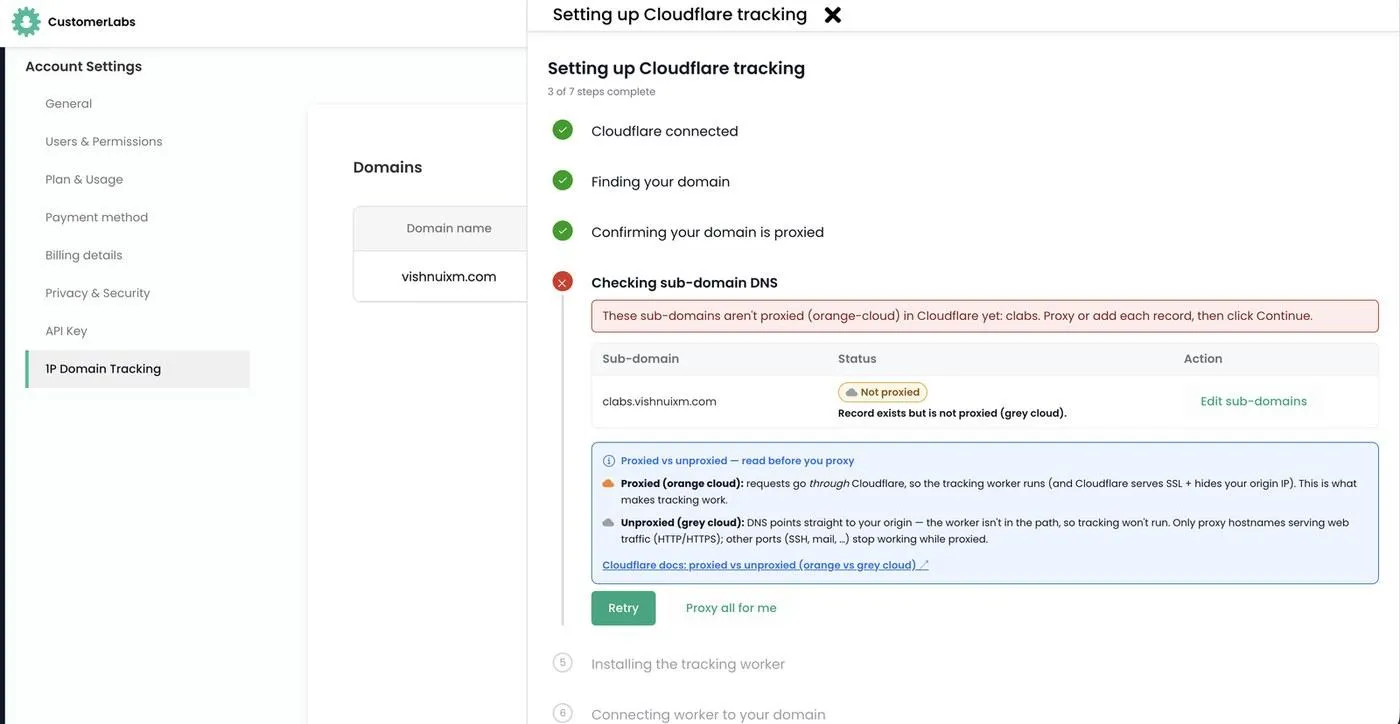
Section titled “Fixing “not proxied” warnings”“Proxied” means the cloud icon next to the DNS record in Cloudflare is orange instead of grey. Tracking only works on proxied records. If the setup finds an unproxied record, you have two options:
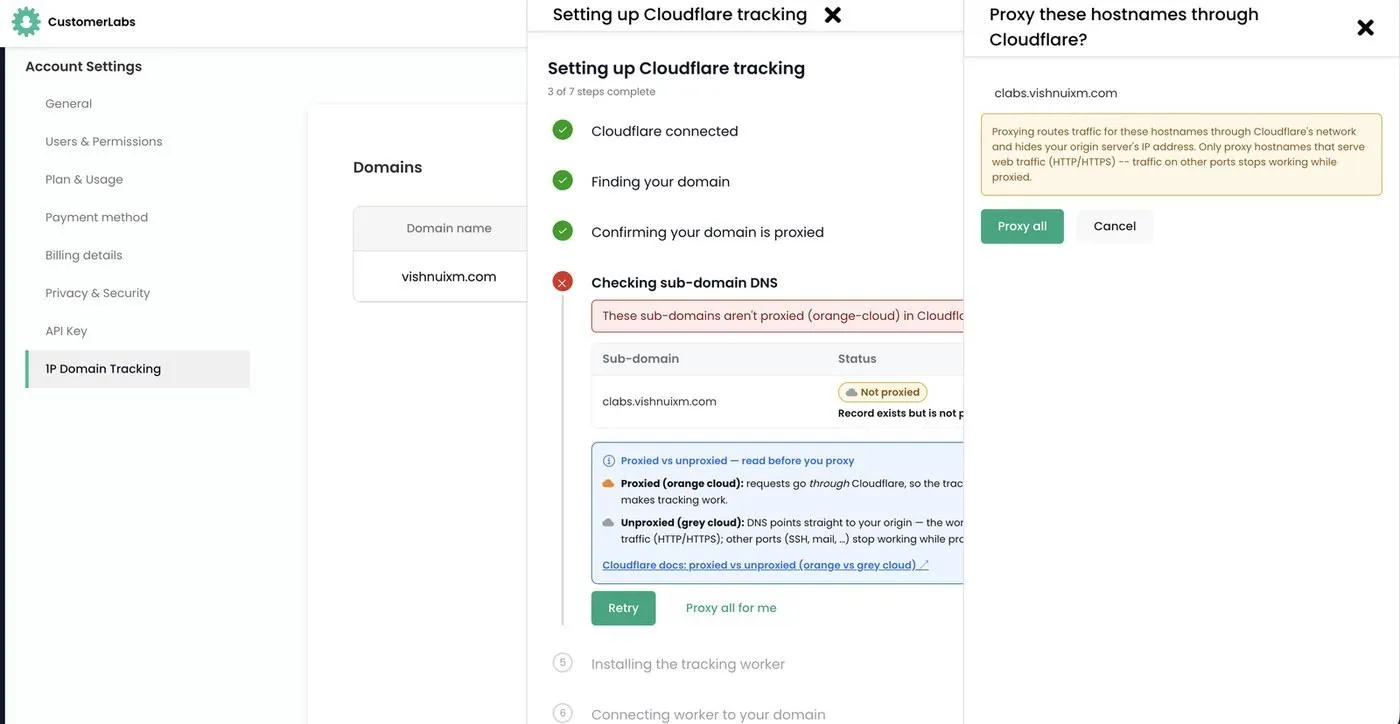
- Proxy all for me — approve one confirmation and CustomerLabs switches the proxy on for you.
- Enable the orange cloud yourself in your Cloudflare DNS settings, then click Retry / Continue.
Nothing is changed without your approval — a confirmation listing the exact hostnames is shown first. Nothing changes unless you click Proxy all.
Managing sub-domains
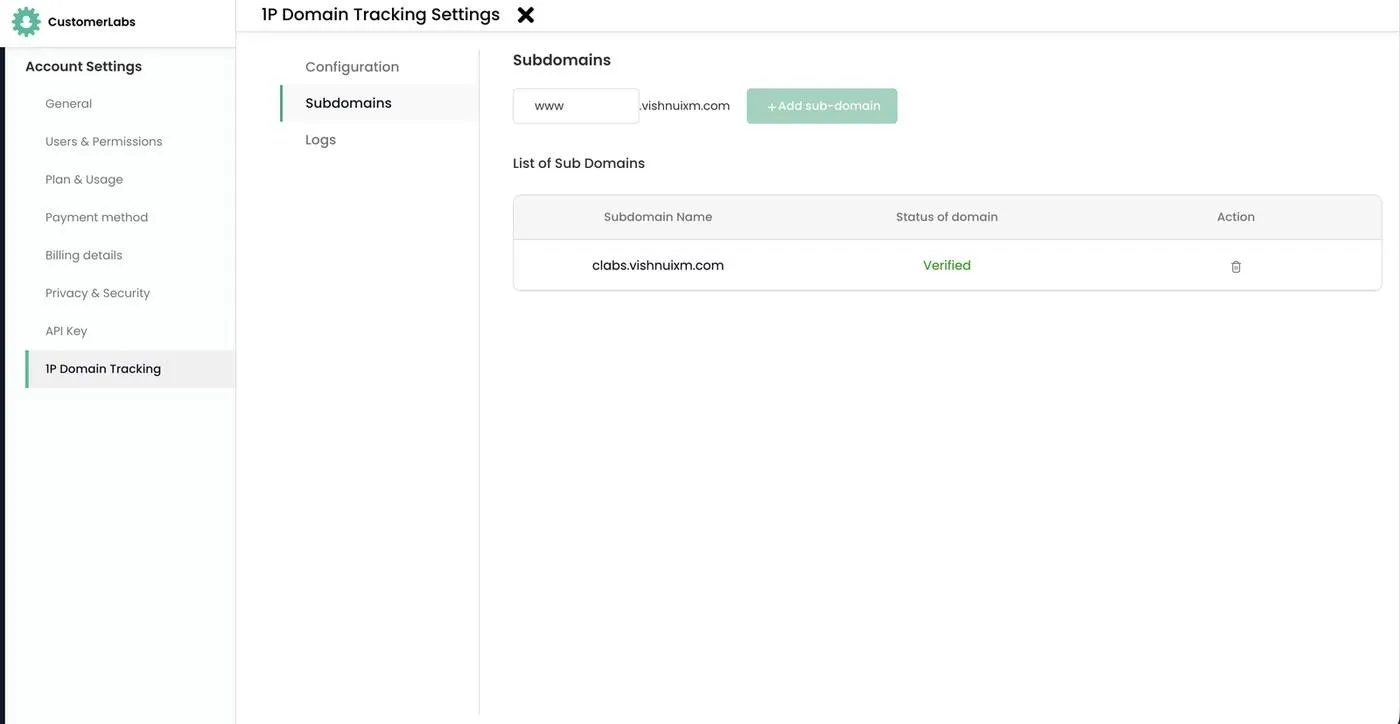
Section titled “Managing sub-domains”You can add or remove tracked sub-domains at any time without redoing the setup. Click the settings (gear) icon on your domain to open the 1P Domain Tracking Settings flyout, go to the Subdomains tab, enter the sub-domain name, and click + Add sub-domain. Each sub-domain is validated against your Cloudflare DNS and shows its own status with Verify / Re-check actions.
| Sub-domain status | Meaning | Fix |
|---|---|---|
| Proxied — ready for tracking | All good | — |
| Not proxied (grey cloud) | The record exists but the orange cloud is off | Click Proxy all for me — one approval fixes all of them at once |
| Can’t be proxied | Cloudflare does not allow proxying this type of record | Fix it in Cloudflare, or remove the sub-domain via Edit sub-domains |
| No DNS record | The sub-domain does not exist in the Cloudflare account | Add it in Cloudflare, then click Continue / Re-check — or remove it |
Connection status and reconnecting
Section titled “Connection status and reconnecting”The Configuration tab of the settings flyout shows your live connection: the connected Cloudflare account, the permissions granted, and the connection status — with a Reconnect button.
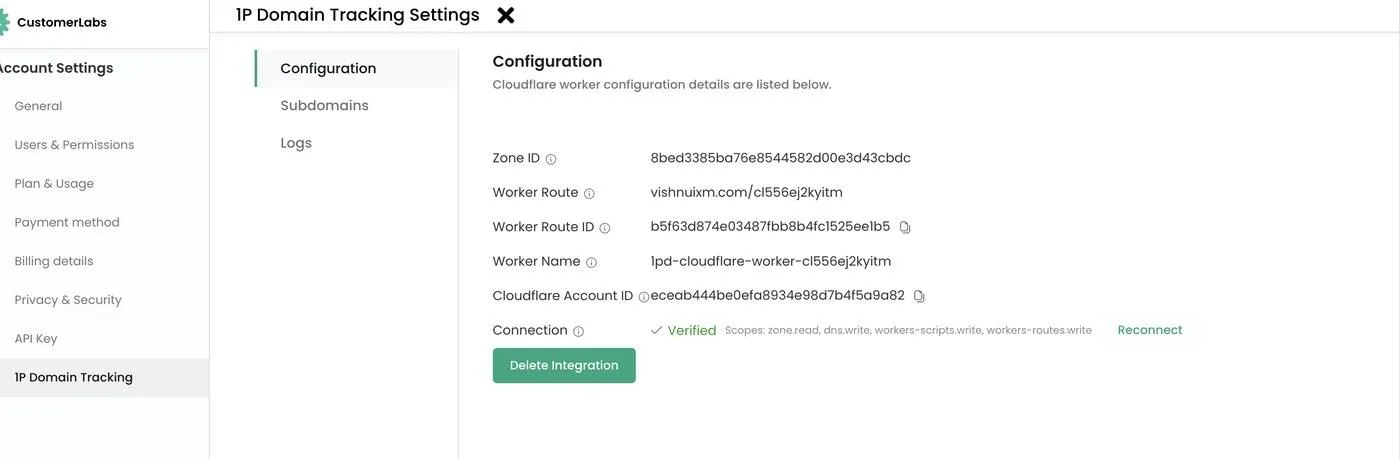
If the Cloudflare authorization is cancelled or expires (for example, someone revoked the CustomerLabs app in your Cloudflare dashboard, or the person who connected left your Cloudflare account), the domain shows Disconnected.
- Your live tracking keeps working. Disconnected only pauses CustomerLabs’ ability to manage and re-verify the setup.
- To re-authenticate, click Reconnect — on the domain row or in the Configuration tab — and approve Cloudflare again as a Super Administrator or Administrator of the same Cloudflare account.
- One reconnect restores all your domains that use that Cloudflare account. Nothing is re-installed and no settings are lost.
Verification
Section titled “Verification”DNS Verification
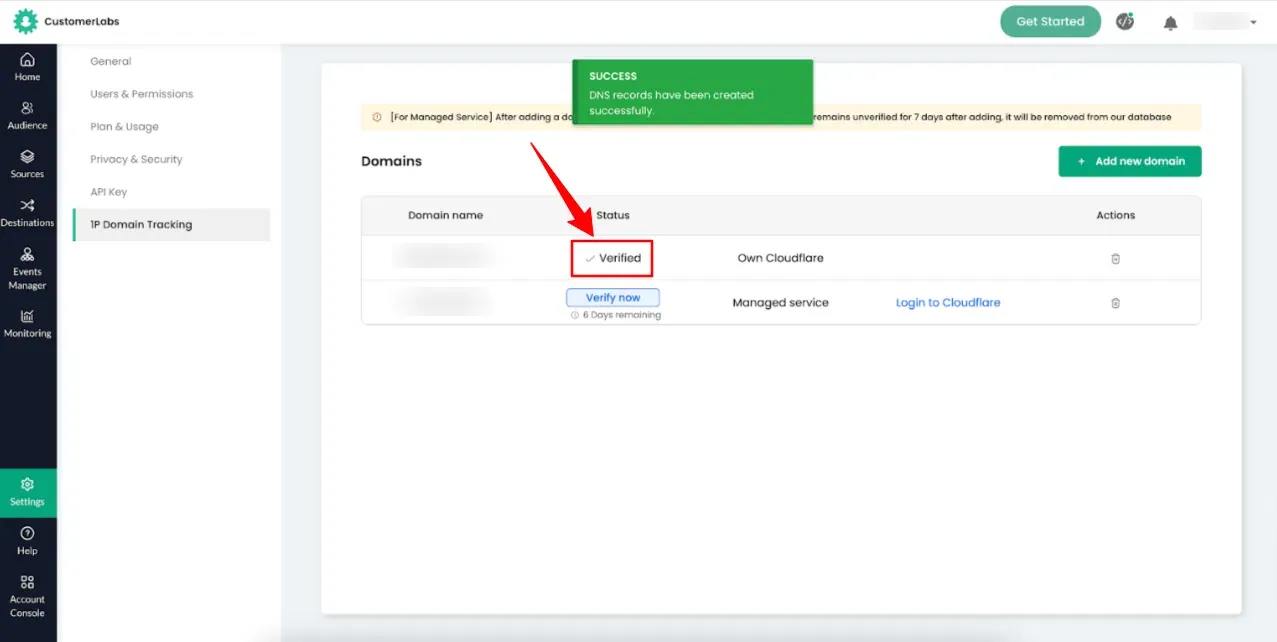
Section titled “DNS Verification”You can check the “Verified” status in the 1P Domain Tracking dashboard in CustomerLabs to ensure that your DNS records are active and correctly mapped.
Installation Verification
Section titled “Installation Verification”To verify that 1P Domain Tracking is successfully installed and functioning, inspect the cookies set in your browser’s developer tools:
- Before 1P Domain Tracking: The CustomerLabs cookie is set from the default tracking domain —
io.v2.customerlabs.co— even for your own domain (e.g.,example.com). - After 1P Domain Tracking: The CustomerLabs cookie will now be set directly from your own domain (e.g.,
www.example.com), confirming that all data collection is happening first-party.
You can verify this by:
-
Opening your website in Chrome.
-
Opening Website Inspect → Network tab.
-
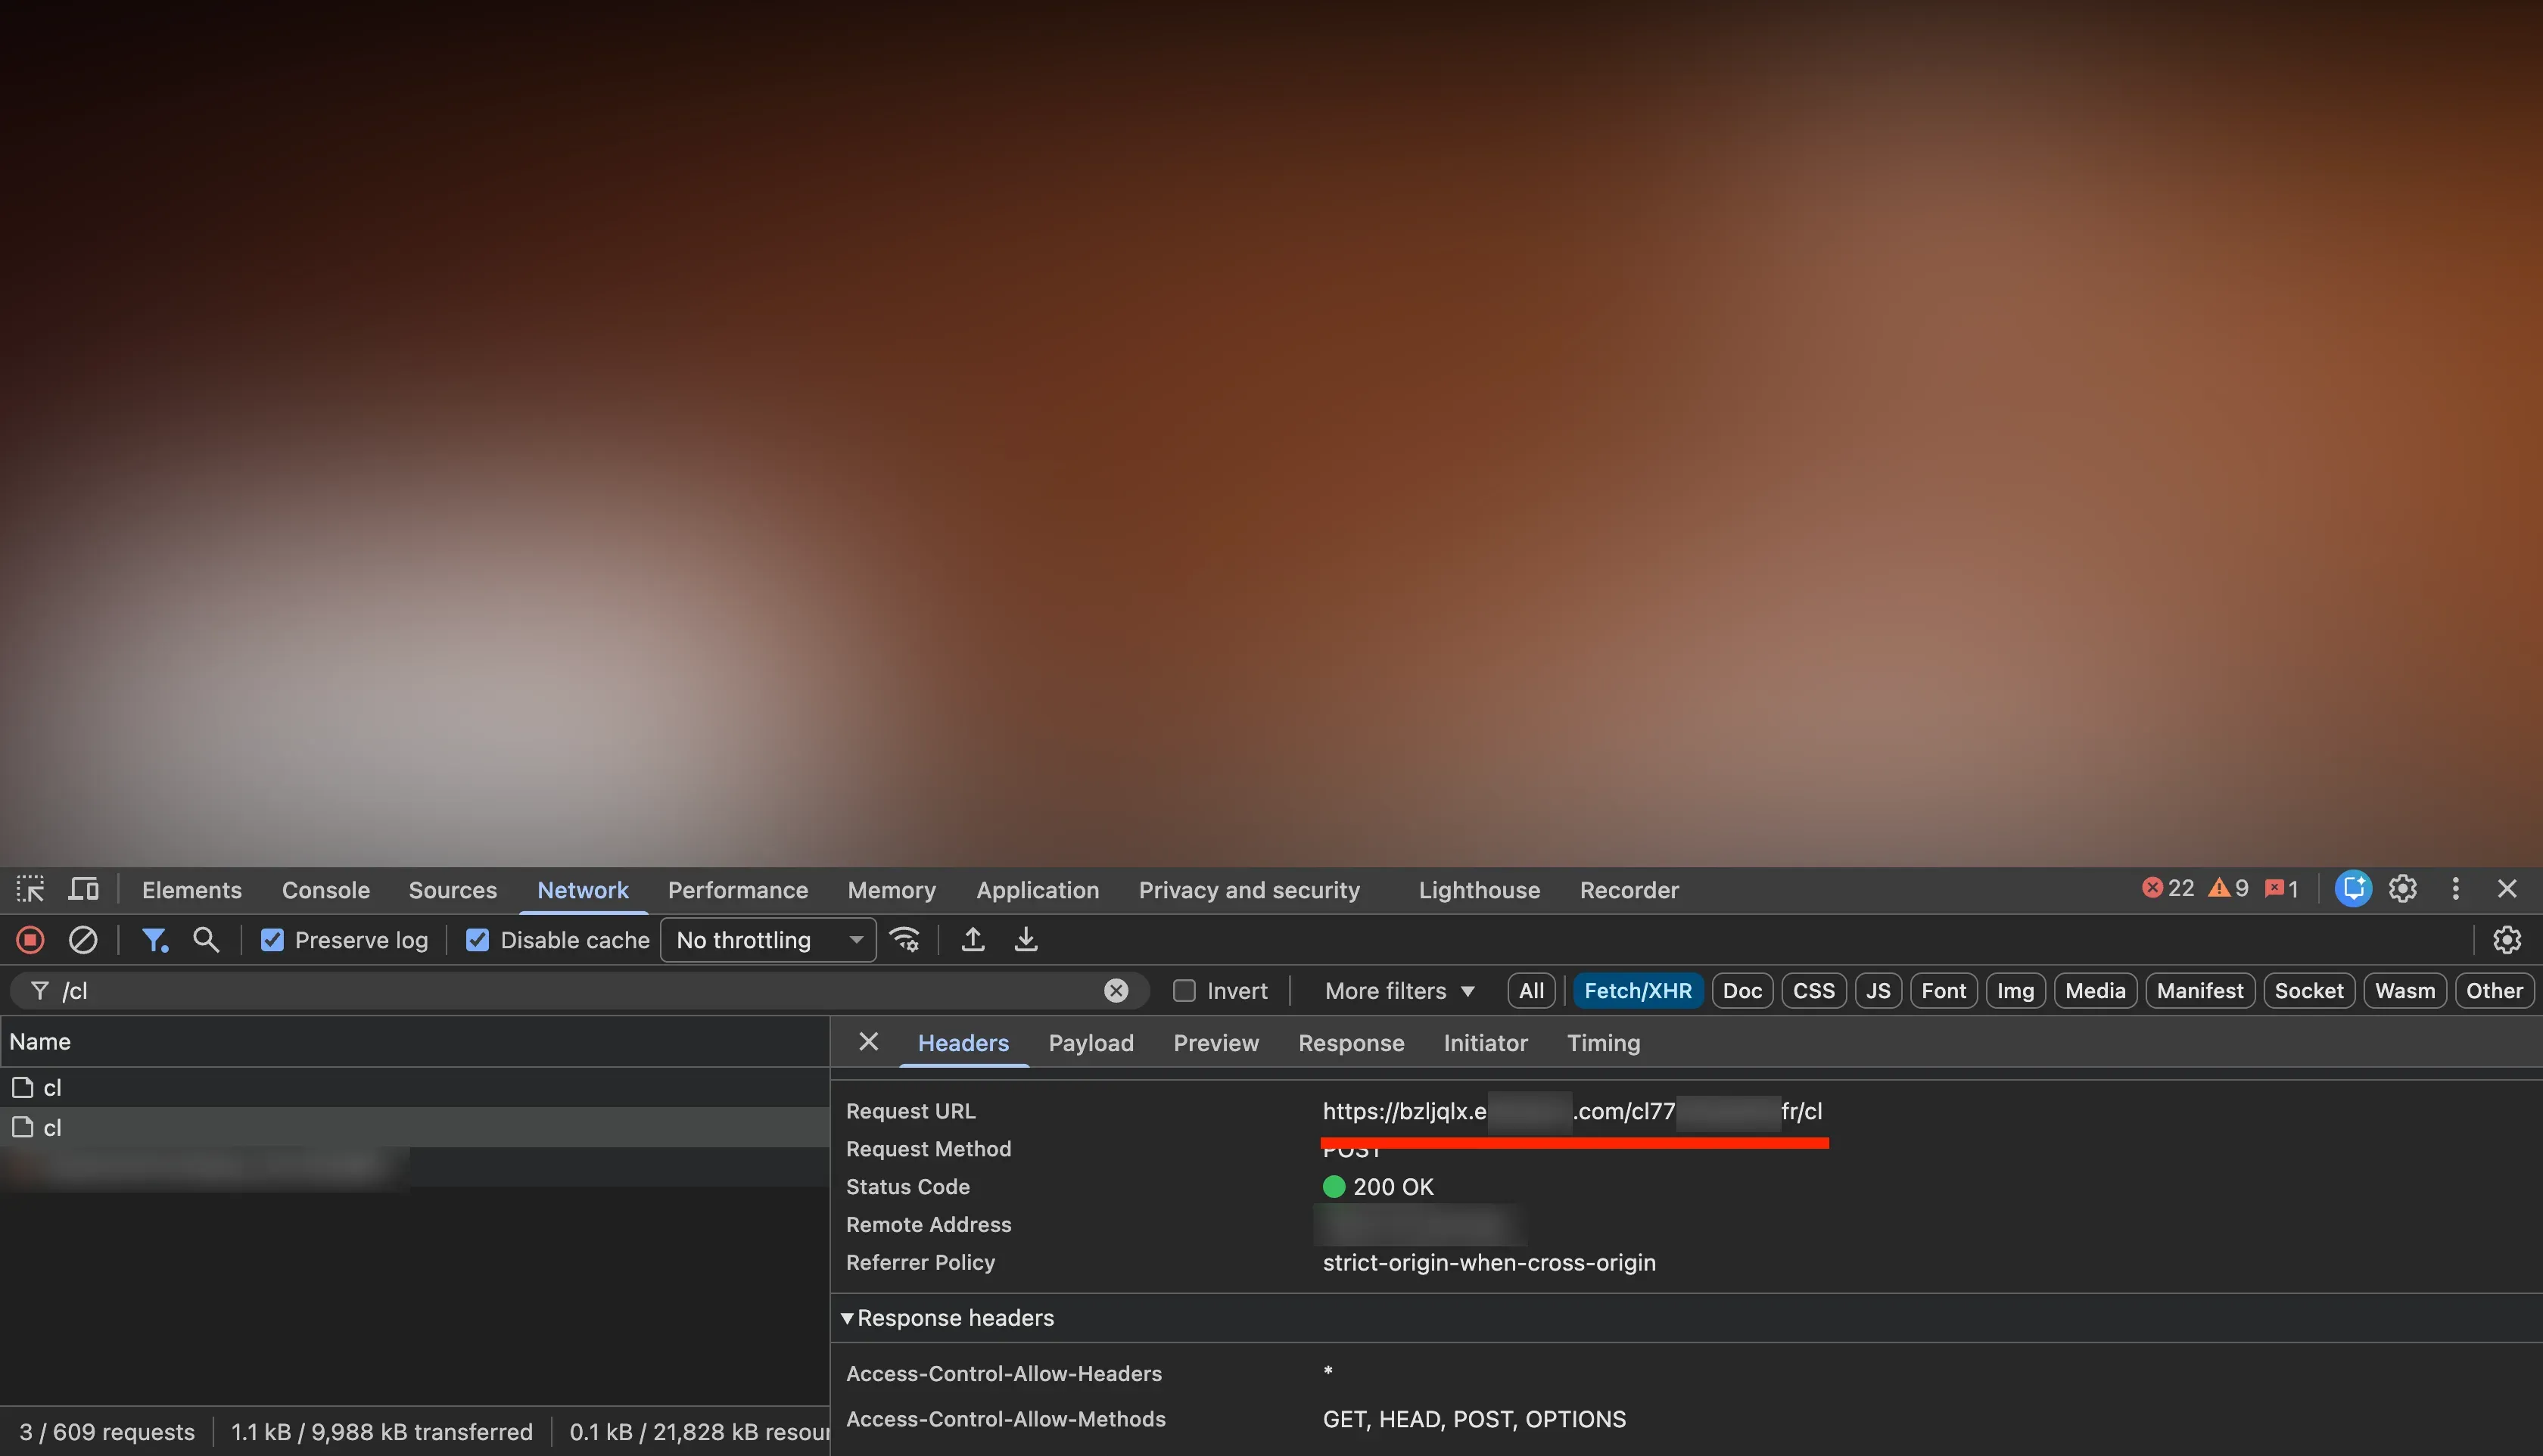
In the filter search bar, type
/cl. -
Perform the activities and you will be able to see the events in the network tab.
-
Under the
headers, the request URL will be in the format ofhttps://<sub-domain>.<your-domain>.com/<tracking-id>/clinstead ofhttps://io.v2.customerlabs.co/cl.