CustomerLabs + Kickbox Integration
Kickbox is an email verification service that validates email addresses for deliverability before they are used in outreach campaigns. This integration works in both directions: CustomerLabs forwards email addresses from event data or audience lists to Kickbox for verification, and the verification results are returned to CustomerLabs via an automatically created Kickbox Source. Verified results can then be used to filter for deliverable contacts before syncing to downstream destinations.
Prerequisites
Section titled “Prerequisites”- An active CustomerLabs account
- An active Kickbox account with API access
Part 1 — Destination Authentication
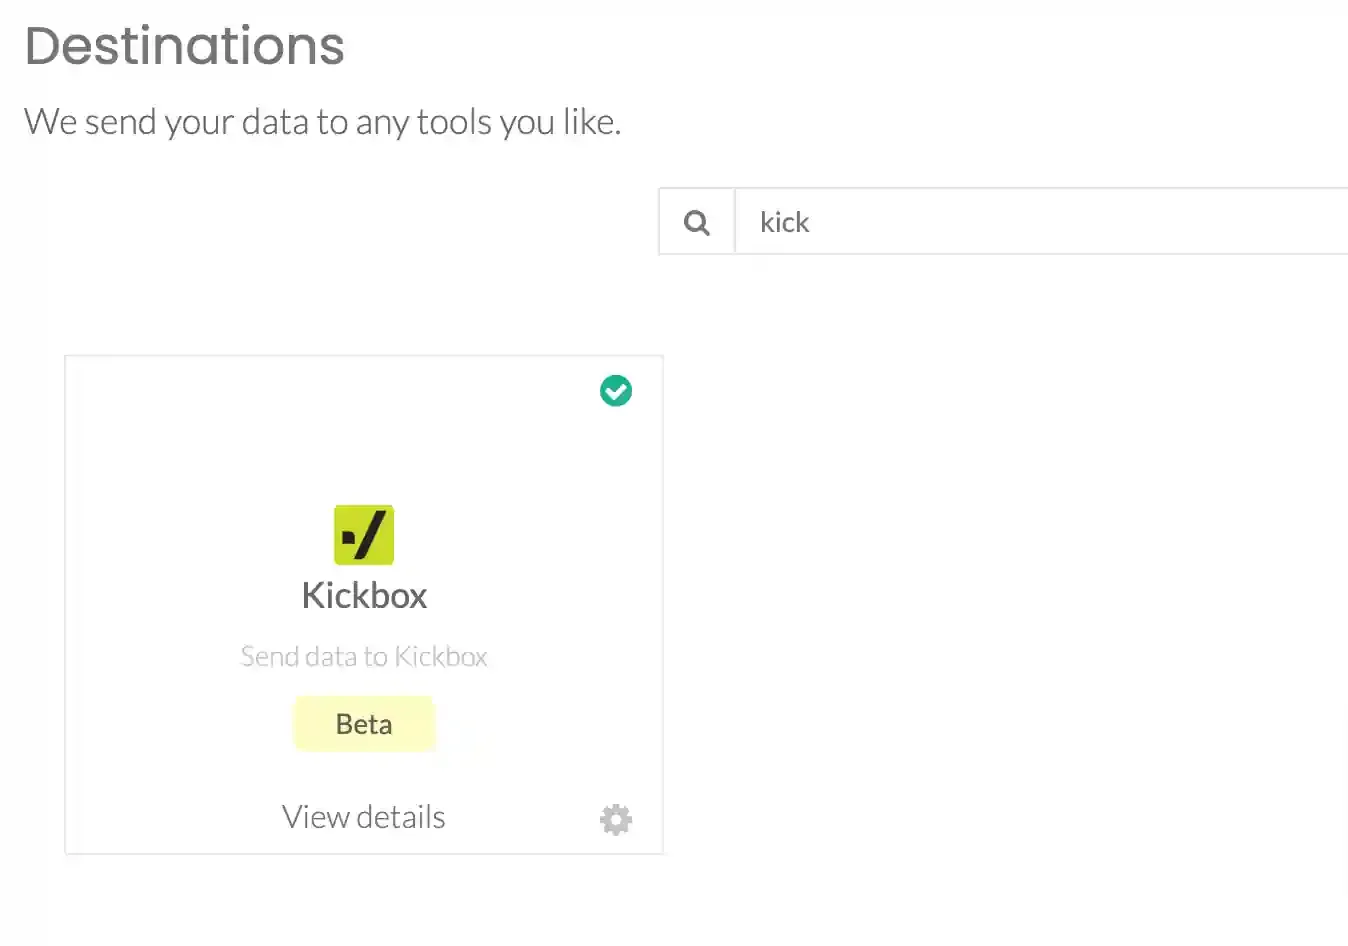
Section titled “Part 1 — Destination Authentication”Select the Destination
Section titled “Select the Destination”In CustomerLabs, navigate to Destinations, search for Kickbox, and select it from the list.
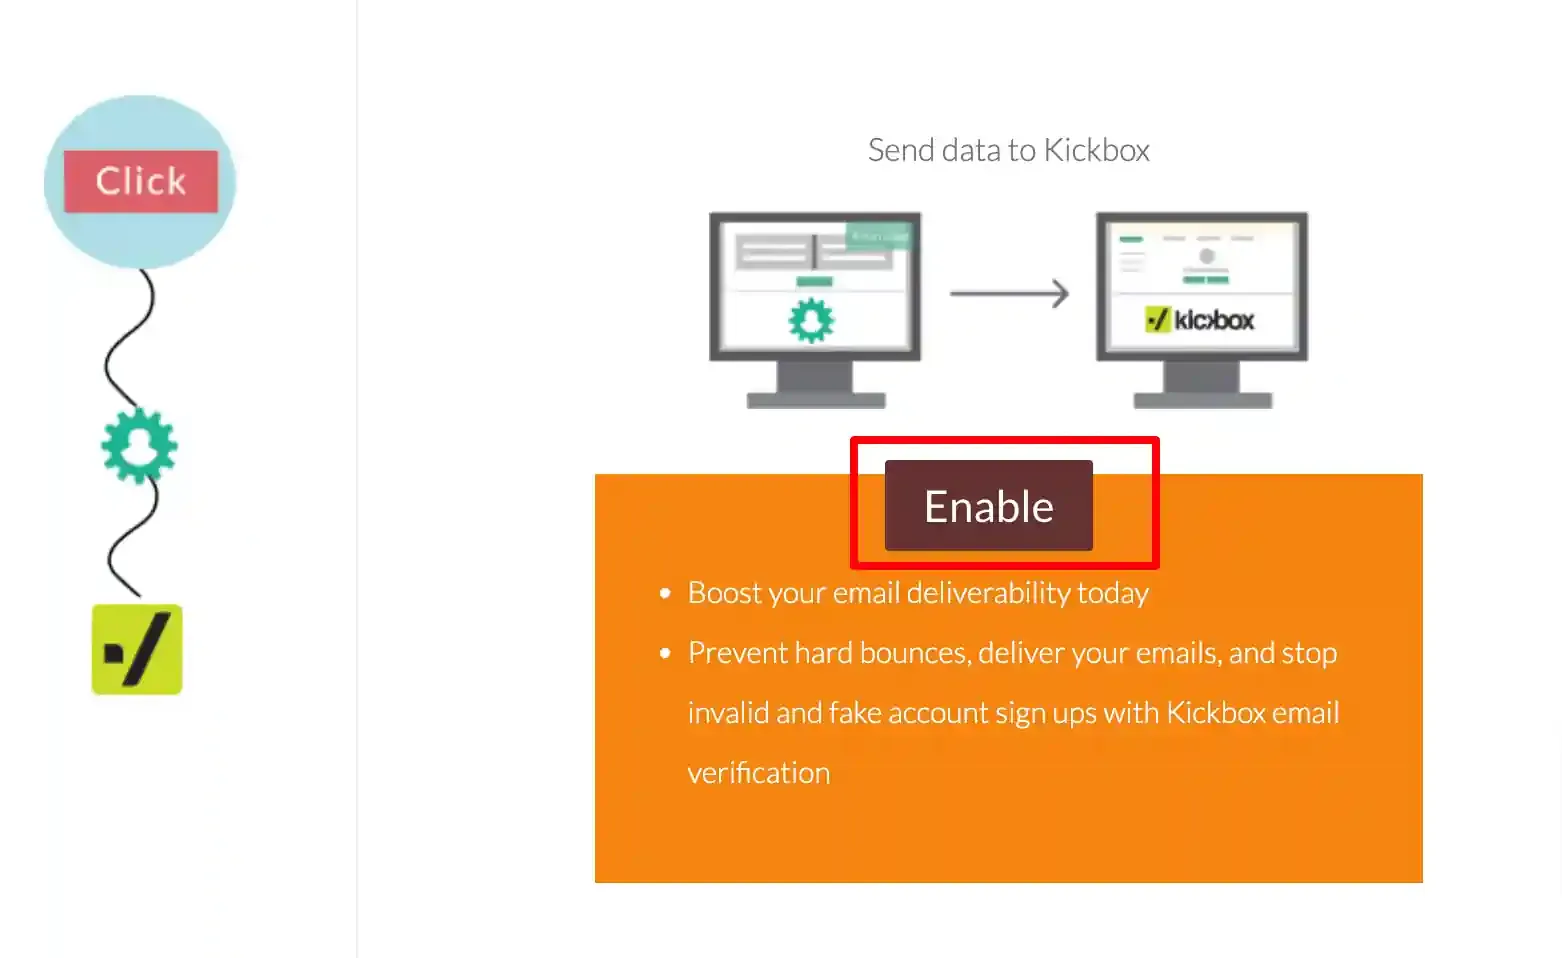
Enable Kickbox
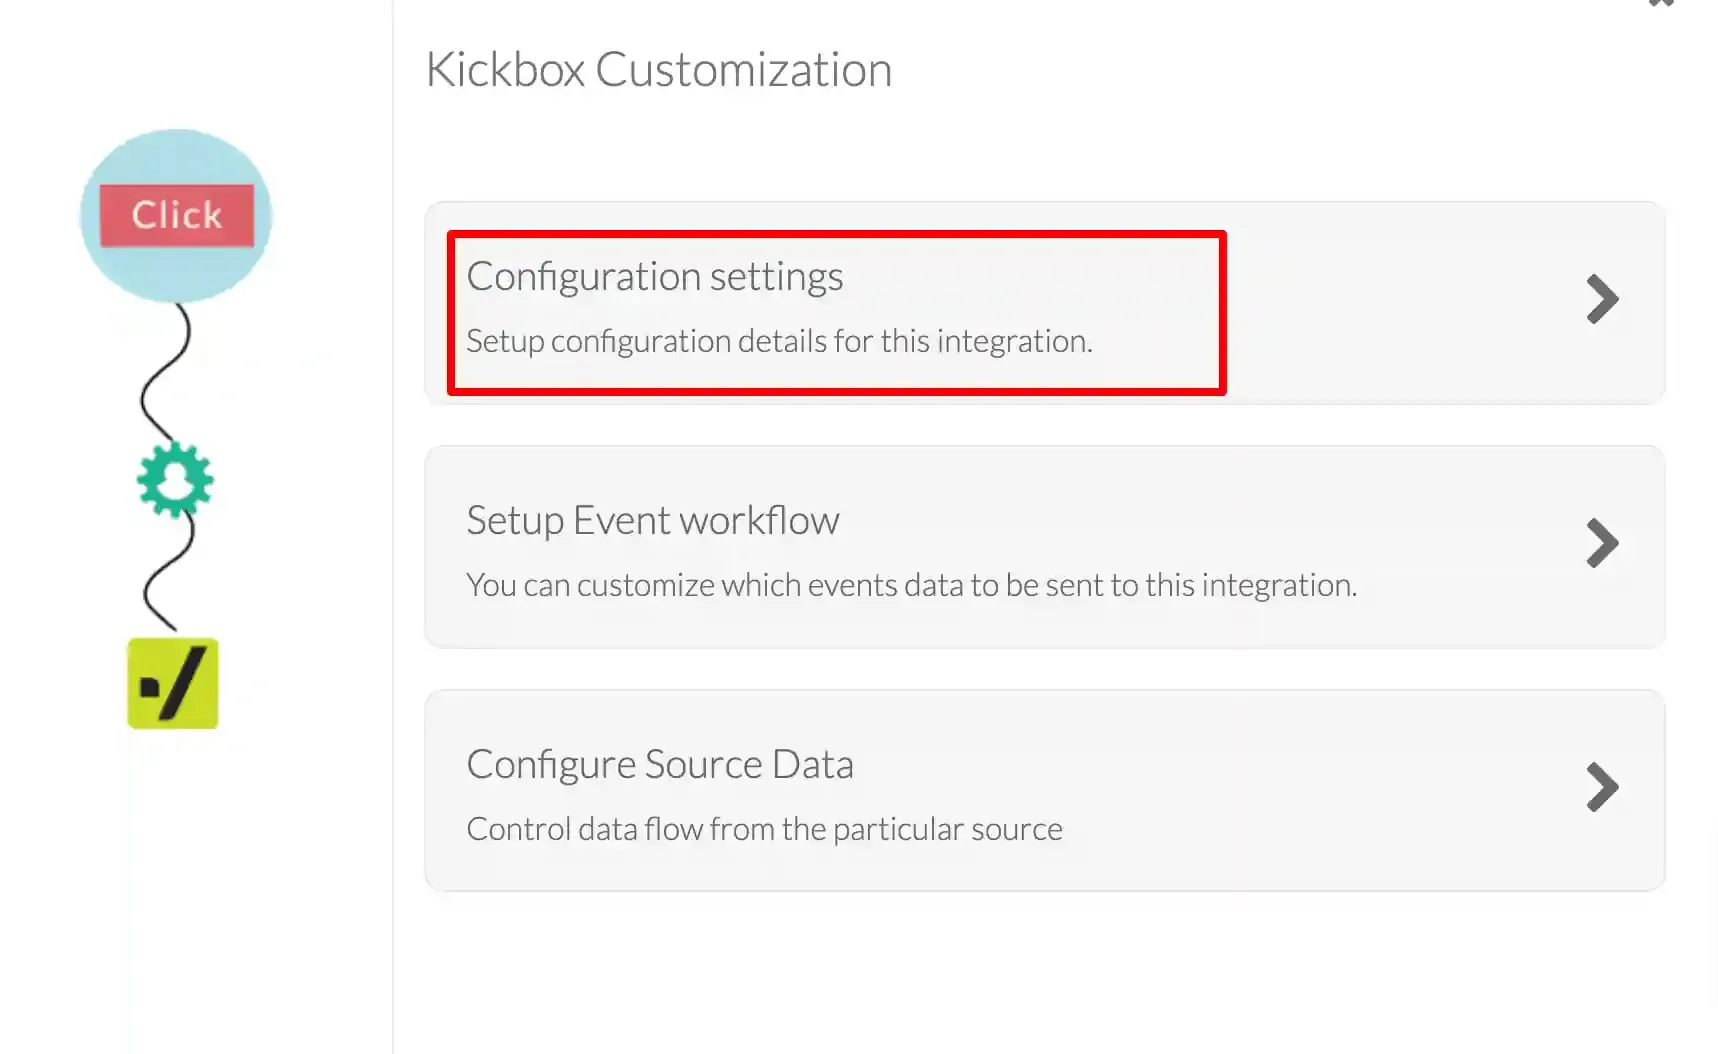
Section titled “Enable Kickbox”In the pop-up screen, click Enable, then open Configuration Settings.
Generate a Kickbox API Key
Section titled “Generate a Kickbox API Key”In your Kickbox account, navigate to API Keys → Manage Keys.
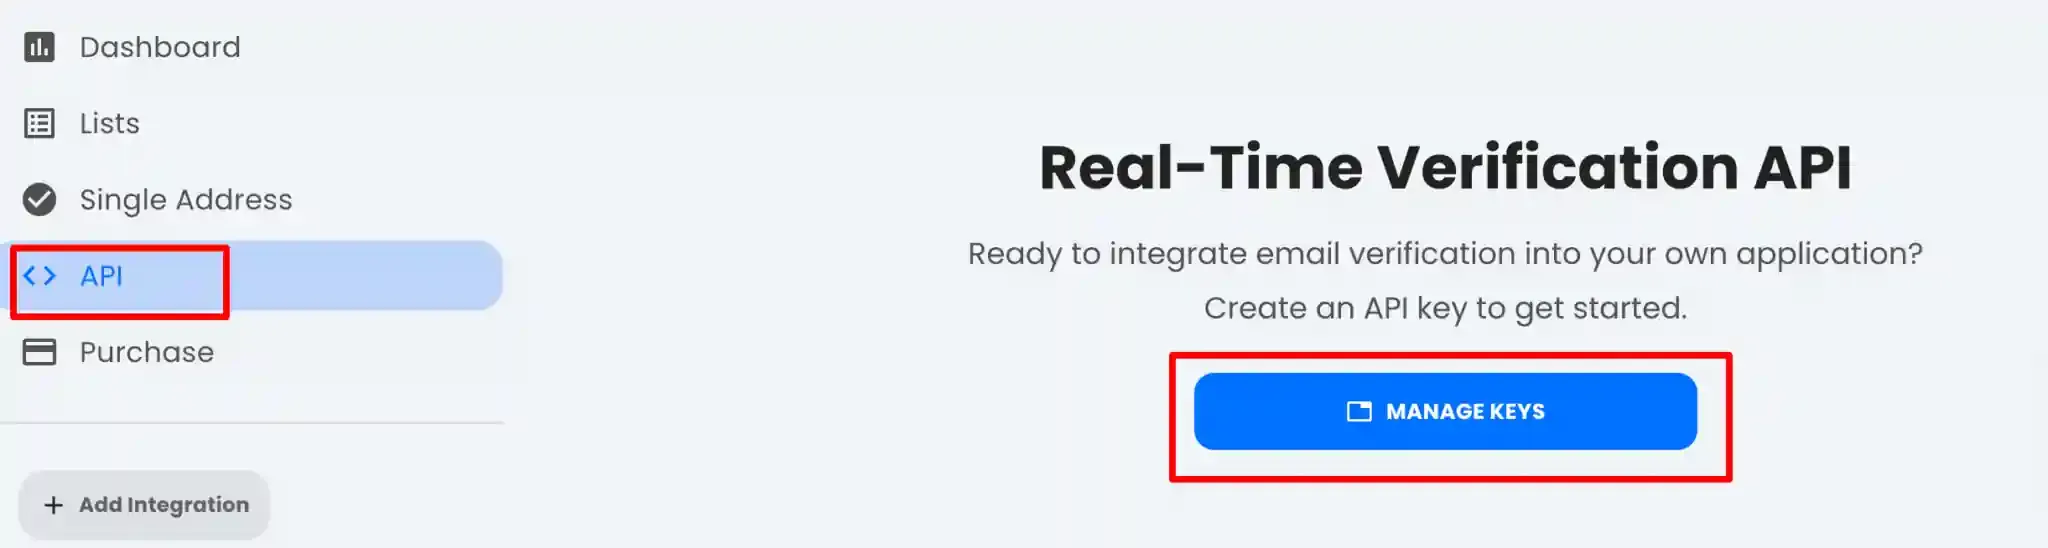
Click the + icon to create a new API key.
Configure the key as follows:
- Name:
CustomerLabs - Mode: Production
- Permissions: Enable
Check balance,Verify email address list, andVerify single email address
Click Create to generate the key.
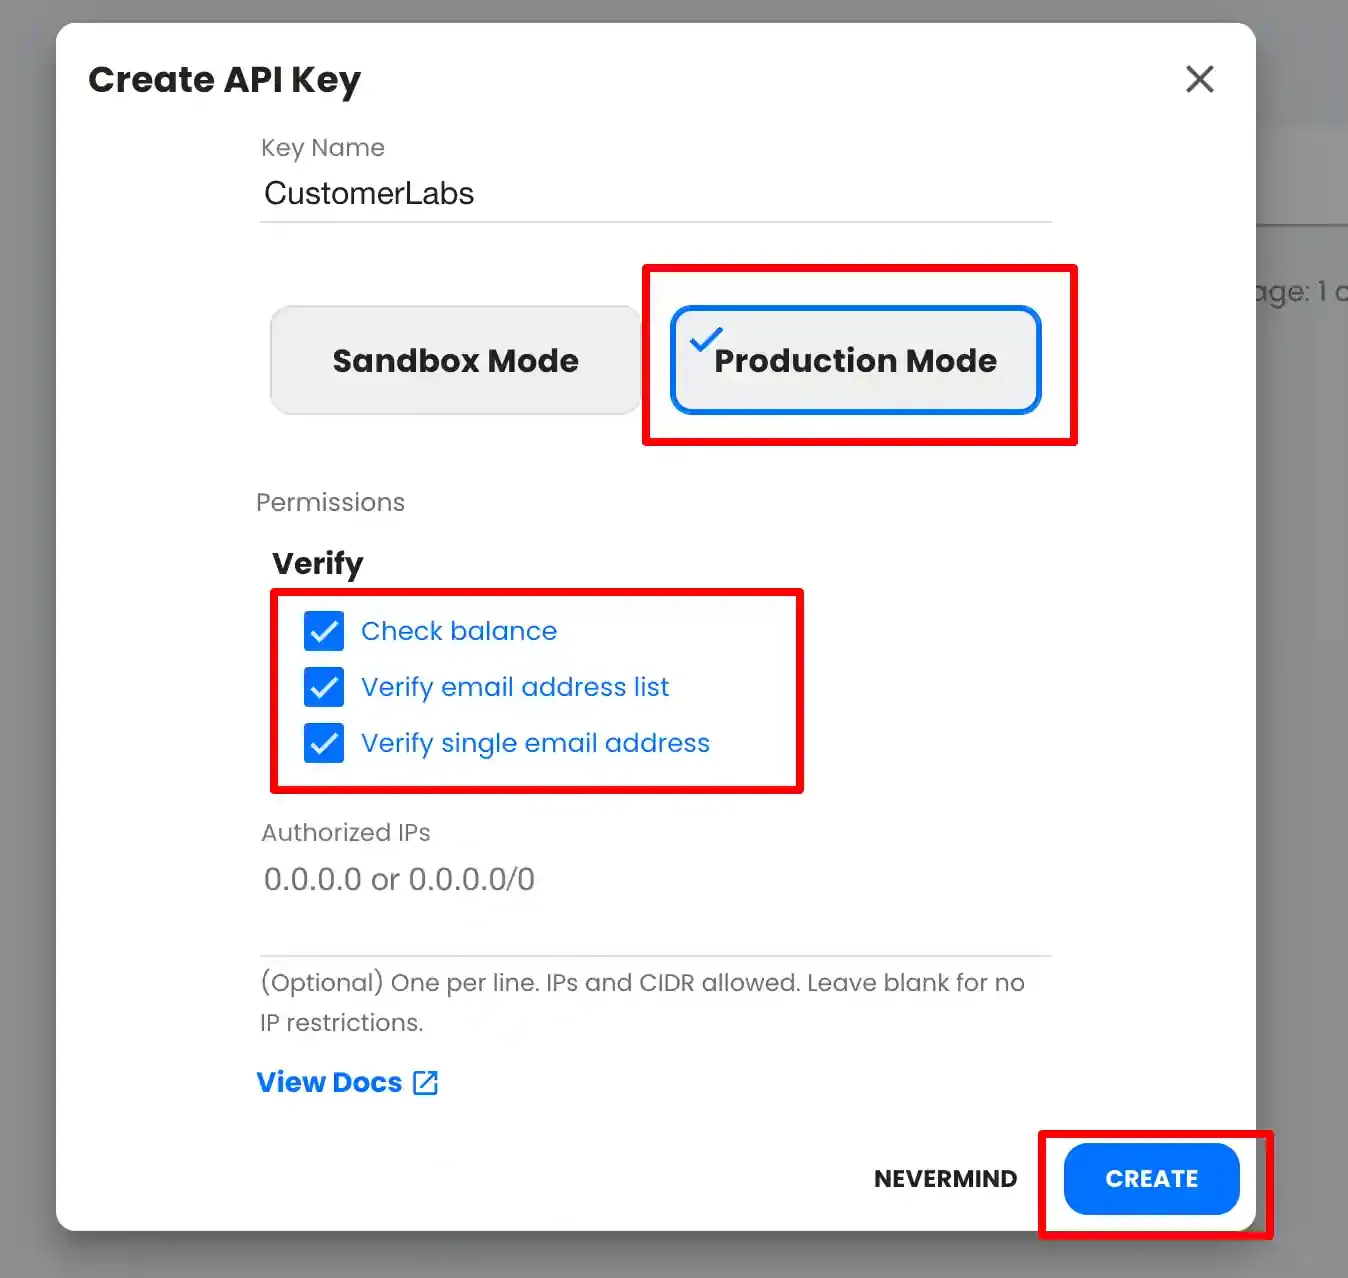
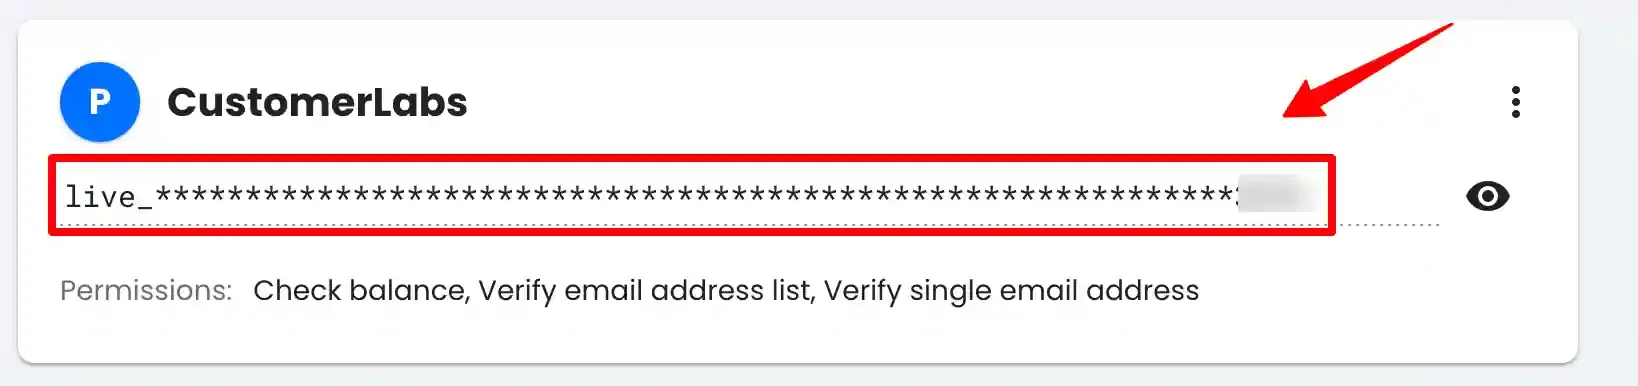
Copy the generated API key.
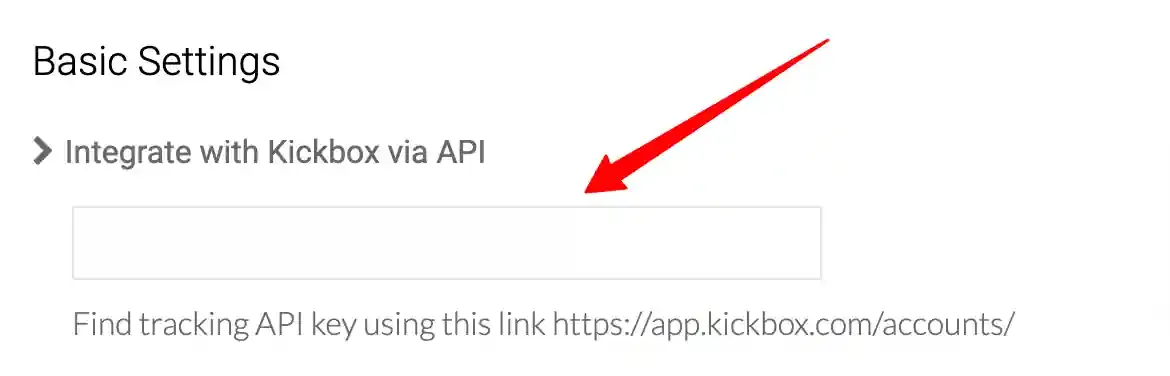
Enter the API Key in CustomerLabs
Section titled “Enter the API Key in CustomerLabs”In CustomerLabs, navigate to Destinations → Kickbox → Configuration Settings. Paste the API key into the Integrate with Kickbox via API field and click Save Changes.
Saving the API key automatically creates a Kickbox Source connection in CustomerLabs. No additional workflow configuration is required at this stage.
Part 2 — Email Field Mapping
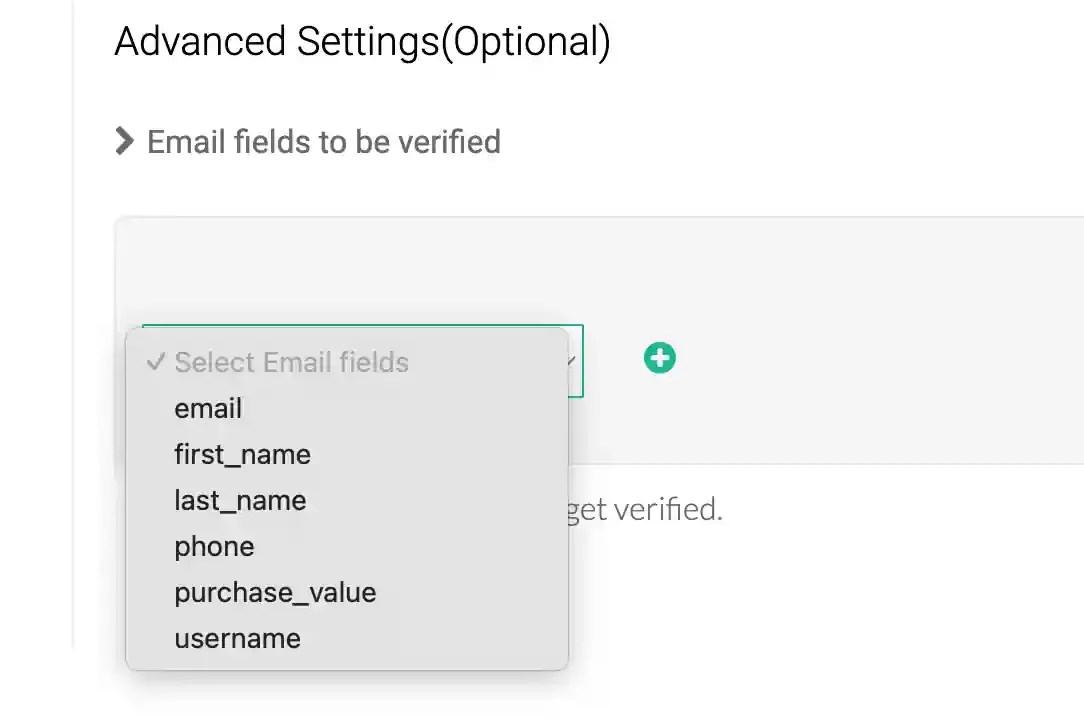
Section titled “Part 2 — Email Field Mapping”Email field mapping defines which email address fields from your event data are forwarded to Kickbox for verification. Up to three fields can be mapped.
Configure Email Fields
Section titled “Configure Email Fields”Navigate to Destinations → Kickbox → Configuration Settings → Advanced Settings. Select the required email fields from the dropdown and click the + icon to add each one. Click Save Changes.
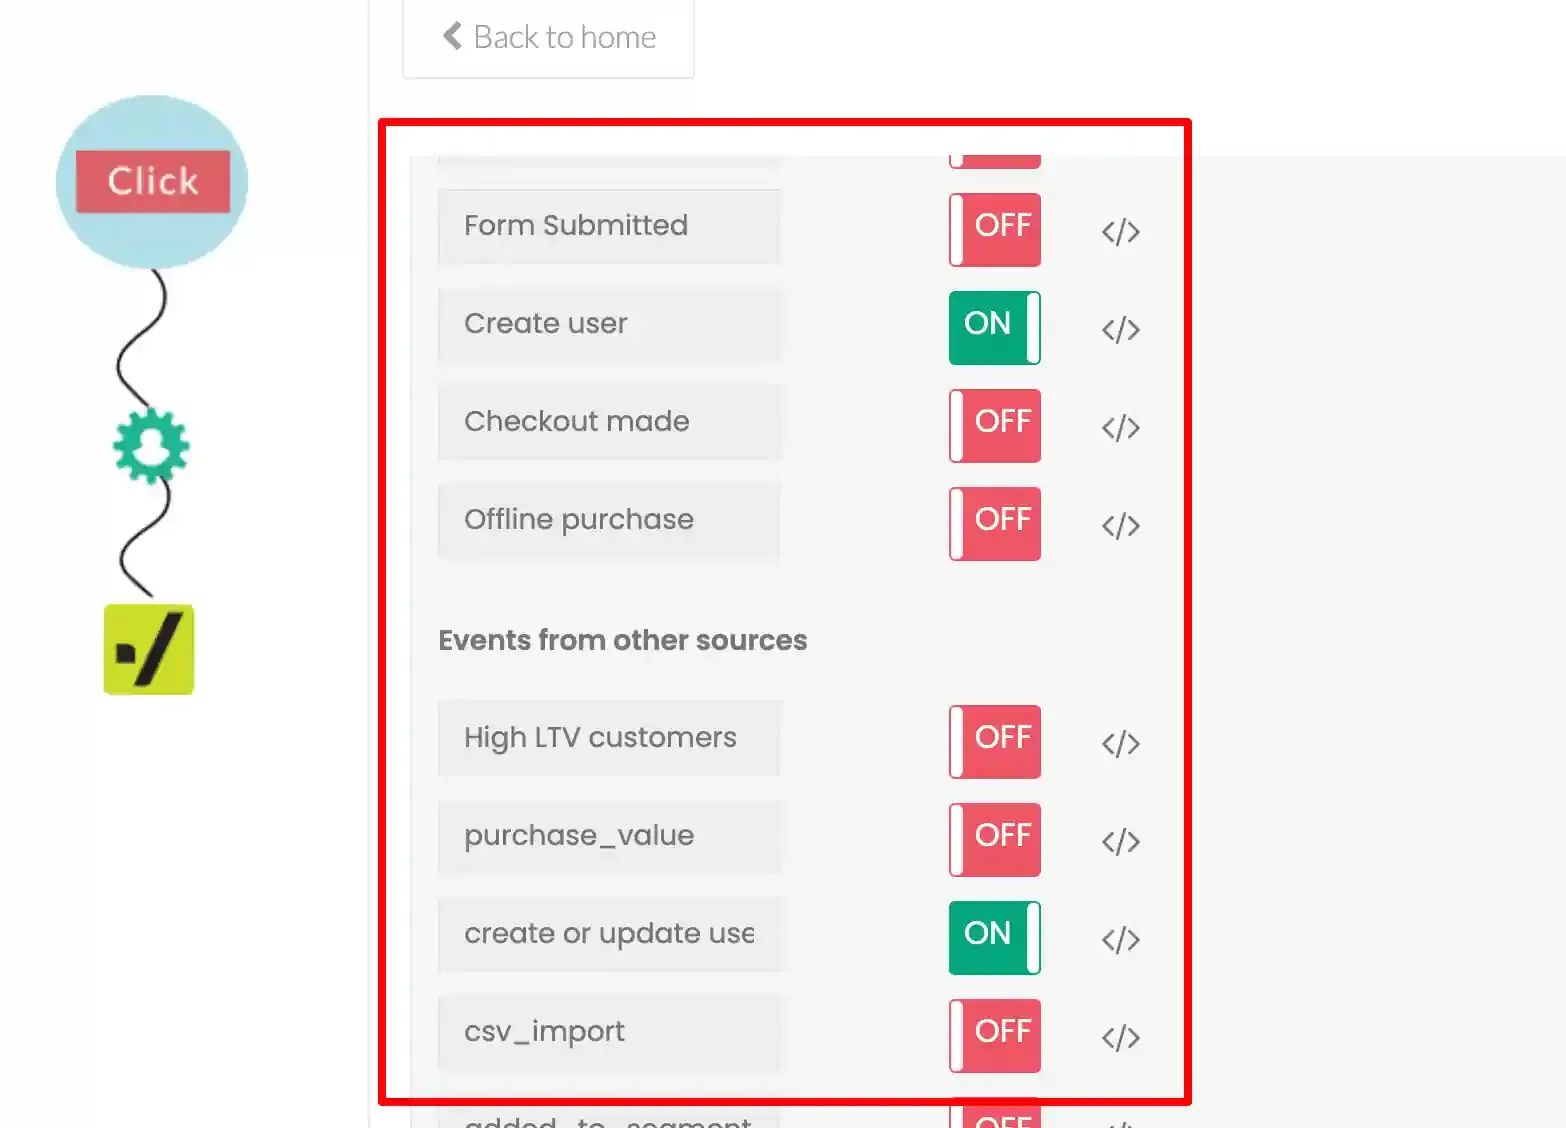
Enable the Event Workflow
Section titled “Enable the Event Workflow”Navigate to Destinations → Kickbox → Setup Event Workflow. Enable the toggle for each event that contains the mapped email fields and click Save Changes.
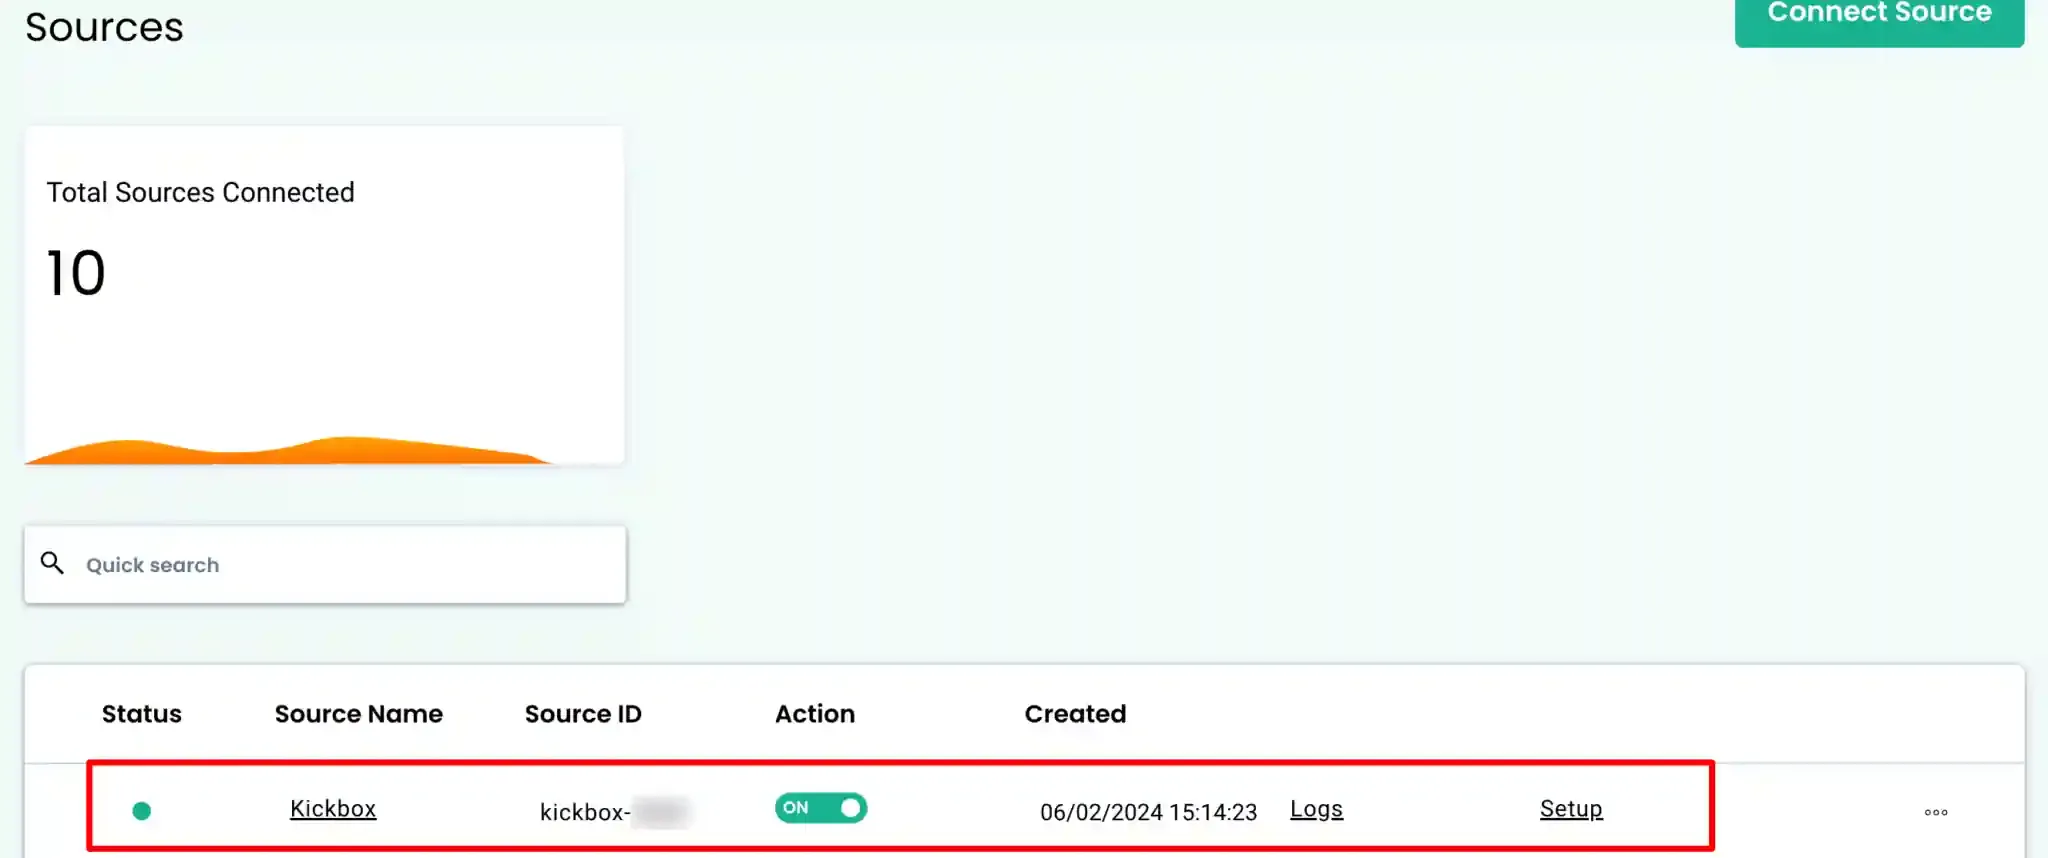
Part 3 — Kickbox Source Configuration
Section titled “Part 3 — Kickbox Source Configuration”Each draft workflow created in the Kickbox Source must be activated before verification results are returned to CustomerLabs.
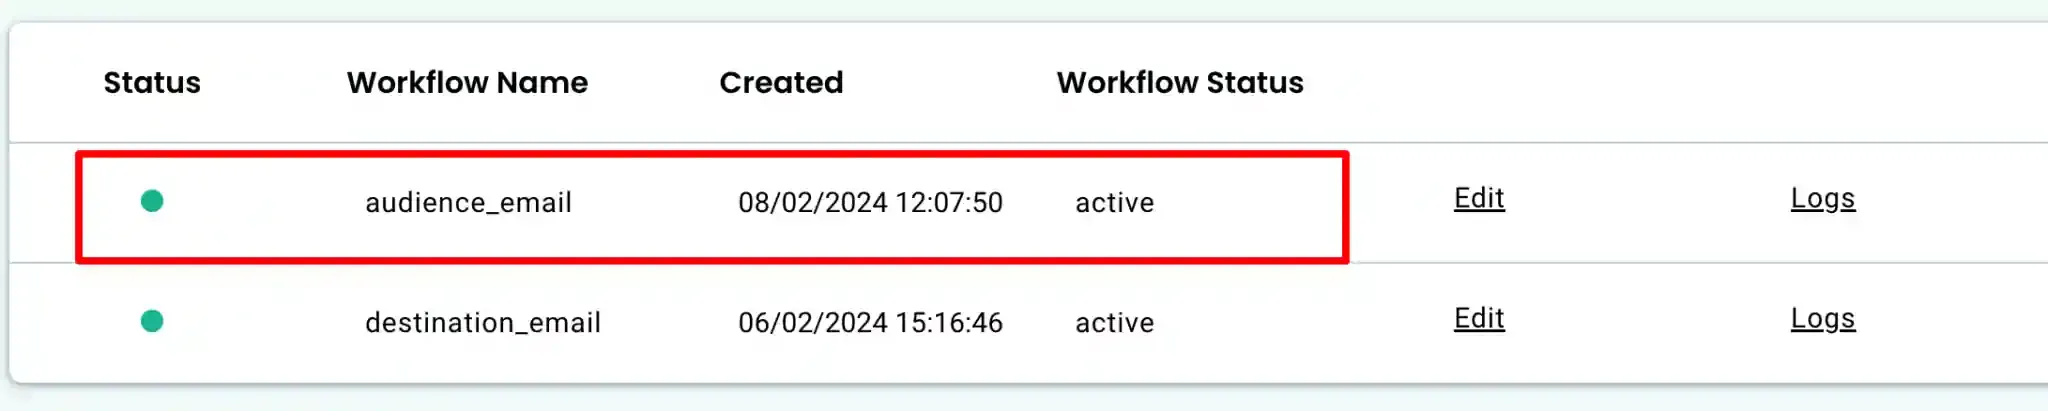
Open the Draft Workflow
Section titled “Open the Draft Workflow”Navigate to Sources → Kickbox and click Edit on the draft workflow corresponding to the email field you configured.

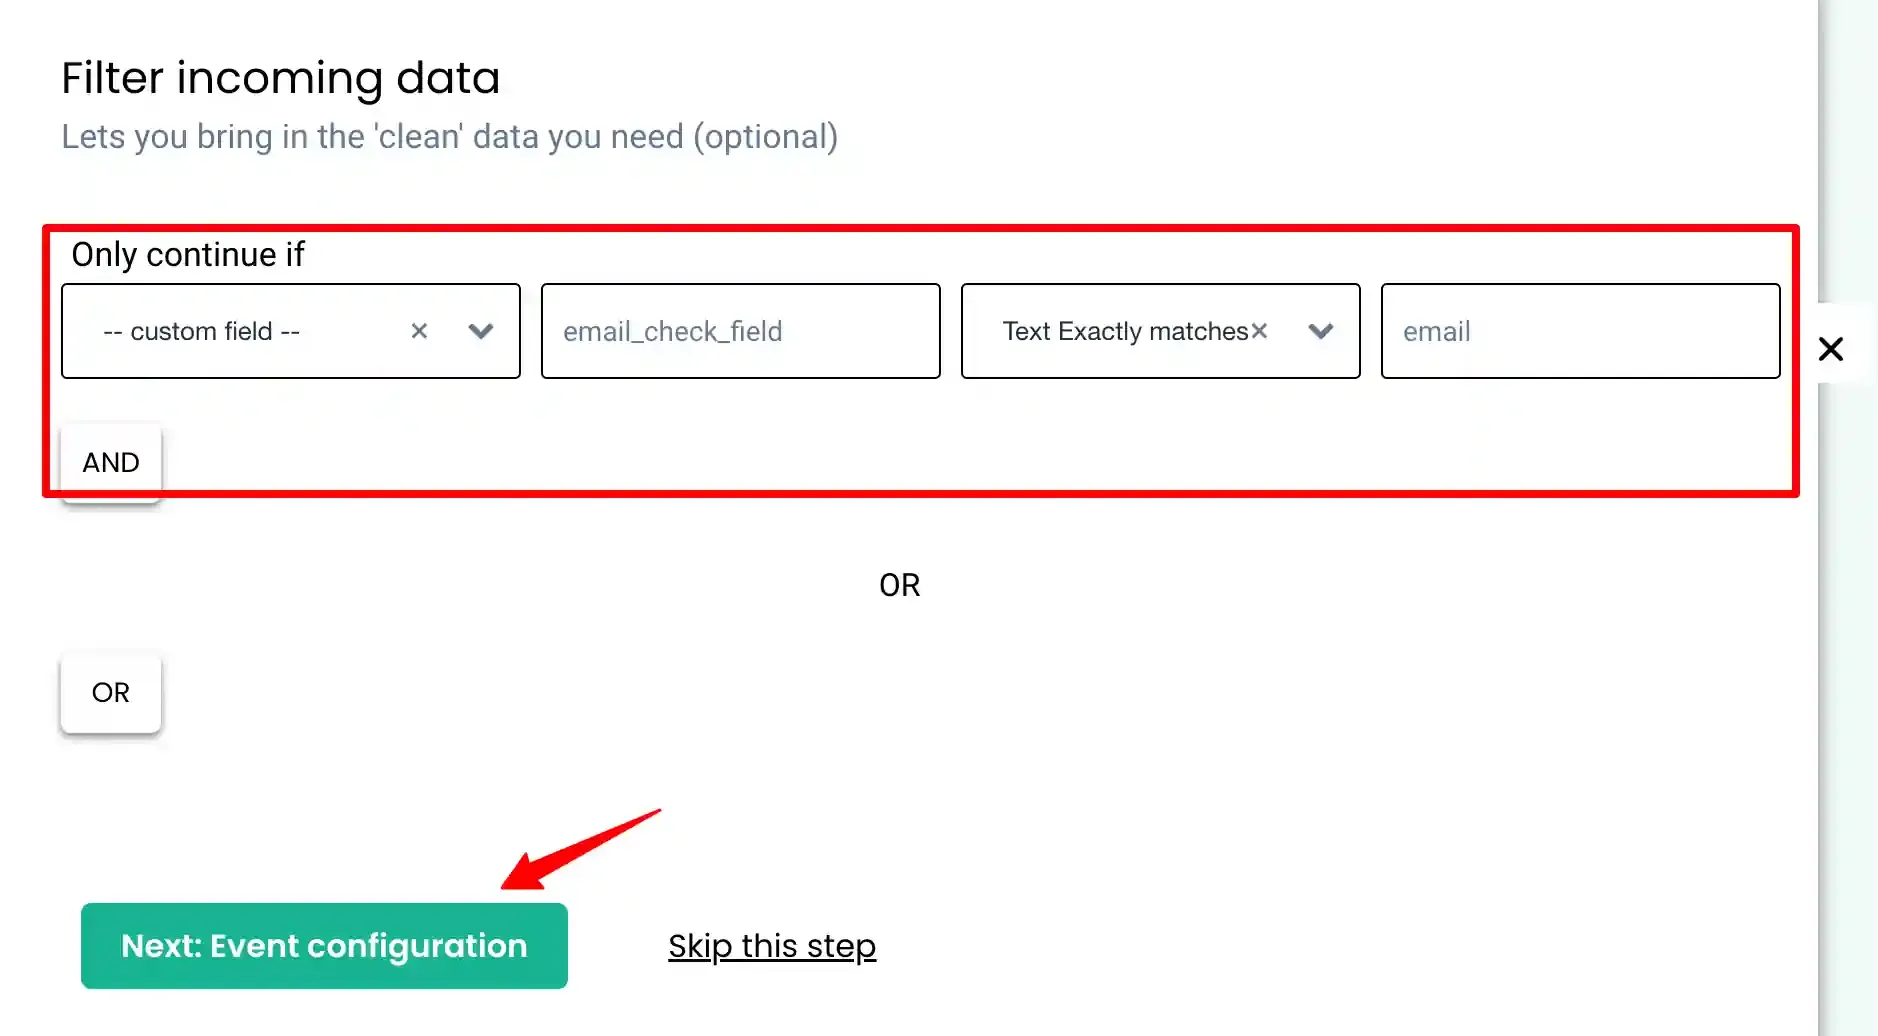
Proceed to Event Configuration
Section titled “Proceed to Event Configuration”The Sample Data and Filter Incoming Data steps are pre-configured by CustomerLabs. Click Next: Event Configuration to proceed directly.
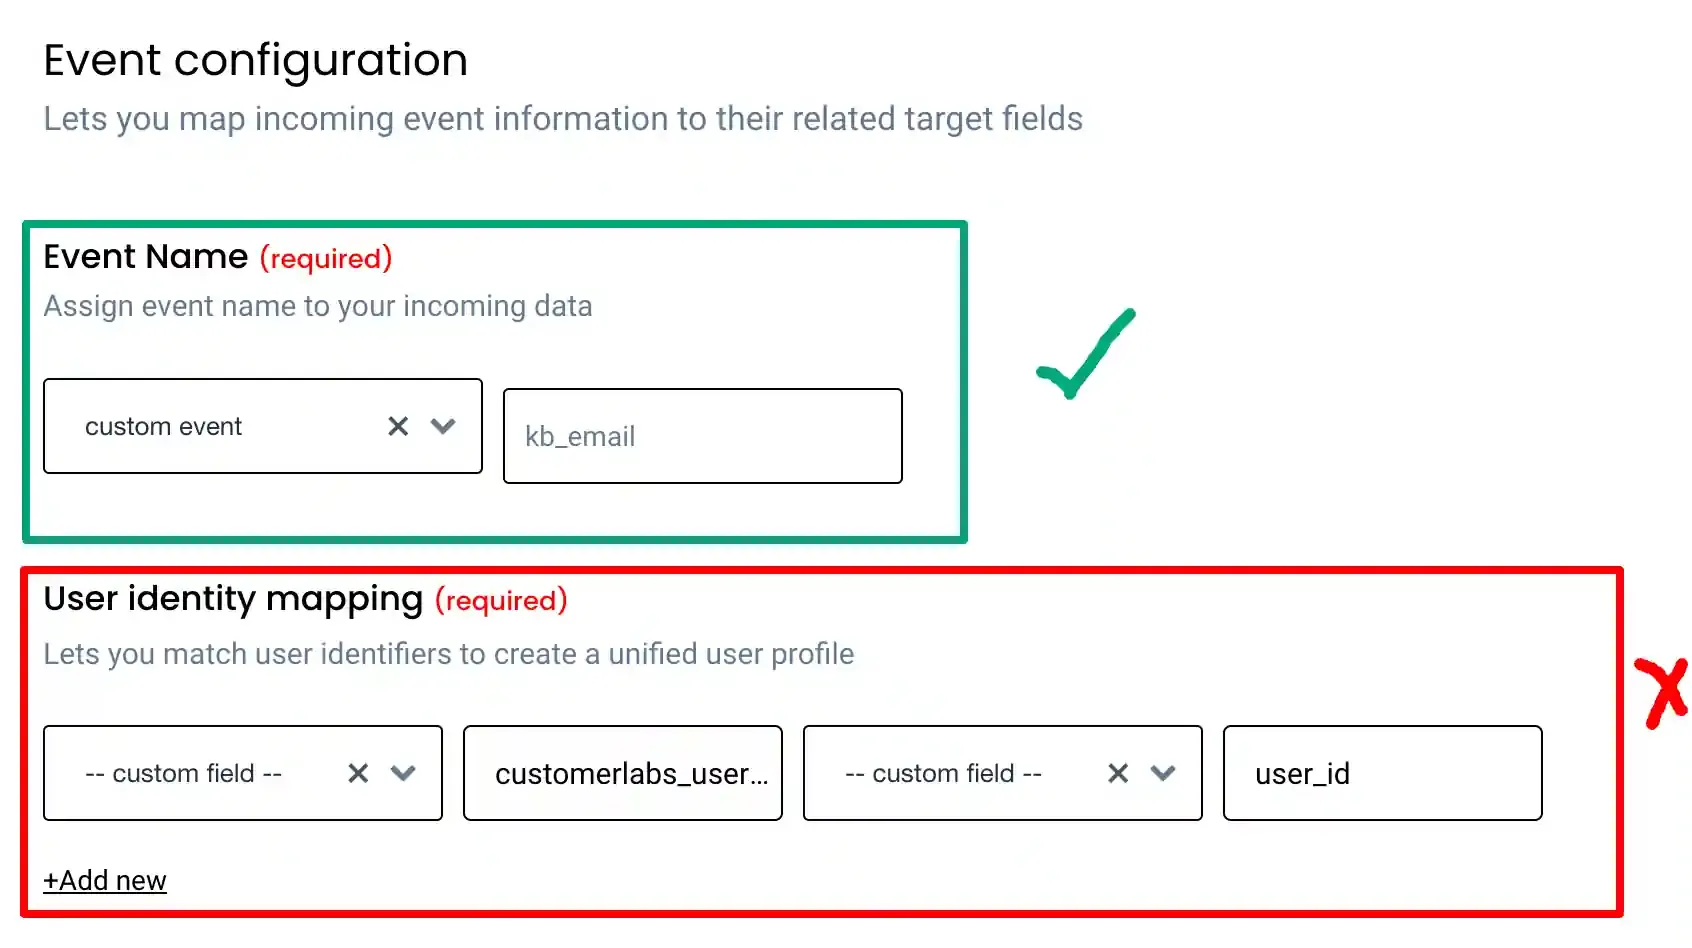
Configure the Event Name
Section titled “Configure the Event Name”In Event Configuration, the custom event name can be modified if required. All other settings in this section should be left as configured.
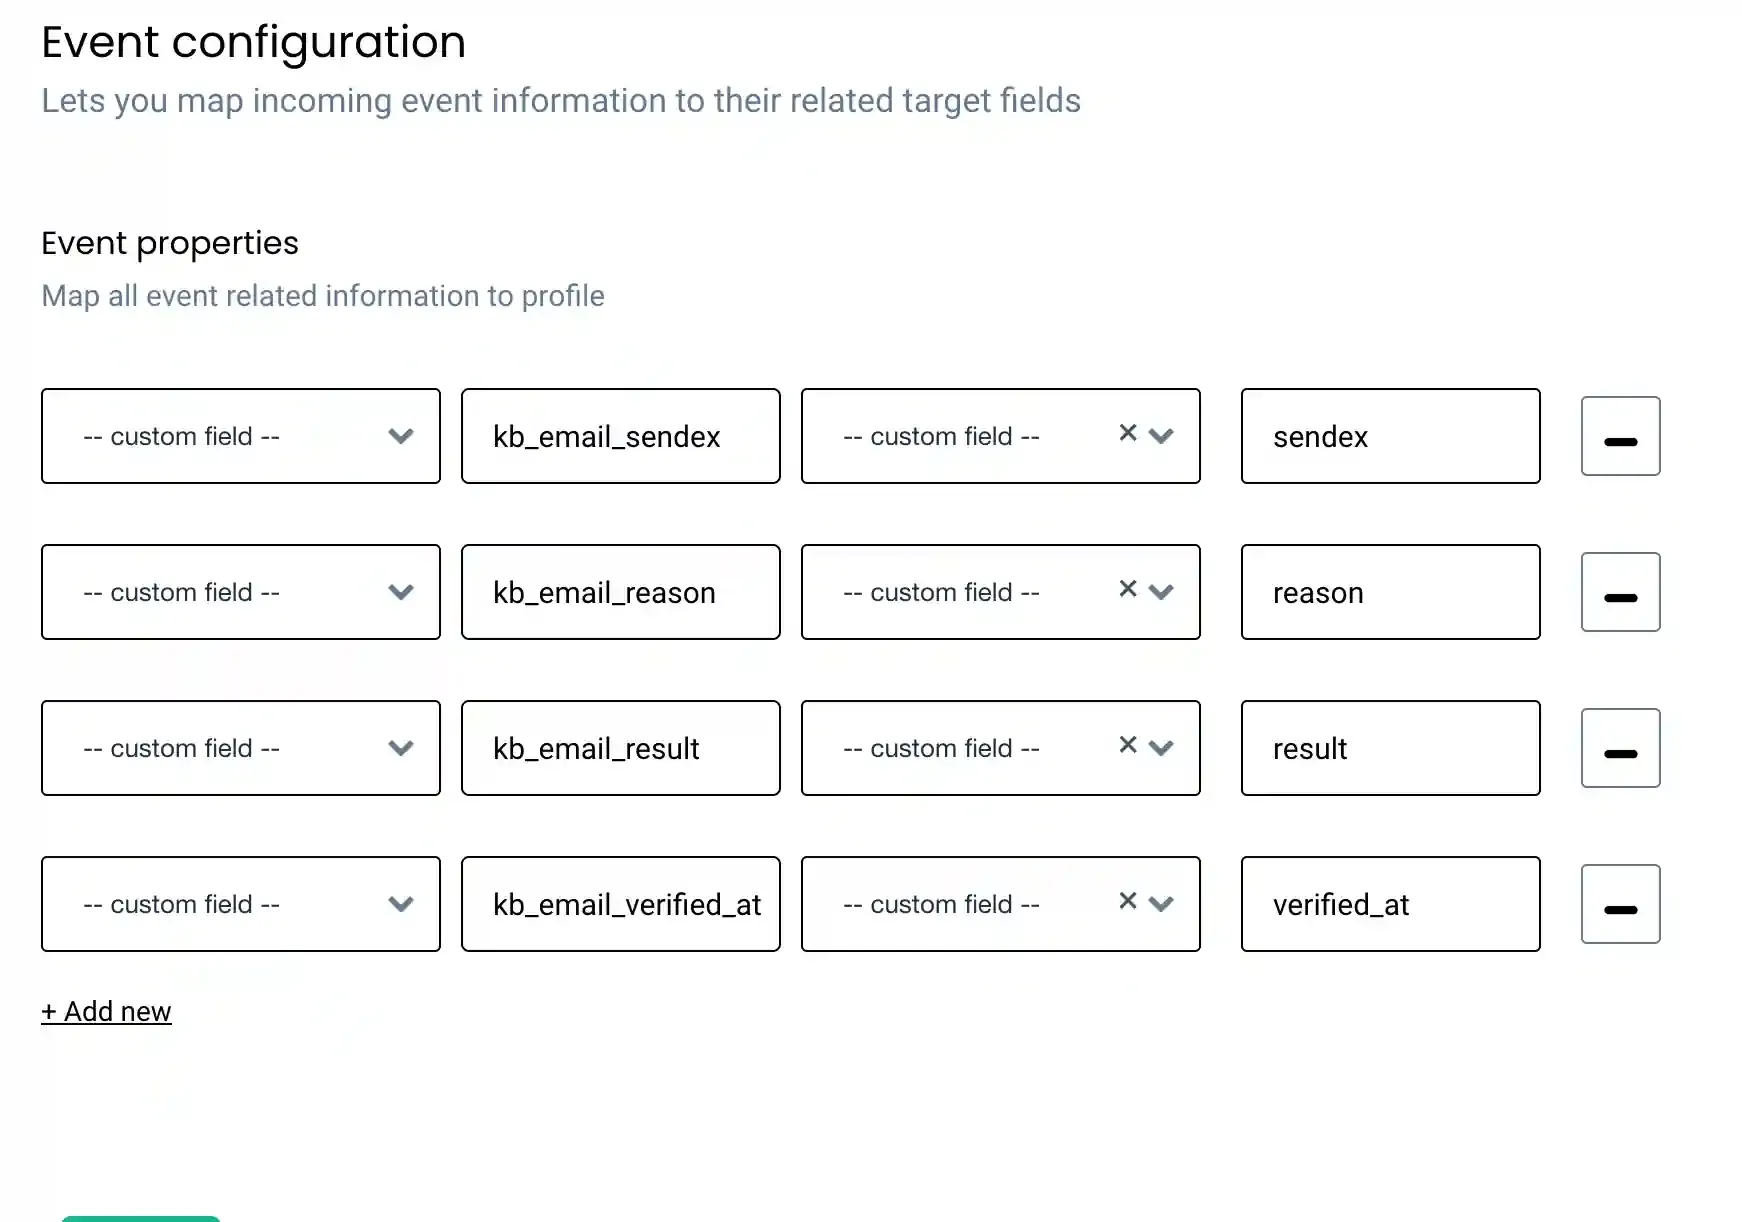
Review Event Properties
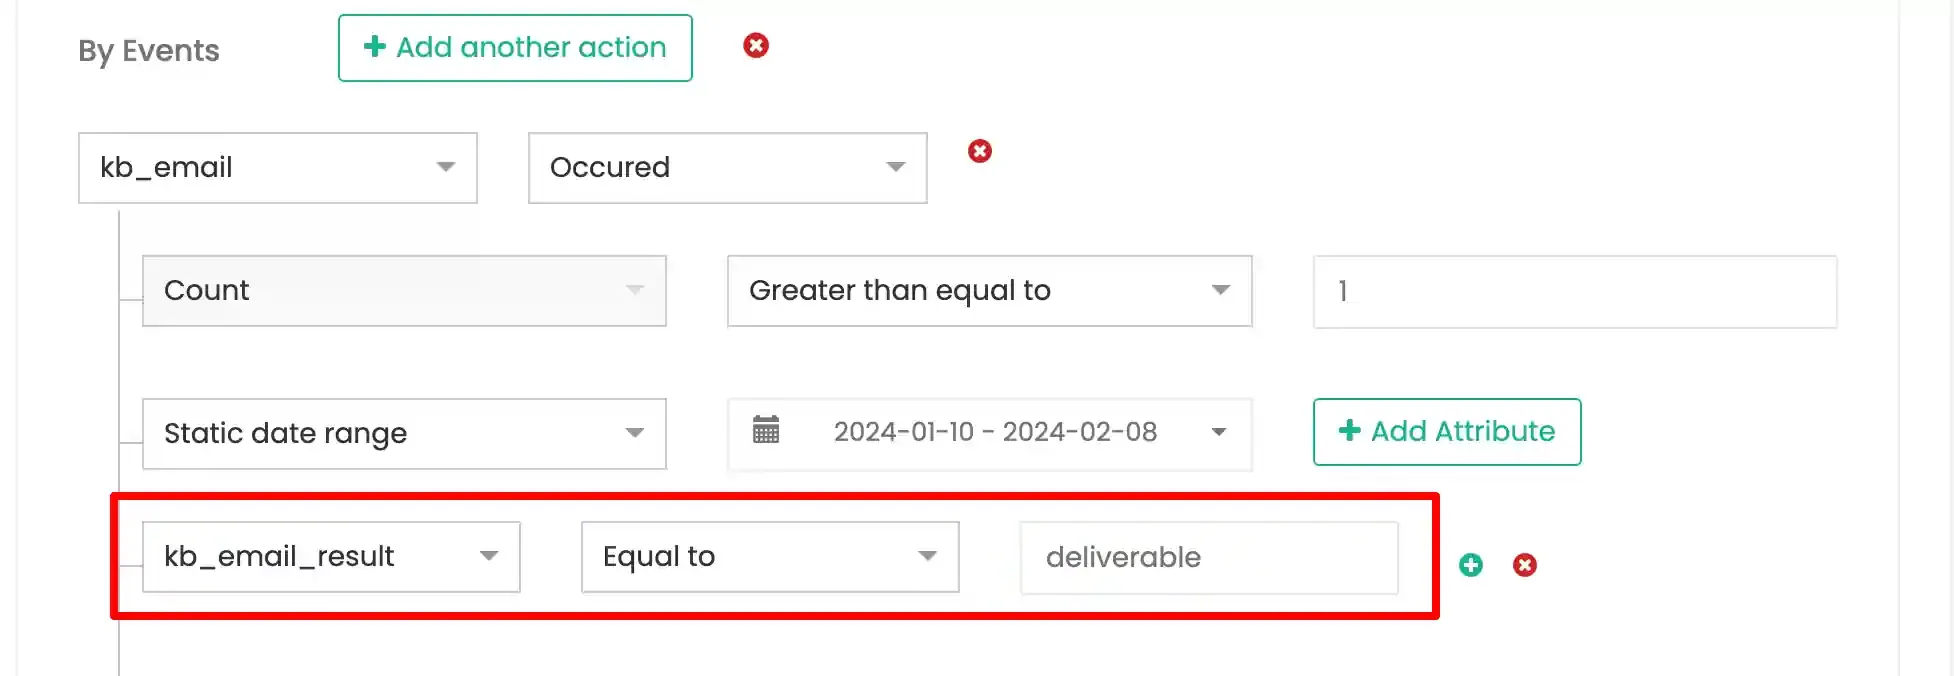
Section titled “Review Event Properties”The Event Properties section contains default properties added by CustomerLabs, including the verification result status. These properties can be used downstream to filter contacts whose email status is deliverable.

Review User Traits
Section titled “Review User Traits”The User Traits section contains mandatory field mappings pre-configured by CustomerLabs.
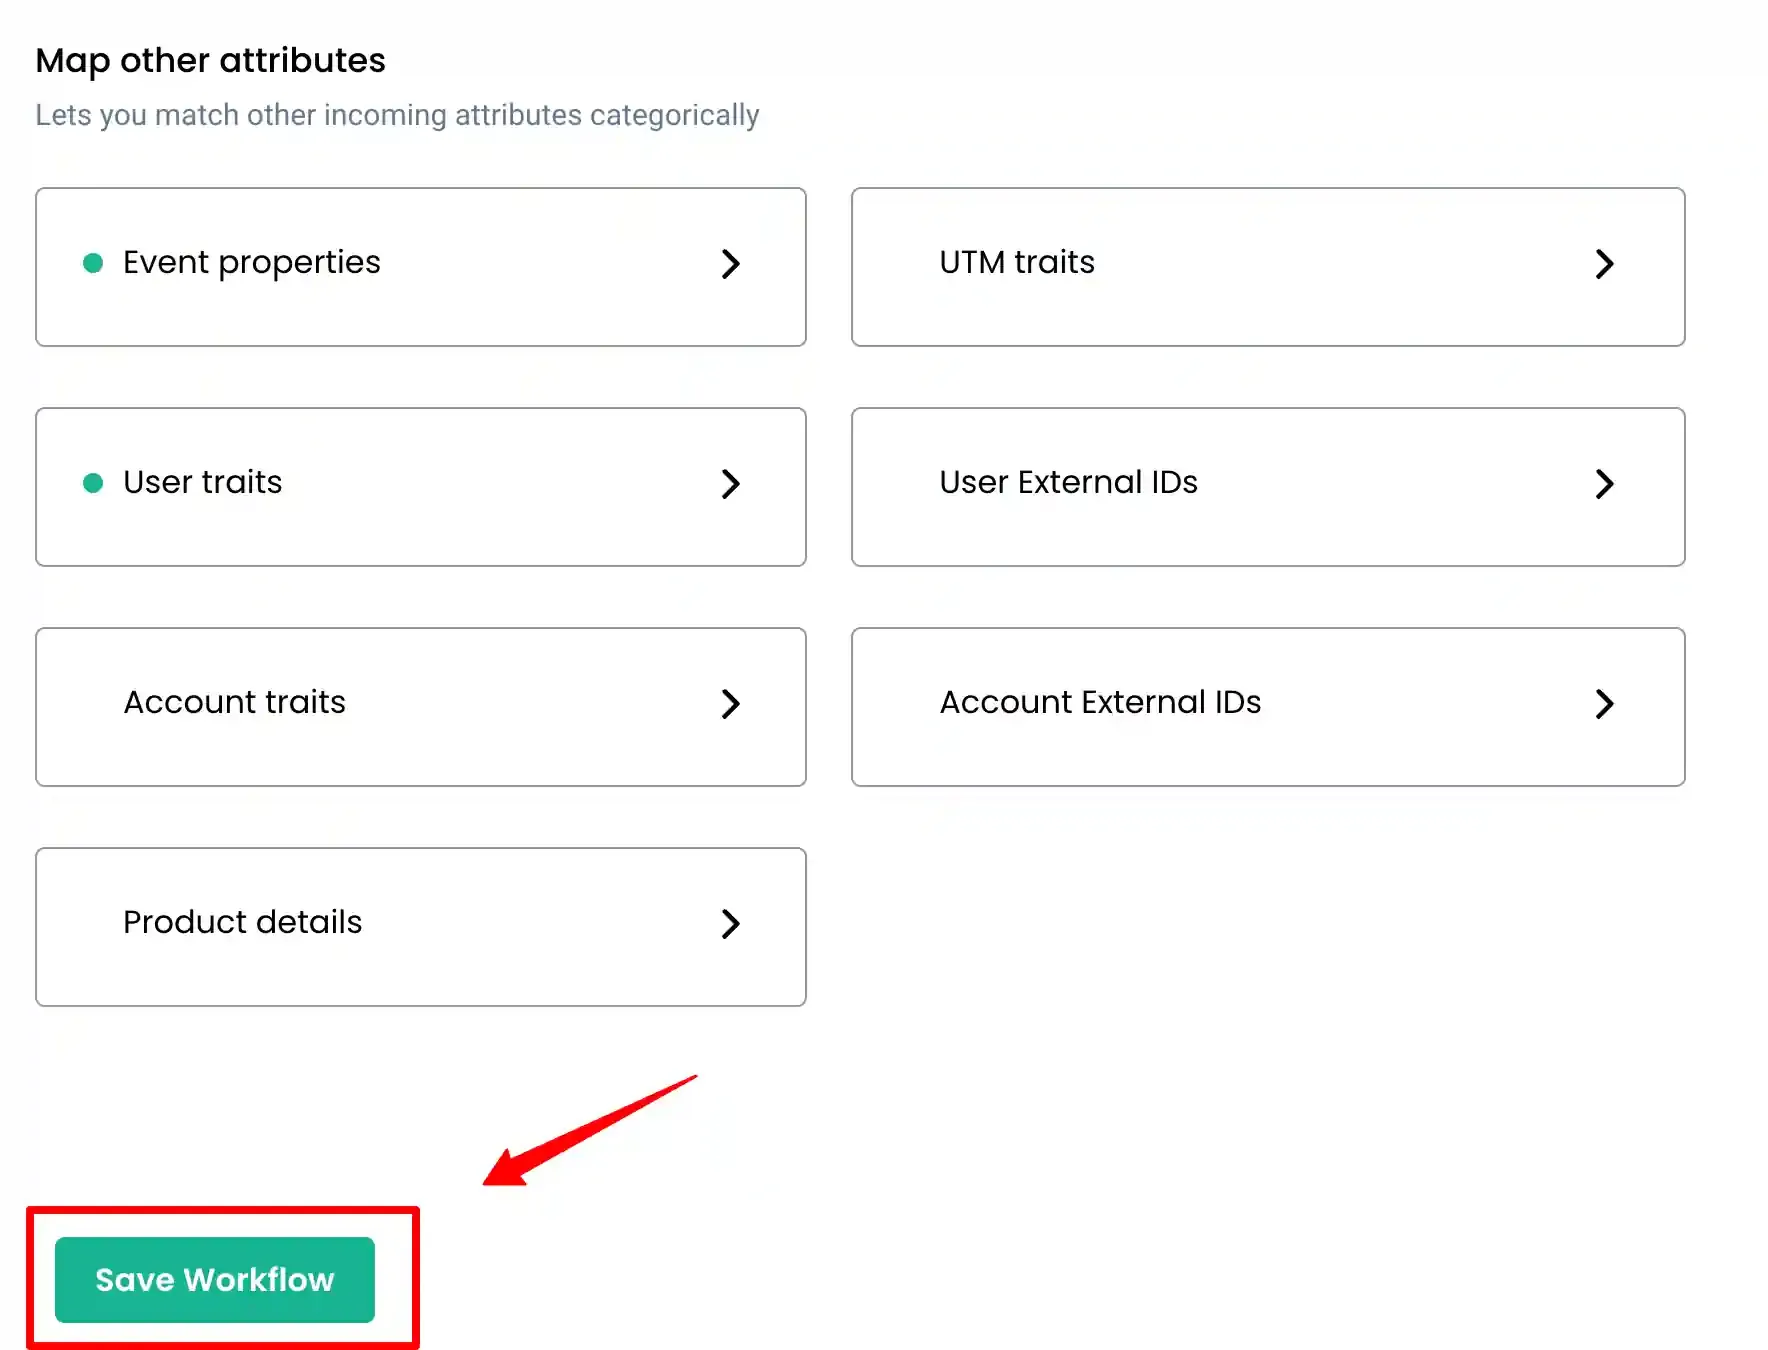
Save the Workflow
Section titled “Save the Workflow”Click Save Workflow to activate the draft. The workflow will begin processing verification results returned from Kickbox.
Part 4 — Syncing an Audience List to Kickbox
Section titled “Part 4 — Syncing an Audience List to Kickbox”Audience lists can also be sent directly to Kickbox for bulk email verification.
Open the Audience
Section titled “Open the Audience”Navigate to the target audience list or create a new one. Click the View Audience icon to open it.

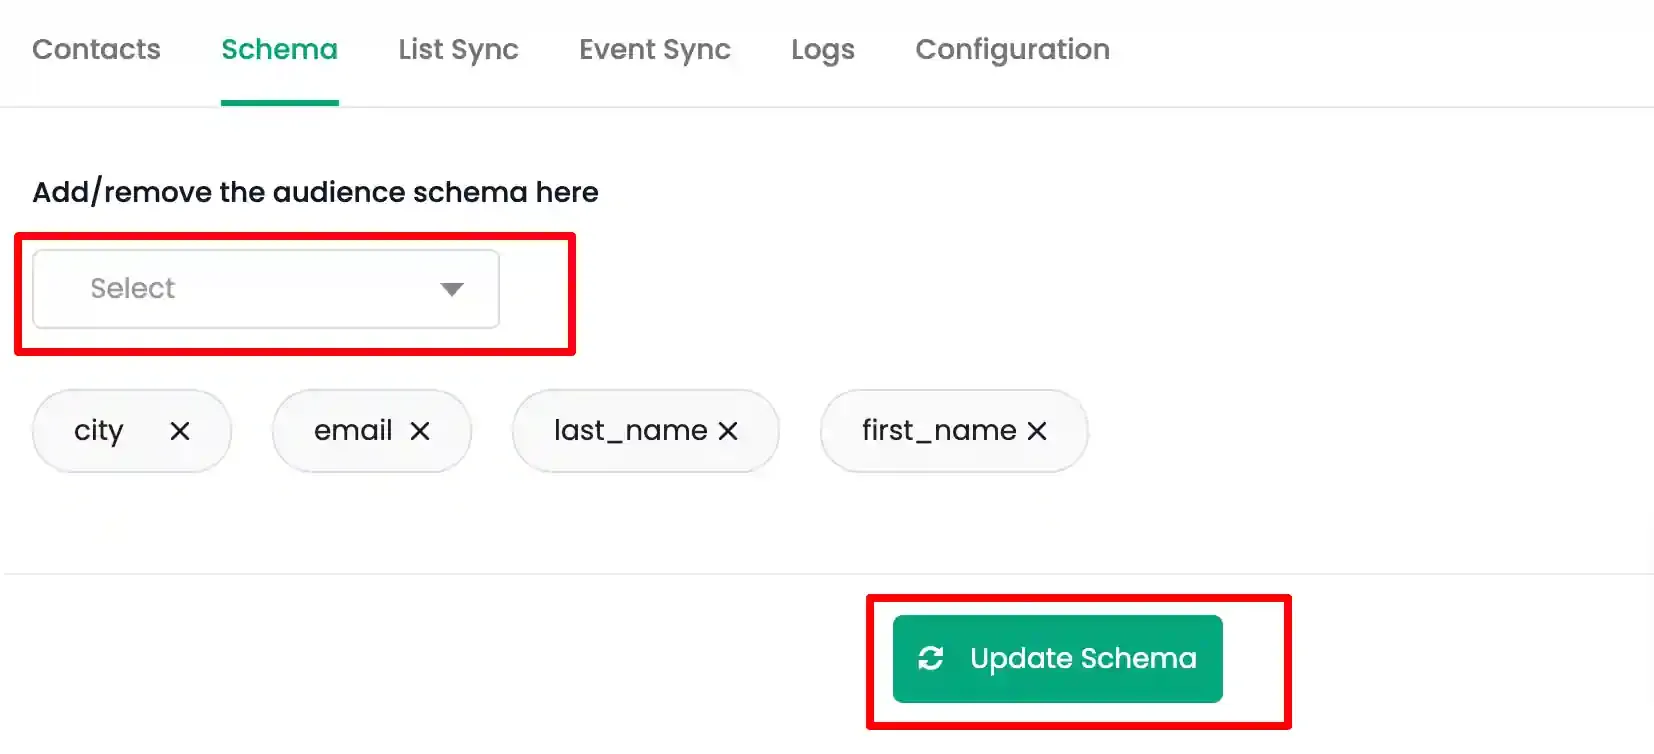
Add Email Fields to the Schema
Section titled “Add Email Fields to the Schema”Open the Schema tab. Select the email fields to include from the dropdown and click Update Schema.
Map the Schema to Kickbox
Section titled “Map the Schema to Kickbox”Open the List Sync tab, locate Kickbox, and click Map Schema.

Map each email field to the corresponding Kickbox field (Email 1, Email 2, Email 3 — maximum three fields) and click Save Schema.
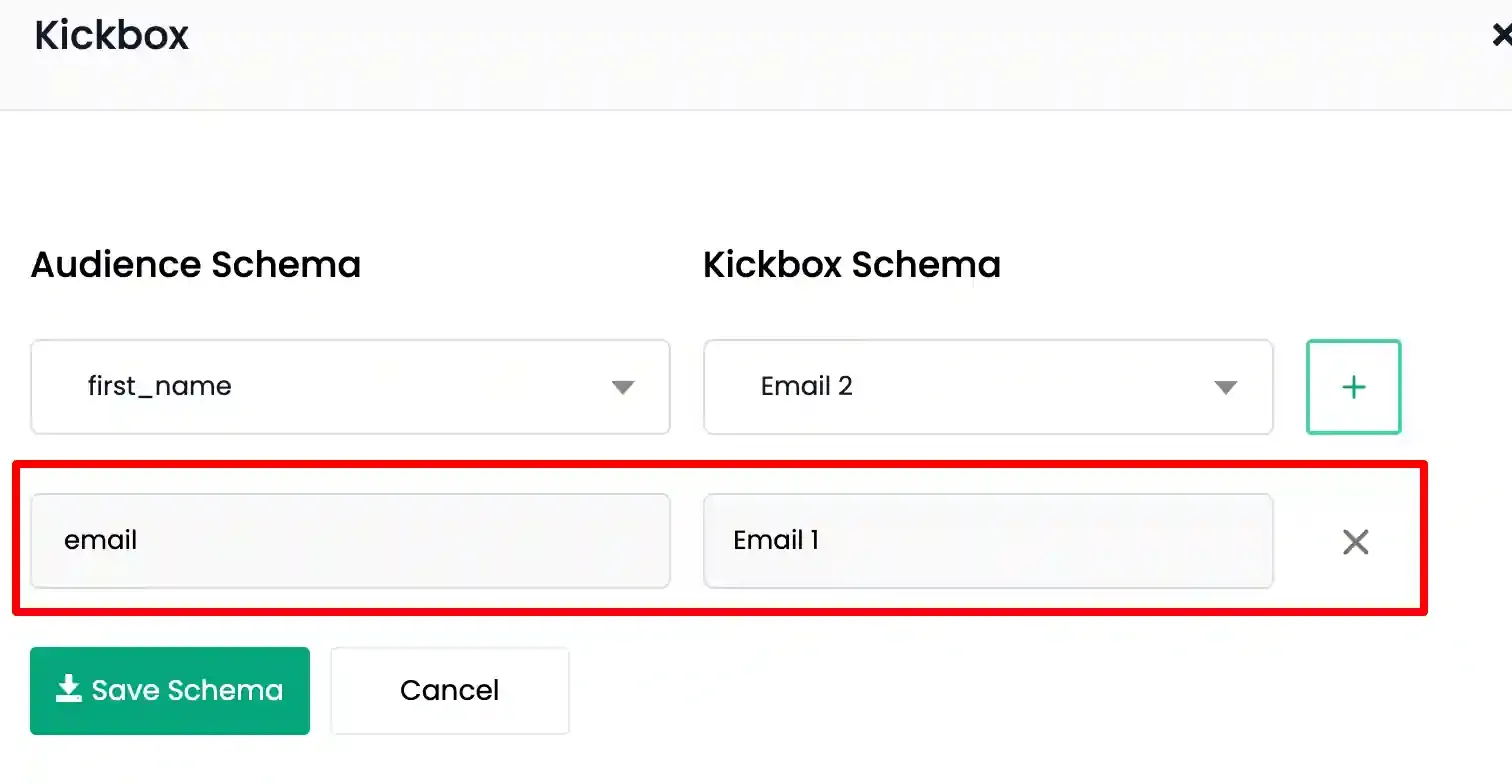
Enable the Kickbox toggle and click Instant Sync to begin the bulk verification.

Quick Reference
Section titled “Quick Reference”| Setting | Value |
|---|---|
| Auth Type | API Key |
| API Key Location | Kickbox → API Keys → Manage Keys |
| API Permissions Required | Check balance, Verify email address list, Verify single email address |
| Where to Enter | CustomerLabs → Destinations → Kickbox → Configuration Settings |
| Max Email Fields | 3 (per destination config and per audience schema) |
| Verification Results | Returned via auto-created Kickbox Source workflows |