Freshsales + CustomerLabs 1PD Ops
Freshsales is a cloud-based CRM that helps businesses manage interactions with existing and potential customers. It offers features such as one-click calling, lead tracking, sales pipeline management, and event tracking.
CustomerLabs 1PD Ops is a first-party data operations platform that unifies customer data from multiple sources, resolves identities, and syncs enriched profiles to your marketing stack.
Why This Integration Matters
Section titled “Why This Integration Matters”By connecting Freshsales to CustomerLabs 1PD Ops, you create a real-time data bridge between your sales team and your marketing tools. Every time a contact is created, a lead moves stages, or a deal is updated in Freshsales — that data flows into CustomerLabs automatically.
With this integration, marketing teams can:
- Enrich user profiles — Combine CRM data (name, email, lifecycle stage, job title) with behavioral data already in CustomerLabs to build 360° customer profiles.
- Build precise audience segments — Create segments based on CRM lifecycle stages (e.g., “All contacts marked as MQL in the last 7 days”) for targeted campaigns.
- Sync data to downstream tools — Push enriched profiles to ad platforms (Google, Meta, LinkedIn), email tools (Klaviyo, Brevo), and analytics destinations in real time.
Prerequisites
Section titled “Prerequisites”Before you begin, ensure you have the following:
| Requirement | Details |
|---|---|
| Freshsales Account | Admin-level access to create workflows. |
| CustomerLabs Account | An active CustomerLabs 1PD Ops account. |
| Webhook URL | Generated during setup in CustomerLabs (Step 1 below). |
Integration Architecture
Section titled “Integration Architecture”The integration uses a webhook-based approach:
- Freshsales fires a webhook whenever a configured event occurs (e.g., contact created or updated).
- CustomerLabs receives the webhook payload at a unique endpoint URL.
- Workflows in CustomerLabs process, filter, and map the incoming data into user profiles and events.
- Destinations receive the enriched data (ad platforms, email tools, analytics, etc.).
Freshsales CRM → (webhook) → CustomerLabs Source → (workflow) → Destinations
Step 1: Create a Custom Source in CustomerLabs
Section titled “Step 1: Create a Custom Source in CustomerLabs”-
Log in to your CustomerLabs 1PD Ops account.
-
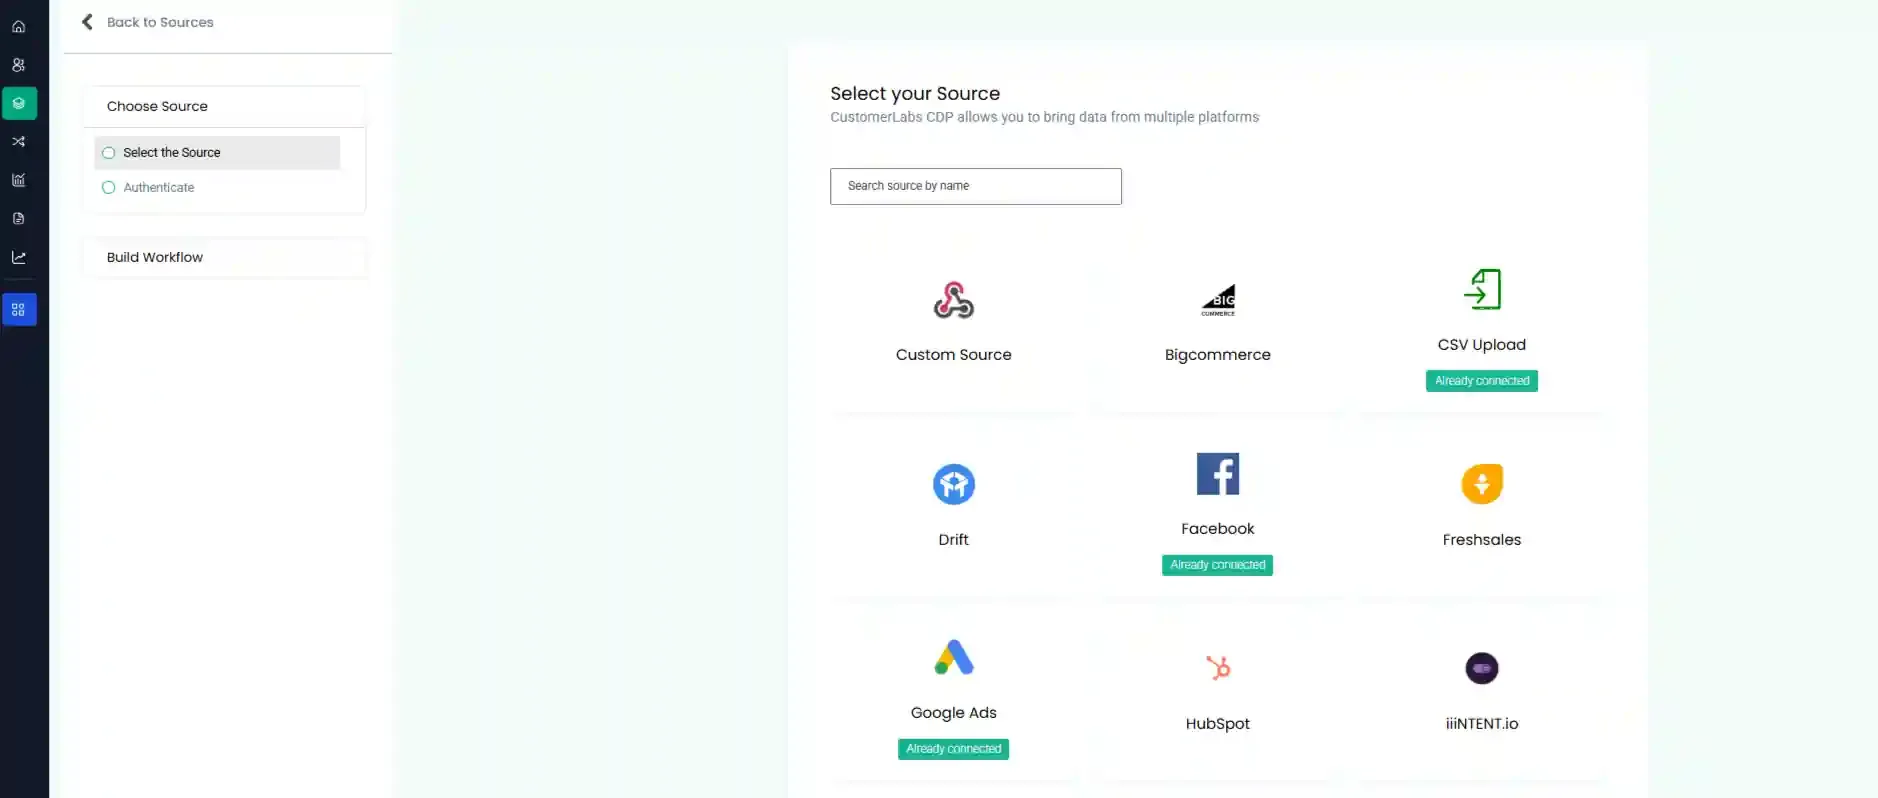
Navigate to Sources → click Connect Source.
-
Select Custom Source from the source list.
-
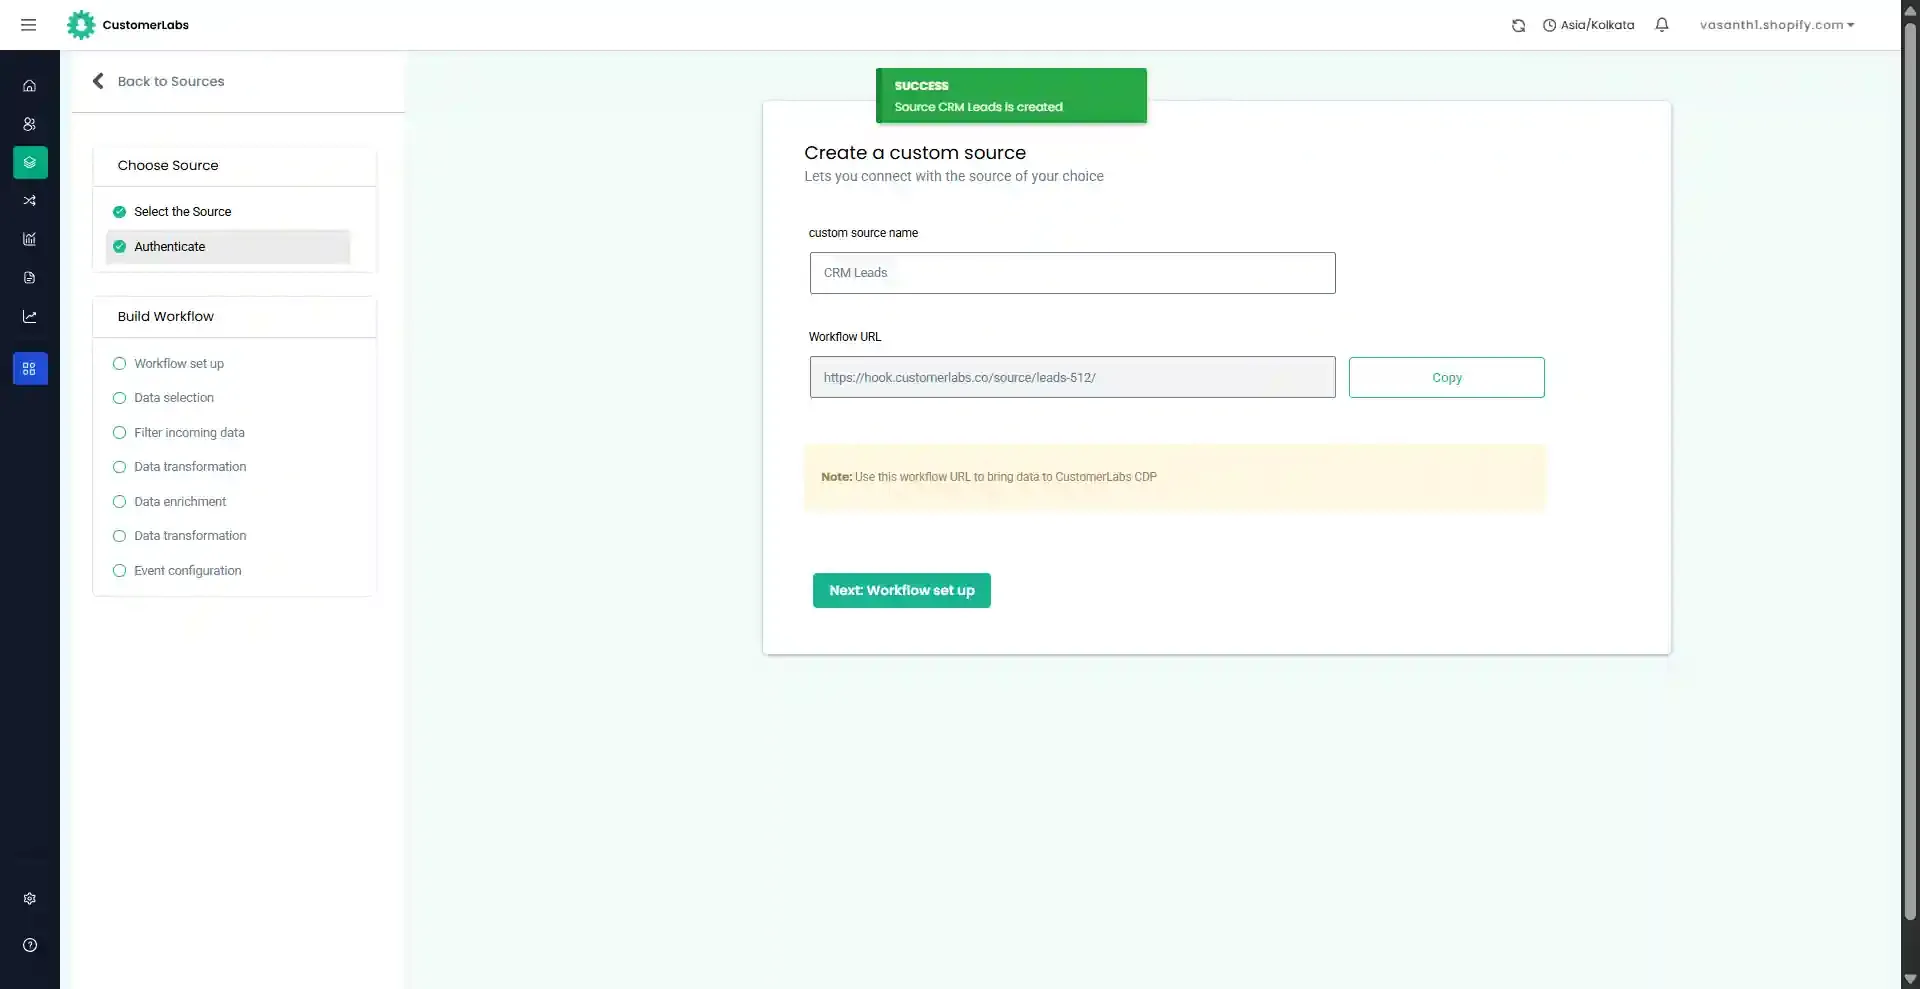
Name the source with a clear, descriptive label.
-
After saving, copy the Webhook URL displayed on screen. You will need this in the next step.
Step 2: Create a Webhook Workflow in Freshsales
Section titled “Step 2: Create a Webhook Workflow in Freshsales”- Log in to your Freshsales account (Admin access required).
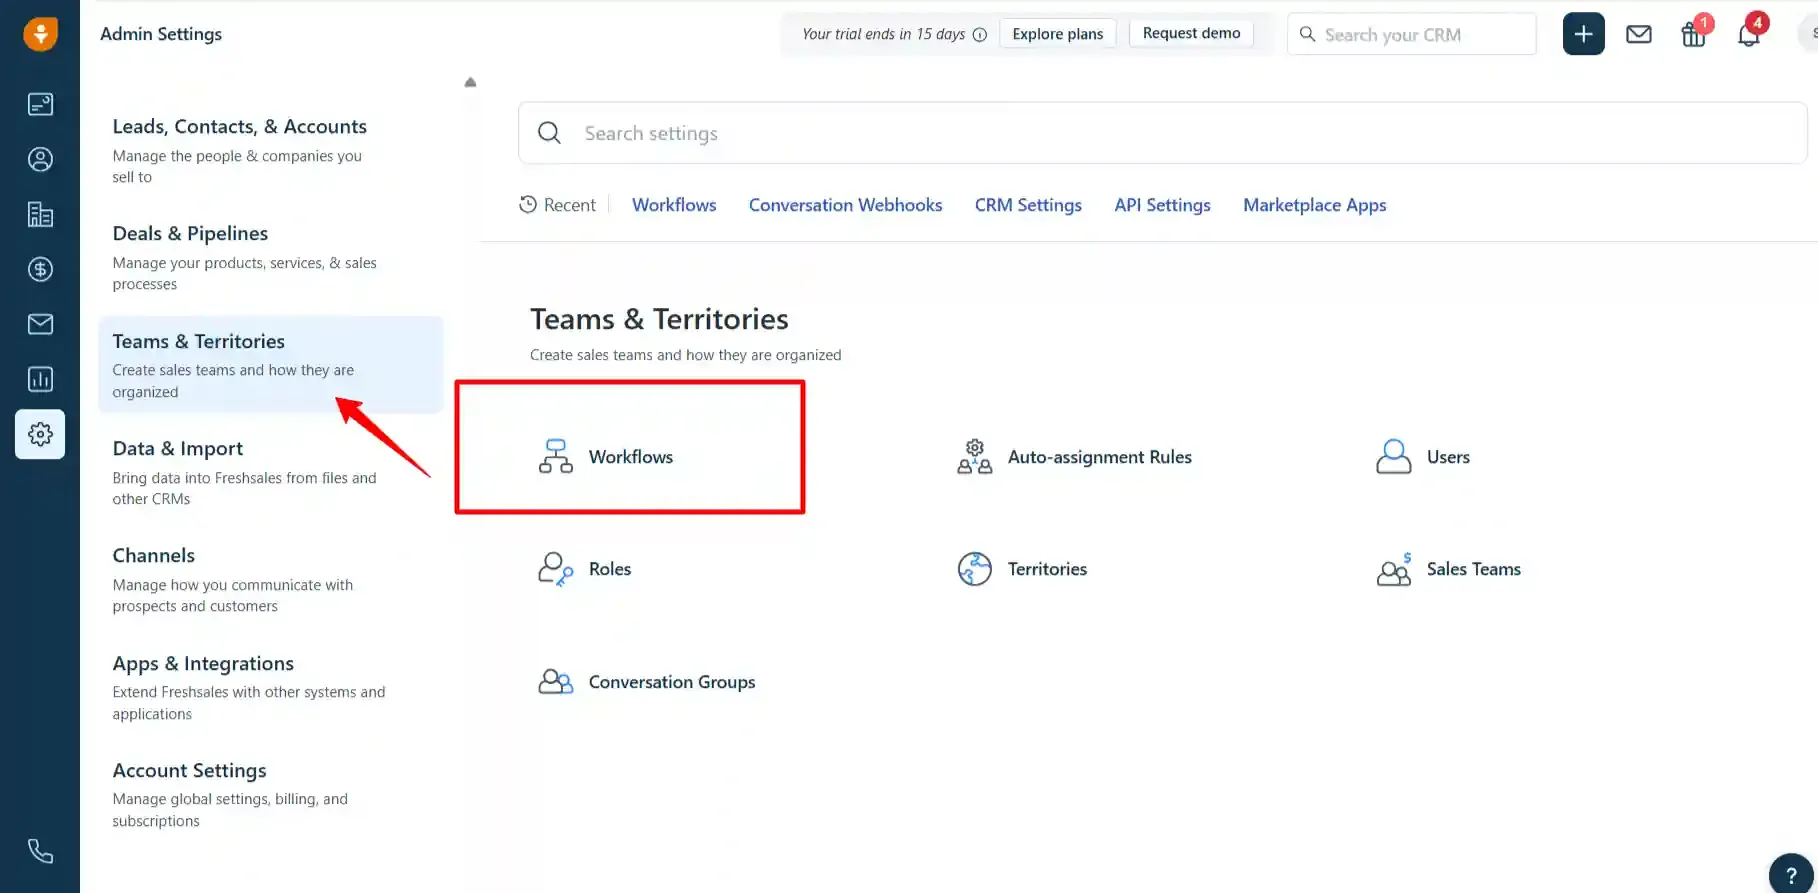
- Navigate to: Admin Settings → Teams & Territories → Workflows.
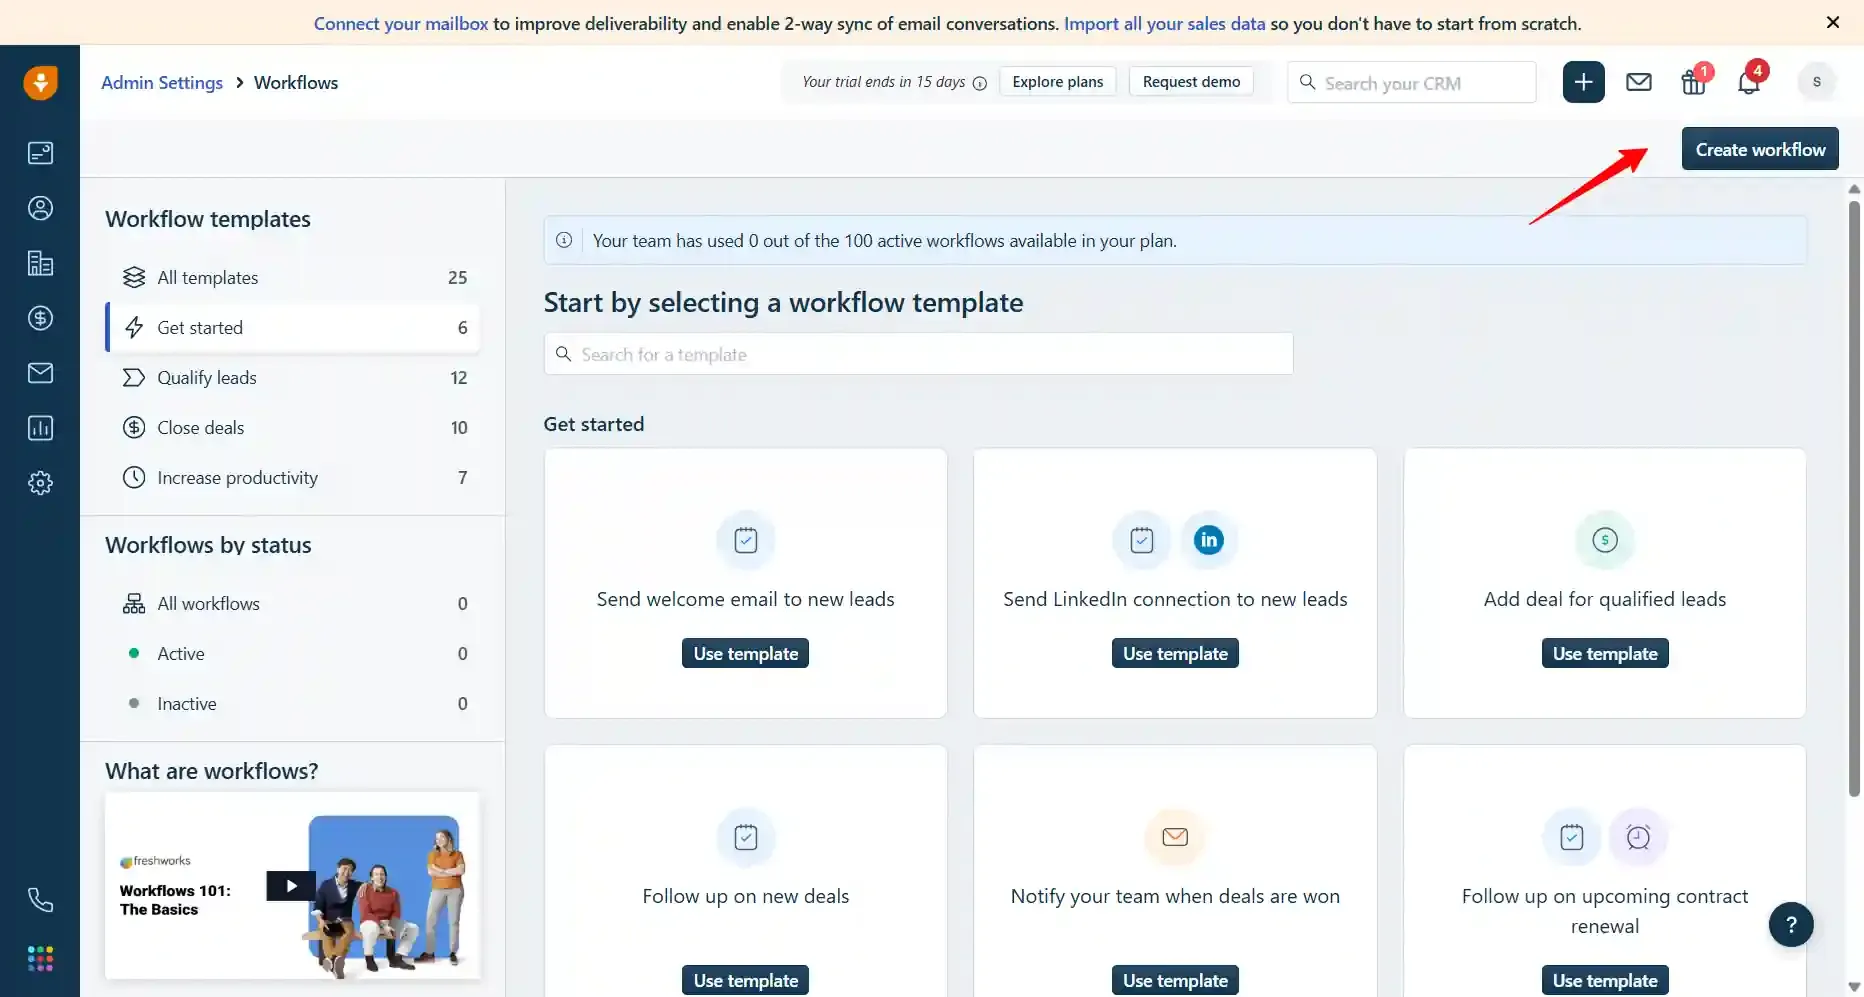
- Click Create Workflow.
You will create two separate workflows — one for contact creation and one for contact updates.
Step 3: Workflow #1 — Contact Created
Section titled “Step 3: Workflow #1 — Contact Created”This workflow fires every time a new contact is created in Freshsales.
3.1 Create the Workflow
Section titled “3.1 Create the Workflow”-
Inside Workflows, name it descriptively (e.g.,
CL – Contact Created). -
Set the Module to Contacts.
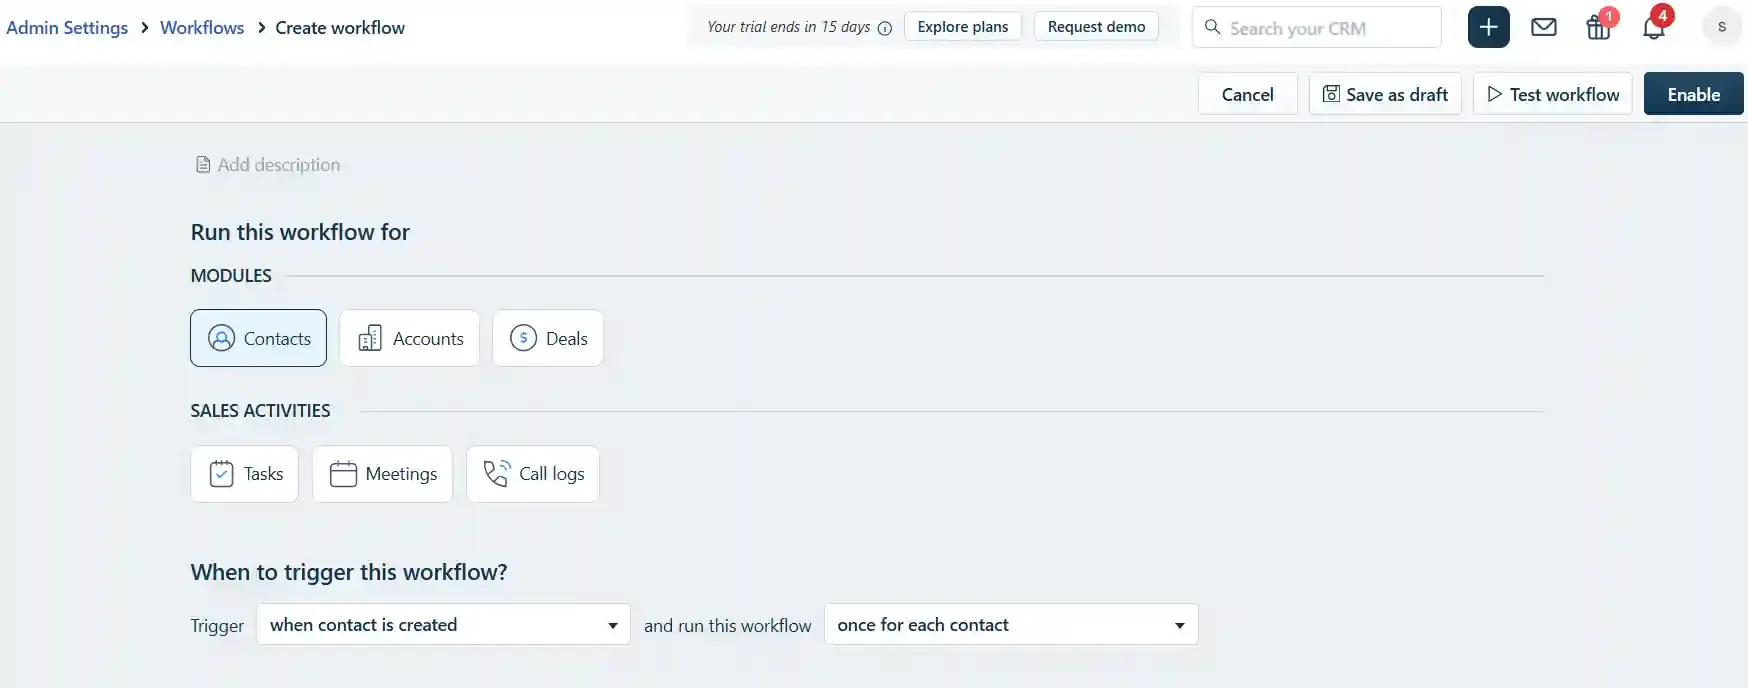
3.2 Set the Trigger Condition
Section titled “3.2 Set the Trigger Condition”-
Set the trigger to: When a contact is created.
-
Ensure the workflow is configured to run for every contact.
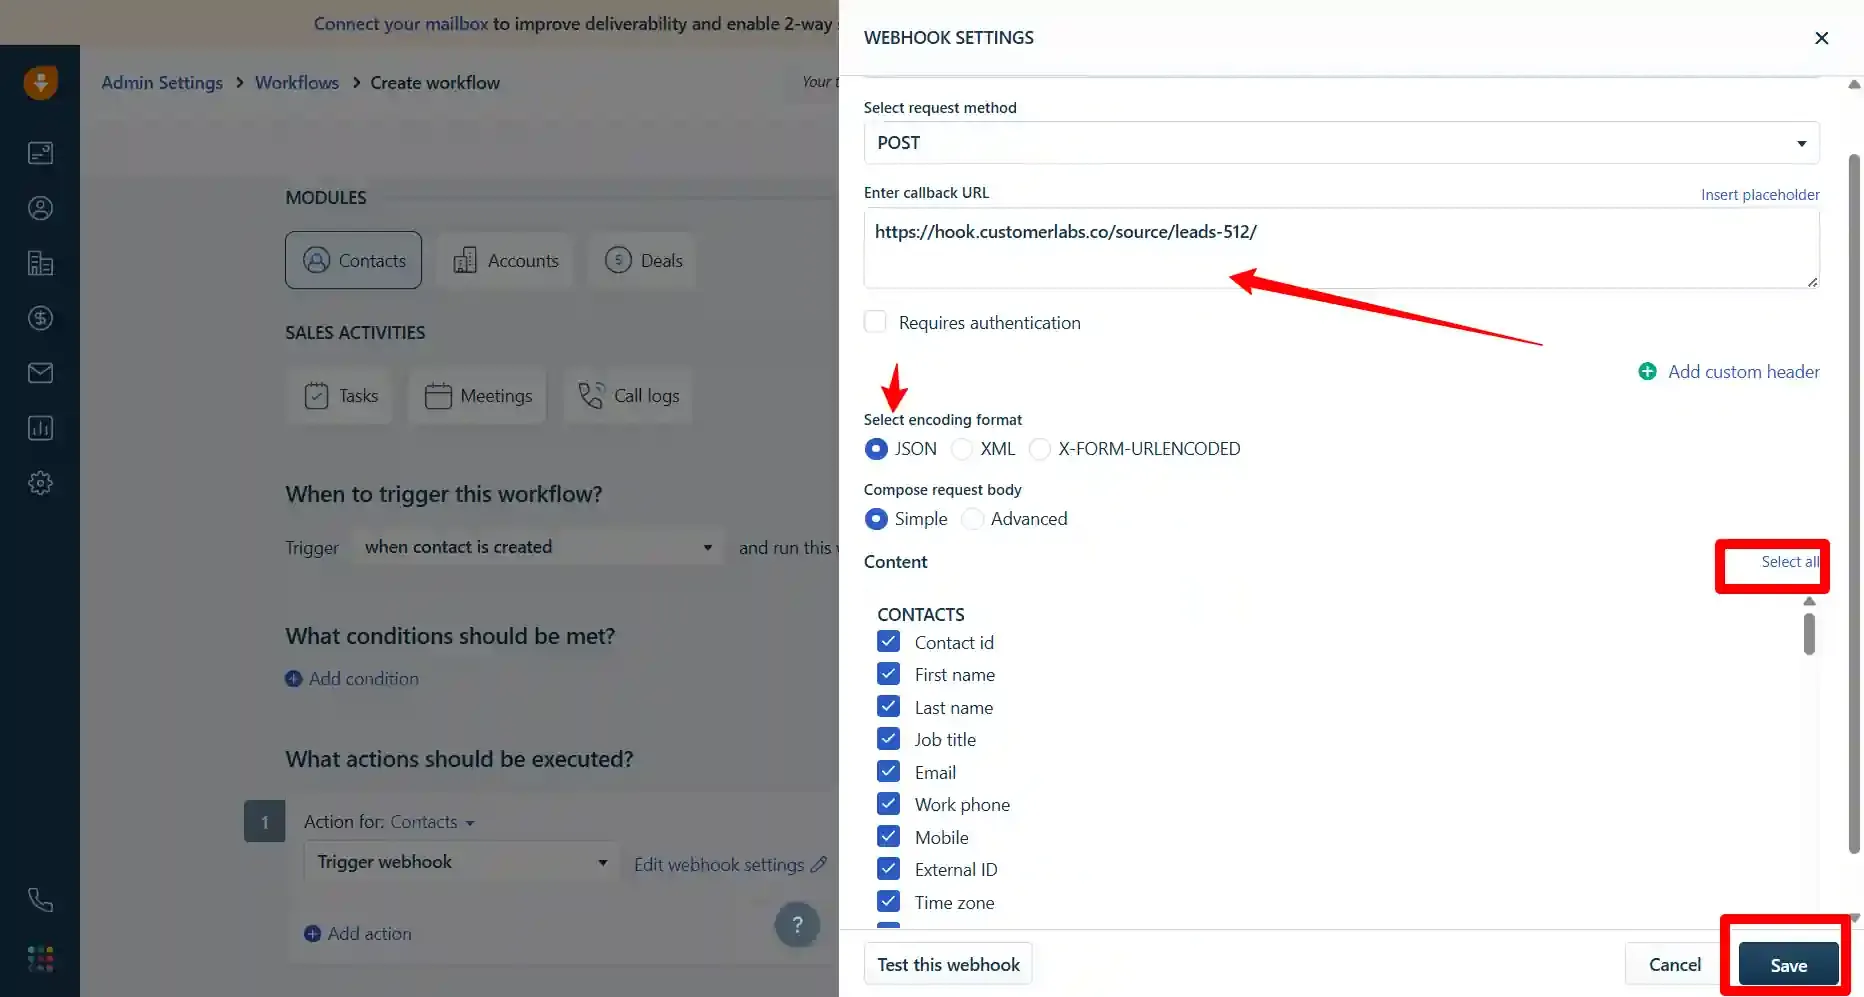
3.3 Configure the Action
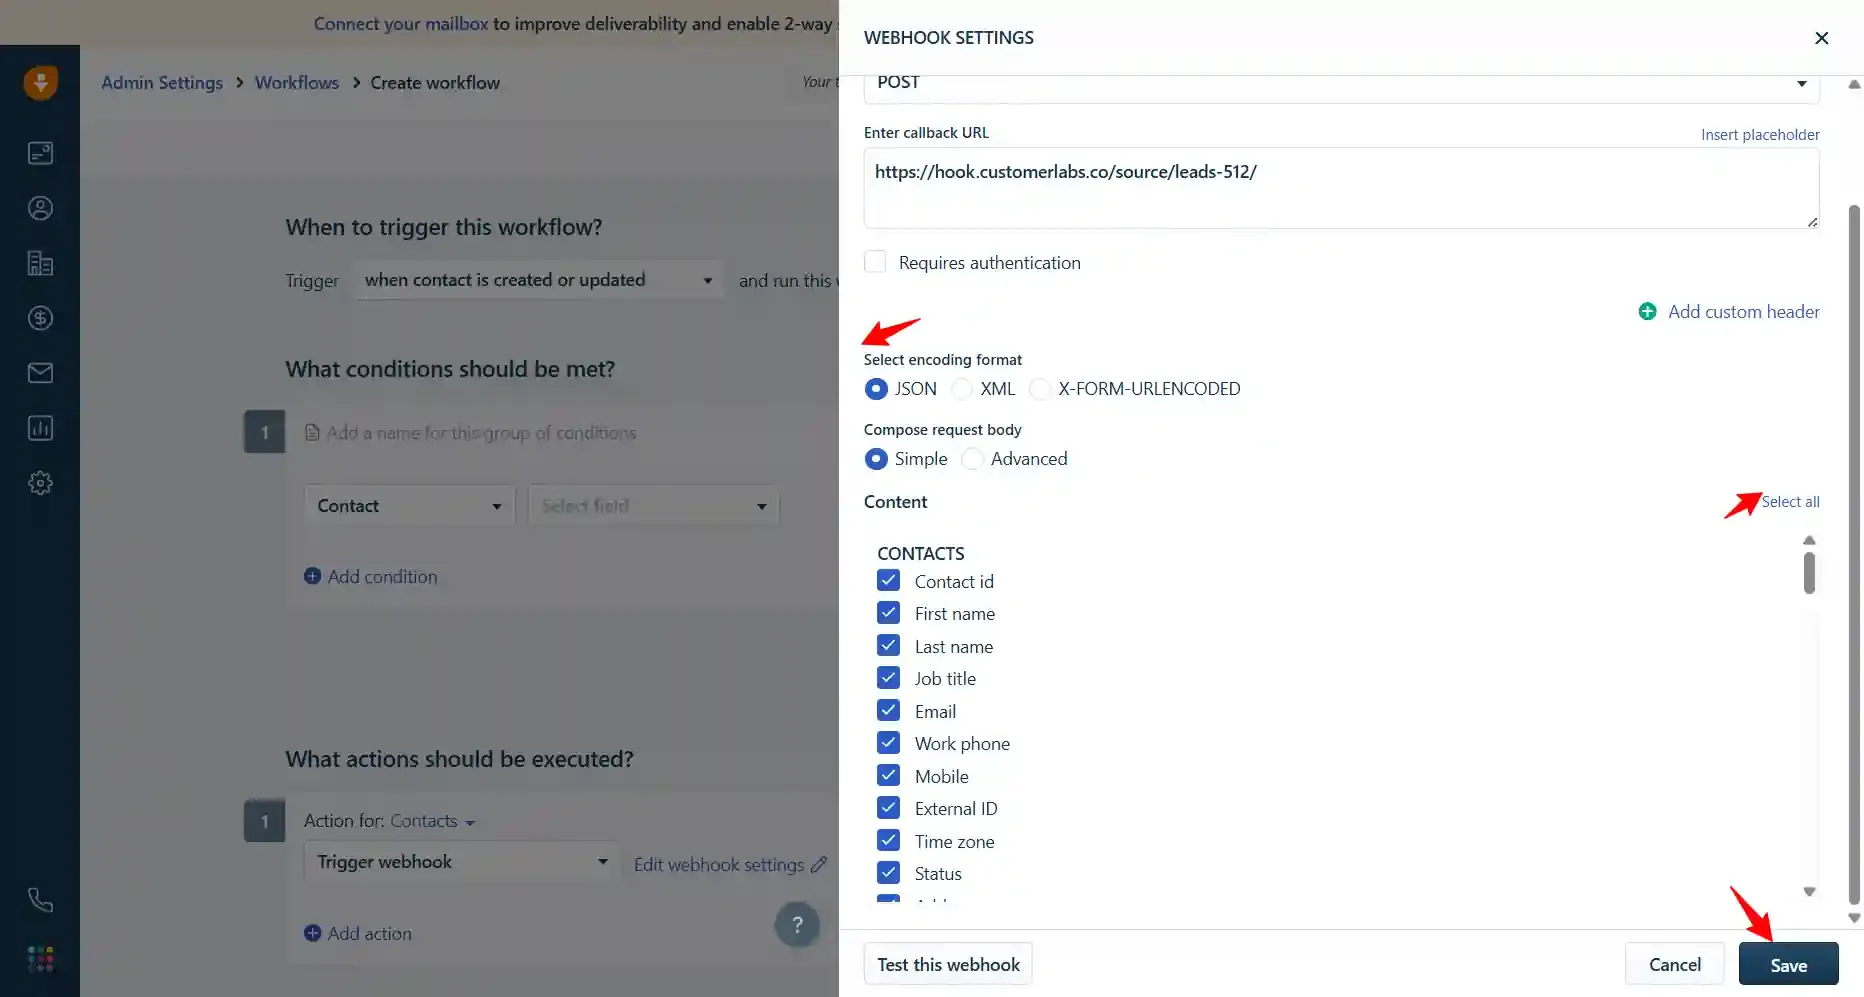
Section titled “3.3 Configure the Action”-
Choose Trigger Webhook as the action type.
-
Paste the Webhook URL you copied from CustomerLabs (Step 1).
-
Set Encoding Format to JSON and Content to Select All Fields.
-
Click Test Webhook to verify the connection.
-
Click Save to activate the workflow.
Step 4: Workflow #2 — Contact Updated
Section titled “Step 4: Workflow #2 — Contact Updated”This workflow fires every time an existing contact is updated (e.g., lifecycle stage change, phone number updated).
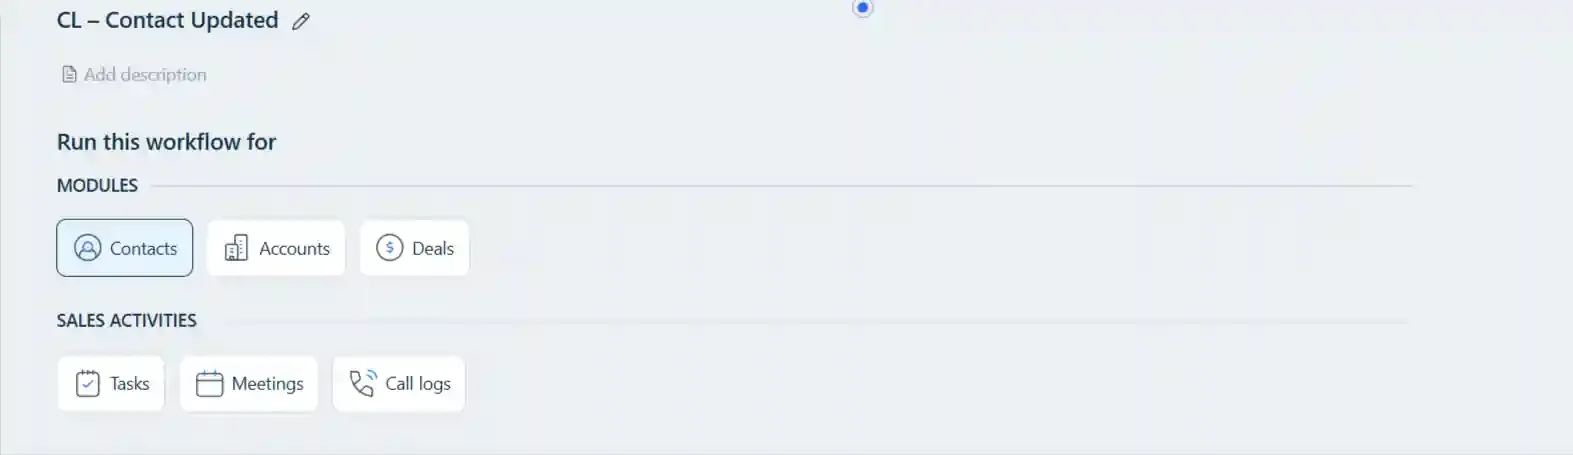
4.1 Create the Workflow
Section titled “4.1 Create the Workflow”-
Click Create Workflow.
-
Name it:
CL – Contact Updated. -
Set the Module to Contacts.
4.2 Set the Trigger Condition
Section titled “4.2 Set the Trigger Condition”-
Set the trigger to: When a contact is updated.
-
Ensure the workflow runs for every contact update.
4.3 Configure the Action
Section titled “4.3 Configure the Action”-
Choose Trigger Webhook as the action type.
-
Paste the same Webhook URL from CustomerLabs.
-
Set Encoding Format to JSON and Content to Select All Fields.
-
Click Test Webhook to verify and then Save.

Step 5: Verify Incoming Data in CustomerLabs
Section titled “Step 5: Verify Incoming Data in CustomerLabs”-
Go to CustomerLabs → Sources.
-
Select your Freshsales source.
-
Click Fetch New Data.
-
You should see incoming webhook payloads in the Source Logs.
Step 6: Configure CustomerLabs Workflows
Section titled “Step 6: Configure CustomerLabs Workflows”Now that data is flowing in, create workflows to process the events.
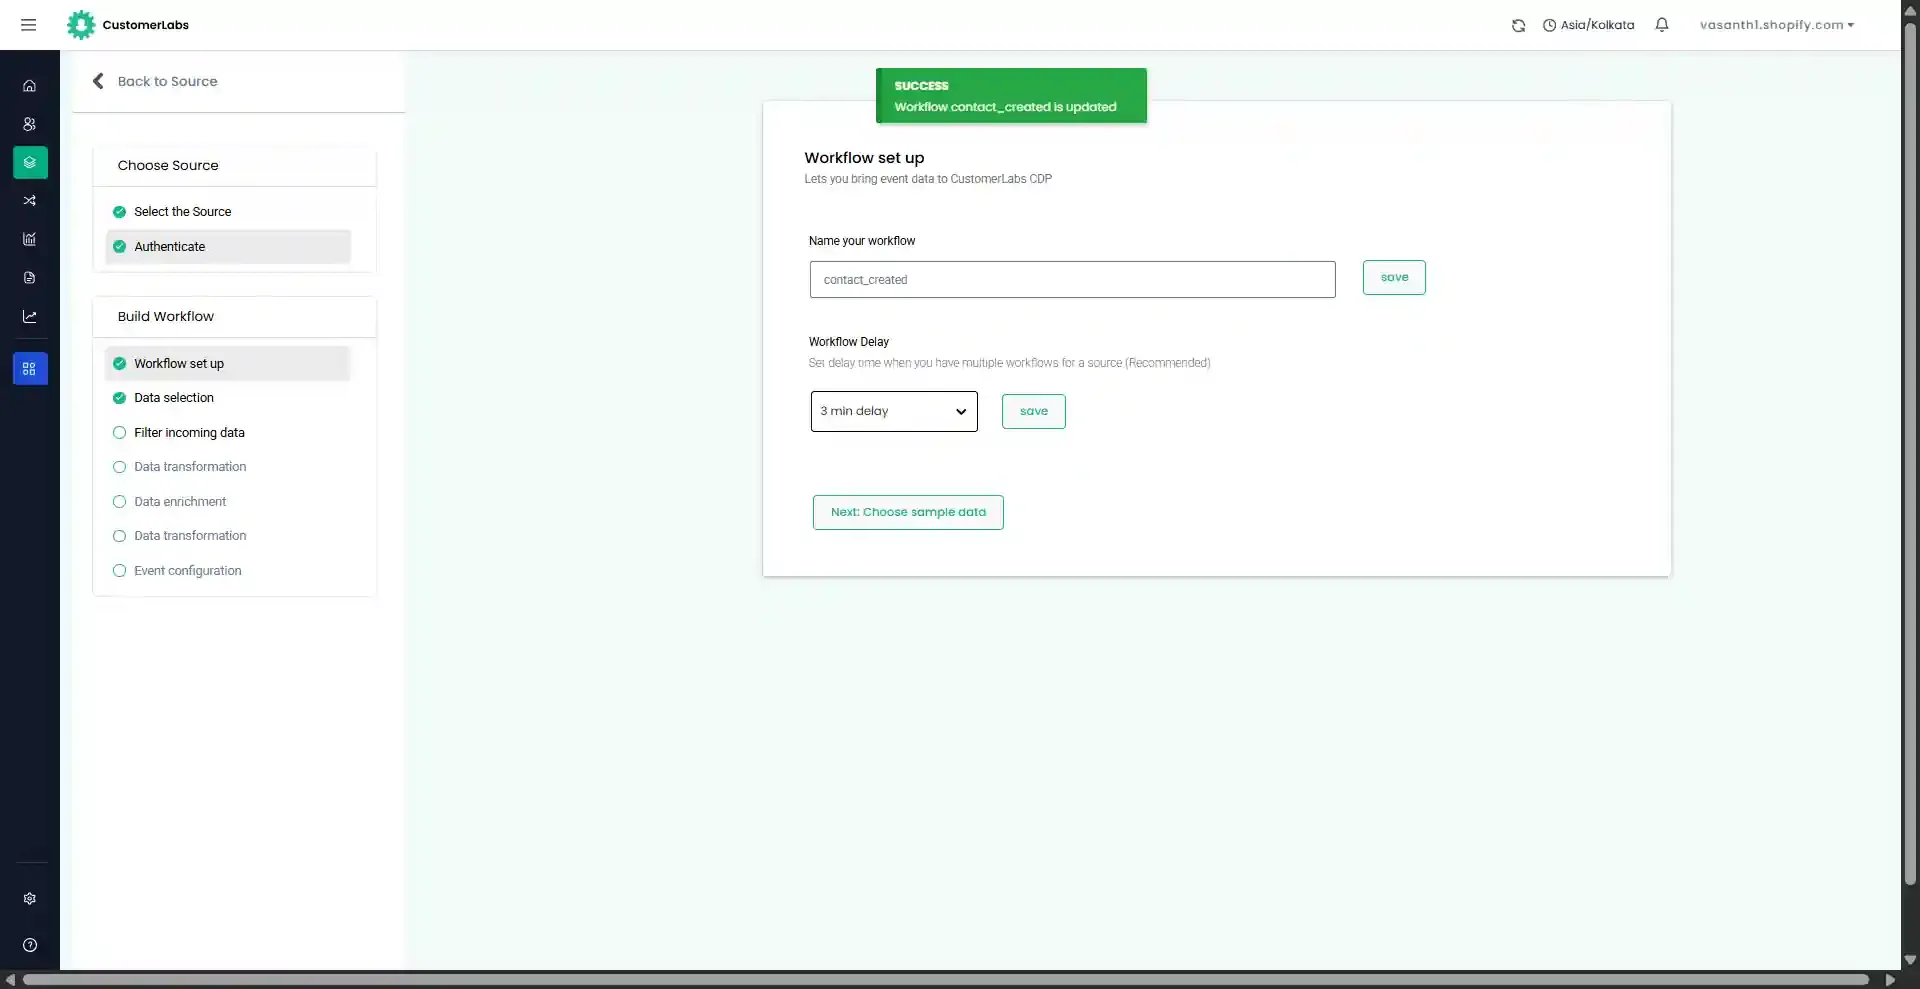
6.1 Create a New Workflow
Section titled “6.1 Create a New Workflow”Inside your Freshsales source, click Create New Workflow.
| Scenario | Recommended Name |
|---|---|
| Contact created in CRM | contact_created |
| Contact updated / stage changed | contact_updated |
| Lead lifecycle stage changed | lead_stage_updated |
6.2 Set Workflow Delay (Recommended)
Section titled “6.2 Set Workflow Delay (Recommended)”Best Practice: Set a delay of 5 seconds for the second workflow, 10 seconds for the third, and so on.
Step 7: Select Sample Data
Section titled “Step 7: Select Sample Data”7.1 Trigger a Test Event
Section titled “7.1 Trigger a Test Event”Perform the corresponding action in Freshsales to generate data:
- Contact Created: Create a new test contact.
- Contact Updated: Update a field (e.g., change lifecycle stage) on a test contact.
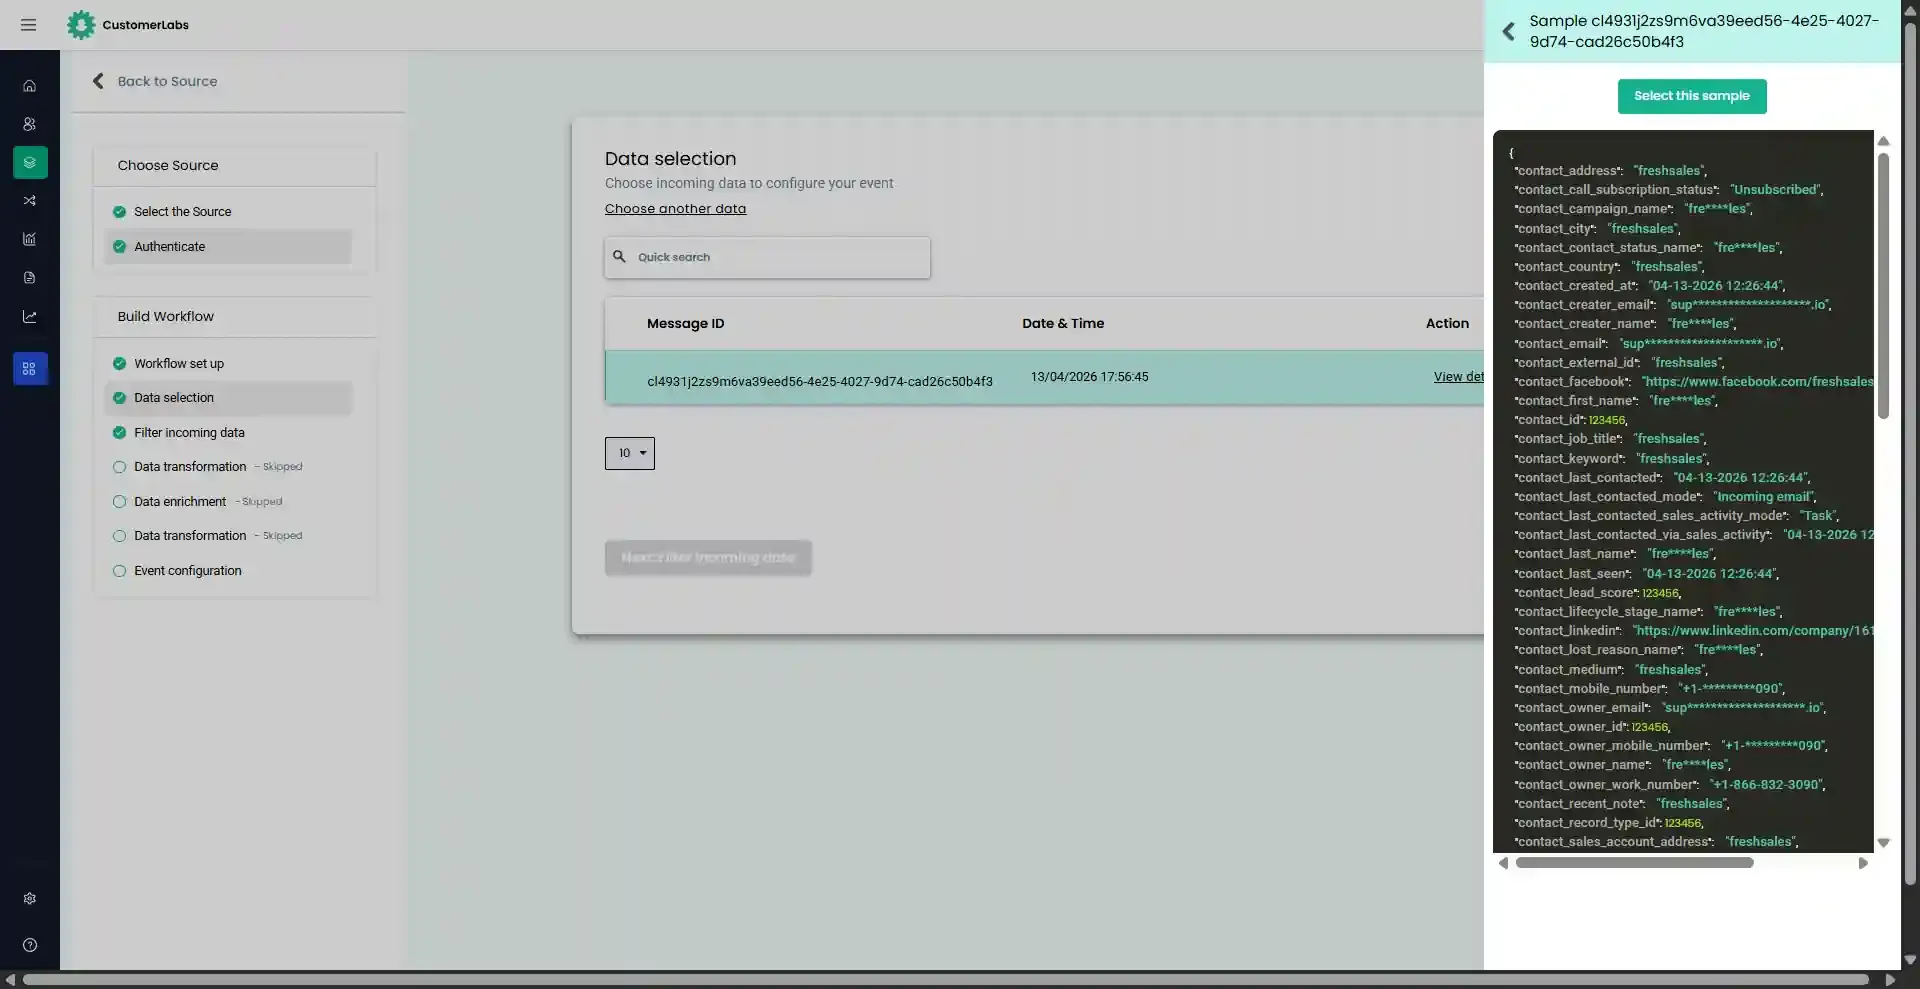
7.2 Fetch and Select the Sample
Section titled “7.2 Fetch and Select the Sample”-
In CustomerLabs, click Fetch New Data.
-
Review the samples and select the most complete one.

7.3 Critical: Validate Sample Data (No Null Values)
Section titled “7.3 Critical: Validate Sample Data (No Null Values)”Best Practice: Populate all fields on the test contact in Freshsales before triggering the event to ensure a clean sample.
Step 8: Event Configuration (Workflow #1)
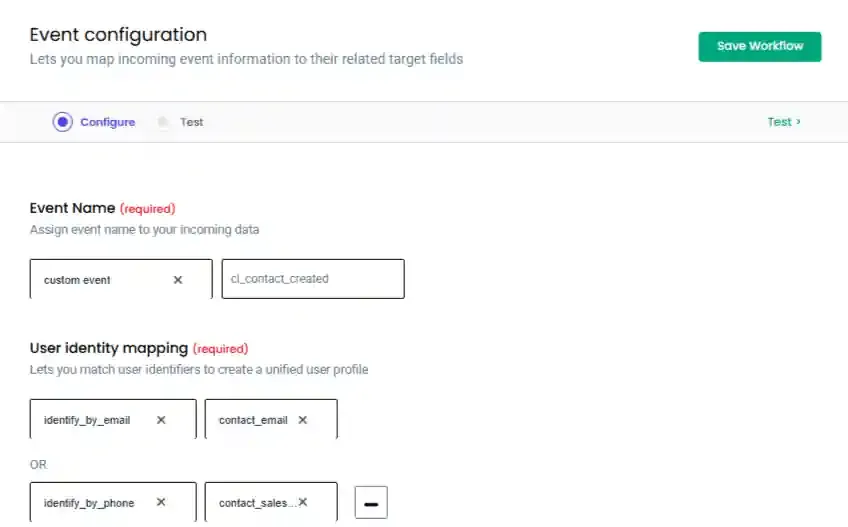
Section titled “Step 8: Event Configuration (Workflow #1)”8.1 Assign an Event Name
Section titled “8.1 Assign an Event Name”- Click the Event Name dropdown.
- Select Custom Event.
- Enter a name (e.g.,
cl_contact_created).
8.2 User Identity Mapping
Section titled “8.2 User Identity Mapping”-
Select your primary identifier (recommended:
identify_by_email). -
You can add up to 3 identifiers.
8.3 Map User Traits
Section titled “8.3 Map User Traits”Map the Freshsales fields to CustomerLabs traits.
| Freshsales Field | CustomerLabs Trait | Category |
|---|---|---|
contact_first_name | First Name | User Trait |
contact_last_name | Last Name | User Trait |
contact_email | User Trait | |
contact_mobile_number | Phone | User Trait |
contact_company | Company | User Trait |
contact_job_title | Job Title | User Trait |
contact_lifecycle_stage_name | Lifecycle Stage | User Trait |
contact_city | City | User Trait |
contact_country | Country | User Trait |
contact_address | Address | User Trait |
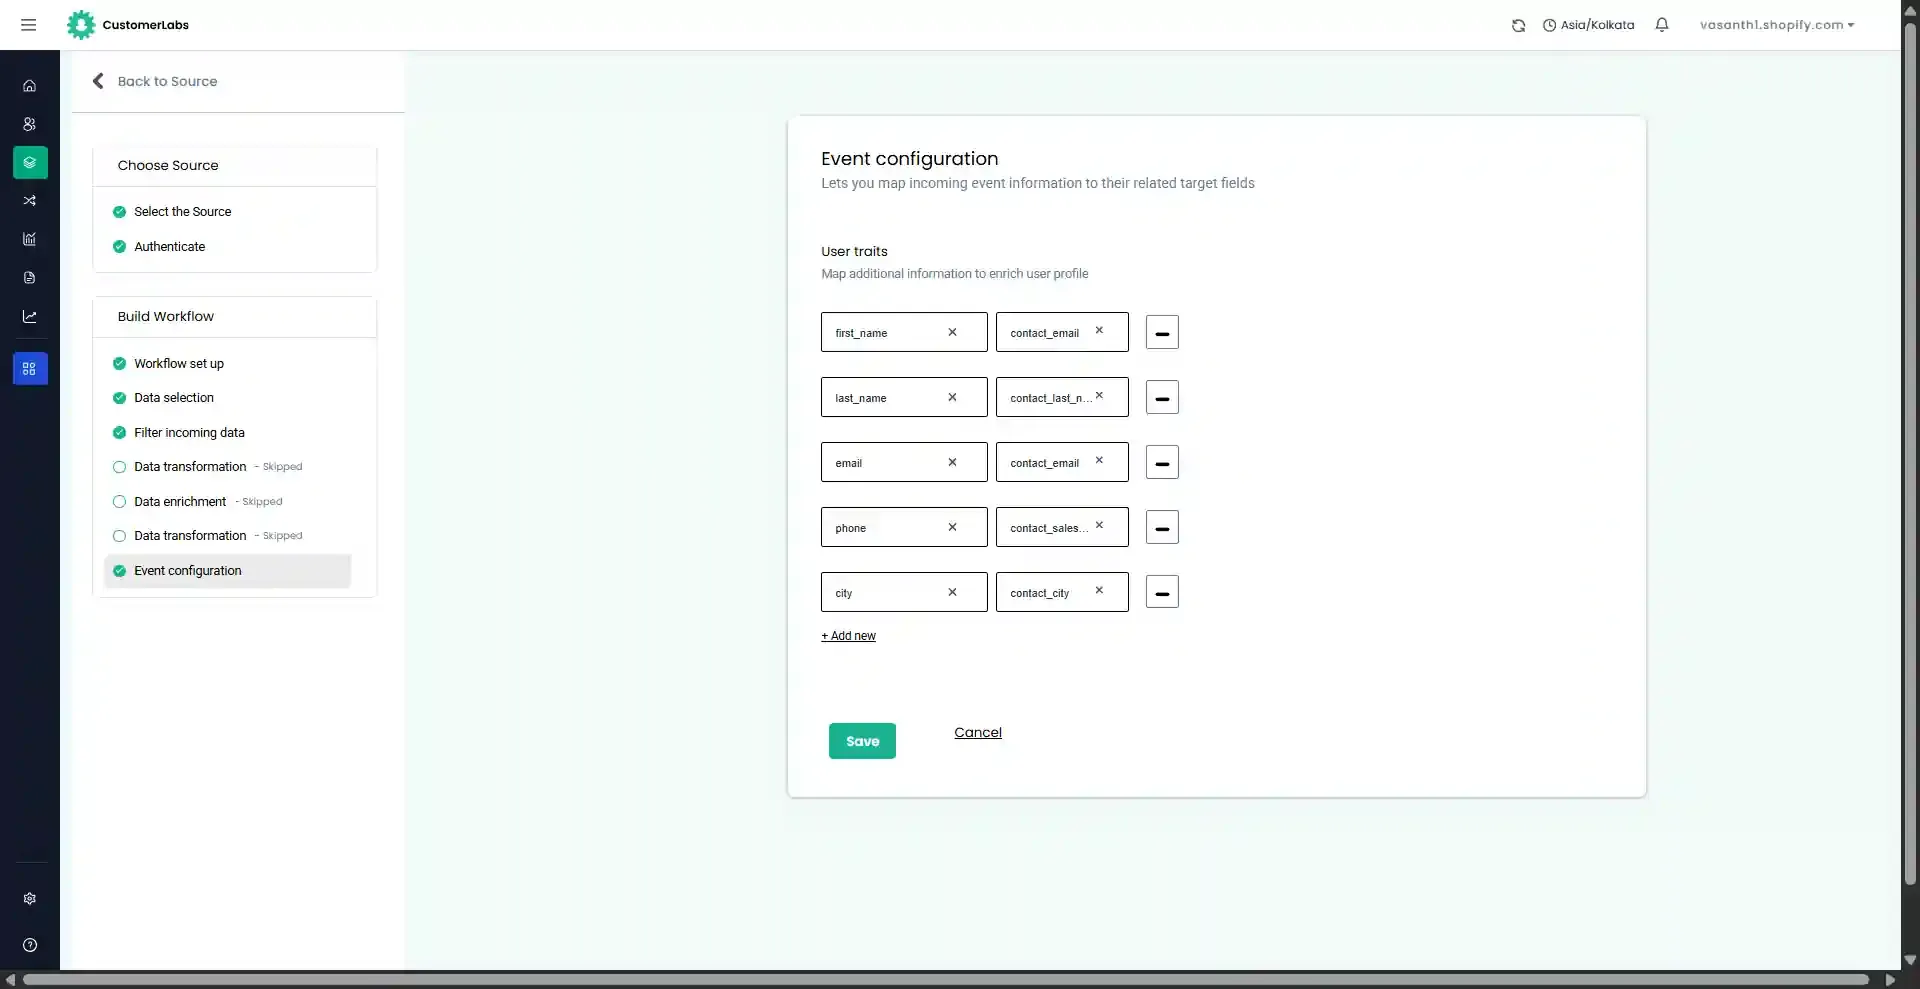
- Once configured, click Save and Activate.
Step 9: Event Configuration (Workflow #2)
Section titled “Step 9: Event Configuration (Workflow #2)”9.1 Assign an Event Name
Section titled “9.1 Assign an Event Name”For Workflow #2 (Contact Updated):
-
Select Dynamic Event.
-
Map it to the
contact_lifecycle_stage_namefield.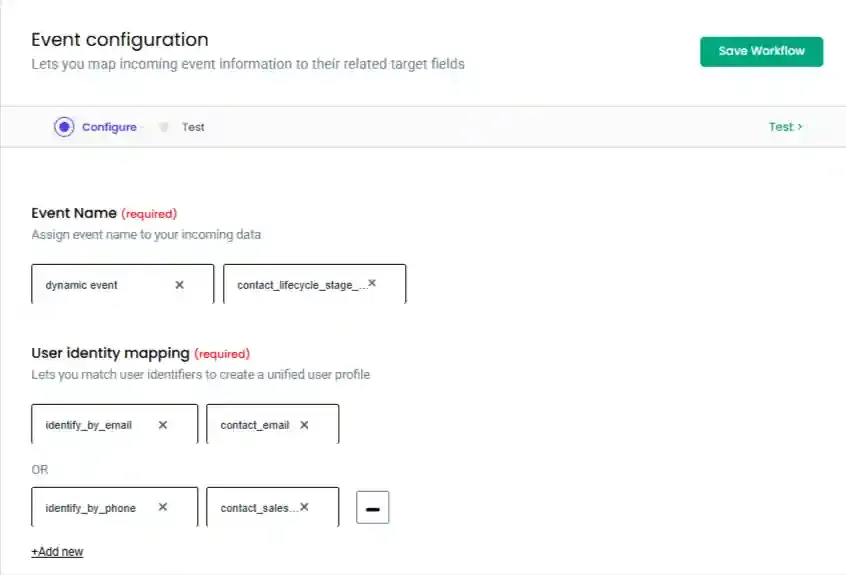
9.2 User Identity Mapping
Section titled “9.2 User Identity Mapping”Follow the same process as step 8.2 to ensure the update enriches the existing profile.
9.3 Map User Traits
Section titled “9.3 Map User Traits”Ensure all relevant traits (Lifecycle Stage, Phone, etc.) are mapped so updates are captured.
- Click Save and Activate the workflow.