Sync First-Party Audience from CustomerLabs to Klaviyo
You can sync the audience created in CustomerLabs with Klaviyo as a customer list by creating an audience segment in CustomerLabs and syncing it with an existing list or a new list in Klaviyo. This allows you to target and convert high-intent audiences by sending personalized emails and SMS at the right time.
Things to Note Before Syncing
Section titled “Things to Note Before Syncing”- Subscription Type: Determines if users are added to the Email or SMS subscription list. You must enable SMS subscription in your Klaviyo account before syncing to an SMS subscription type.
- Opt-in Process: By default, Klaviyo sets new lists to “Double Opt-in”. To change to “Single Opt-in”, you must adjust this inside your Klaviyo account settings.
- Consent Status: You can set the status as
Subscribed,Never Subscribed, orUnsubscribedwhich updates the user’s marketing consent status in Klaviyo. - Syncing Anonymous Users: You can toggle “Allow Anonymous users” to sync users without explicit PII identifiers, bearing in mind Klaviyo’s pricing is profile-based.
- Handling Duplicates (Exclude External ID): Klaviyo prioritizes “External ID” over Email/Phone Number. To avoid duplicating profiles from different external IDs matching the same email, enable the “Exclude External ID” toggle in the CustomerLabs Klaviyo destination configuration before you sync.
Step-by-Step Guide to Sync Audience to Klaviyo
Section titled “Step-by-Step Guide to Sync Audience to Klaviyo”Here’s how you can sync the audience with Klaviyo as a customer list:
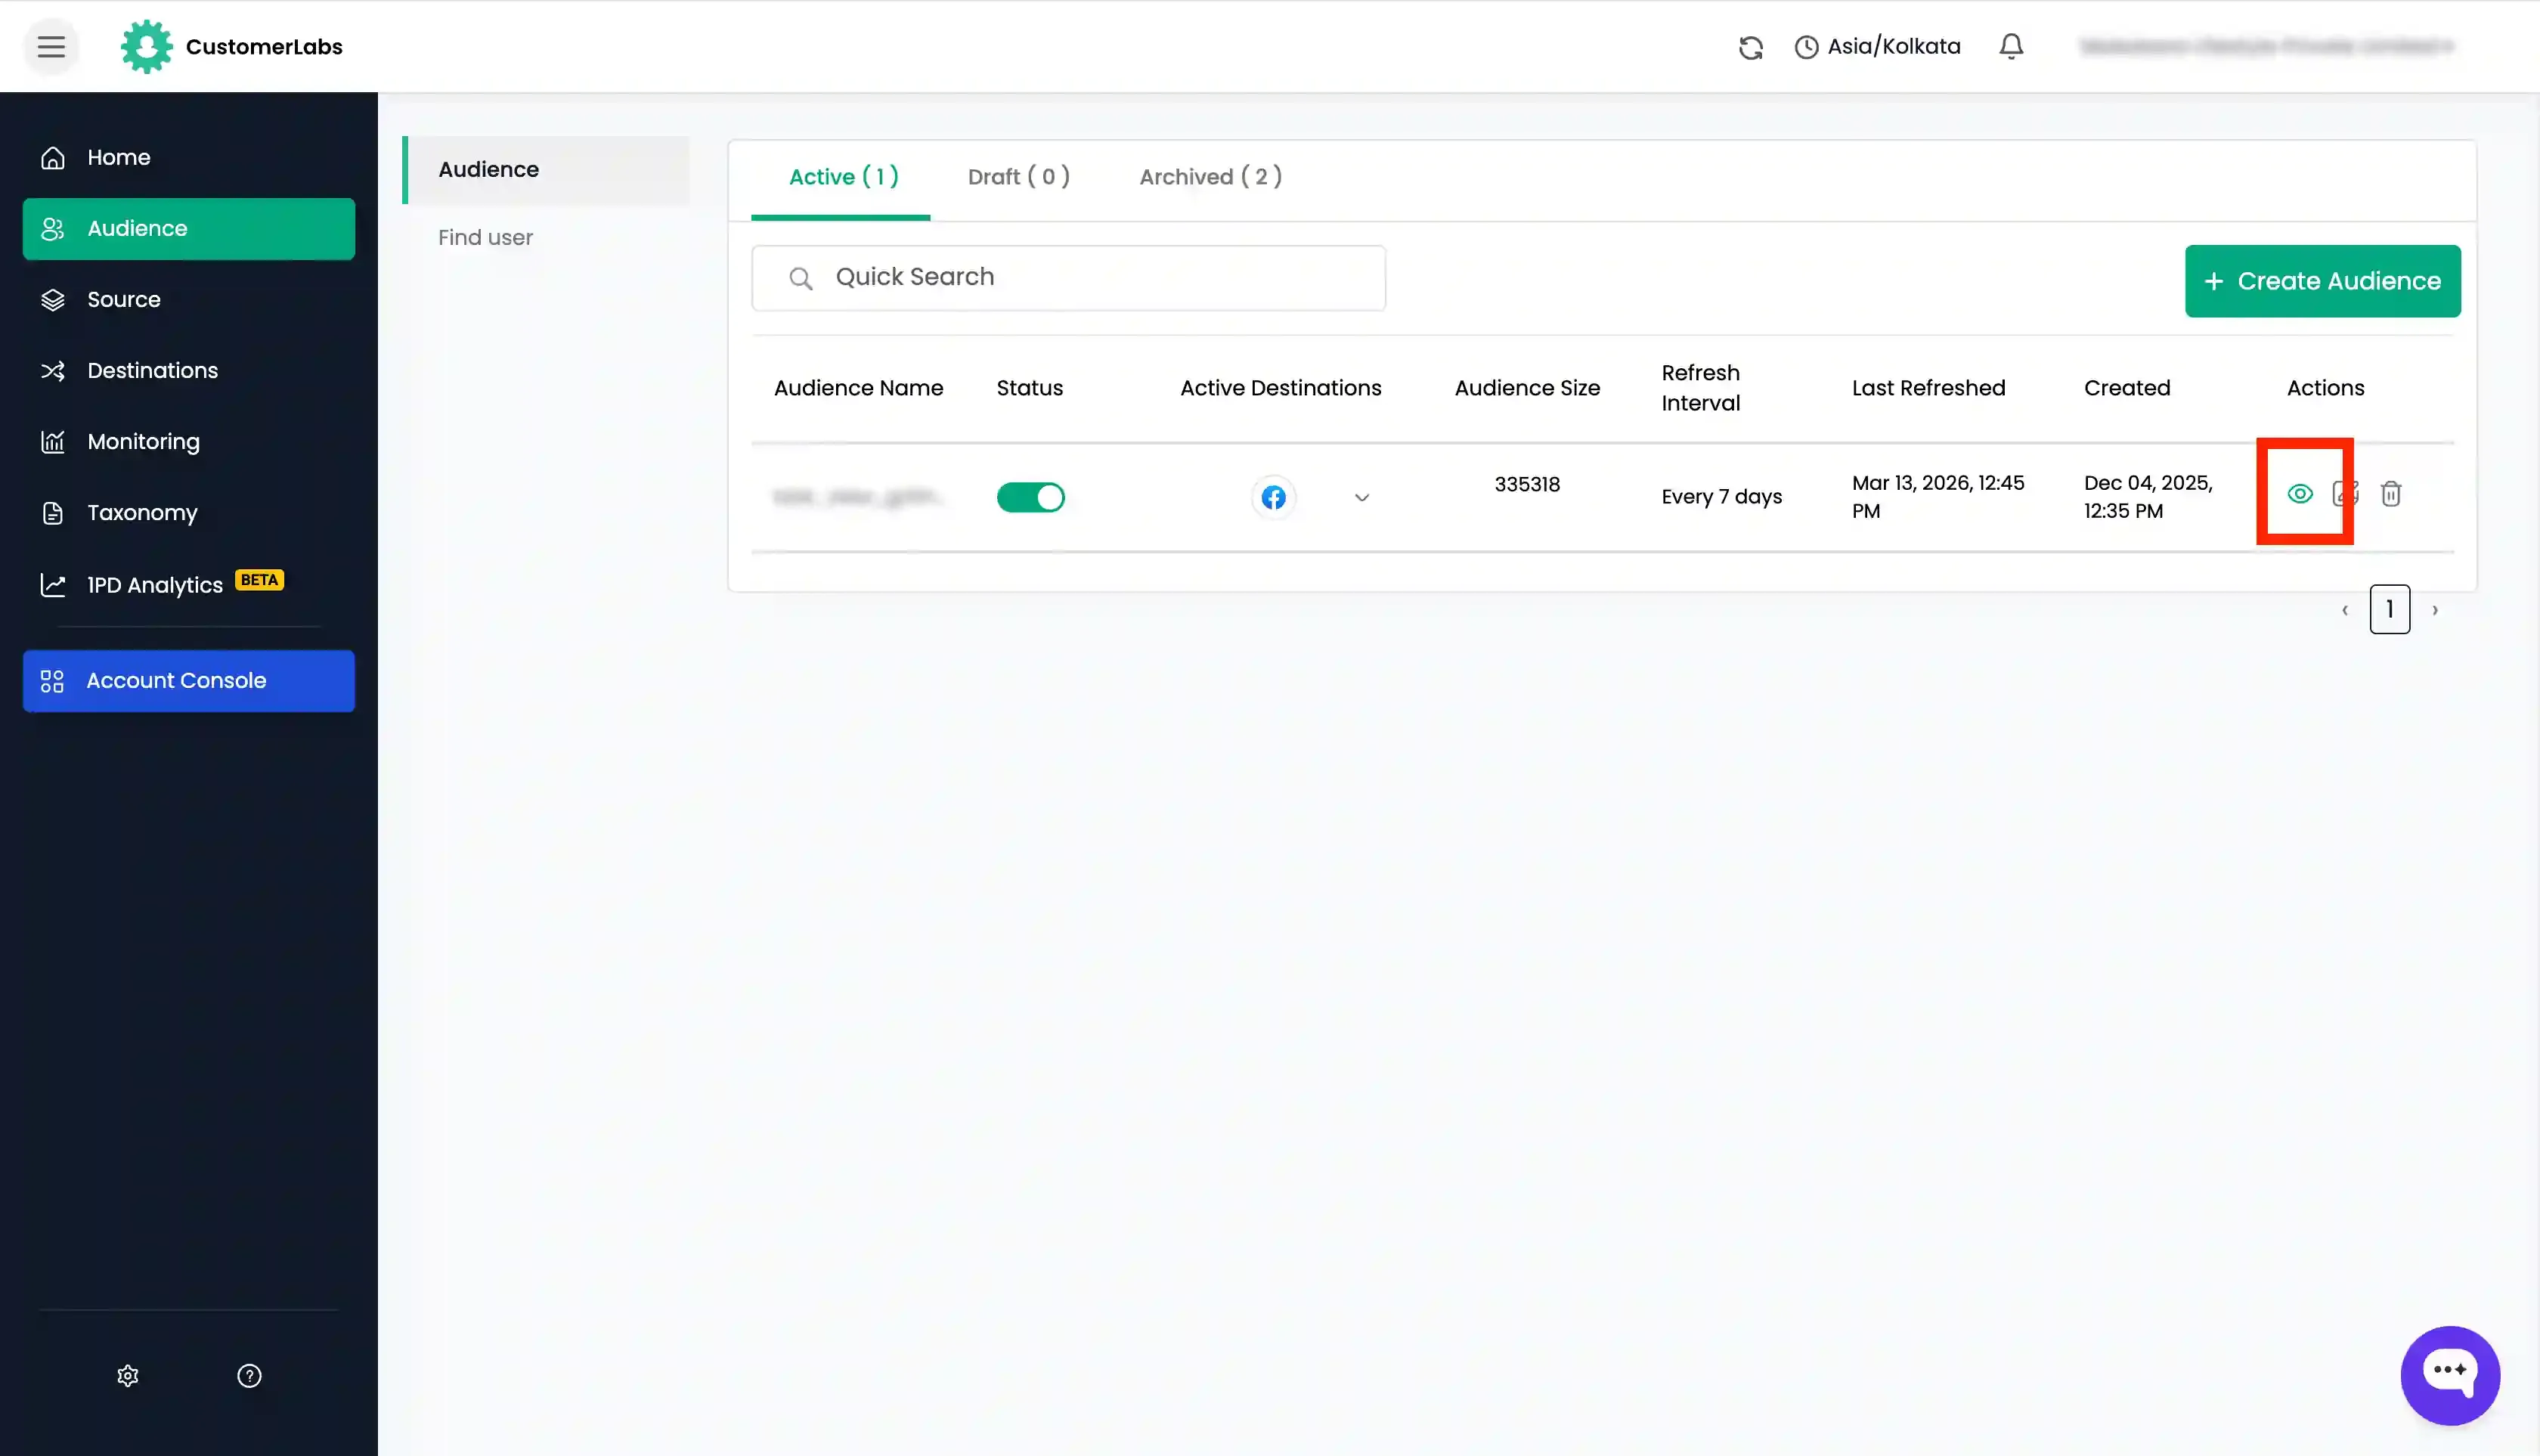
-
Create a new audience with the desired events or user traits in CustomerLabs and after creating, “view” the audience to set up the sync.
-
Go to the “Schema” tab and add the necessary schema based on the list sync requirement for Klaviyo like
email,phone,first name,last name, etc.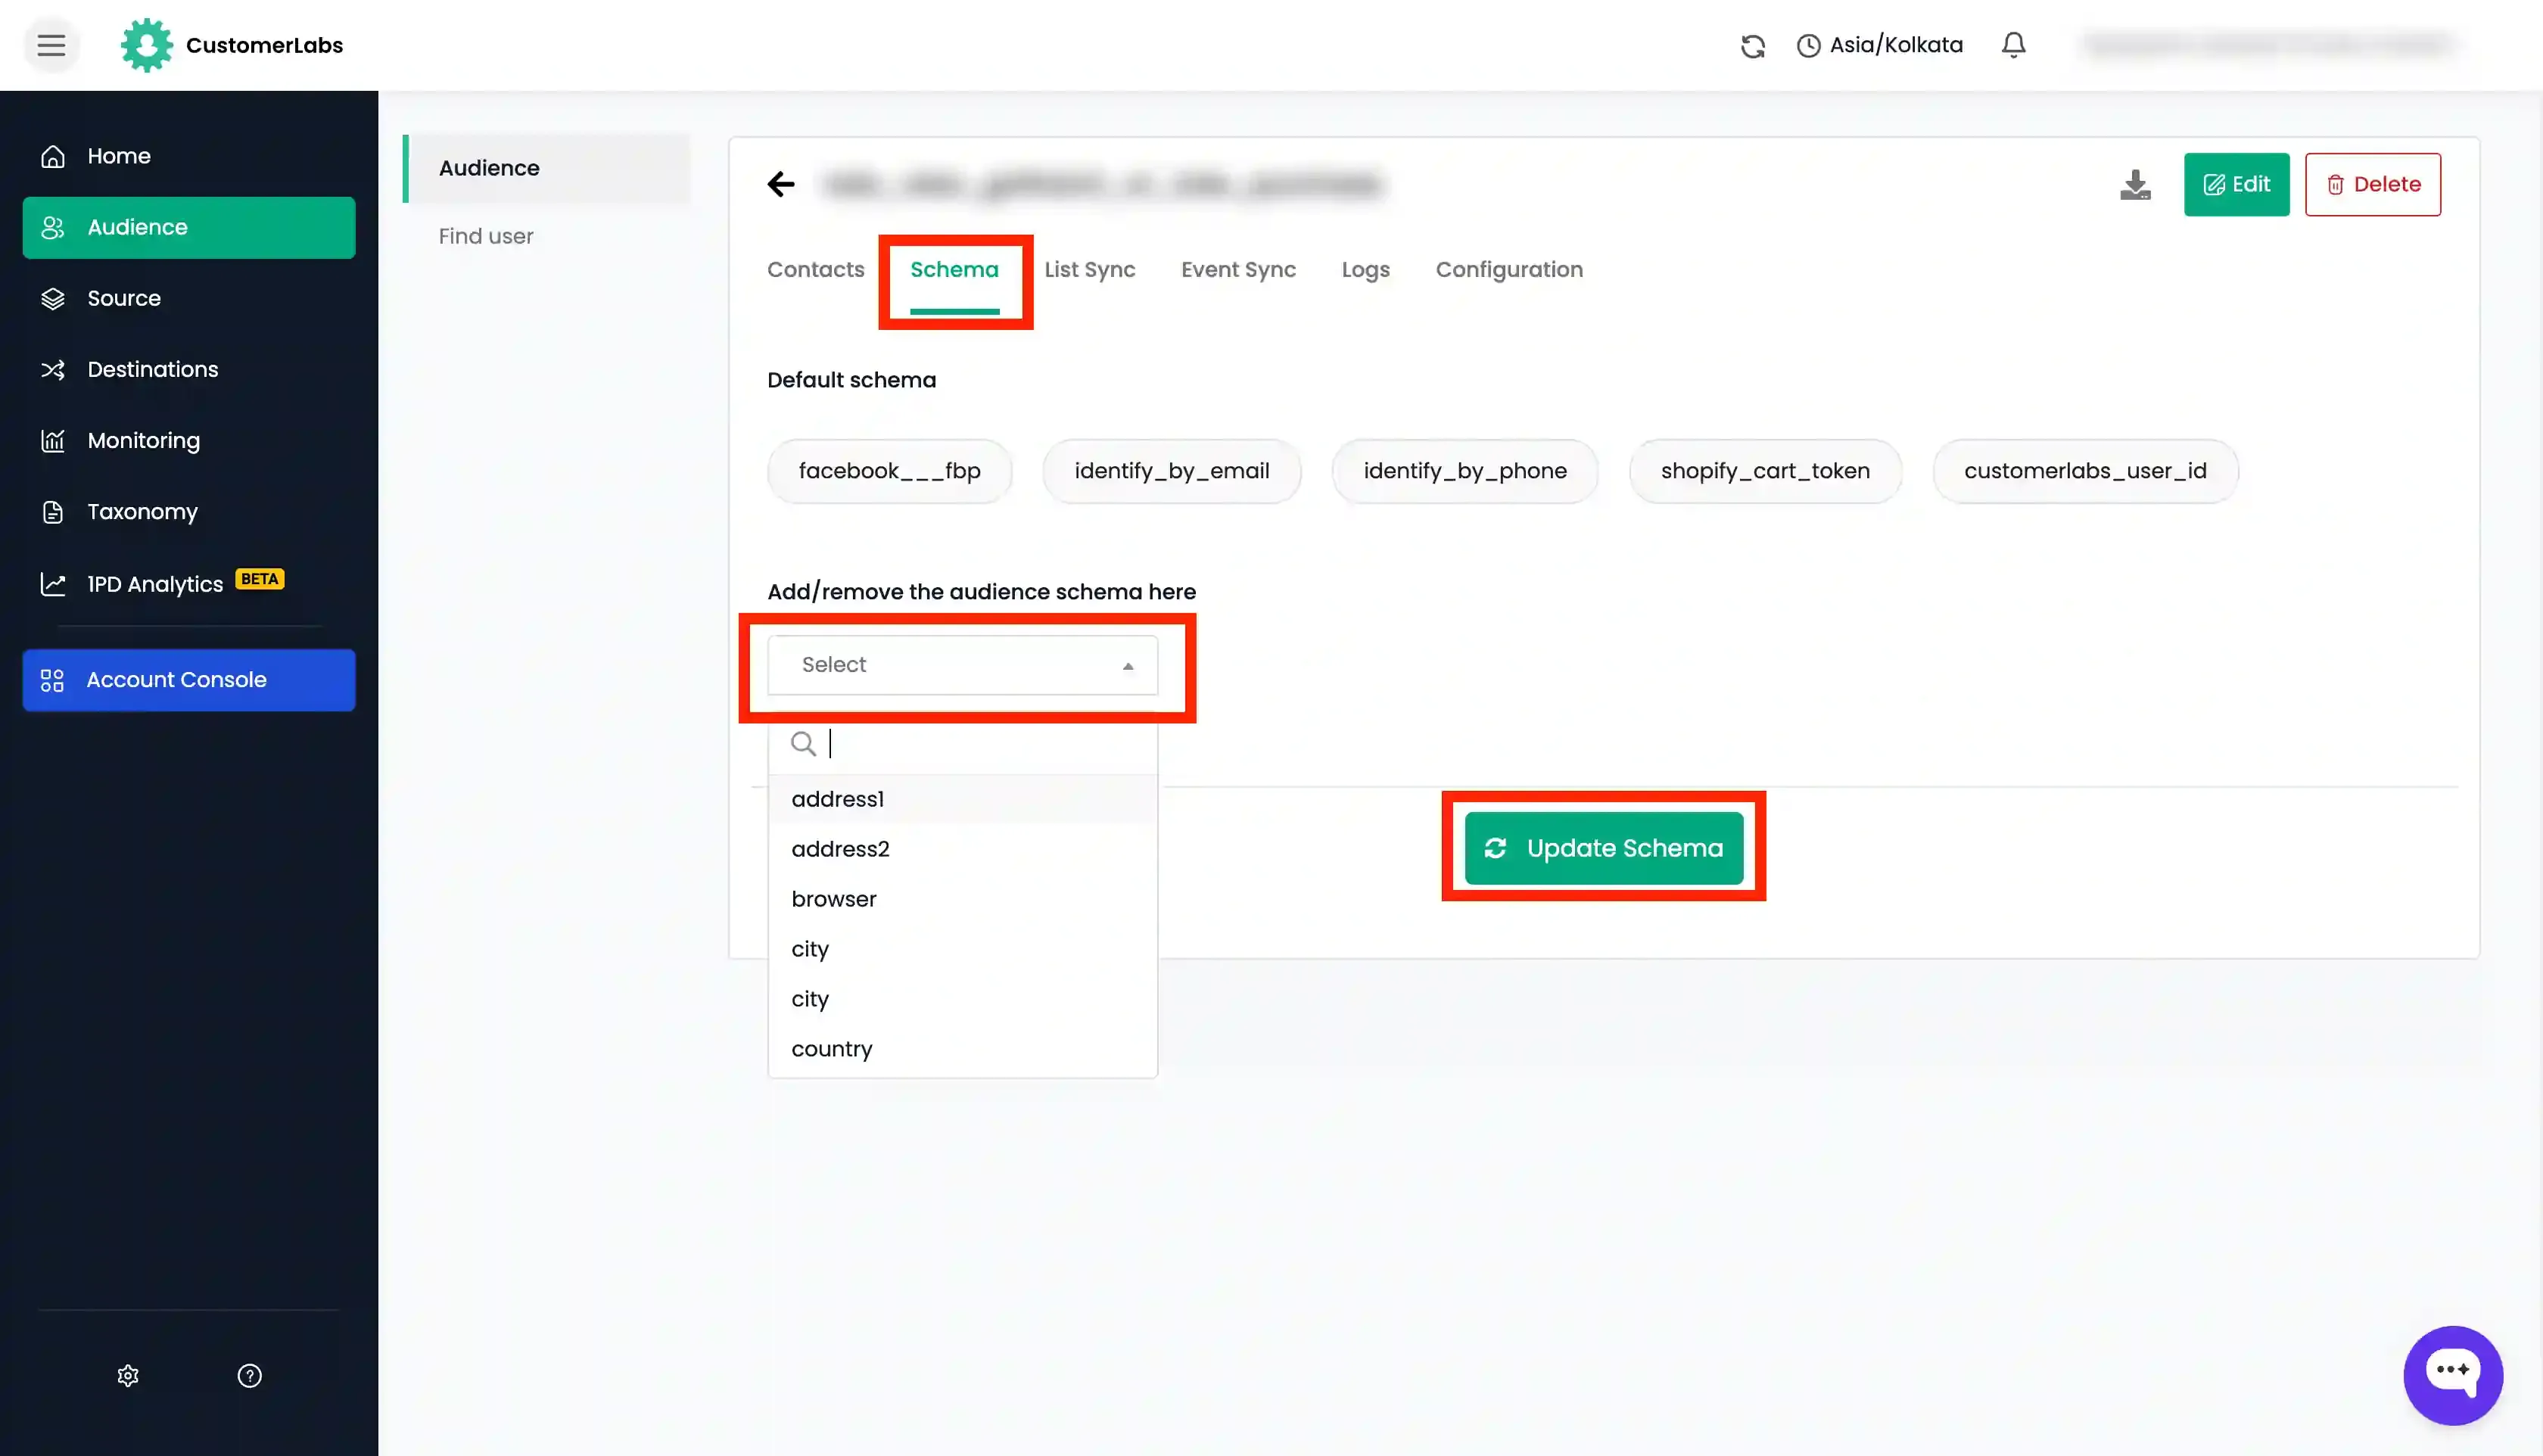
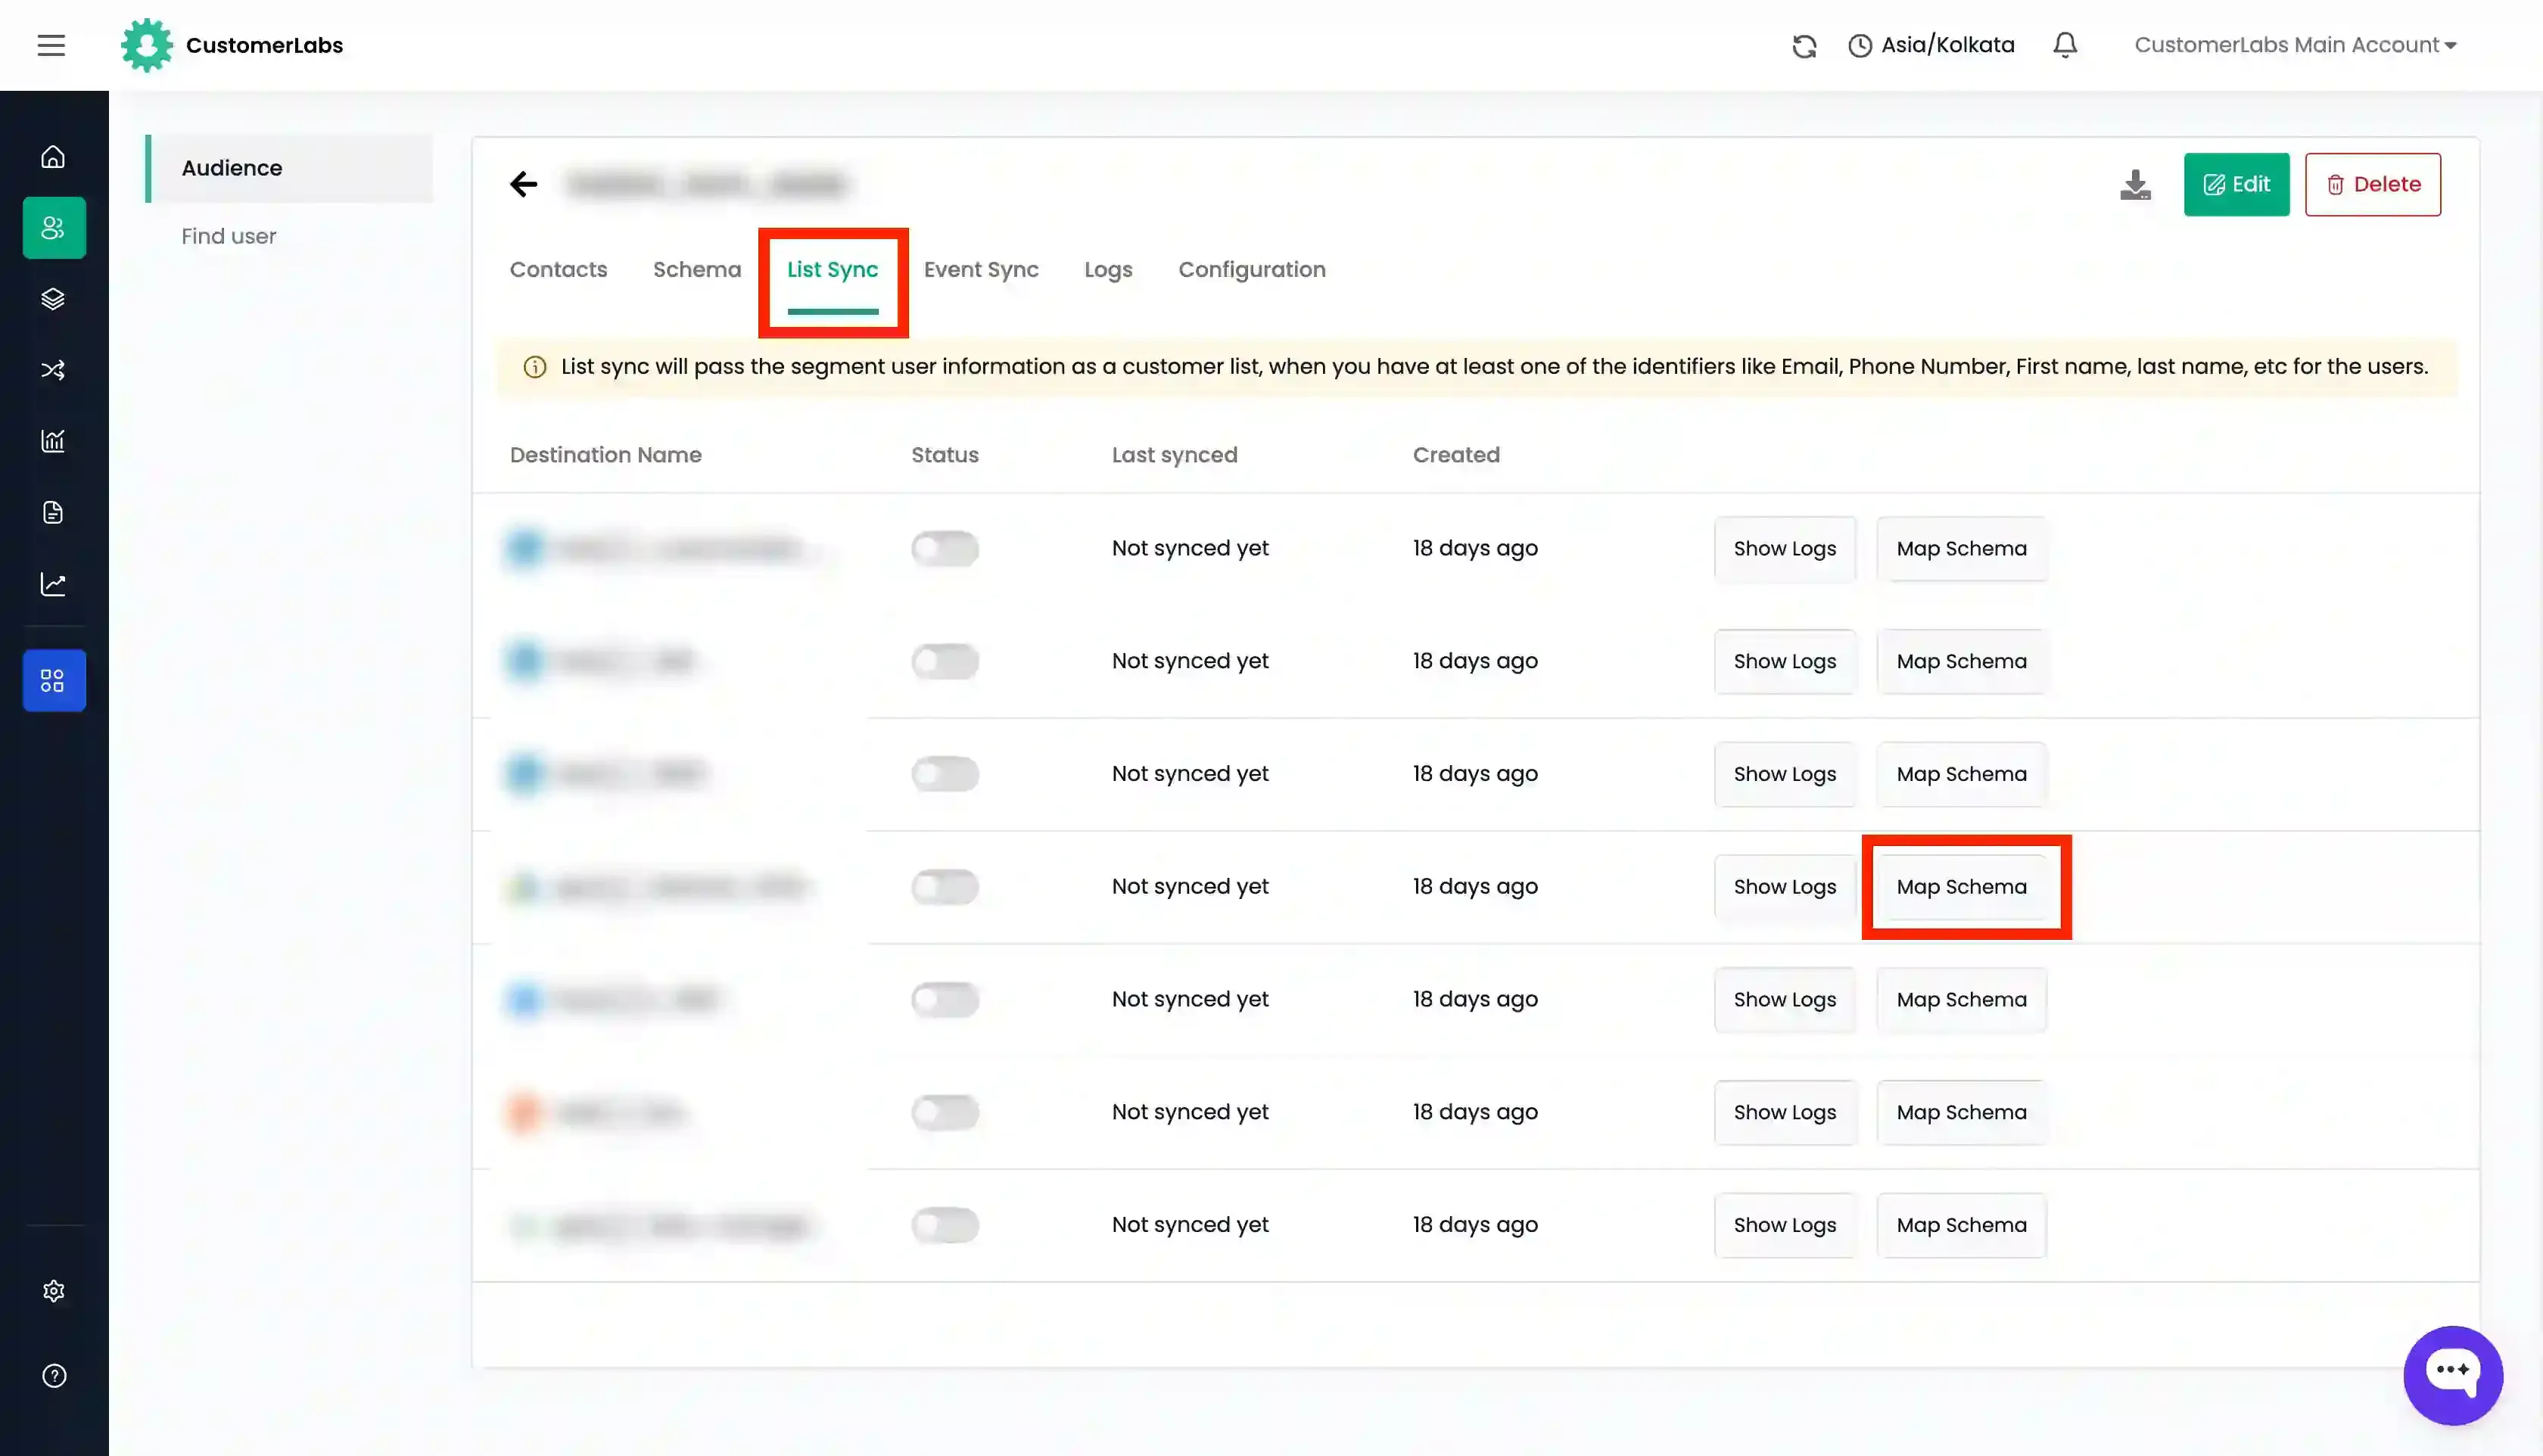
-
Now go to the “List Sync” tab and click on “Map Schema” for Klaviyo.
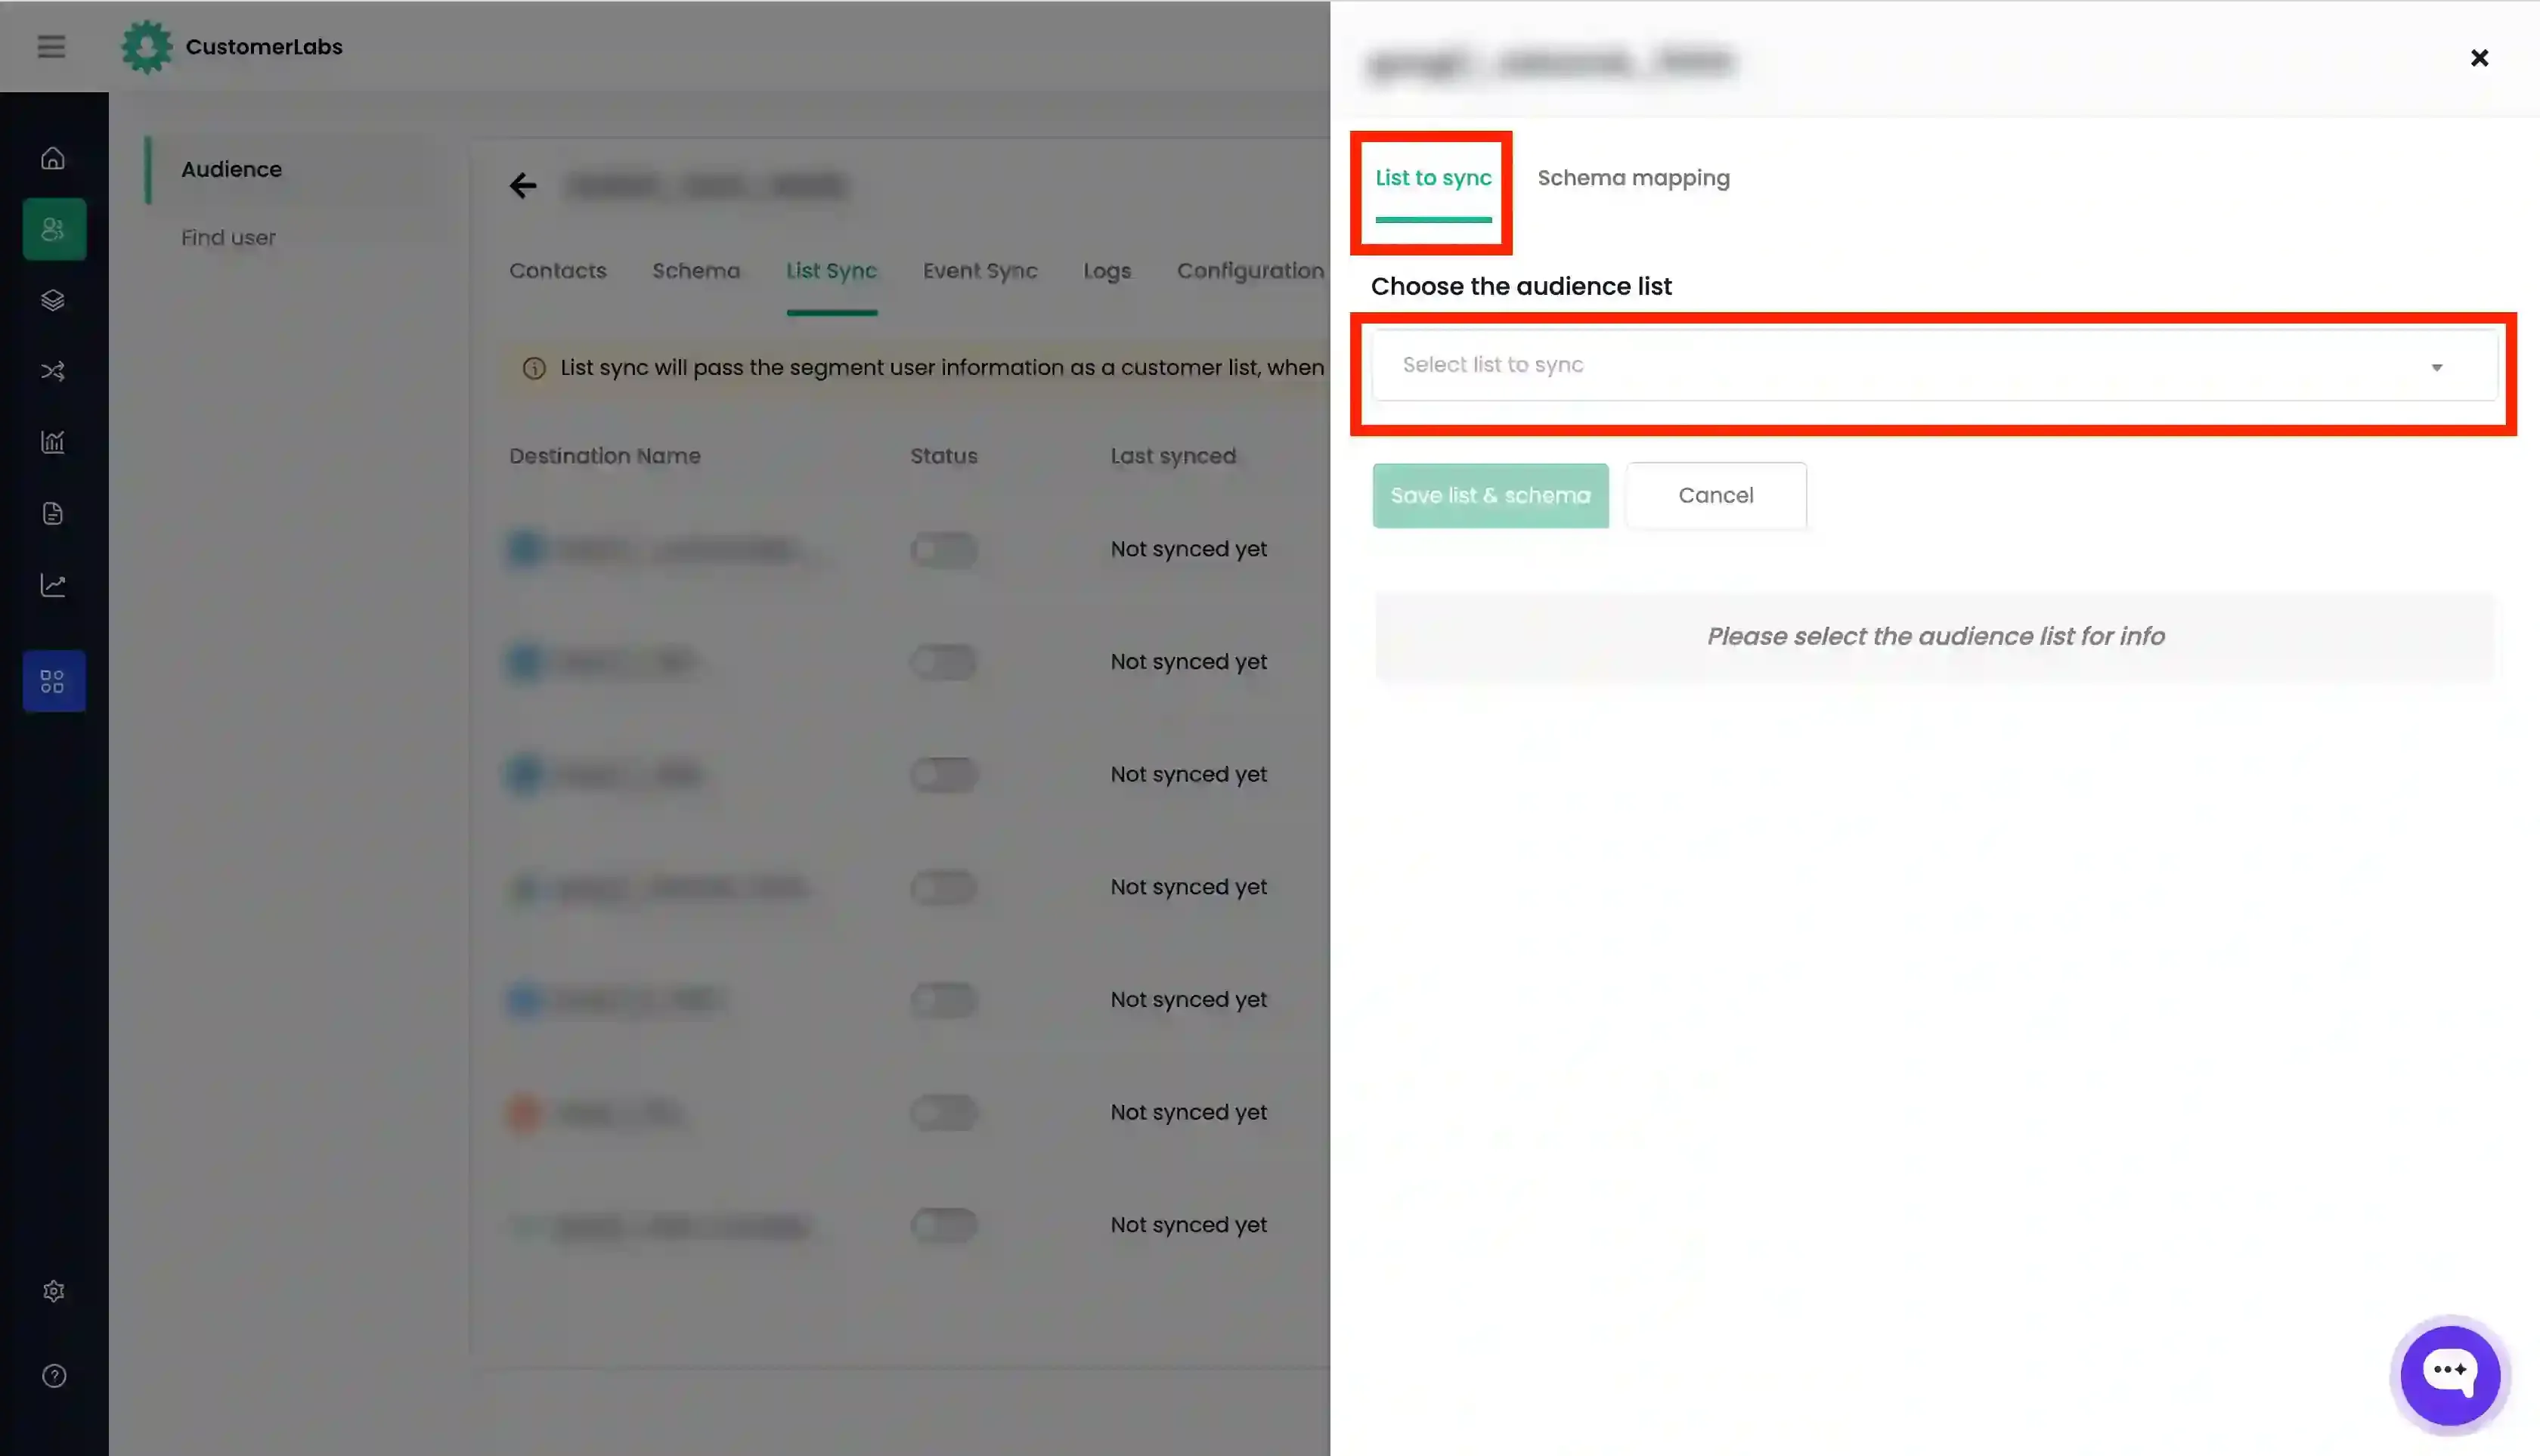
-
In the “List to sync” tab, click the dropdown under “Choose the audience list”. Here you can either:
- Select an existing audience list from Klaviyo (OR)
- Choose “Create New List” and enter the name for the new audience list to be created in Klaviyo.
-
For both new and existing lists, choose the Subscription type (Email/SMS) that you want to apply to the users.
-
Choose the Consent status (
Subscribed,Never Subscribed,Unsubscribed) from the drop-down to determine the user’s consent status in Klaviyo.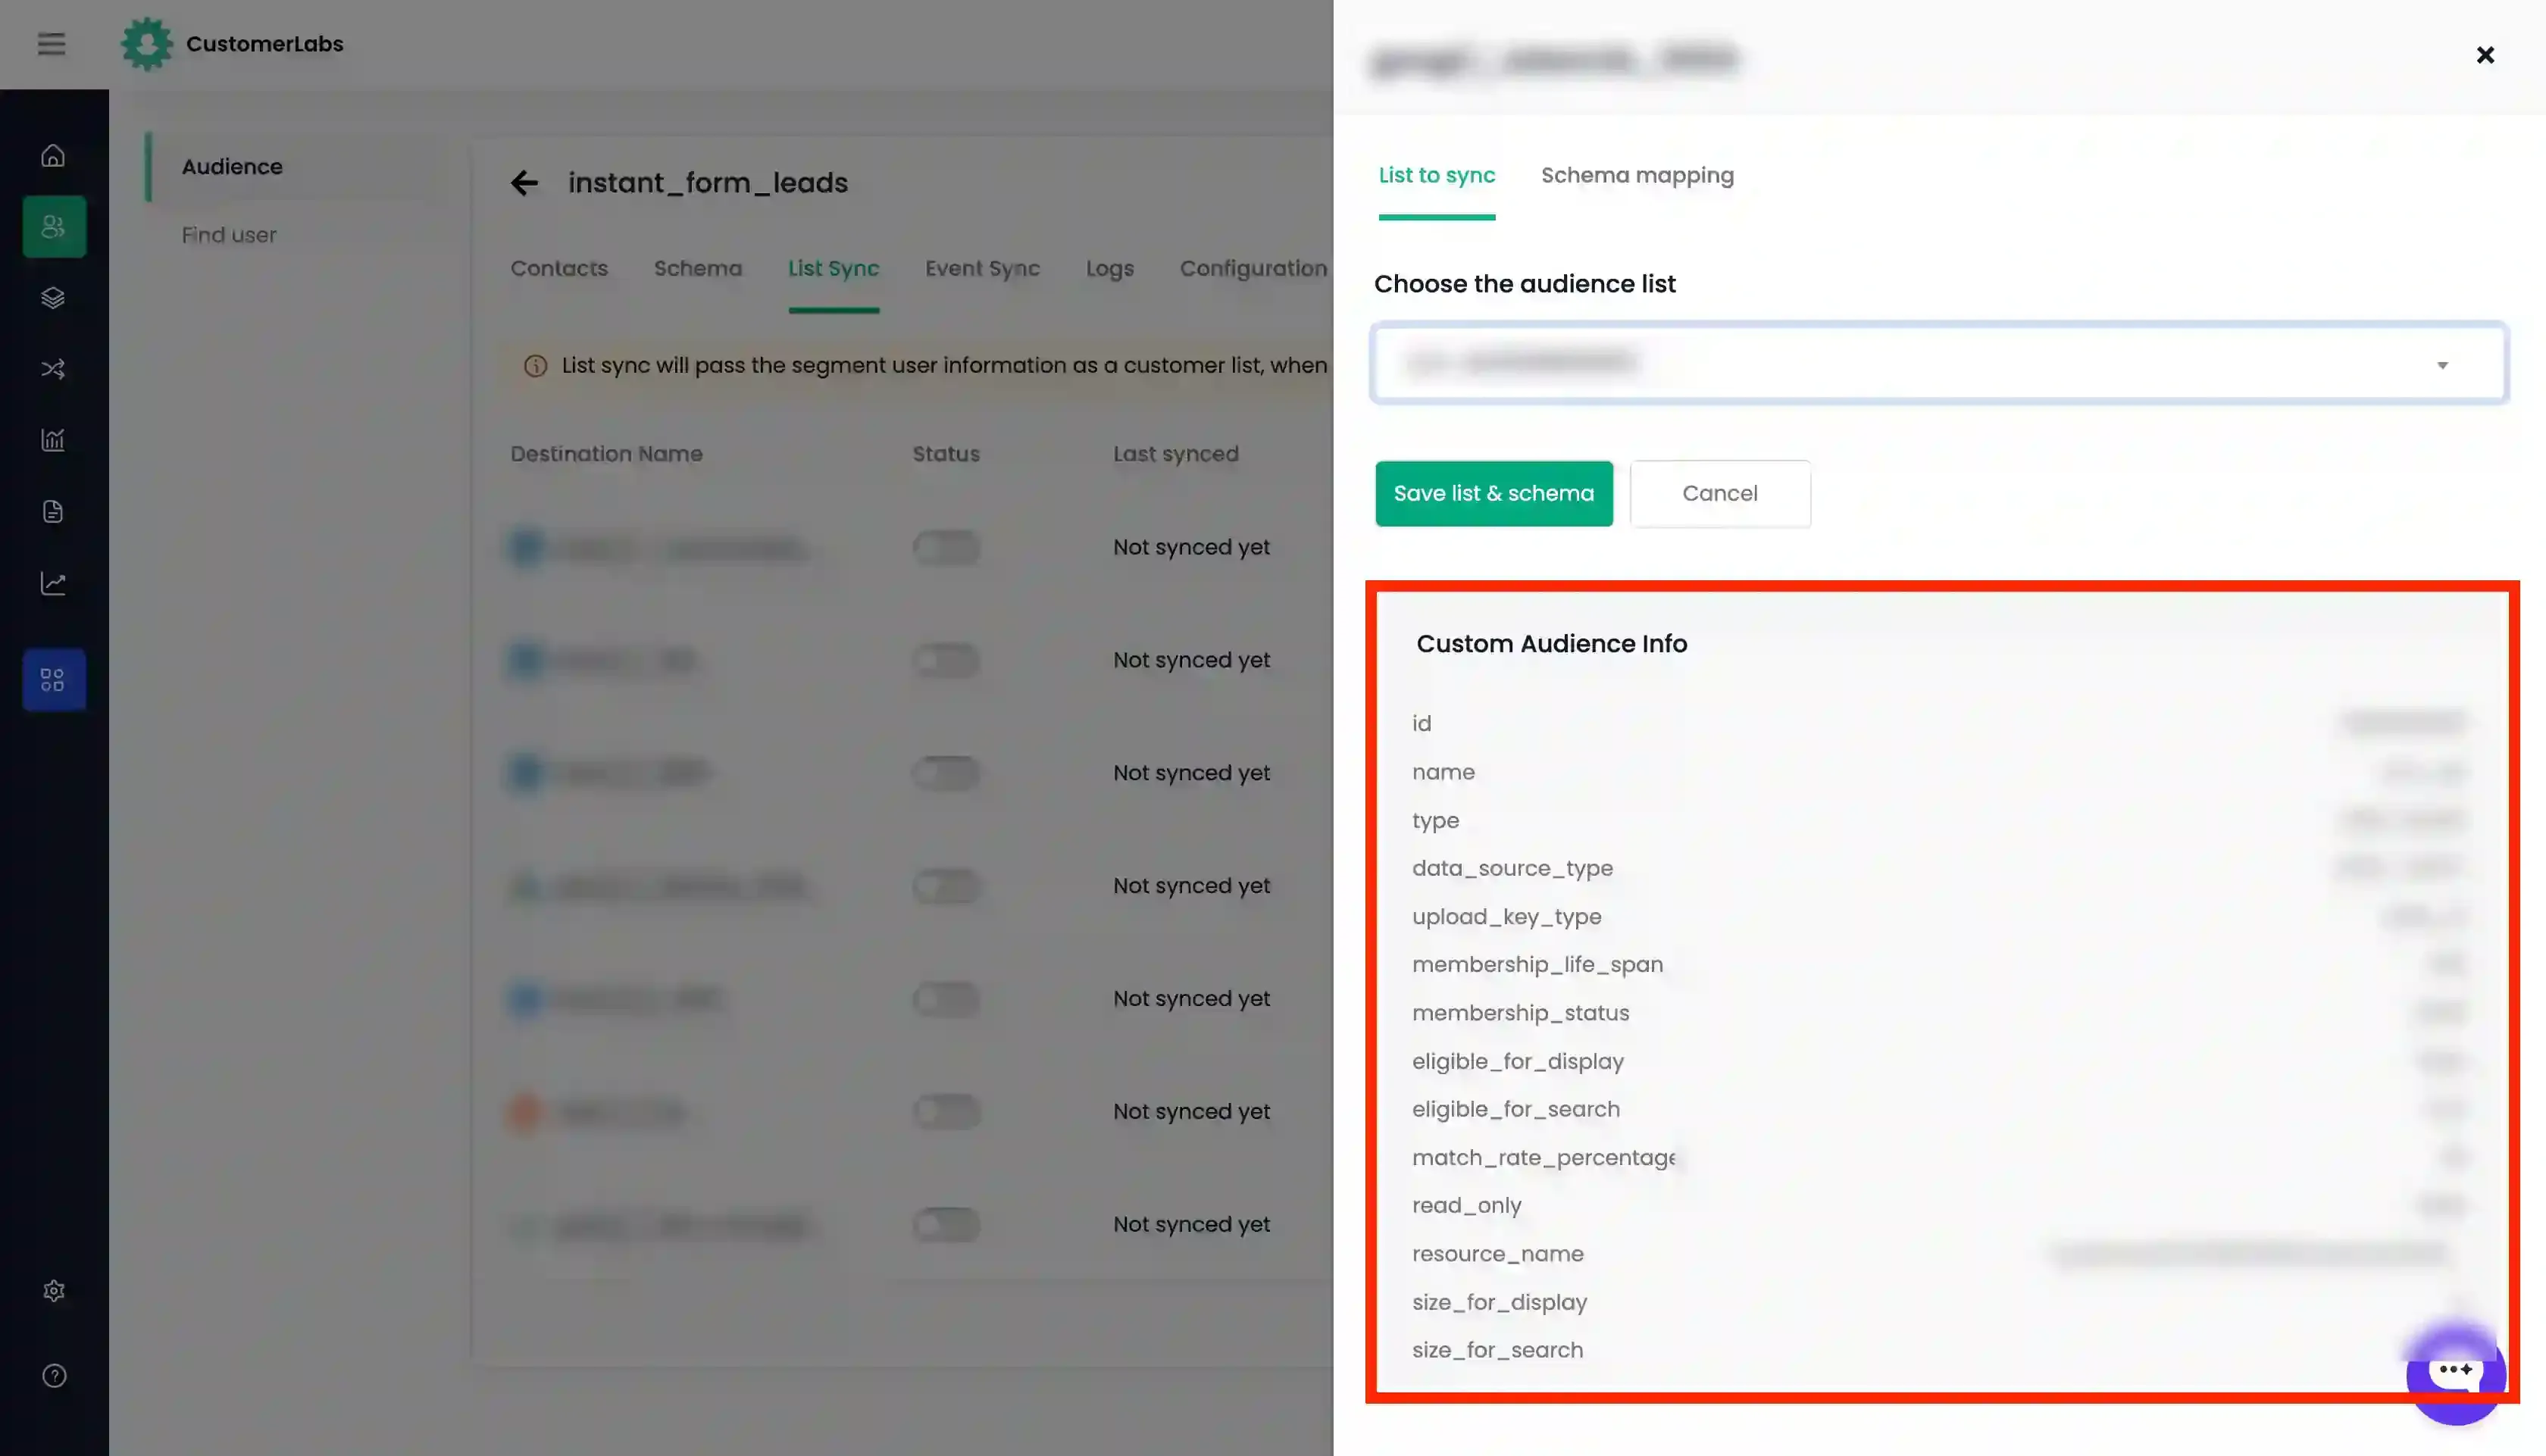
-
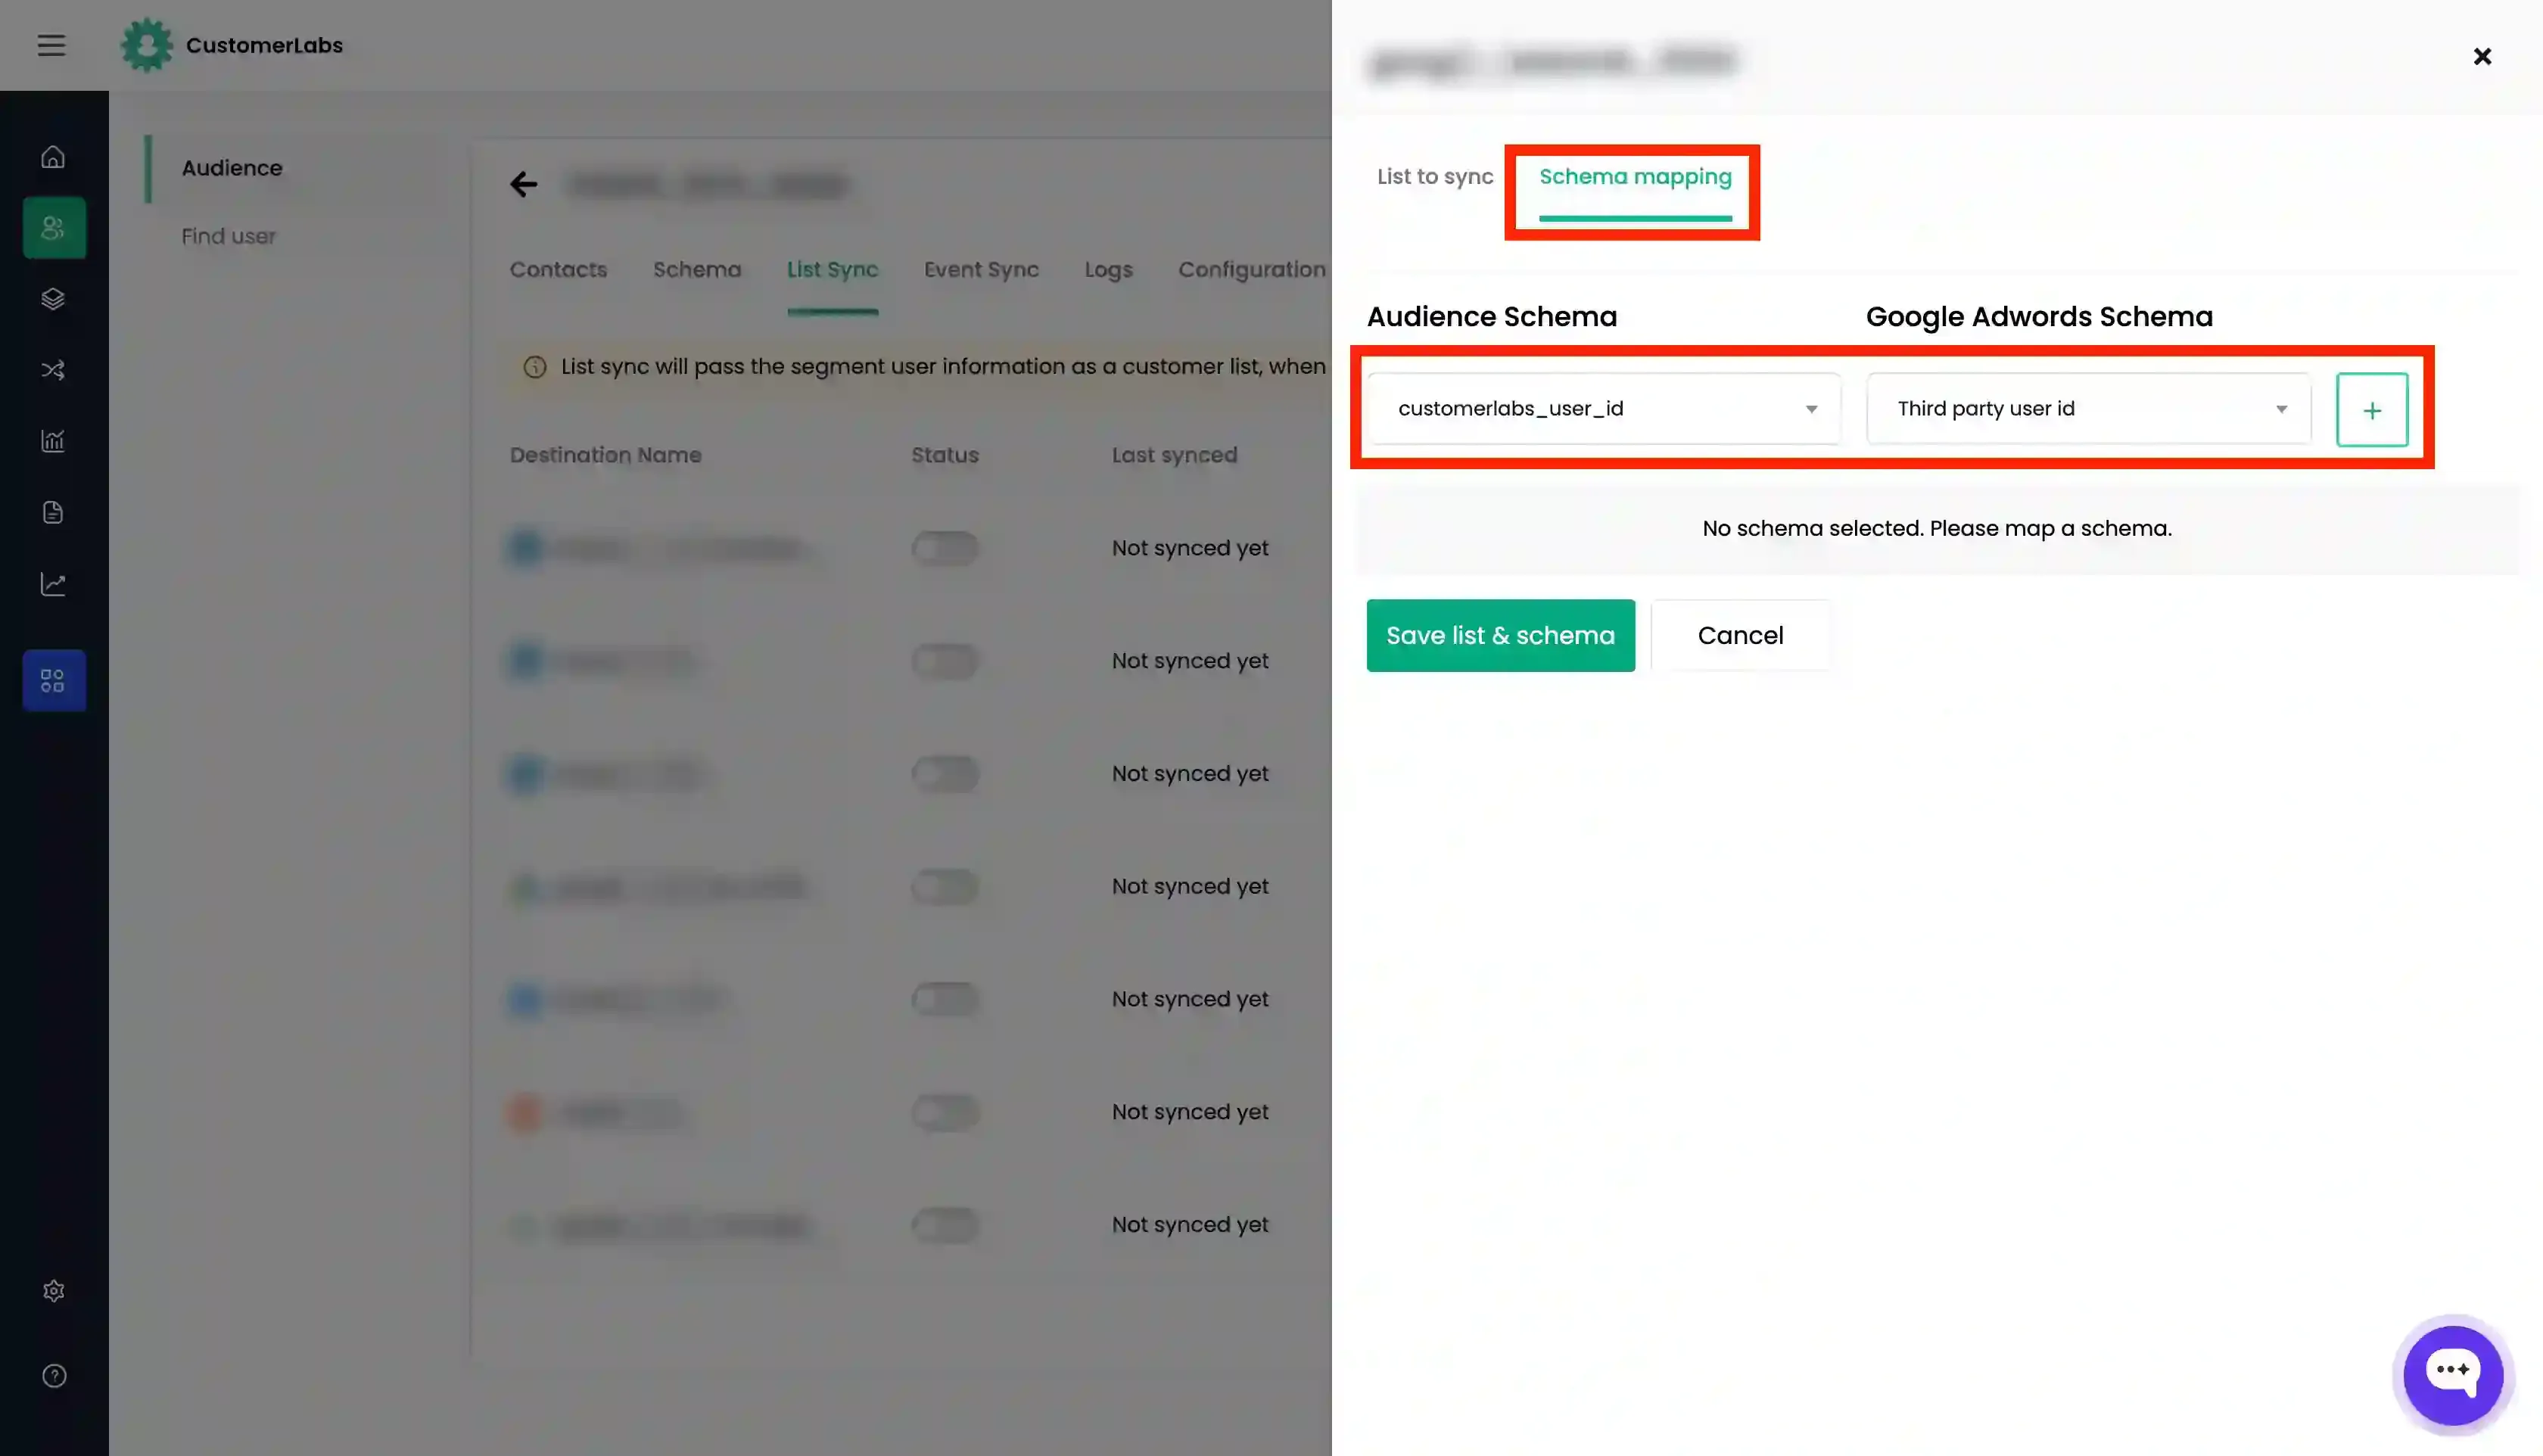
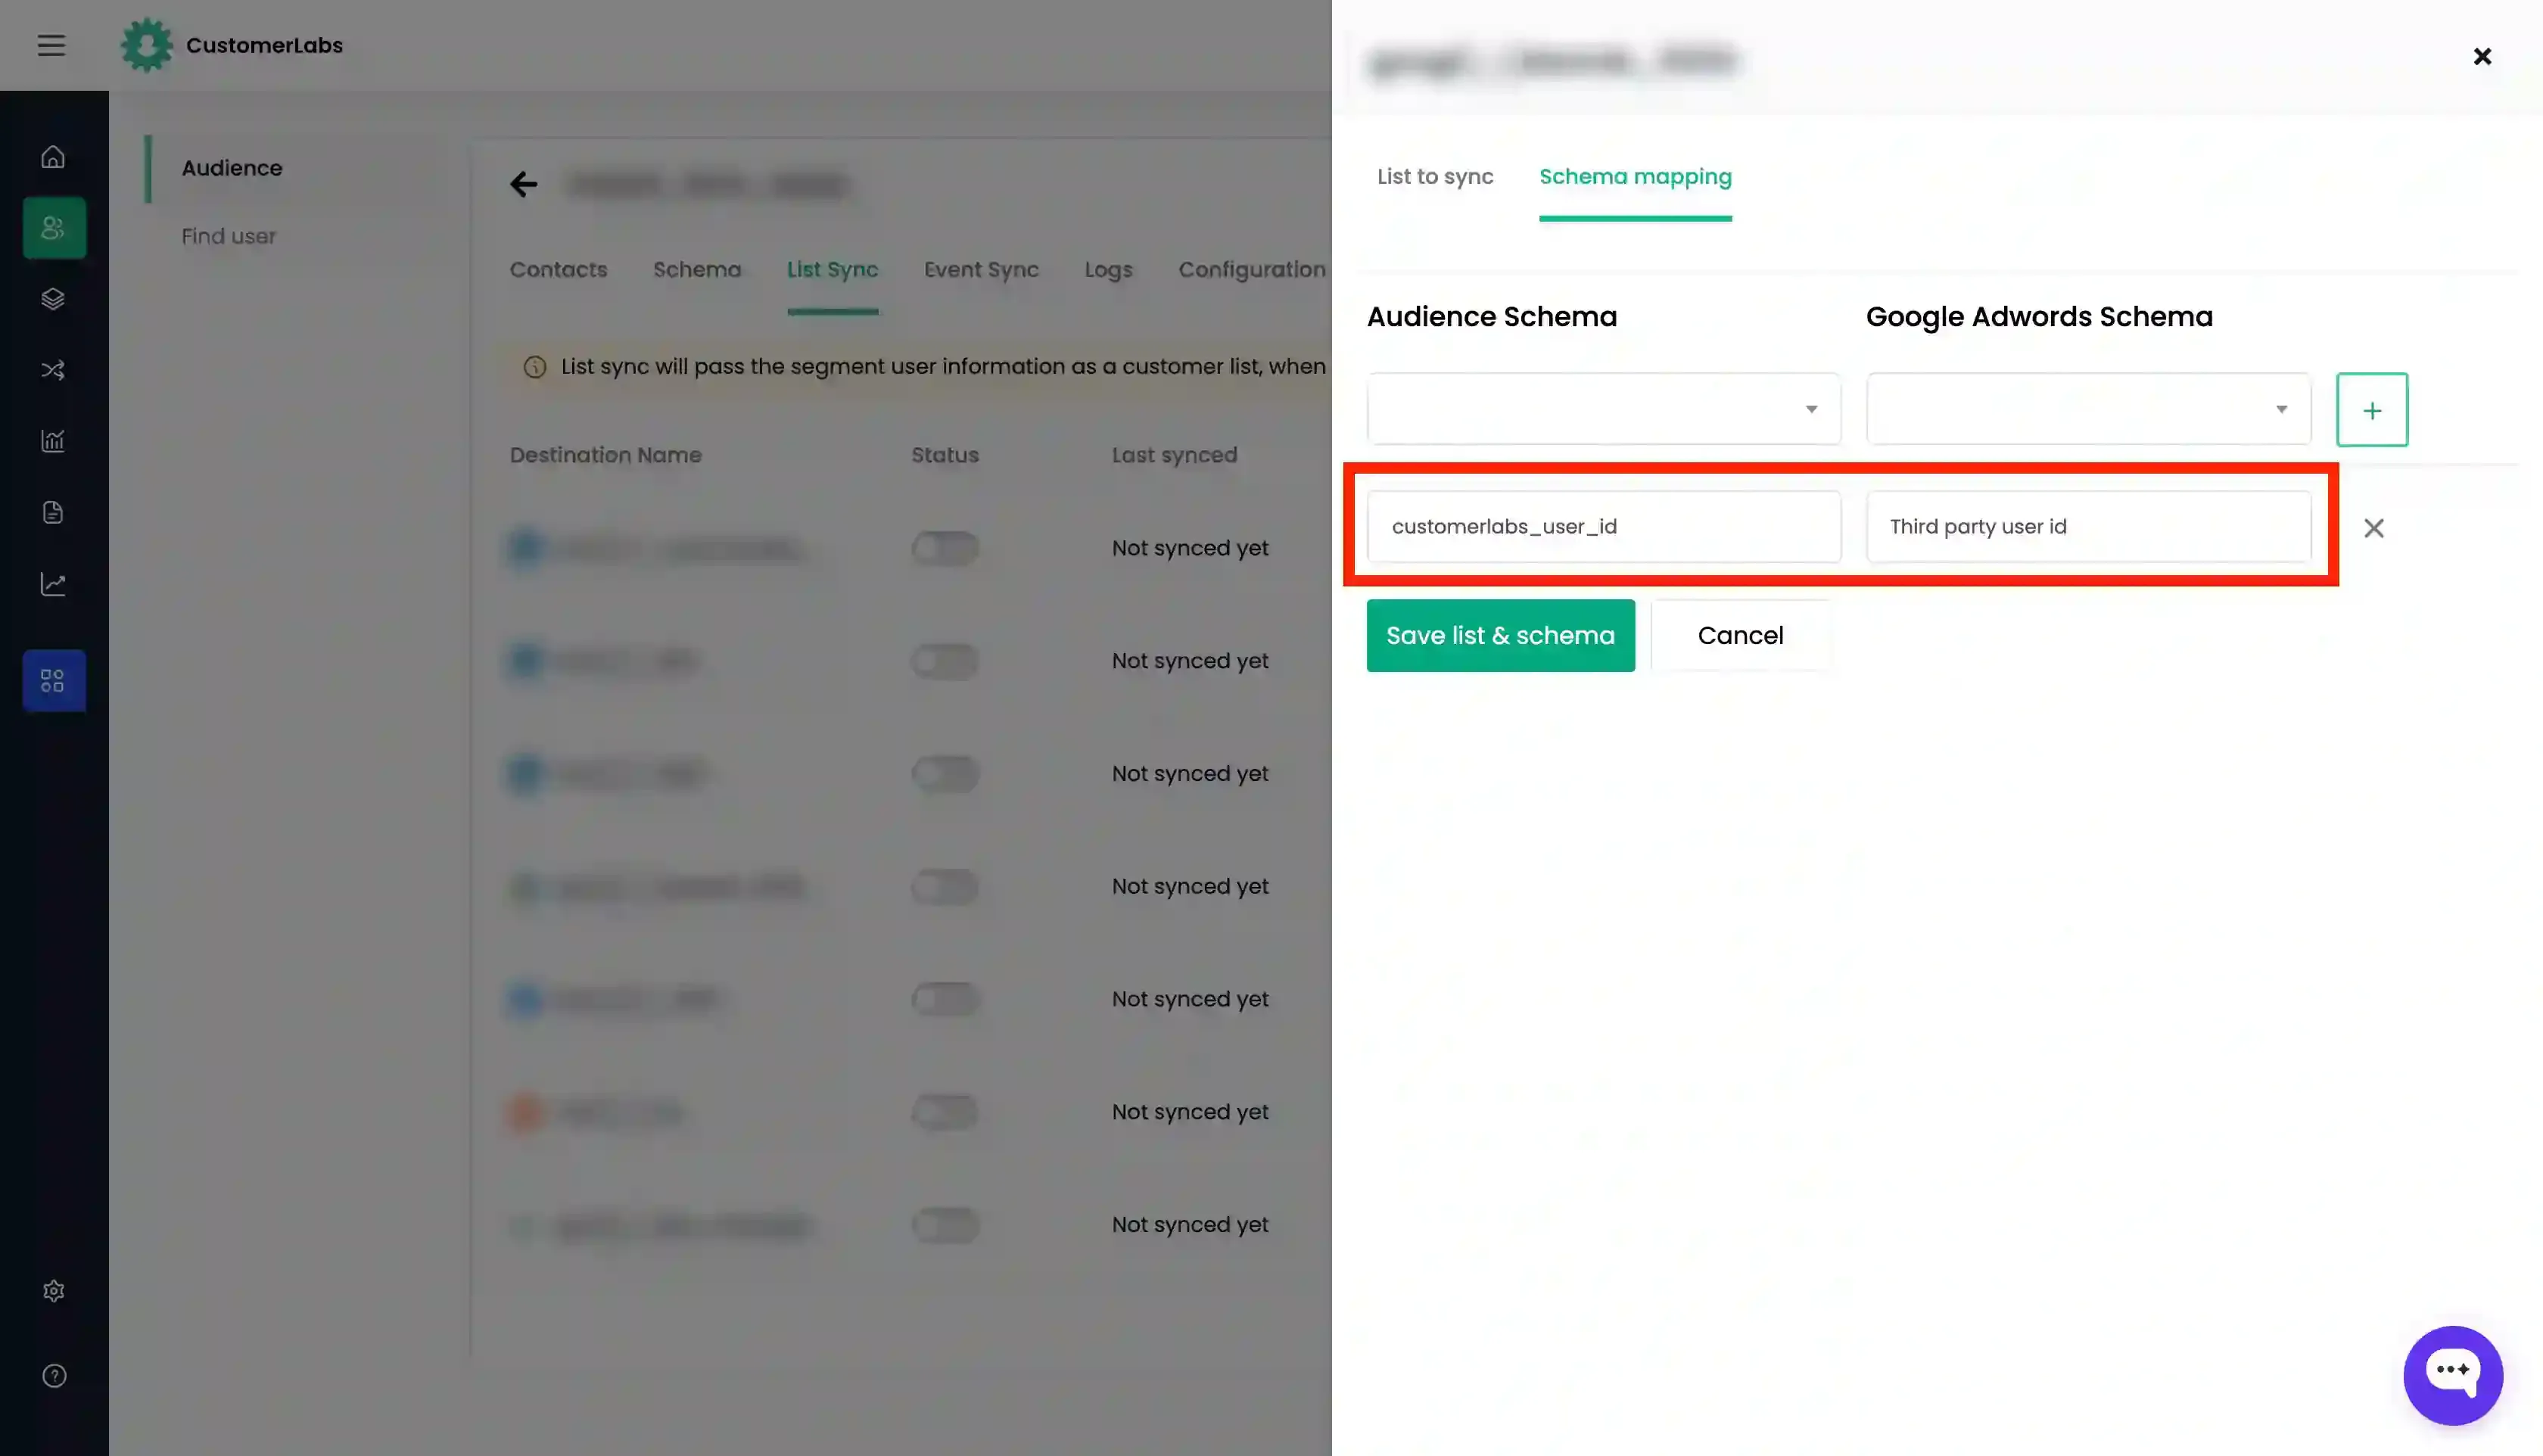
Go to the “Schema Mapping” tab and map the audience schema with the Klaviyo destination schema for the identifiers that you added in Step 2 by adding each schema using the “+” button.
-
If you want to include anonymous users, check the “Allow Anonymous user” box.
-
Once this is done, click “Save List and Schema”.
-
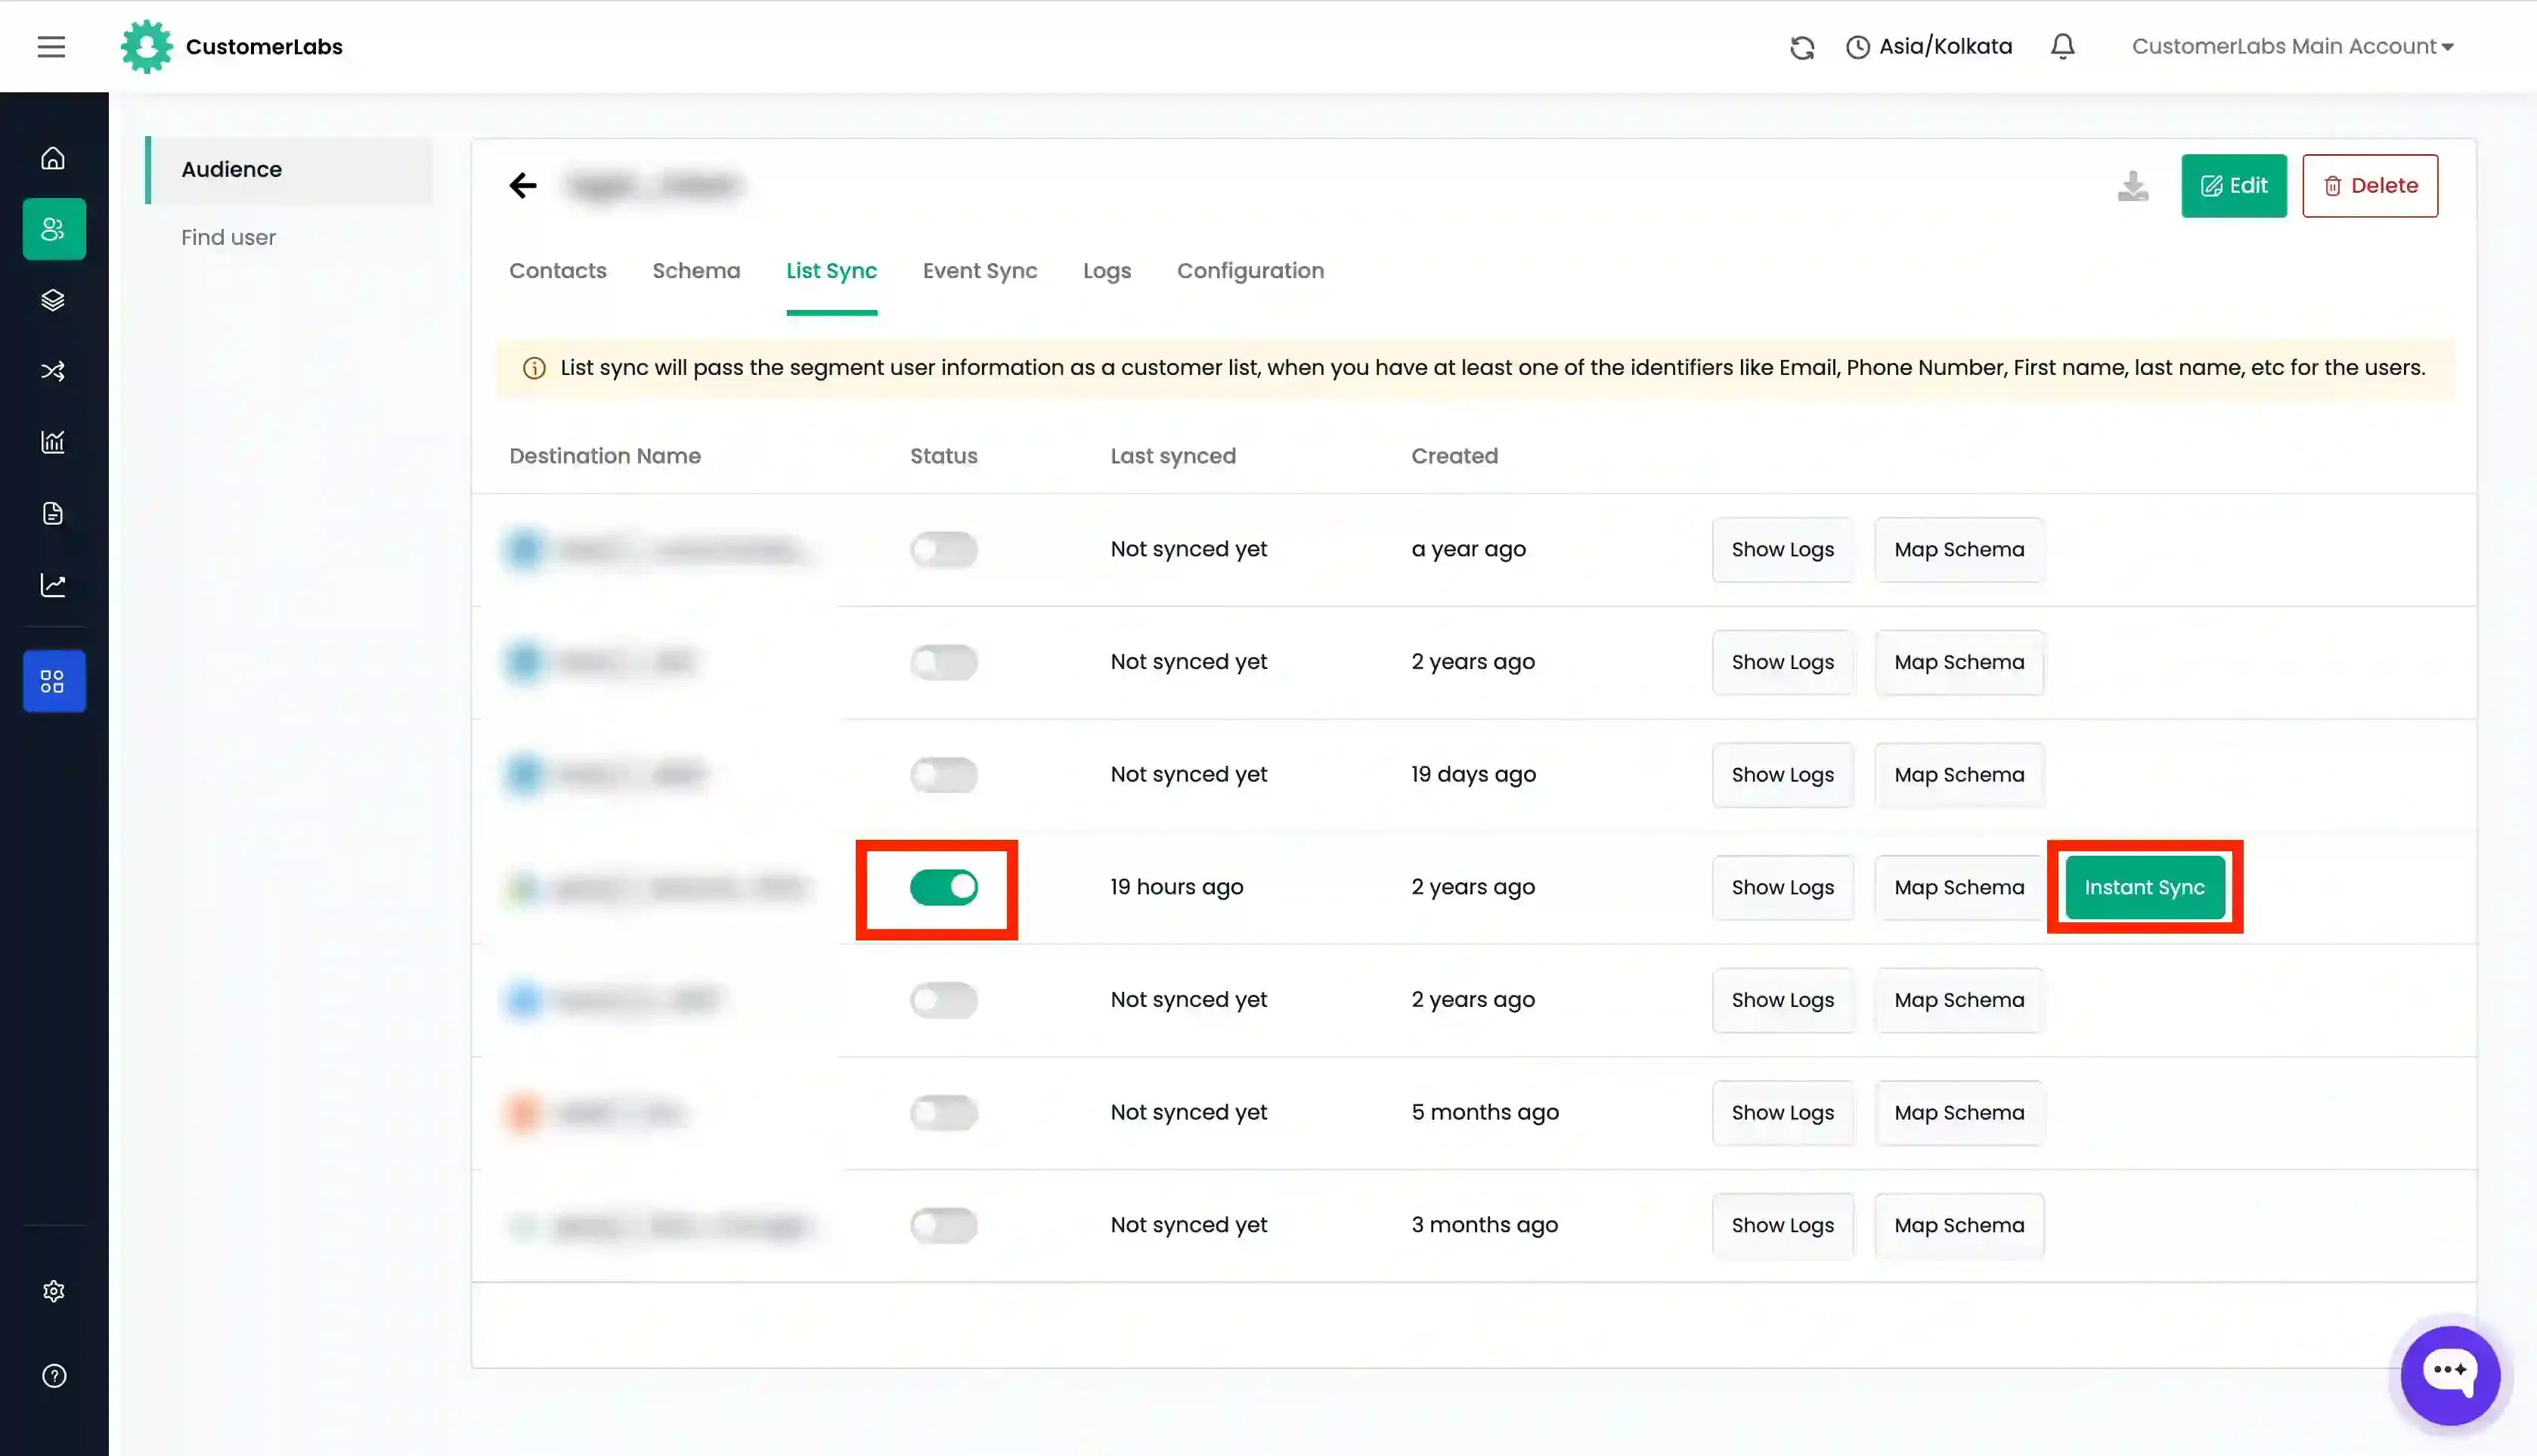
Now enable the toggle under “Status” for Klaviyo.
-
Click “Instant Sync” to sync the list immediately.
-
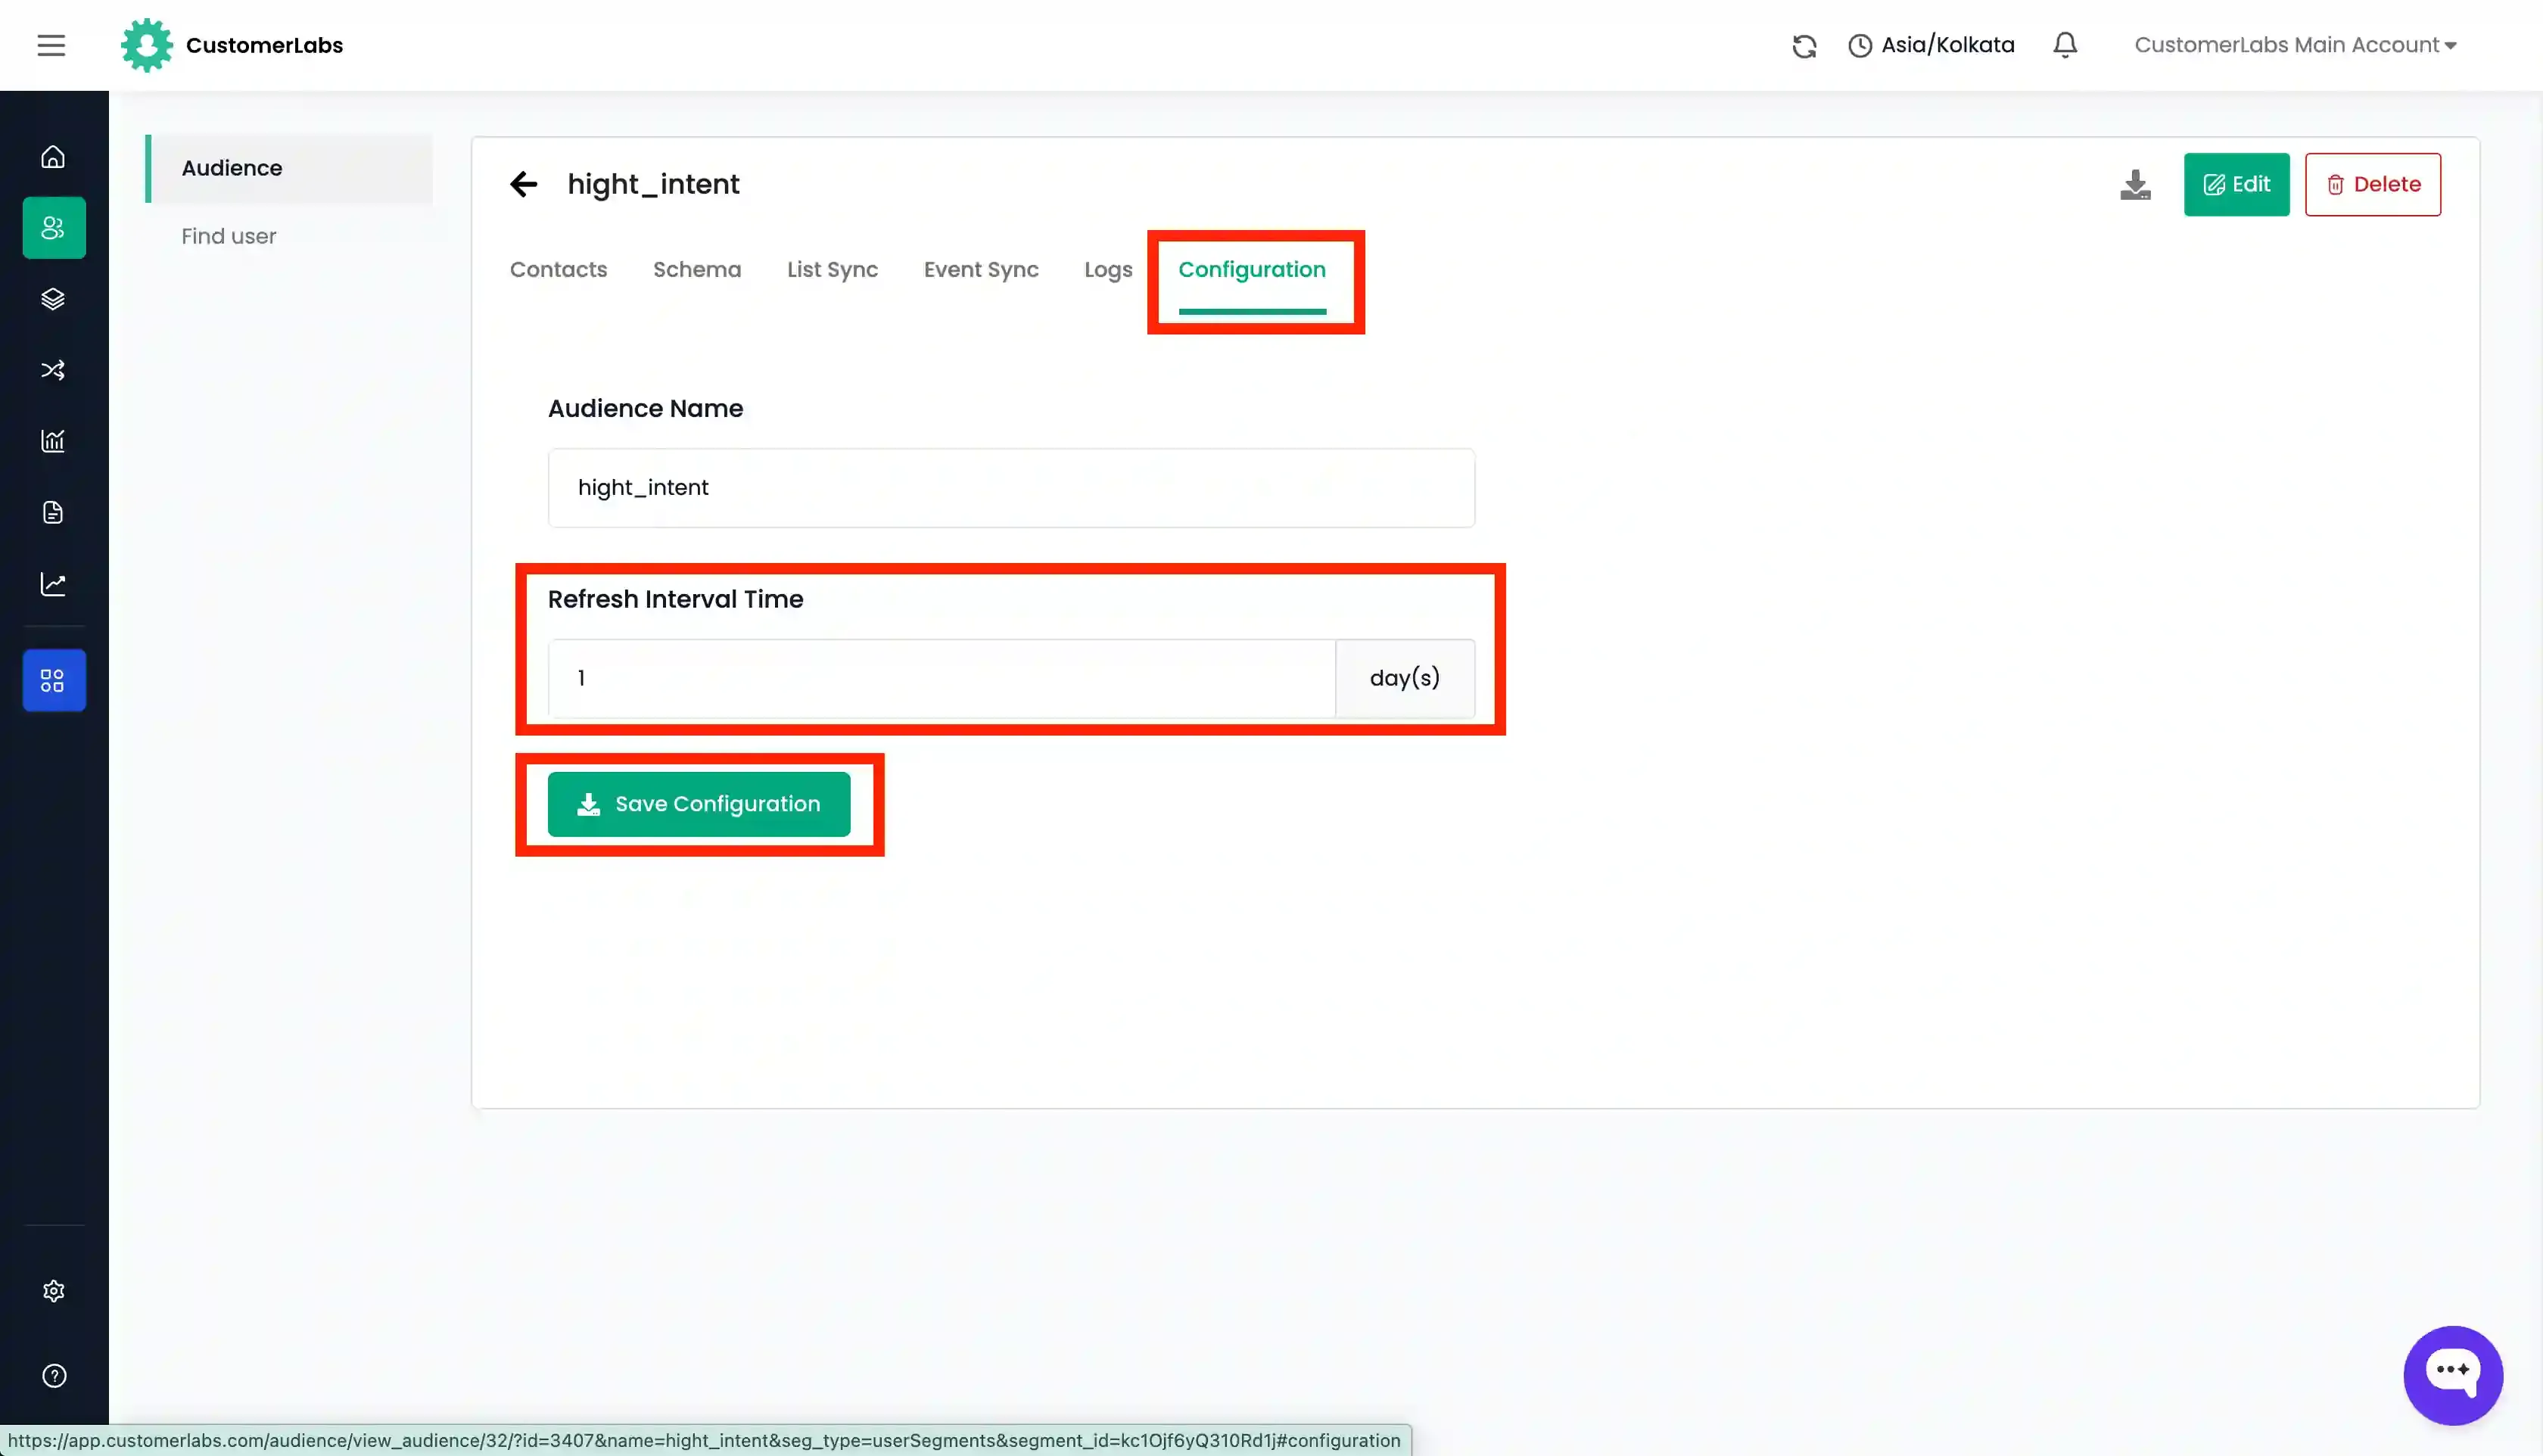
Go to the “Configuration” tab and set the “Refresh interval” as required. This ensures your Klaviyo audience stays up-to-date automatically.
-
You can check the sync logs for the audience from the “Logs” tab and also the log specifically for Klaviyo by going to the “List sync” tab → “Show Logs” for Klaviyo.
Check if the audience has been created/synced
Section titled “Check if the audience has been created/synced”You can check whether the list has been synced correctly within the Klaviyo platform after 10-15 minutes if you have enabled “Instant Sync” or based on the refresh interval days set for the audience.
- Go to Klaviyo → Audiences → Lists & Segments.
- Check if the audience list has been created under the same name as given in CustomerLabs or if the existing list has been updated.