
OpenAI Ads
Connect CustomerLabs to OpenAI Ads to send conversion events from your website to OpenAI’s Ads Manager. This enables conversion attribution and optimisation for ads served inside ChatGPT.
The integration needs two values from OpenAI Ads Manager:
- Pixel ID — from a data source you create under Conversions.
- API Key — a conversion key you create under Manage Conversion Keys.
Step 1: Add OpenAI Ads as a destination
Section titled “Step 1: Add OpenAI Ads as a destination”-
Log in to your CustomerLabs account and navigate to Destinations from the left-hand menu.
-
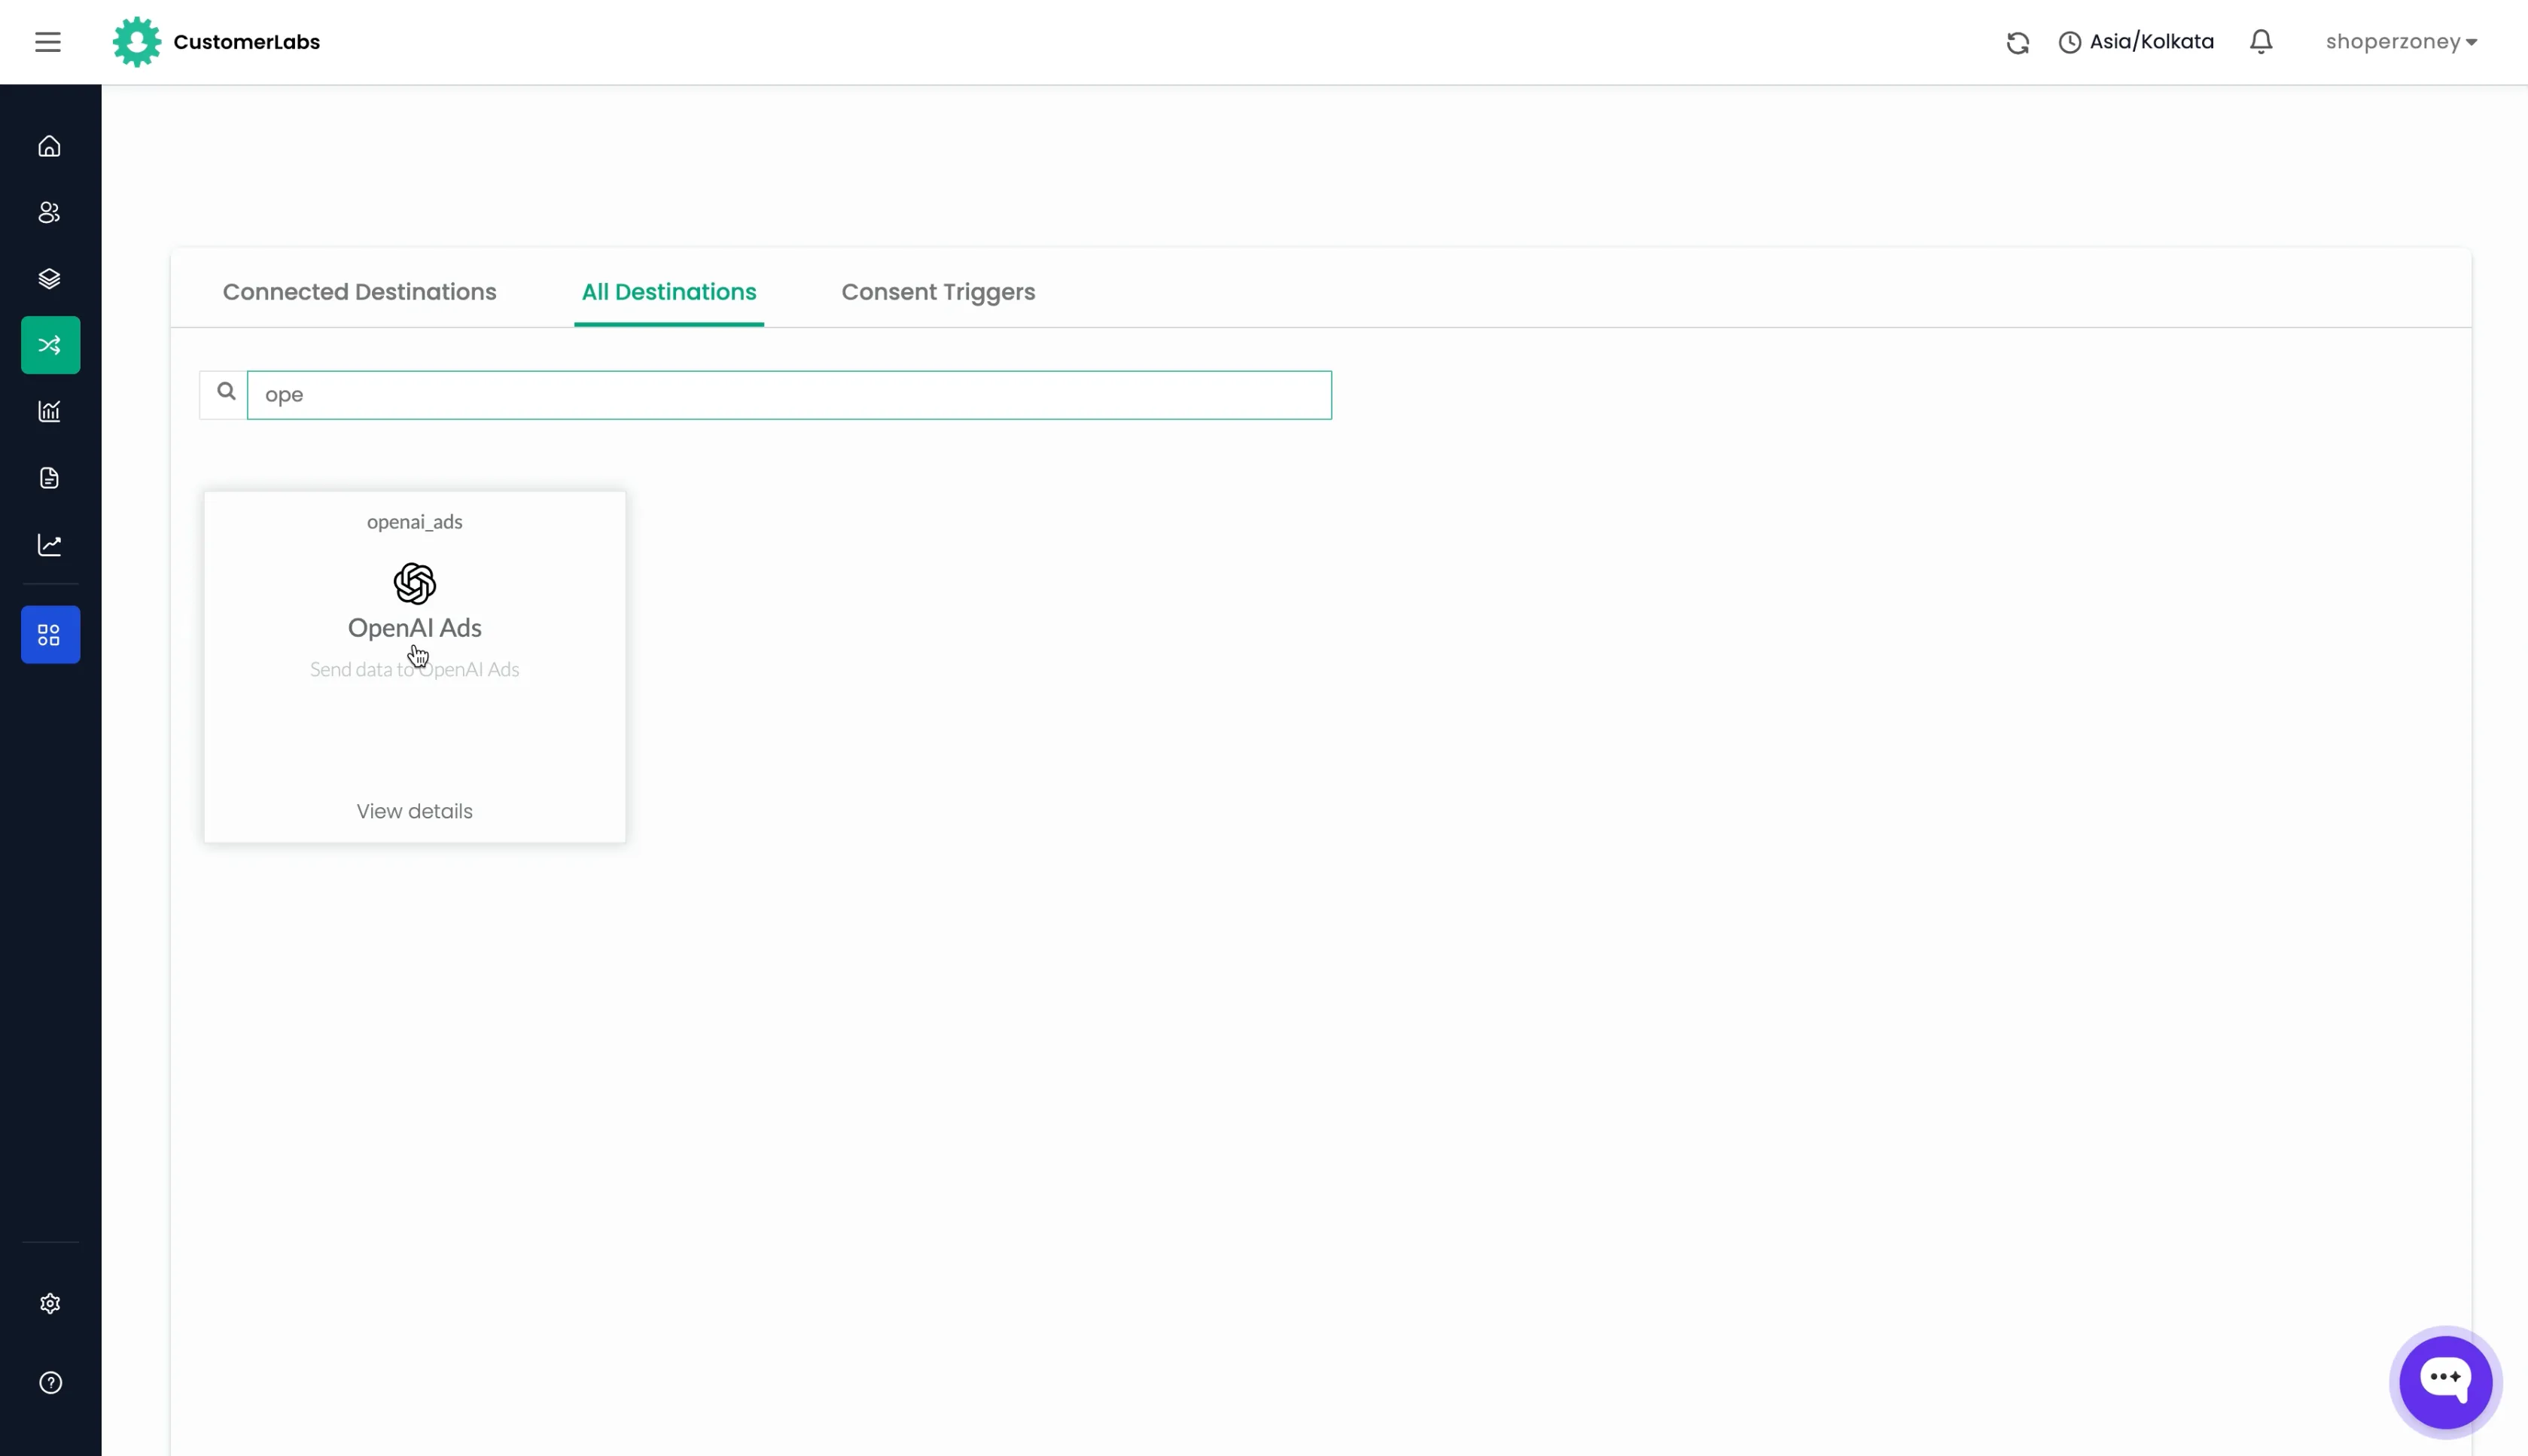
Open the All Destinations tab, search for OpenAI Ads, and select the card.
-
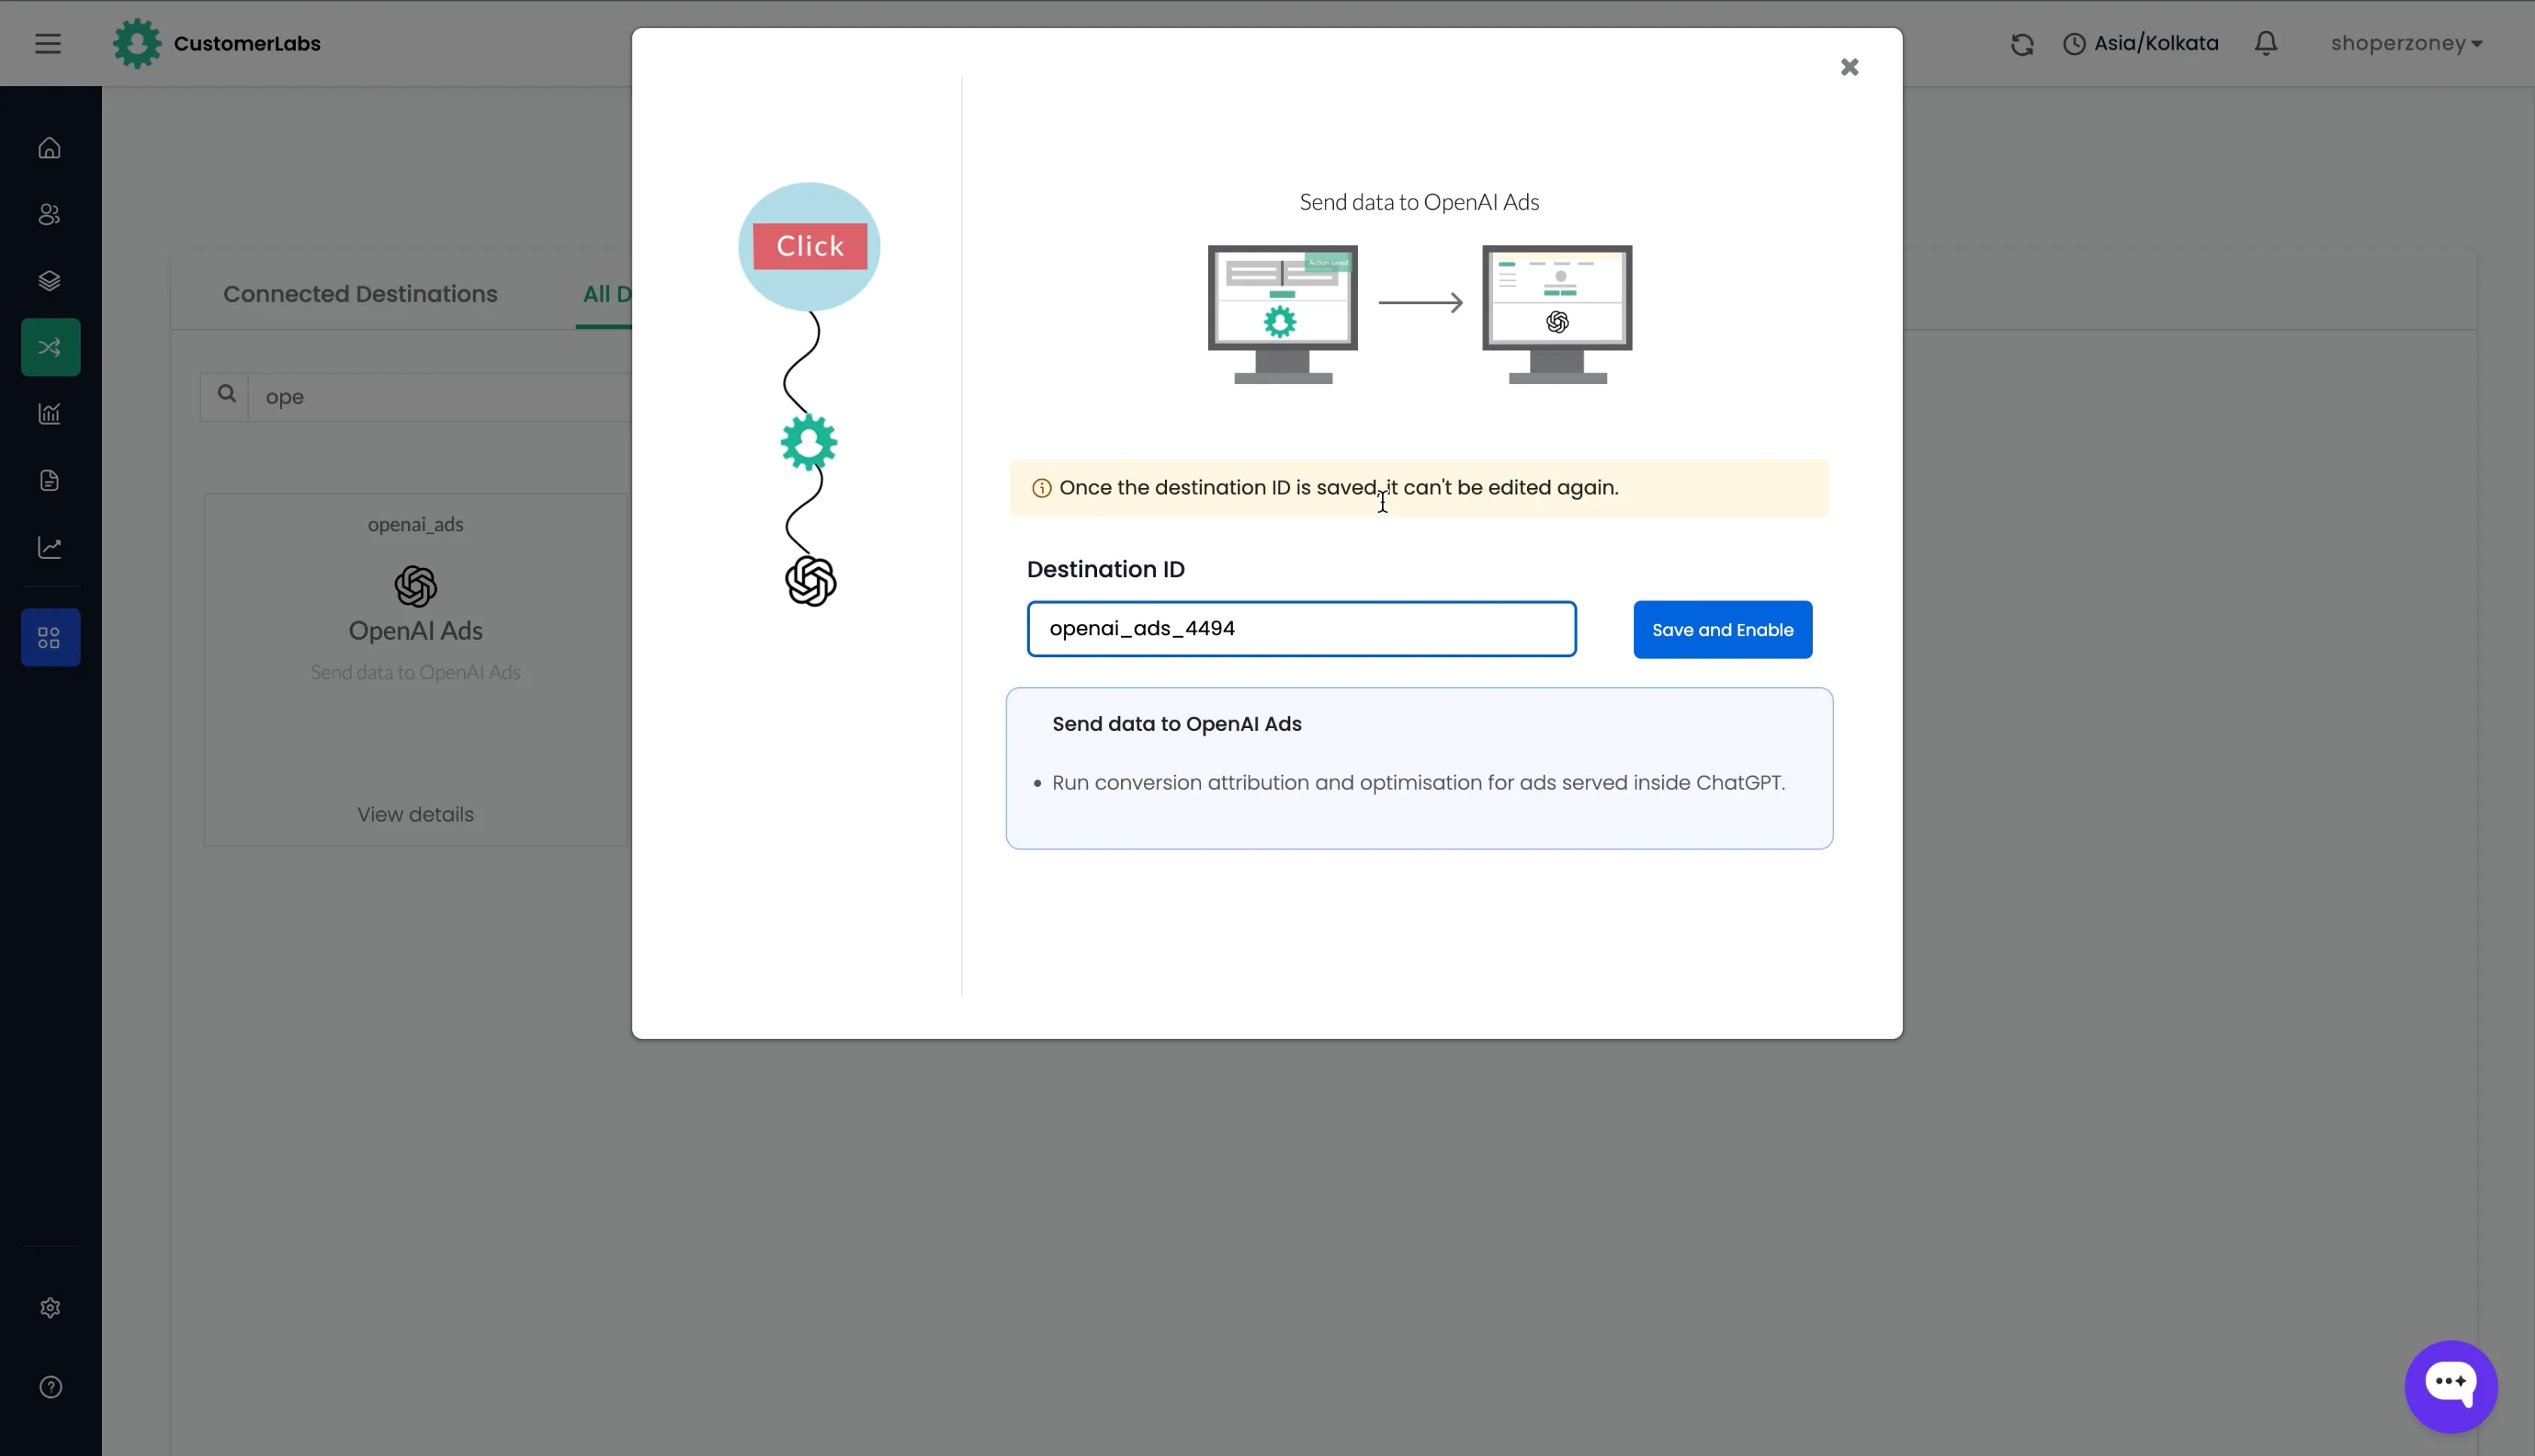
On the setup screen, you will see an auto-generated Destination ID. Click Save and Enable to proceed.
-
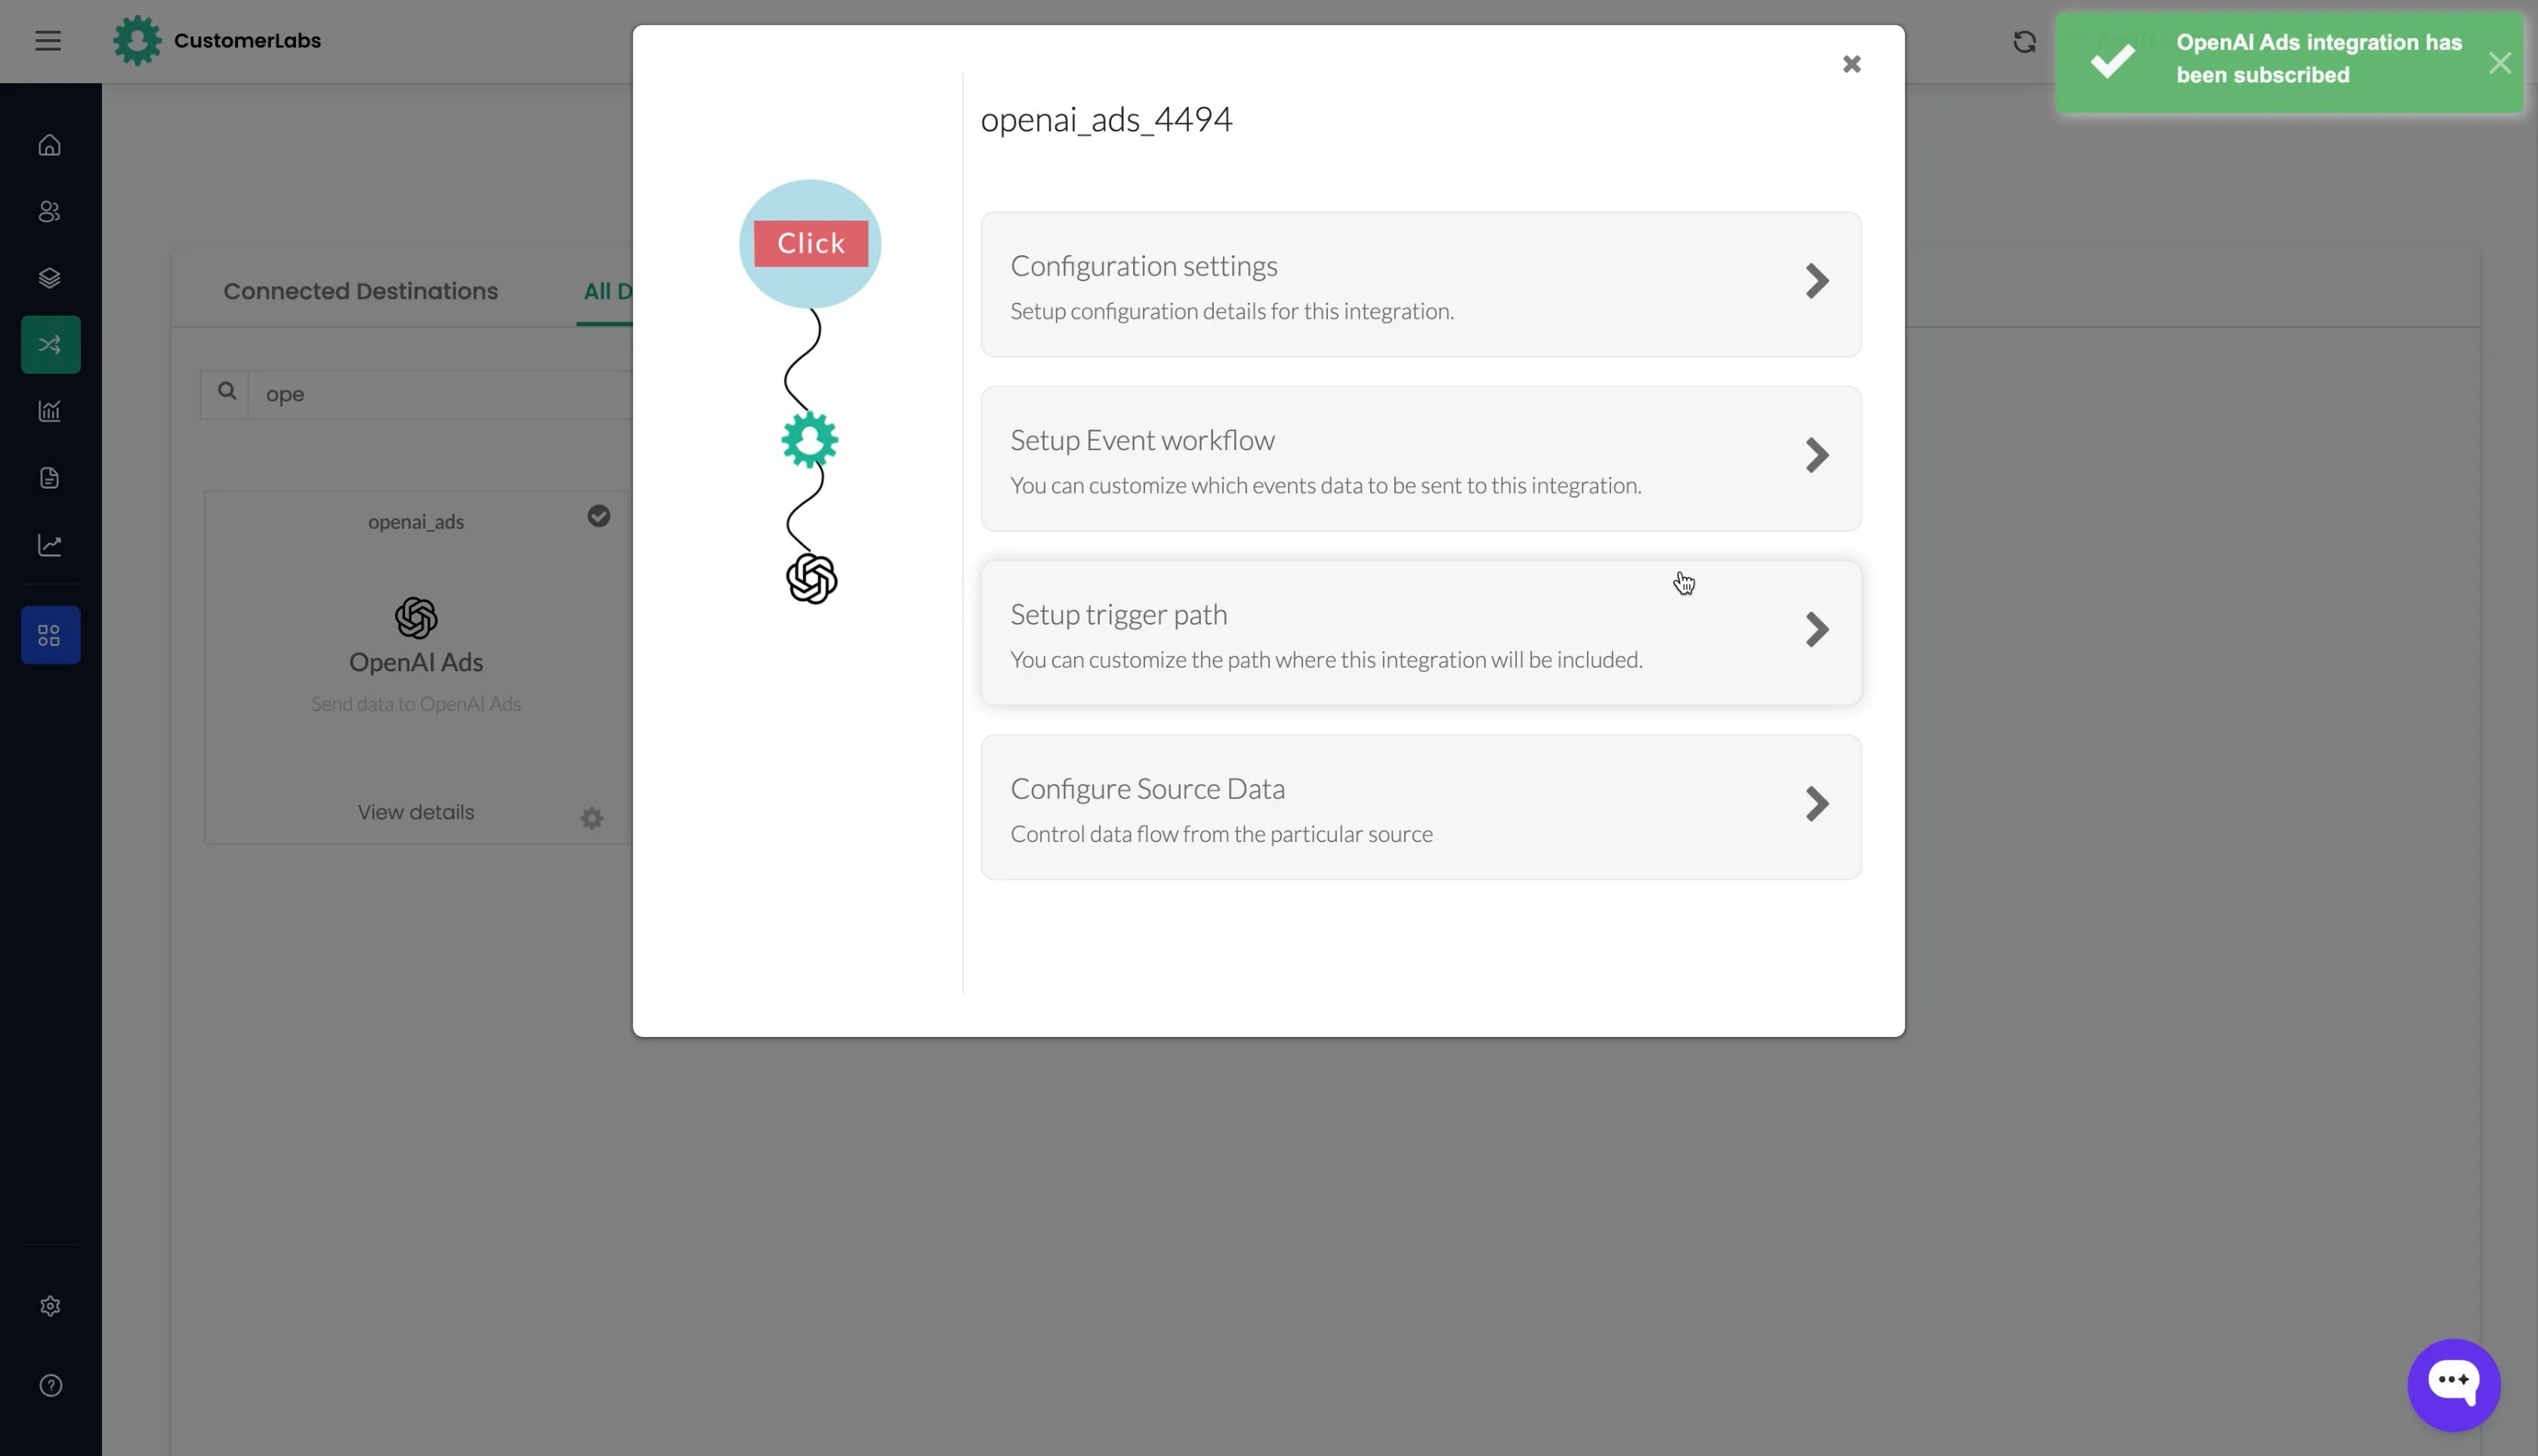
The destination detail screen opens with Configuration settings, Setup Event workflow, Setup trigger path, and Configure Source Data.
Step 2: Open Configuration settings
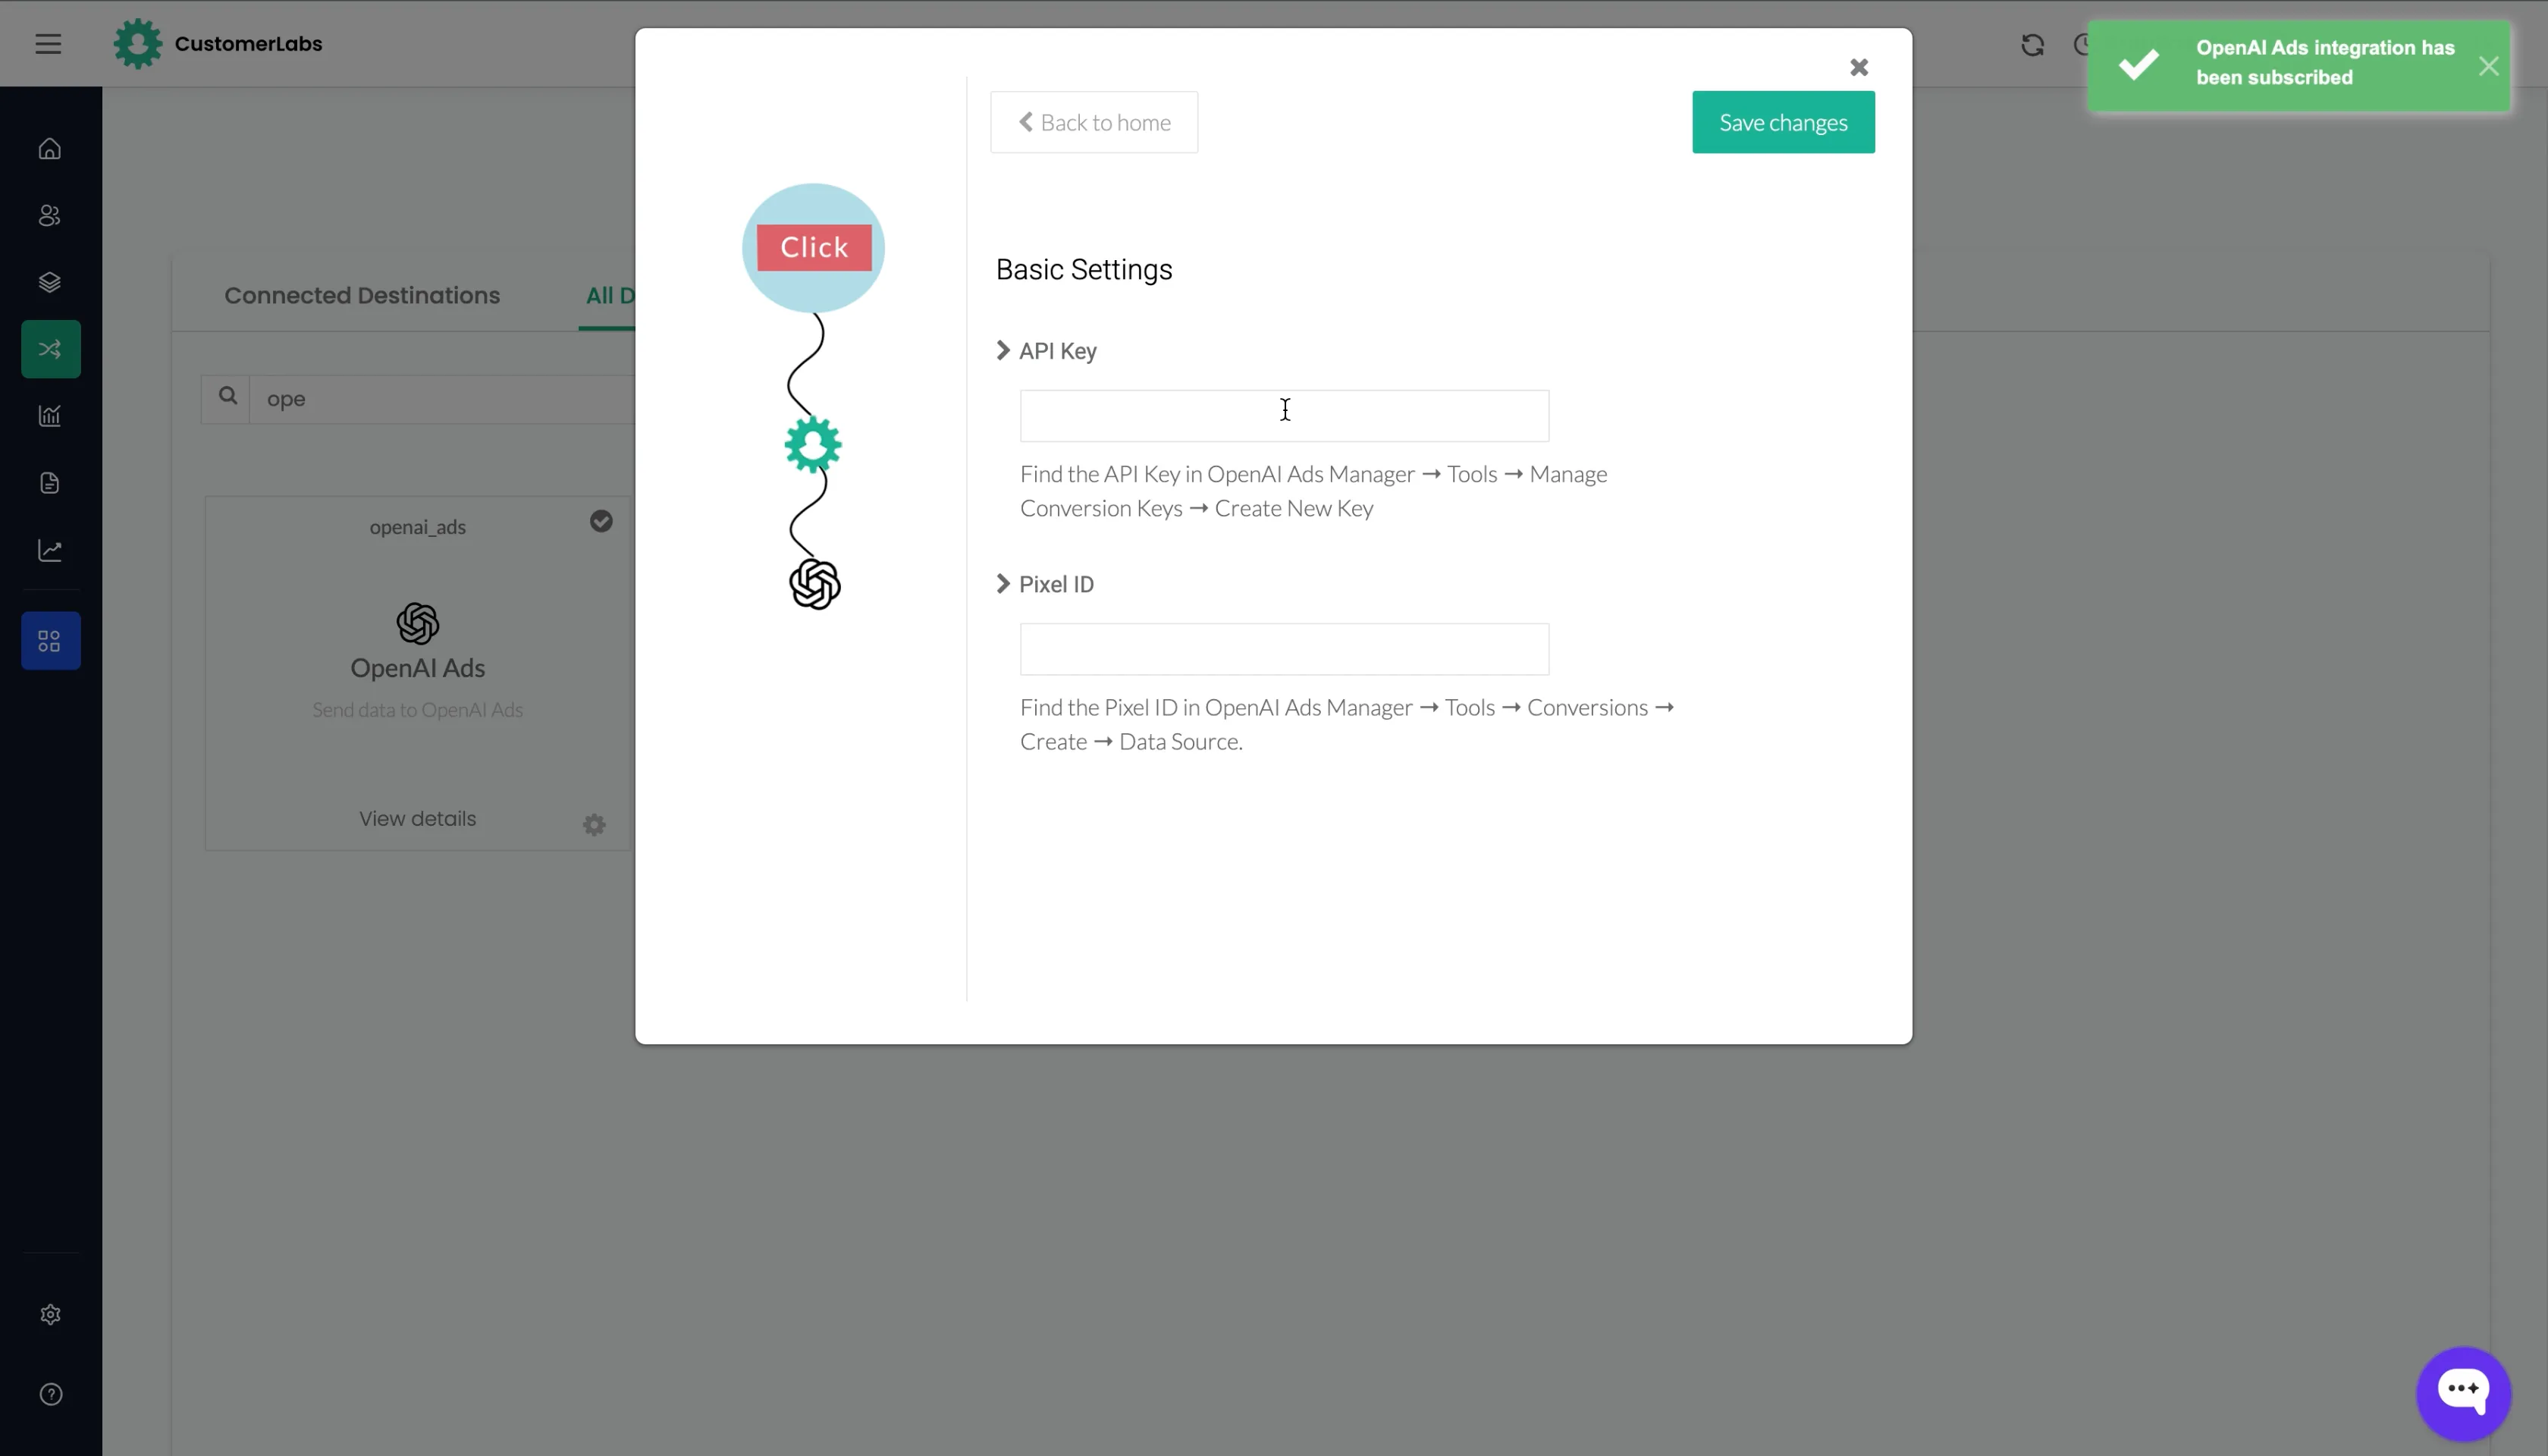
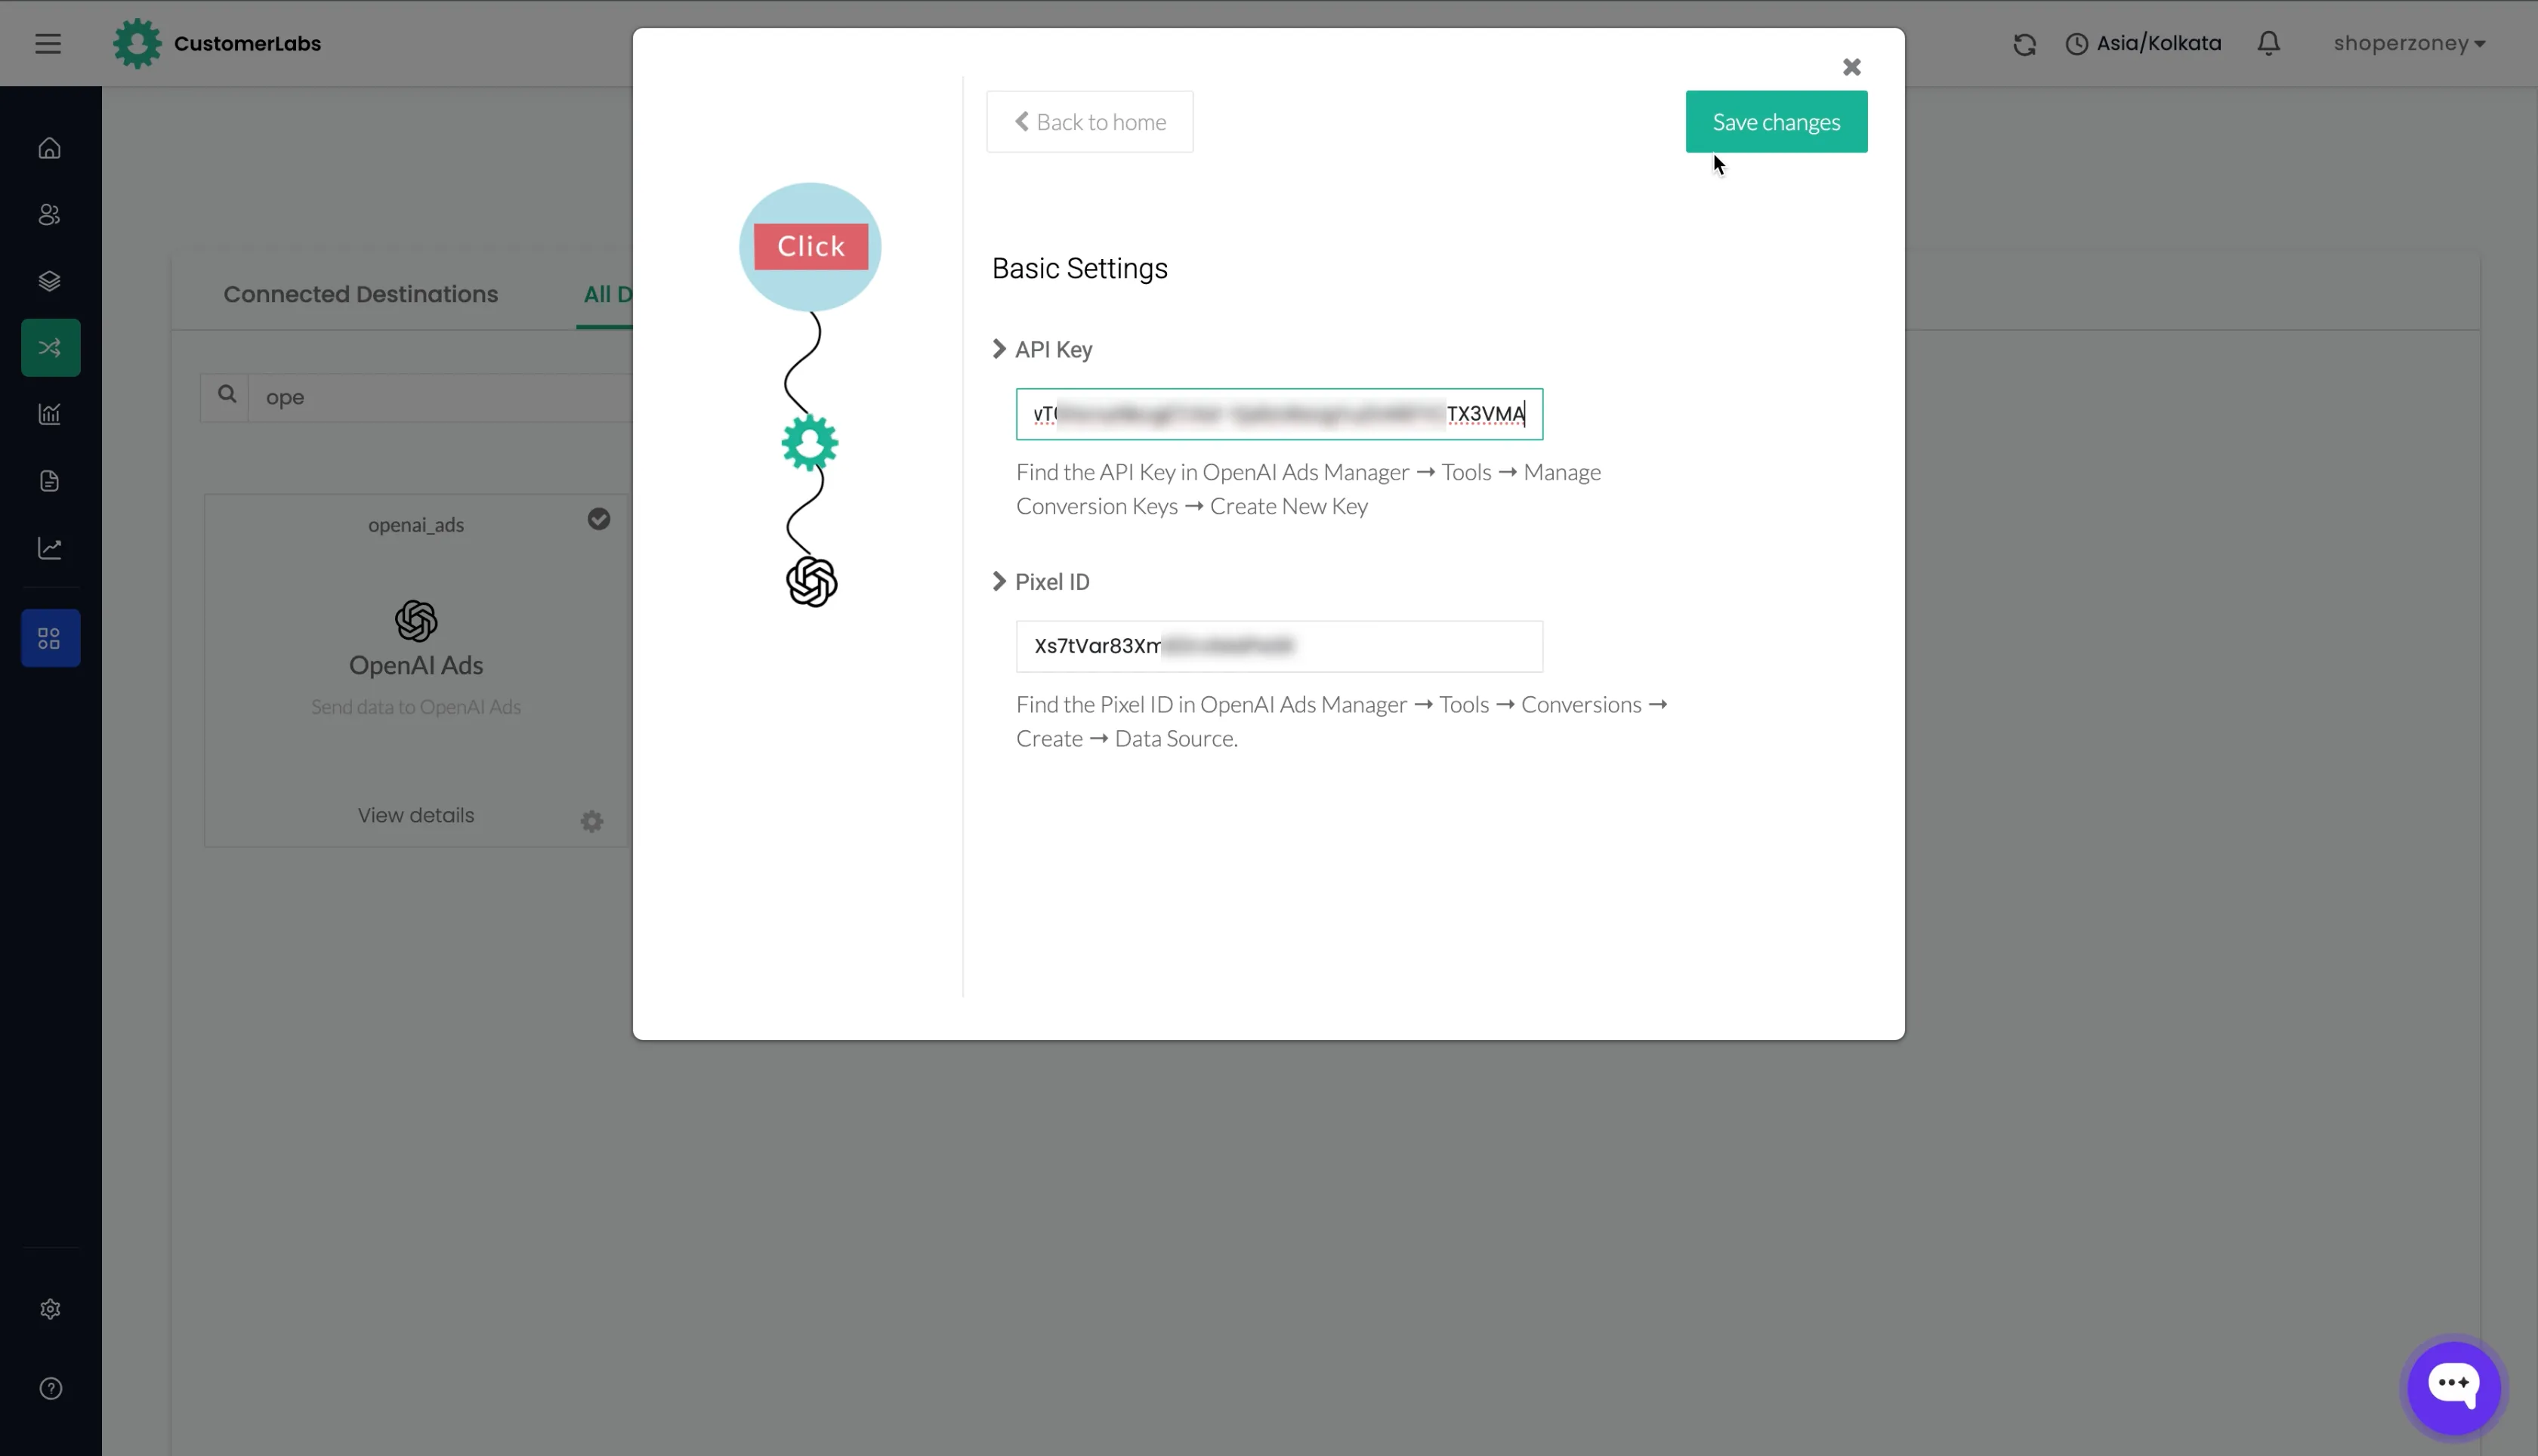
Section titled “Step 2: Open Configuration settings”Click Configuration settings. The Basic Settings section asks for two values:
- API Key — found in OpenAI Ads Manager → Tools → Manage Conversion Keys → Create New Key.
- Pixel ID — found in OpenAI Ads Manager → Tools → Conversions → Create → Data Source.
The next two steps walk through creating both values in OpenAI Ads Manager.
Step 3: Create a data source in OpenAI Ads Manager (Pixel ID)
Section titled “Step 3: Create a data source in OpenAI Ads Manager (Pixel ID)”-
In OpenAI Ads Manager, go to Tools → Conversions.
-
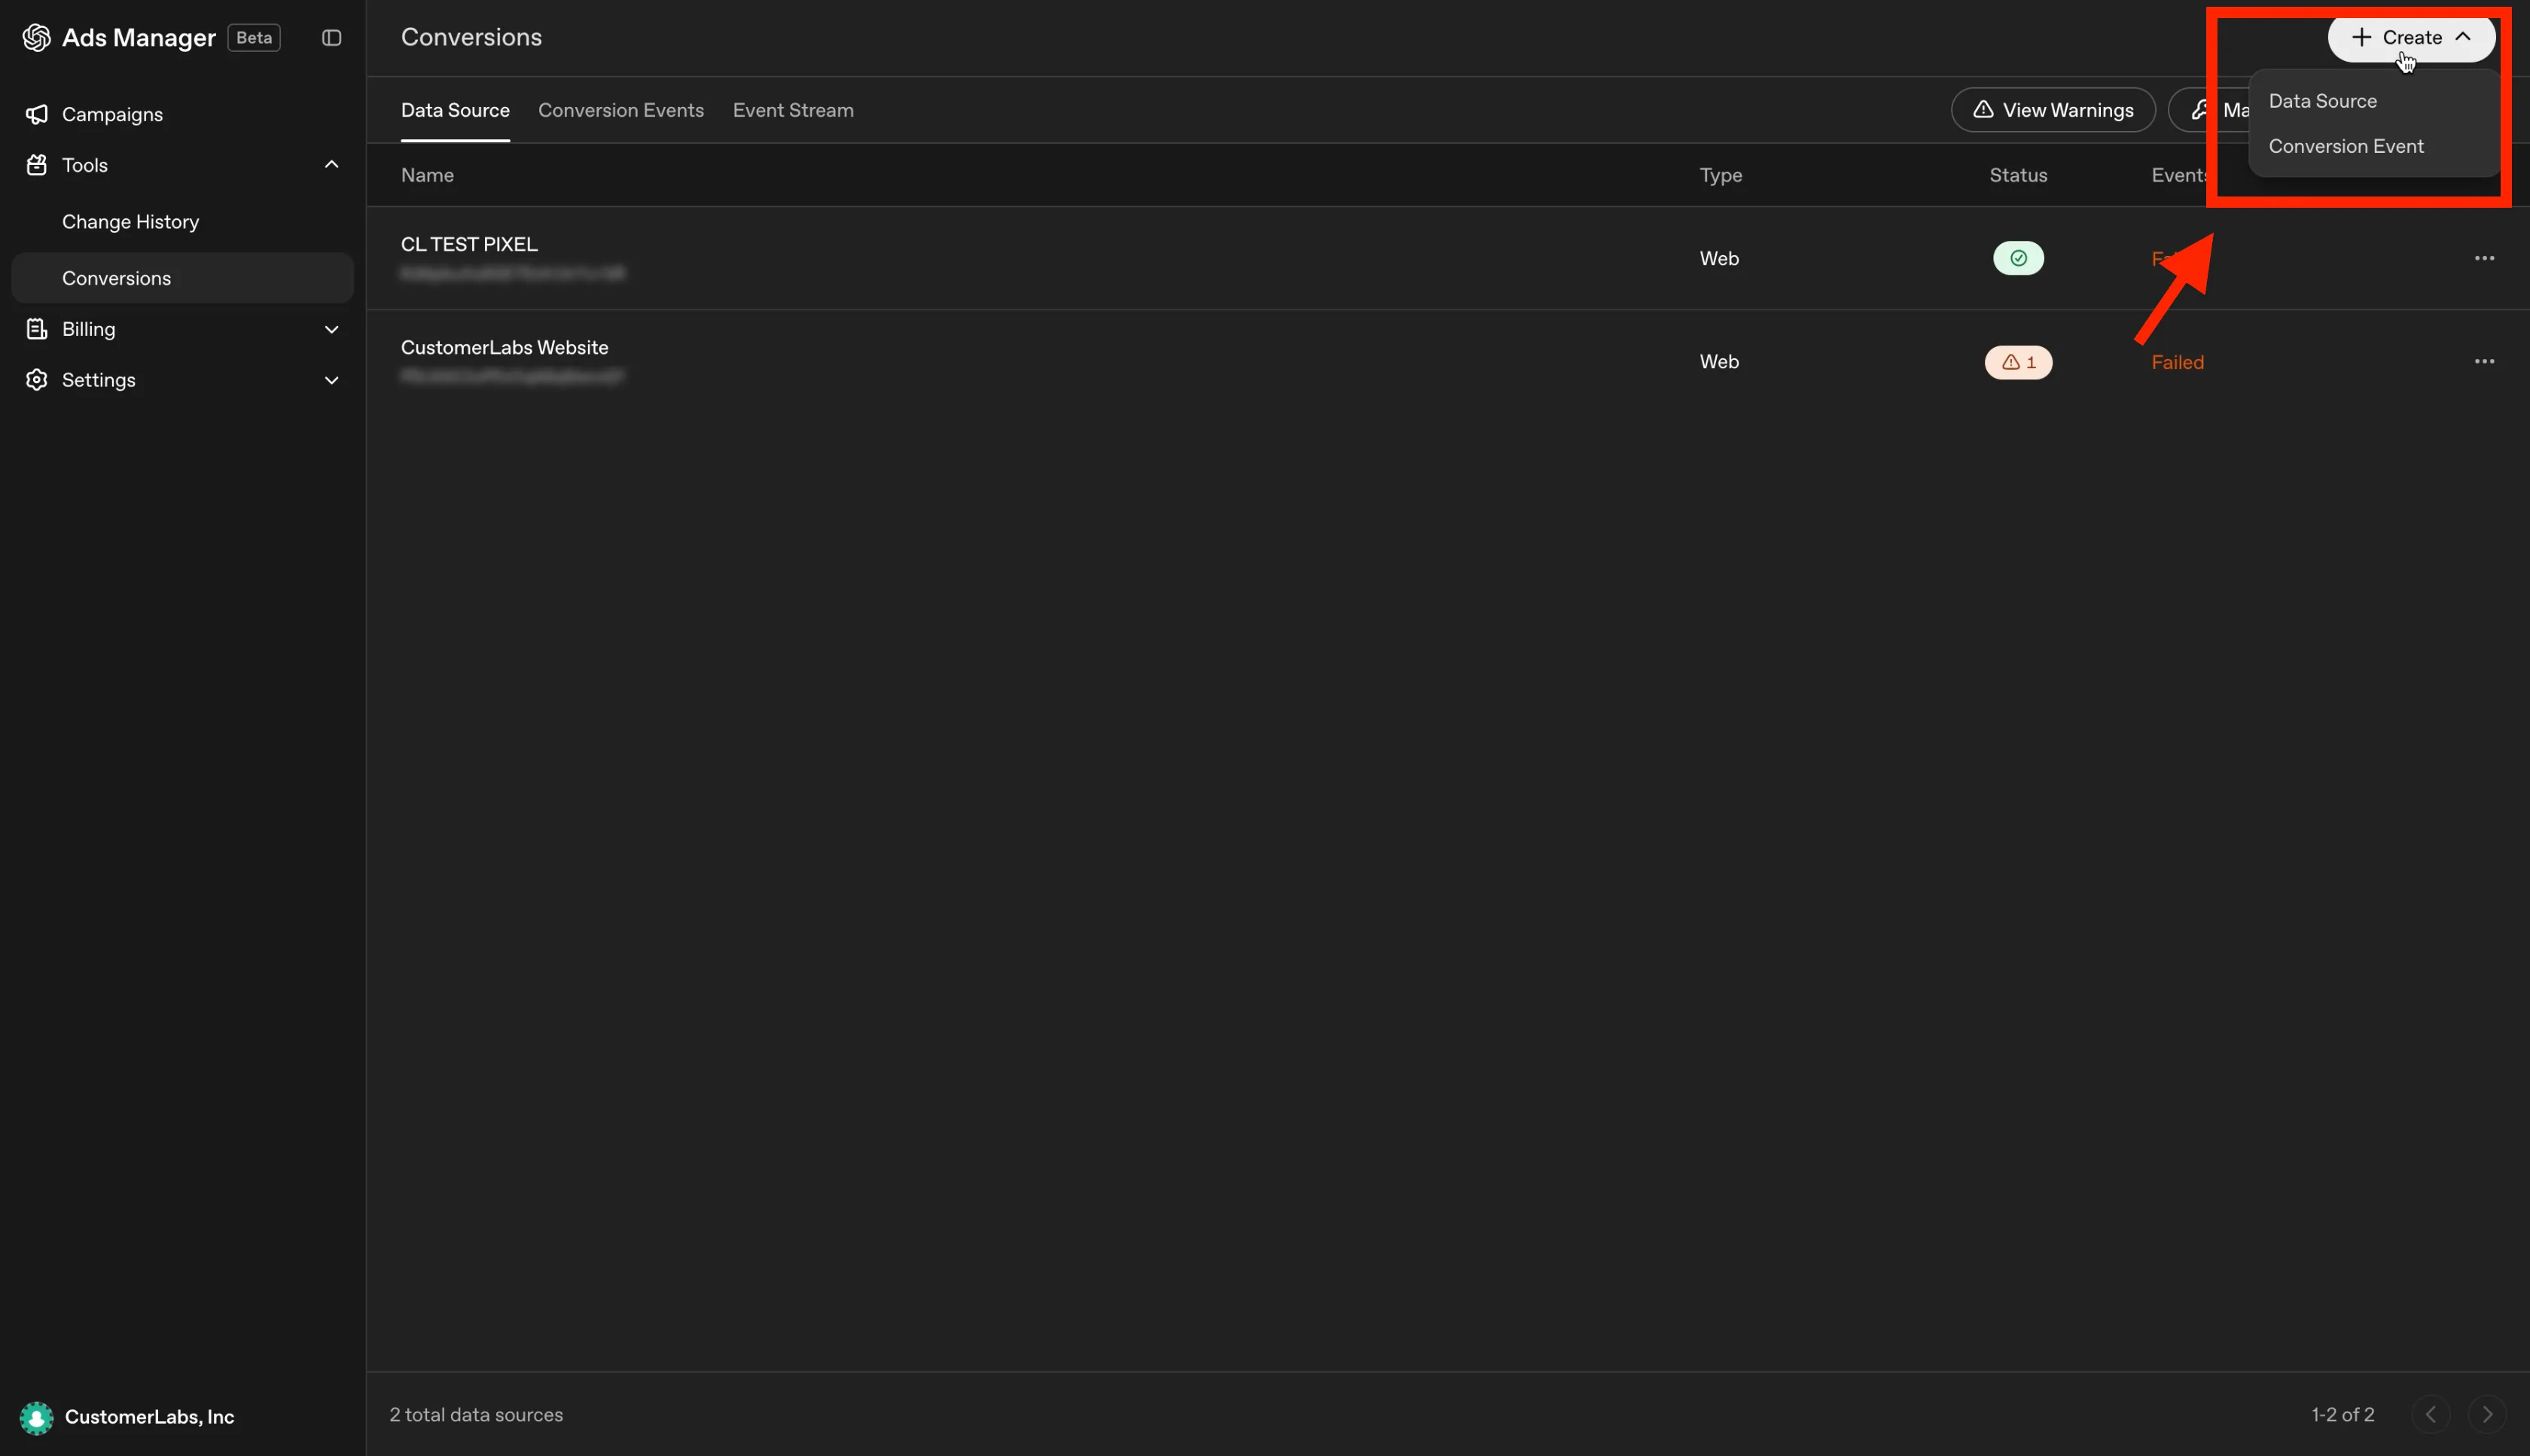
Click + Create in the top-right corner and select Data Source.
-
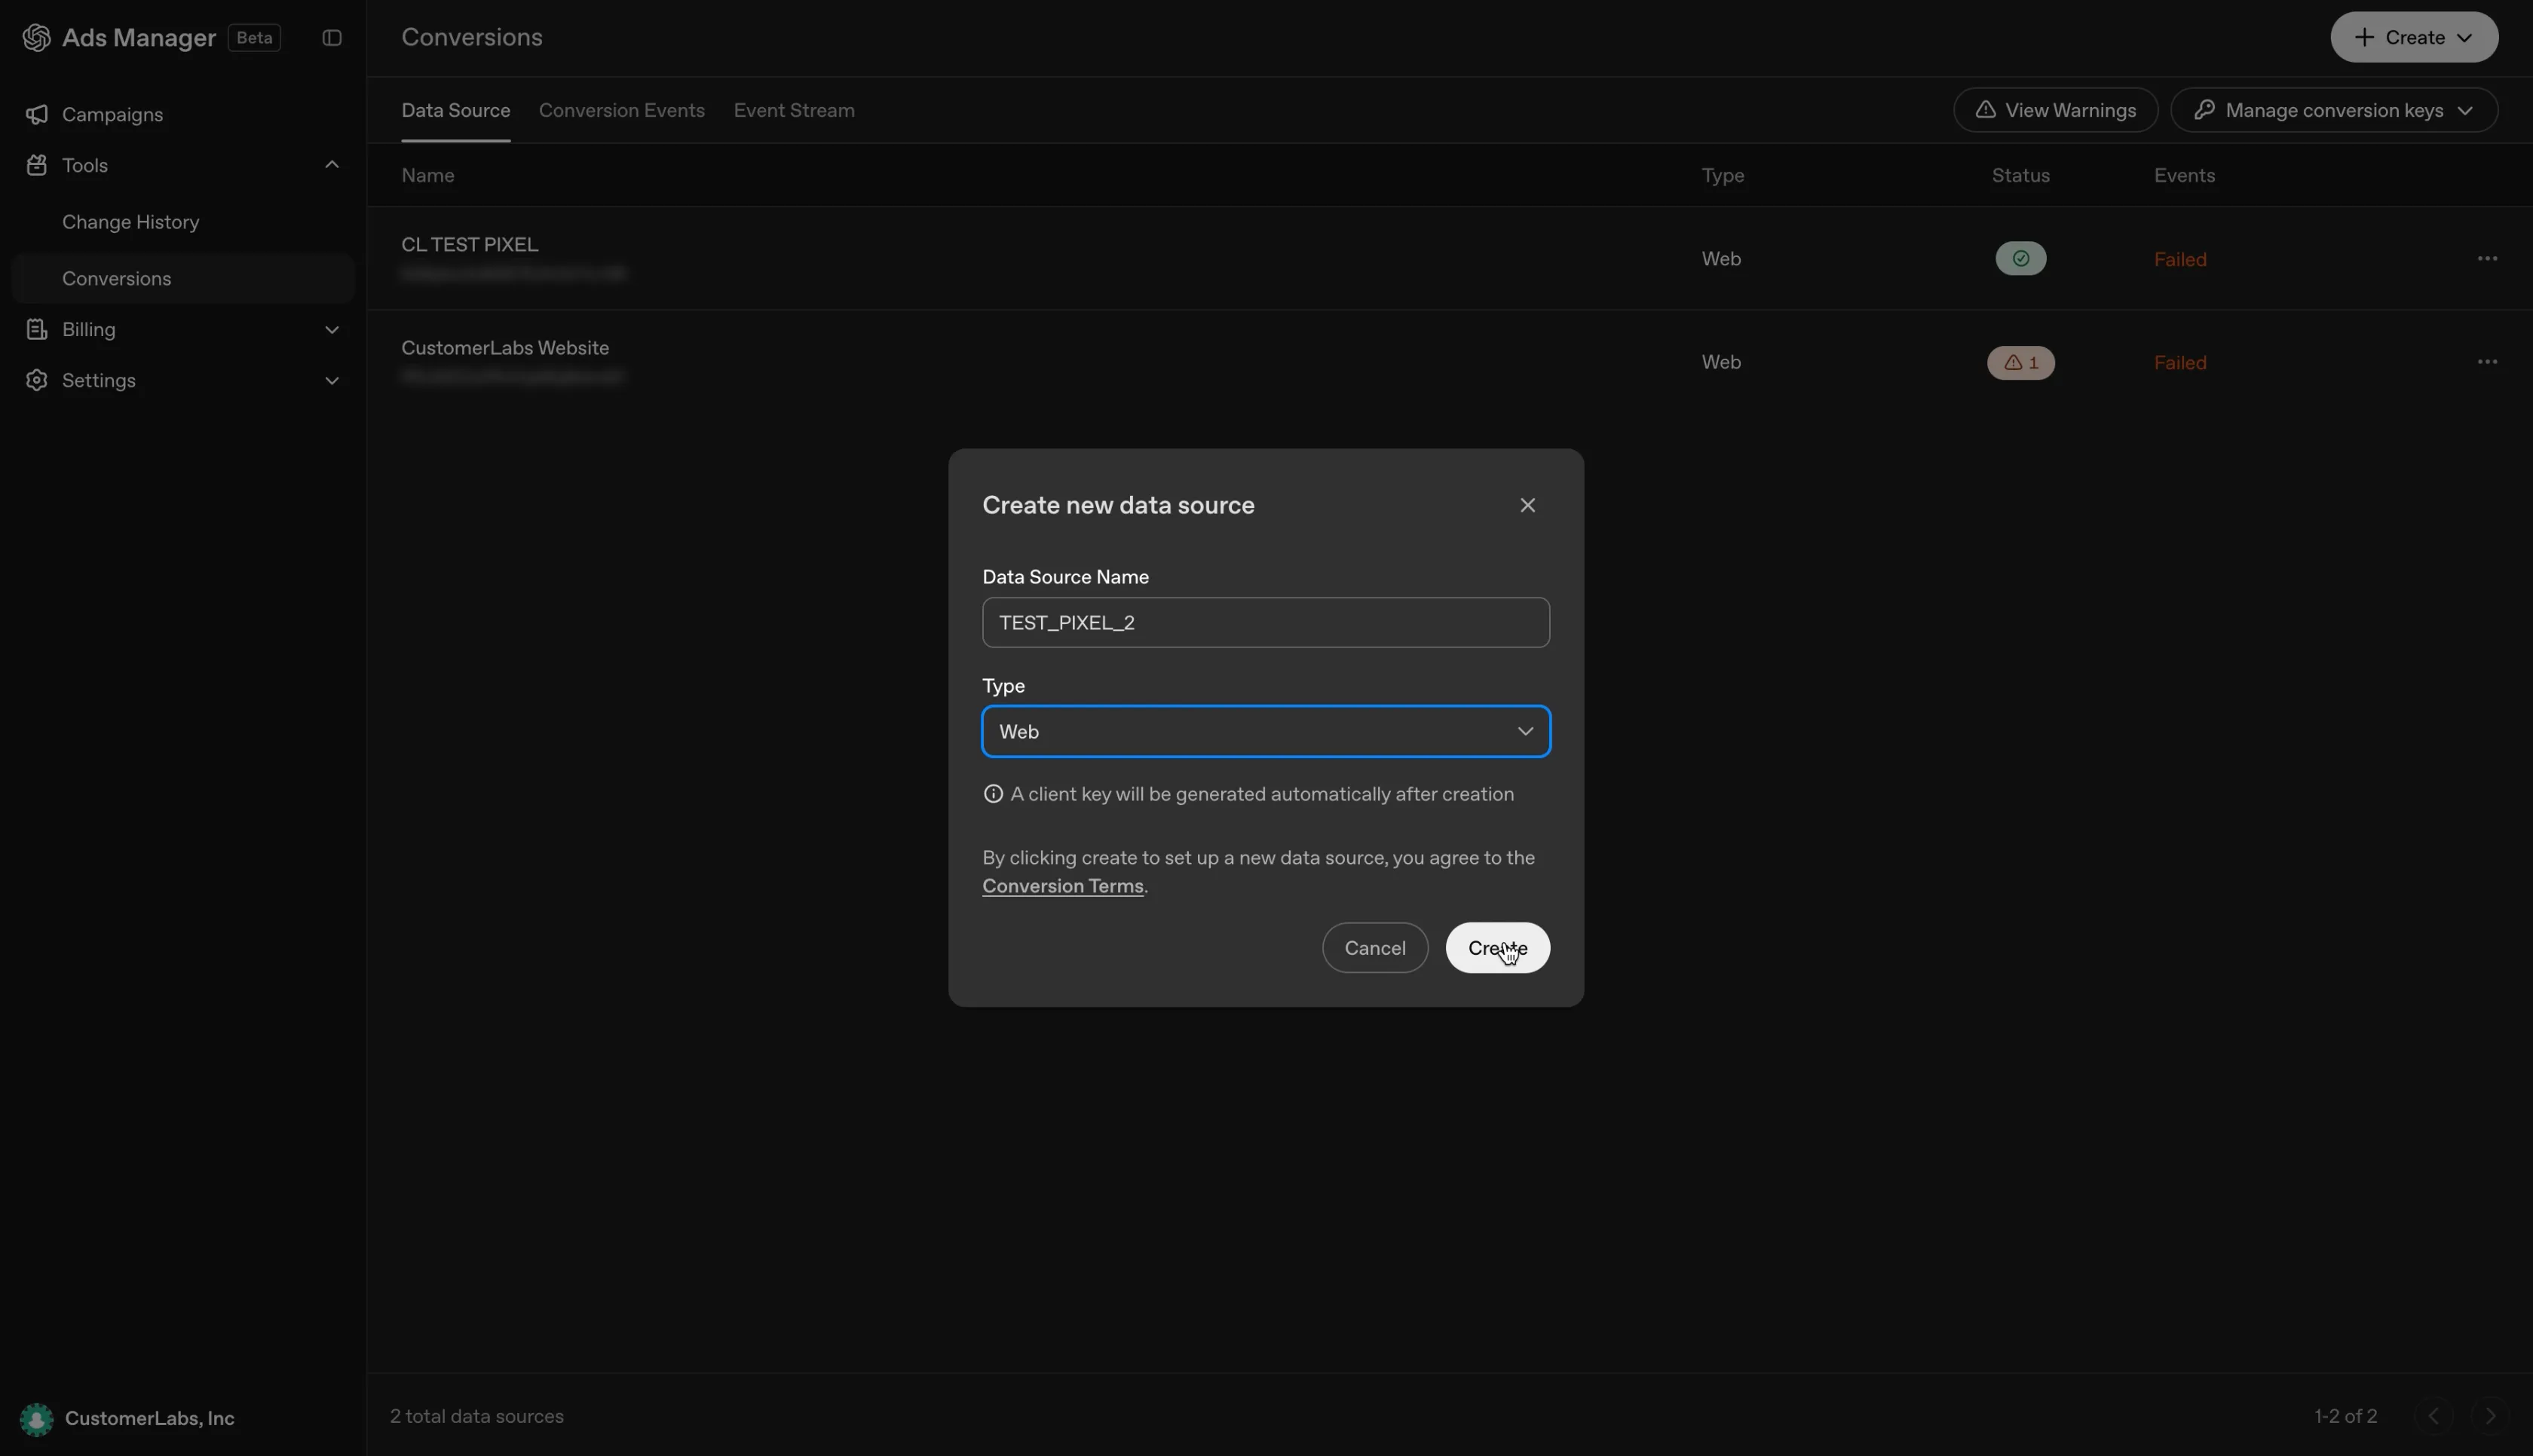
In the Create new data source dialog, enter a Data Source Name and set Type to Web, then click Create. A client key is generated automatically after creation.
-
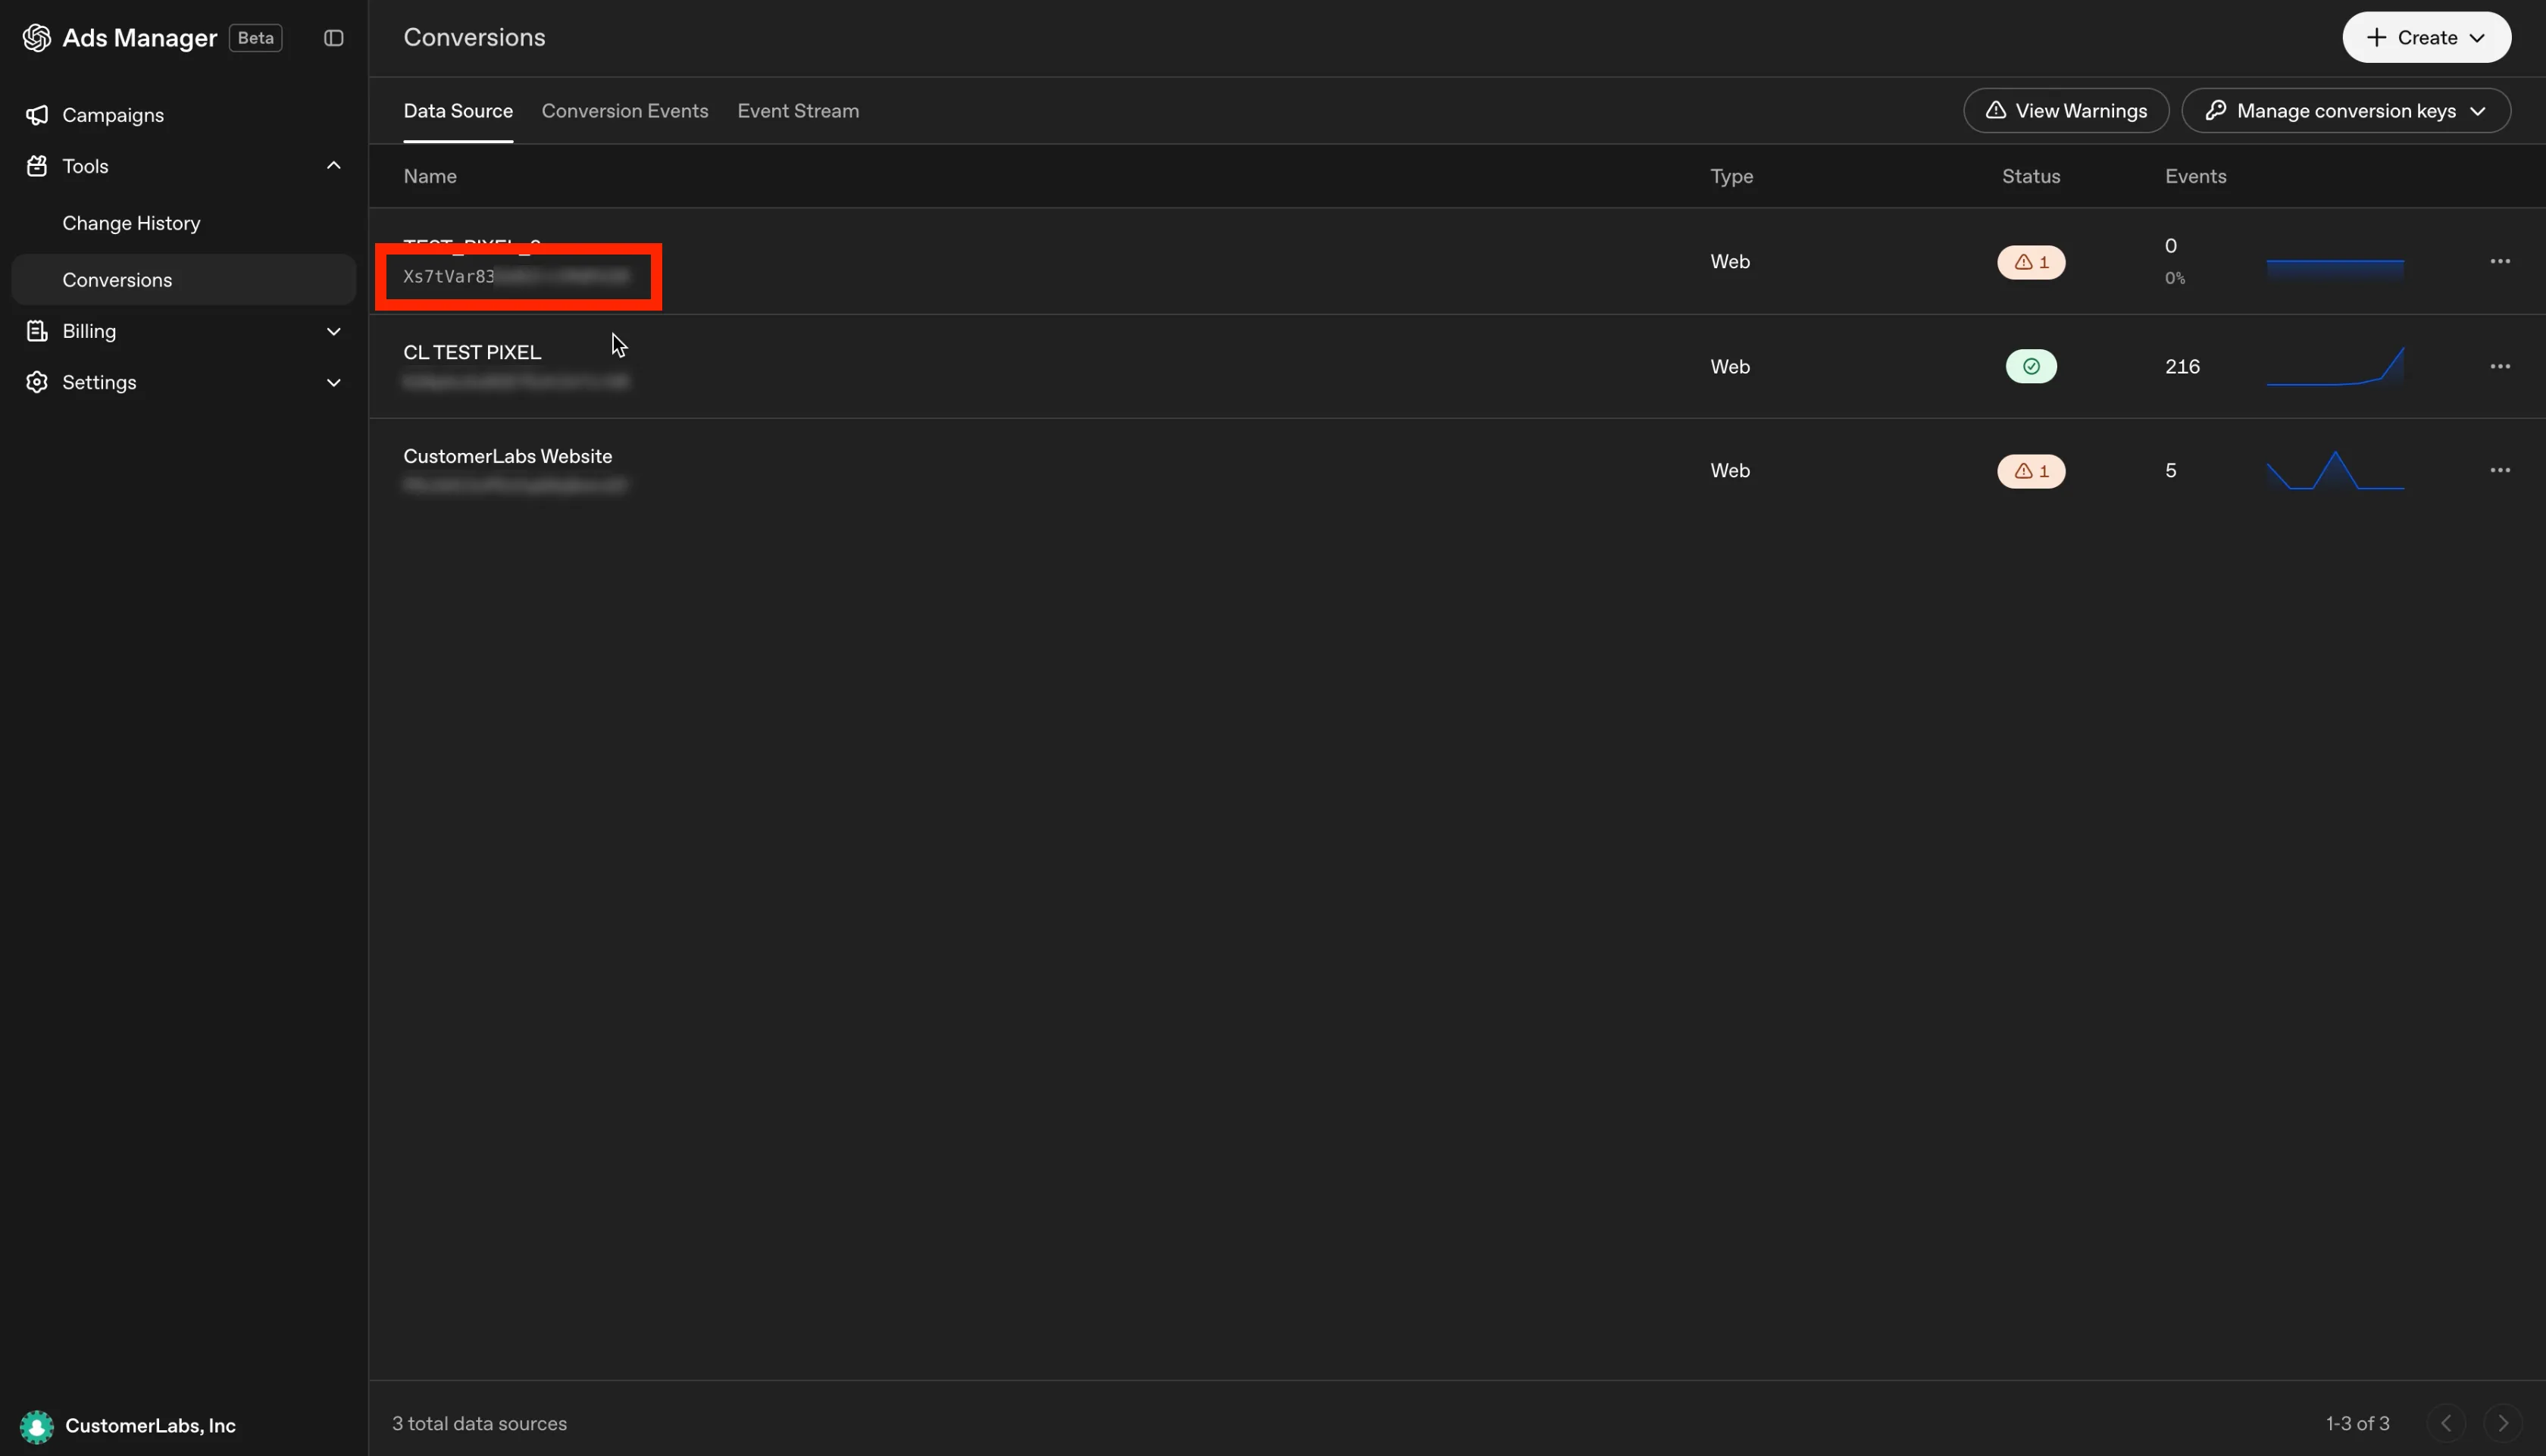
The new data source appears in the Data Source list. The value shown below the data source name is the Pixel ID — copy it.
Step 4: Create a conversion key in OpenAI Ads Manager (API Key)
Section titled “Step 4: Create a conversion key in OpenAI Ads Manager (API Key)”-
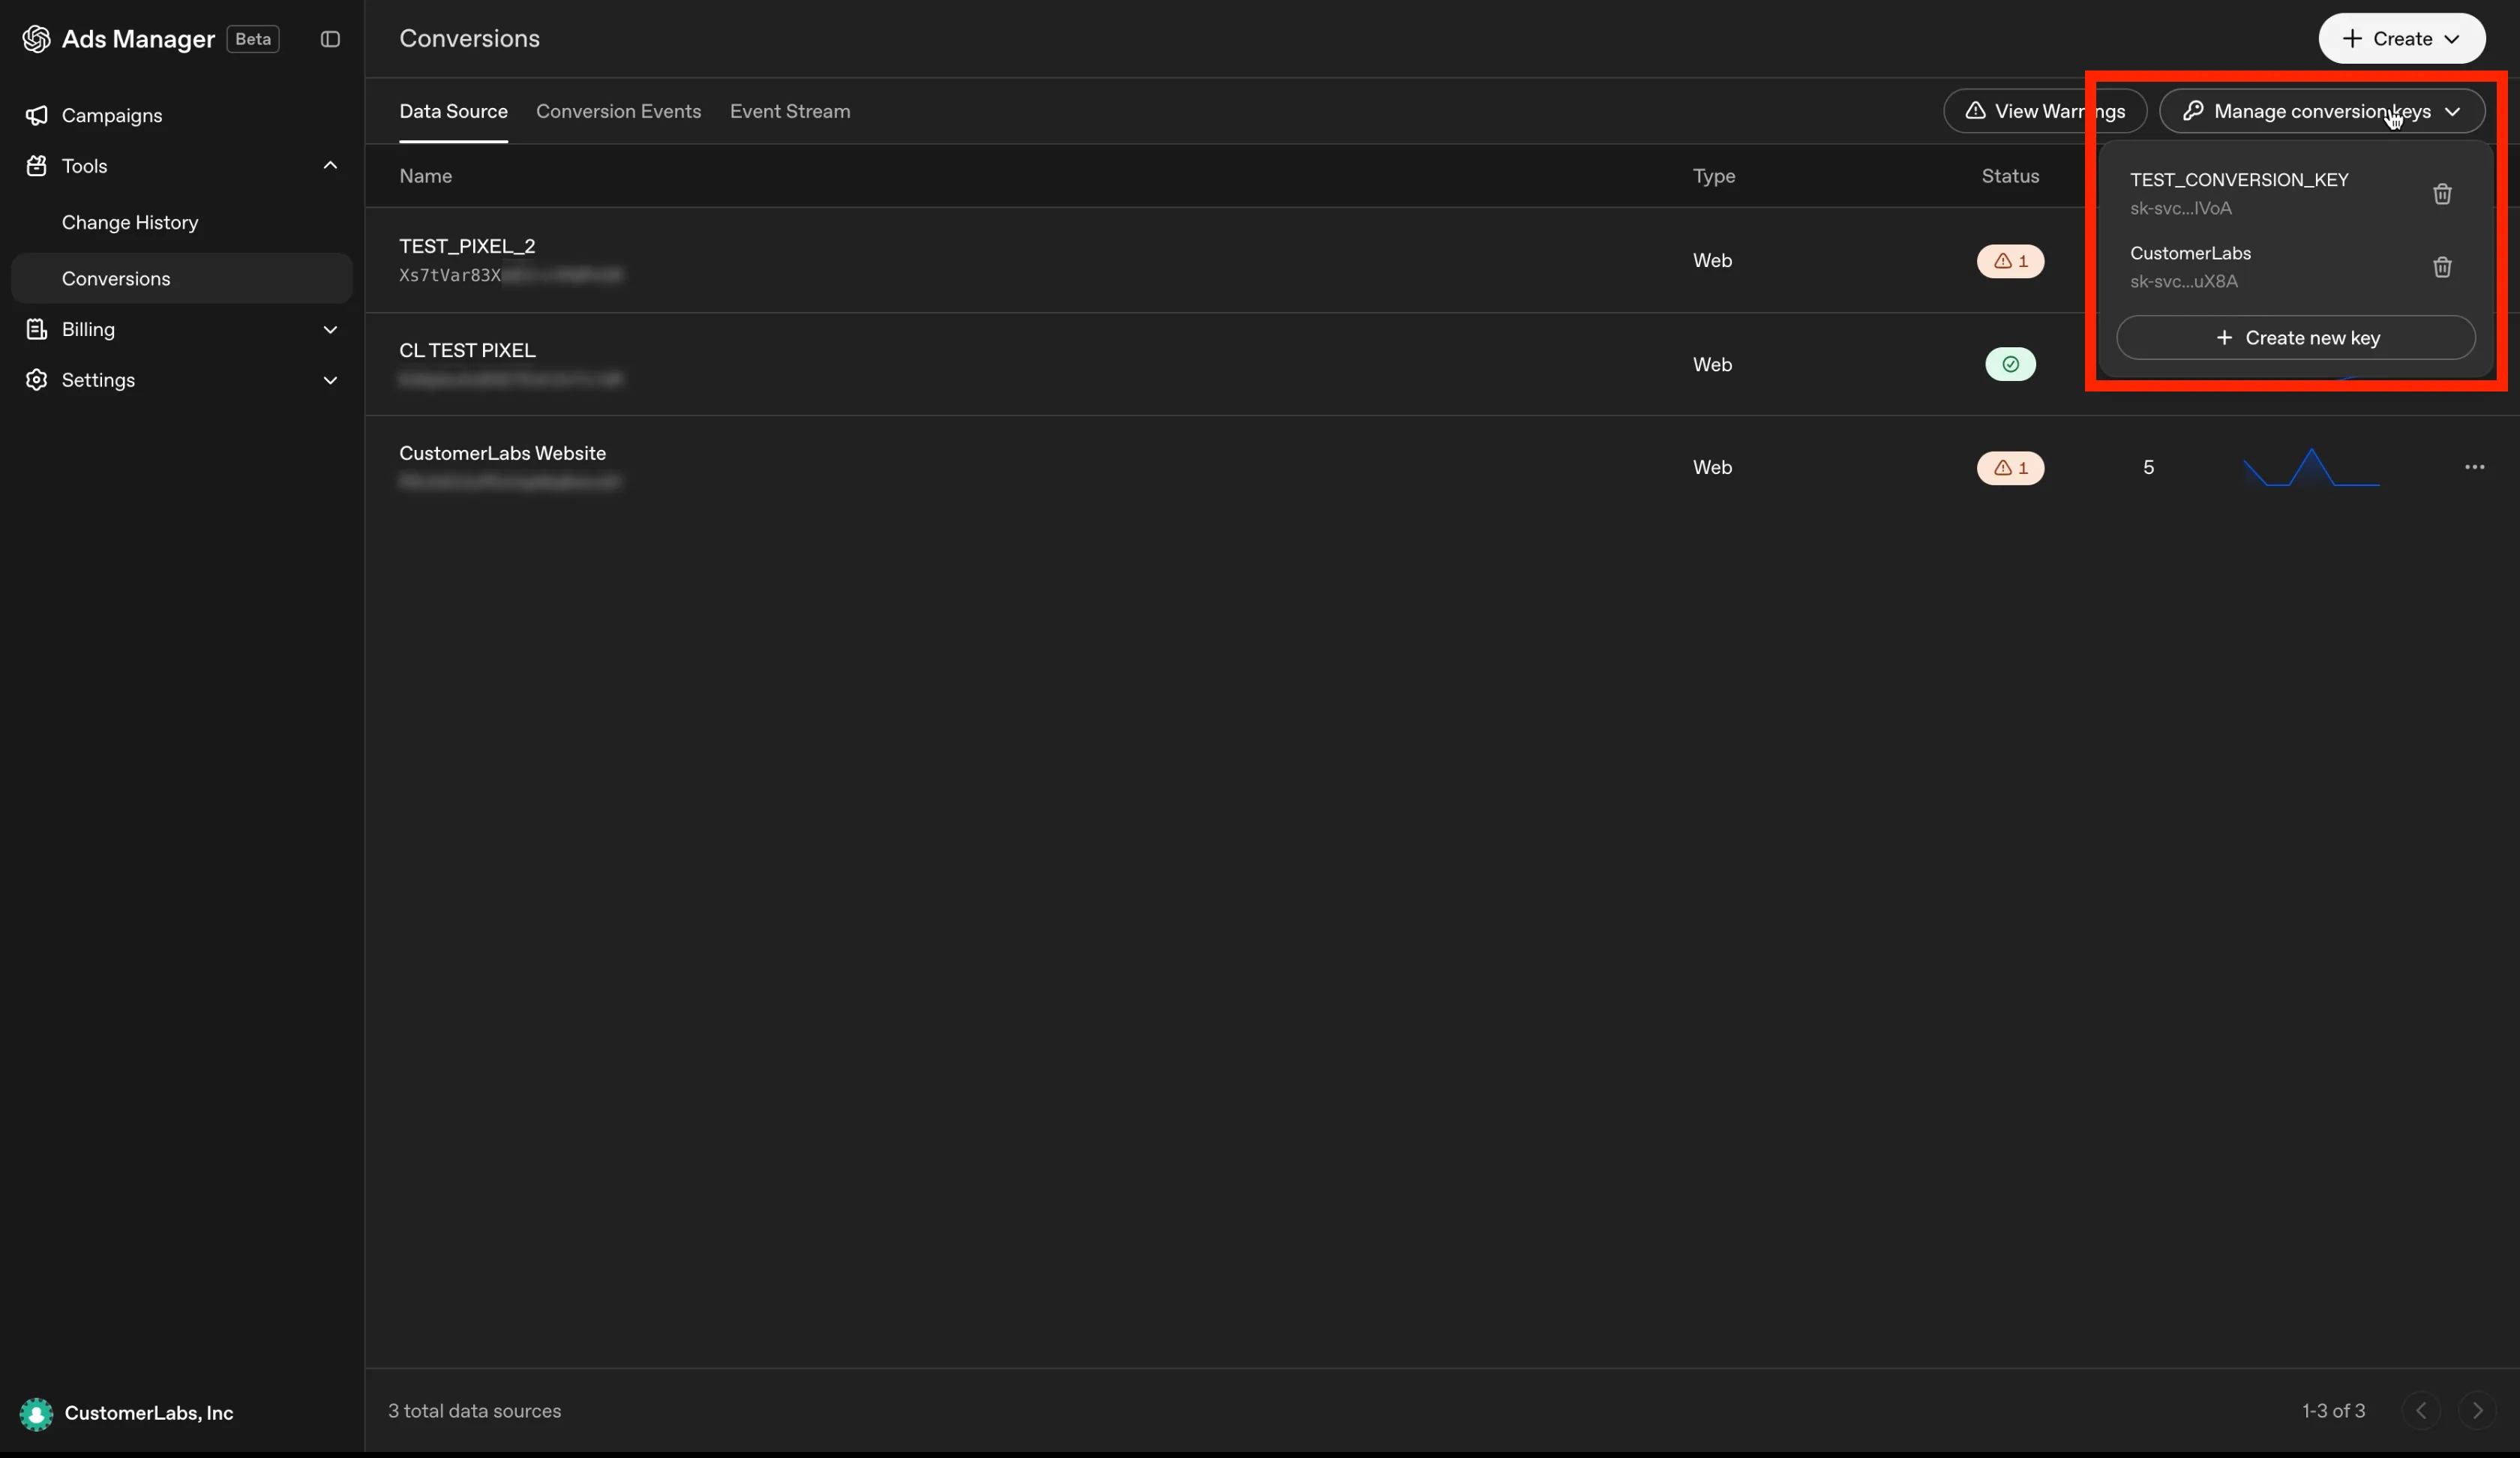
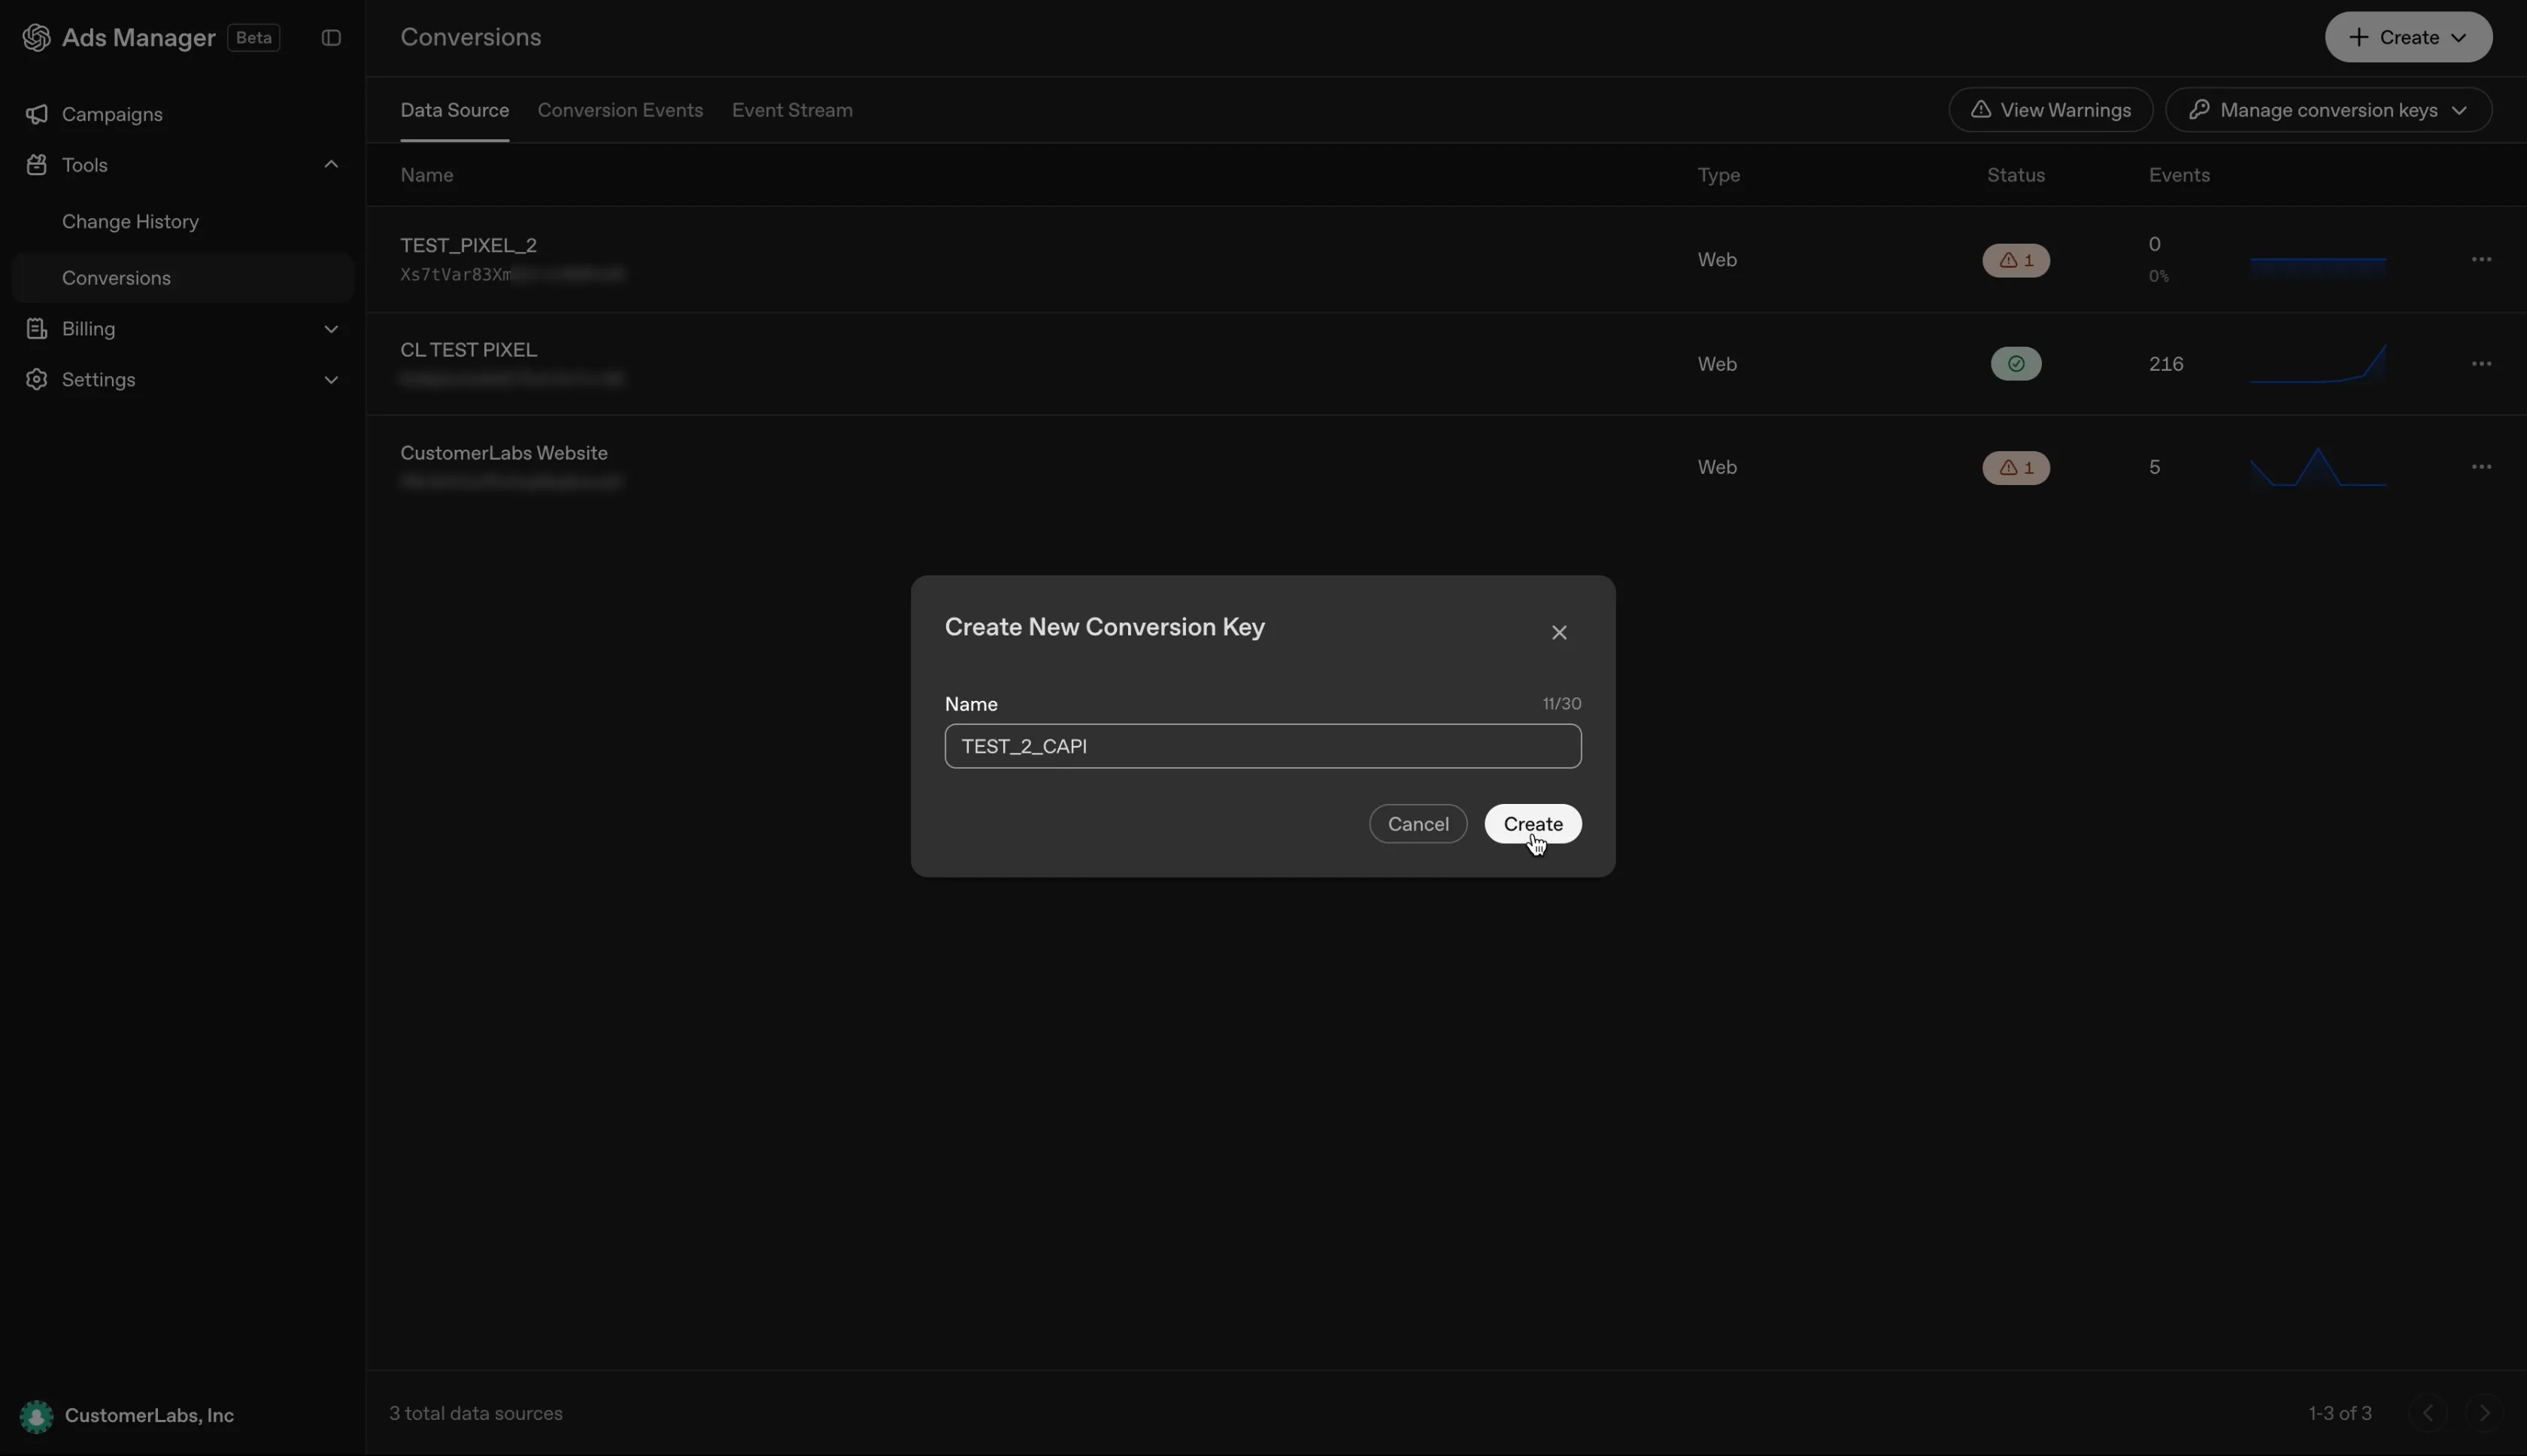
In Tools → Conversions, click Manage conversion keys in the top-right corner and select + Create new key.
-
Enter a Name for the key and click Create.
-
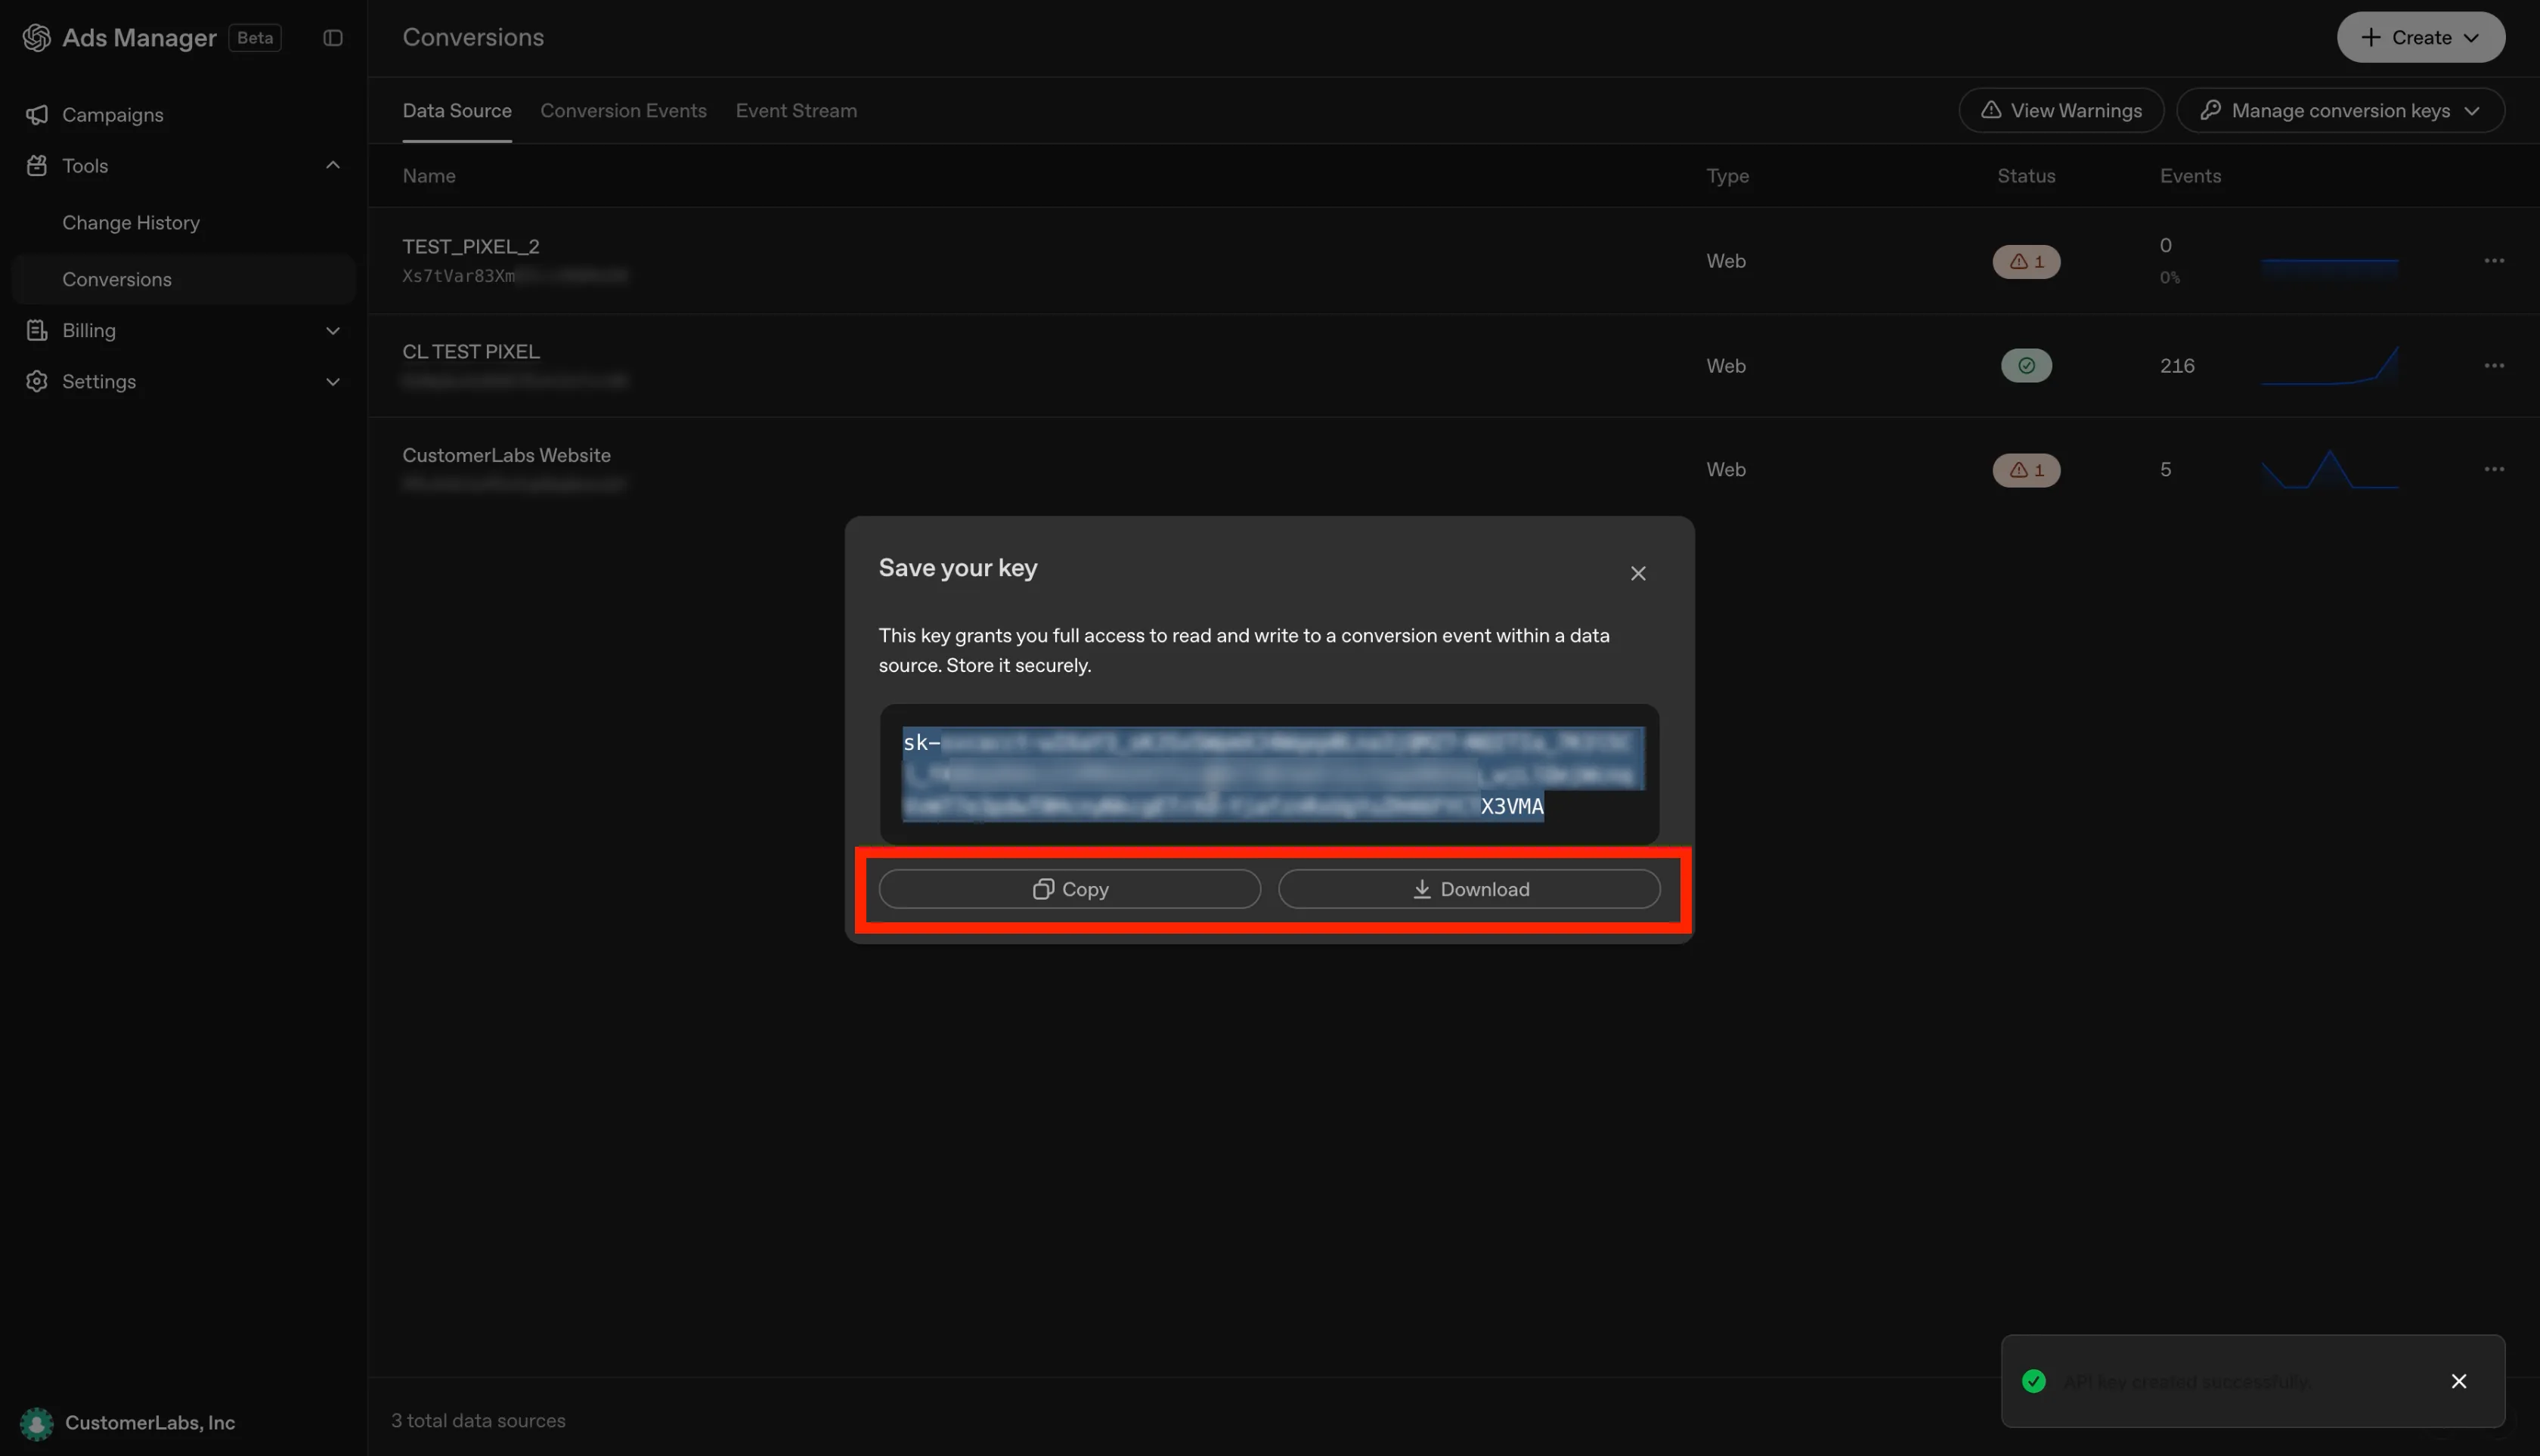
The key is displayed once in the Save your key dialog. Copy or Download it and store it securely.
Step 5: Save the configuration in CustomerLabs
Section titled “Step 5: Save the configuration in CustomerLabs”- Return to CustomerLabs → Destinations → OpenAI Ads → Configuration settings.
- Paste the API Key and Pixel ID into the Basic Settings fields.
- Click Save changes.
Step 6: Enable the event workflow
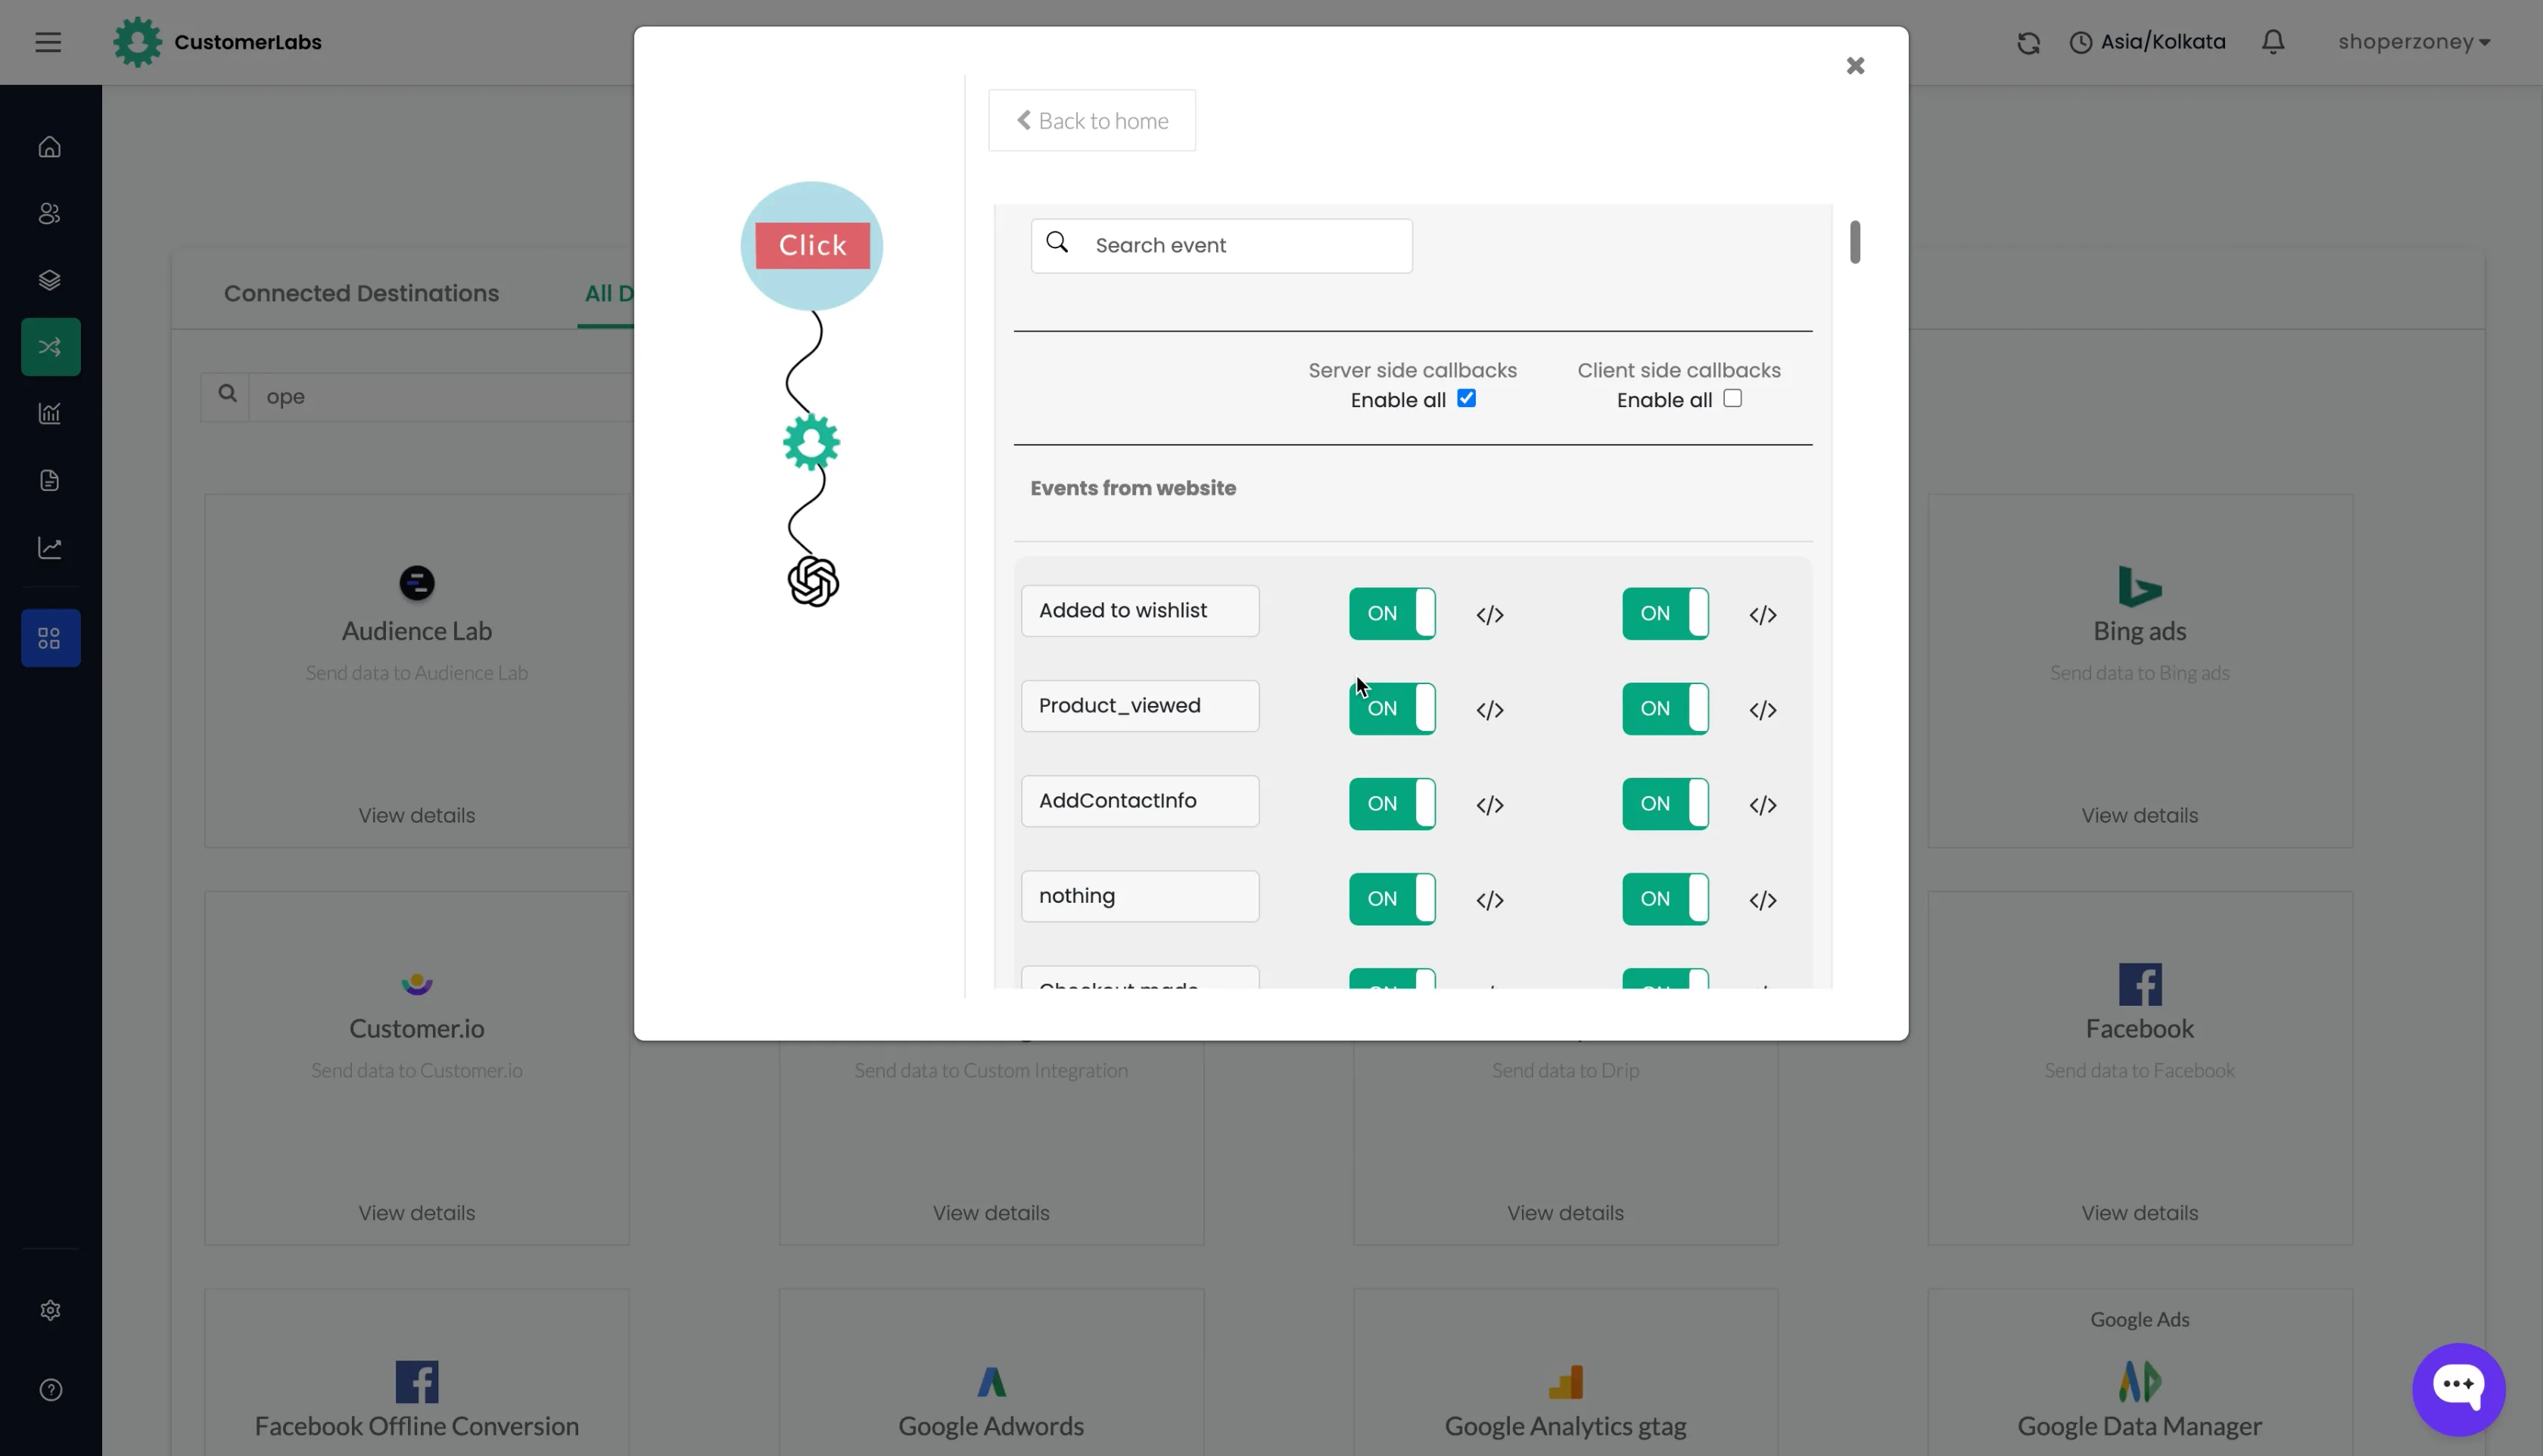
Section titled “Step 6: Enable the event workflow”- Click Setup Event workflow from the OpenAI Ads destination screen.
- Toggle ON the events you want to send to OpenAI Ads. Use Enable all under Server side callbacks to send all events server-side, or enable events individually. Client-side callbacks can be enabled the same way.
- Save your changes.
Once the workflow is enabled, CustomerLabs starts sending the selected events to OpenAI Ads for conversion attribution.