Meta (Facebook) Ads Integration with CustomerLabs
Integrate Facebook with CustomerLabs to sync your audience segments created in CustomerLabs with Facebook through events by creating a custom audience. This allows you to retarget high-intent audiences based on their behavioral data with personalized ads.
Pre-requisites
Section titled “Pre-requisites”- Access to Meta Business Manager
- Full access to Meta Ad Account
- Full access to Meta Pixel
- Active CustomerLabs Account
Authentication
Section titled “Authentication”Recommended Authentication
Section titled “Recommended Authentication”To connect your Facebook Ad account via the recommended method, you must have Full access to your Meta Business Manager account.
Why is this recommended?
This method uses a system user to avoid data sharing discrepancies. It ensures that any changes or other manual updates to the Facebook account do not disrupt authentication or data flow.
Steps to Authenticate
Section titled “Steps to Authenticate”-
Log in to your CustomerLabs account.
-
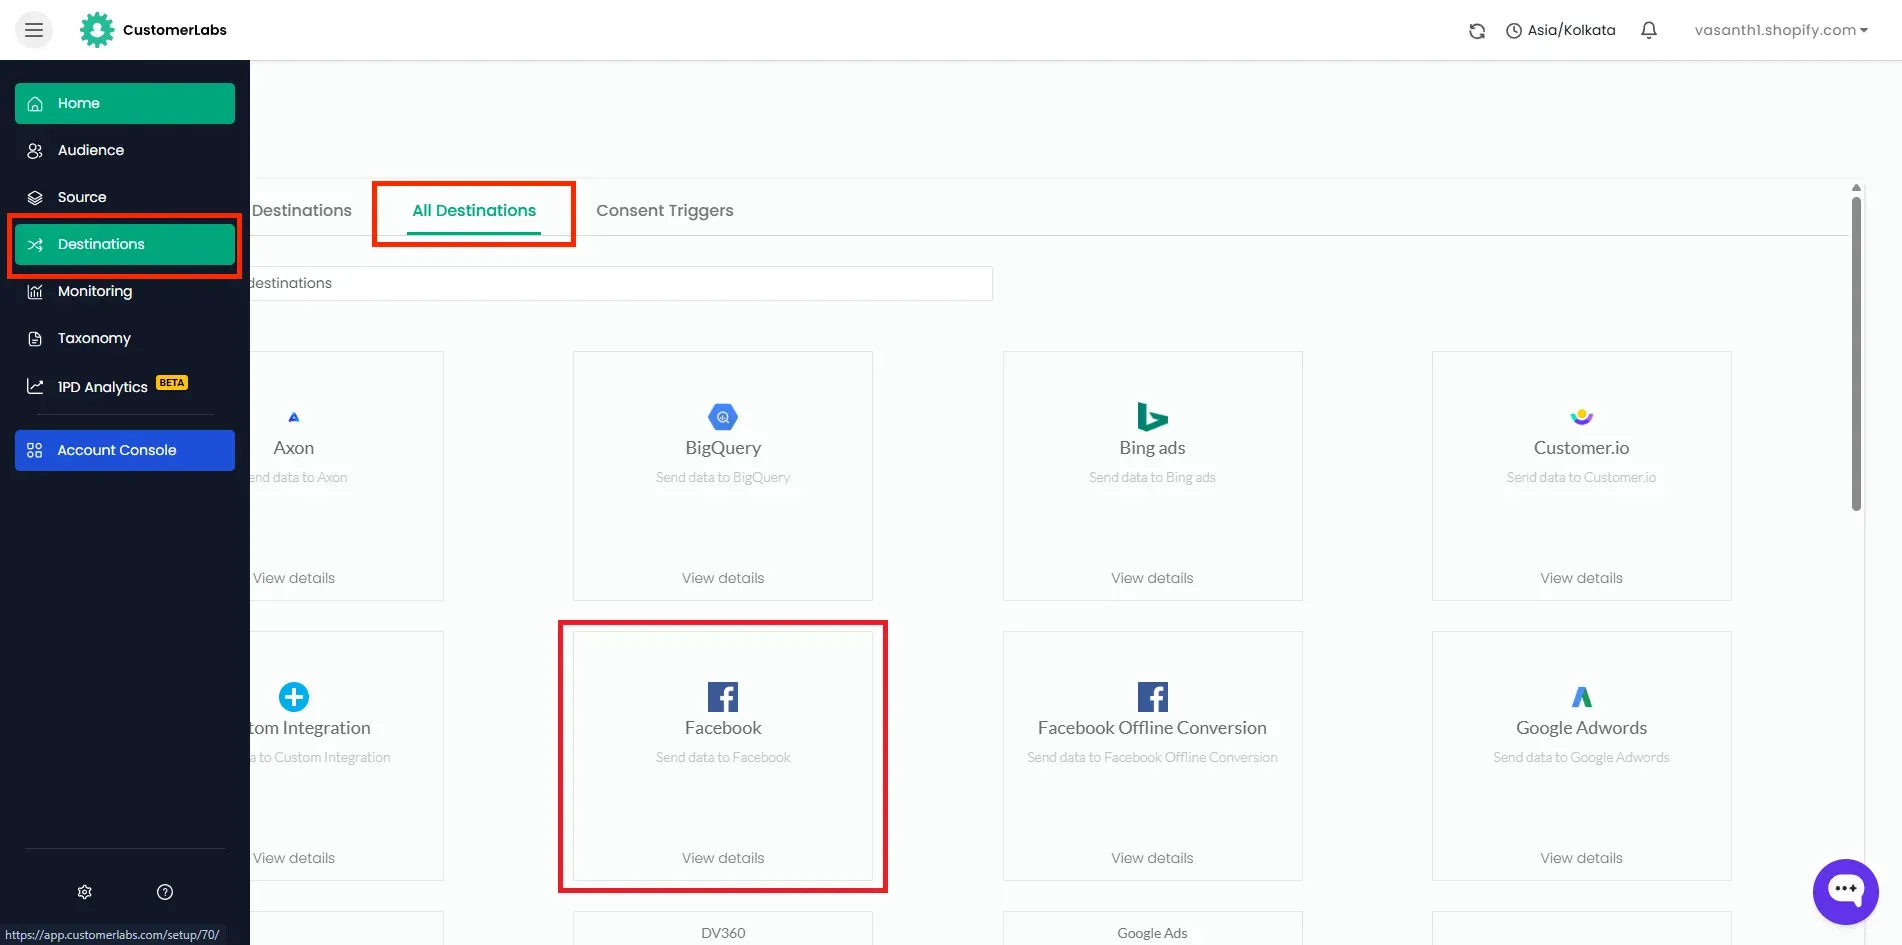
Navigate to Destinations in the left sidebar menu.
-
Go to all destinations tab and select Facebook.
-
Enter the last 4 digits of the pixel you are sending data to, then click Save and Enable.
-
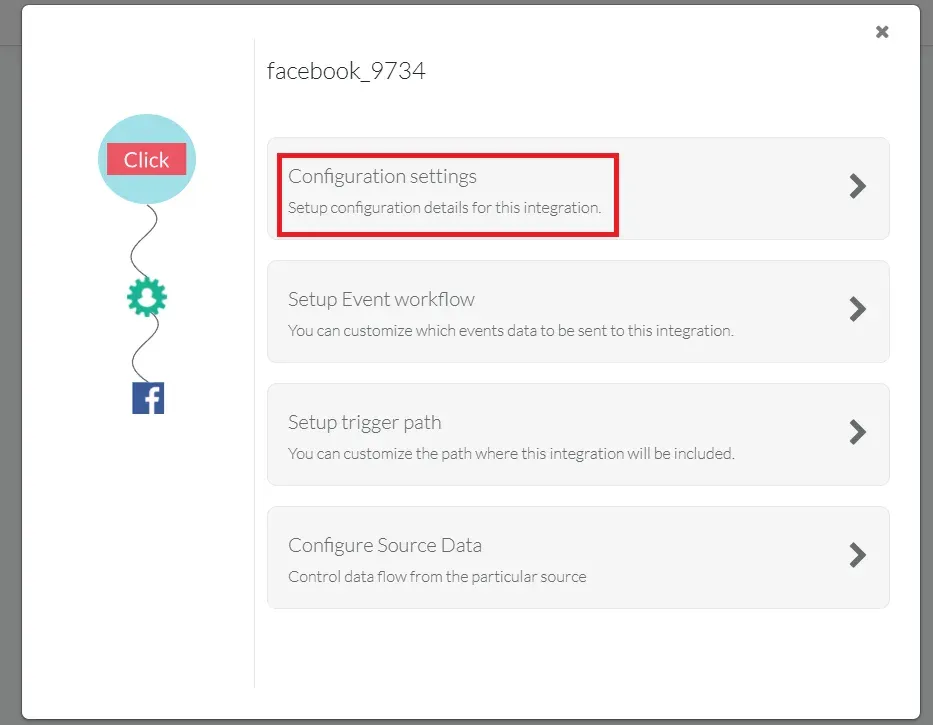
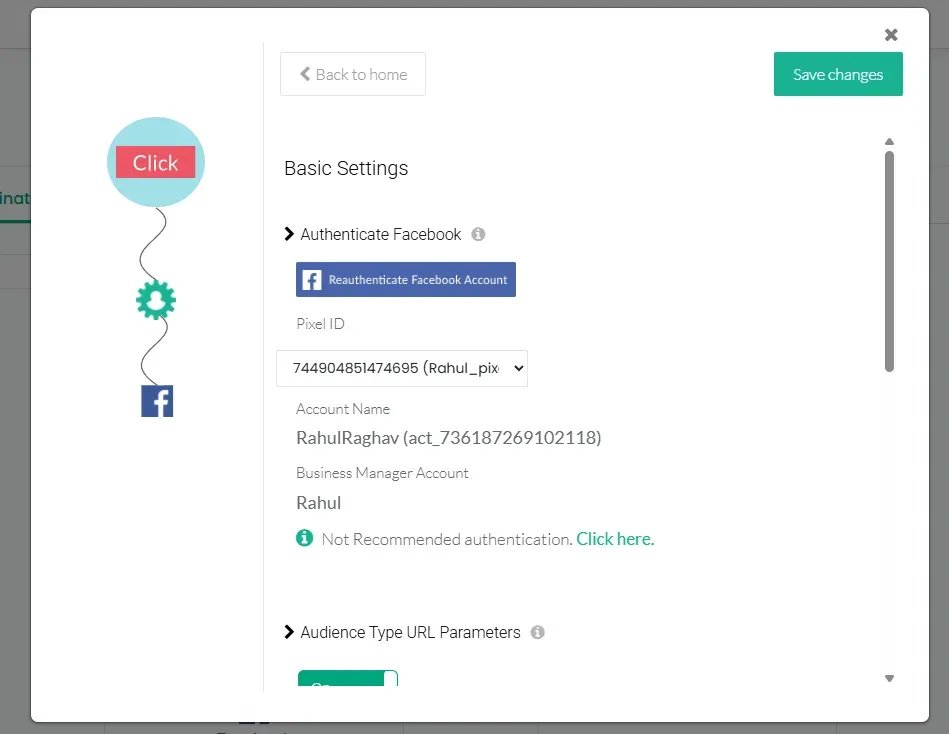
Go to Configuration Settings.
-
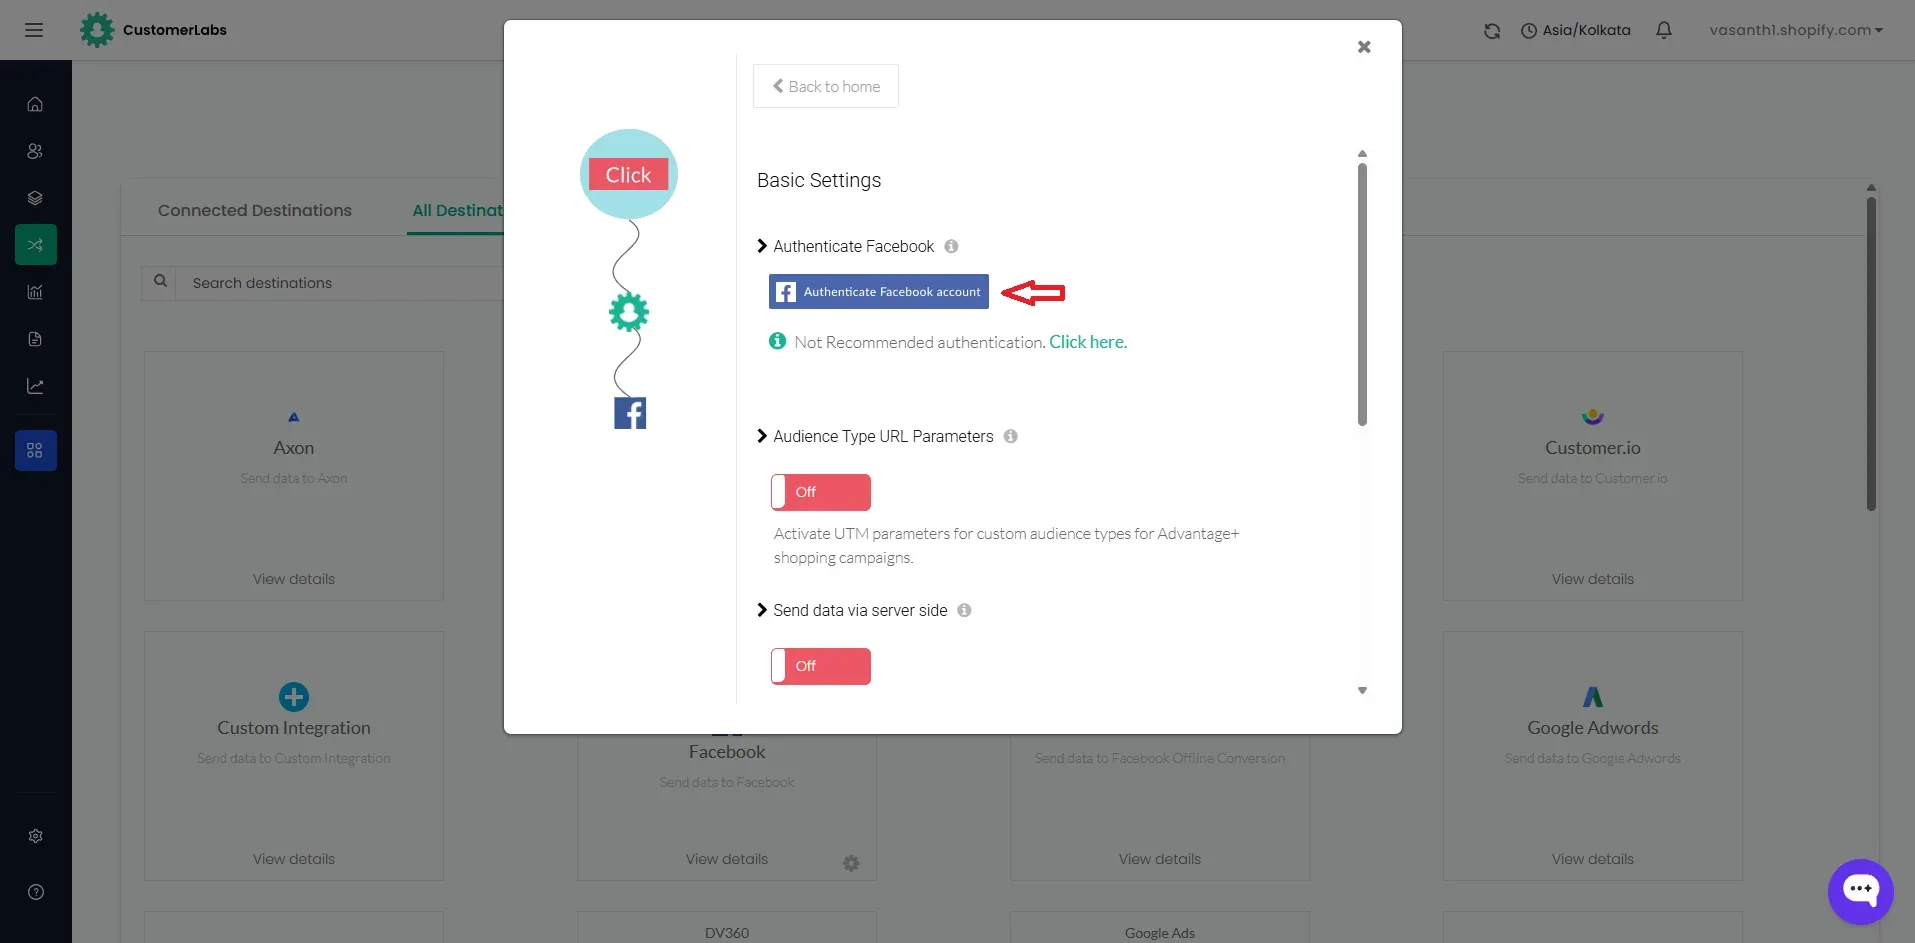
Click on Authenticate Facebook account.
-
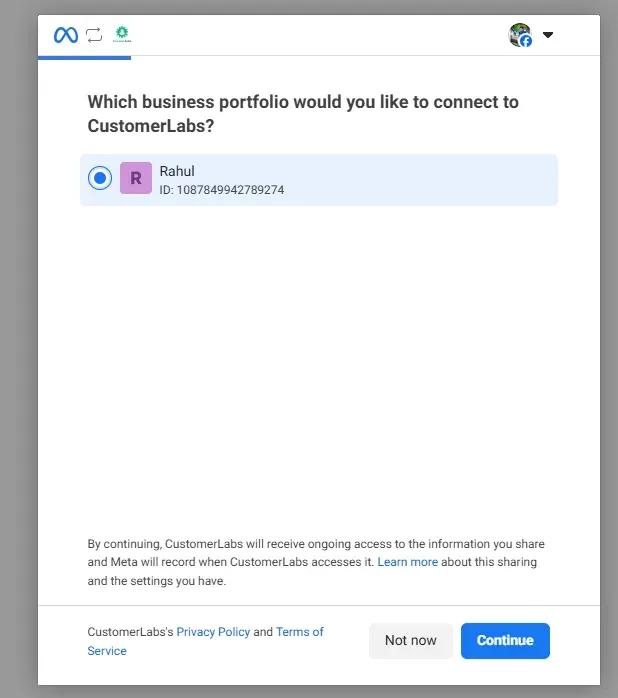
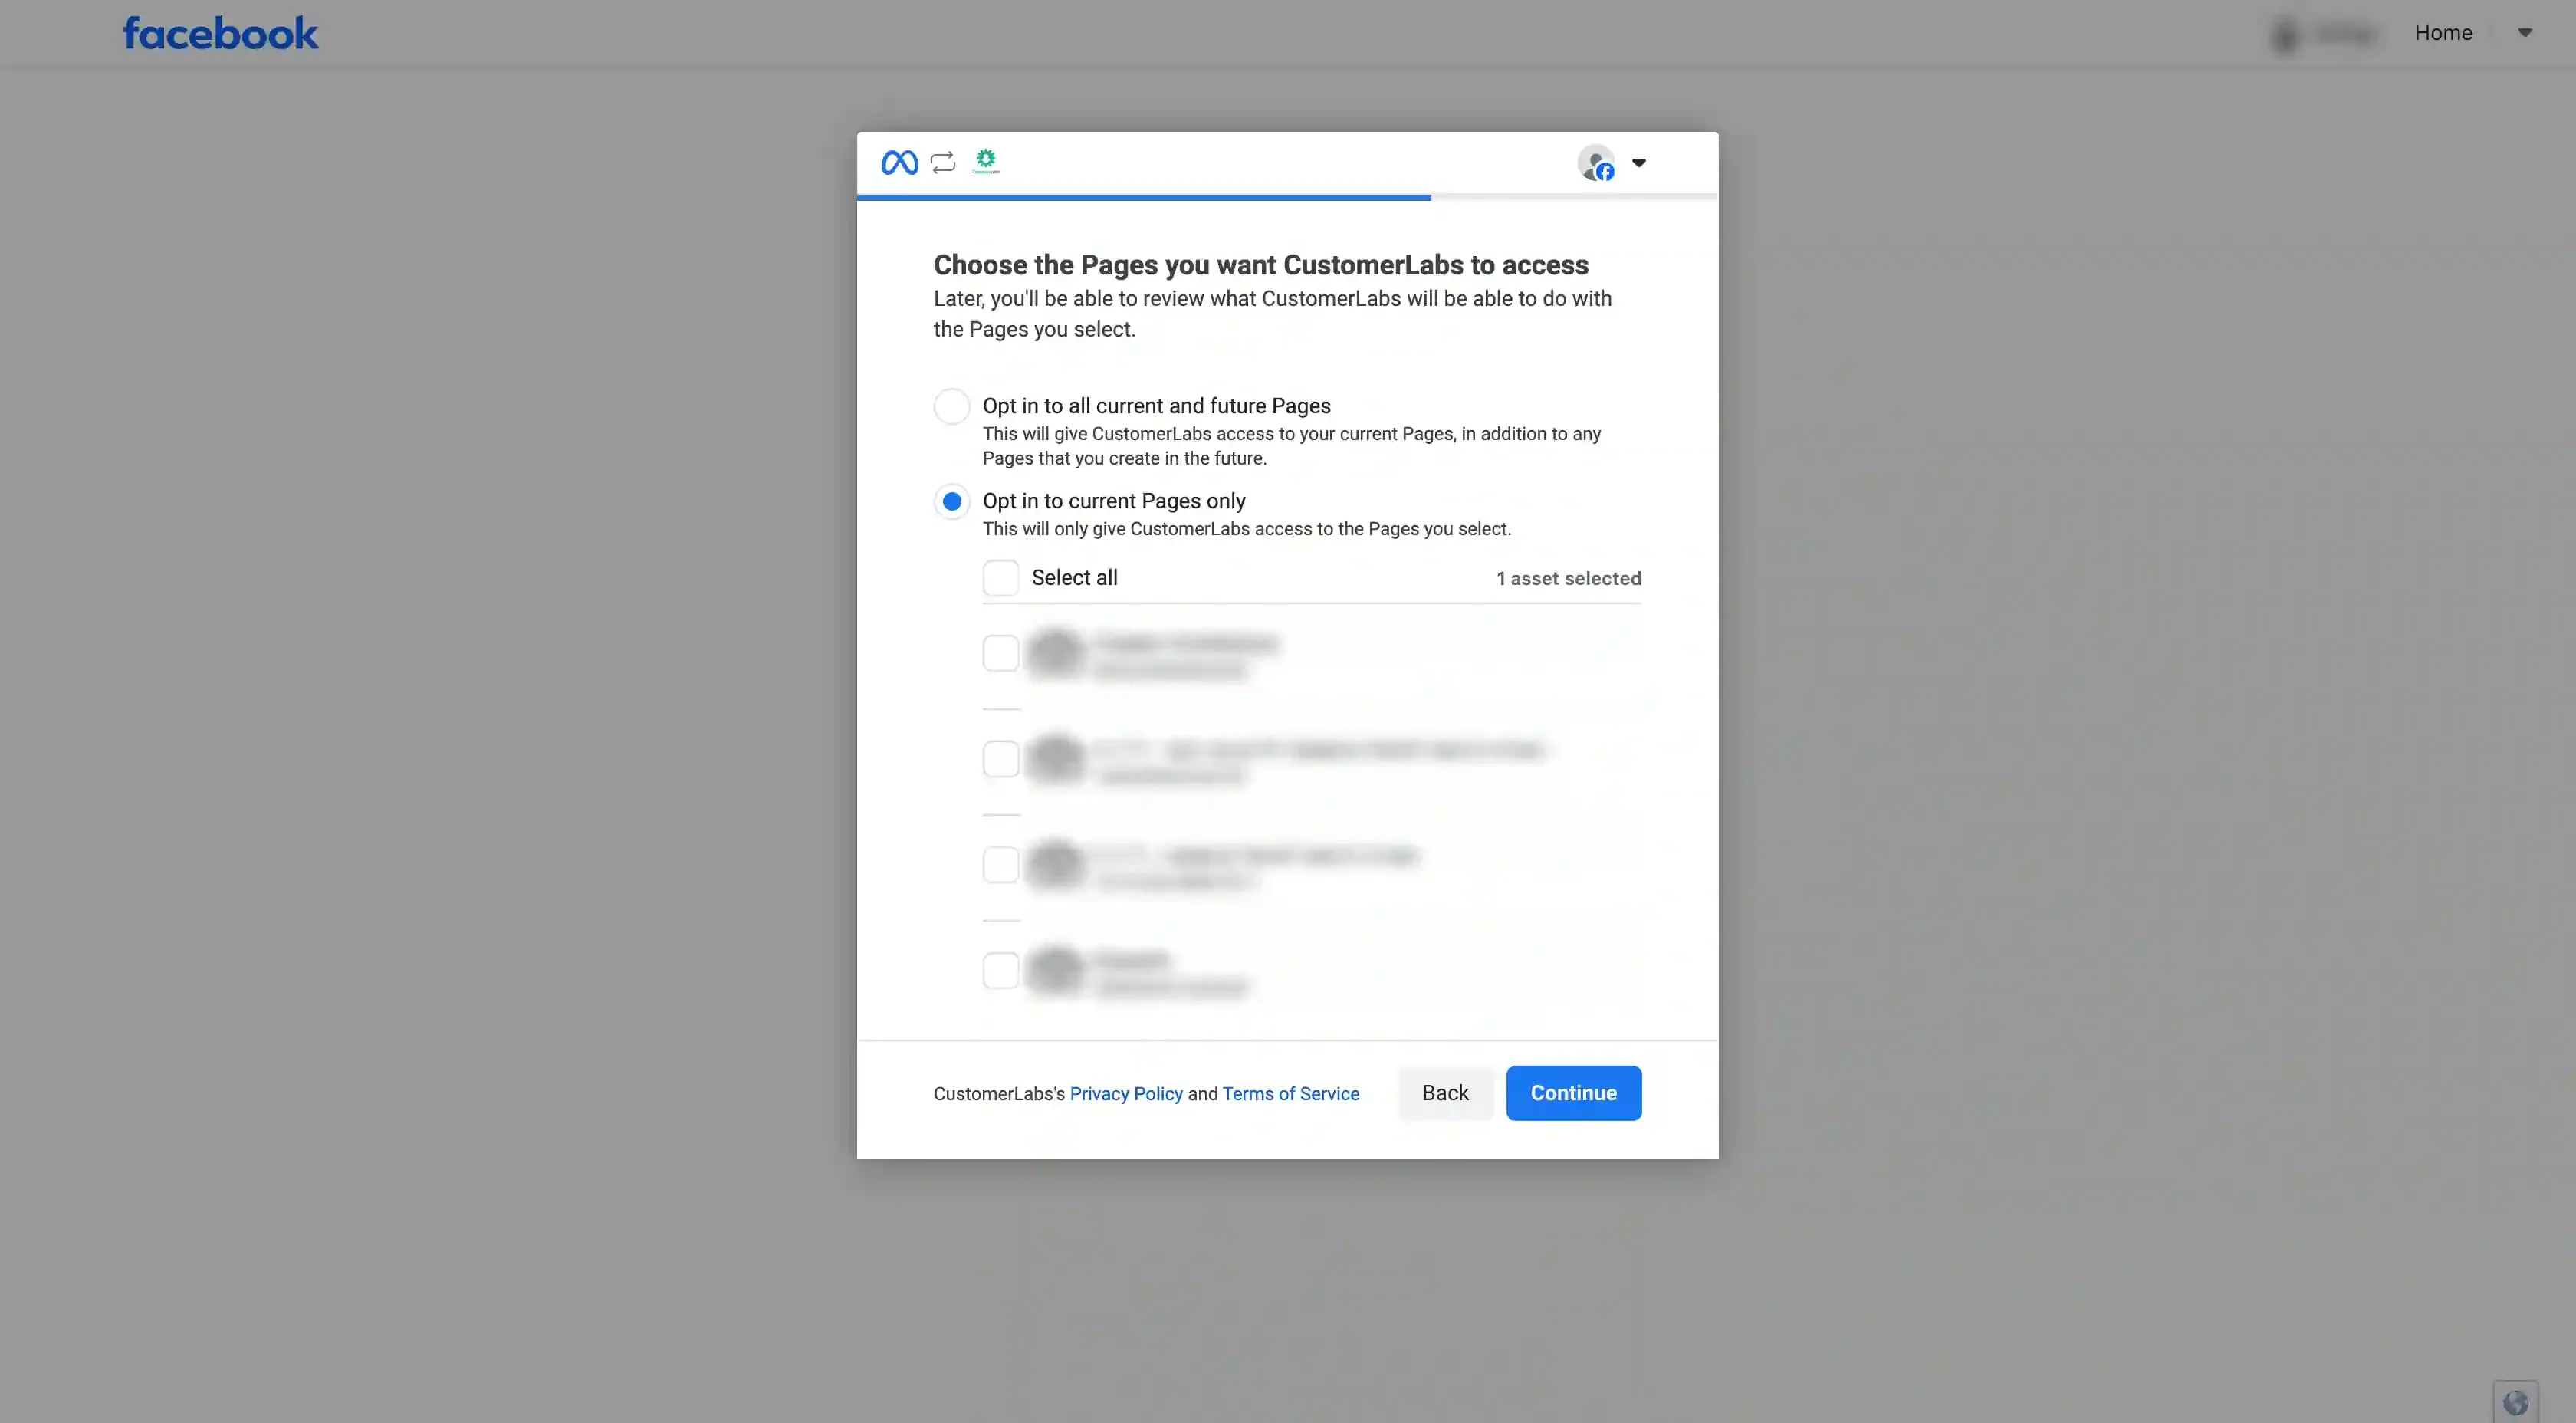
You will be redirected to choose the Business Manager account.
-
Select the Business Manager account.
-
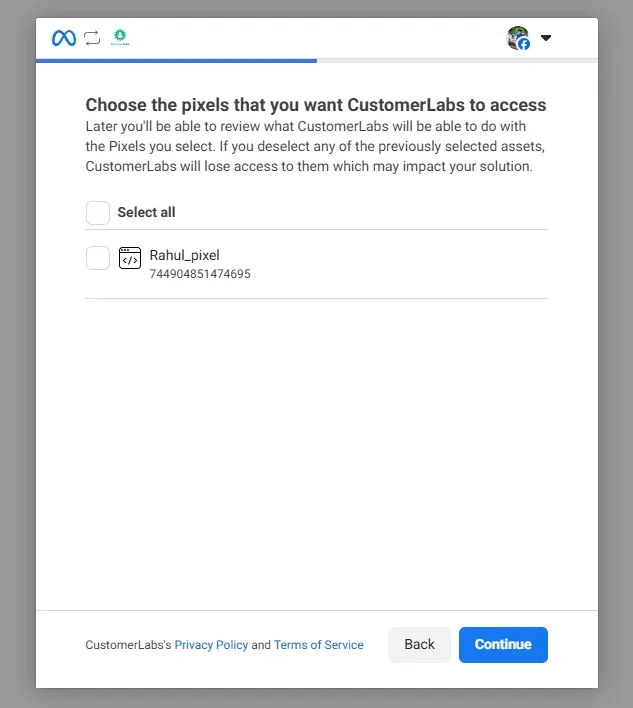
Select the Pixel you want to connect.
-
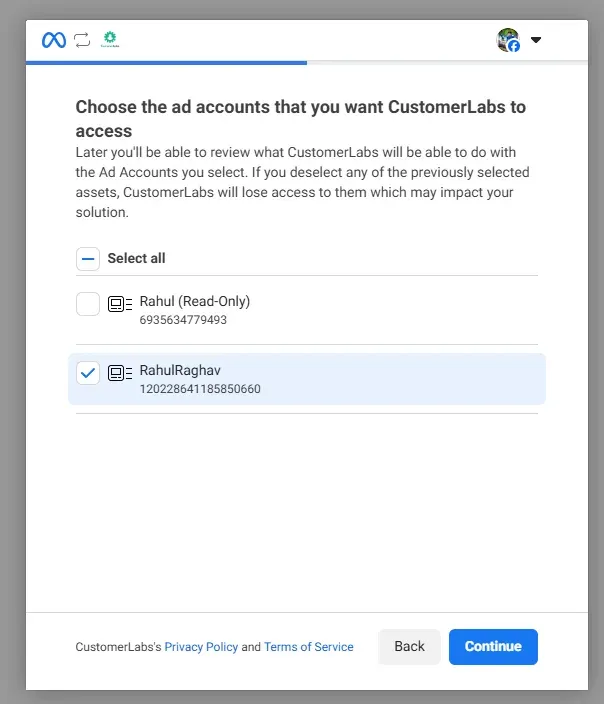
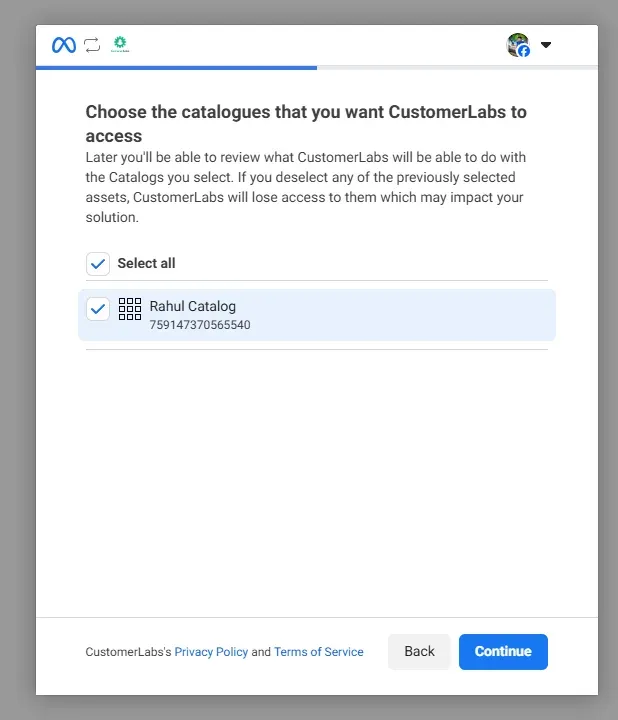
Choose the Ad Account and Catalogue from the list.
-
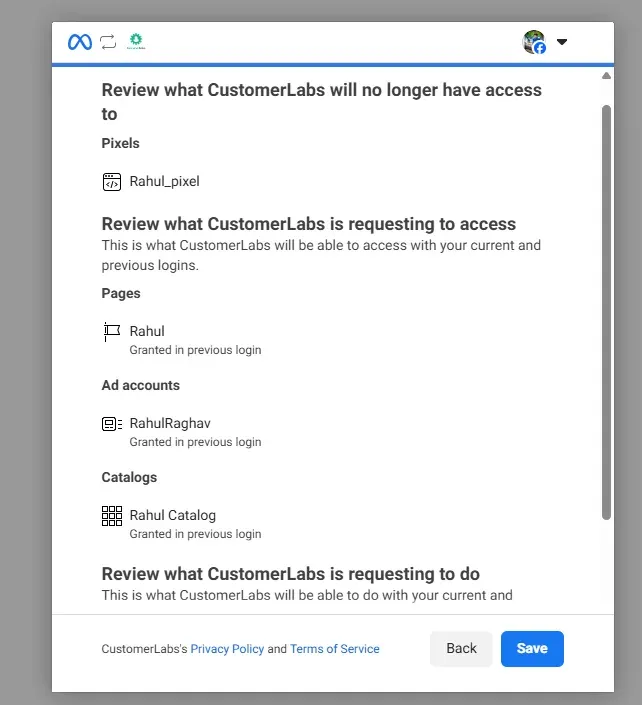
Click Submit and then Got it.
-
Choose the Ad Account and Pixel to connect with CustomerLabs. Click “Save”.
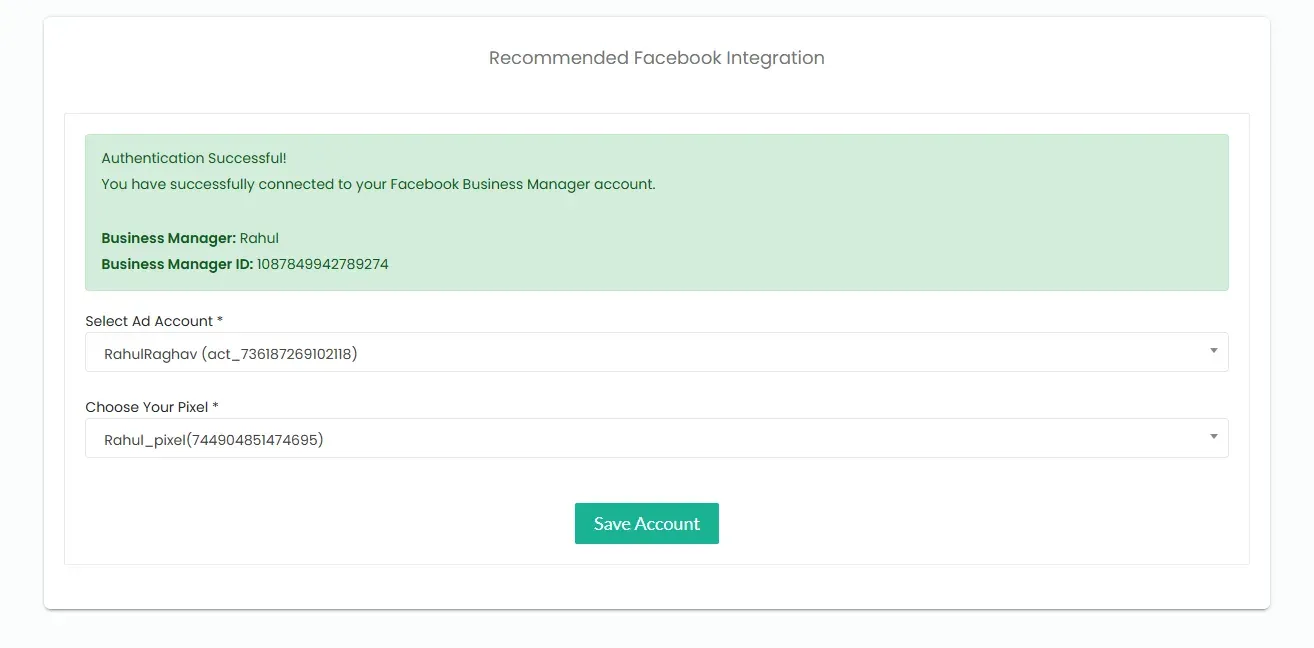
-
You will be redirected back to Configuration Settings in the destinations.
-
Toggle ON the “Audience type URL parameters” to attribute conversions to your first-party audience in Advantage+ Sales Campaigns.
-
Turn ON the toggle for Send data via server-side if you wish to send data via the server (Advisable for better tracking).
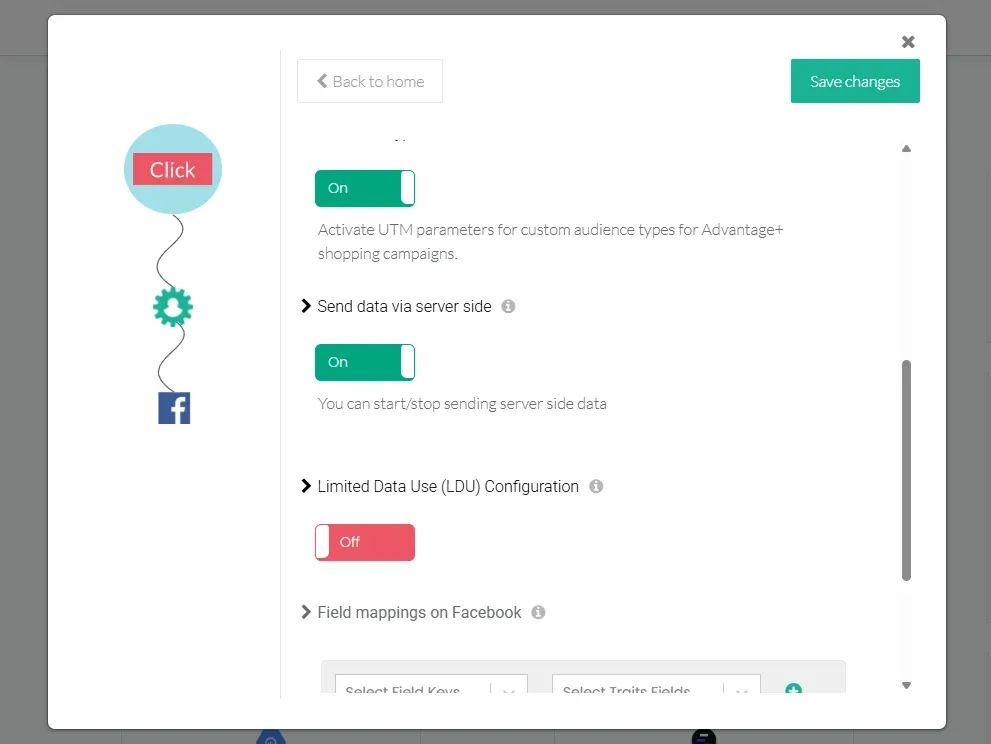
-
If your business is operating in certain US states where “Limited Data Use” Policy applies, toggle ON the “Limited Data Use Configuration” toggle.
-
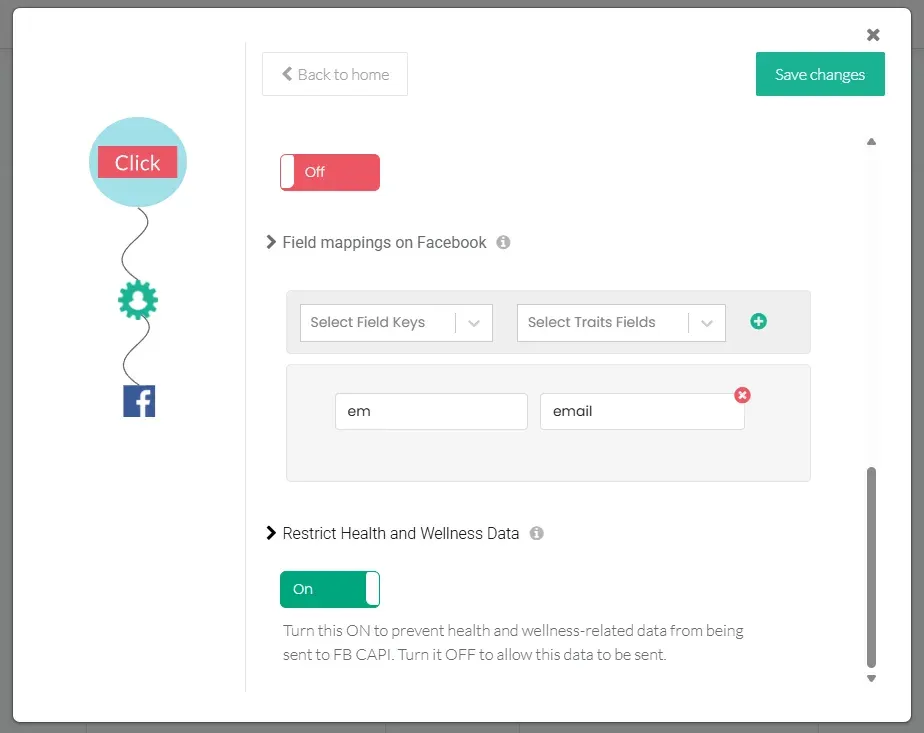
Custom Field Mappings (Optional): By default, CustomerLabs automatically maps all standard
user_traitsandevent_propertiesto Meta’s corresponding Conversions API parameters (e.g.,email→em,phone→ph,purchase→Purchase). However, if you are capturing any custom event properties or user traits that fall outside the standard CustomerLabs schema, you must manually map them here to their corresponding Meta parameter names.For example, if you are tracking a custom property
order_refthat maps to Meta’s standardorder_idparameter, you would add that mapping here so Meta can correctly parse and attribute the value.
-
Restrict Health and Wellness Data: If your business falls under Meta’s Restricted Categories, toggle ON the “Restrict Health and Wellness Data” toggle.
-
Click Save Changes to save the configuration.
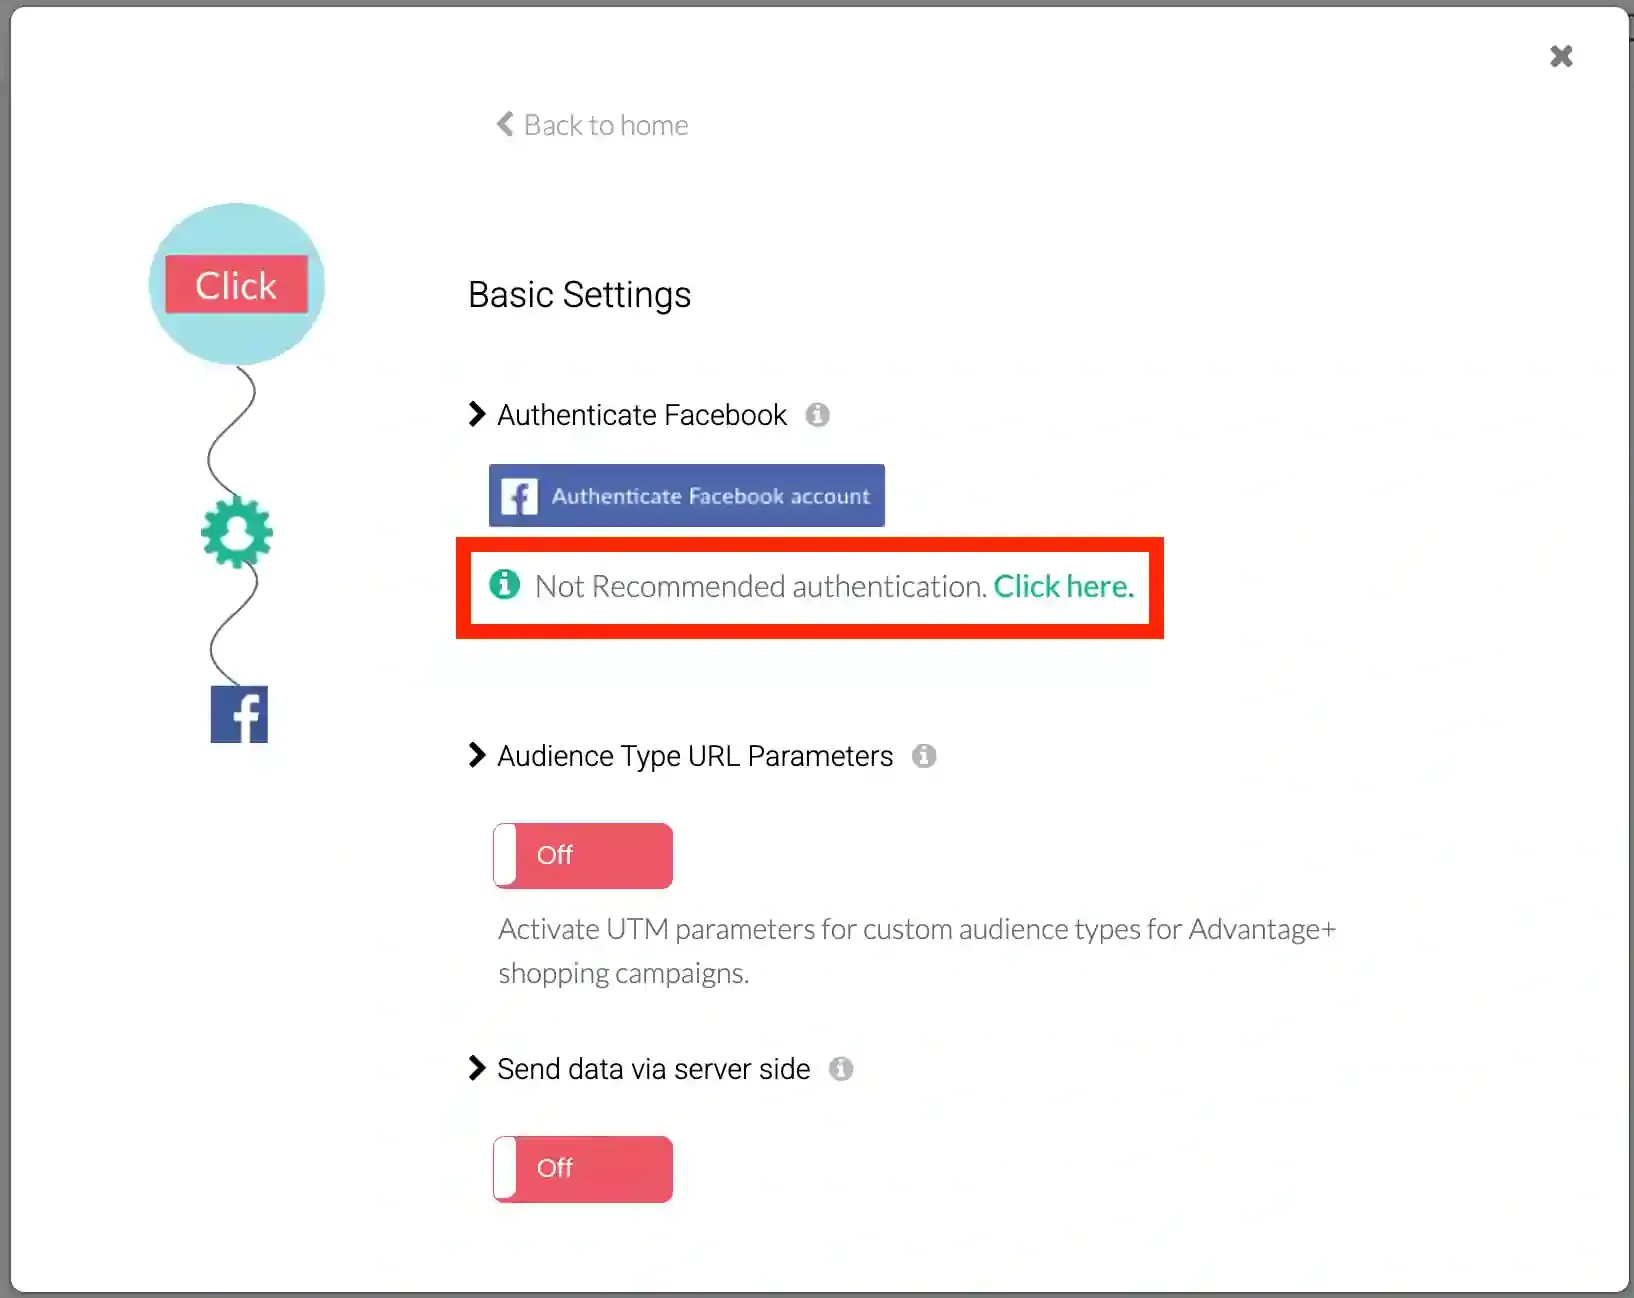
Alternative Authentication (Not Recommended)
Section titled “Alternative Authentication (Not Recommended)”-
In CustomerLabs, go to Destinations → Facebook → Configuration Settings.
-
Click on Not Recommended authentication.
-
Choose the Facebook Pages to which the business is associated.
-
Choose your Meta Ad account and Pixel from the drop-down.
-
Click Save Changes.
Updating Configuration or Authentication Details
Section titled “Updating Configuration or Authentication Details”If you need to change details (Ad account, Pixel, Business Manager, etc.) after authentication:
-
Click the Reauthenticate Facebook account button in Configuration Settings.
-
Update the necessary details.
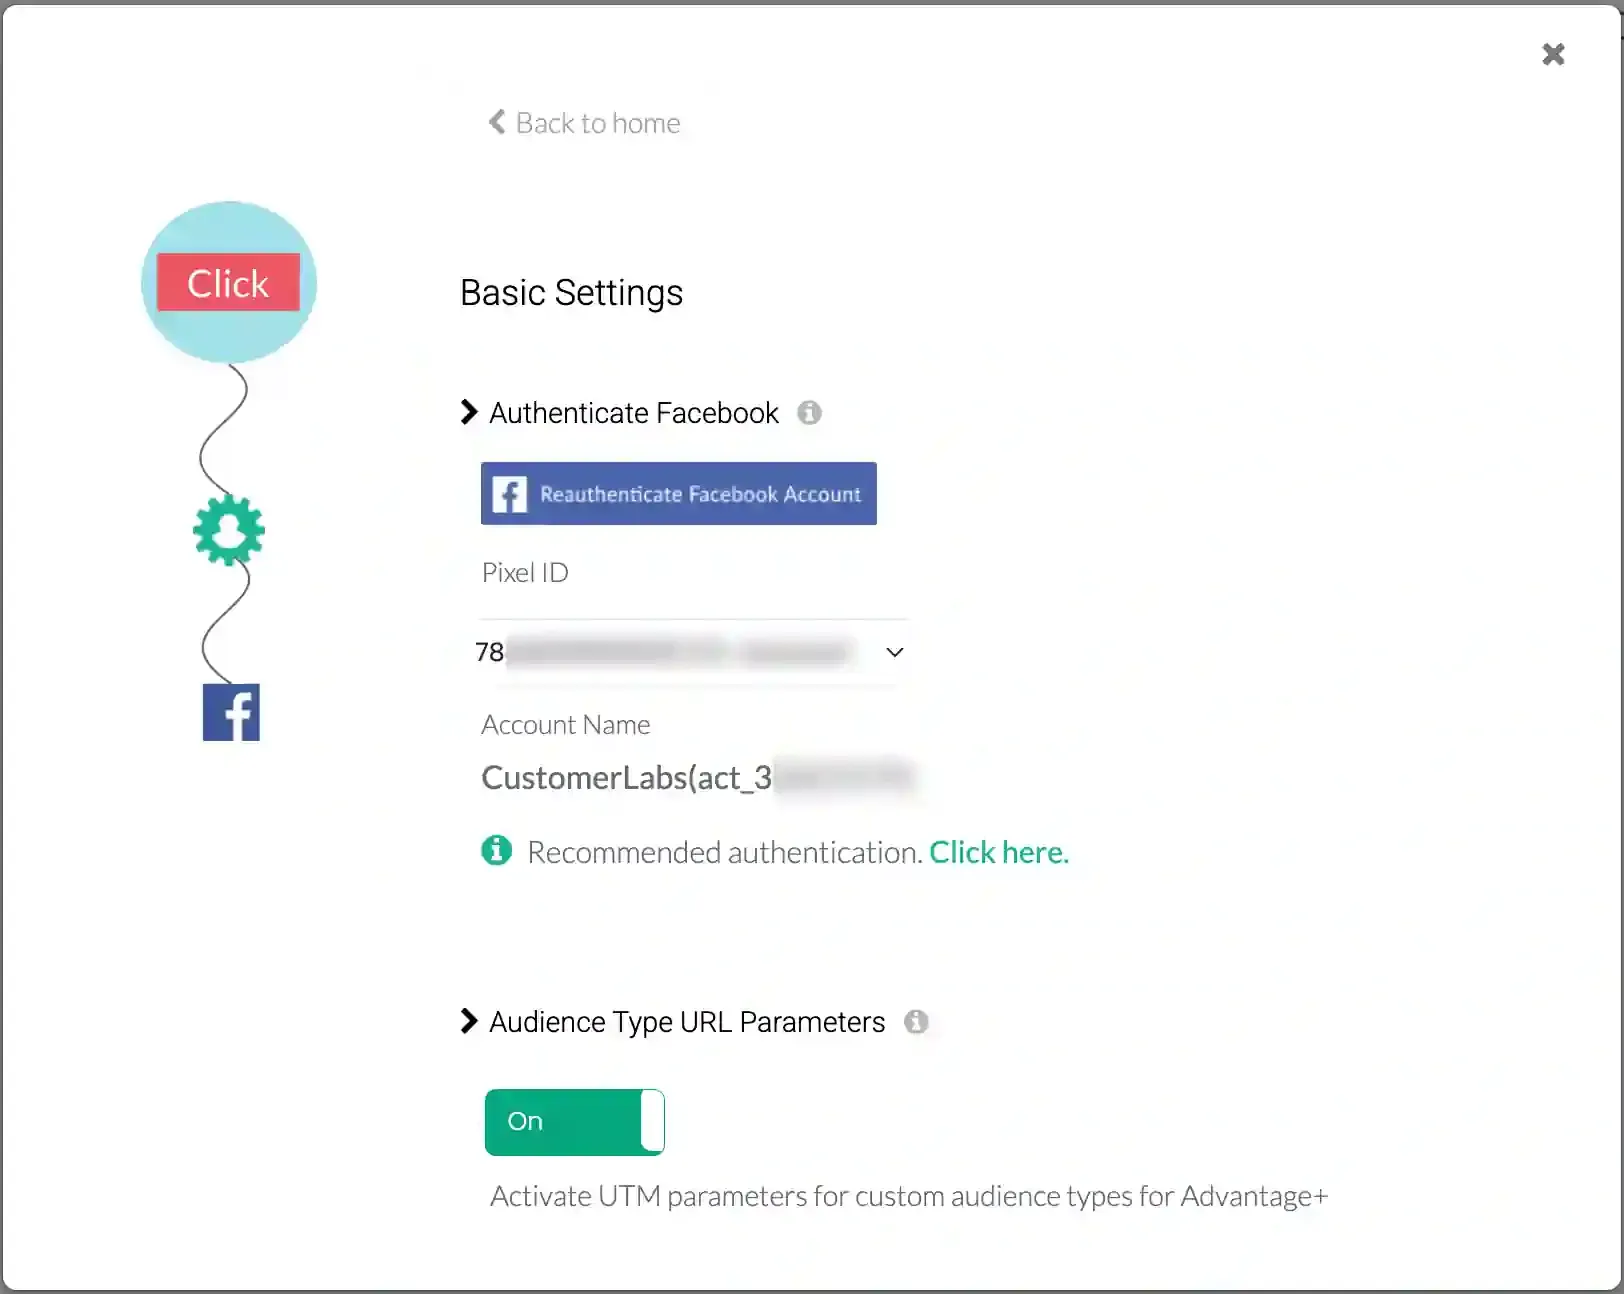
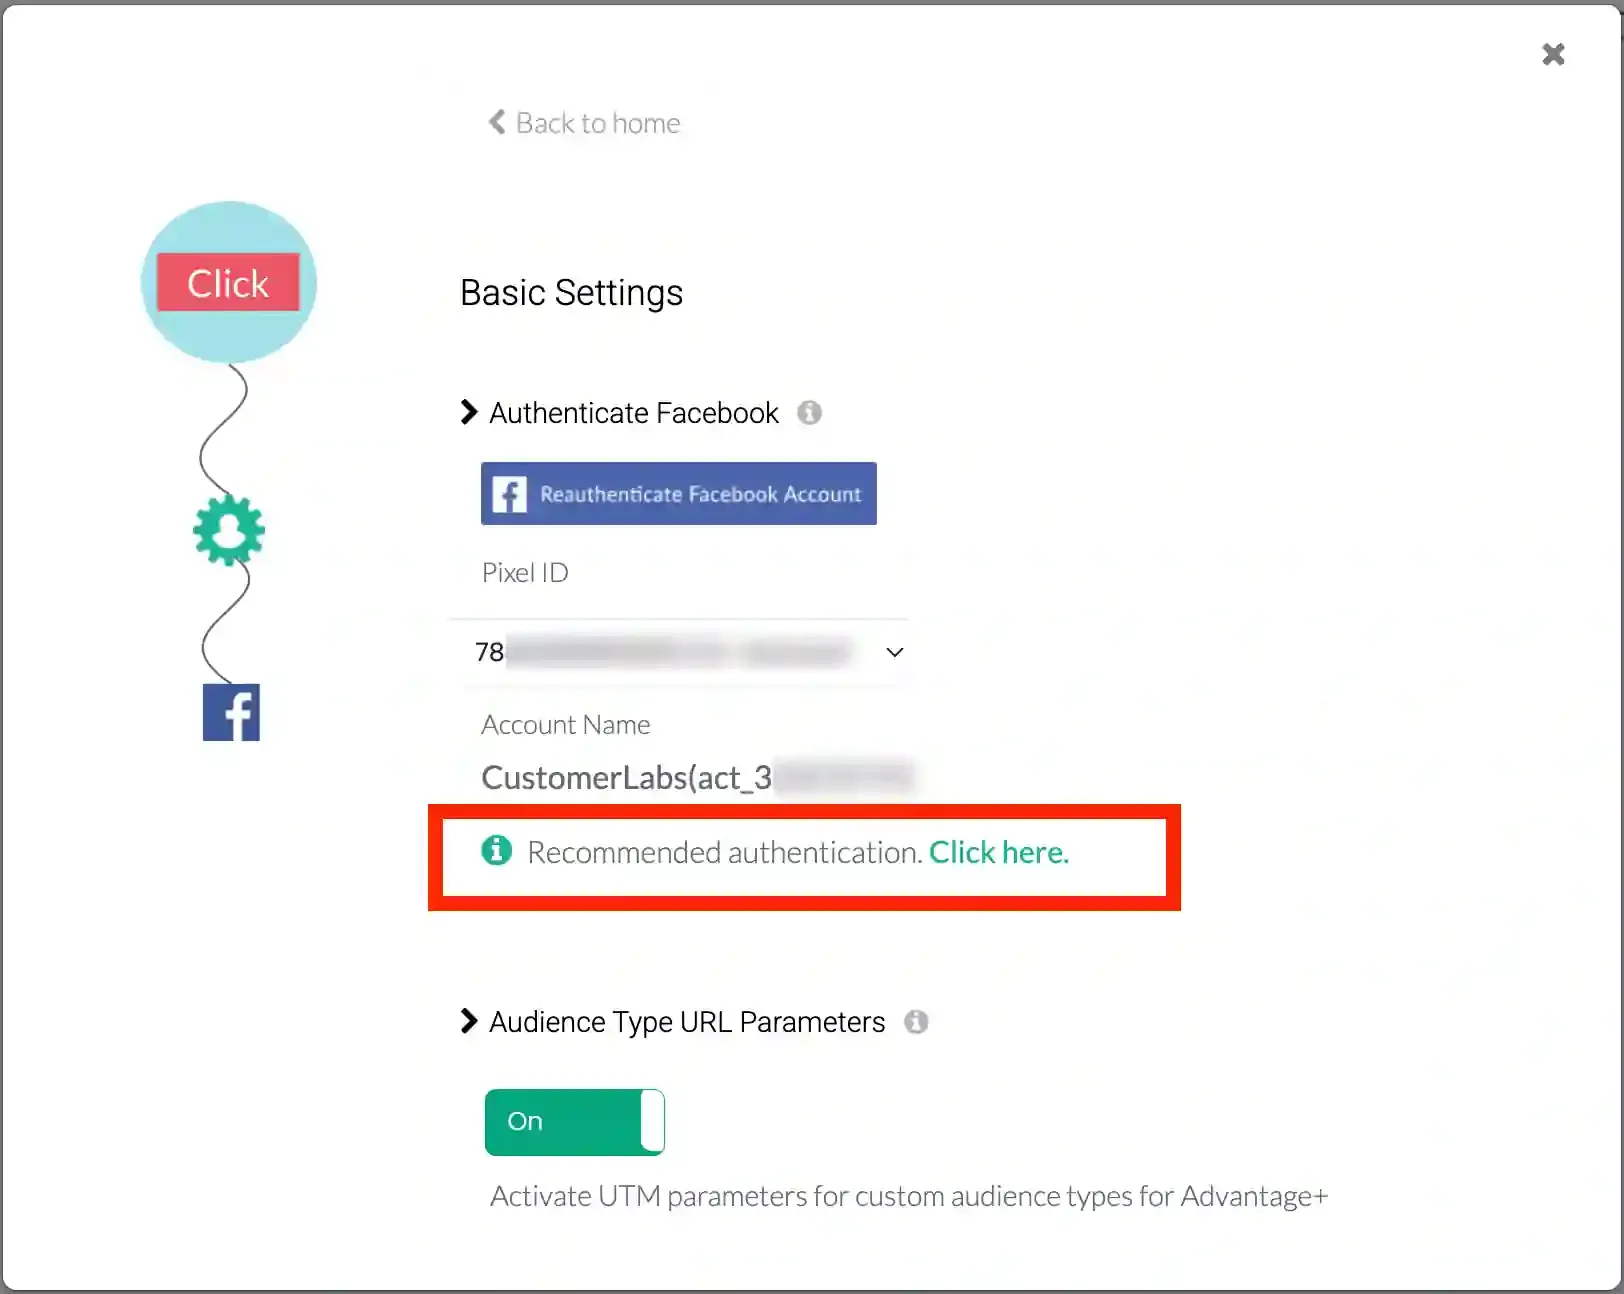
If you previously connected via the Not Recommended Authentication, you can switch to the new recommended method by clicking near “Recommended Authentication”.
-
Click on “Recommended Authentication” in the Configuration settings.
-
Authenticate Facebook account as shown in Recommended Authentication section.
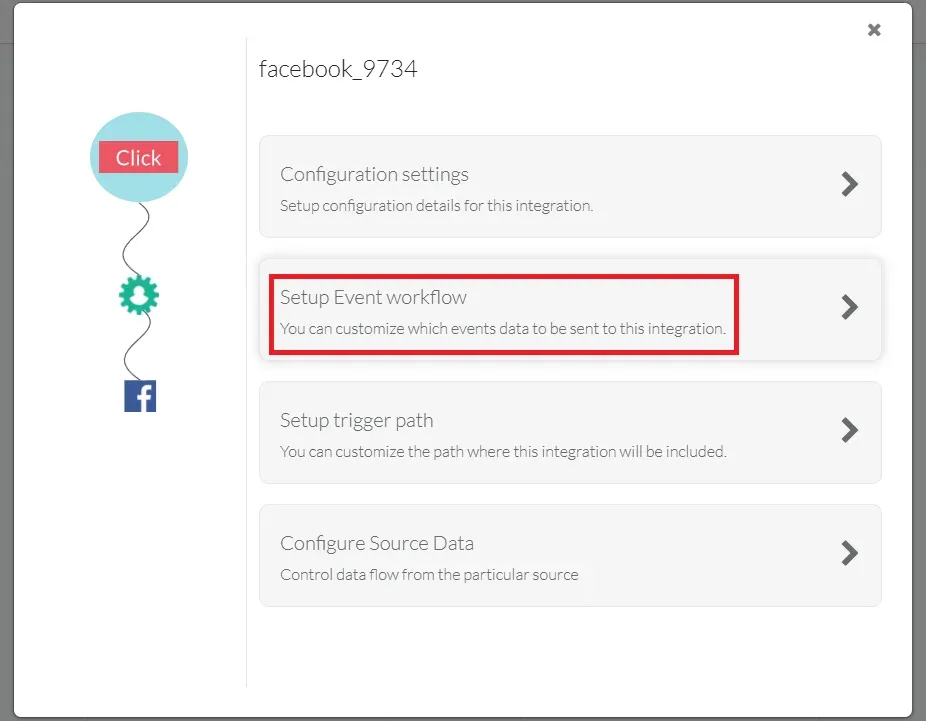
Setup Event Workflow
Section titled “Setup Event Workflow”After authentication, configure the event workflow to send events and sync audience segments.
-
Go to Destinations → Facebook → Setup event workflow in CustomerLabs.
-
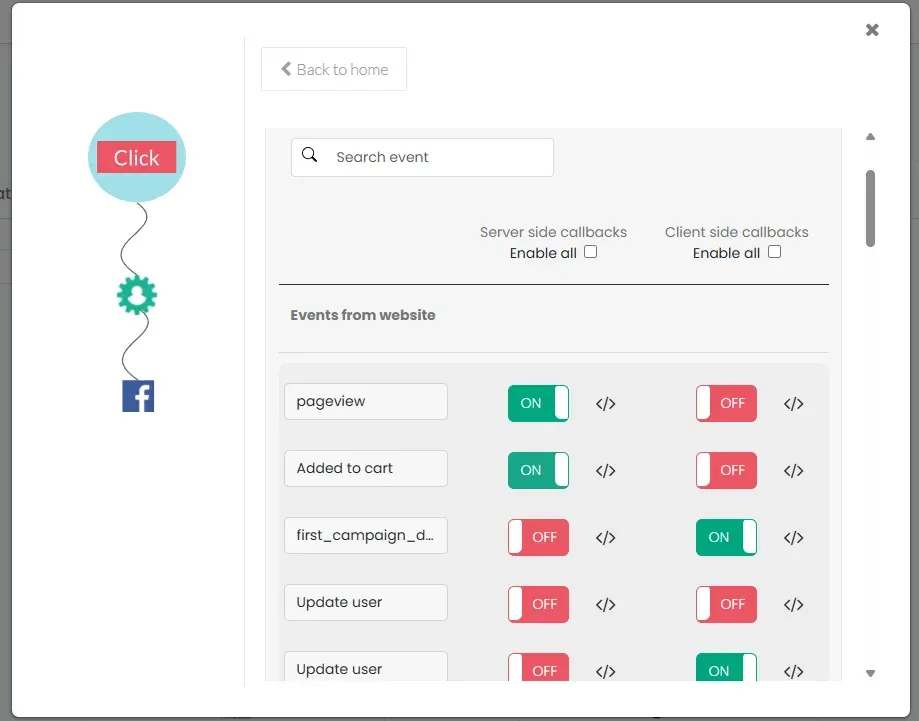
Click “Enable all server-side callbacks” to send all events to Facebook. This improves Event Match Quality (EMQ).
-
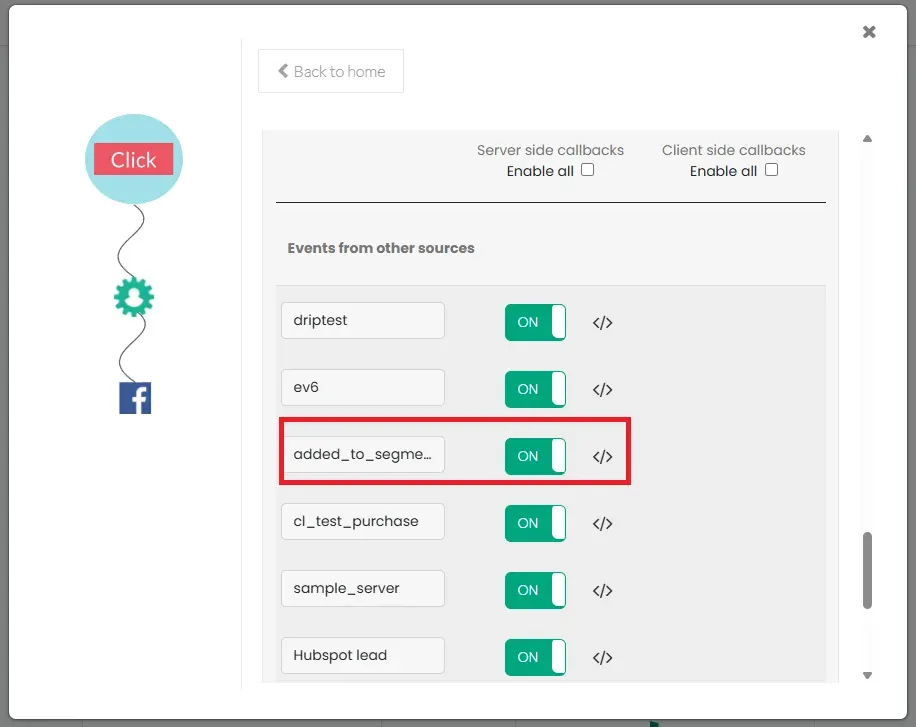
Audience Syncing:
- After creating an audience in CustomerLabs, turn ON the toggle for all
added_to_segmentevents to sync audiences to Facebook. - If you need to track removals, turn ON
removed_from_segment. - The
added_to_segmentevent refreshes on Facebook based on the minimum refresh interval set for the audience segment in CustomerLabs. - You can choose to send all events (pageview, purchase, added_to_cart, etc.) or only segments (
added_to_segment).
- After creating an audience in CustomerLabs, turn ON the toggle for all
-
Click Save Changes.
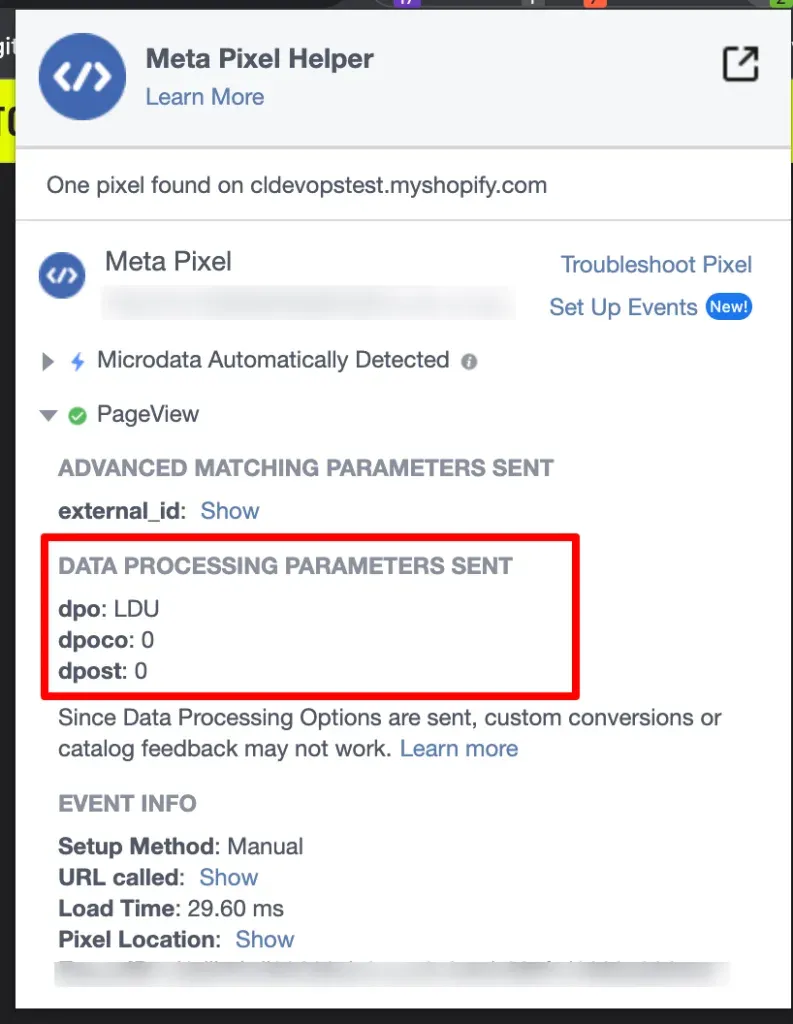
Limited Data Use (LDU)
Section titled “Limited Data Use (LDU)”Limited Data Use is a Facebook data processing option that restricts the use of user data for marketing purposes to comply with US state privacy regulations (California, Colorado, and Connecticut).
Based on user consent from these states, you must flag users with Limited Data Use (LDU). Facebook will then process data as a service provider/processor and restrict its use according to Facebook’s State-Specific Terms.
Learn more about Limited Data Use
Set up Limited Data Use
Section titled “Set up Limited Data Use”CustomerLabs supports the LDU flag for users in the mentioned states.
Prerequisites:
-
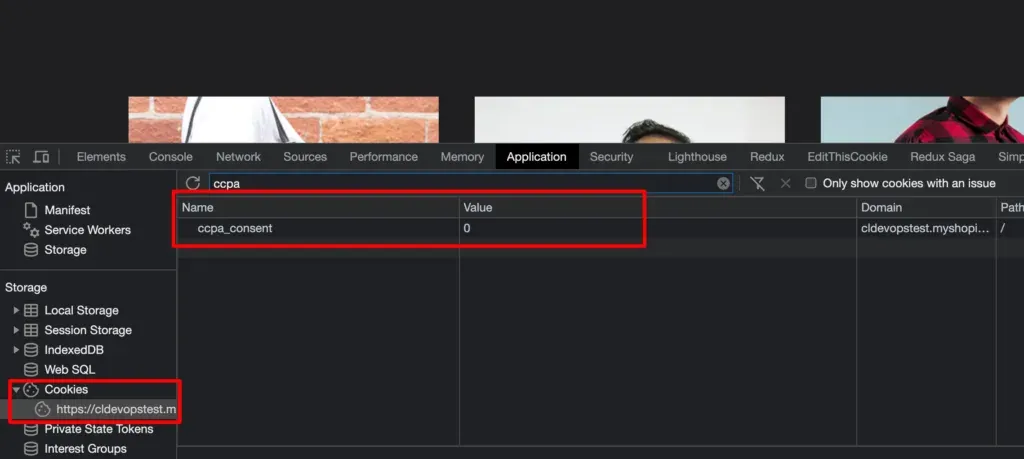
You must collect user consent on your website regarding marketing data usage (e.g., via a CCPA compliance cookie plugin).
-
Consent must be stored in a cookie with a specific name and boolean value.
Enable LDU in CustomerLabs
Section titled “Enable LDU in CustomerLabs”-
Log into CustomerLabs and go to Destinations → Facebook.
-
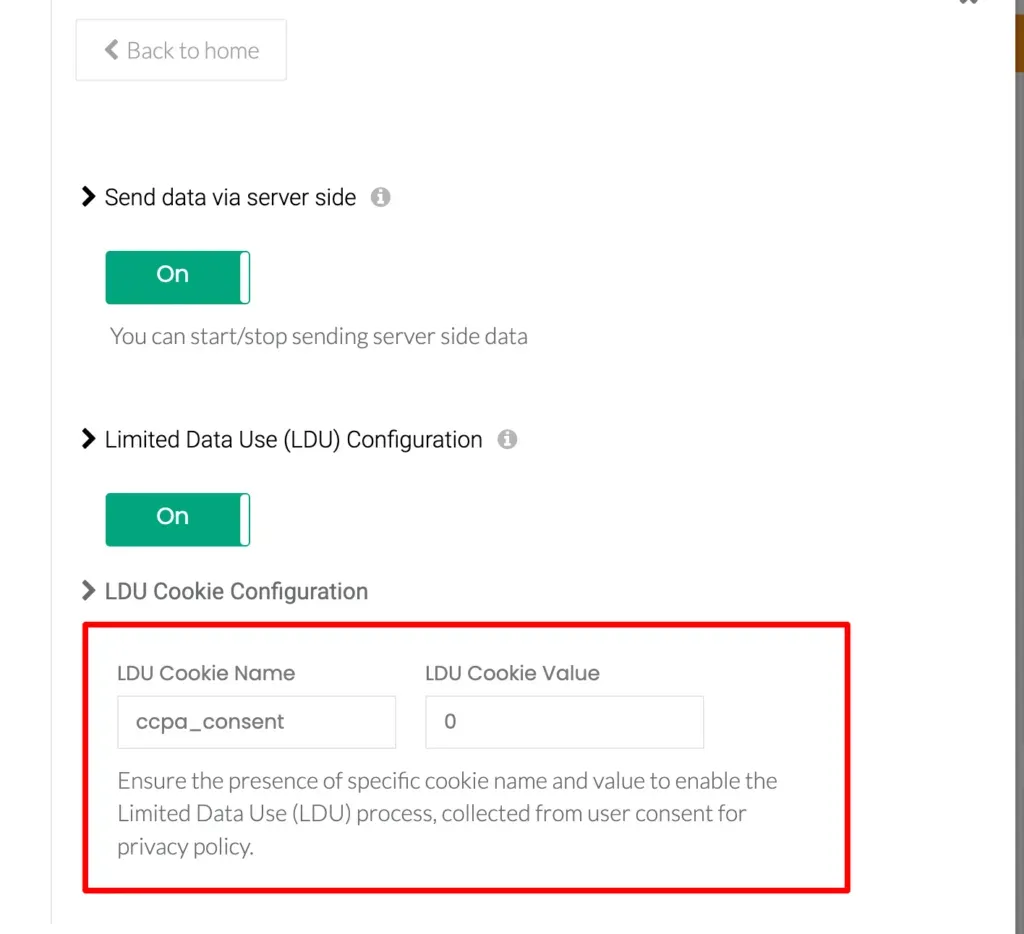
Navigate to Configuration Settings → Limited Data Use (LDU) Configuration.
-
Turn ON the toggle to enable Limited Data Use on Facebook.
-
Cookie Configuration:
- Enter the Cookie name and Cookie value where user consent is stored.
- Click Save Changes.
-
Consent Logic:
- The cookie value should represent an opt-out (e.g.,
1,true,y). - If the value matches, it means the user has opted out of marketing. CustomerLabs will flag this user with LDU and send it to Facebook.
- The cookie value should represent an opt-out (e.g.,
Once set up, anytime a user provides “opt-out” consent, the LDU flag is sent to Facebook for that user. Facebook will identify the state and apply LDU restrictions.