CustomerLabs + Meta CRM Pixel Integration
Integrate Meta’s CRM pixel with CustomerLabs to send your conversion leads to Meta through events. This integration allows you to send lead data to Meta and optimize your Lead Ads (Instant Forms) to generate high-quality leads that are more likely to convert.
Prerequisites
Section titled “Prerequisites”Before sending lead data to Meta, ensure the following setup is complete:
-
Receive Lead Data: You must be receiving lead form data in your CustomerLabs account.
- Connect Meta as a Source if receiving data from Facebook Lead Forms.
- Connect your CRM as a Source if you are already bringing lead data into your CRM.
-
Map Lead ID: You must bring in the
lead_idfor all leads to effectively match data with the Meta CRM pixel.- Map the
lead_idas a User Trait while configuring the Source in CustomerLabs.
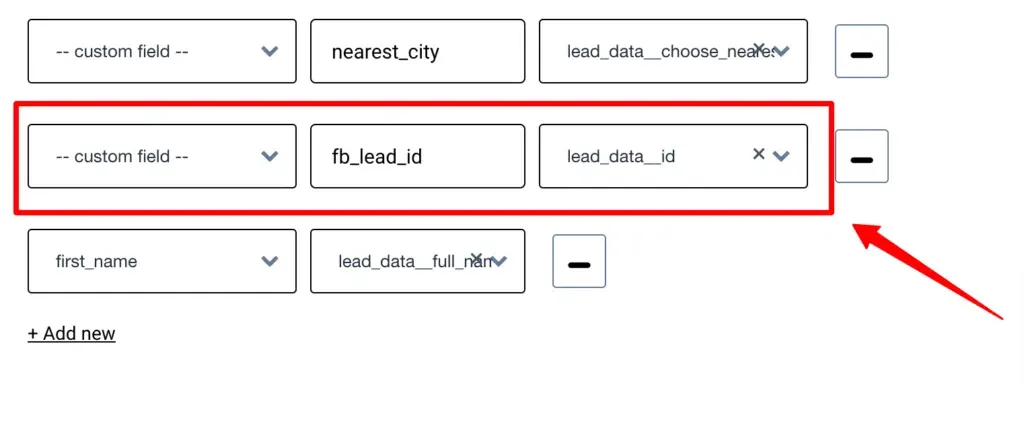
- Map the
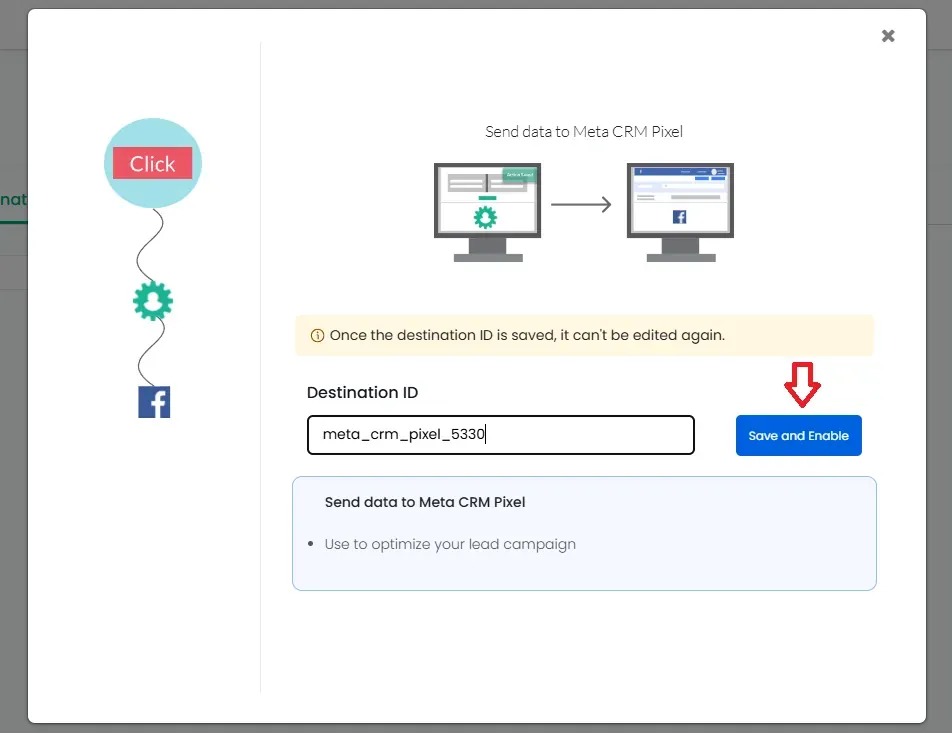
Create a Meta CRM Pixel
Section titled “Create a Meta CRM Pixel”You can either create a new CRM pixel or use an existing one to send lead data.
Refer to the Official Meta documentation to create a CRM Pixel. Ensure you choose the correct option during creation for the integration to work properly.
Meta Authentication
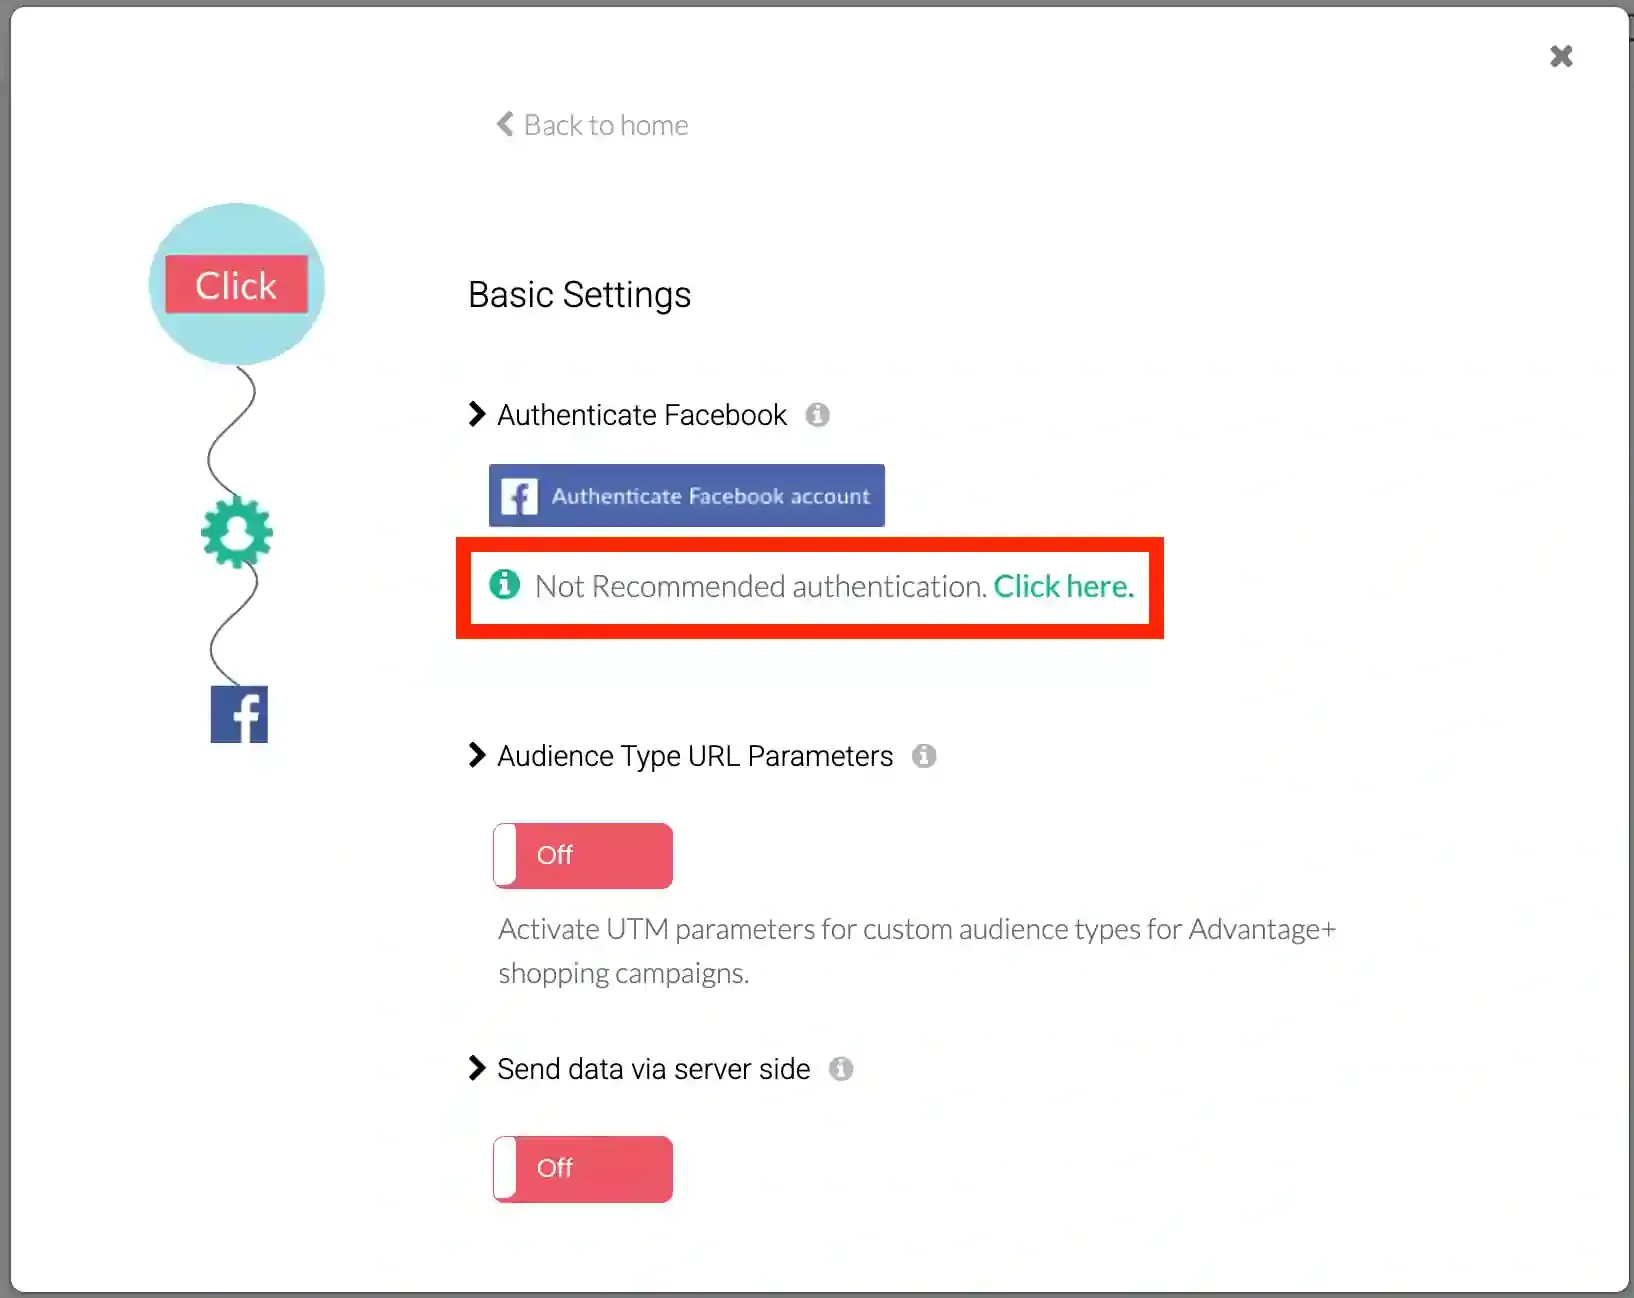
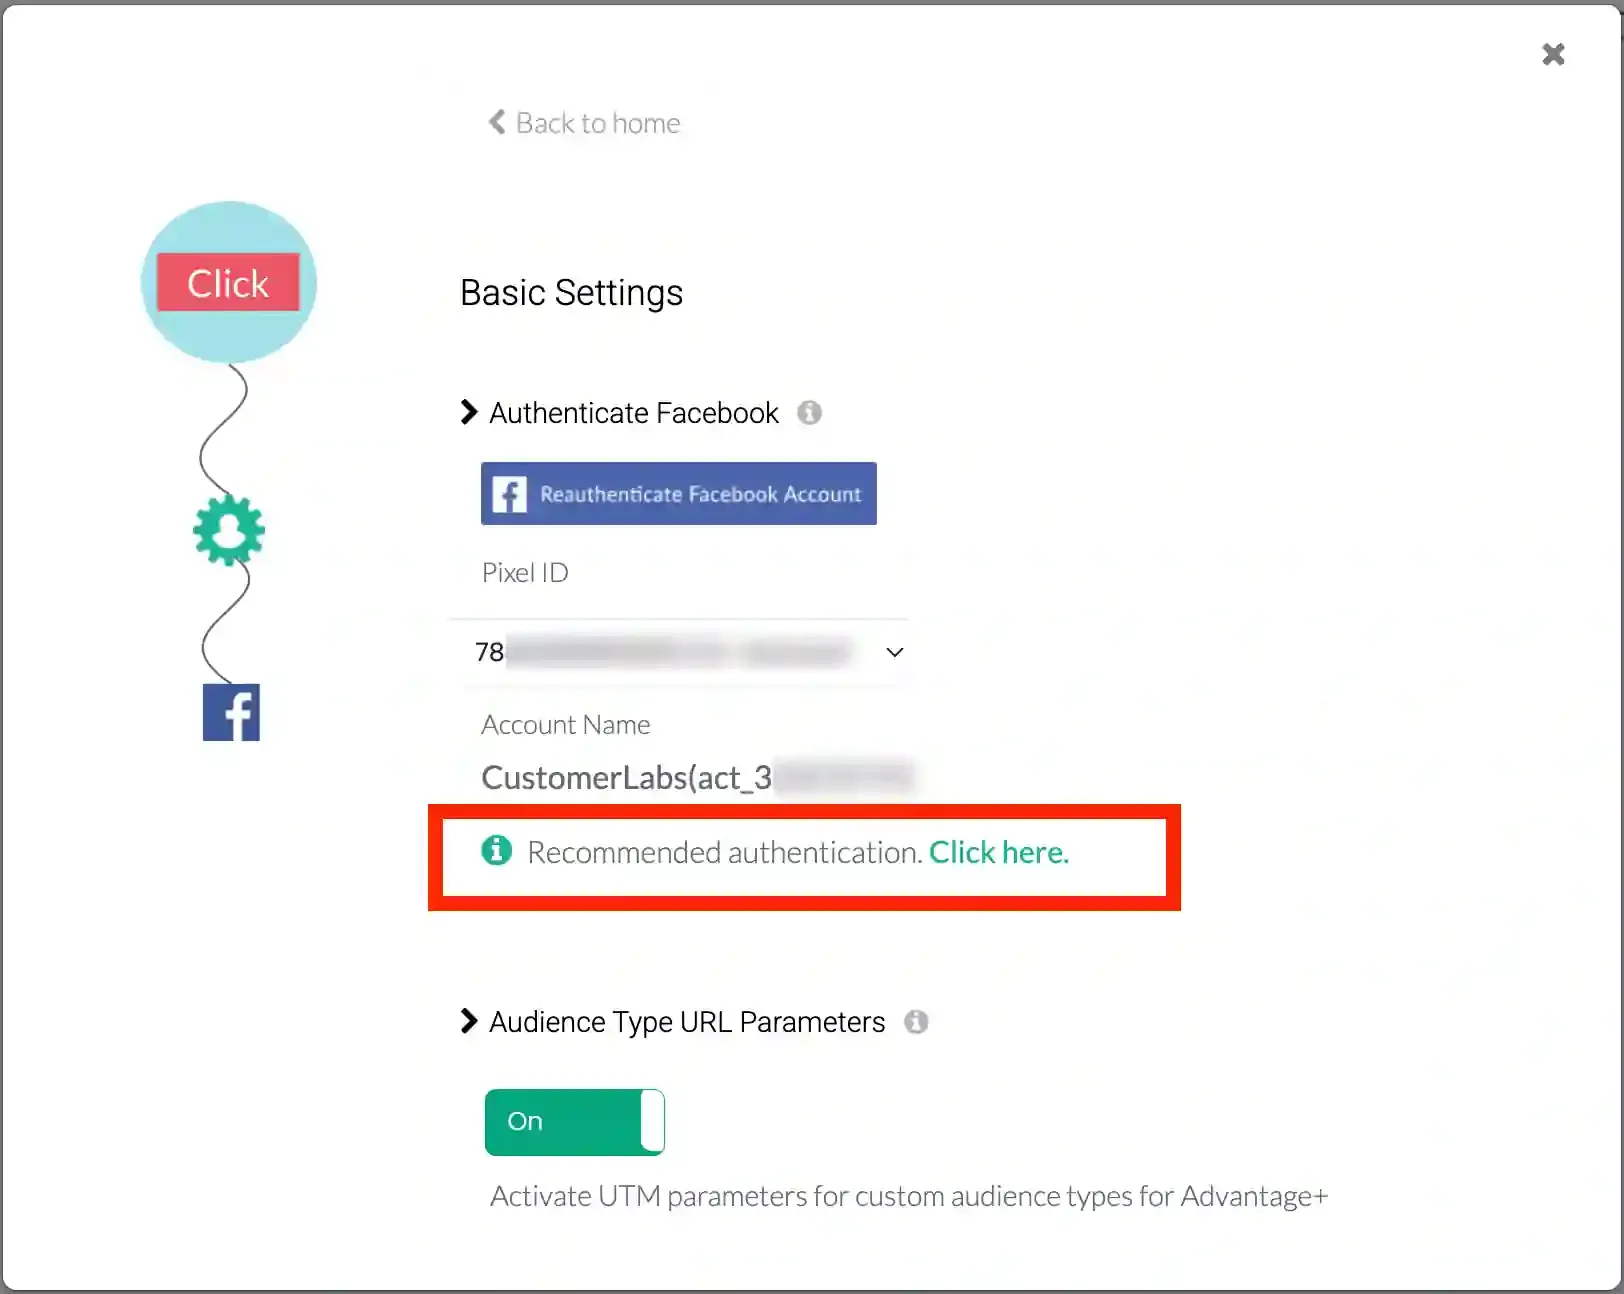
Section titled “Meta Authentication”Recommended Authentication (System User)
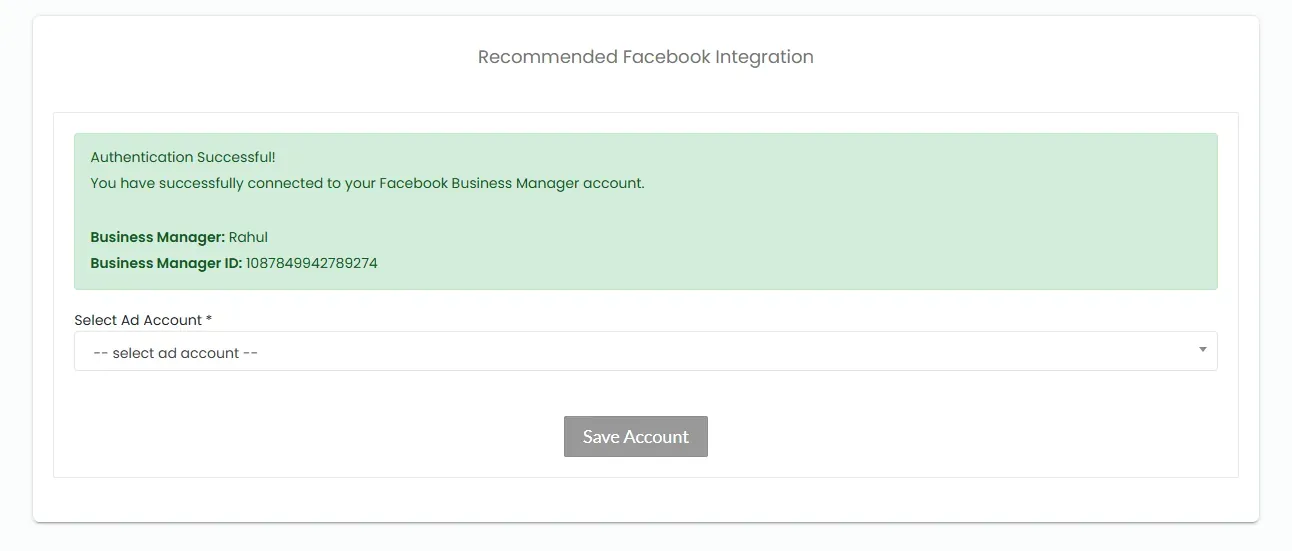
Section titled “Recommended Authentication (System User)”We recommend connecting your Meta Ad account via System User authentication. This requires Admin access to your Meta Business Manager account.
Why use this method? It prevents data discrepancies caused by any changes or manual updates to the personal Facebook account used for authentication.
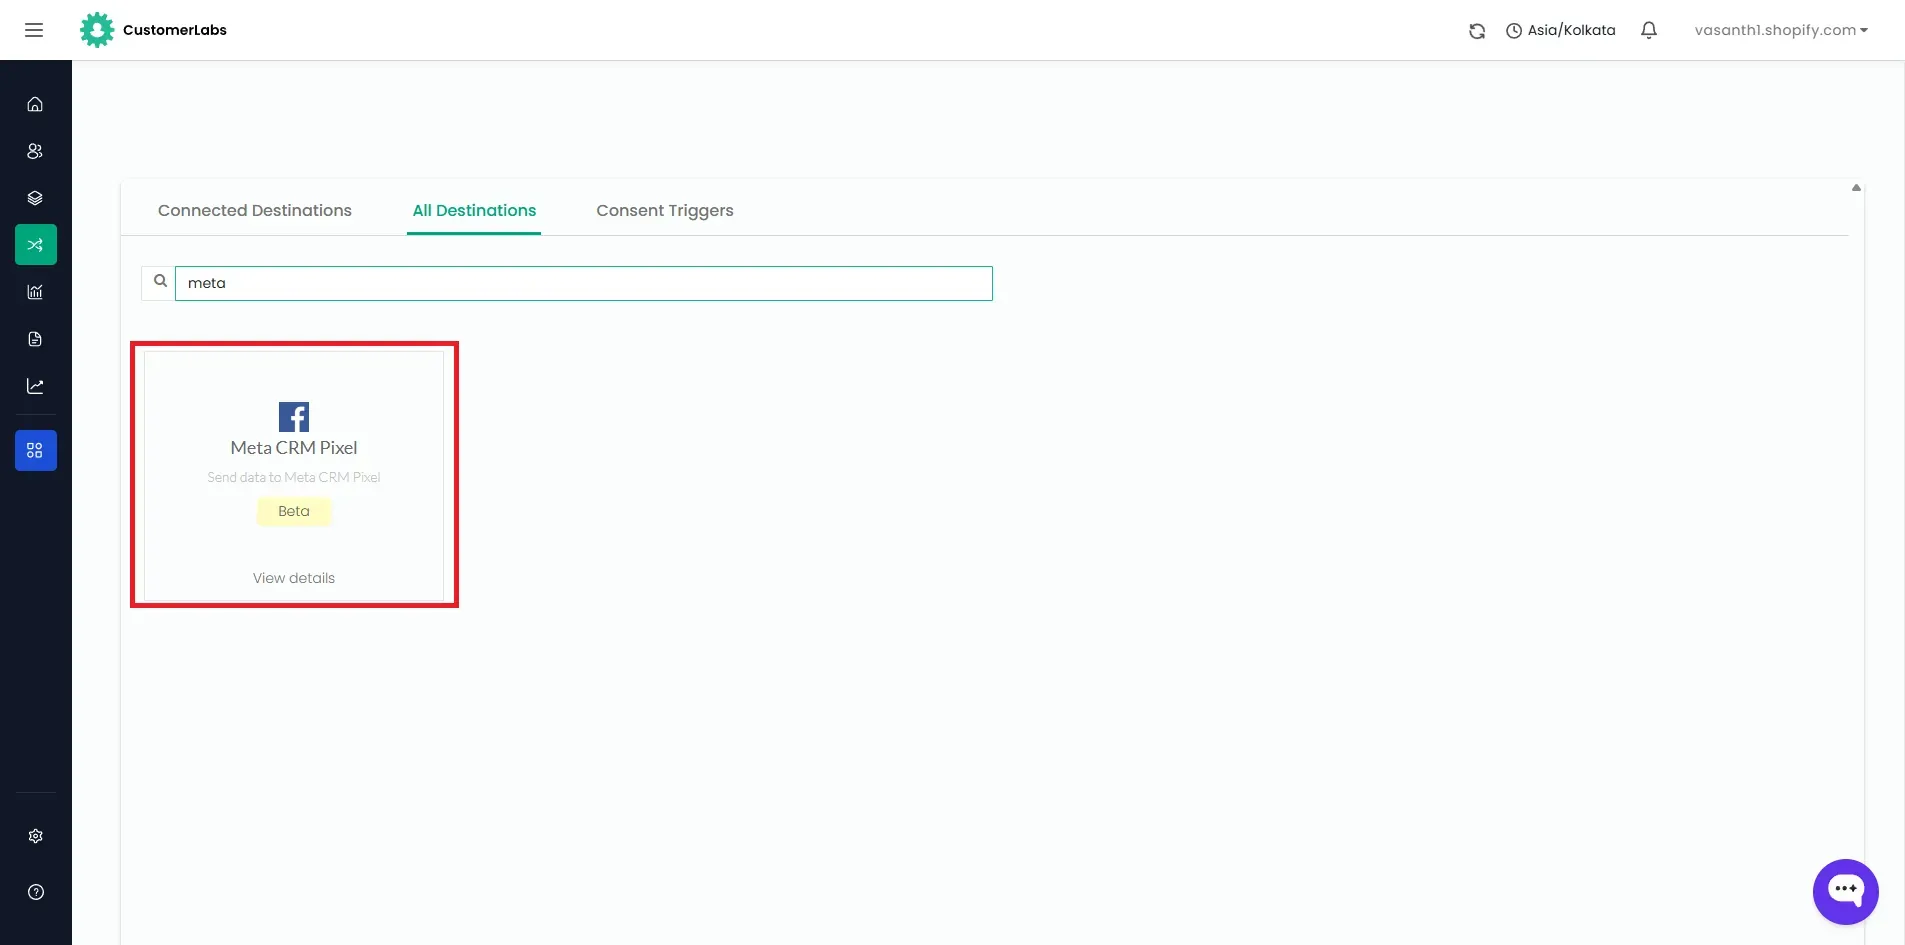
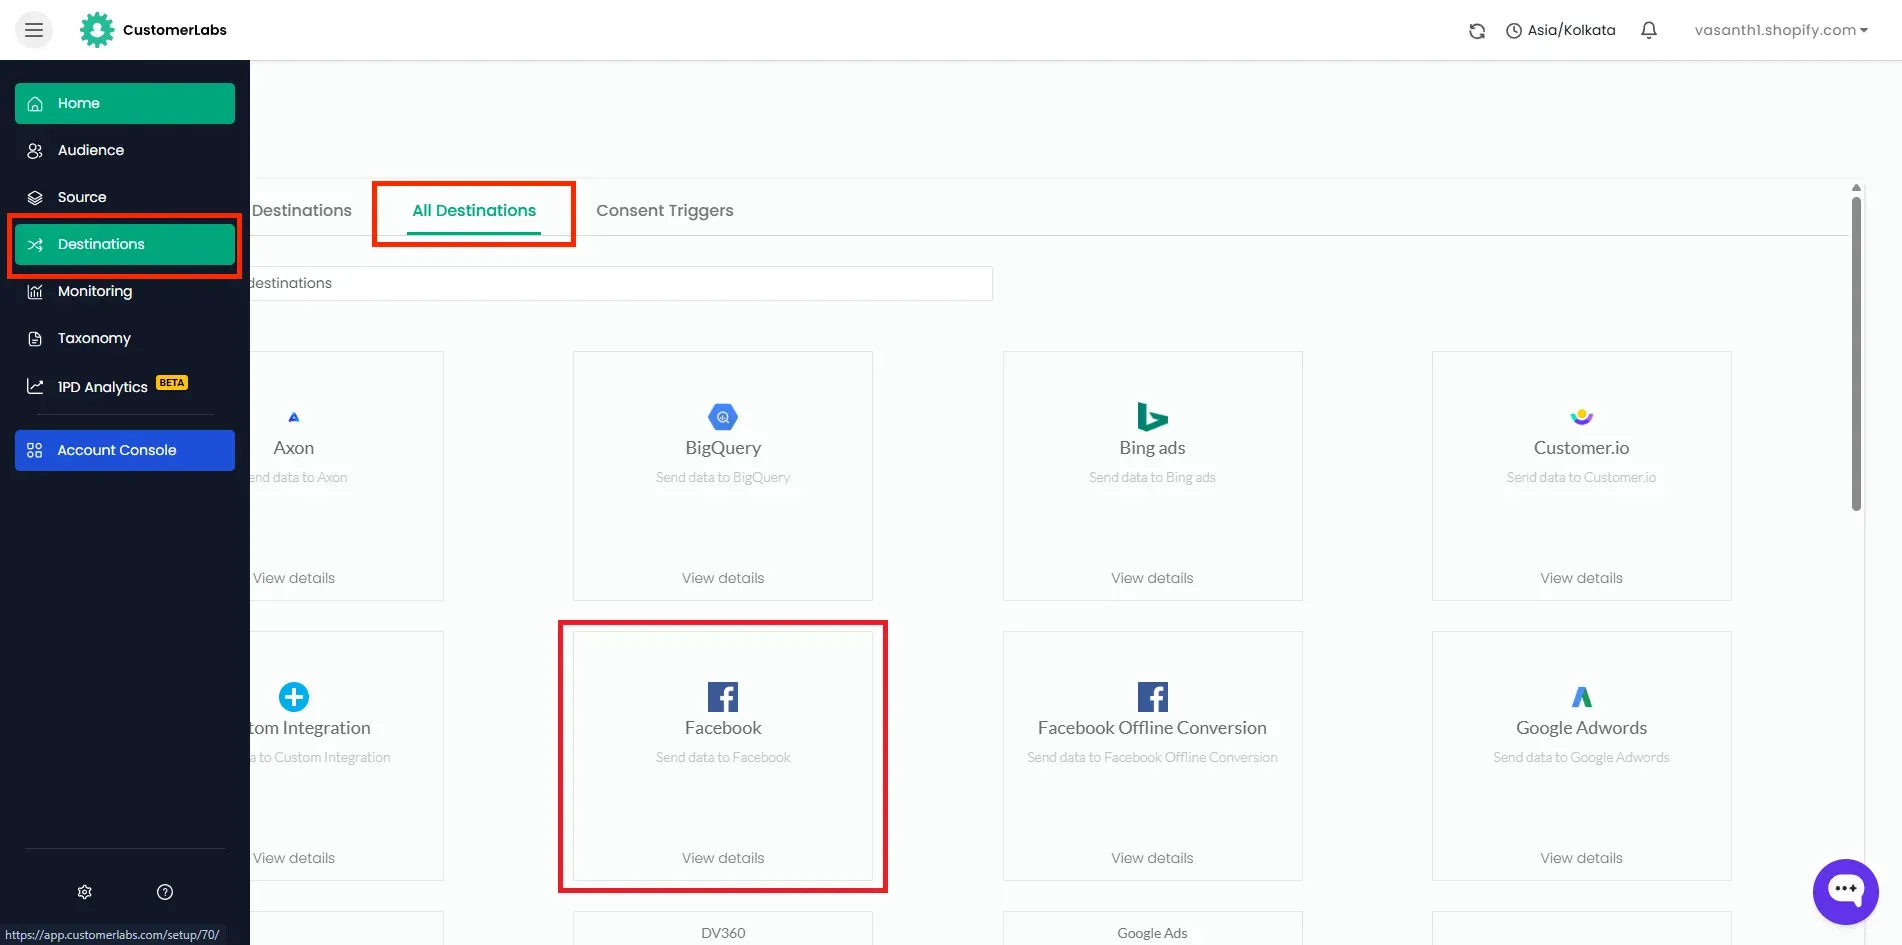
- Log in to your CustomerLabs account.
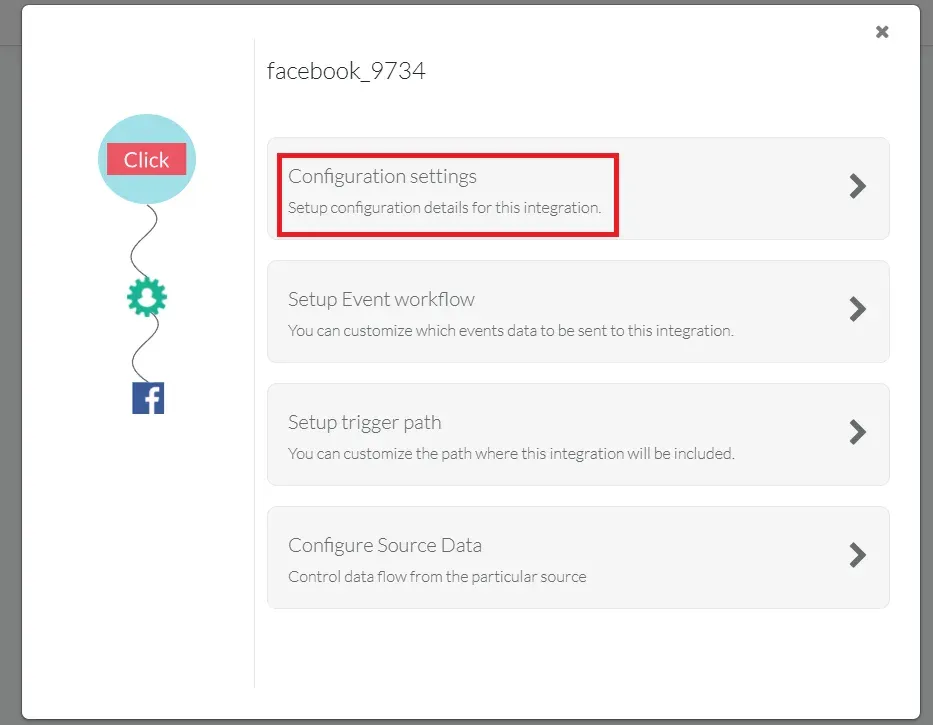
- Navigate to Destinations → Meta CRM Pixel.
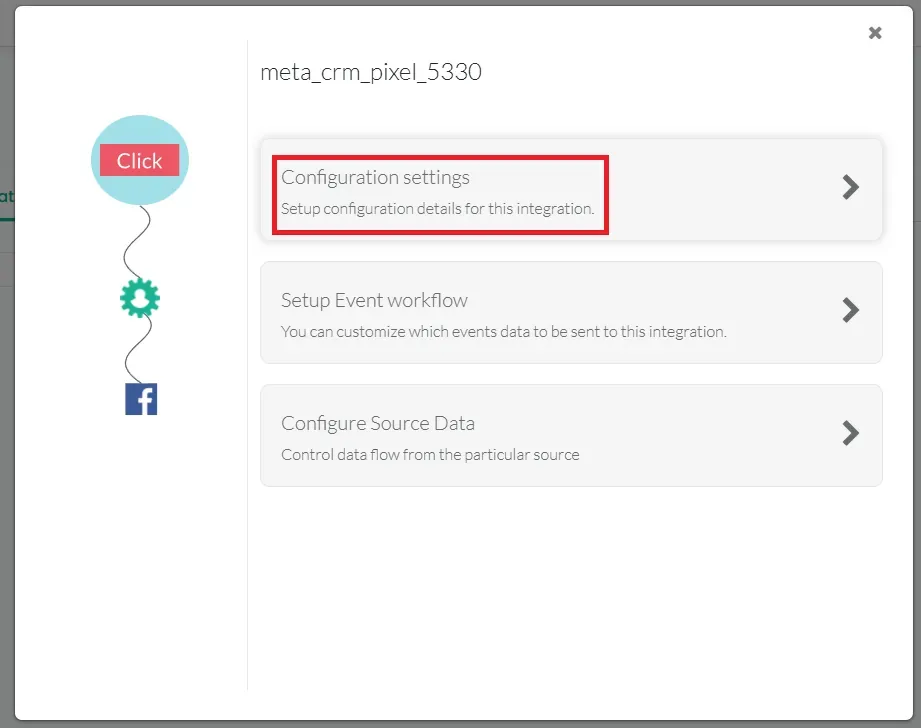
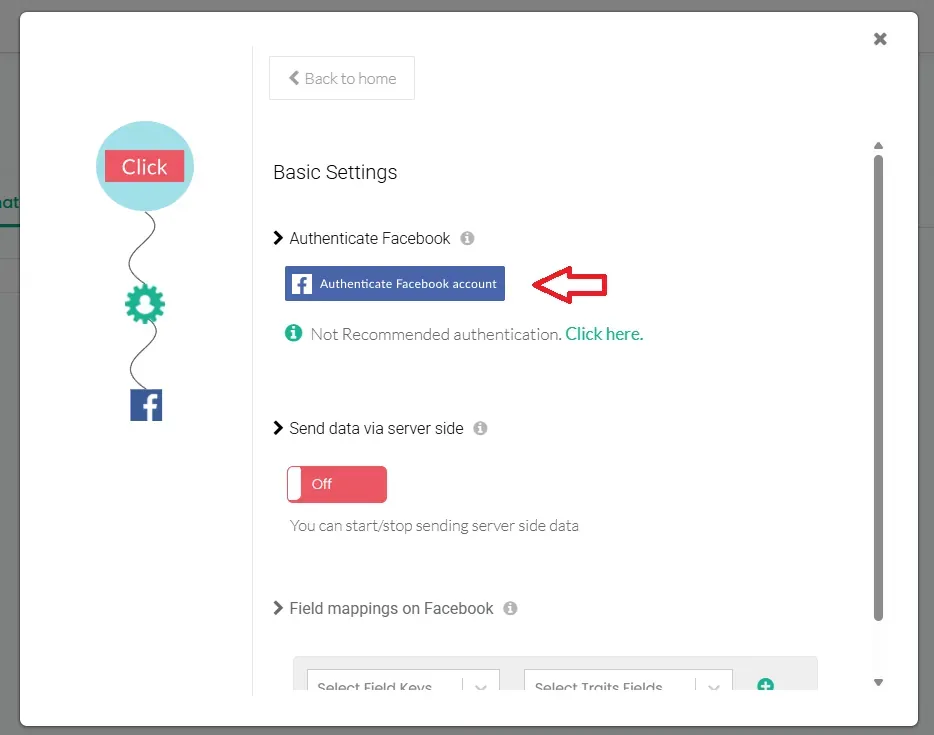
- Click Enable and go to Configuration Settings.
- Click on Authenticate Facebook account. You will be redirected to authorize the connection.
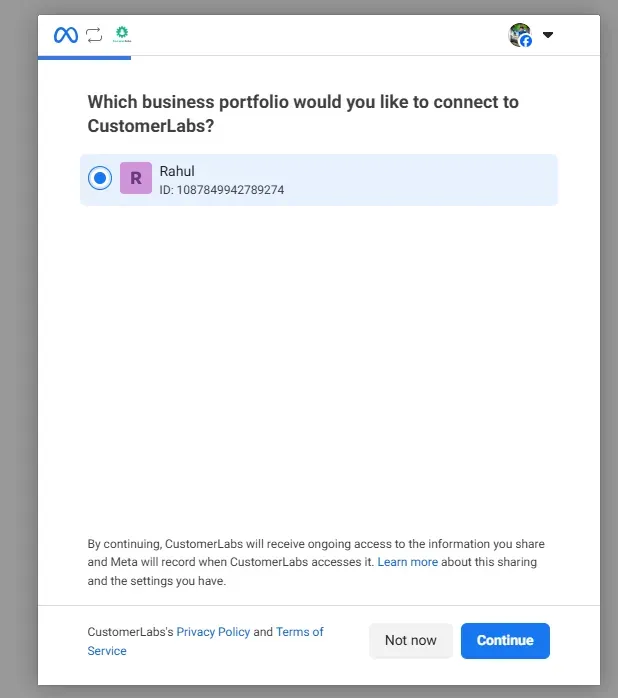
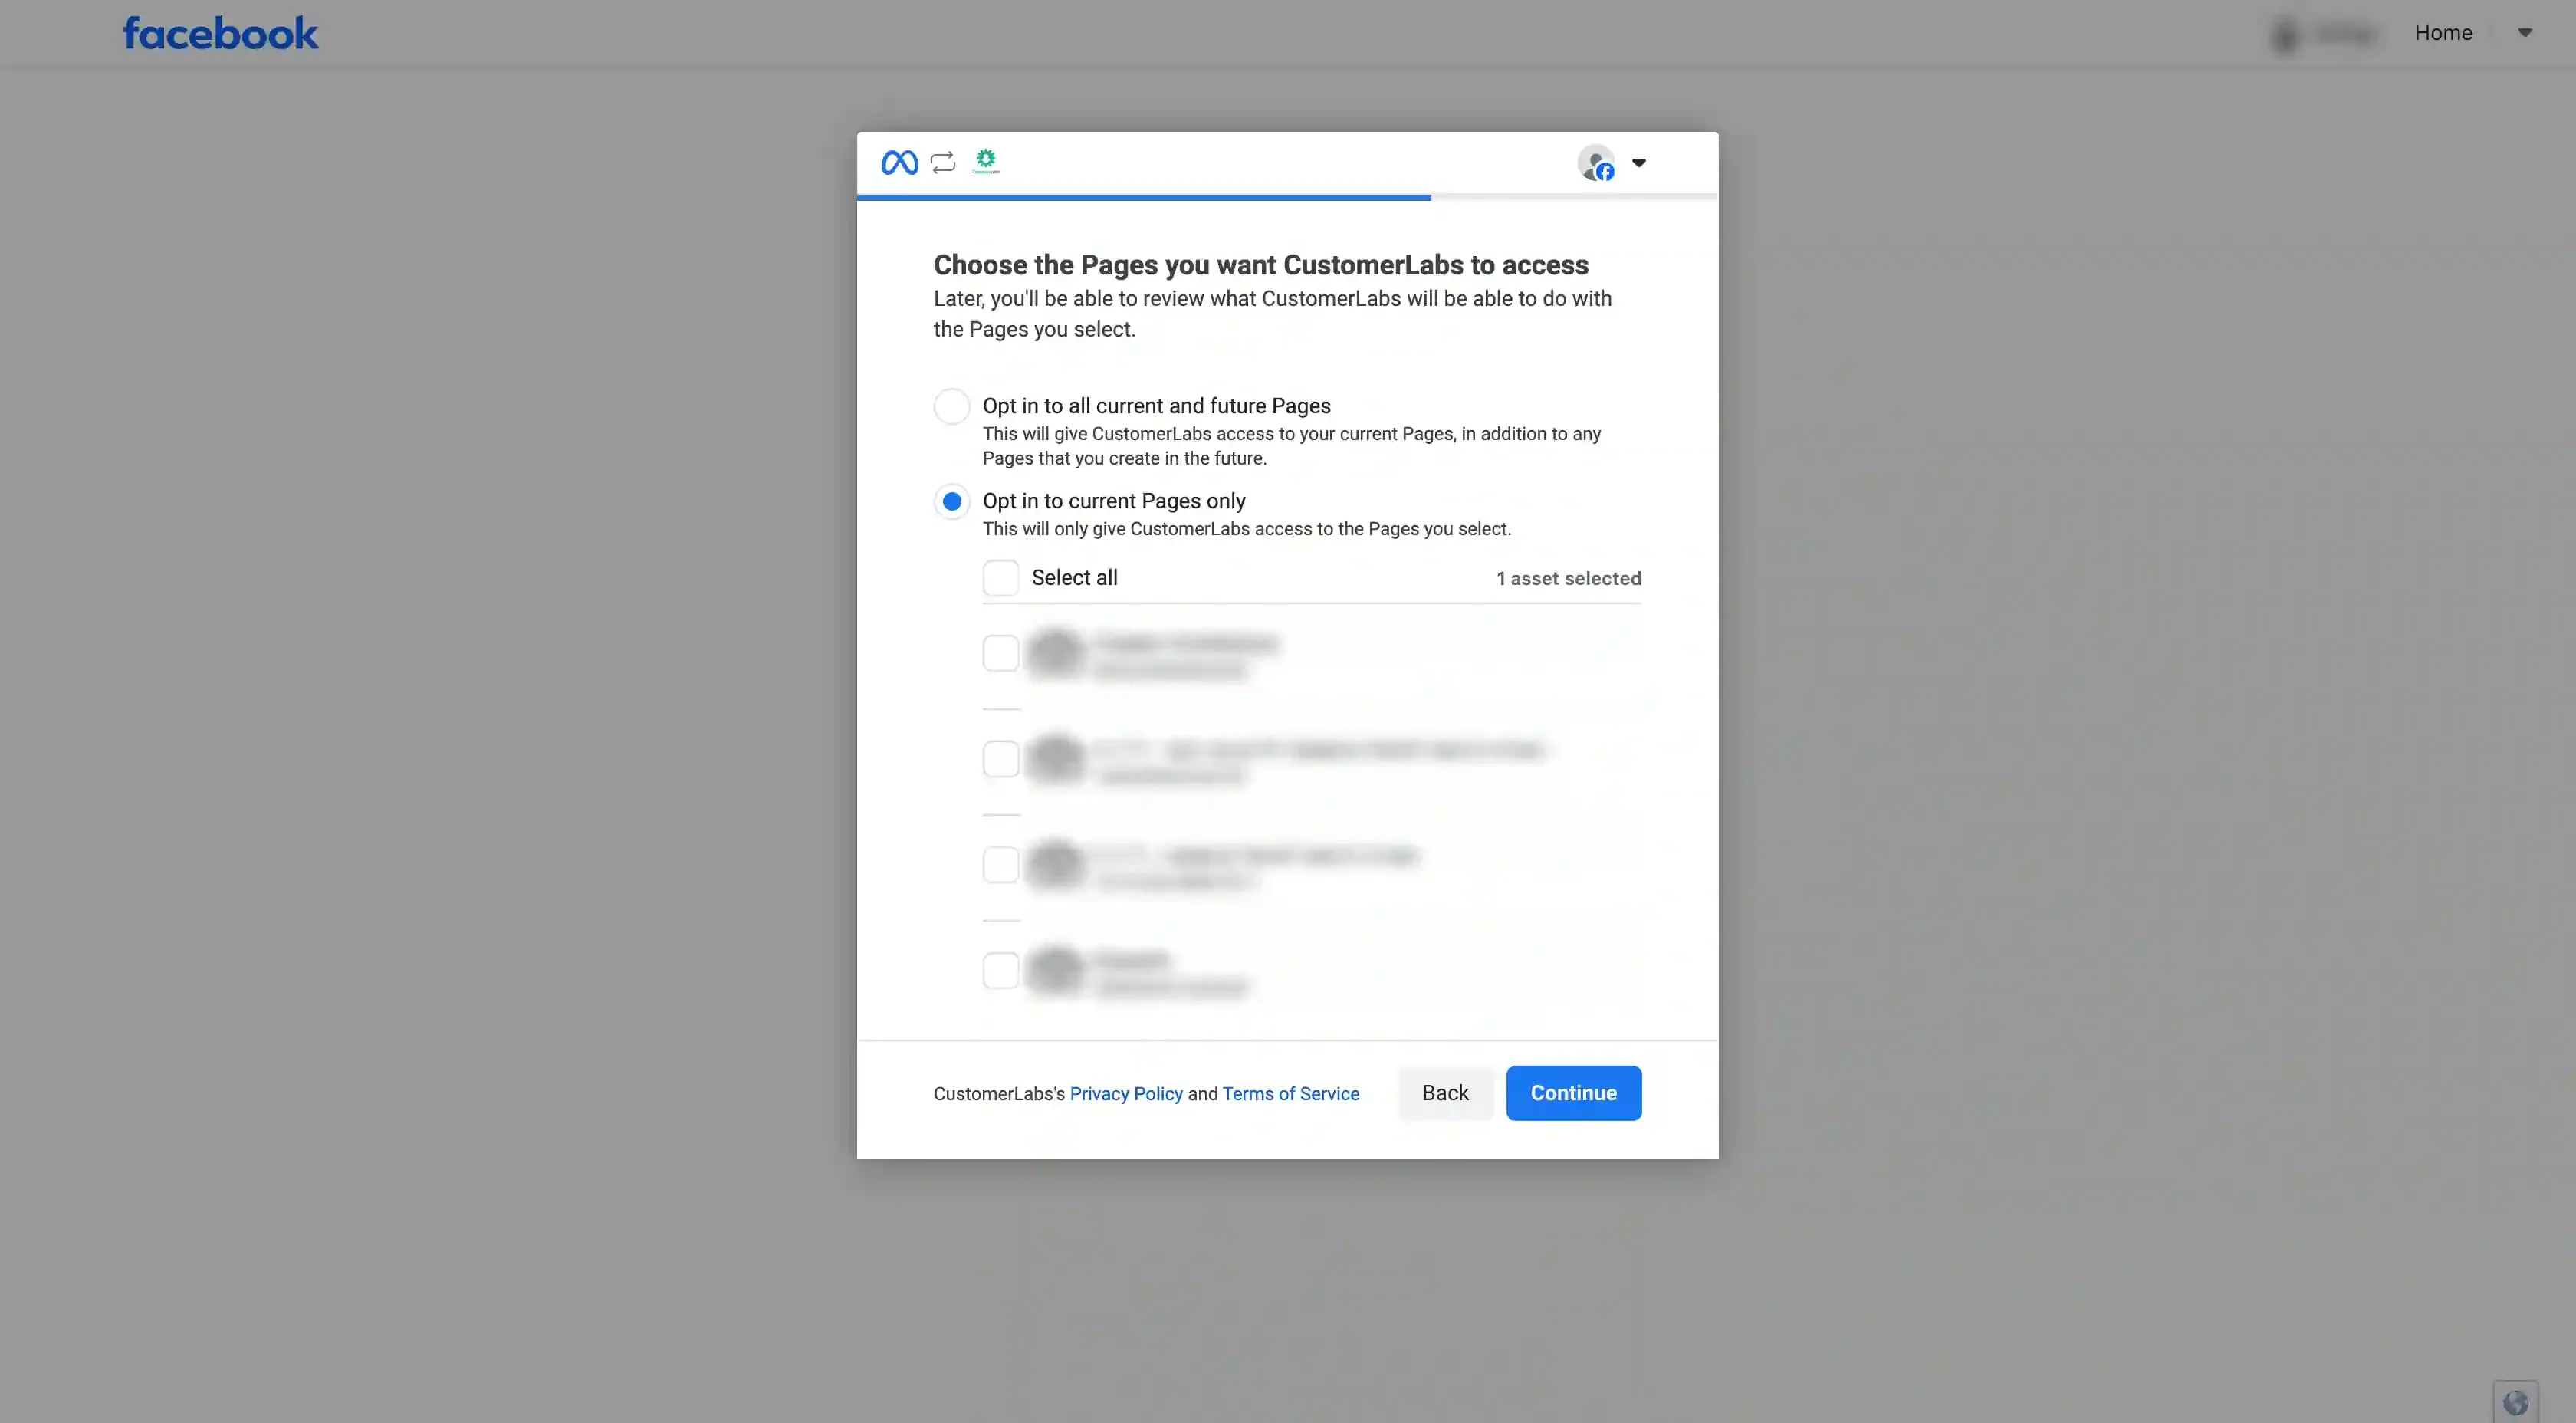
- Select your Business Manager account.
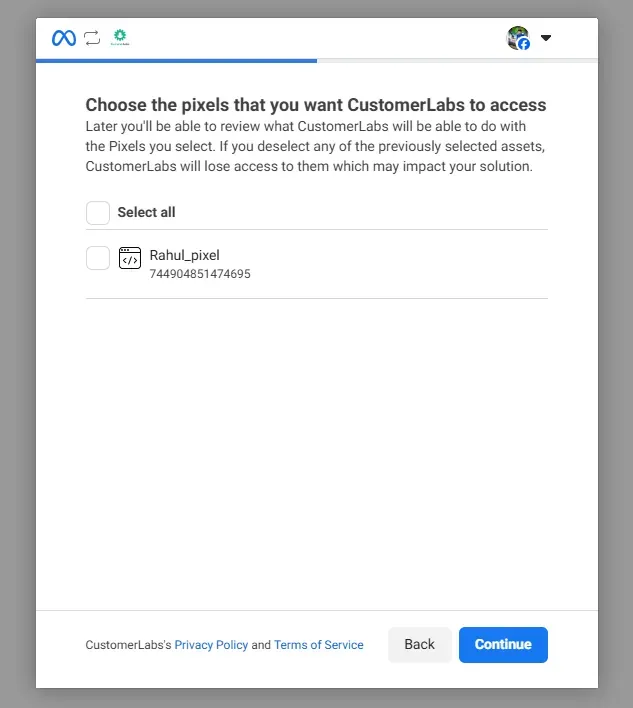
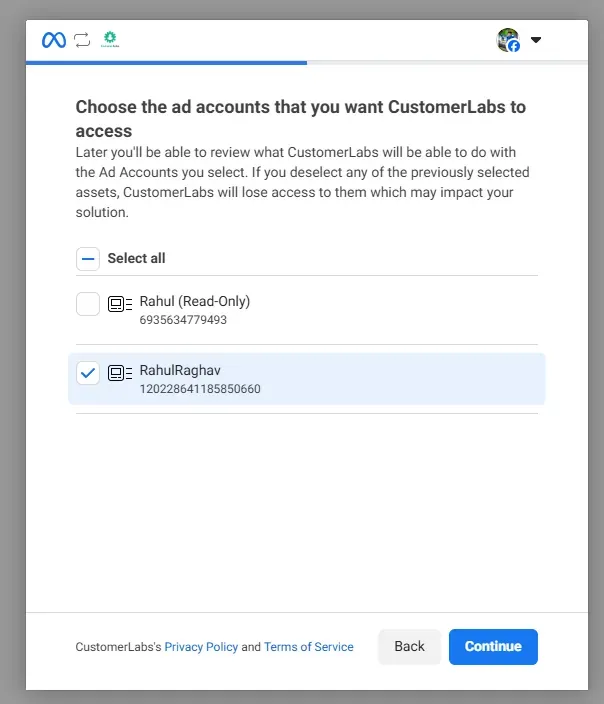
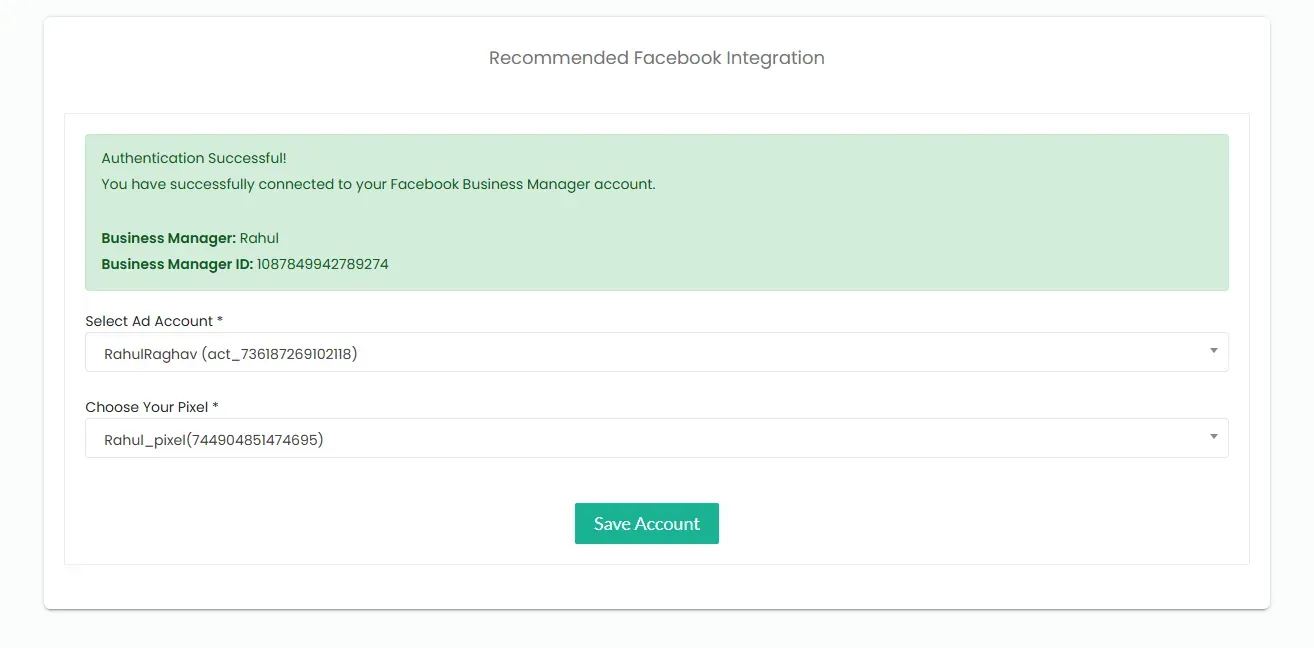
- Select the pixel and Ad Account you want to connect.
- Click Save in Meta Authentication Panel.

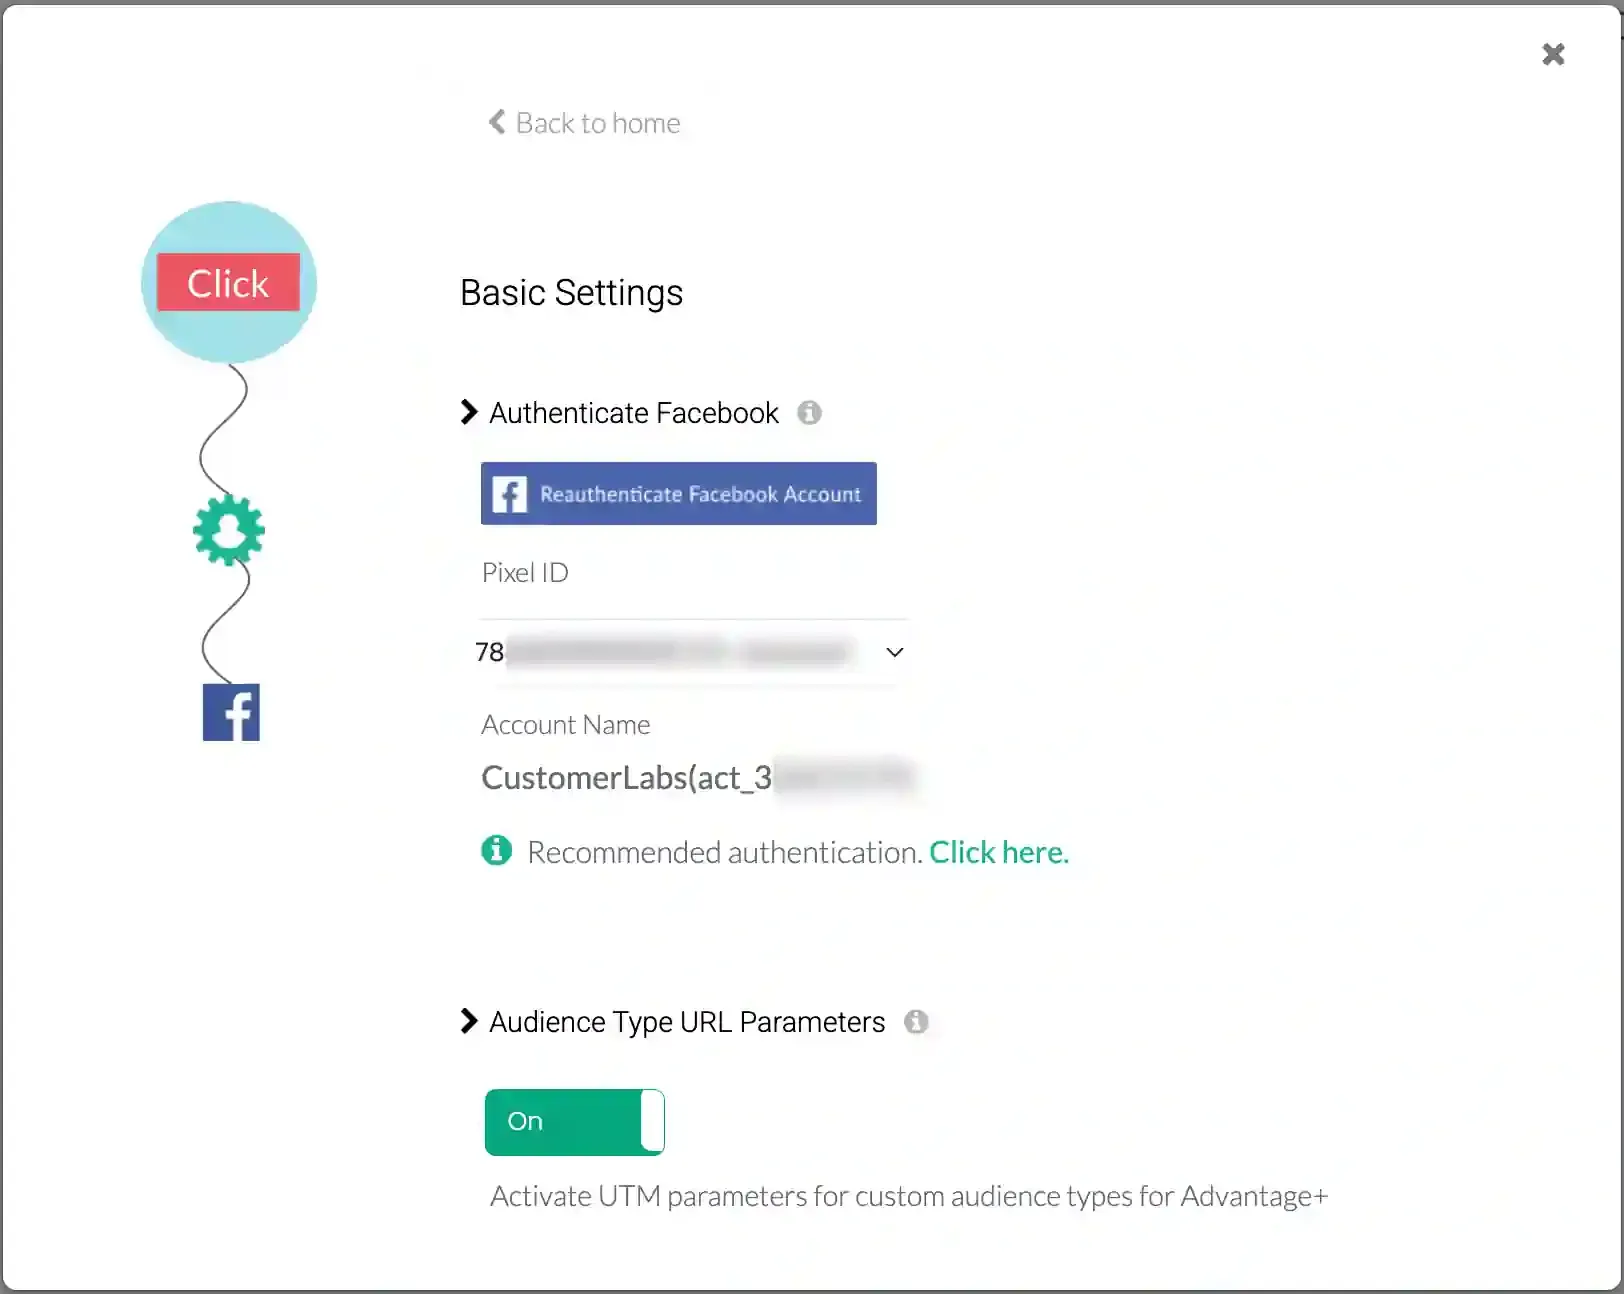
- Choose the Ad Account and Pixel from the dropdown in the CustomerLabs Integration Panel and Save.
- Turn on the toggle for Send data via server-side if you wish to send data via the conversion API / server.
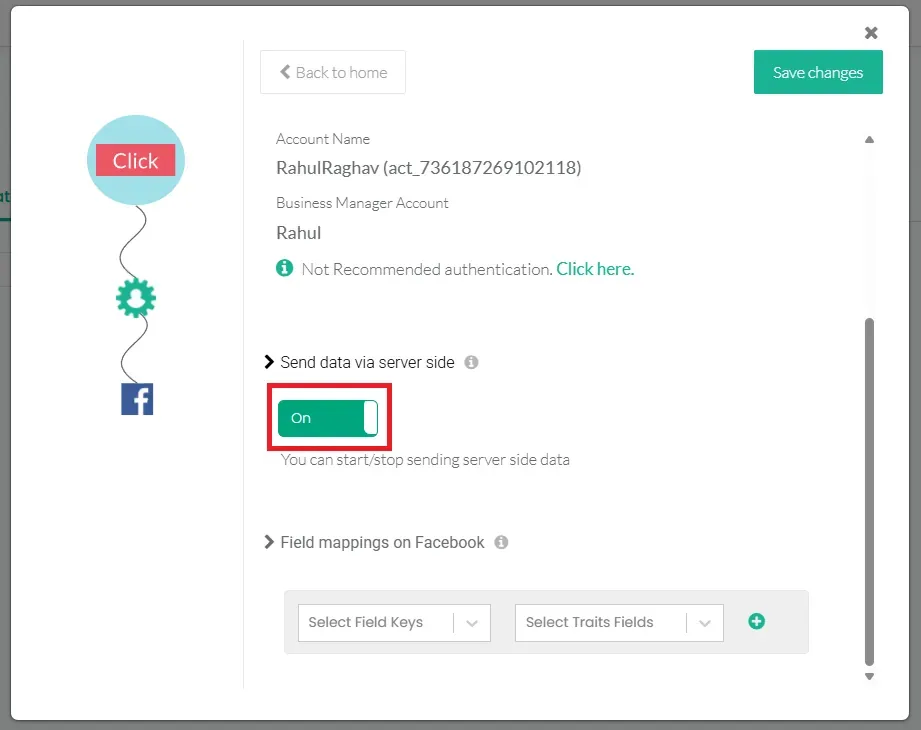
- Click Save Changes in CustomerLabs Configuration Settings.
Alternative Authentication (Not Recommended)
Section titled “Alternative Authentication (Not Recommended)”-
In CustomerLabs, go to Destinations → Facebook → Configuration Settings.
-
Click on Not Recommended authentication.
-
Choose the Facebook Pages to which the business is associated.
-
Choose your Meta Ad account and Pixel from the drop-down.

-
Click Save Changes.
Updating Configuration or Authentication Details
Section titled “Updating Configuration or Authentication Details”If you need to change details (Ad account, Pixel, Business Manager, etc.) after authentication:
-
Click the Reauthenticate Facebook account button in Configuration Settings.
-
Update the necessary details.
If you previously connected via the Not Recommended Authentication, you can switch to the new recommended method by clicking near “Recommended Authentication”.
-
Click on “Recommended Authentication” in the Configuration settings.
-
Authenticate Facebook account as shown in Recommended Authentication section.
Field Mappings
Section titled “Field Mappings”Properly mapping fields is critical for event matching.
- Ensure you map the
lead_id(or your custom field name for the lead ID) in the Field Mappings section. - If you named the
lead_idfield differently in your Source, ensure it is mapped correctly here. - Click Save Changes.
Setup Event Workflow
Section titled “Setup Event Workflow”After authentication, configure the event workflow to sync your lead data with the Meta CRM pixel.
-
Go to Destinations → Meta CRM Pixel → Setup event workflow.
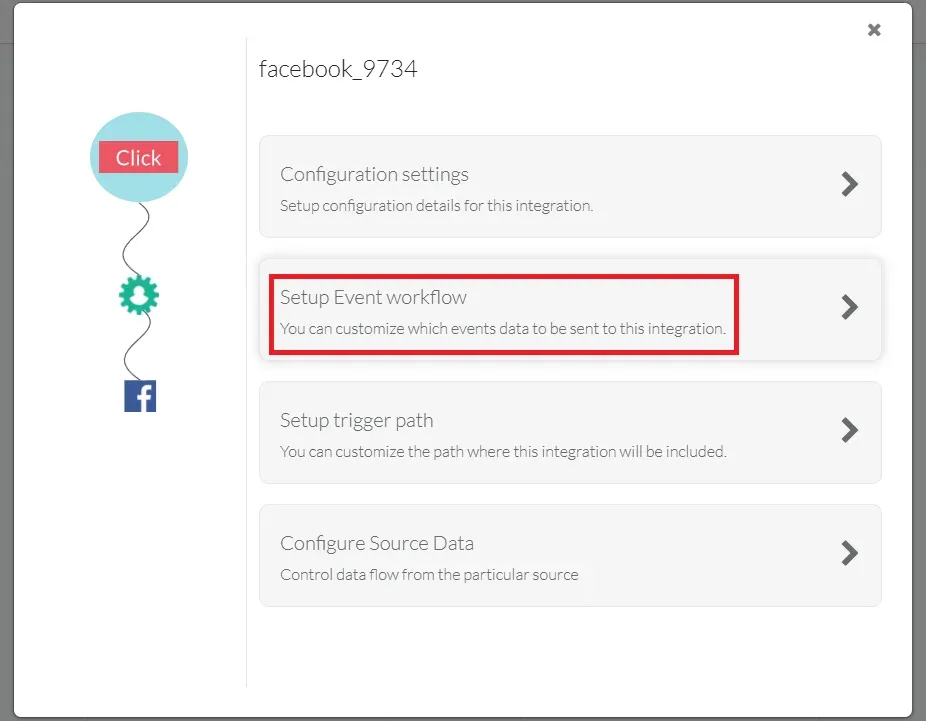
-
Toggle ON the lead events that you are receiving via your Source (e.g., CRM events or Facebook Lead Form events).
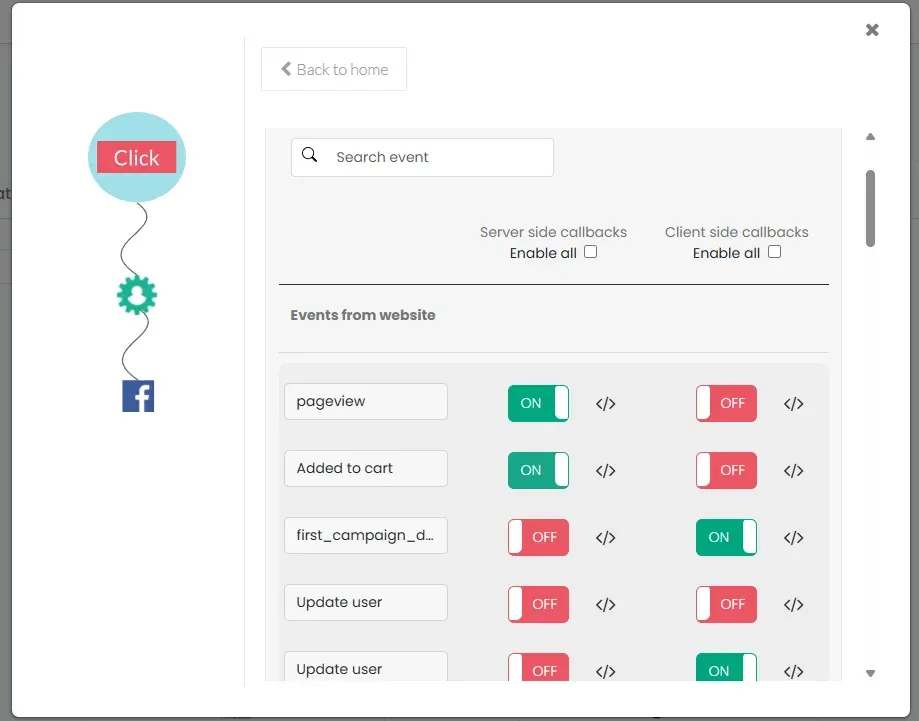
-
Click Save Changes.
You have now successfully integrated the Meta CRM pixel with your CustomerLabs account. Lead data will begin flowing to your CRM pixel in Meta Events Manager.