Customerlabs CDP Documentation
Klaviyo is a marketing automation platform for sending personalized emails and SMS messages to engage and retain your targeted audience.
Integrate CustomerLabs CDP with Klaviyo to sync your unified customer behavior data to target and convert the high-intent audience by sending personalized emails and SMS at the right time.
Authentication
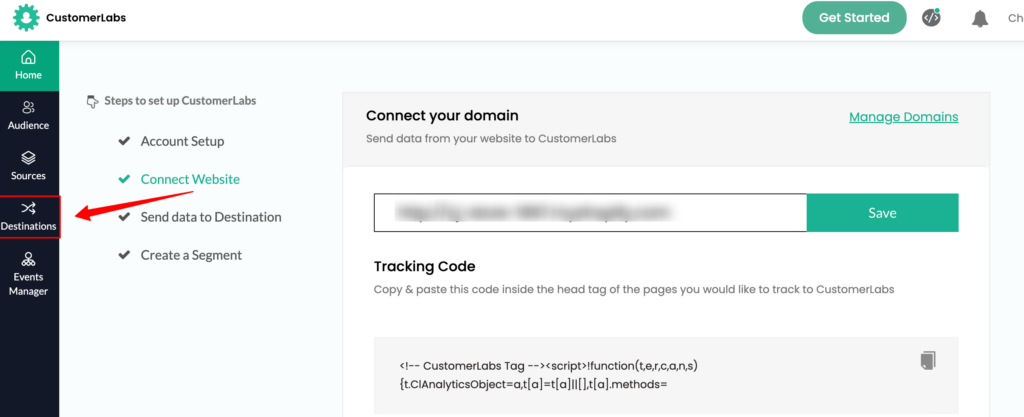
1. Login to CustomerLabs account and Navigate to Destinations page.
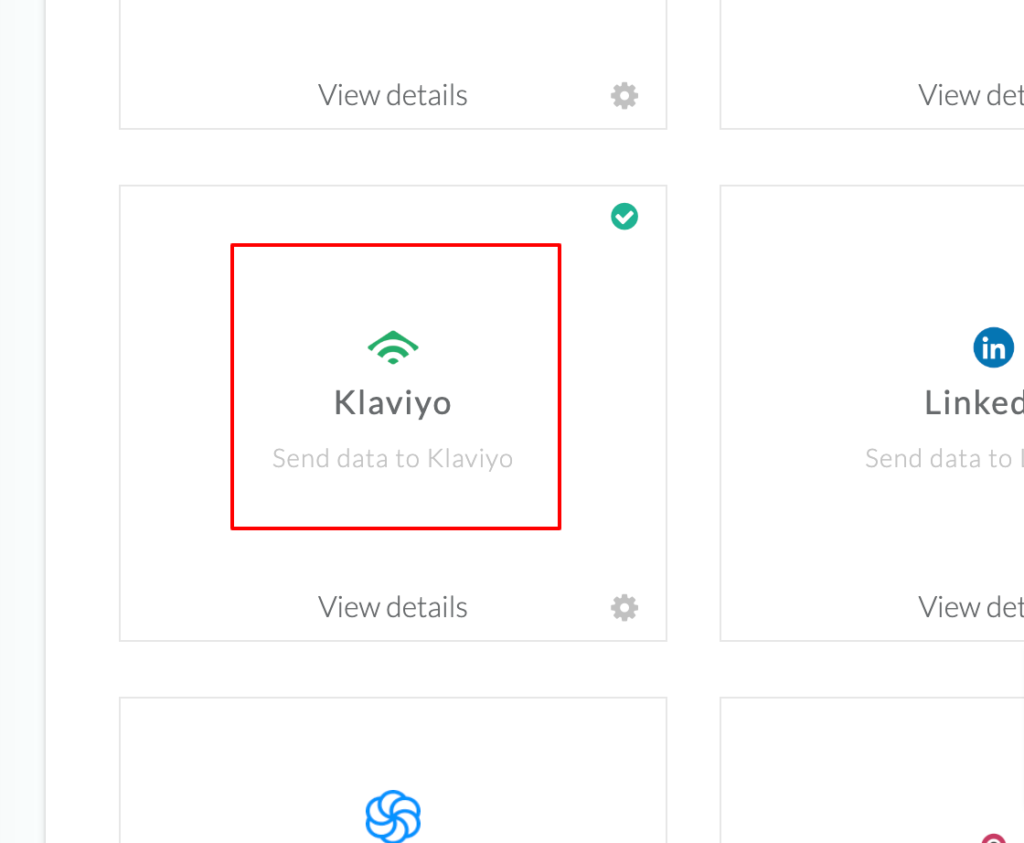
2. Search and choose Klaviyo from the list of destinations.
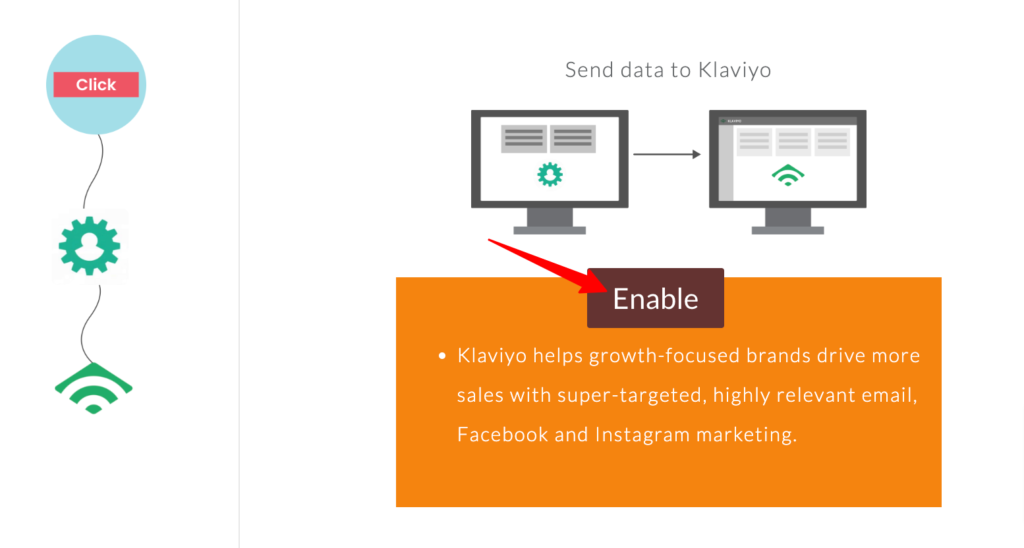
3. Click Enable to setup the configuration.
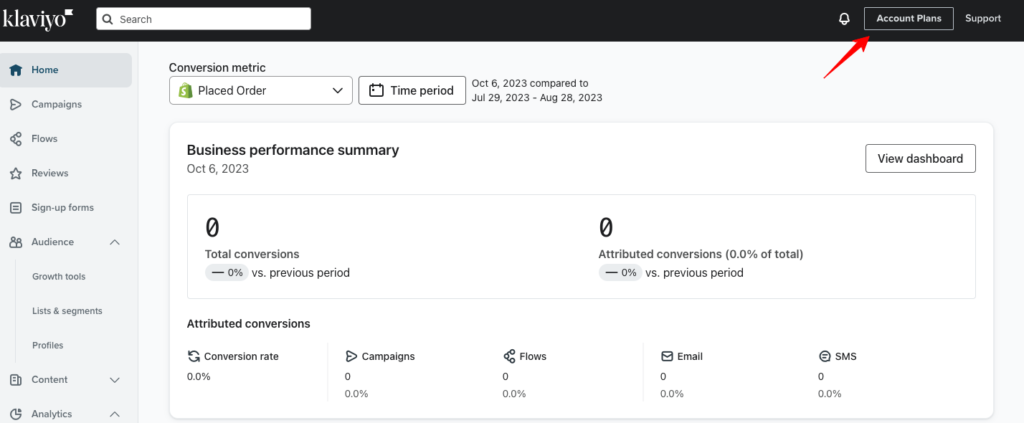
4. Now, log in to your Klaviyo account → Go to Account Plans
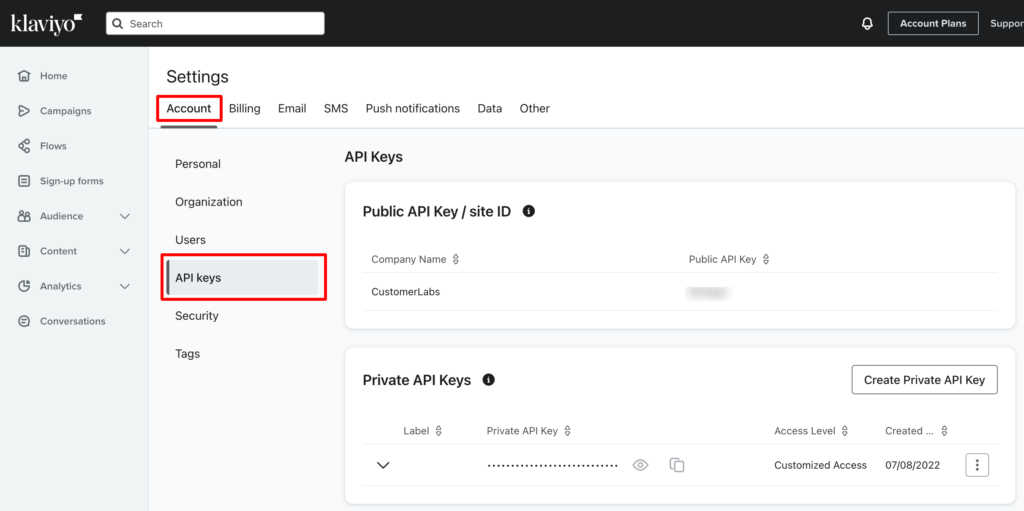
5. Go to Settings → Accounts → API keys
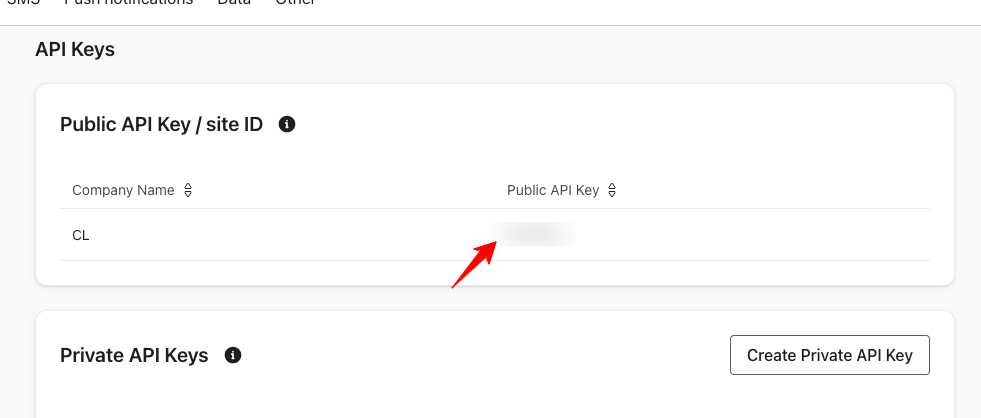
6. Copy the Public API Key
7. Go to your CustomerLabs account → Destinations → Klaviyo → Configuration settings.
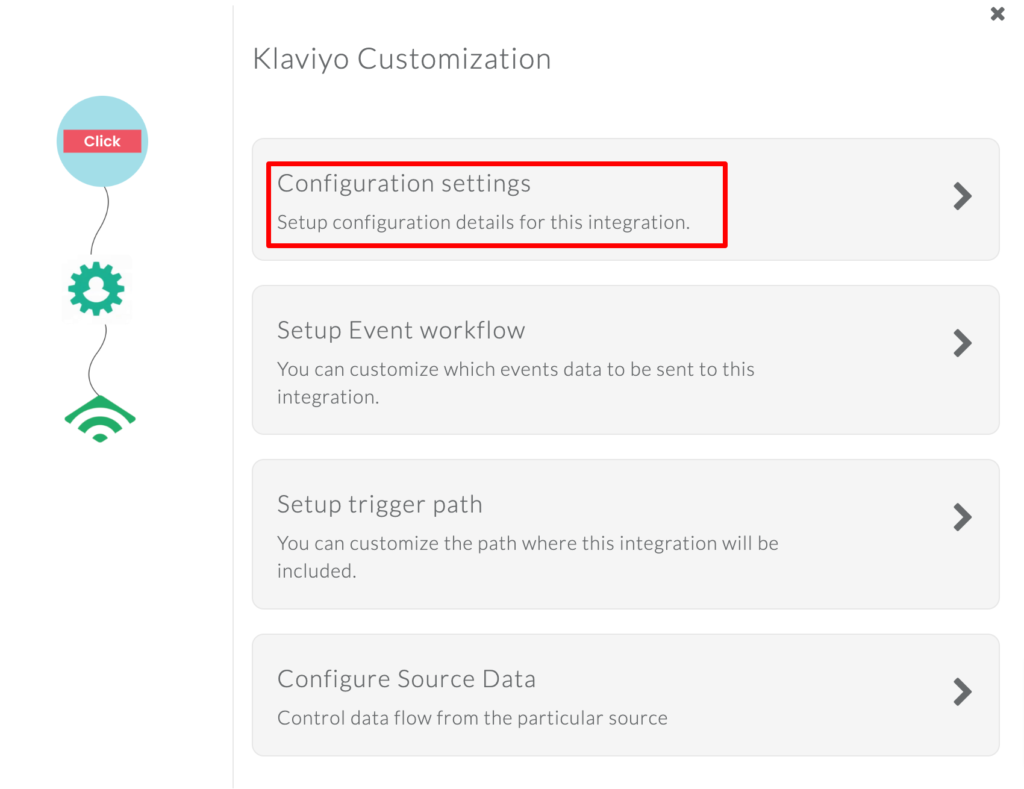
8. Paste the Public API Key in the box as shown in the image below.
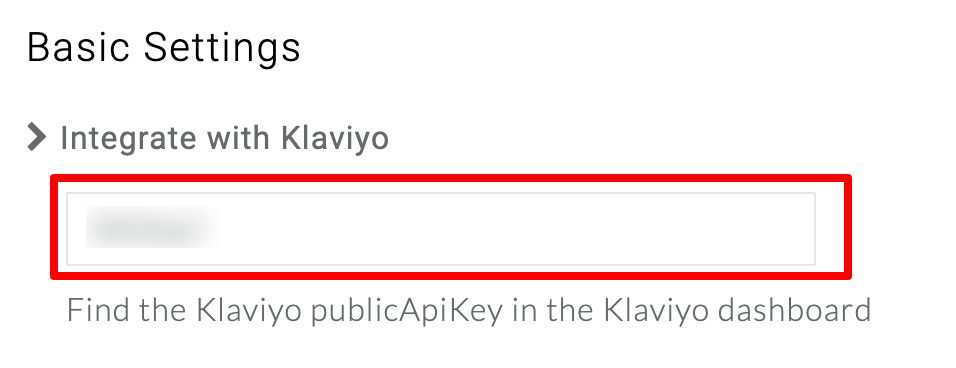
9. Again go to your Klaviyo Account → Settings → API Keys
10. Create Private API Key if you don’t have one already.

Note: While creating a Private key, give Full access to edit the Lists, Segments, Events, Profiles, Subscriptions and other events you want to edit using CustomerLabs.
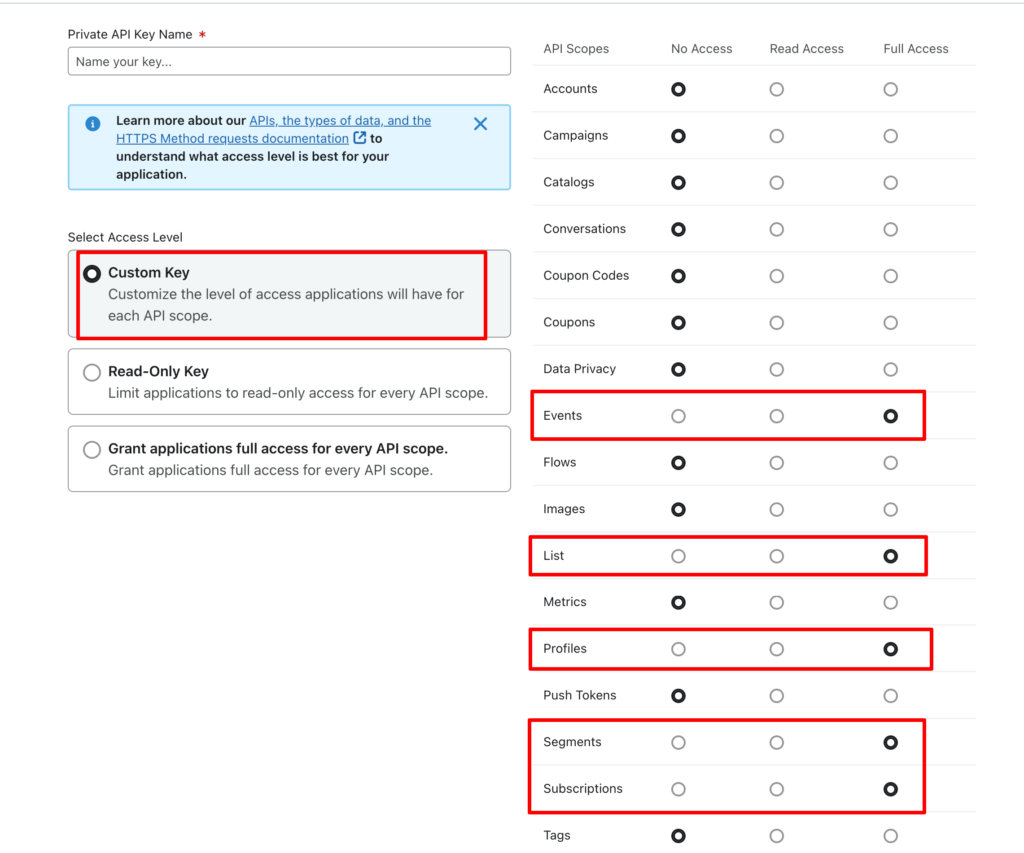
11. Copy the Private API Key.

12. Go to your CustomerLabs account → Destinations → Klaviyo → Configuration settings.
13. Paste the Private API Key in the box as shown in the image below.
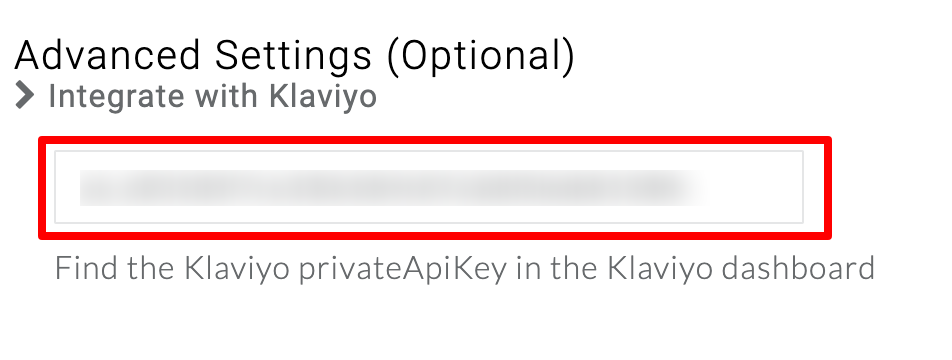
14. Click Save Changes.
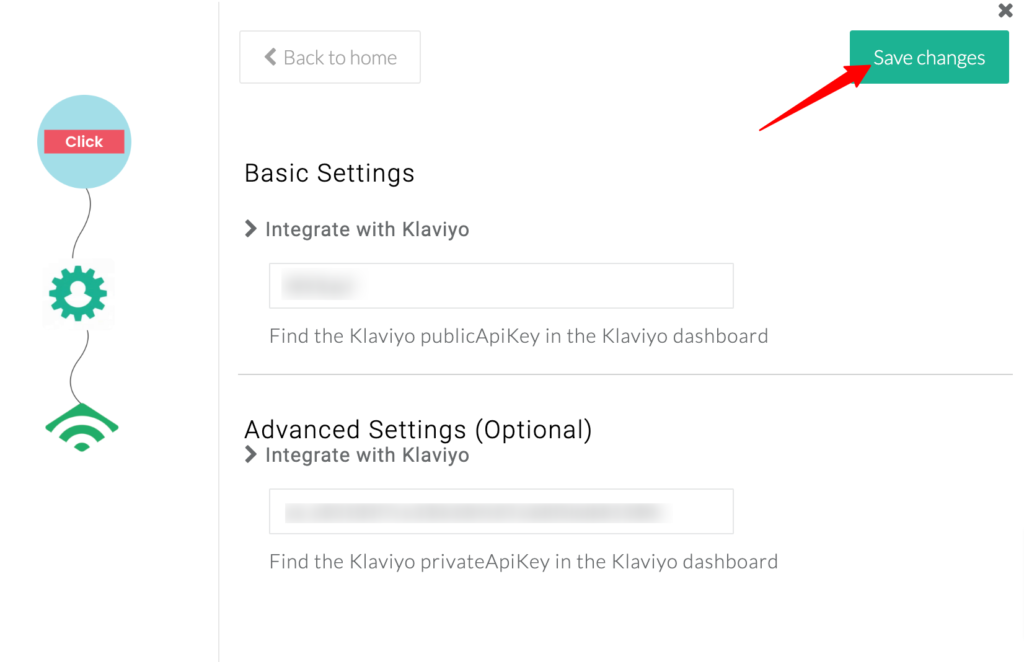
Event Workflow Setup
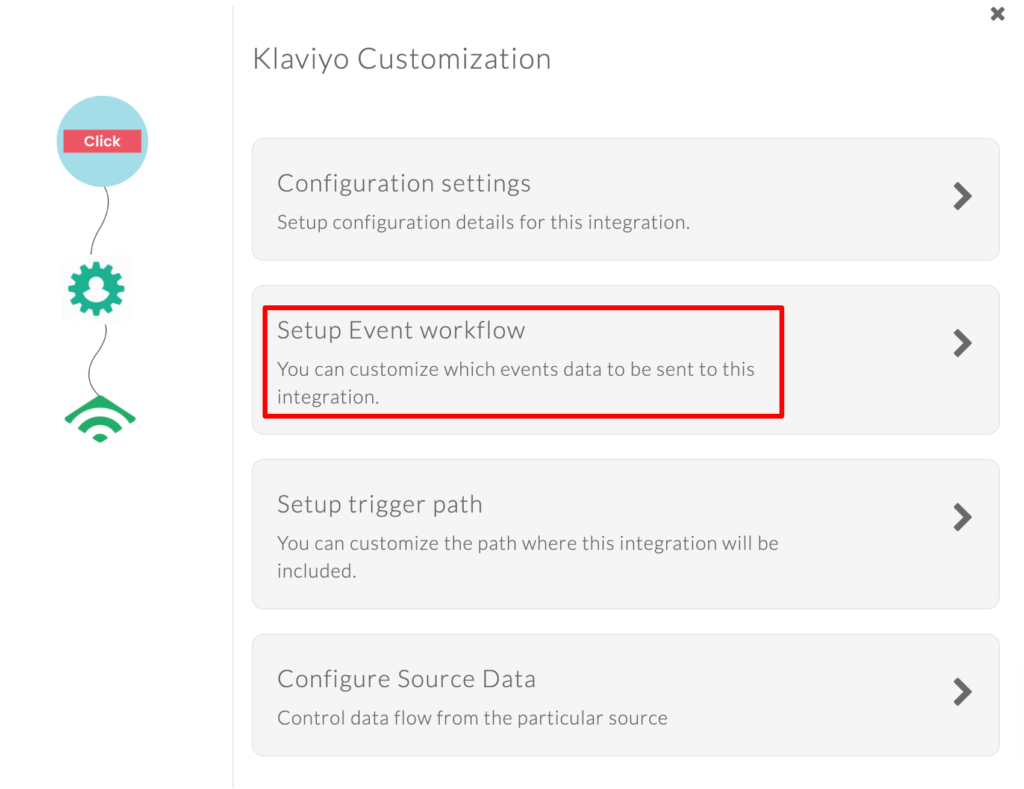
1. To send the required events to Klaviyo, Go to Setup Event workflow.
2. Turn ON the toggle for the events that you want to send for either client_side or server_side (Don’t turn on both – to avoid duplication).
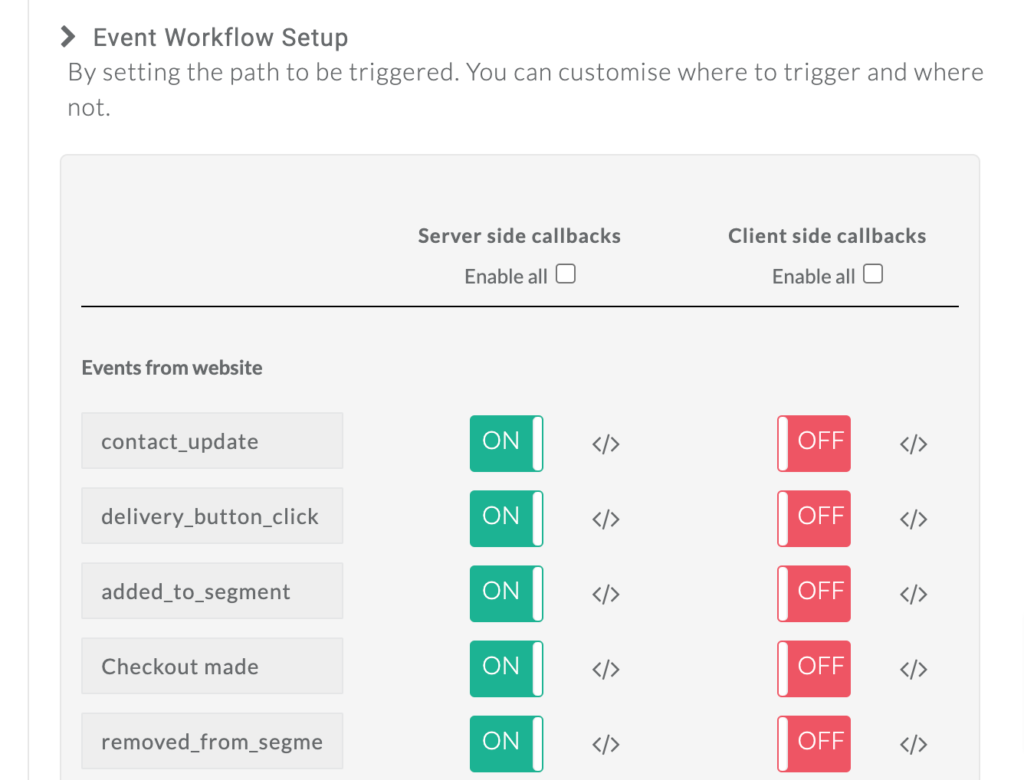
3. Click on Save changes.
You have now integrated Klaviyo with CustomerLabs to automatically send the events data.
Check if you are receiving the events
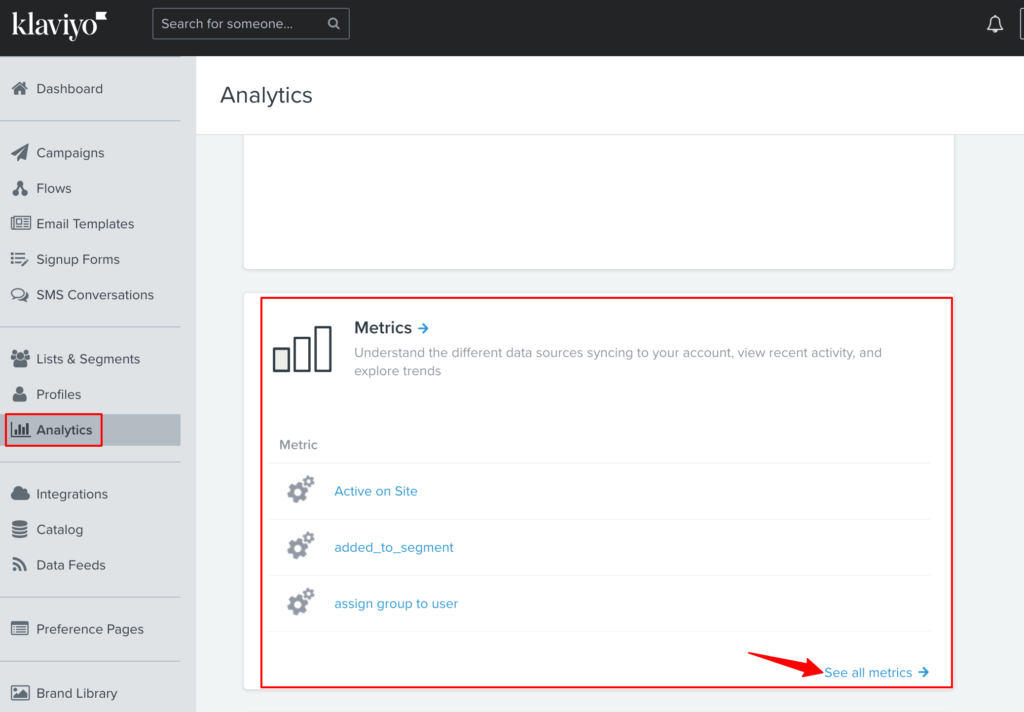
1. Go to your Klaviyo account → Analytics → Metrics
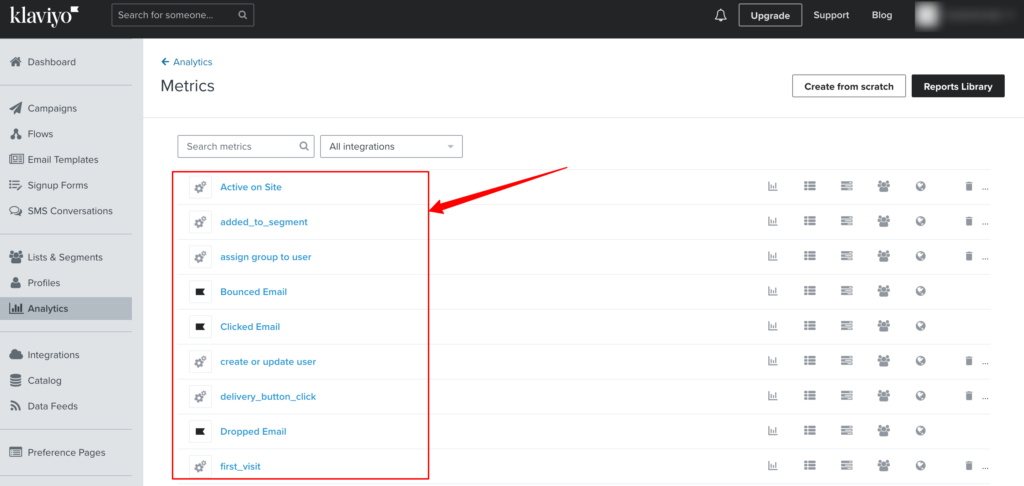
2. You will see the events received from CustomerLabs here.
Sync the audience with Klaviyo
You can sync the audience created in CustomerLabs with Klaviyo as a customer list by creating an audience segment in CustomerLabs and syncing it with an existing list or a new list in Klaviyo.
Make sure you have completed the autnhentication of your Klaviyo account before syncing.
Few things to note before syncing the audience with Klaviyo:
1. Subscription type:
Subscription type option is to add users in the audience list to the specific subscription type (Email/SMS).
You have to enable SMS subscription in your Klaviyo Account before syncing the audience list with the SMS subscription type. Learn more
2. Opt-in Process option:
By default, the Opt-in process is set to Double Opt-in when you create a new list. But if you want to change the Opt-in to Single Opt-in, you will have to log in to your Klaviyo account → Search for the list you created → Change the Opt-in process setting. Learn more about Opt-in process
3. Consent Status:
Consent status indicates whether the users in the audience list have subscribed/unsubscribed to receive SMS and/or Email.
Based on the consent status option provided such as Subscribed, Never Subscribed and Unsubscribed, the user profiles will be updated with the marketing consent status respectively. Learn more about consent status
Options Explained:
a. Subscribed – The users will be added to the SMS and/or Email subscription and the users will be sent a notification if the Opt-in setting is set to Double Opt-in and once the users accept the subscription, the status is updated to “Susbcribed”
(or)
It will directly be added to the list and shows the profiles statuses as “Subscribed” if the setting is set to Single Opt-in
b. Never Subscribed – The users with implicit consent (they have given their email ID at the checkout but they have not explicitly mentioned they don’t want to receive marketing messages) are tagged as “Never Subscribed”. This is applicable only for Email subscription type. Learn more about subscriptions and consent.
If this option is chosen, the users will be added to the list in Klaviyo directly.
c. Unsubscribed – The users in the list would be unsubscribed from SMS and/or Email subscriptions.
4. Syncing anonymous users with Klaviyo:
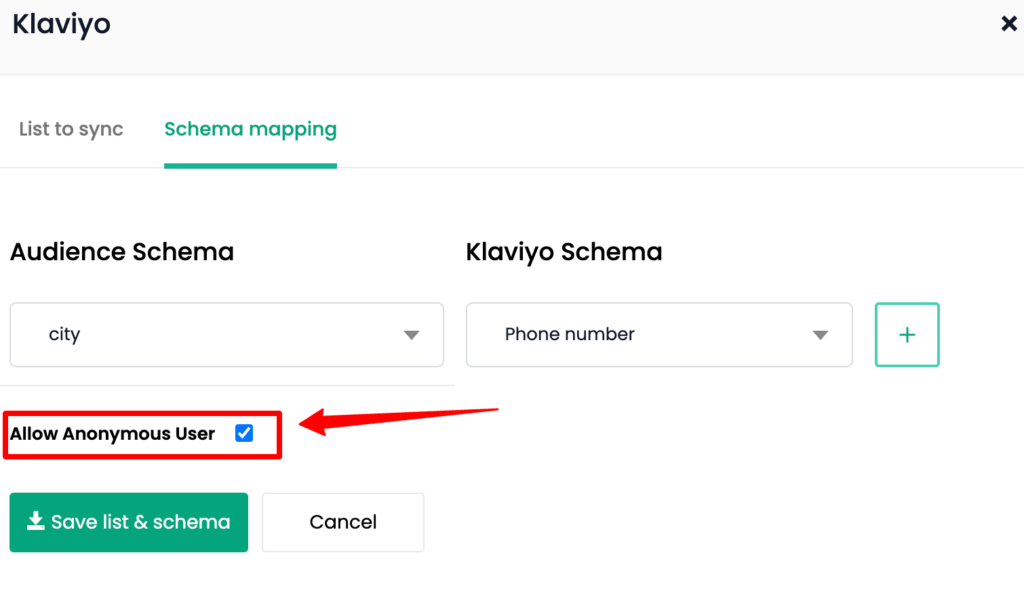
By enabling this option while syncing an audience, all the anonymous users (For eg. users without an email ID, name or phone number) are synced with Klaviyo and a new user profile is created in Klaviyo for each anonymous user.
Since in Klaviyo, the pricing is based on the number of user profiles, you can enable this anonymous users sync based on your requirements.
Steps to sync audience with Klaviyo:
Here’s how you can sync the audience with Klaviyo as a customer list:
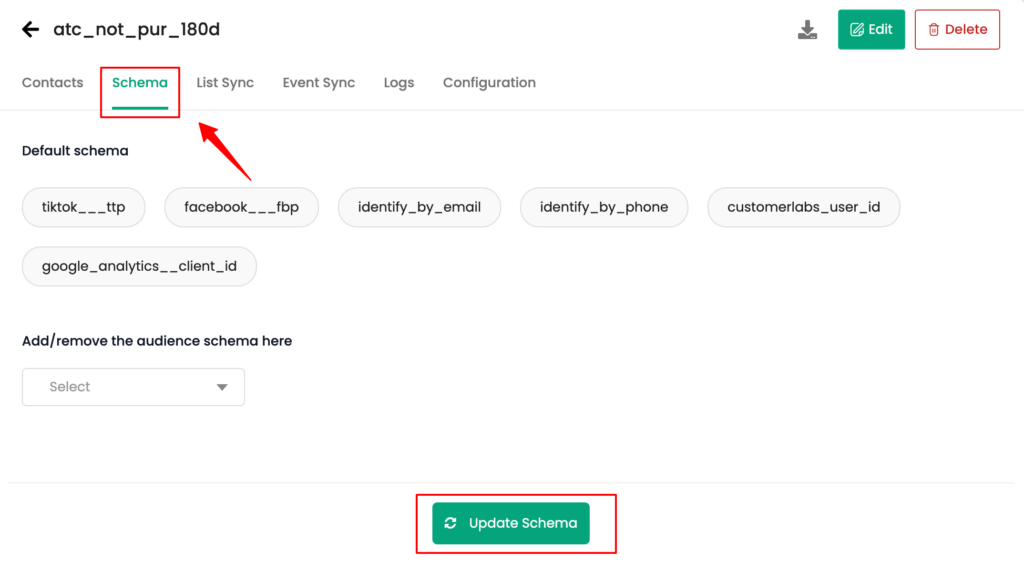
1. Create a new segment with the desired events or user traits in CustomerLabs → Go to Schema tab of the segment created.
2. Configure the Segment Schema as needed for the customer list to be created or synced in Klaviyo.
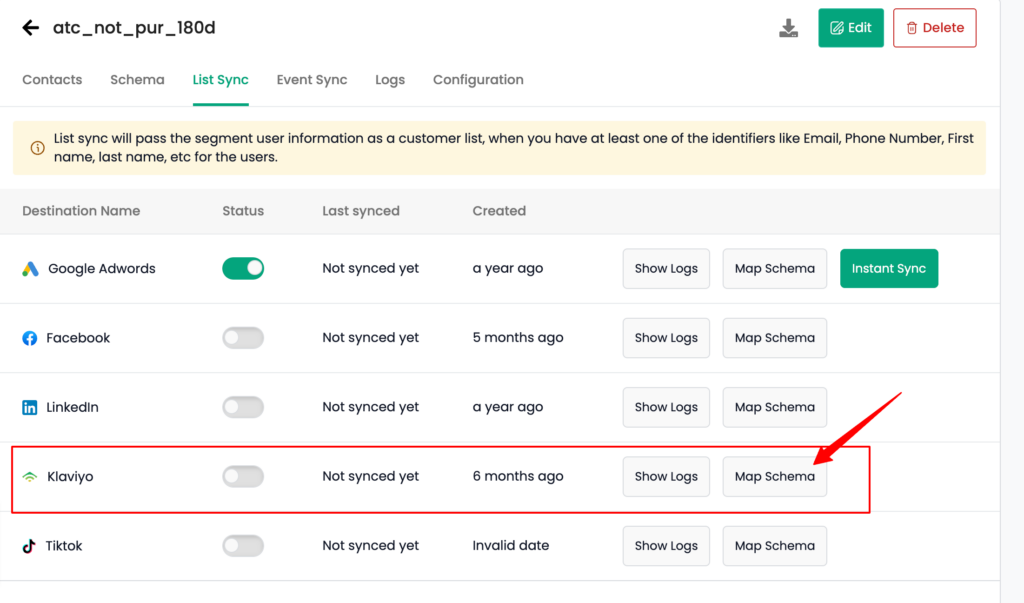
3. Now go to the Destinations tab and click on Map Schema for Klaviyo.
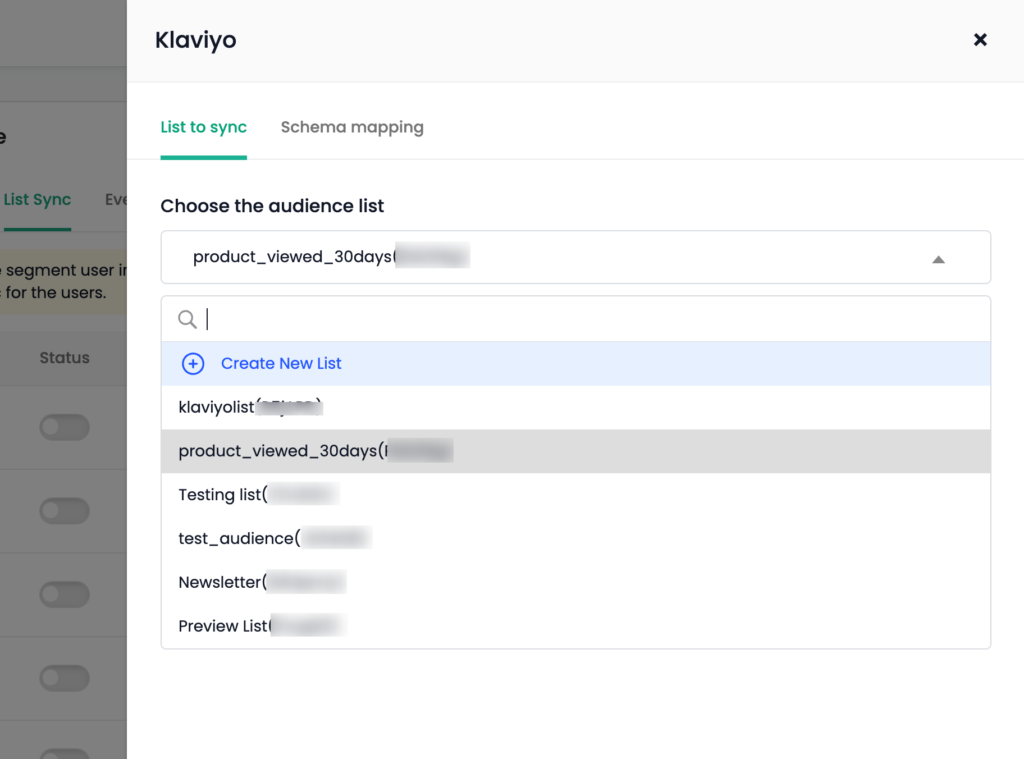
4. In the List to sync tab, choose the audience list from the lists that are already created in Klaviyo or choose Create New List and enter the name for the new audience list.
5. For a new list and an existing list, choose the subscription type for the list from the drop-down.
Note: Subscription type is to add each user profile in this list to email and/or SMS based on what you select. Once chosen, the subscription type is applied to all the users in the list.
For the existing list, the users added to the list after enabling the syncing will be subscribed for the subscription type you choose.
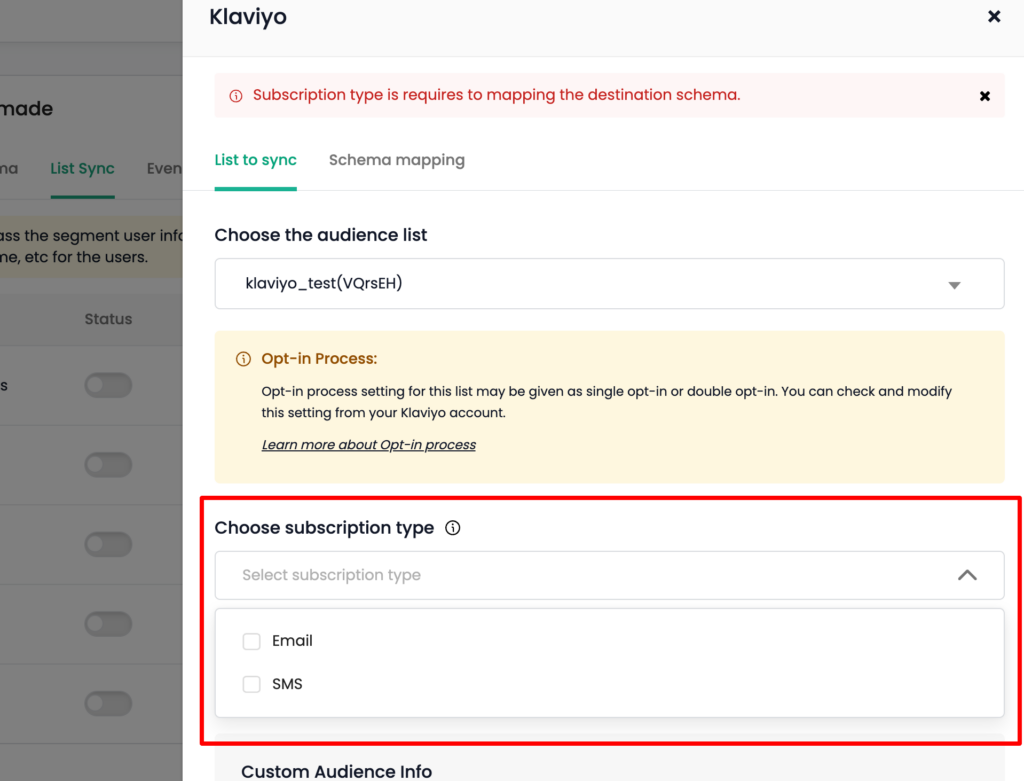
Note: For SMS subscription type, make sure you’ve set up SMS subscription at the account level in your Klaviyo account. Otherwise, the users in this list won’t be synced with your account. Learn more about SMS set up
6. The next step is to choose the Consent status (Subscribed, Never Subscribed, Unsubscribed) from the drop-down.
Consent status is updated for the users in the list based on the option you choose. Depending on the consent status given, the user profiles are updated accordingly in Klaviyo. Check the details about consent status here.
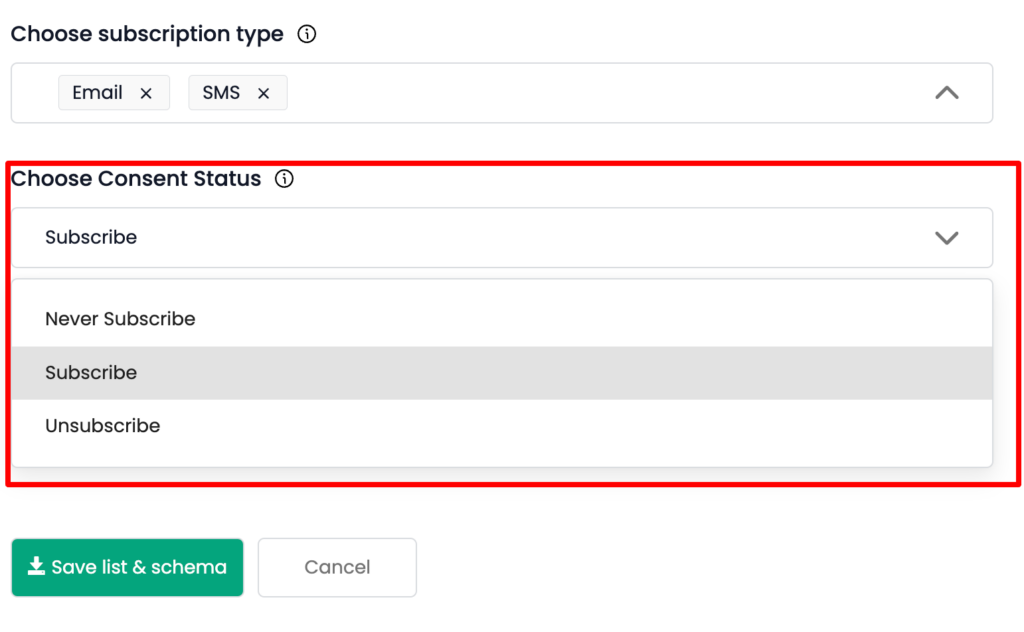
7. Once the audience list is selected or created, Custom audience Info will be displayed.
Note: If it shows “Error Fetching data”, make sure to re-authenticate your Klaviyo account from Menu → Destinations page → Klaviyo.
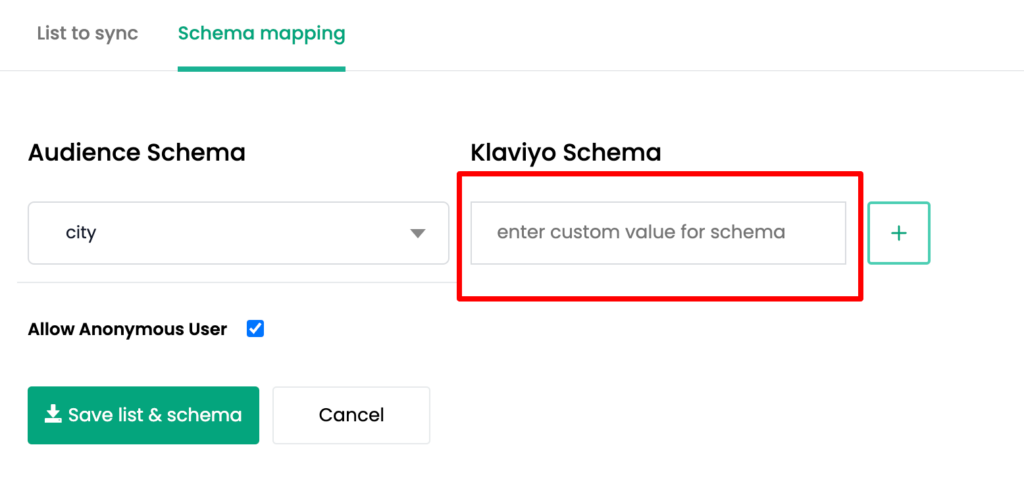
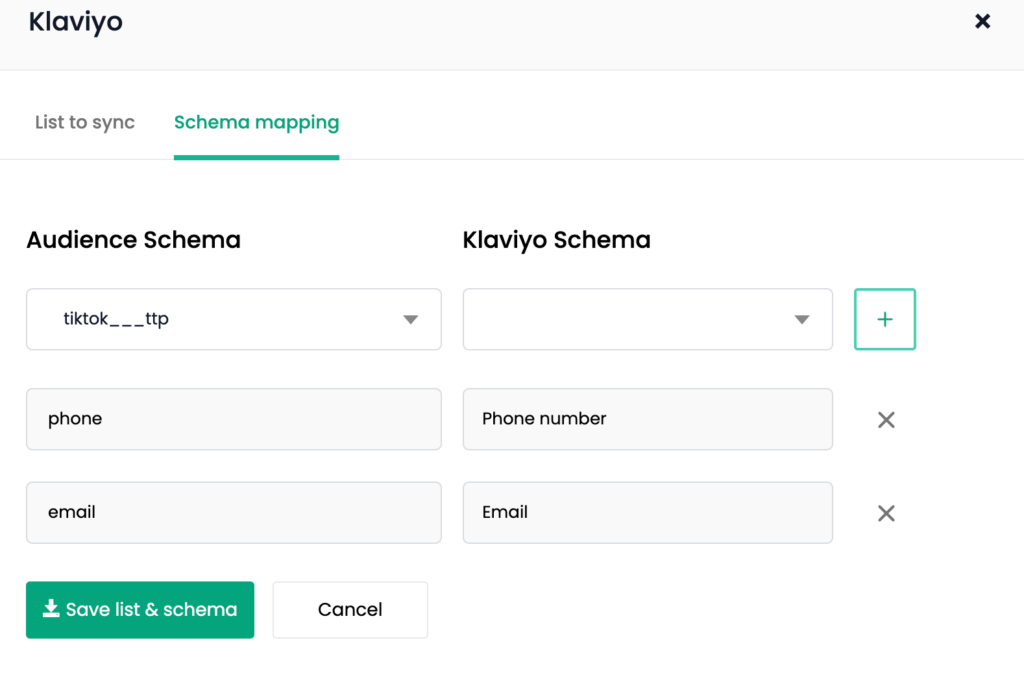
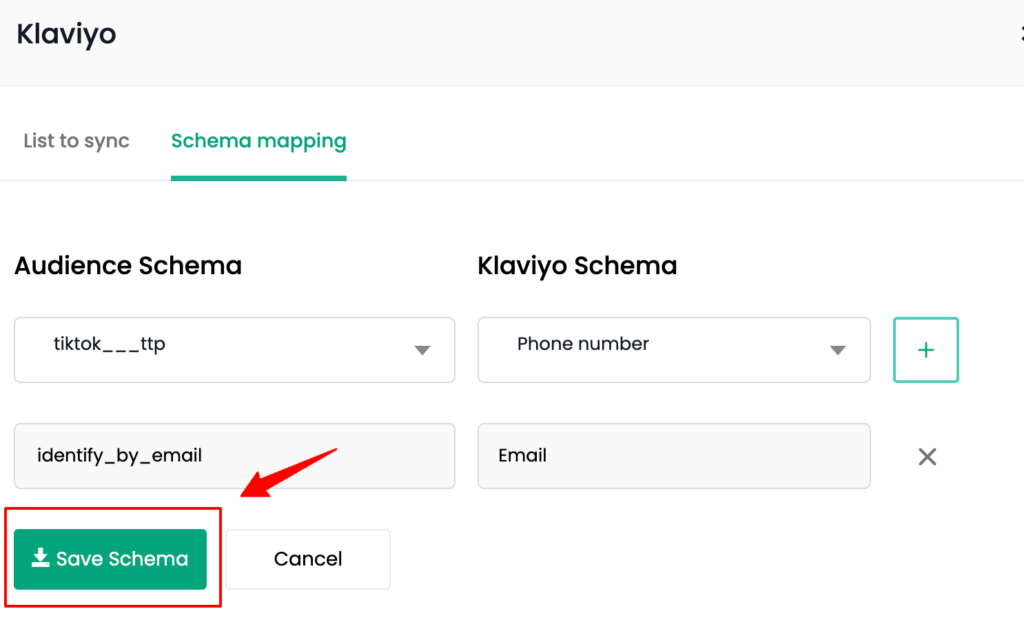
8. Go to the Schema Mapping tab after saving the list and map the audience schema with Klaviyo schema for the identifier and user traits that you have given in Step 2 by adding each schema using “+” button.
You can also add custom Klaviyo Schema to map the Audience schema.
Note:
1. For email subscription type, you have to mandatorily map the “email” schema.
2. For SMS subscription type, you have to mandatorily map the “phone number” schema.
9. If you want to include anonymous users while syncing this list with Klaviyo, tick the checkbox – “Allow Anonymous user”.
Note: Since Klaviyo’s pricing is based on the number of user profiles, you can enable this anonymous users sync based on your requirements. Learn more
10. Once this is done, click Save Schema.
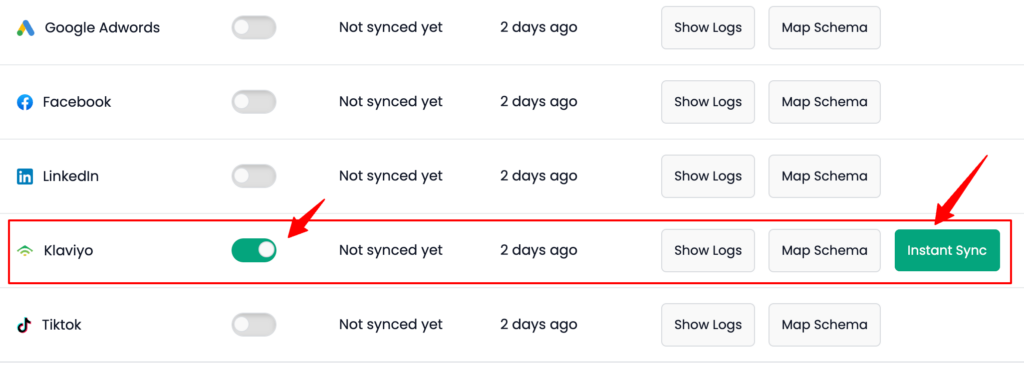
11. Now switch on the toggle under Status for Klaviyo.
12. Click Instant Sync to sync the list now.
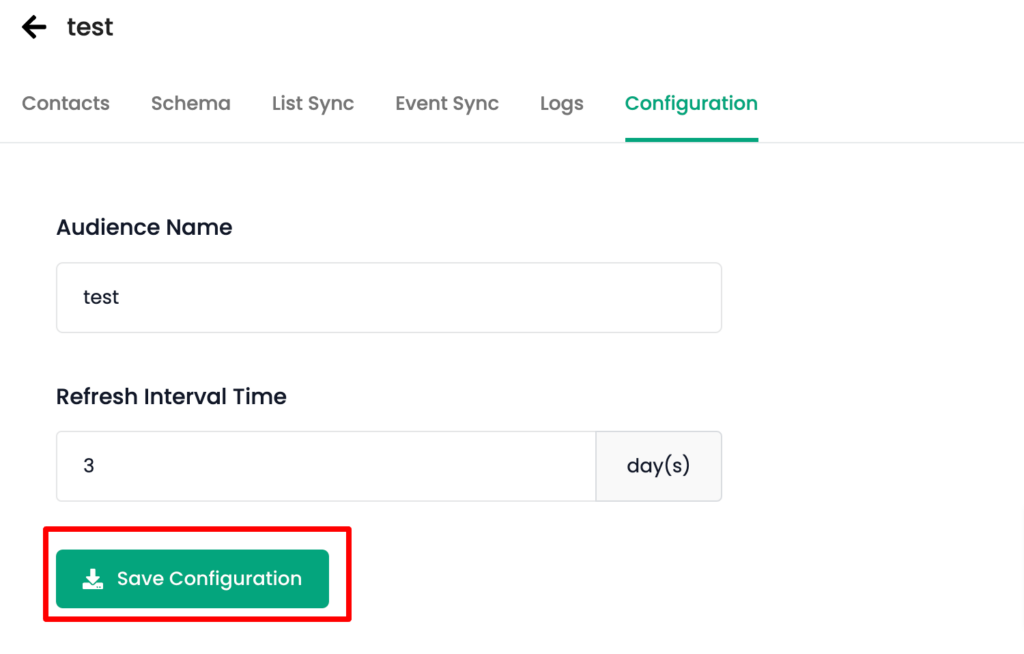
13. Go to the Configuration tab and set the Refresh interval as required → Save Configuration.
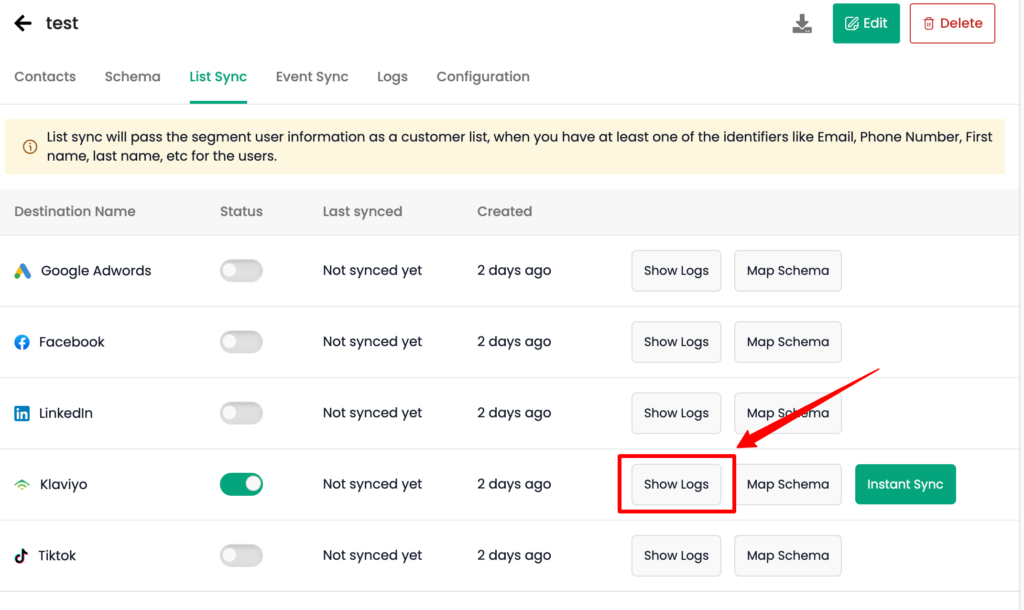
14. You can check the log for the segment from the Logs tab and also the log for Klaviyo by going to the Destinations tab → Klaviyo → Show Logs for the latest sync that has happened.
Check if the audience has been created/synced
You can check whether the list has been created/synced with Klaviyo after 10-15 minutes if you have enabled Instant Sync or after the refresh interval days set for the segment.
Note: If your list is in Double Opt-in setting, the list will be created but the users won’t be added until the users accept the Subscription type (Email/SMS)
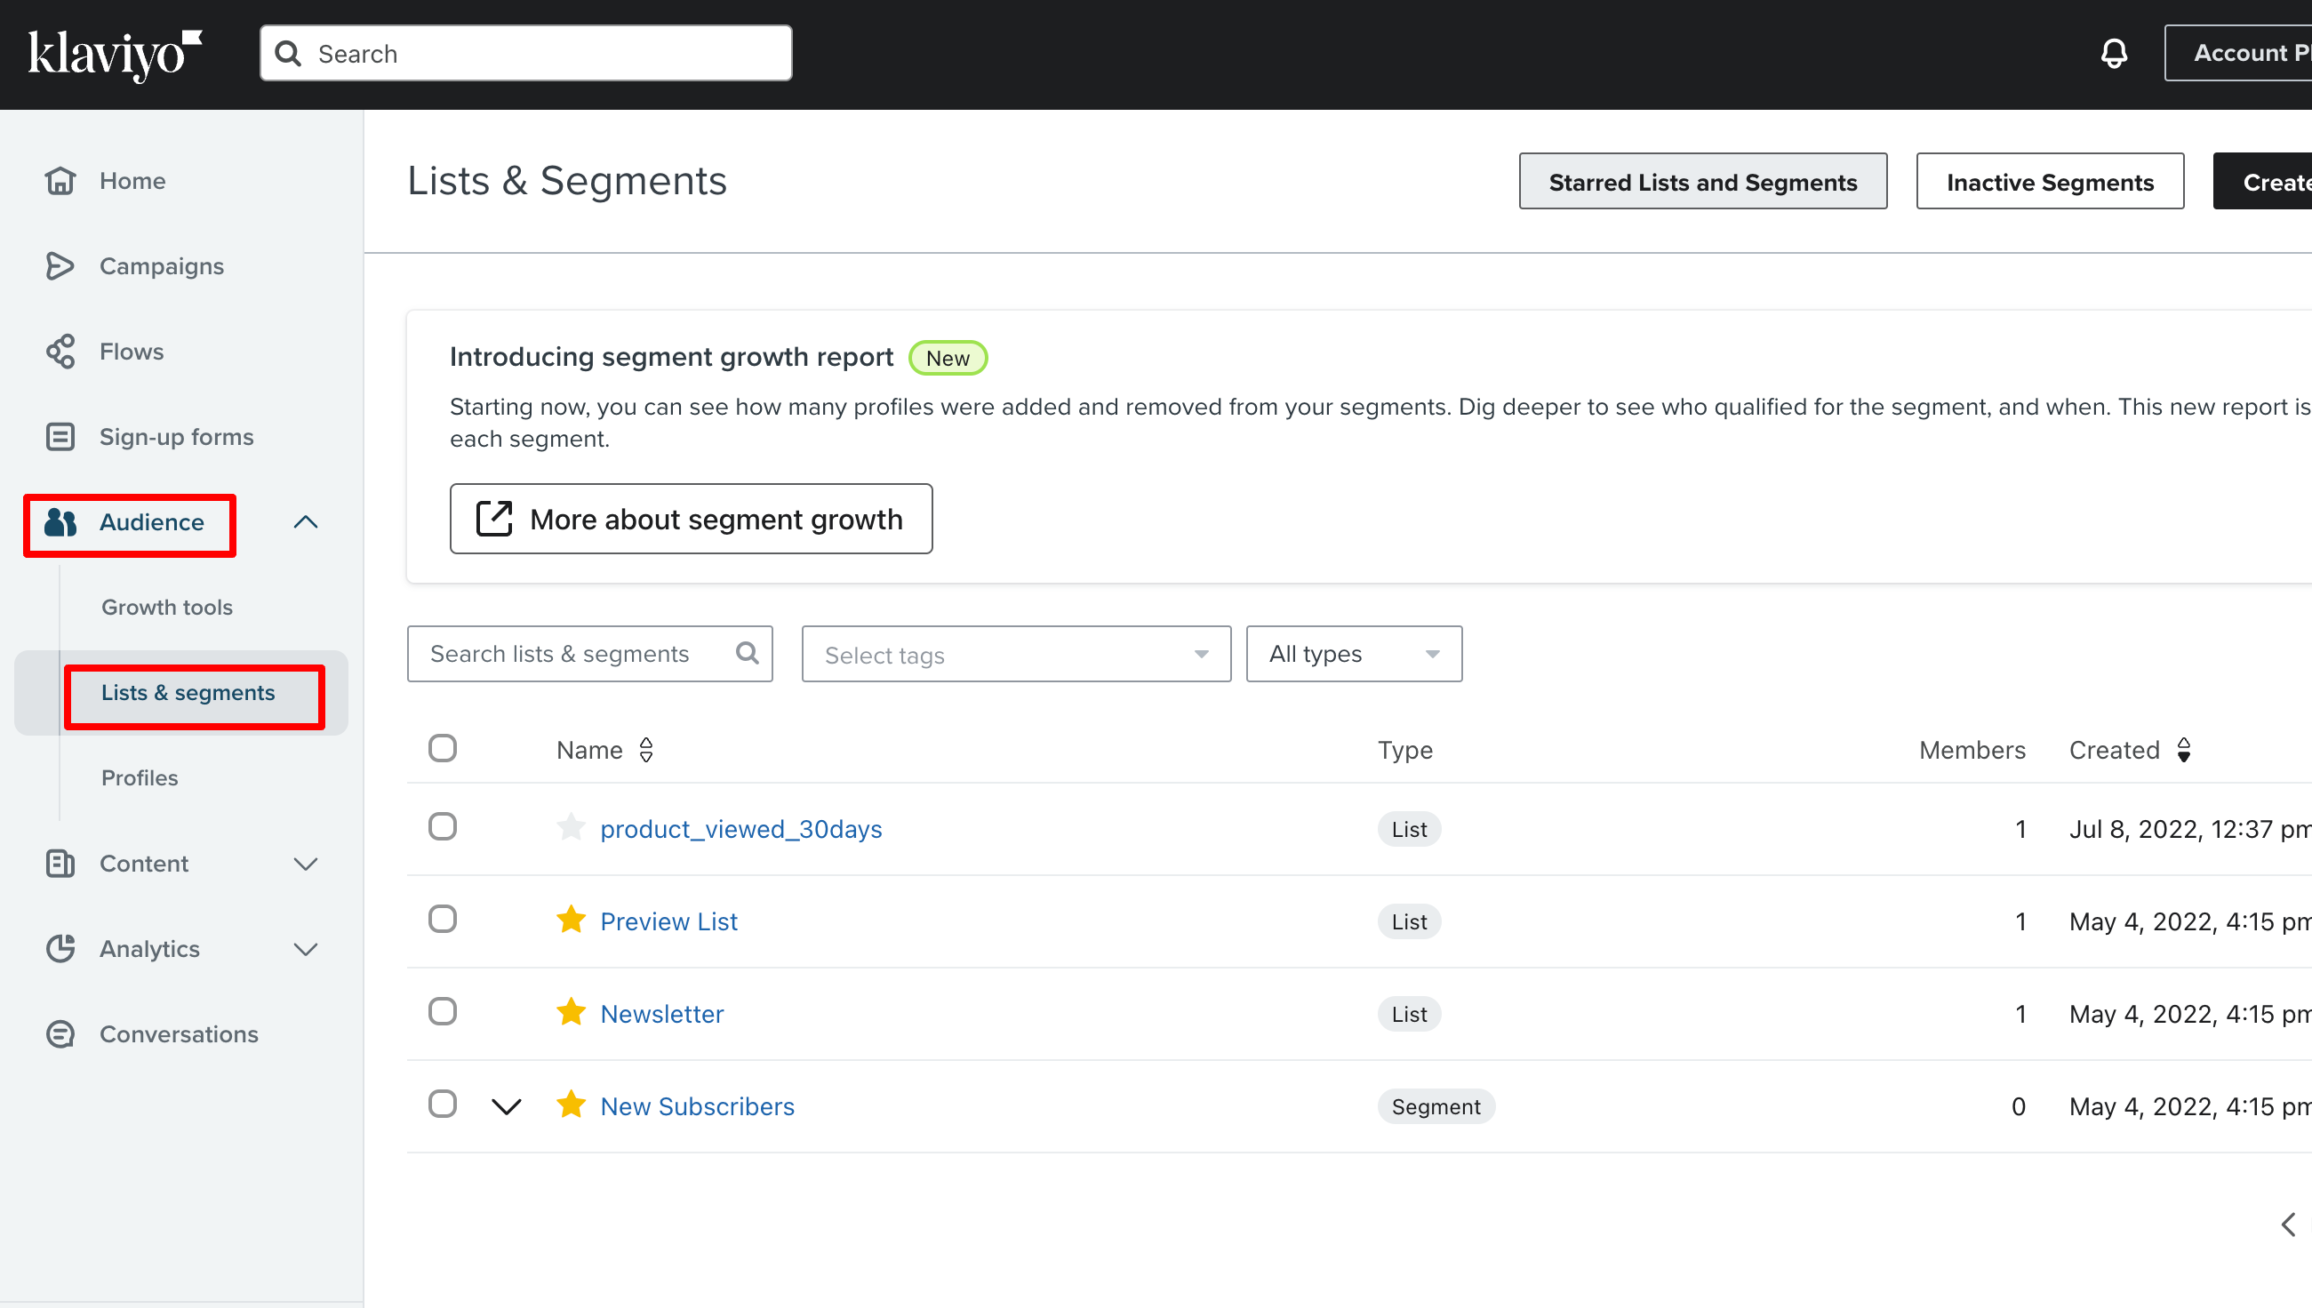
1. Go to Klaviyo → Audiences → Lists & Segments → Check if the audience list has been created under the same name as given in CustomerLabs or the existing list has been updated.
