CSV Upload — Import Customer Data into CustomerLabs
A Source in CustomerLabs is a platform from which data can be brought into CustomerLabs 1PD Ops (First-Party Data Operations).
CSV Upload allows you to import data from a .csv file directly into CustomerLabs. Once imported, the data can be unified with existing customer profiles, enabling a consolidated view of your customer information — all without writing any code.
Getting Started
Section titled “Getting Started”Follow the steps below to set up CSV Upload as a data source in CustomerLabs 1PD Ops.
Step 1 – Navigate to Sources
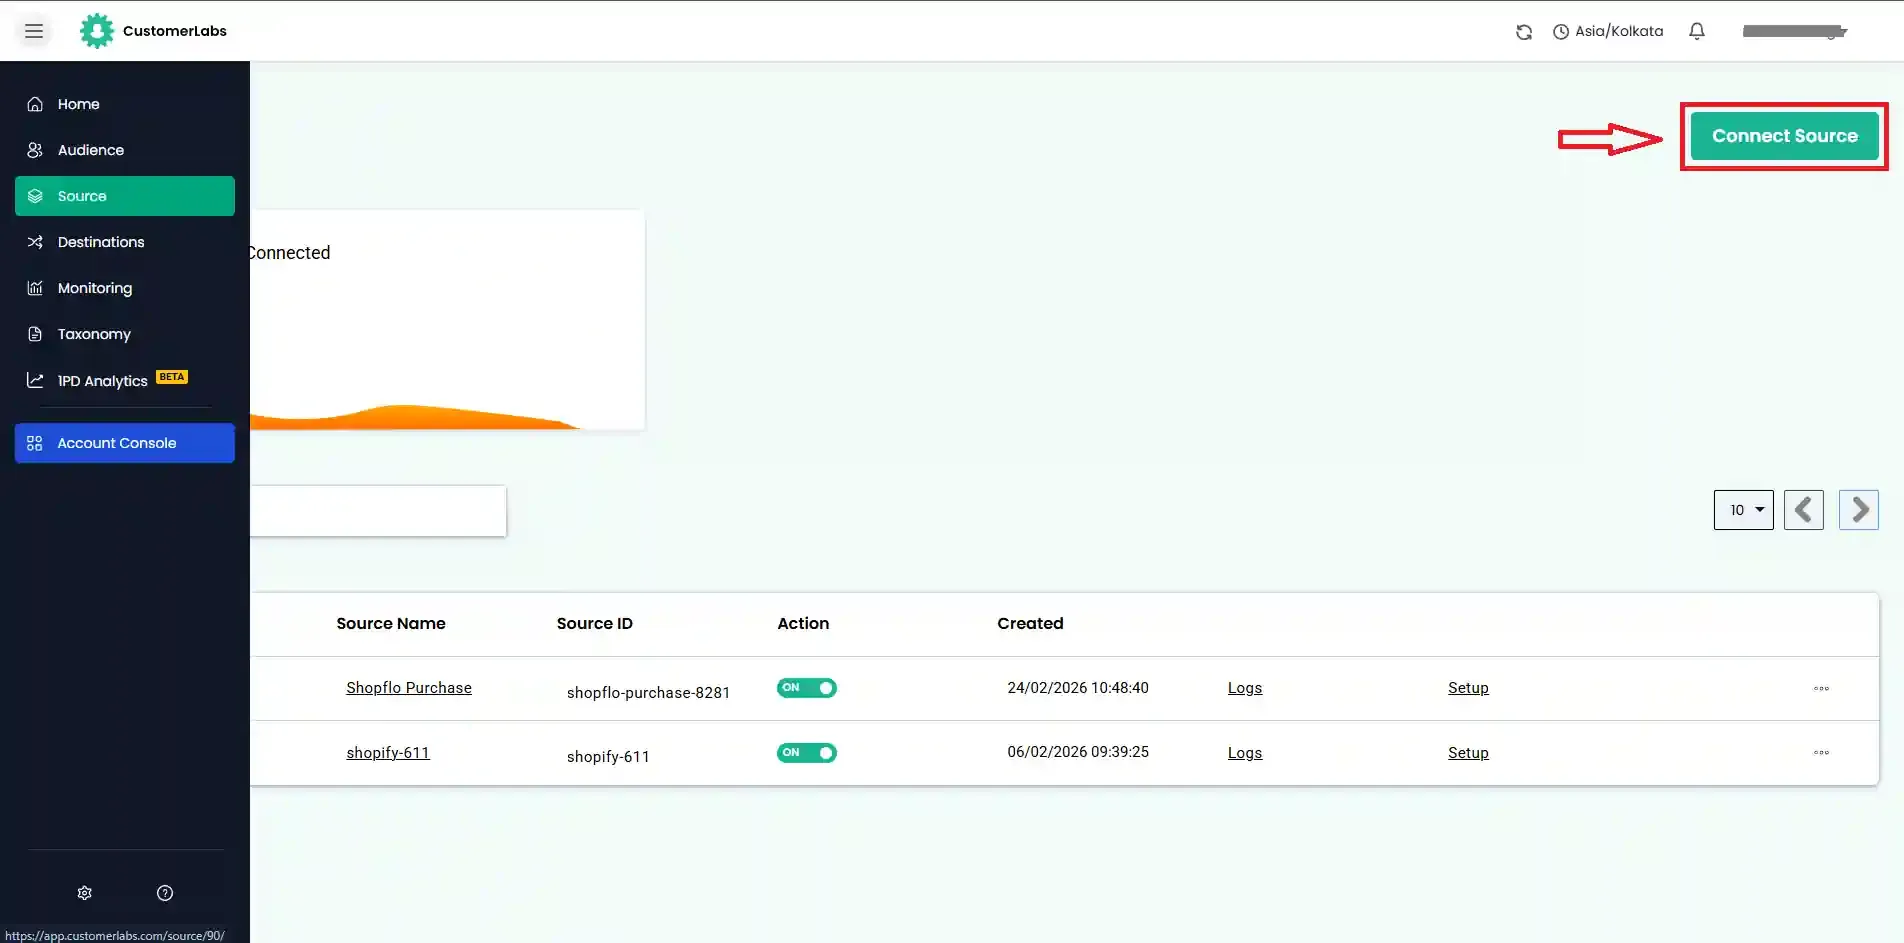
Section titled “Step 1 – Navigate to Sources”- Log in to your CustomerLabs 1PD Ops account.
- Go to Sources → Connect Source.
Step 2 – Select CSV Upload
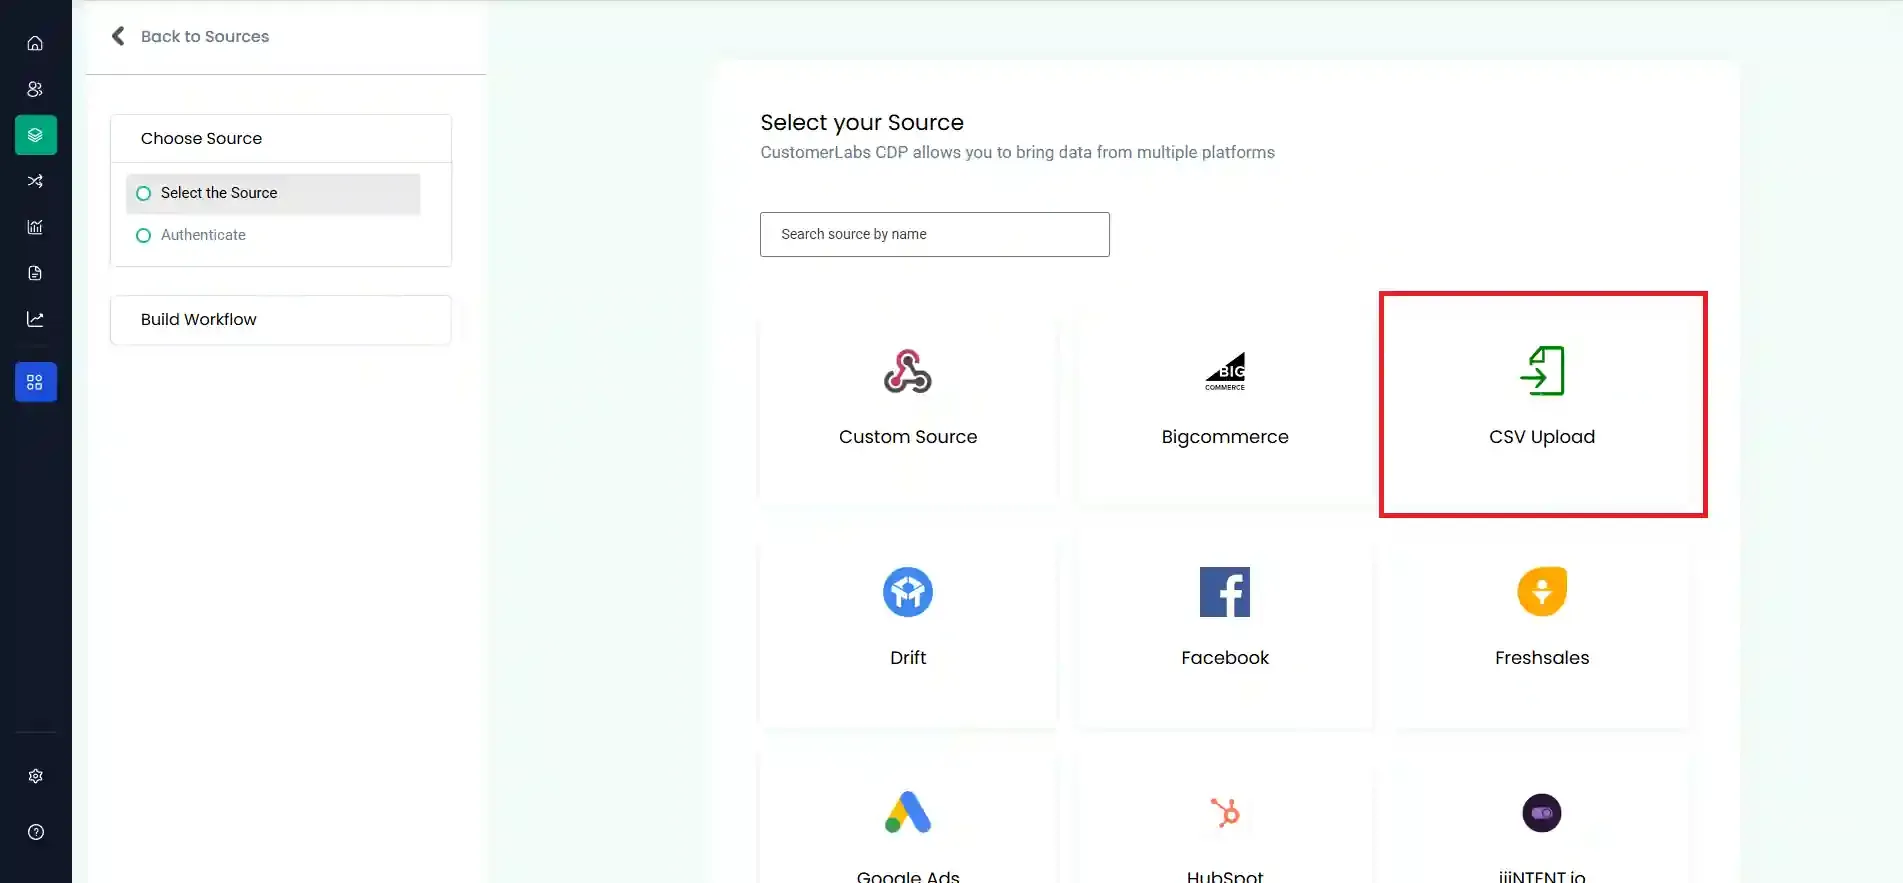
Section titled “Step 2 – Select CSV Upload”- From the list of available sources, select CSV Upload.
Step 3 – Subscribe to CSV Import
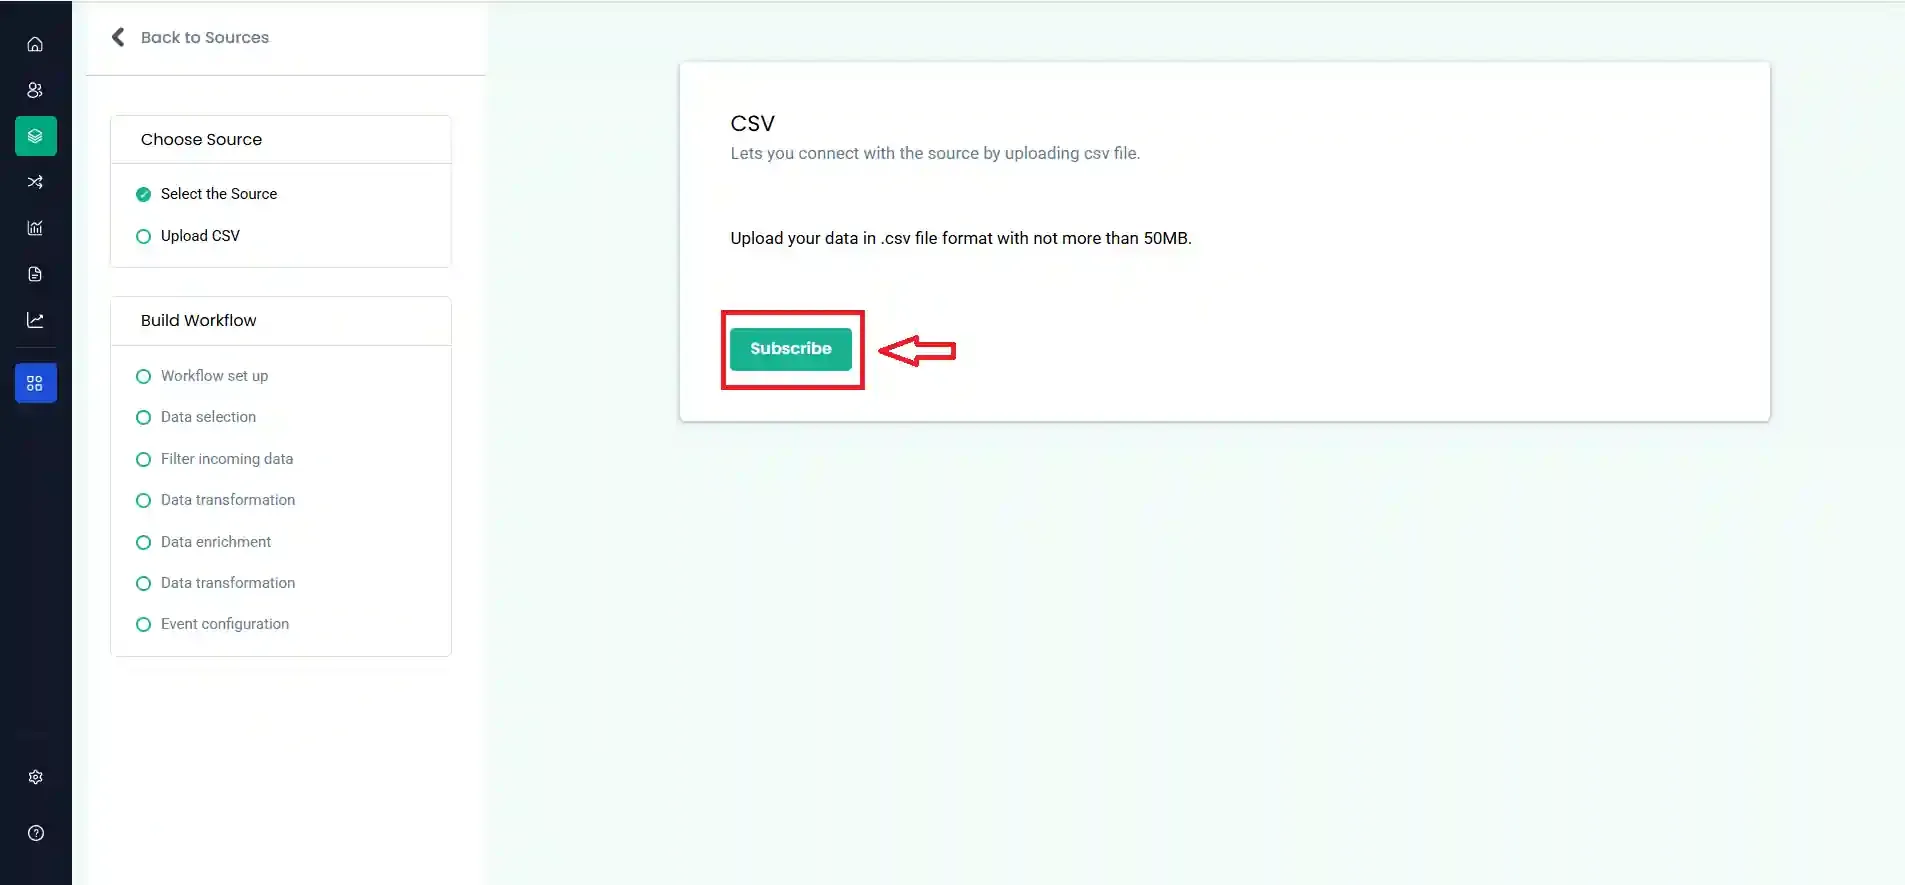
Section titled “Step 3 – Subscribe to CSV Import”- Click the Subscribe button to enable the CSV import functionality.
Step 4 – Import Your CSV File
Section titled “Step 4 – Import Your CSV File”- Click Import CSV.
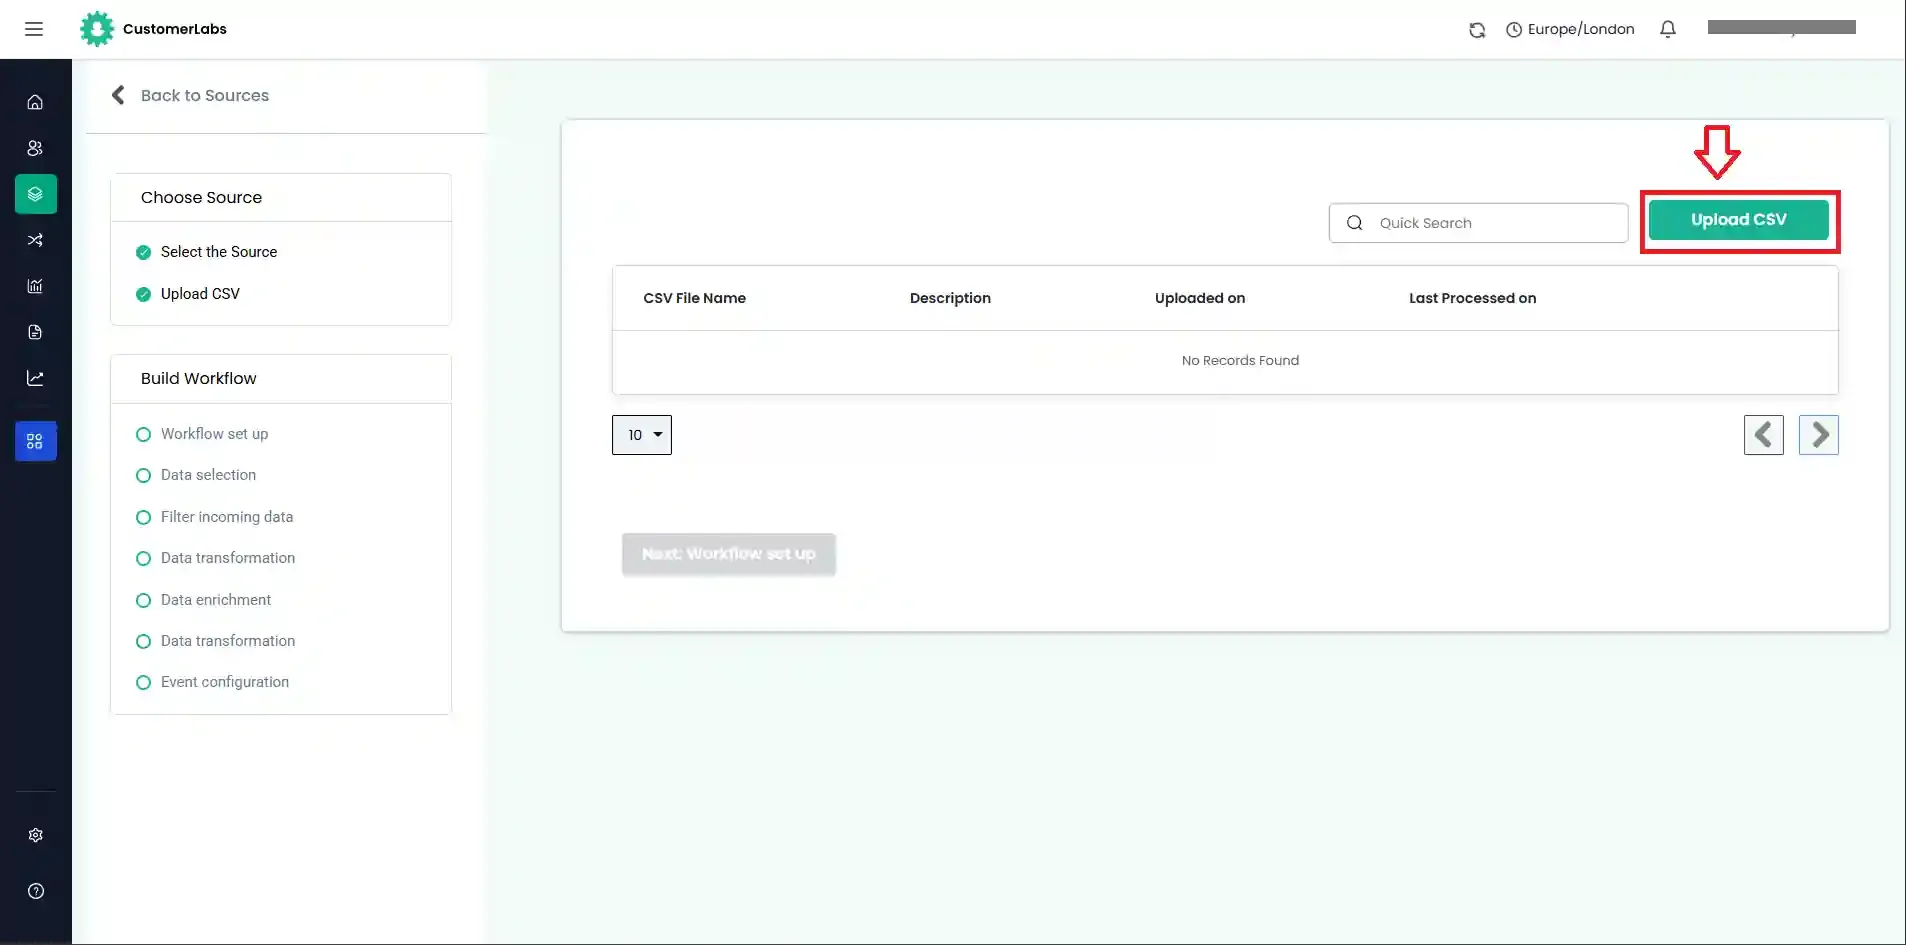
- Enter a File name and an optional Description.
- Click Choose file and select the
.csvfile you want to import.
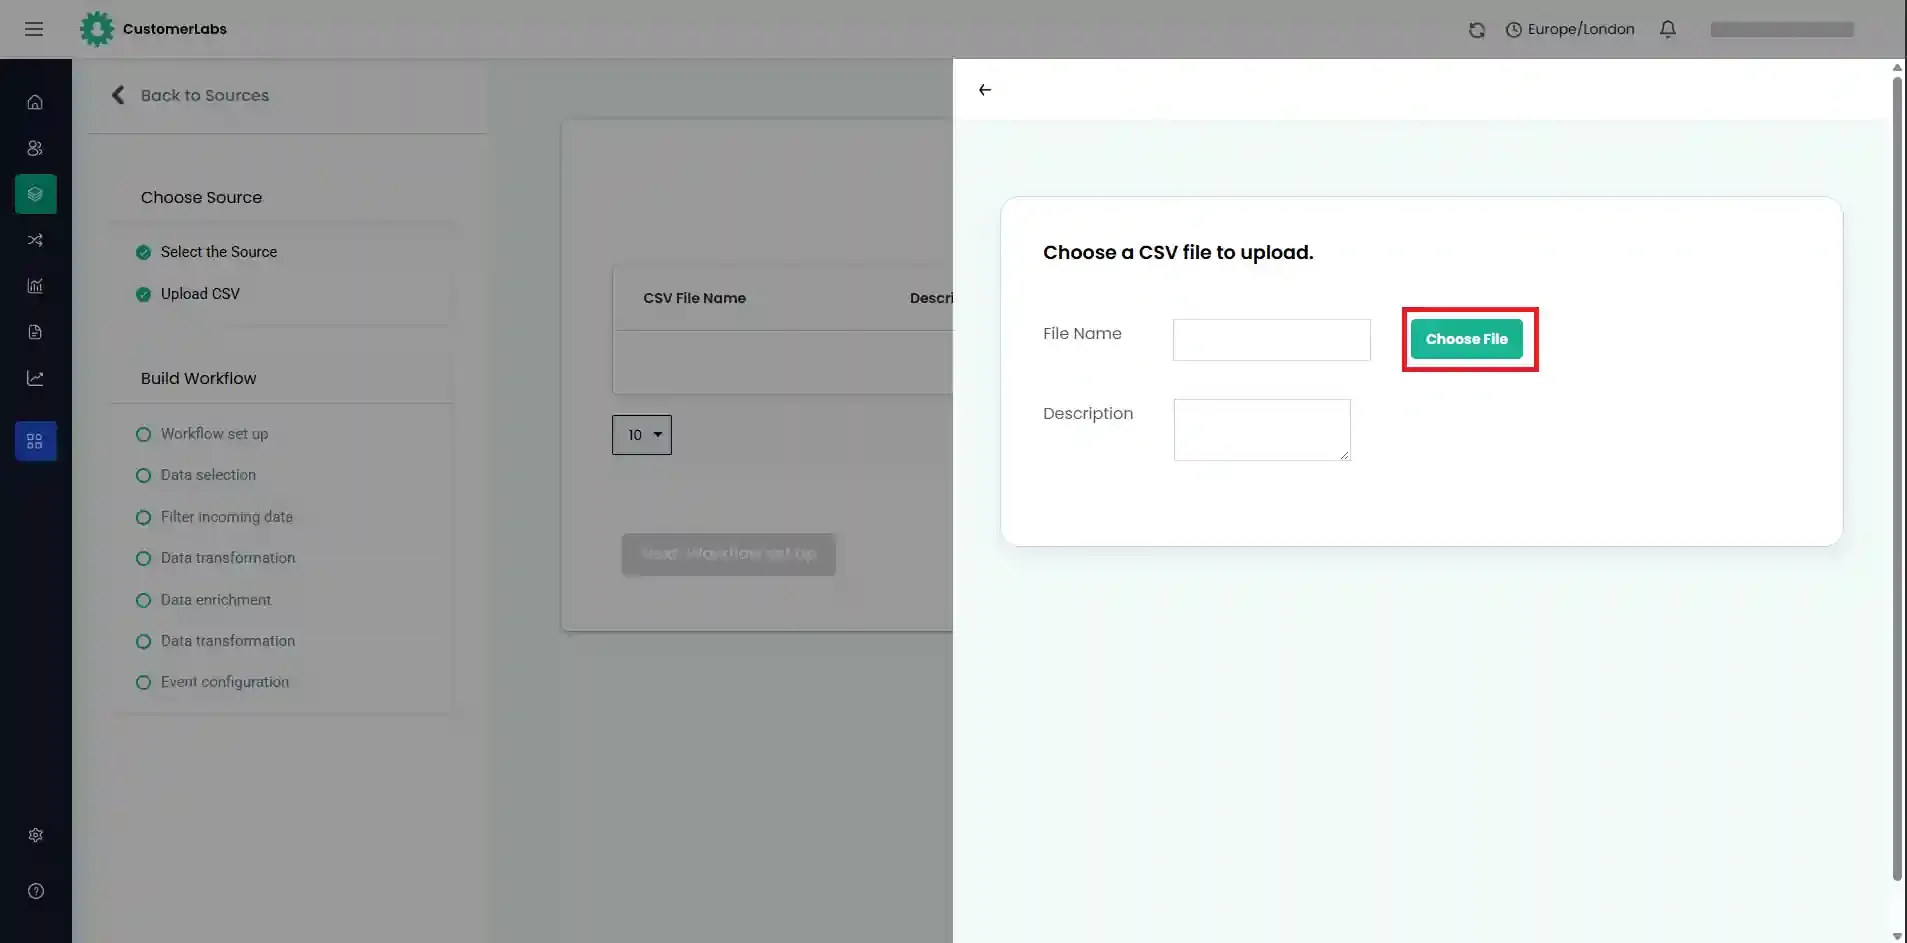
- Once the file is validated, click Upload file.

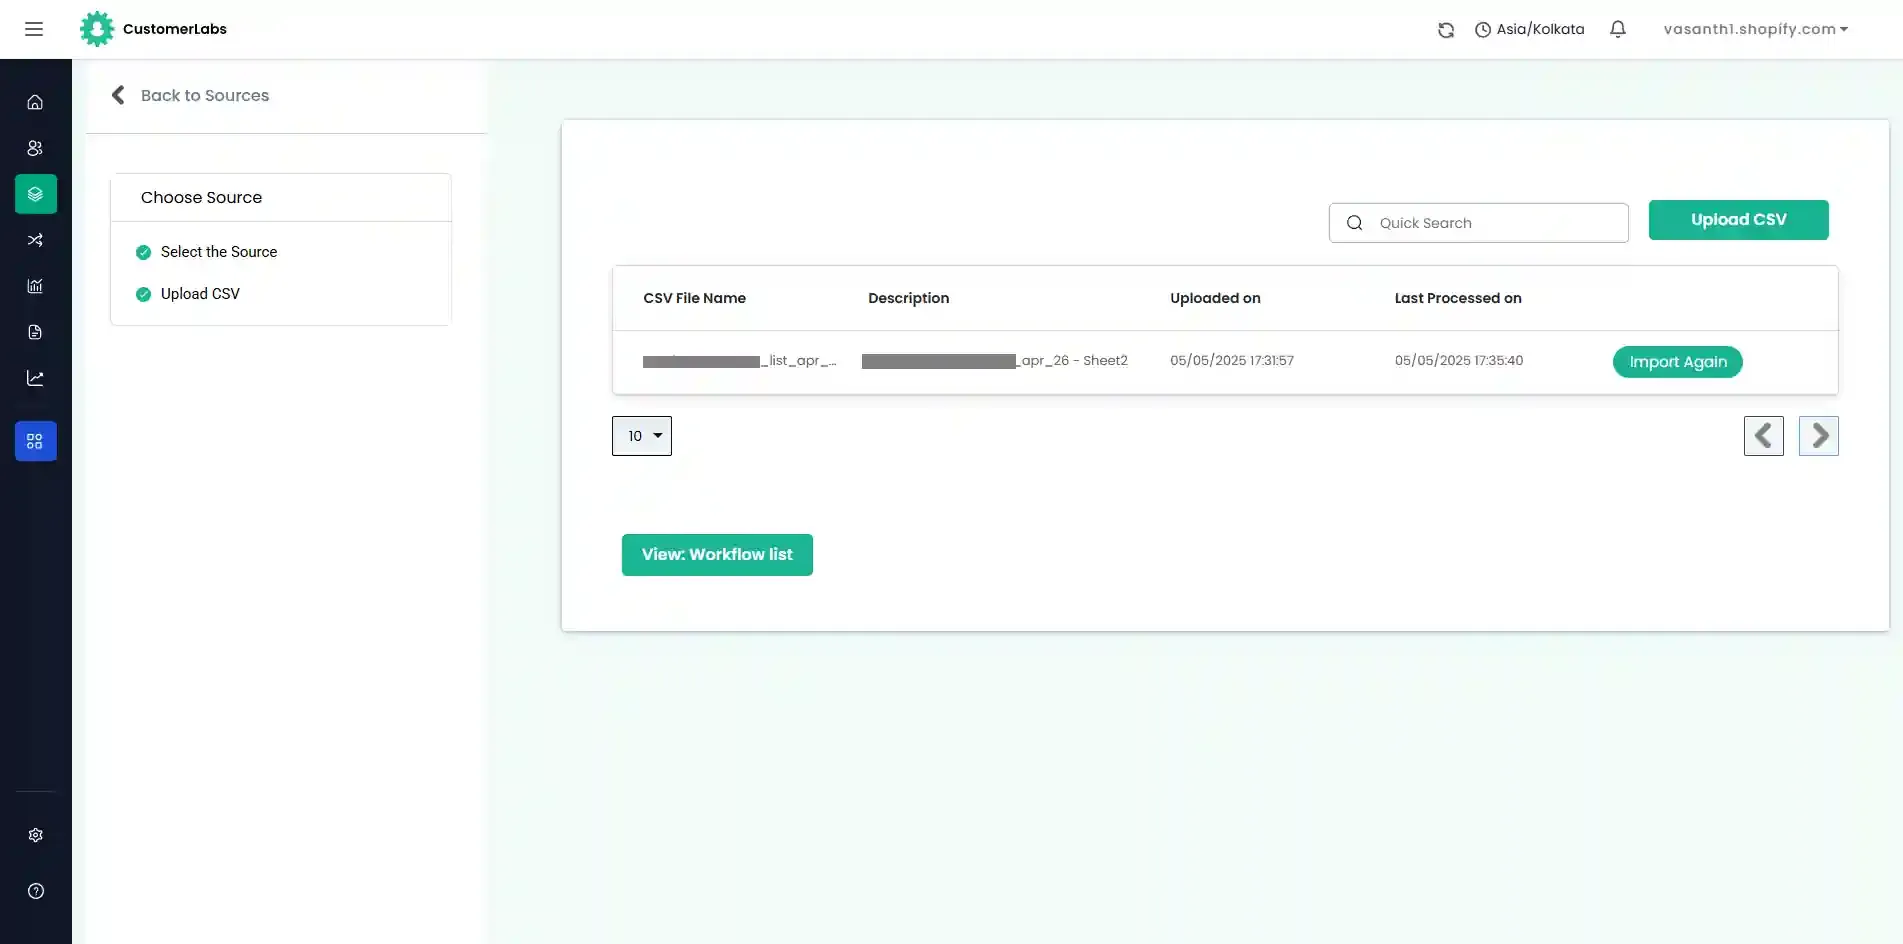
- After the upload is complete, click Next: Workflow Setup to proceed with configuring a workflow for the imported data.
Workflows in CustomerLabs 1PD Ops
Section titled “Workflows in CustomerLabs 1PD Ops”Workflows allow you to filter, transform, and map incoming data to match your business requirements. By creating a workflow, you can align imported CSV data with existing customer profiles in CustomerLabs — achieving a unified customer view without any coding.
Building a Workflow
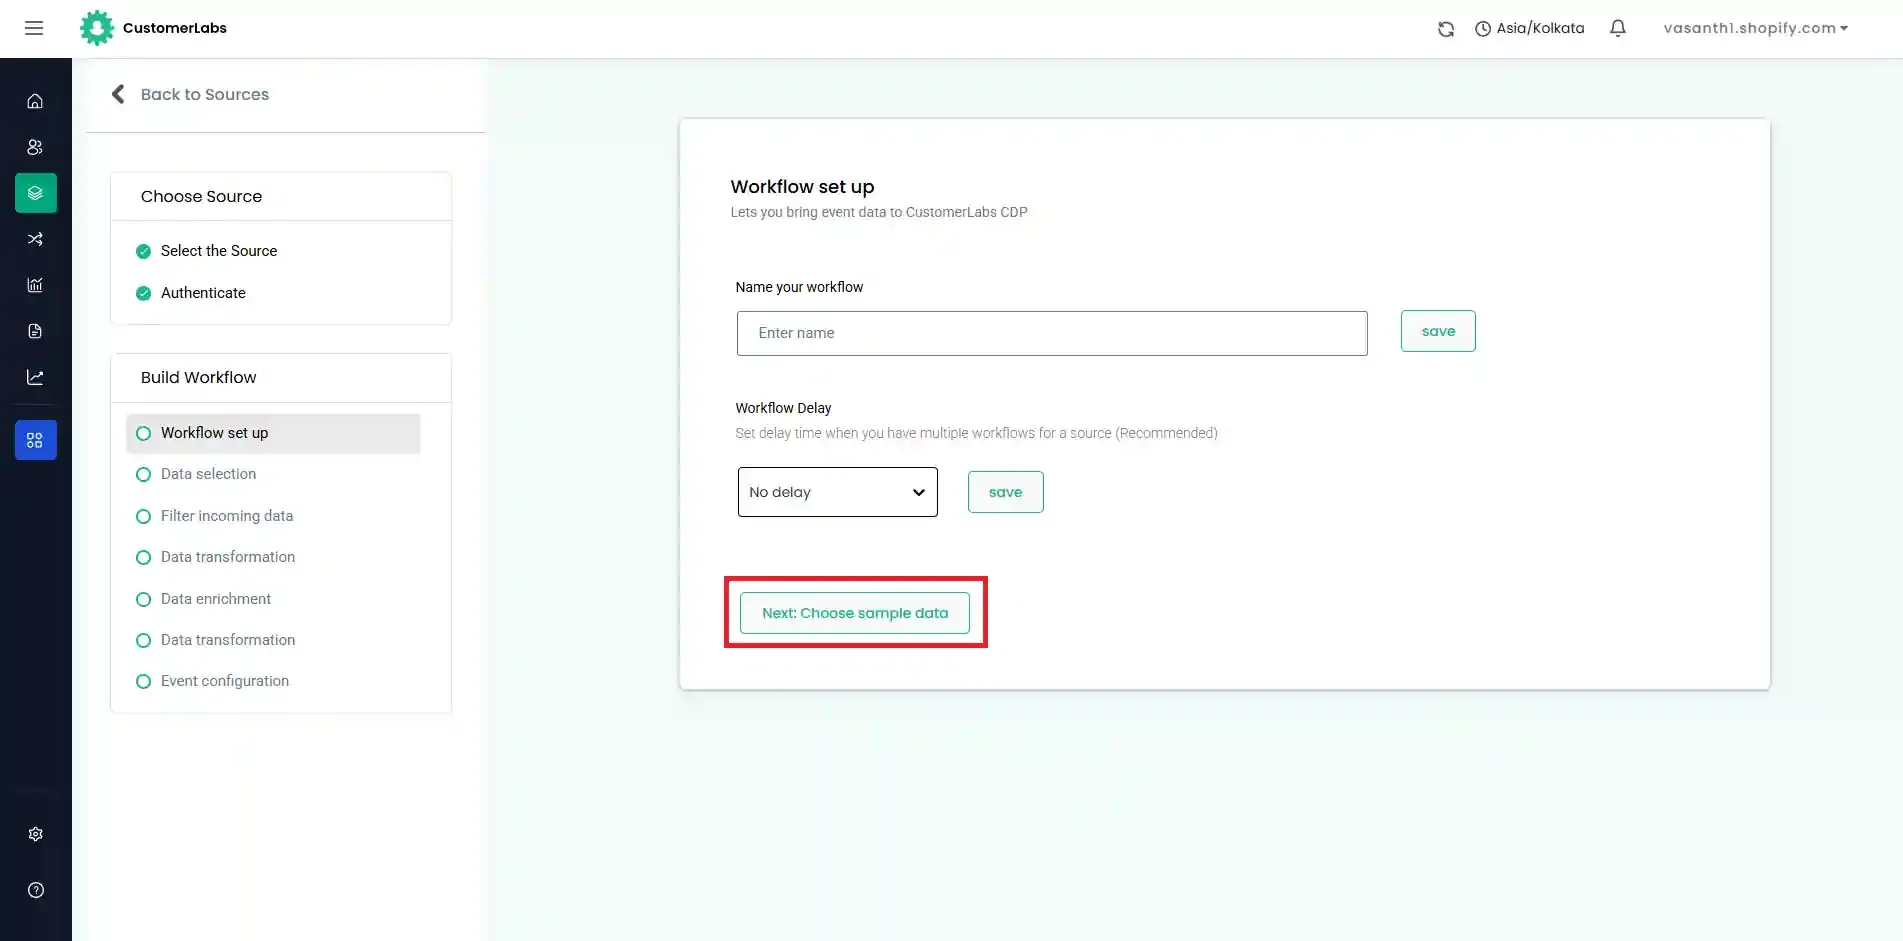
Section titled “Building a Workflow”Step 1 – Name and Configure the Workflow
Section titled “Step 1 – Name and Configure the Workflow”- Enter a name for the workflow → click Save.
- Optionally, set a delay for the workflow → click Save.
- Click Next: Choose sample data.
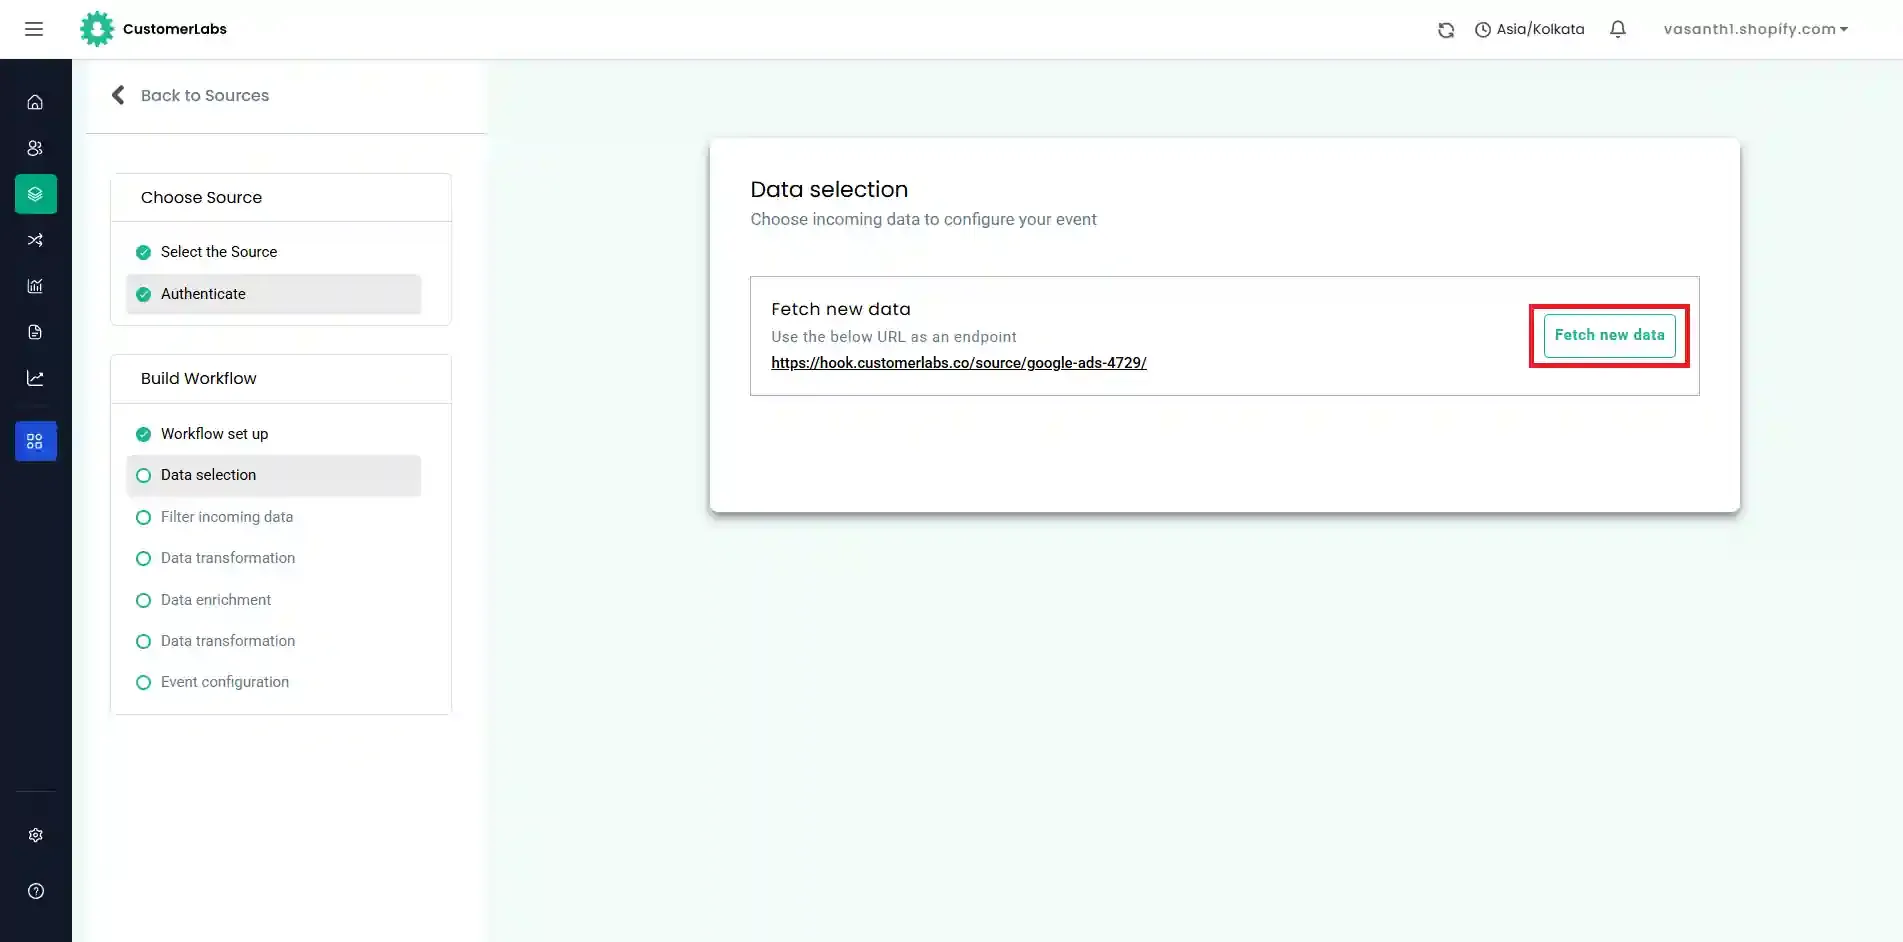
Step 2 – Fetch and Select Sample Data
Section titled “Step 2 – Fetch and Select Sample Data”- Click Fetch new data to retrieve records from your uploaded CSV.
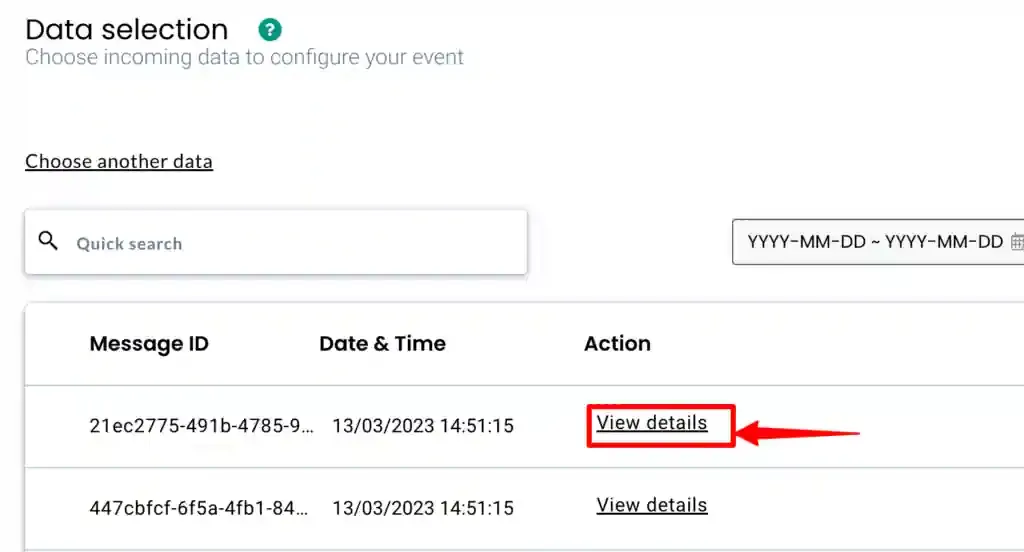
- Choose a sample record from the list → click View Details.
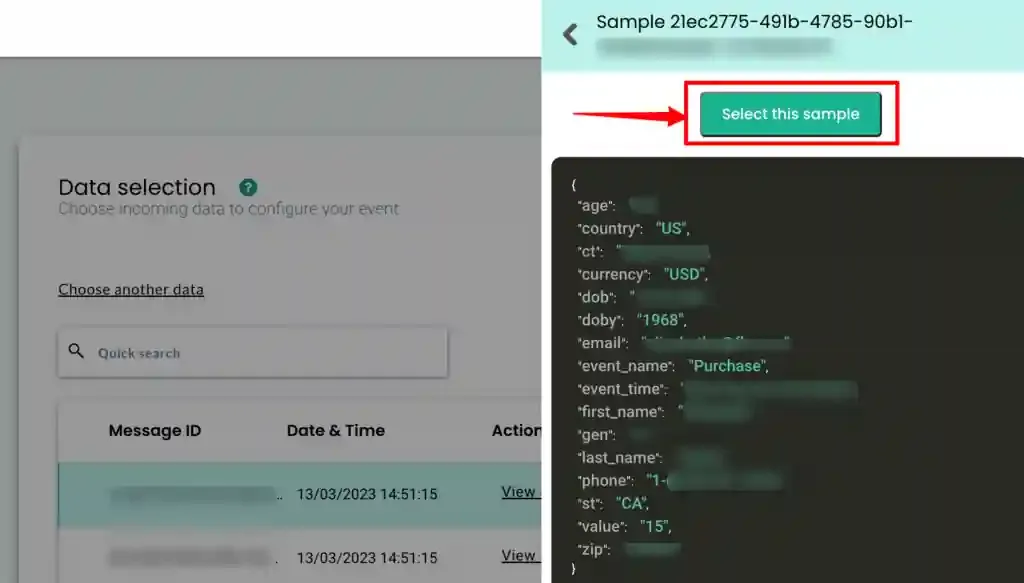
- Review the raw data displayed. Click Select this sample to use it as the basis for your workflow configuration.
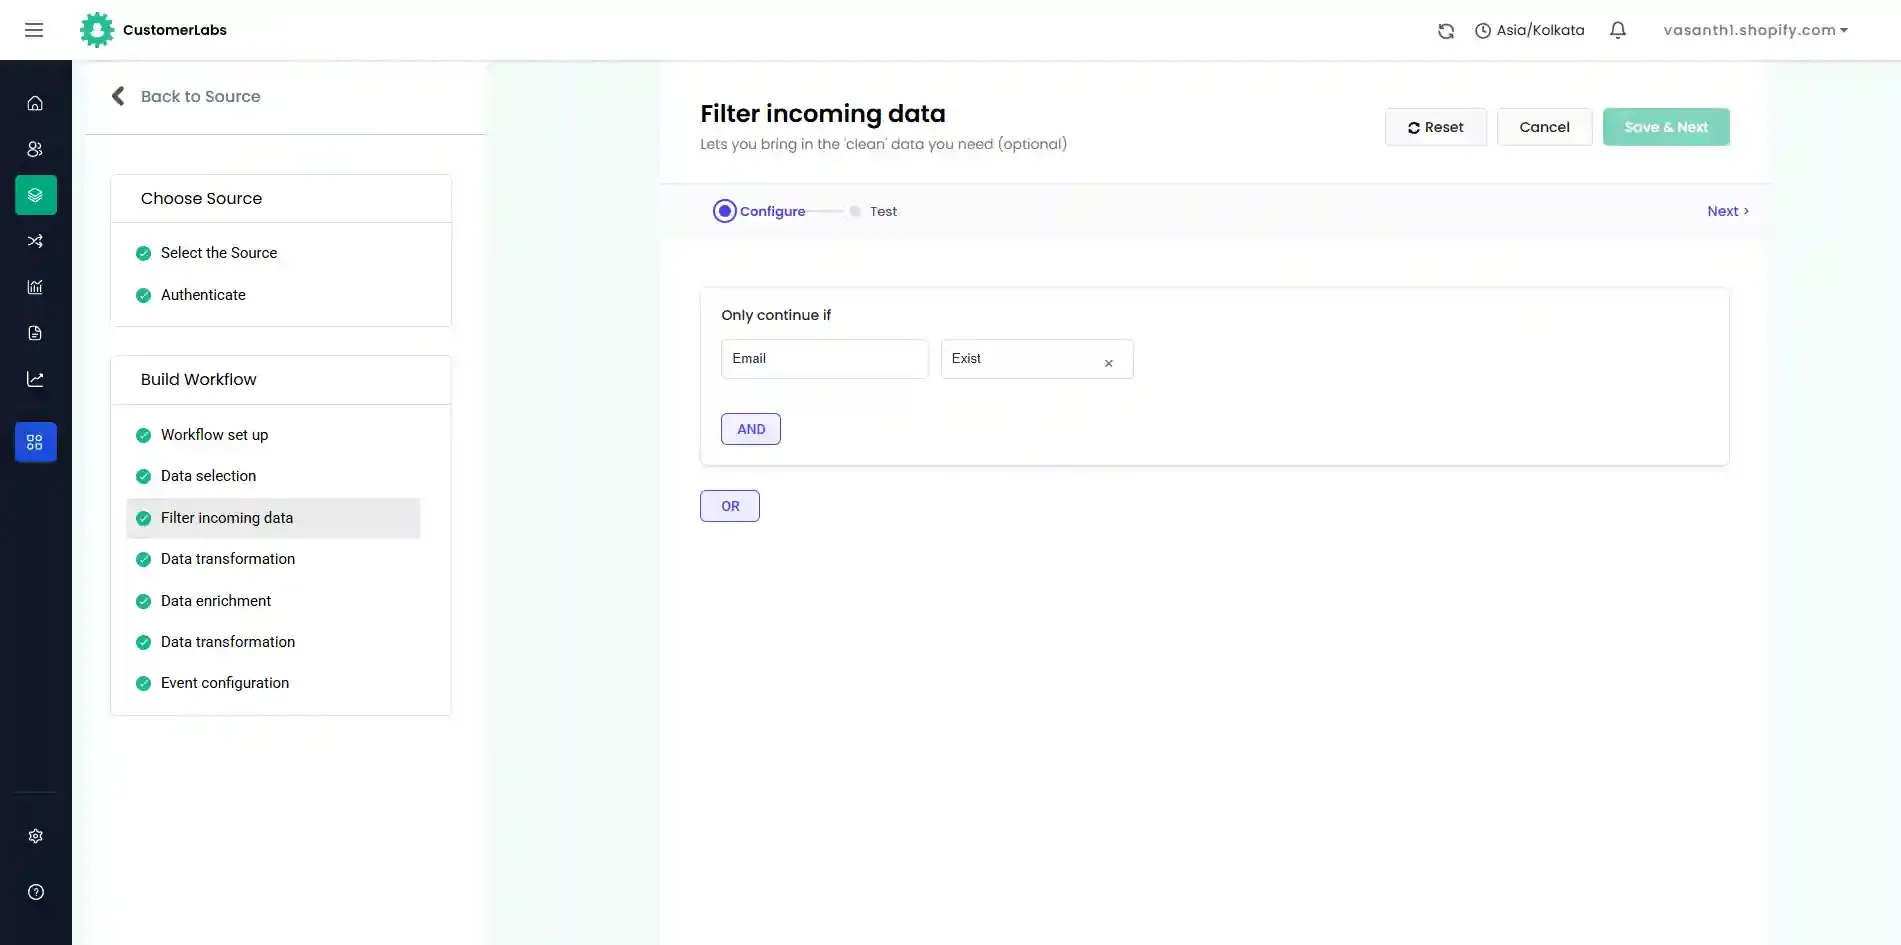
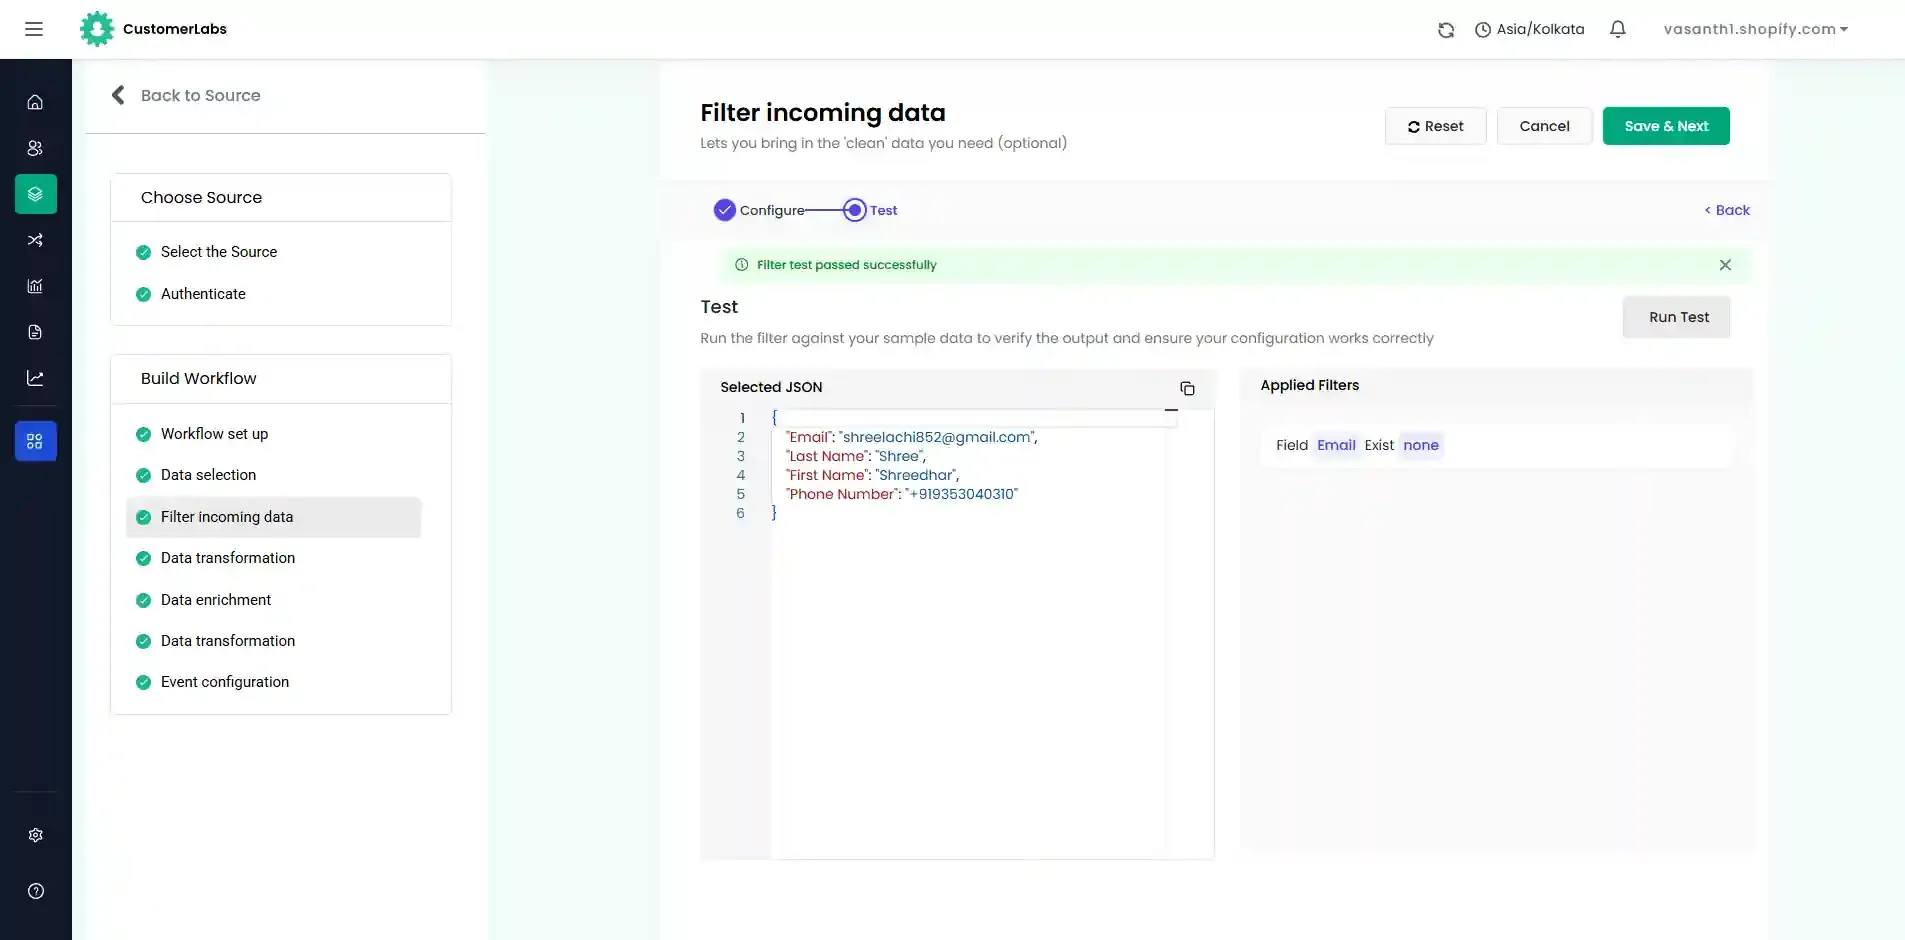
Step 3 – Filter Incoming Data (Optional)
Section titled “Step 3 – Filter Incoming Data (Optional)”This step allows you to filter out irrelevant records so that only the data you need enters the workflow.
- Define filter conditions based on specific field values.
- Only records matching your criteria will be processed.
Step 4 – Configure Event Mapping
Section titled “Step 4 – Configure Event Mapping”Event configuration is the final step in the workflow creation process. Here you define how the imported CSV data maps to events and user identities within CustomerLabs.
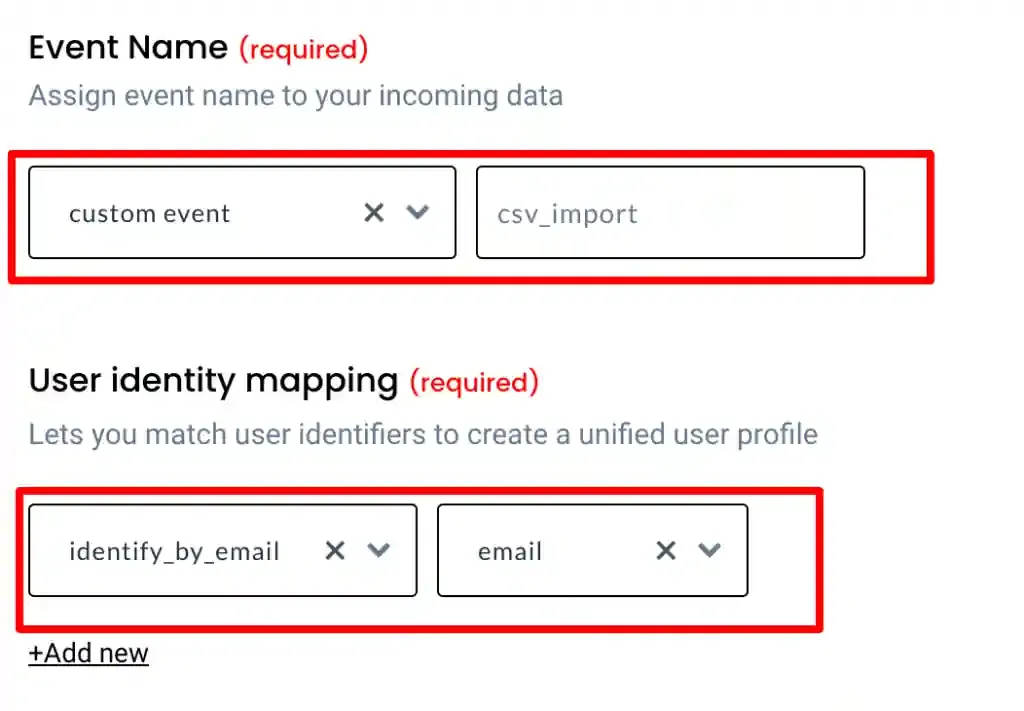
4a – Choose the Event Name
Section titled “4a – Choose the Event Name”- Select an event name from the drop-down menu.
- To create a custom event, choose Custom Event and provide a name that describes the data being imported.
4b – Map User Identity
Section titled “4b – Map User Identity”CustomerLabs 1PD Ops supports a wide range of user identifiers (unique data points used to identify individual users, such as email, phone number, or user ID).
- Select the identifier type. For example, choose
identify_by_emailto map the email address field from your CSV. - Select the corresponding value (e.g., the email column) from the drop-down.
4c – Map User Traits
Section titled “4c – Map User Traits”After mapping user identity, you can categorically map additional incoming attributes as User traits (descriptive properties associated with a user profile).
Common user traits from CSV data include:
| Trait | Description |
|---|---|
first_name | User’s first name |
last_name | User’s last name |
email | Email address |
city | City of residence |
state | State or region |
zip_code | Postal or ZIP code |
company | Company or organization name |
ad_campaign | Associated advertising campaign |
ad_set | Associated ad set |
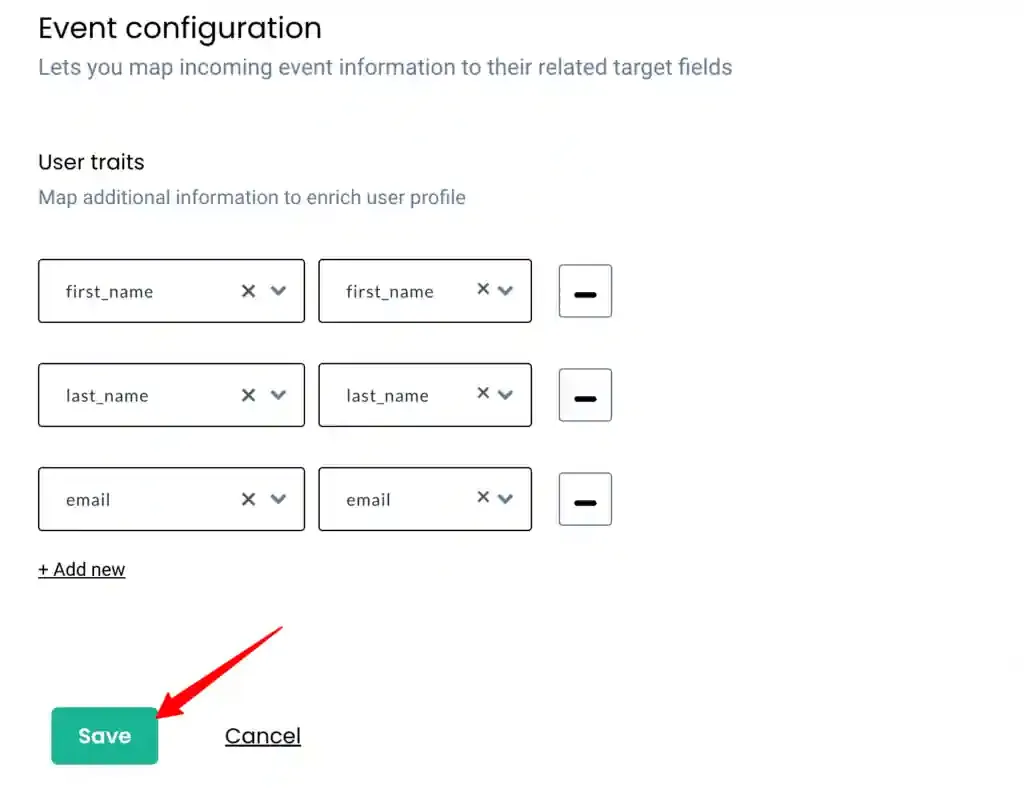
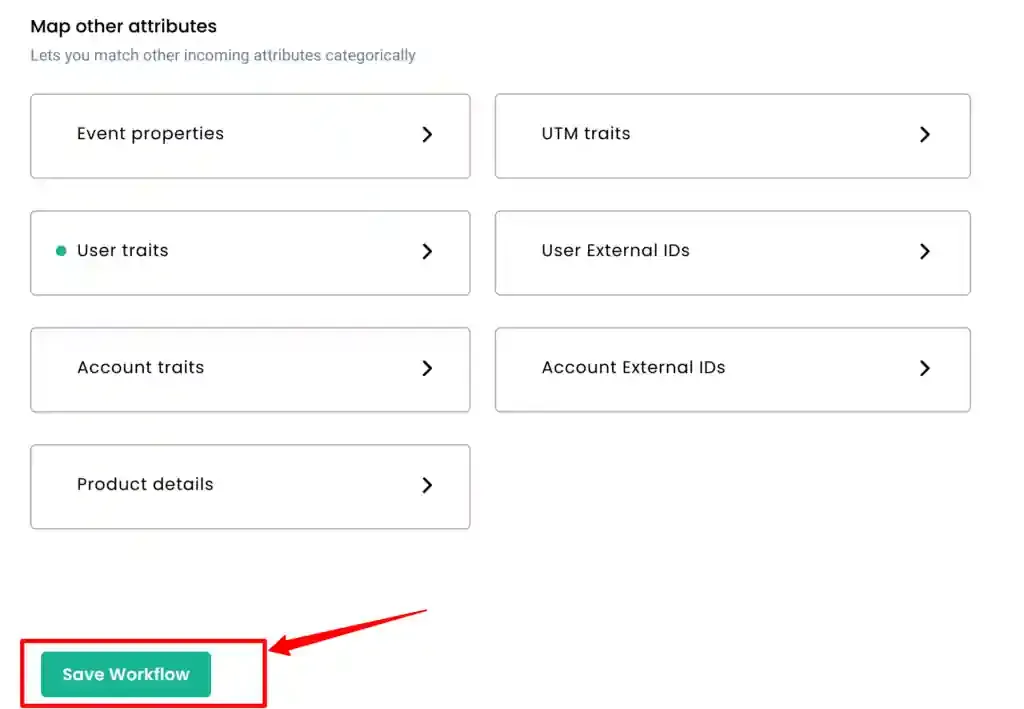
Step 5 – Save the Workflow
Section titled “Step 5 – Save the Workflow”- Once all mappings are configured, click Save workflow.
Import CSV Again to Process
Section titled “Import CSV Again to Process”After saving the workflow setup, you must re-import the CSV data so that it is processed according to your newly configured workflow.
Step 1 – Return to Source Configuration
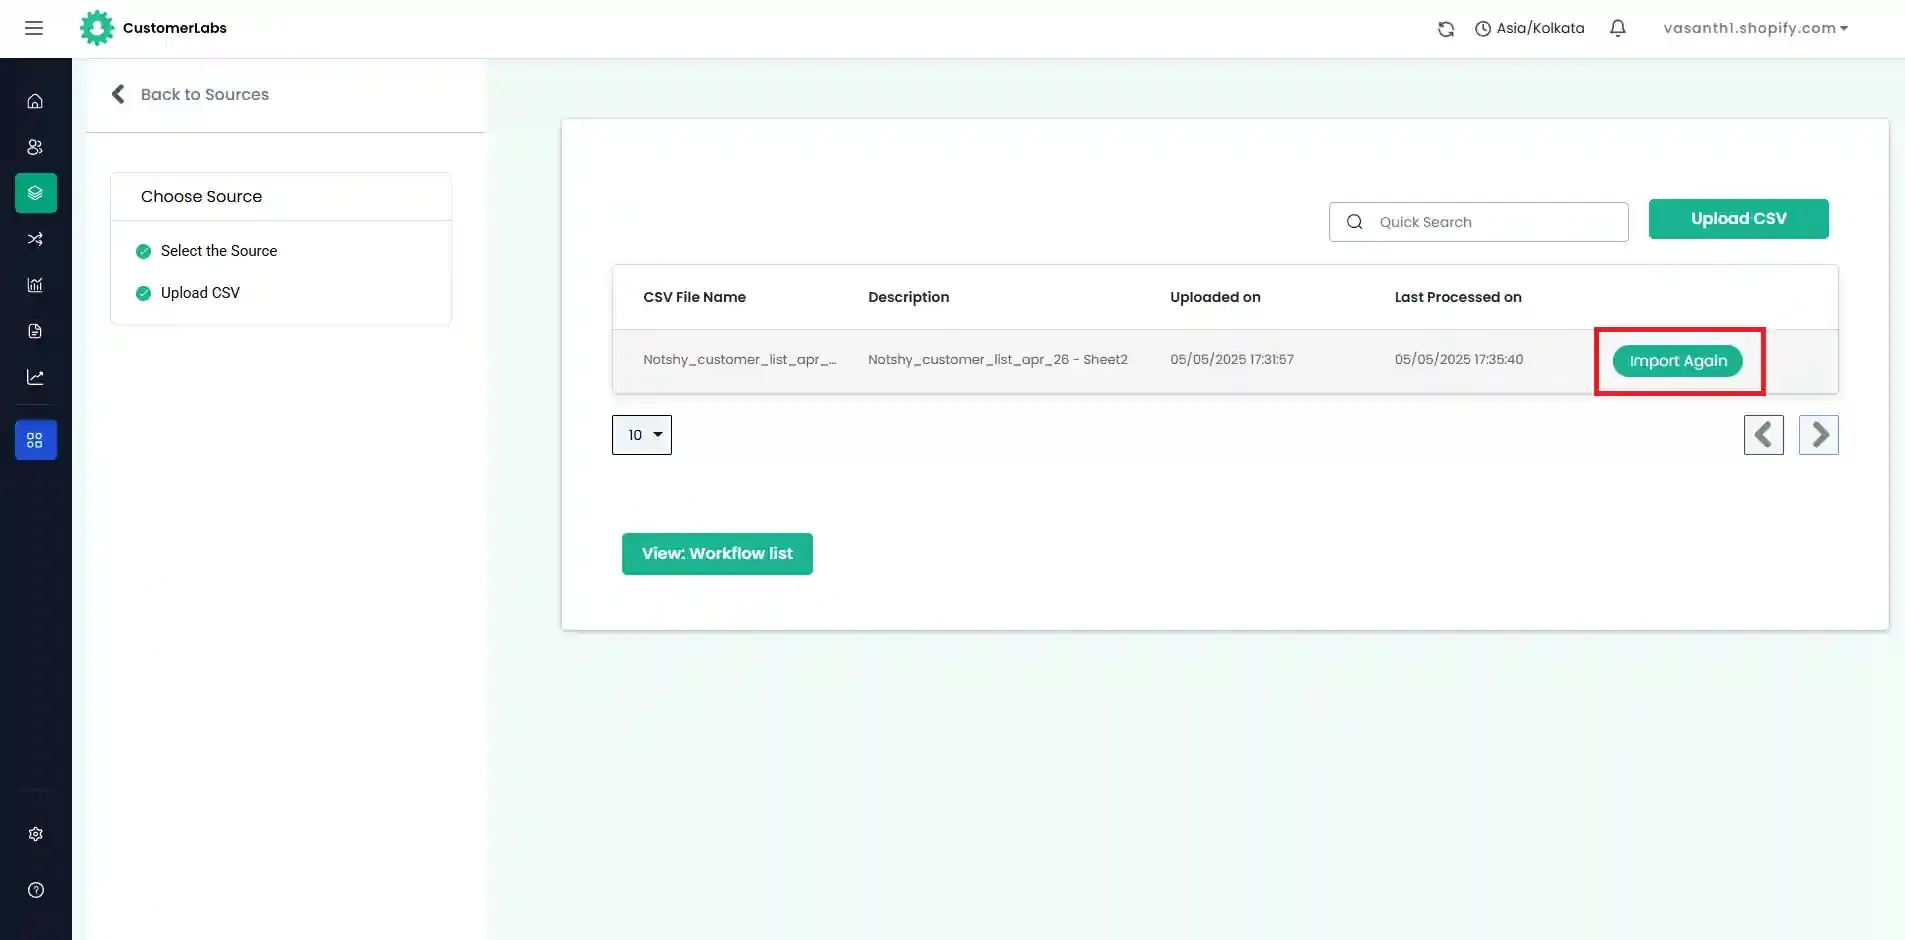
Section titled “Step 1 – Return to Source Configuration”- Navigate to Sources → csv-upload → Setup.
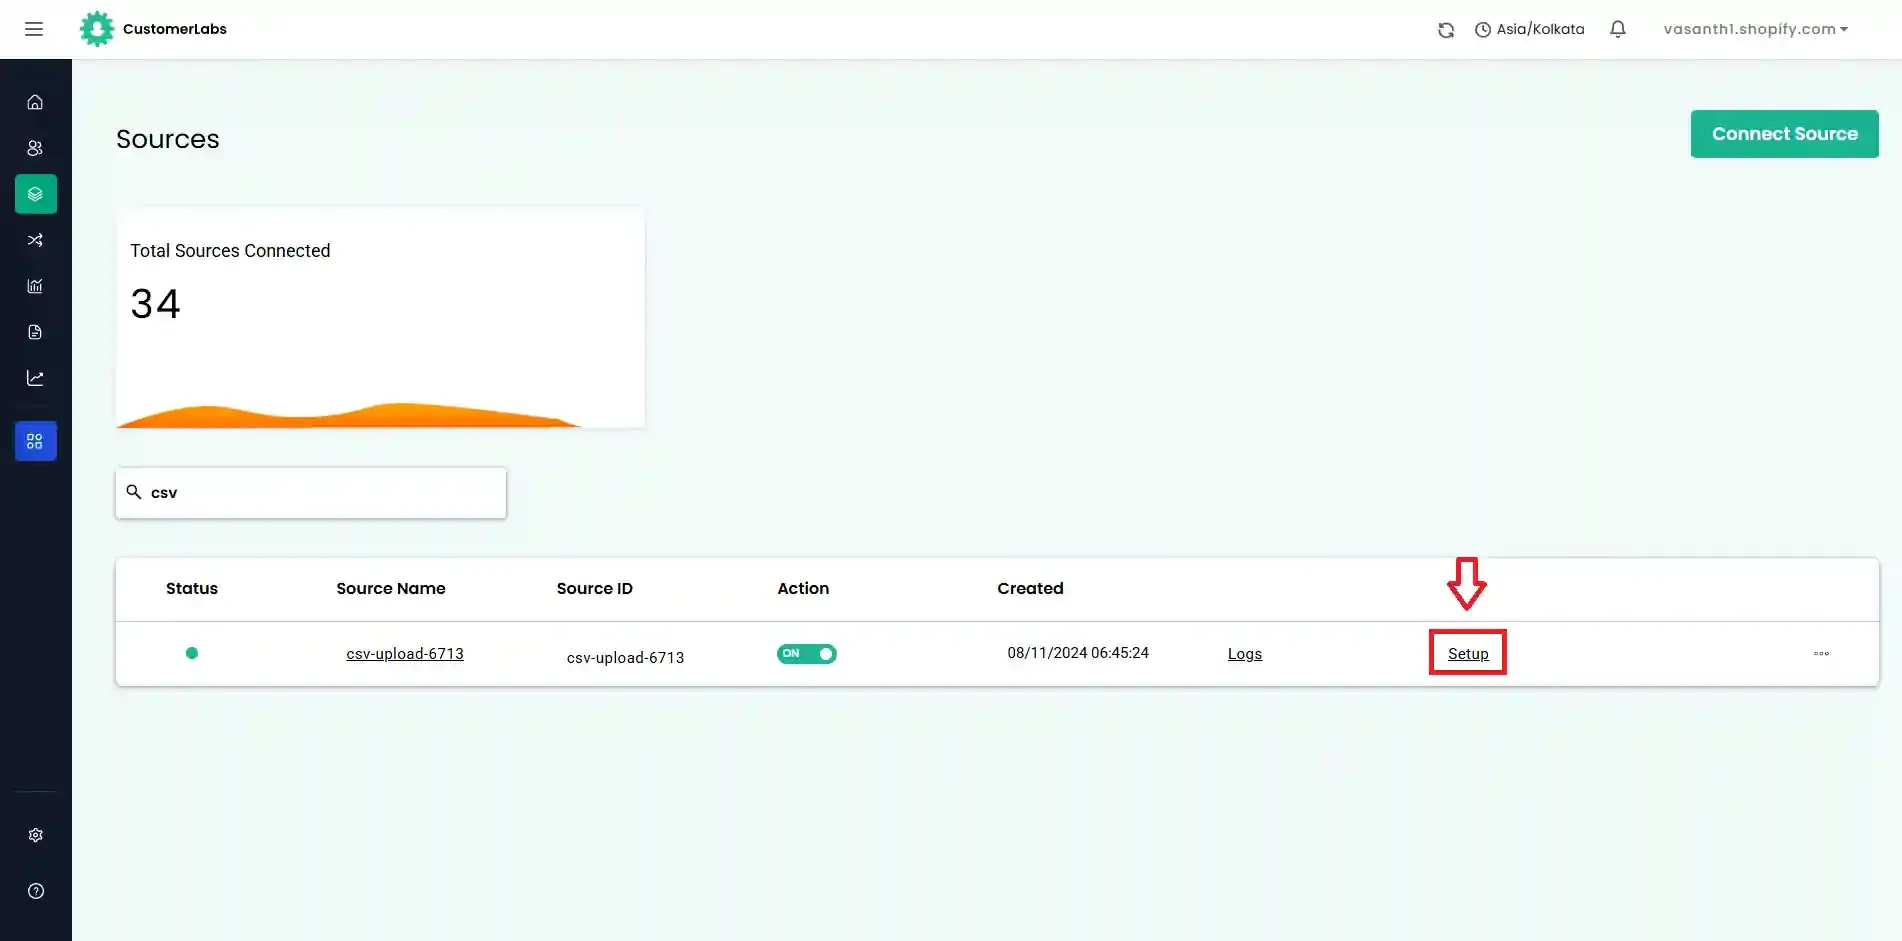
Step 2 – Start the Import
Section titled “Step 2 – Start the Import”- Click Import.
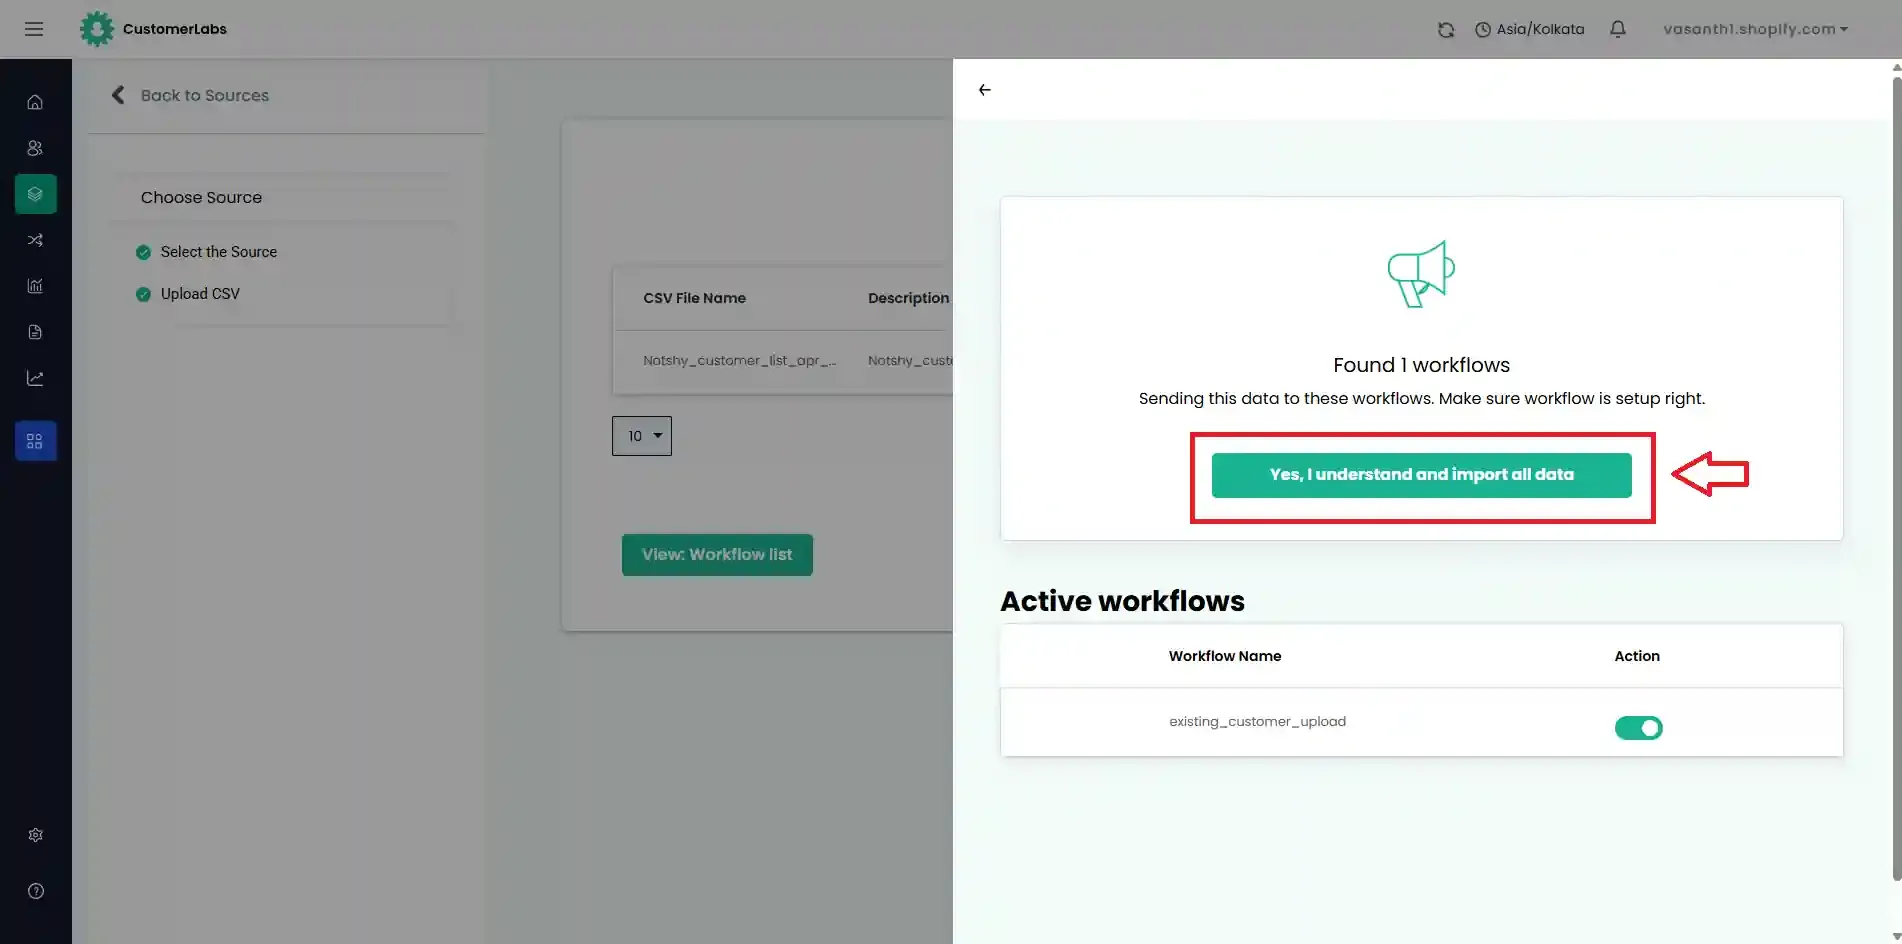
Step 3 – Confirm and Process
Section titled “Step 3 – Confirm and Process”- Enable the workflows you want to apply.
- Click Yes, I understand and import all data to begin processing.
CSV File Format Guidelines
Section titled “CSV File Format Guidelines”When preparing your CSV file for upload, keep the following best practices in mind:
- Ensure the file is saved in
.csv(comma-separated values) format. - Include a header row with descriptive column names.
- Use consistent formatting for data values (e.g., dates, phone numbers).
Sample CSV Structure
Section titled “Sample CSV Structure”first_name,last_name,email,phone,city,state,zip_code,company,ad_campaignField Mapping Reference
Section titled “Field Mapping Reference”The table below summarizes the key field mapping concepts used during workflow configuration:
| Concept | Description |
|---|---|
| Event Name | The name assigned to the event triggered by the imported data. Can be a standard or custom event. |
| User Identity | A unique identifier (e.g., email, phone, user ID) used to match and unify user profiles. |
| User Traits | Descriptive attributes (e.g., name, city, company) associated with a user profile. |
| Custom Event | A user-defined event name for non-standard data imports. |
| Filter | An optional condition applied to exclude irrelevant records from processing. |
Summary
Section titled “Summary”| Step | Action |
|---|---|
| 1 | Navigate to Sources → Connect Source |
| 2 | Select CSV Upload |
| 3 | Click Subscribe |
| 4 | Import and upload your .csv file |
| 5 | Build a workflow (name, sample data, filters, event mapping) |
| 6 | Save the workflow |
| 7 | Re-import CSV to process data through the workflow |