Customerlabs CDP Documentation
Audiences created in CustomerLabs can be synced with Maropost as an email contact list through the List sync option.
Here are the steps to sync the audience with Maropost:
1. Make sure you have integrated Maropost with CustomerLabs from Destinations → Maropost → Configuration Settings.
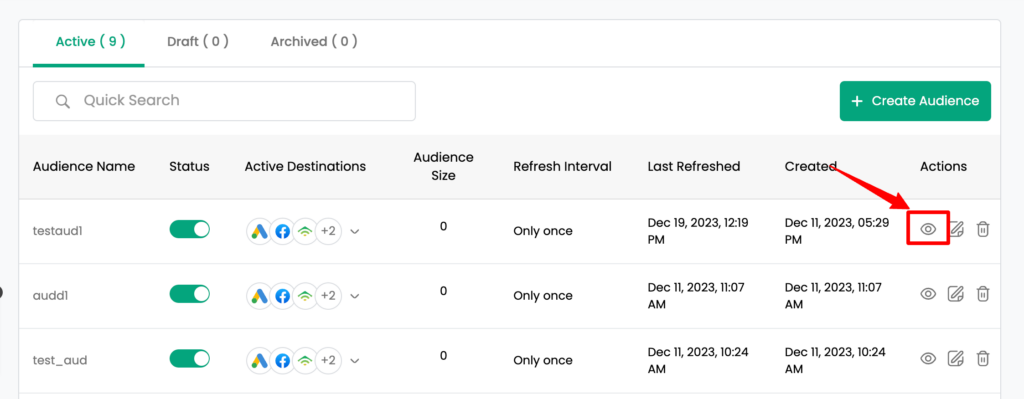
2. Now, View the audience created in CustomerLabs that you want to sync with Maropost or create a new audience if you haven’t created one yet.
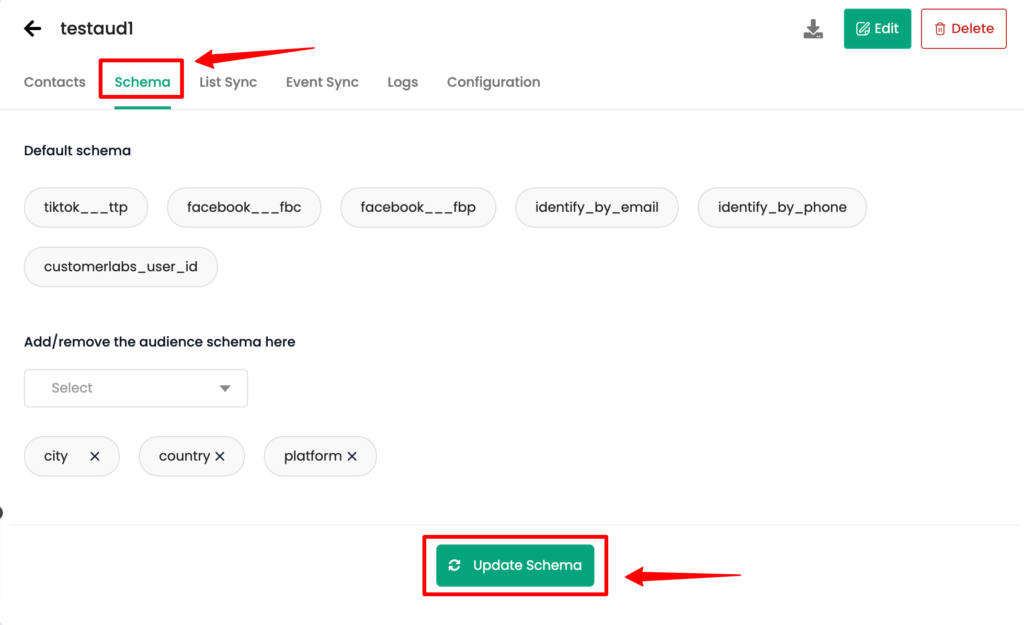
3. Navigate to the “Schema” tab and configure the required audience schema for Maropost i.e. email, phone, first_name, last_name, etc.
What is Schema?
The schema represents the user data that is stored in the system for instance email, phone, location, etc, and you need to map those schemas with the destination schema to sync the data appropriately.
4. Once the schema has been added click on “Update schema“.
5. Now, go to the “List sync” tab and click on “Map schema” under Maropost in order to map the audience schema with the destination schema.

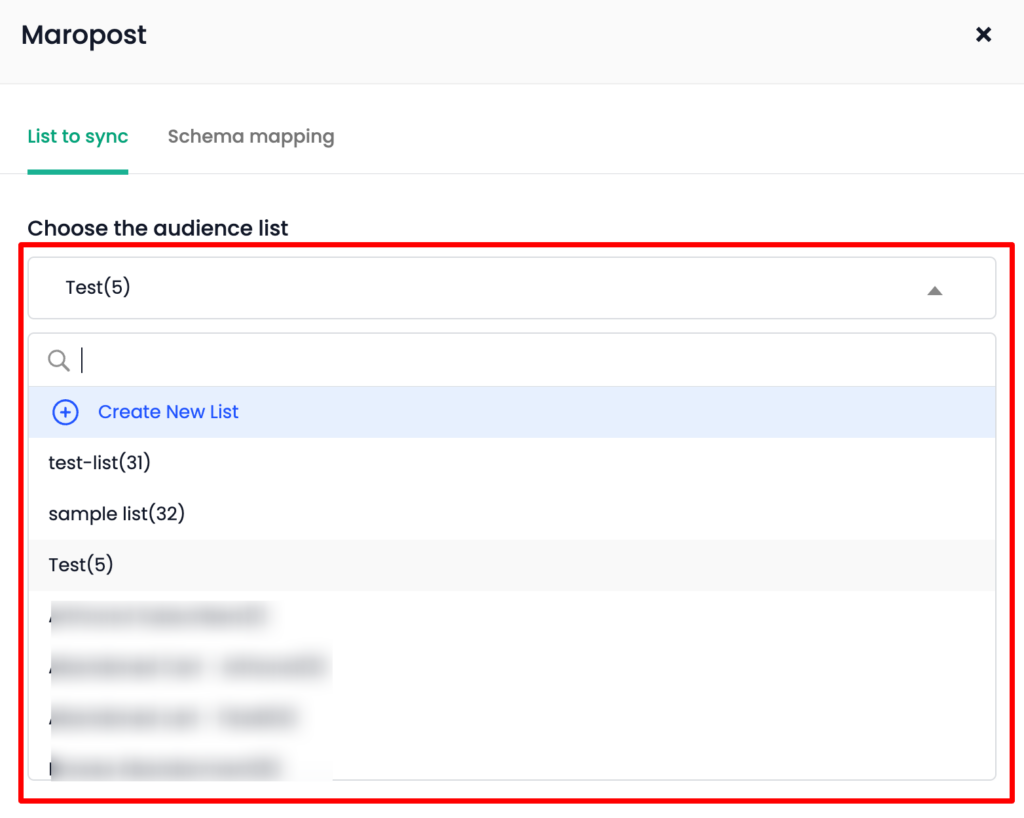
6. In the “List to sync” tab, choose the audience list from the lists that are already created on Maropost or choose “+Create New List” and enter all the required fields for the new audience list.
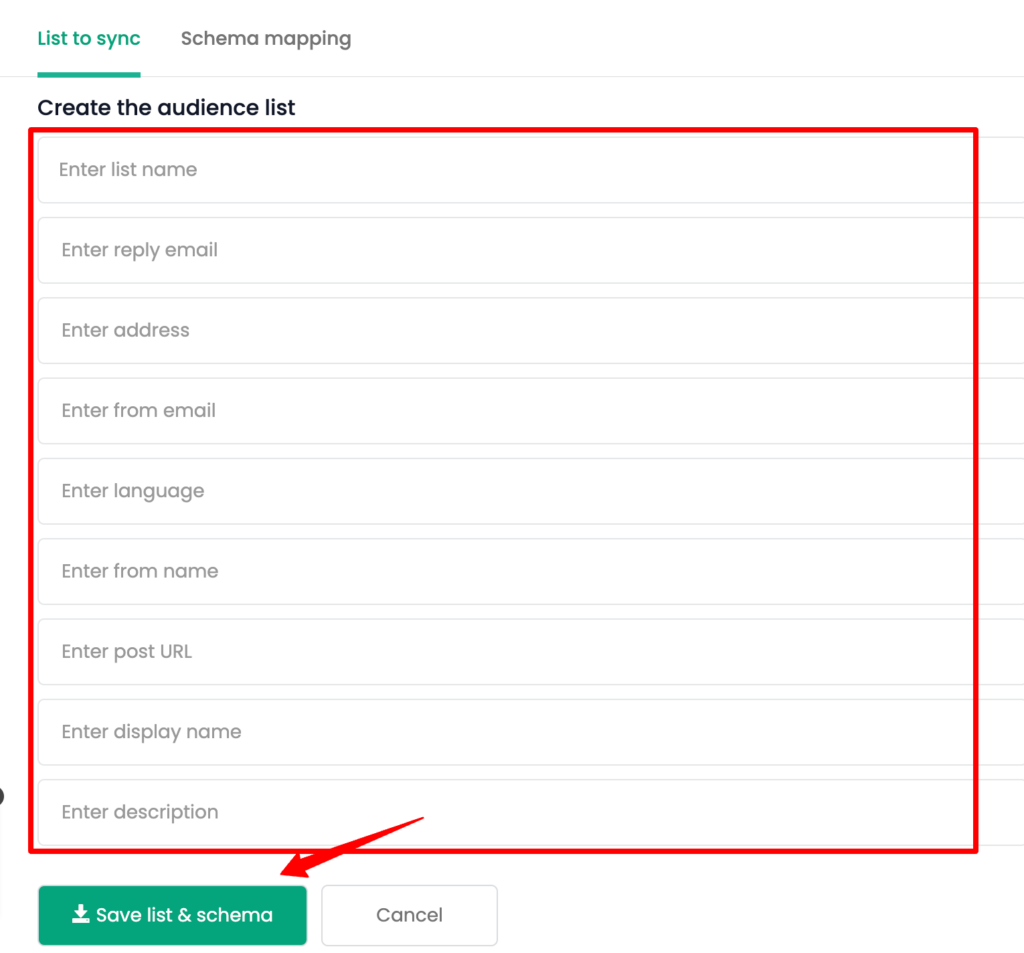
7. Once the audience list is selected or created, “Custom audience Info” will be displayed.
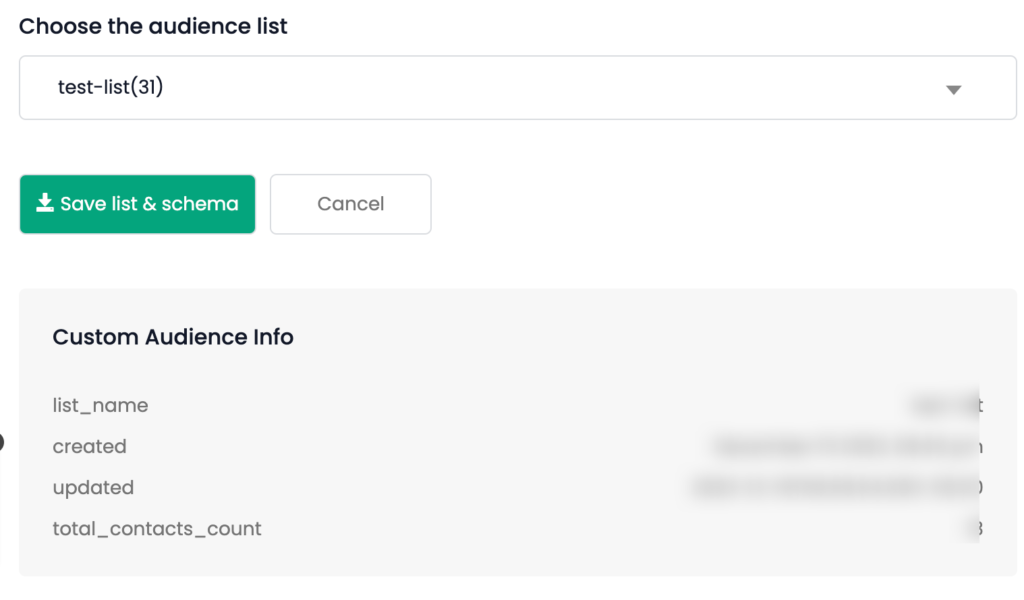
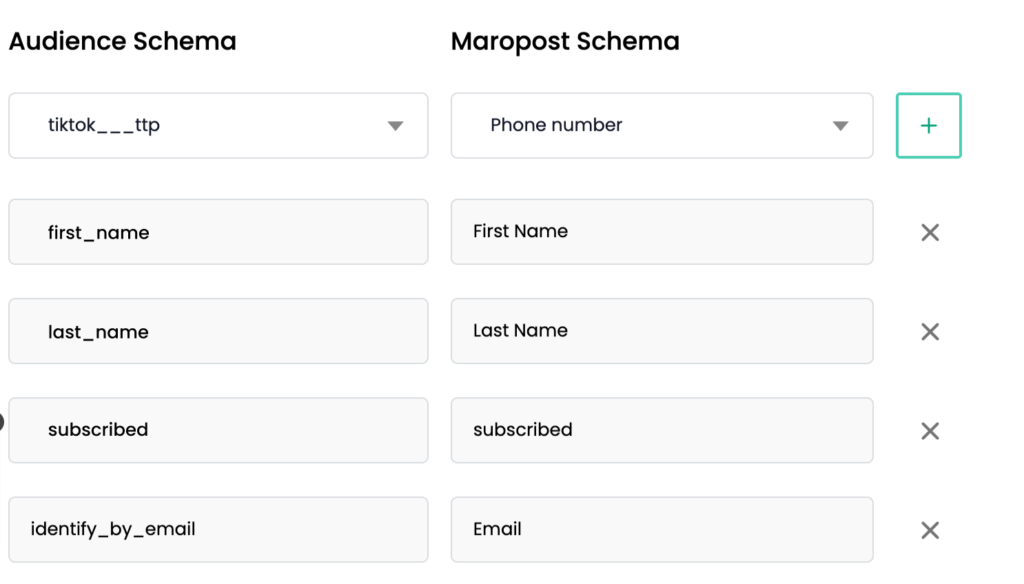
8. Go to the “Schema Mapping” tab after saving the list and map the audience schema with Maropost schema for the identifier/user traits that you have given in Step 3 by adding each schema using the “+” icon.
9. Tick the Subscribe checkbox to add the users in this list by default to the subscription list.
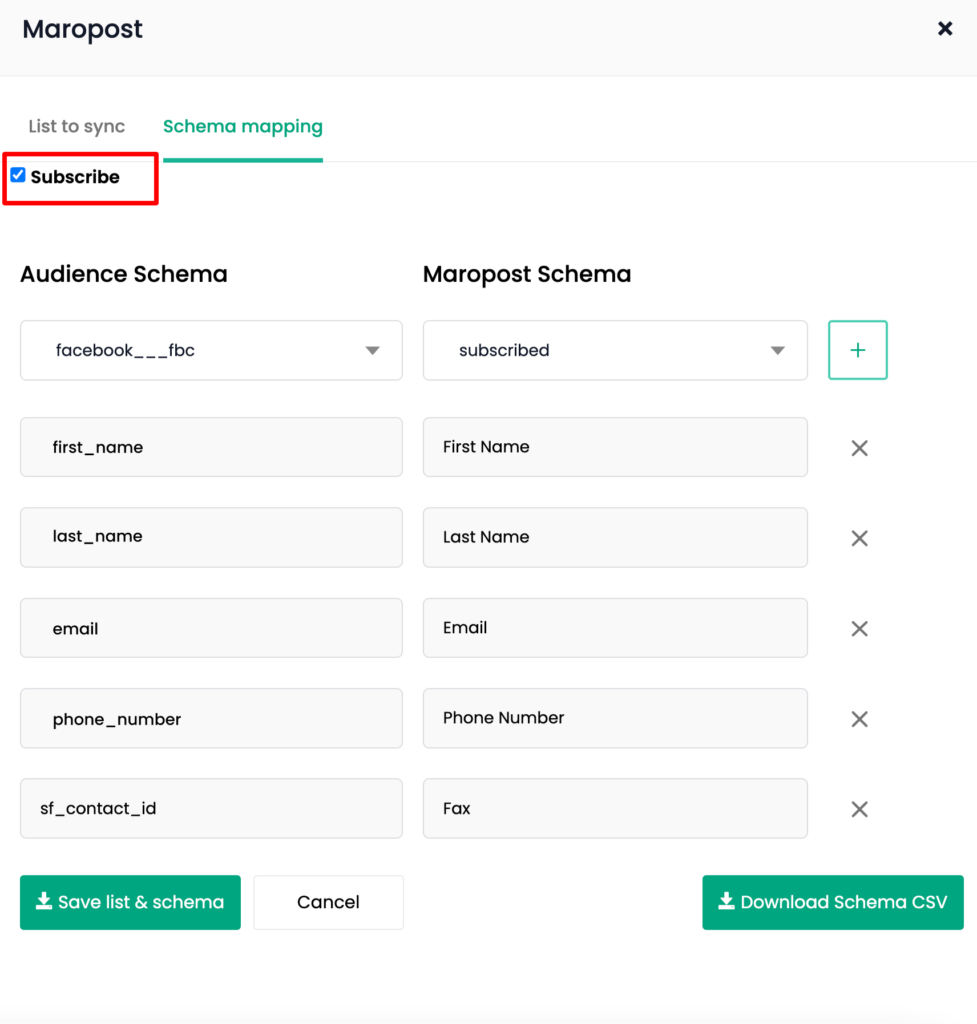
10. Once this is done, click “Save List and Schema”
11. Now download the CSV by clicking on “Download Schema CSV”.
12. Go to your Maropost account → Audience → Email contact lists
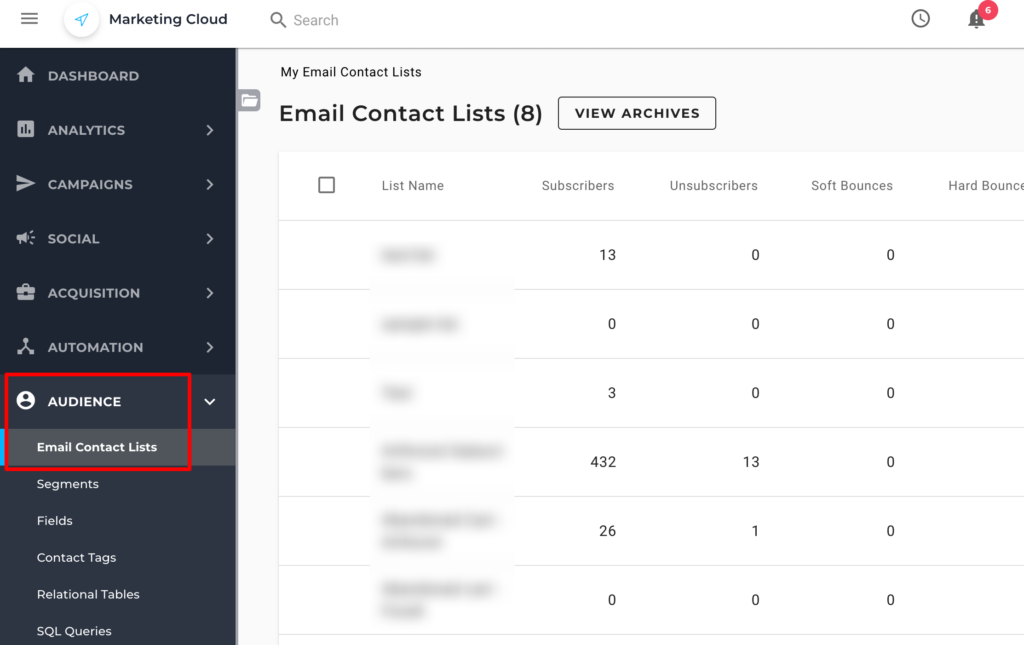
13. You can find your existing list/the list created from CustomerLabs here.
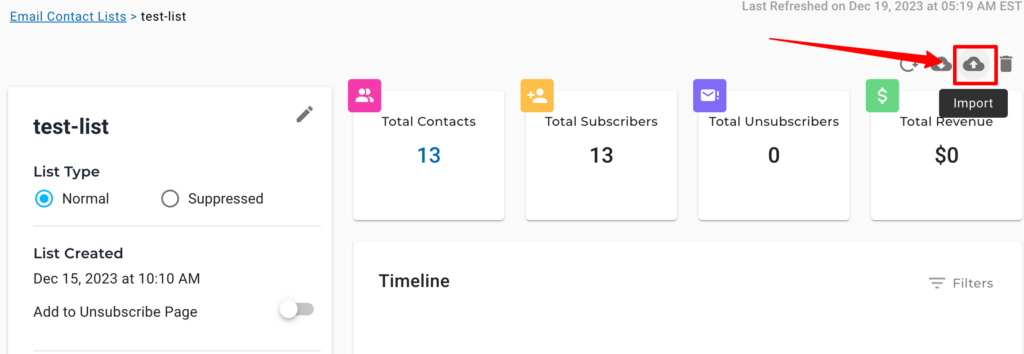
14. Select the list → Click Import in the top right corner
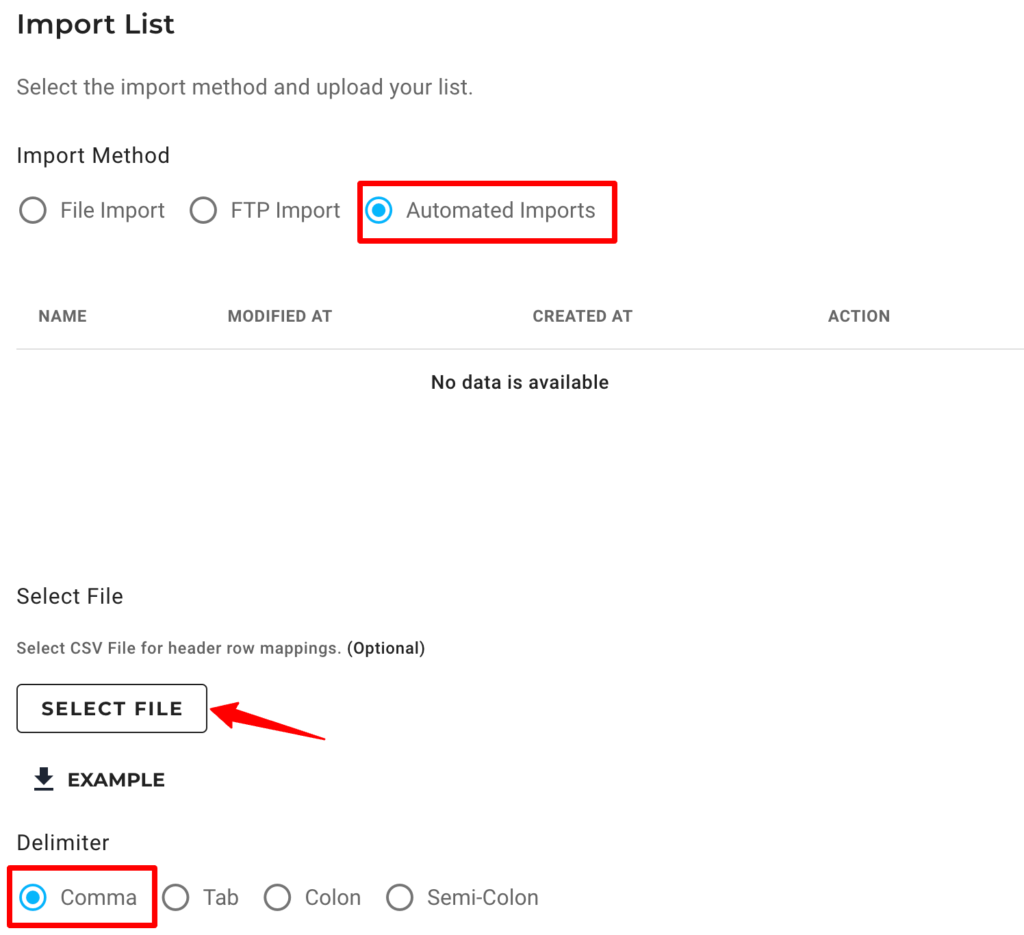
15. Now Choose the Import method as “Automated imports”
16. Upload the CSV Downloaded from CustomerLabs by clicking on “Select file”
17. After it is uploaded, choose the Delimiter as “Comma” → Continue
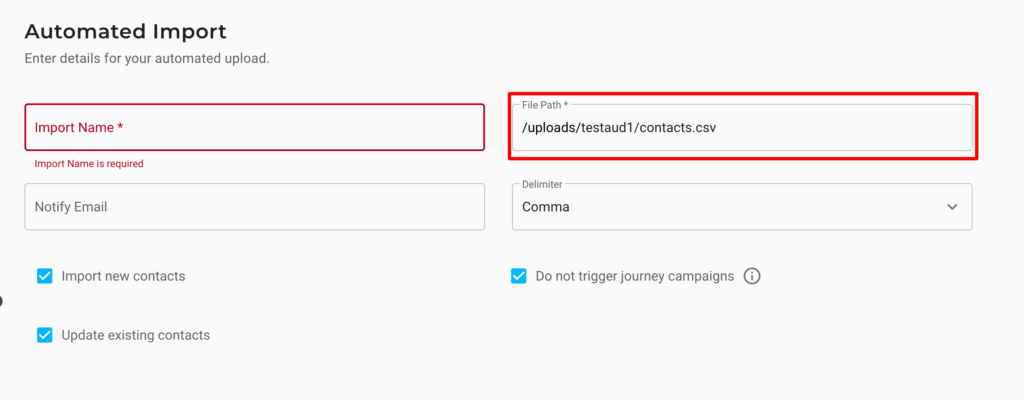
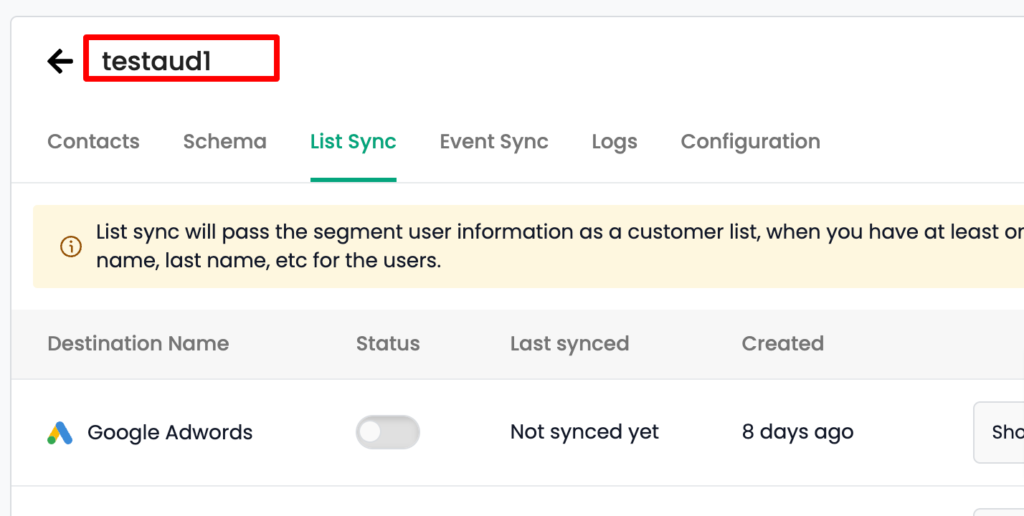
18. Now give an “Import Name” and in the File path include the audience name as given in CustomerLabs (refer in the second image below) and follow the format correctly – /uploads/[customerlabs_audience_name]/contacts.csv
19. The mappings are automatically fetched from the imported file. If you have any custom fields that you want to map from the imported file, you can do so by adding in the Custom field section.
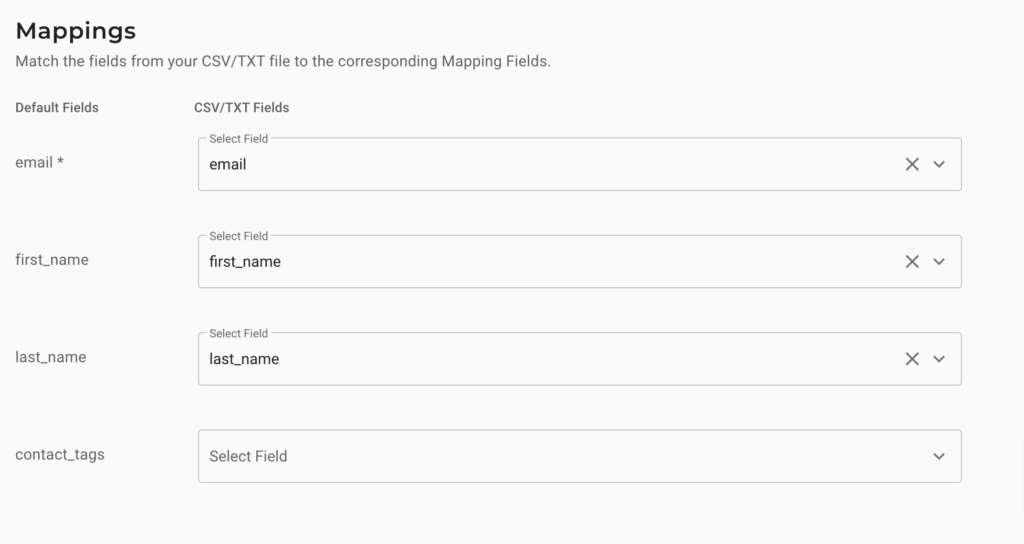
20. In the Subscribed field, choose “Subscribed” from the dropdown. This will enable subscriptions for the users in the list → Click “Save”

21. Now go to CustomerLabs → Audiences → View the Audience that you want to sync with Maropost → List Sync tab → Turn on the toggle under “Status” for Maropost.
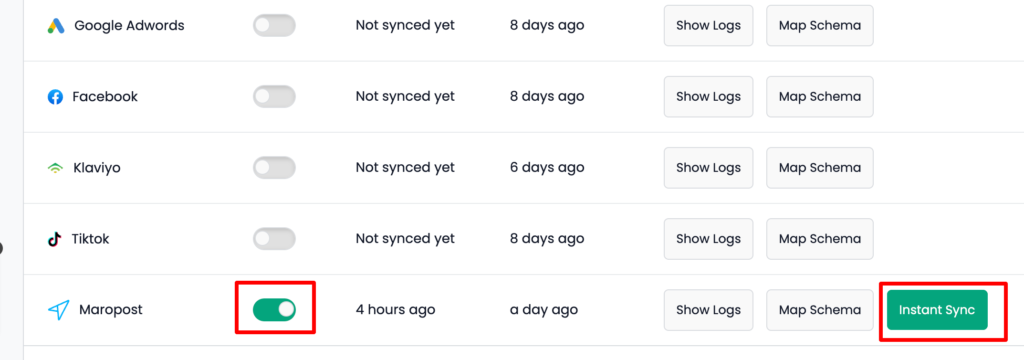
22. Click “Instant Sync” to sync the list now.
The audience list will be synced based on the refresh interval that you have set in CustomerLabs while creating this audience.


