Custom Built Website
For a custom-built website, tracking is set up in two parts:
- Installing the base tracking code — placed in the
<head>of every page. - Implementing JavaScript API calls — to track specific user actions and events.
Install the Tracking Code
Section titled “Install the Tracking Code”- Log in to your CustomerLabs account.
- Go to Home → Connect Website → Tracking Code.
- Copy the CustomerLabs tracking code.
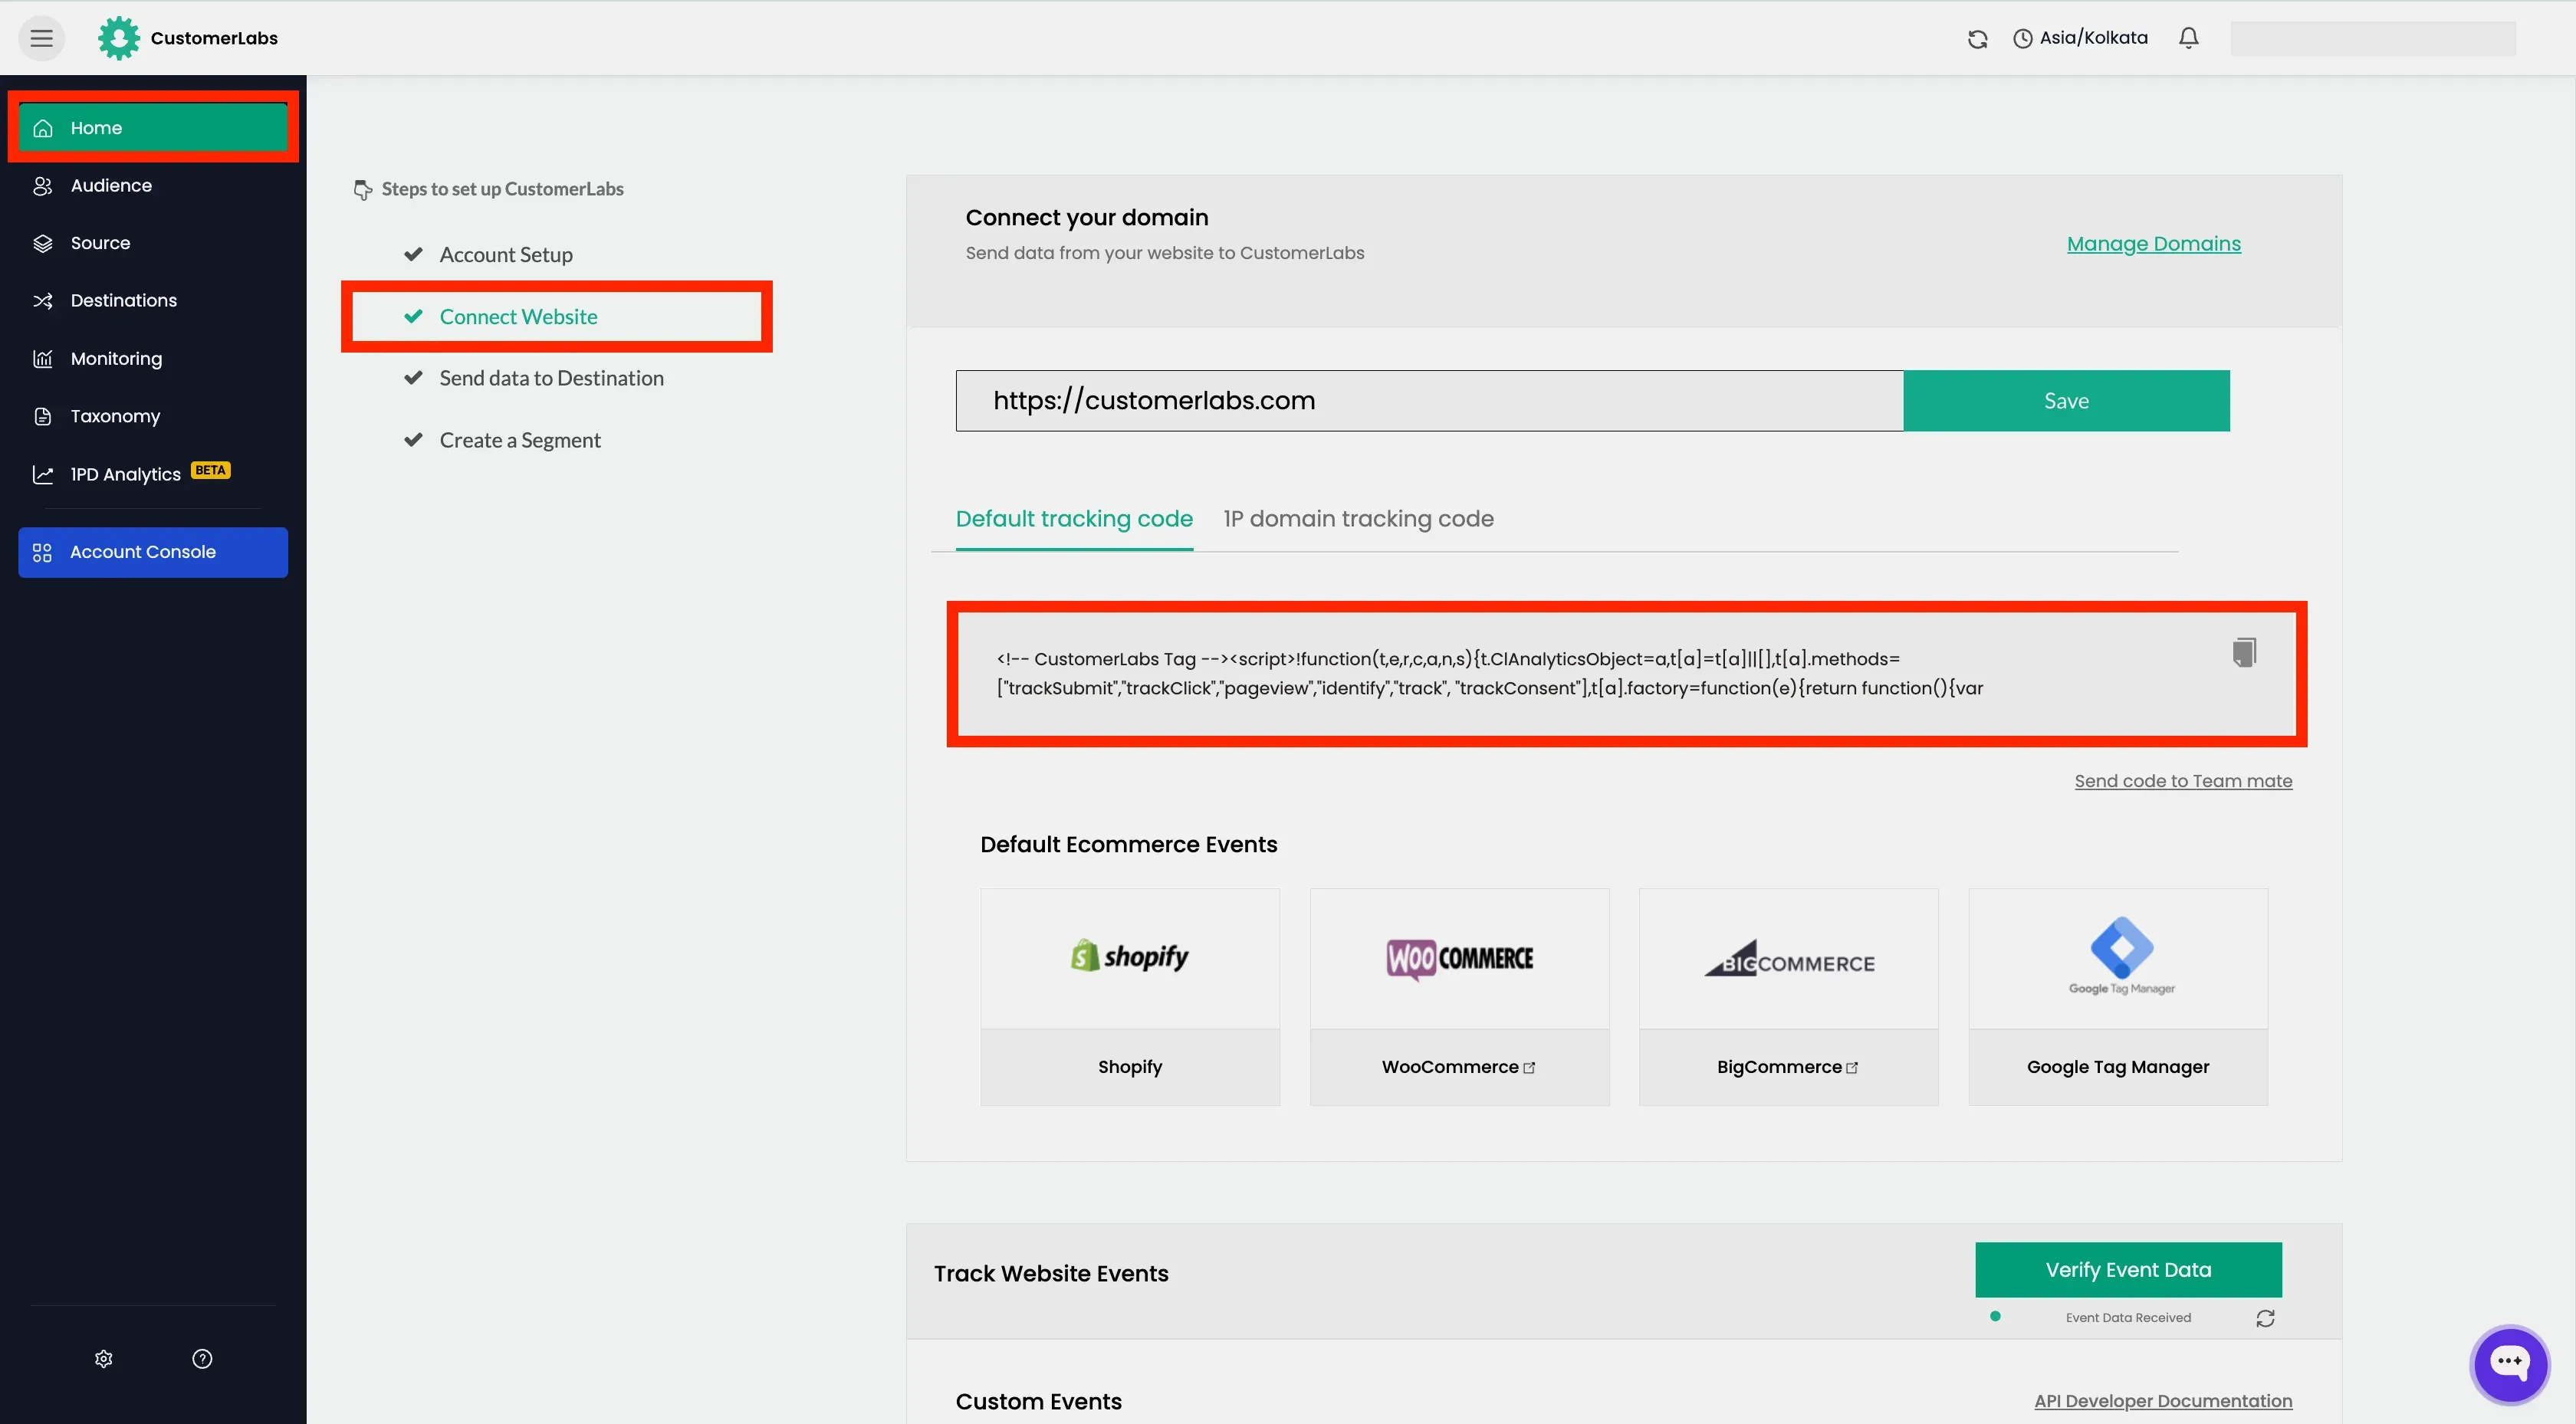
- Paste it inside the
<head>tag of every page on your website, before the closing</head>tag.
<head>...
<script>!function(t,e,r,c,a,n,s){t.ClAnalyticsObject=a,t[a]=t[a]||[],t[a].methods=["trackSubmit","trackClick","pageview","identify","track", "trackConsent"],t[a].factory=function(e){return function(){var r=Array.prototype.slice.call(arguments);return r.unshift(e),t[a].push(r),t[a]}};for(var i=0;i<t[a].methods.length;i++){var o=t[a].methods[i];t[a][o]=t[a].factory(o)};n=e.createElement(r),s=e.getElementsByTagName(r)[0],n.async=1,n.crossOrigin="anonymous",n.src=c,s.parentNode.insertBefore(n,s)}(window,document,"script","https://cdn.js.customerlabs.co/<ACCOUNT-ID>.js","_cl");_cl.SNIPPET_VERSION="2.0.0"</script>
...</head>Track other Events with the JavaScript API
Section titled “Track other Events with the JavaScript API”Once the base tracking code is installed, use the CustomerLabs JavaScript API to capture specific user interactions.
Tracking Page Views
Section titled “Tracking Page Views”Page views are tracked automatically by the tracking code.
For custom or dynamic page views, use _cl.pageview() function.
Syntax
Section titled “Syntax”properties = { // customProperties // productProperties (for e-commerce events)}_cl.pageview(<event-name>, properties)Tracking Click and Custom Events
Section titled “Tracking Click and Custom Events”Use _cl.trackClick() to capture form submissions, button clicks, or any other user interaction.
For example, Form submitted, Added to cart, Checkout made, etc.
var properties = { // customProperties // productProperties (for e-commerce events)};_cl.trackClick(<event-name>, properties);Identifying Users
Section titled “Identifying Users”When a user submits their unique identifier (e.g., email or phone number), call _cl.identify() to create or update their profile in CustomerLabs.
var properties = { "customProperties": { "user_traits": { "t": "Object", "v": { "first_name": { "t": "string", "v": "John" }, } }, "identify_by_email": { "t": "string", "ib": true // identify by flag } }};_cl.identify(properties);Tracking Company / Group Data
Section titled “Tracking Company / Group Data”To associate a user with a company or account, use _cl.group().
var properties = { "customProperties": { "user_traits": { "t": "Object", "v": { "first_name": { "t": "string", "v": "John" }, } }, "group_traits": { "t": "Object", "v": { "company_website": { "t": "string", "v": "www.example.com" } } }, "identify_by_website": { "t": "string", "v": "www.example.com", "igb": true // identify group by flag } }};_cl.group(properties);Building the Properties Object
Section titled “Building the Properties Object”All events in CustomerLabs use a structured customProperties object. Understanding this schema is key to correctly tracking any event. If it is a e-commerce event, productProperties are also present along with customProperties.
This properties is mandatory to pass the event and user information correctly to CustomerLabs.
Next Steps
Section titled “Next Steps”- Verify the Installation using our Chrome Extension
- Connect other data sources
- Connect CustomerLabs with Ad Platforms
- Create your first Audience