Customerlabs CDP Documentation
What is a Source in CustomerLabs?
When a platform is connected as a Source, you will be able to bring all the event data from that particular platform through webhooks to CustomerLabs. This will enable you to enrich existing user profiles and create a unified view of the customer in one place.
Marketing teams can quickly connect a Source platform to CustomerLabs without writing a single line of code.
Currently CustomerLabs supports integrations with server-side and cloud app sources. View platforms that you can connect with CustomerLabs here.
Getting Started
Sources is currently accessible to all users of the platform. See how you can access Sources from your CustomerLabs home screen below,

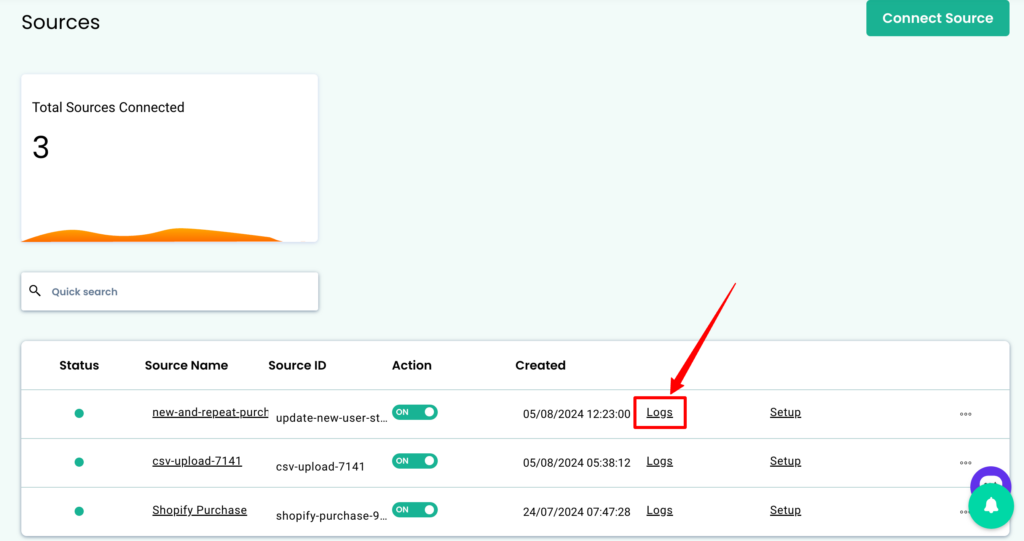
The Sources dashboard, gives a complete overview of the number of sources connected, their status, and the ability to access their setup.
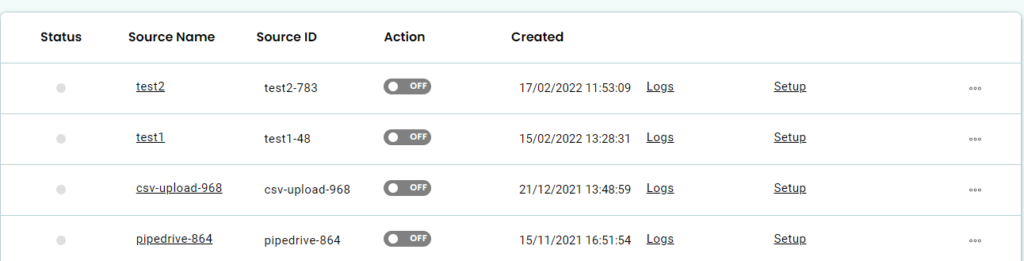
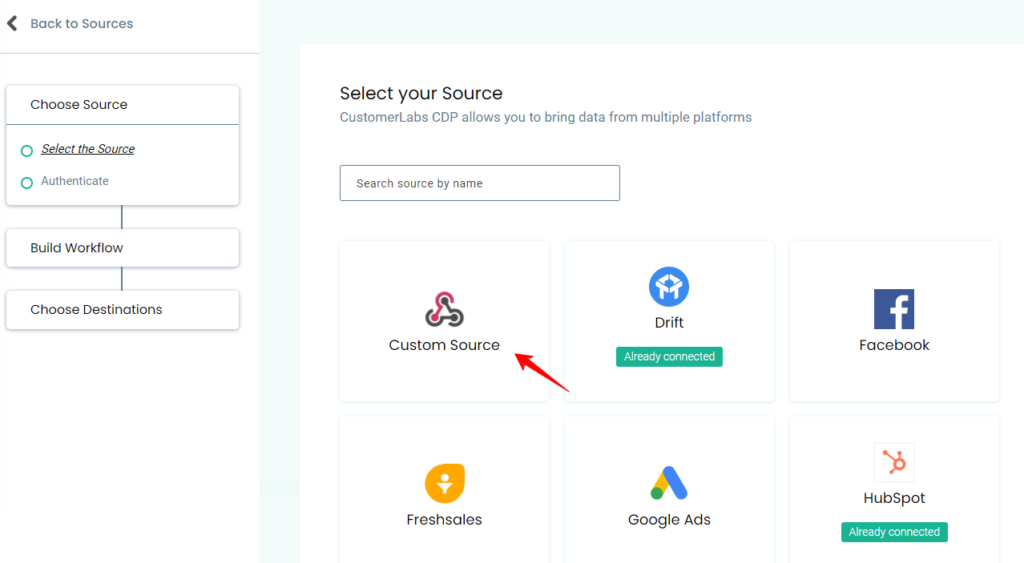
To connect a new source, Click on Connect Source on the top right corner. This will open up the list of sources that CustomerLabs currently offers.
You can also connect a custom source that supports webhooks by selecting Custom Source.
In case you need a new source to connect to CustomerLabs, just let us know. Happy to prioritize and release a new integration for your business.
Once a Source platform is selected, you will be taken to the authentication screen. Once the authentication process is complete CustomerLabs will be able to receive incoming customer data from your Source platform. The authentication process differs for each app. Click below to learn more about the authentication process of popular source apps.
Once the platform integration is complete, you can now codelessly create workflows to bring specific customer data into CustomerLabs.
What is a Workflow?
A Workflow helps you to turn the raw data you receive from the source into specific event data based on the workflow configuration which includes filtering and modifying the parameters. You can create multiple workflows inside a Source. A workflow is a one-time setup that constantly receives customer data & updates user profiles in CustomerLabs in real-time.
Once a Source platform is authenticated, users can build workflows without writing a single line of code.
How to build a Workflow?
The four-step process to build a workflow are as follows,
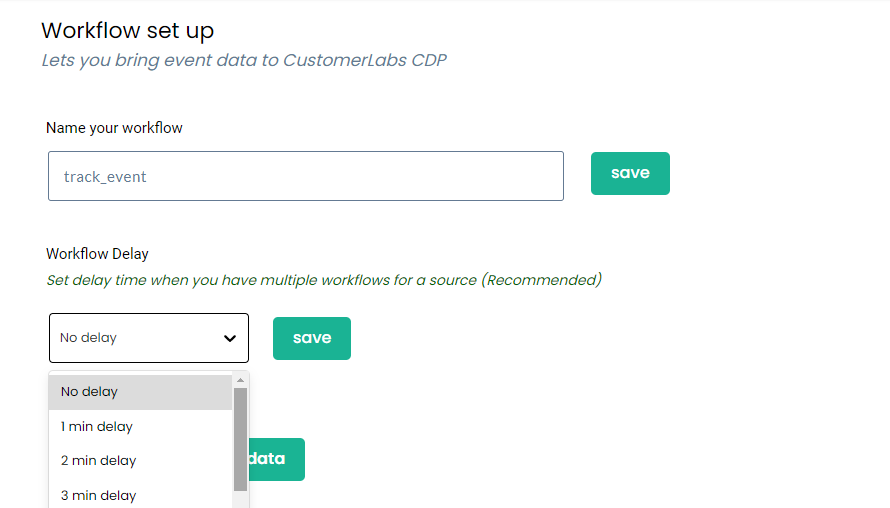
Step 1: Setup the workflow
Name your workflow
This helps you quickly select relevant workflows – just for internal purposes.
Example: If you want to receive the data of users whose stage is changed to “Lead” in your CRM through this workflow, you can name this workflow as “lead_updated” or “lead_created”.
Workflow Delay
Workflow delay is recommended when you have multiple workflows in a source.
The data coming into the source will be sent across the workflows at the same time if the workflow delay is not given. This may result in concurrency issues.
For example, Whenever a user enters from the source, CustomerLabs checks if the user is already available in the database or assigns a unique user id to the user. Say, you have 4 workflows for the source and when the data is sent across all the workflows at the same time, 4 new user ids will be created for the same user if the user is not there in the database. Hence, setting up the delay time will make sure the new user is assigned a single unique id.
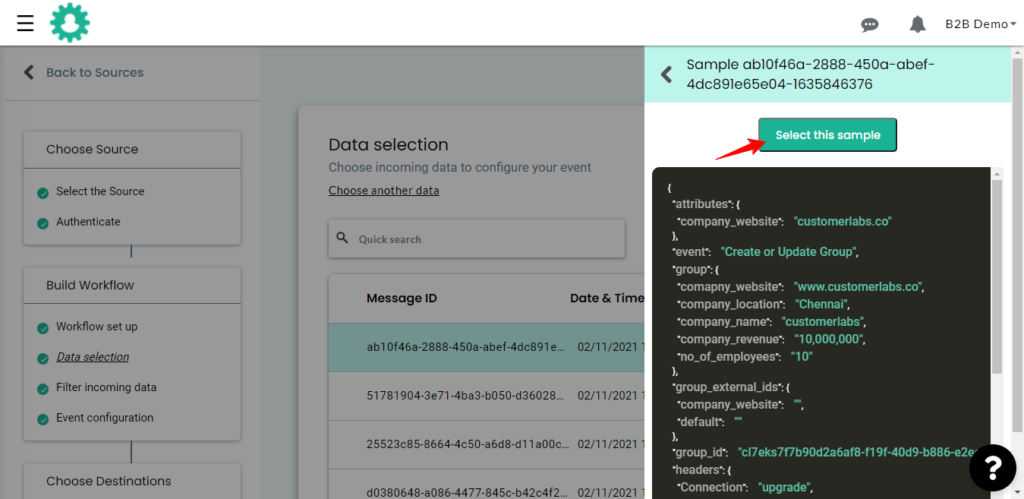
Step 2: Choose sample data
To receive event samples, trigger an event in that particular Source. For example, if you’re setting up a workflow to receive contact information as and when it gets updated in your CRM. Update a test contact in your CRM to receive event information in CustomerLabs.
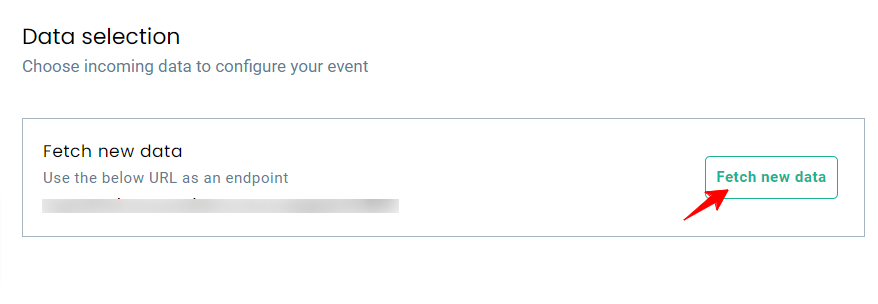
You will be able to update up to 5 samples at once. Fetching sample data in a few source platforms might take time. In that case, please wait for some time before you try again.
You can view the incoming sample data and select the sample that suits your use case.
Note: While selecting the sample, ensure the data contains no parameters with null values as given in the image

The Customer Labs will not process parameters with null values. This is because null values are not considered valid data by the destination. If the sample data consists of any field with a null value, it will not be pushed to the destination.
We suggest passing all the required parameters with a value or an empty string.
For example, if the parameter is “first_name”, you could pass the value “John Doe” or the empty string
” “. Only if you pass all the required parameters with a value or an empty string, we can process the data and send them to the integrated destinations successfully.
Step 3: Filter incoming data
The filter screen acts as a roadblock to stop other non-related event data coming in from the Source & skew existing information.
Appropriate filter criteria help in receiving and maintaining a clean customer data repository to power your marketing efforts.
Choose the required ‘field’ with its filtering ‘conditions’. You can also add a ‘custom field’ and its filtering conditions. Additionally, the ‘custom query field’ can also be added to filter data from the deep nested fields.

The following are fields with their respective conditions,
Predefined Fields/Custom Fields – Text Contains
Text Does not contain
Text Exactly matches
Text Does not exactly match
Text Is in
Text Is not in
Text Starts with
Text Does not start with
Text Ends with
Text Does not end with
Number Greater than
Number Less than
Number Greater than or equal
Number Less than or equal
Number Equals
Number Not equals
Date After
Date Before
Date Equals
Boolean Is true
Boolean Is false
Exist
Does Not exist
Is Null
Is Not null
Should Empty
Should Not Empty
Array Contains
Array Does Not contains
Custom Query Field – Any One
All
For example, if you would want to create a bottom-of-the-funnel event by filtering the CRM stages, you can filter by choosing the lead stage as the field that contains different stages like event_scheduled, trial_signup, poc_stage as the values and combine them using “Or”. This will filter and send the data in if at least one of the criteria is satisfied.
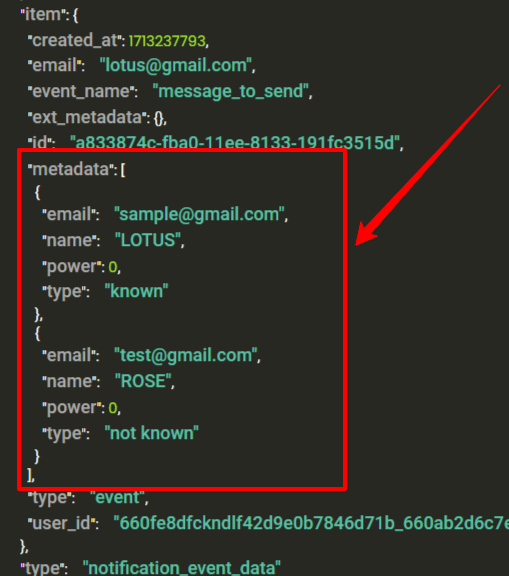
Considering the sample data above, the ‘custom query field’ are item__metadata__email, item__metadata__name, item__metadata__power, item__metadata__type. Any array of data can be filtered using Custom query field.
The custom query fields can be filtered with conditions ‘All‘ or ‘Any One‘. Considering the query in the below image,
Filter ‘All‘ the data from the ‘metadata’ array where ‘item__metadata__power’ has value 0.
Filter ‘Any One‘ of the data from the ‘metadata’ array where ‘item__metadata__name’ has text ROSE.

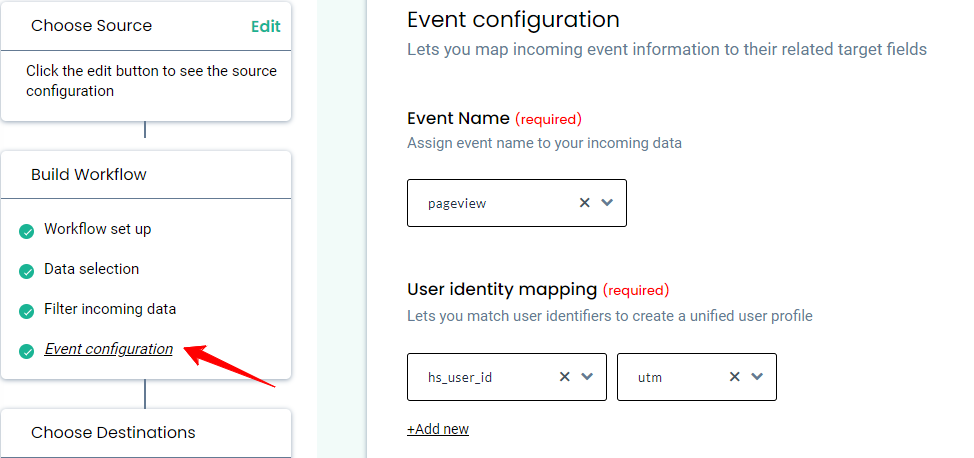
Step 4: Event configuration
Event configuration is the final and the most important step of the workflow setup. Below is a detailed explanation of the various fields provided.
4a. Event name
You can assign an event name by selecting from the drop down as shown below.
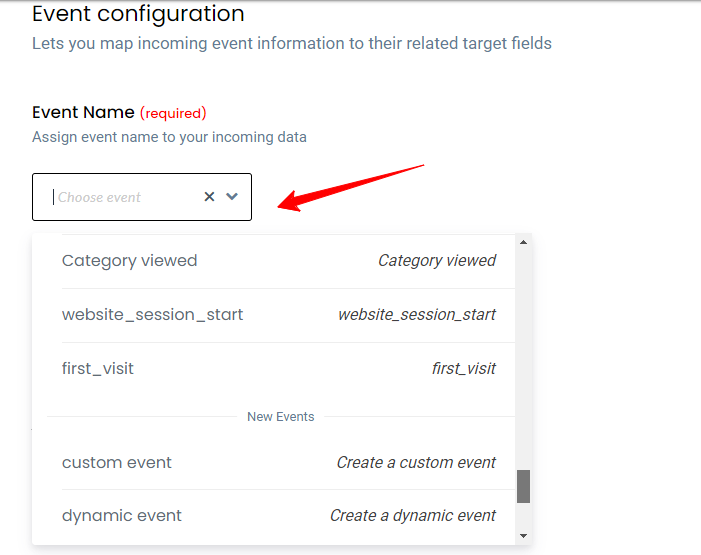
| Event type | Description |
|---|---|
| Custom event | Lets you give a new custom name to your incoming event |
| Dynamic event | Lets you choose the name of the incoming event as sent by the Source |
| Create or update group | Can be chosen if the incoming event is an account level update |
| Create or update user | Can be chosen if the incoming event is an user level update |
| Assign group to user | Lets you add company level updates to user |
4b. Identity mapping
What is Identity Resolution?
Identity Resolution is the heart of CustomerLabs.
Identity Resolution or ID Resolution enables marketers to consolidate the collected user information across disparate sources and delivers individual profiles to improve marketing effectiveness.
Different systems identify and store user information in various formats. Some include email IDs, cookie IDs, external IDs, unique user IDs etc. This is the major reason for customer data silos – the inability to identify the same user between two different tools. Since the destination tool is not able to identify and match user information accurately, incorrect & duplicate users are formed resulting in delivering a crappy customer experience.
However CustomerLabs resolves this problem by collecting and stitching user & account level information gathered across various tools to one unique ID and sends it to destination tools in a usable format. Learn how Identity Resolution in CustomerLabs helps marketing teams.
CustomerLabs helps you resolve identity issues both at a user and at an account level.
4b. i. User identity mapping
User identity mapping in CustomerLabs helps in merging incoming user/contact data to existing information.
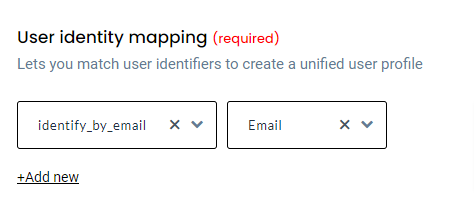
You can choose upto 3 different identifiers including external IDs to map user information. These external IDs will be stored by CustomerLabs to create an enriched user profile.
If you add Facebook as a Destination, CustomerLabs will sync the facebook_fbp to Facebook so that you can easily target the right users thus considerably increasing the audience match rates. Some of the common user identifiers supported by CustomerLabs are shown below.

| ID type | Description |
|---|---|
| identify_by_email | User email address |
| identify_by_phone | User phone number |
| google_analytics_client _id | Unique identifier for a browser–device pair that helps Google Analytics link user actions on a site |
| facebook_fbp | User identifier saved automatically by the Facebook pixel that uses first-party cookies |
| facebook_fbc | User identifier saved automatically by the Facebook pixel that uses first-party cookies when a user clicks on ad |
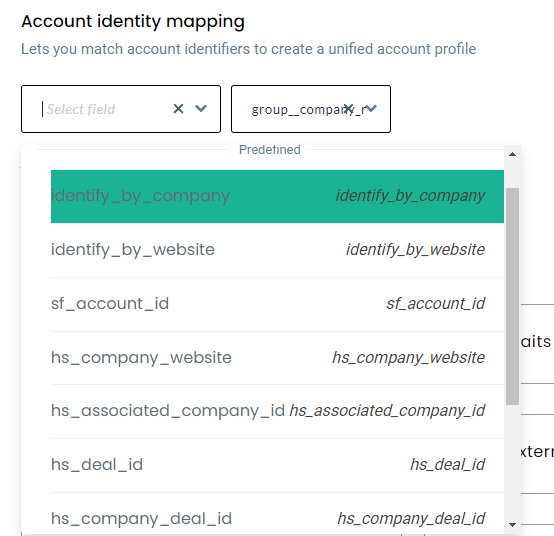
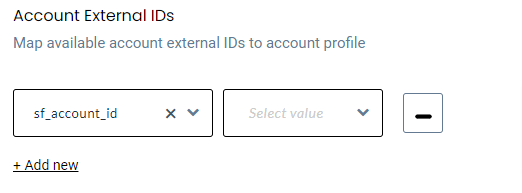
4b. ii. Account identity mapping
Account identity mapping in CustomerLabs helps you link an individual user with an account/company/group/organization/team etc.
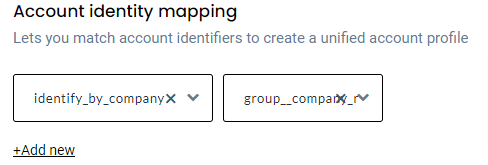
Like User identity mapping, you can add up to three different identifiers to map account level data.
4c. Map other attributes
Post successfully mapping user and account level details, you can categorically map other incoming information into the following buckets.
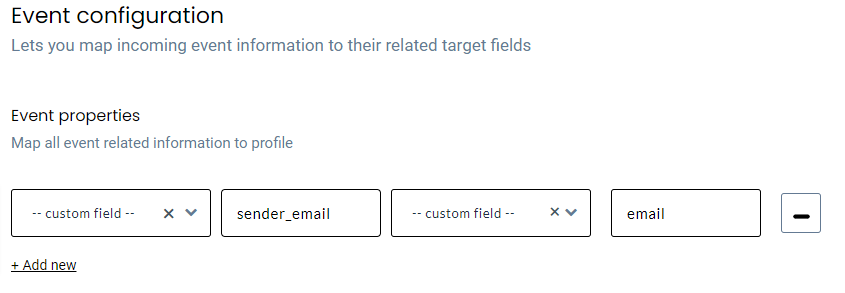
Event Properties: Additional information pertaining to the event can be added under event properties. For example, if you’ve connected an email marketing platform as a source. ‘Email Opened’ is a basic event that will be sent to CustomerLabs. Additional event related data such as ID of the email, Sender email ID, Prospect email ID, Email subject etc. can be added under Event properties.
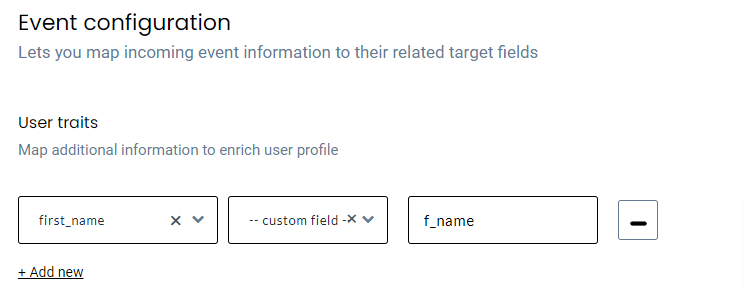
User traits: All user/contact/individual related information can be added under user traits.
To send the user traits to the destination, you must map the user details under this section. This mapping process will allow you to send this valuable user information to the intended destination.
For example, if you’ve set up a workflow to receive all contact updates from your CRM to CustomerLabs. Information such as Contact first & last name, phone, email, address, company, lifecycle stage, job title etc. can be added under user traits. One such scenario would be when you want to run an email campaign with Klaviyo, you should add email ID as a user trait in this section to pass this information to Klaviyo or any such destinations in this case.
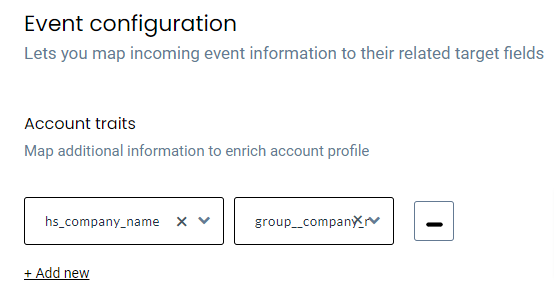
Account traits: Company/group/organization related data can be appended to account traits. In a workflow to receive all company updates from your CRM to CustomerLabs. Data such as Company name, address, city, state, industry, revenue etc. can be added under Account traits.
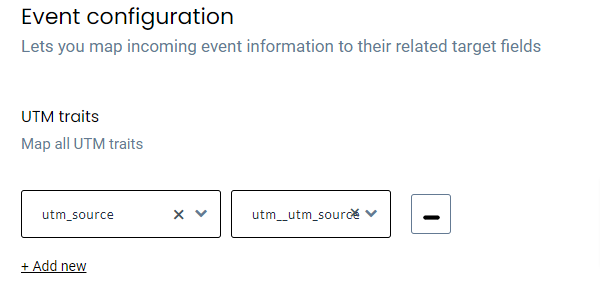
UTM traits: Events containing UTM parameters such as utm_campaign, utm_source, utm_medium etc. can be added under UTM traits.
Product details: Product attributes can be added for events related to E-commerce/other business categories such as Product viewed, Product clicked, Purchases etc. Details such as product sku, product ID, product variant, product size can be added under product details.
- Product details sent to CustomerLabs should either be an object or an array of objects to map the corresponding attributes with CustomerLabs fields. Otherwise, the attributes will not be pulled in CustomerLabs field mappings. A sample object containing product details looks like something as shown in the image below.

- Under the Product details section, you have to filter the object in the first drop-down and map the attributes in the following section as shown in the image below.

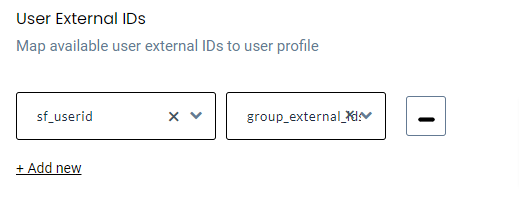
User External IDs: Custom user external IDs such as subscription ID, app ID, Intercom ID, Shopify ID etc. can be added under this category.
Account External IDs: Custom account related IDs provided by popular platforms such as Hubspot, Salesforce etc. can be added to this category.
How to view workflows?
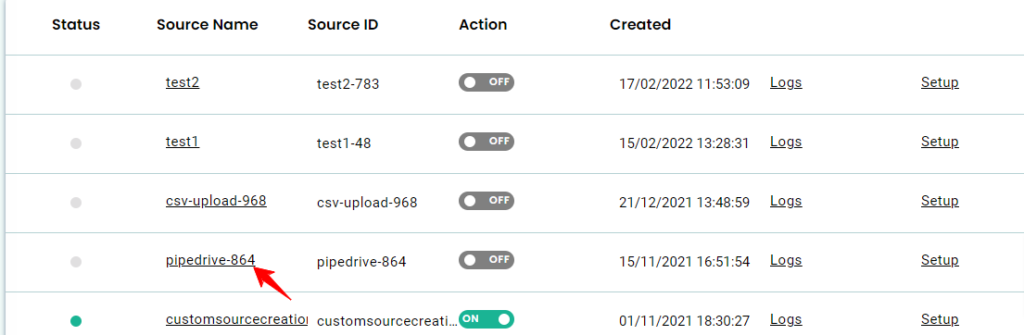
To view created workflows, click on the name of the Source platform as shown below.
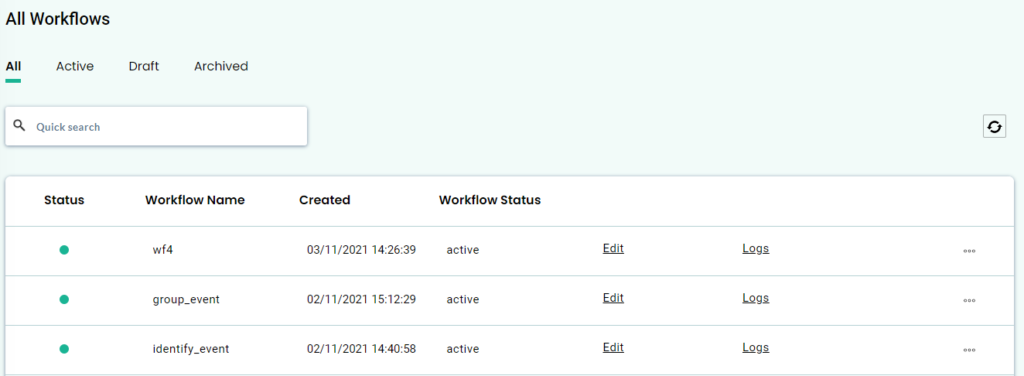
This will open up the workflows created for that particular source as shown below.
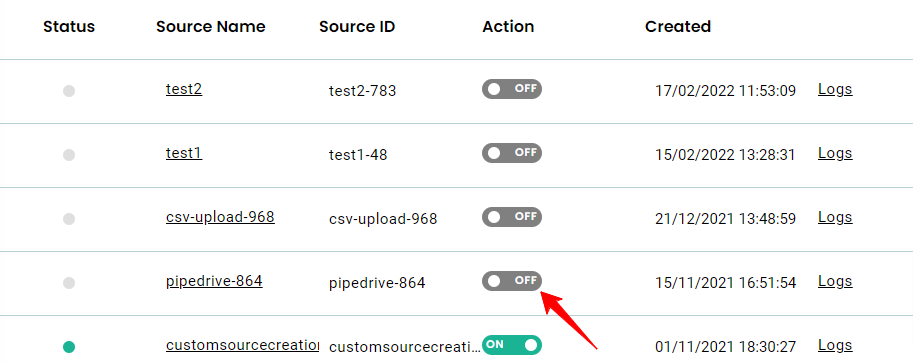
How to activate/deactivate a Source?
Once all the workflows are set up, you can activate or deactivate with a click of a button in the Action section.
Source Logs
Source Logs show a list of events received by the source webhook before being sent to the workflows for event processing. There may be a delay in displaying the events items of up to 10 minutes, which is being currently optimized.
You can see the logs by clicking on “Logs” from a particular source as shown below.
Every single message received by CustomerLabs will have a unique message id and we’ll be logging them so you can see how it is being processed in various workflows before appearing in the event manager.
Source ‘Data in’ log
The below image shows the log data of the message received from that particular source and data variables in JSON format.

Source ‘Data out’ log
The below image shows the log data of the message processed and sent to respective workflows along with a new message id.

Workflow Logs
Individual workflows will also have their own logs, and you can use them to see how the event is transformed including user traits, event attributes, group(account) traits, external ids, group(account) identities, and other attributes.

Few tips on workflow status messages in ‘Data out’
You’ll see the following messages in the workflows and the reasons are listed below.
a) Mapping not found – When a workflow is in draft mode, the message as “Mapping not found” is thrown.
b) Filter condition failed – When a workflow filter condition is failed, this message is thrown.
c) User ID missing or Account ID is missing – We assume every event should have User identity or account identity fields. When the data is missing we’ll throw an error and the event won’t be processed further.
d) Data not found – This message means the data is still being processed, sometimes when there are lot of requests the systems will take up to 10 minutes to process the data.
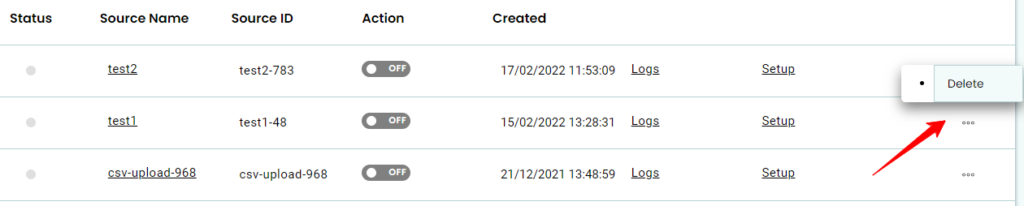
How to delete a Source/Workflow?
To delete a Source/Workflow, click on the dotted lines on the far right of that particular platform/workflow to delete the Source/Workflow.
How to clone a Workflow?
To clone a Workflow, click on the dotted lines on the far right of the particular workflow you want to clone the Workflow.

After the clone, the workflow name will be displayed with a “Clone” tag. The status of the workflow will be ‘draft’.
(Note: Archived Workflow cannot be cloned.)

Need assistance?
Have questions regarding Sources or Facing issues?

