Shopify+CustomerLabs 1PD Ops Integration Guide
Shopify or Shopify Plus is an e-commerce platform that allows users to set up an online store. By connecting your Shopify store with CustomerLabs 1PD Ops, you can start tracking the events (user-behavioral activity) of your website visitors without writing any code.
Prerequisites
Section titled “Prerequisites”- Admin Access to Shopify Store backend
- Active CustomerLabs Account
One-click Checkout
Section titled “One-click Checkout”If you are using one-click checkout tools such as Fastrr (shiprocket), Gokwik, Shopflo, etc., please ensure to complete the integration steps mentioned in the respective tool’s documentation to push bottom-funnel events to the dataLayer or to the CustomerLabs webhook.
- Shiprocket Click Here →
- Shopflo Click Here →
- FlexyPe Click Here →
- Gokwik Click Here →
Initial Setup
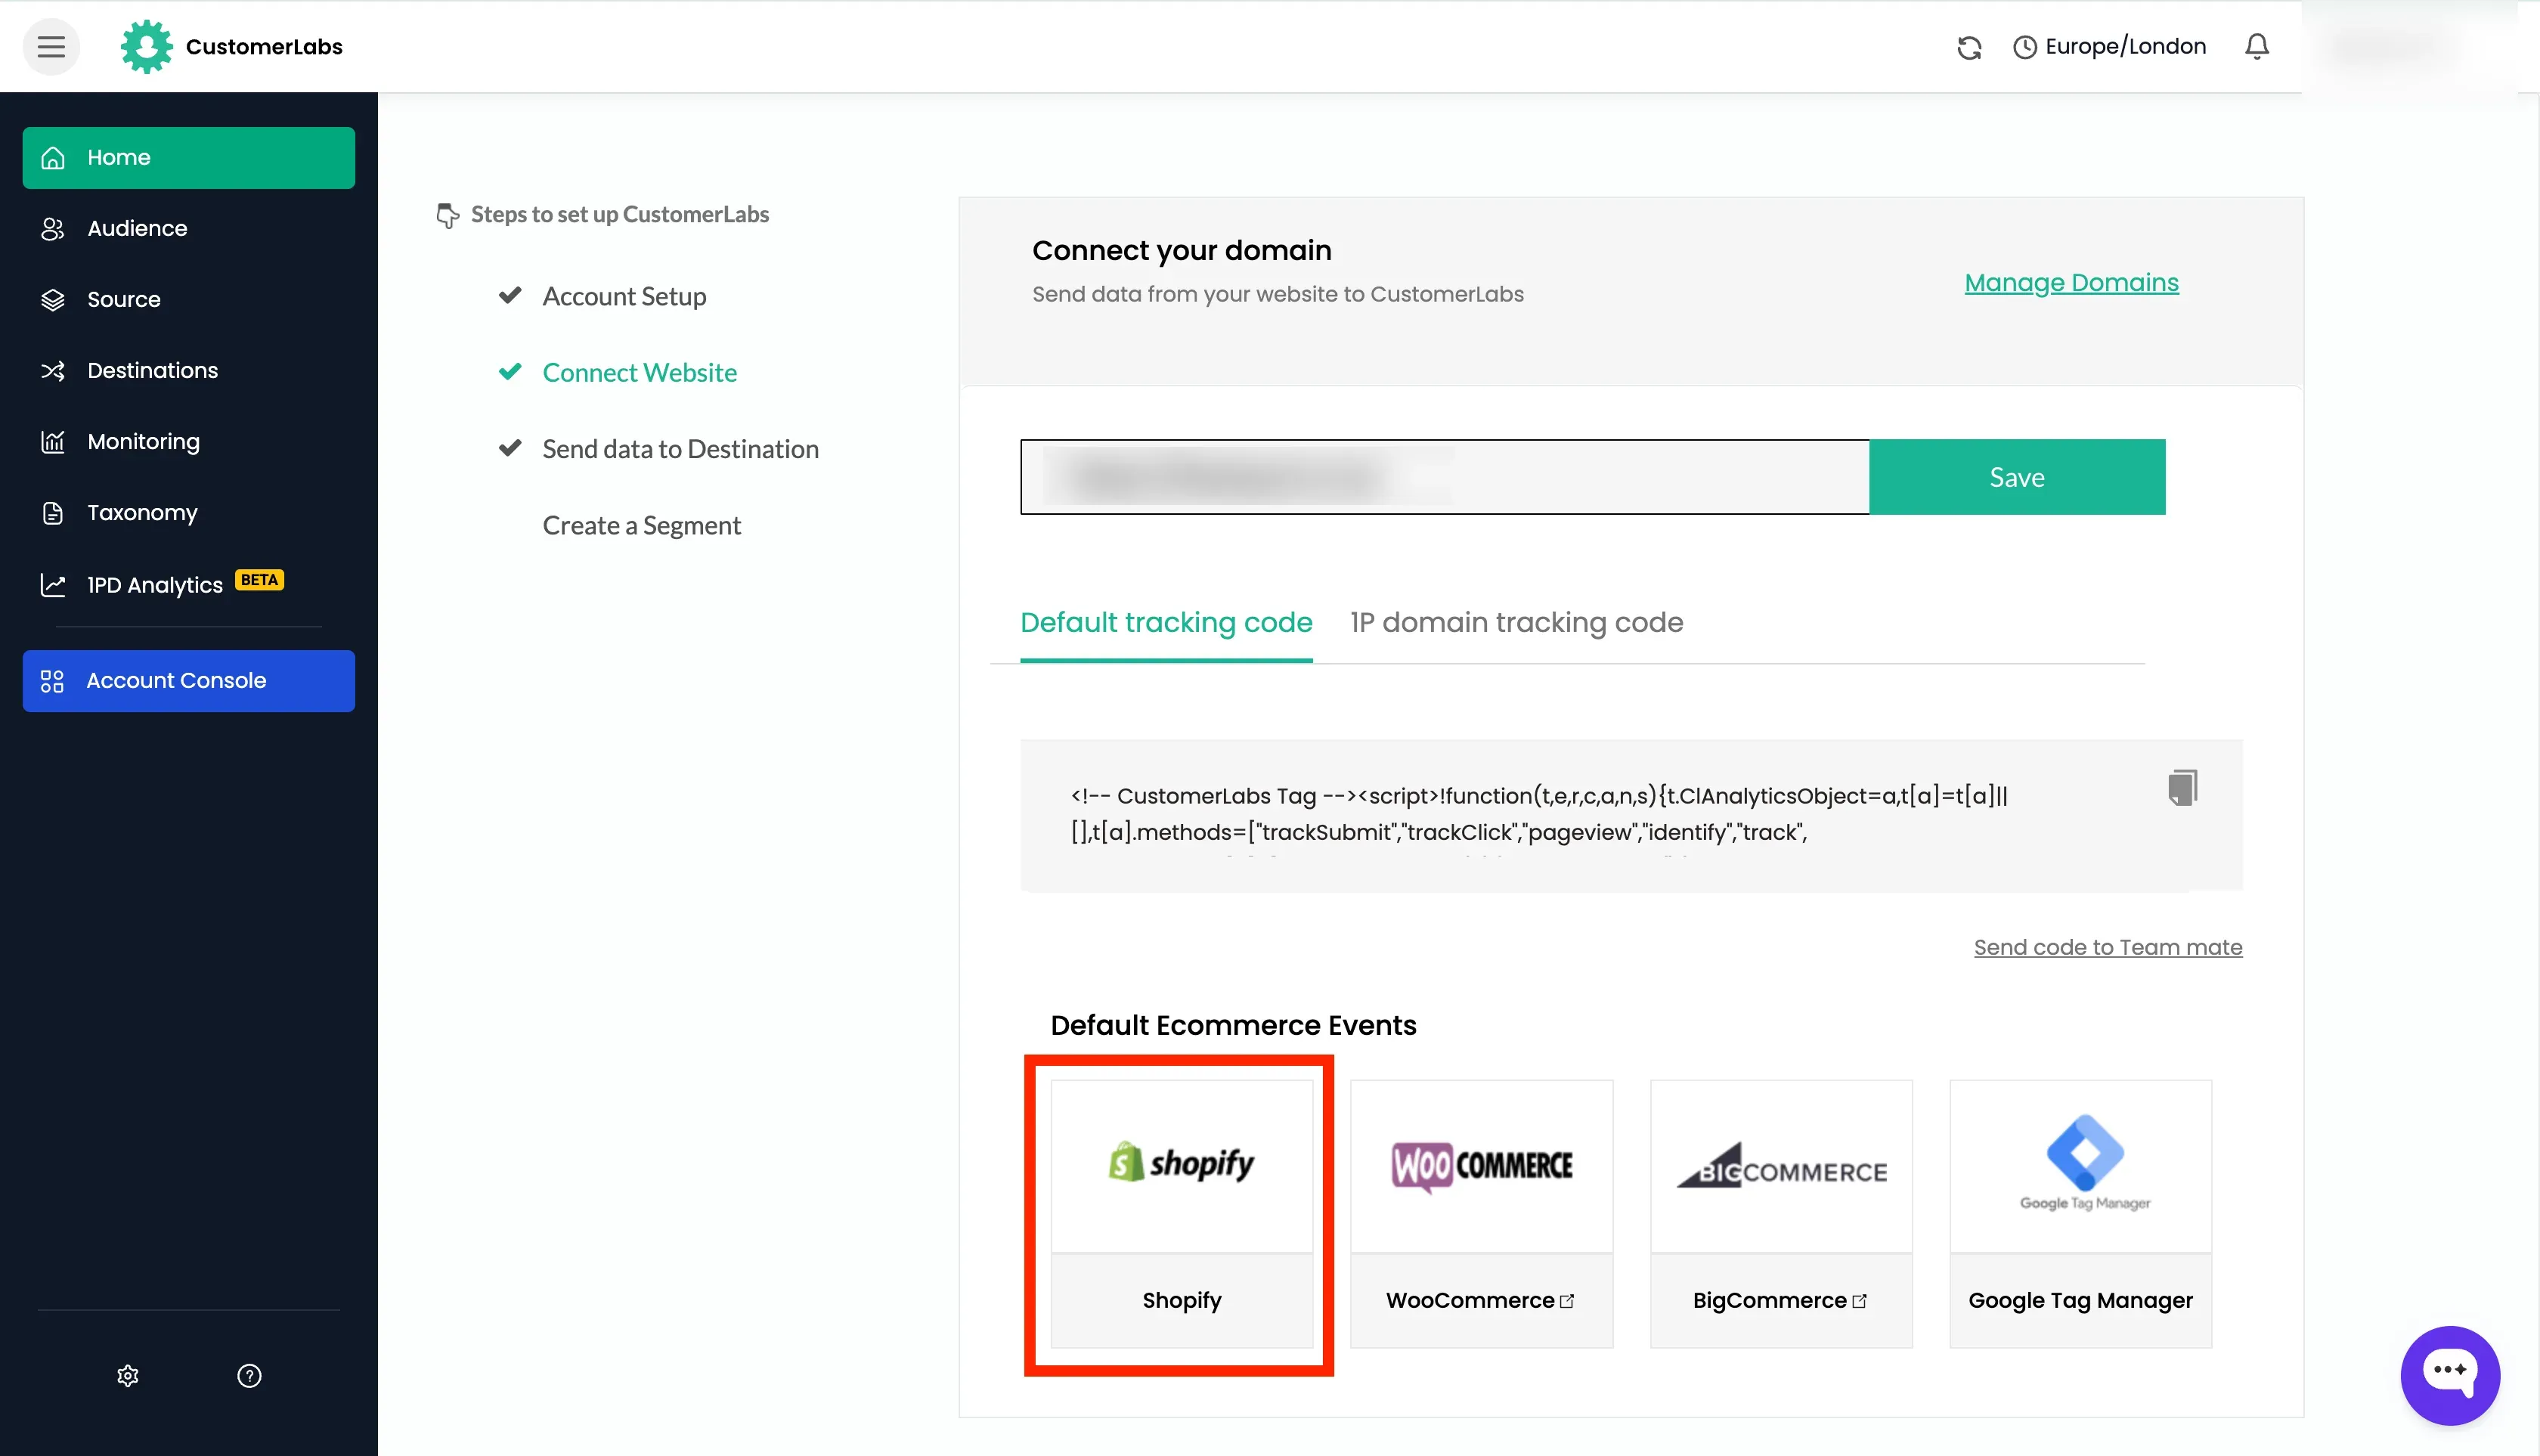
Section titled “Initial Setup”Connect Your Domain
Section titled “Connect Your Domain”- Log in to the CustomerLabs account.
- If you do not have an account, Click “New to CustomerLabs? Sign up” below the login fields and Create a New Account
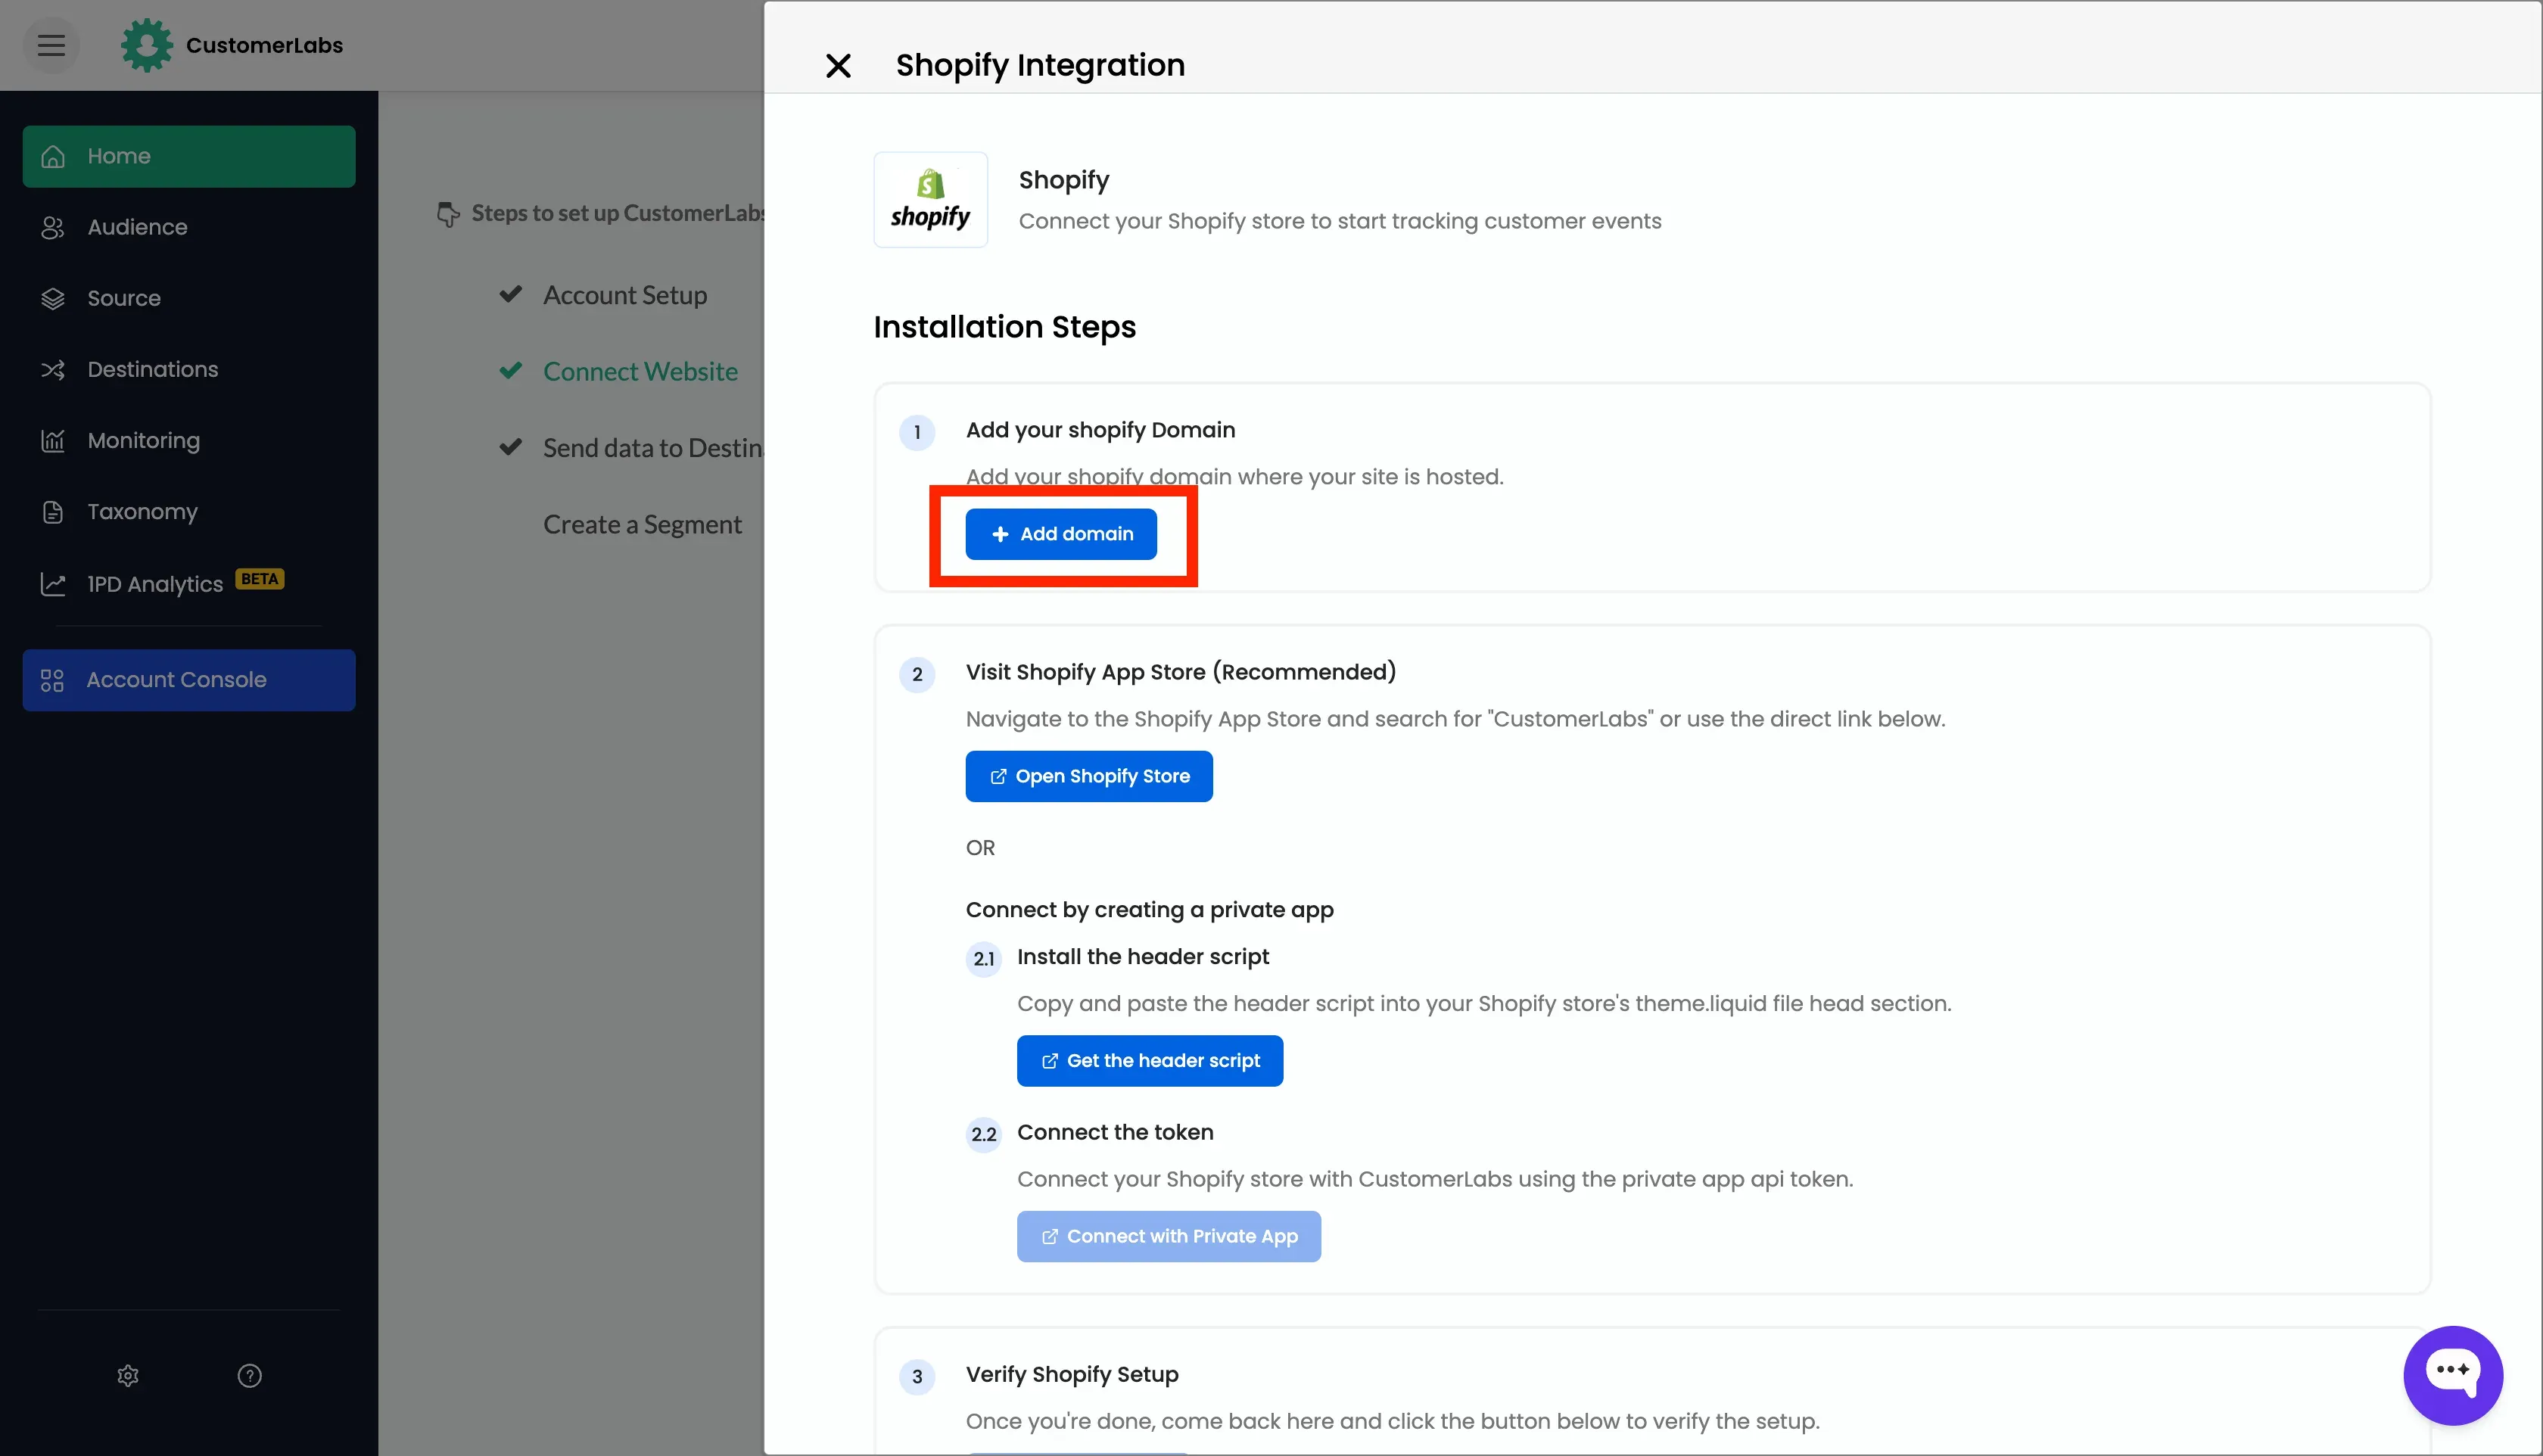
Enable Shopify Integration
Section titled “Enable Shopify Integration”- Go to the Default Ecommerce Events section and click Shopify to open the integration setup.
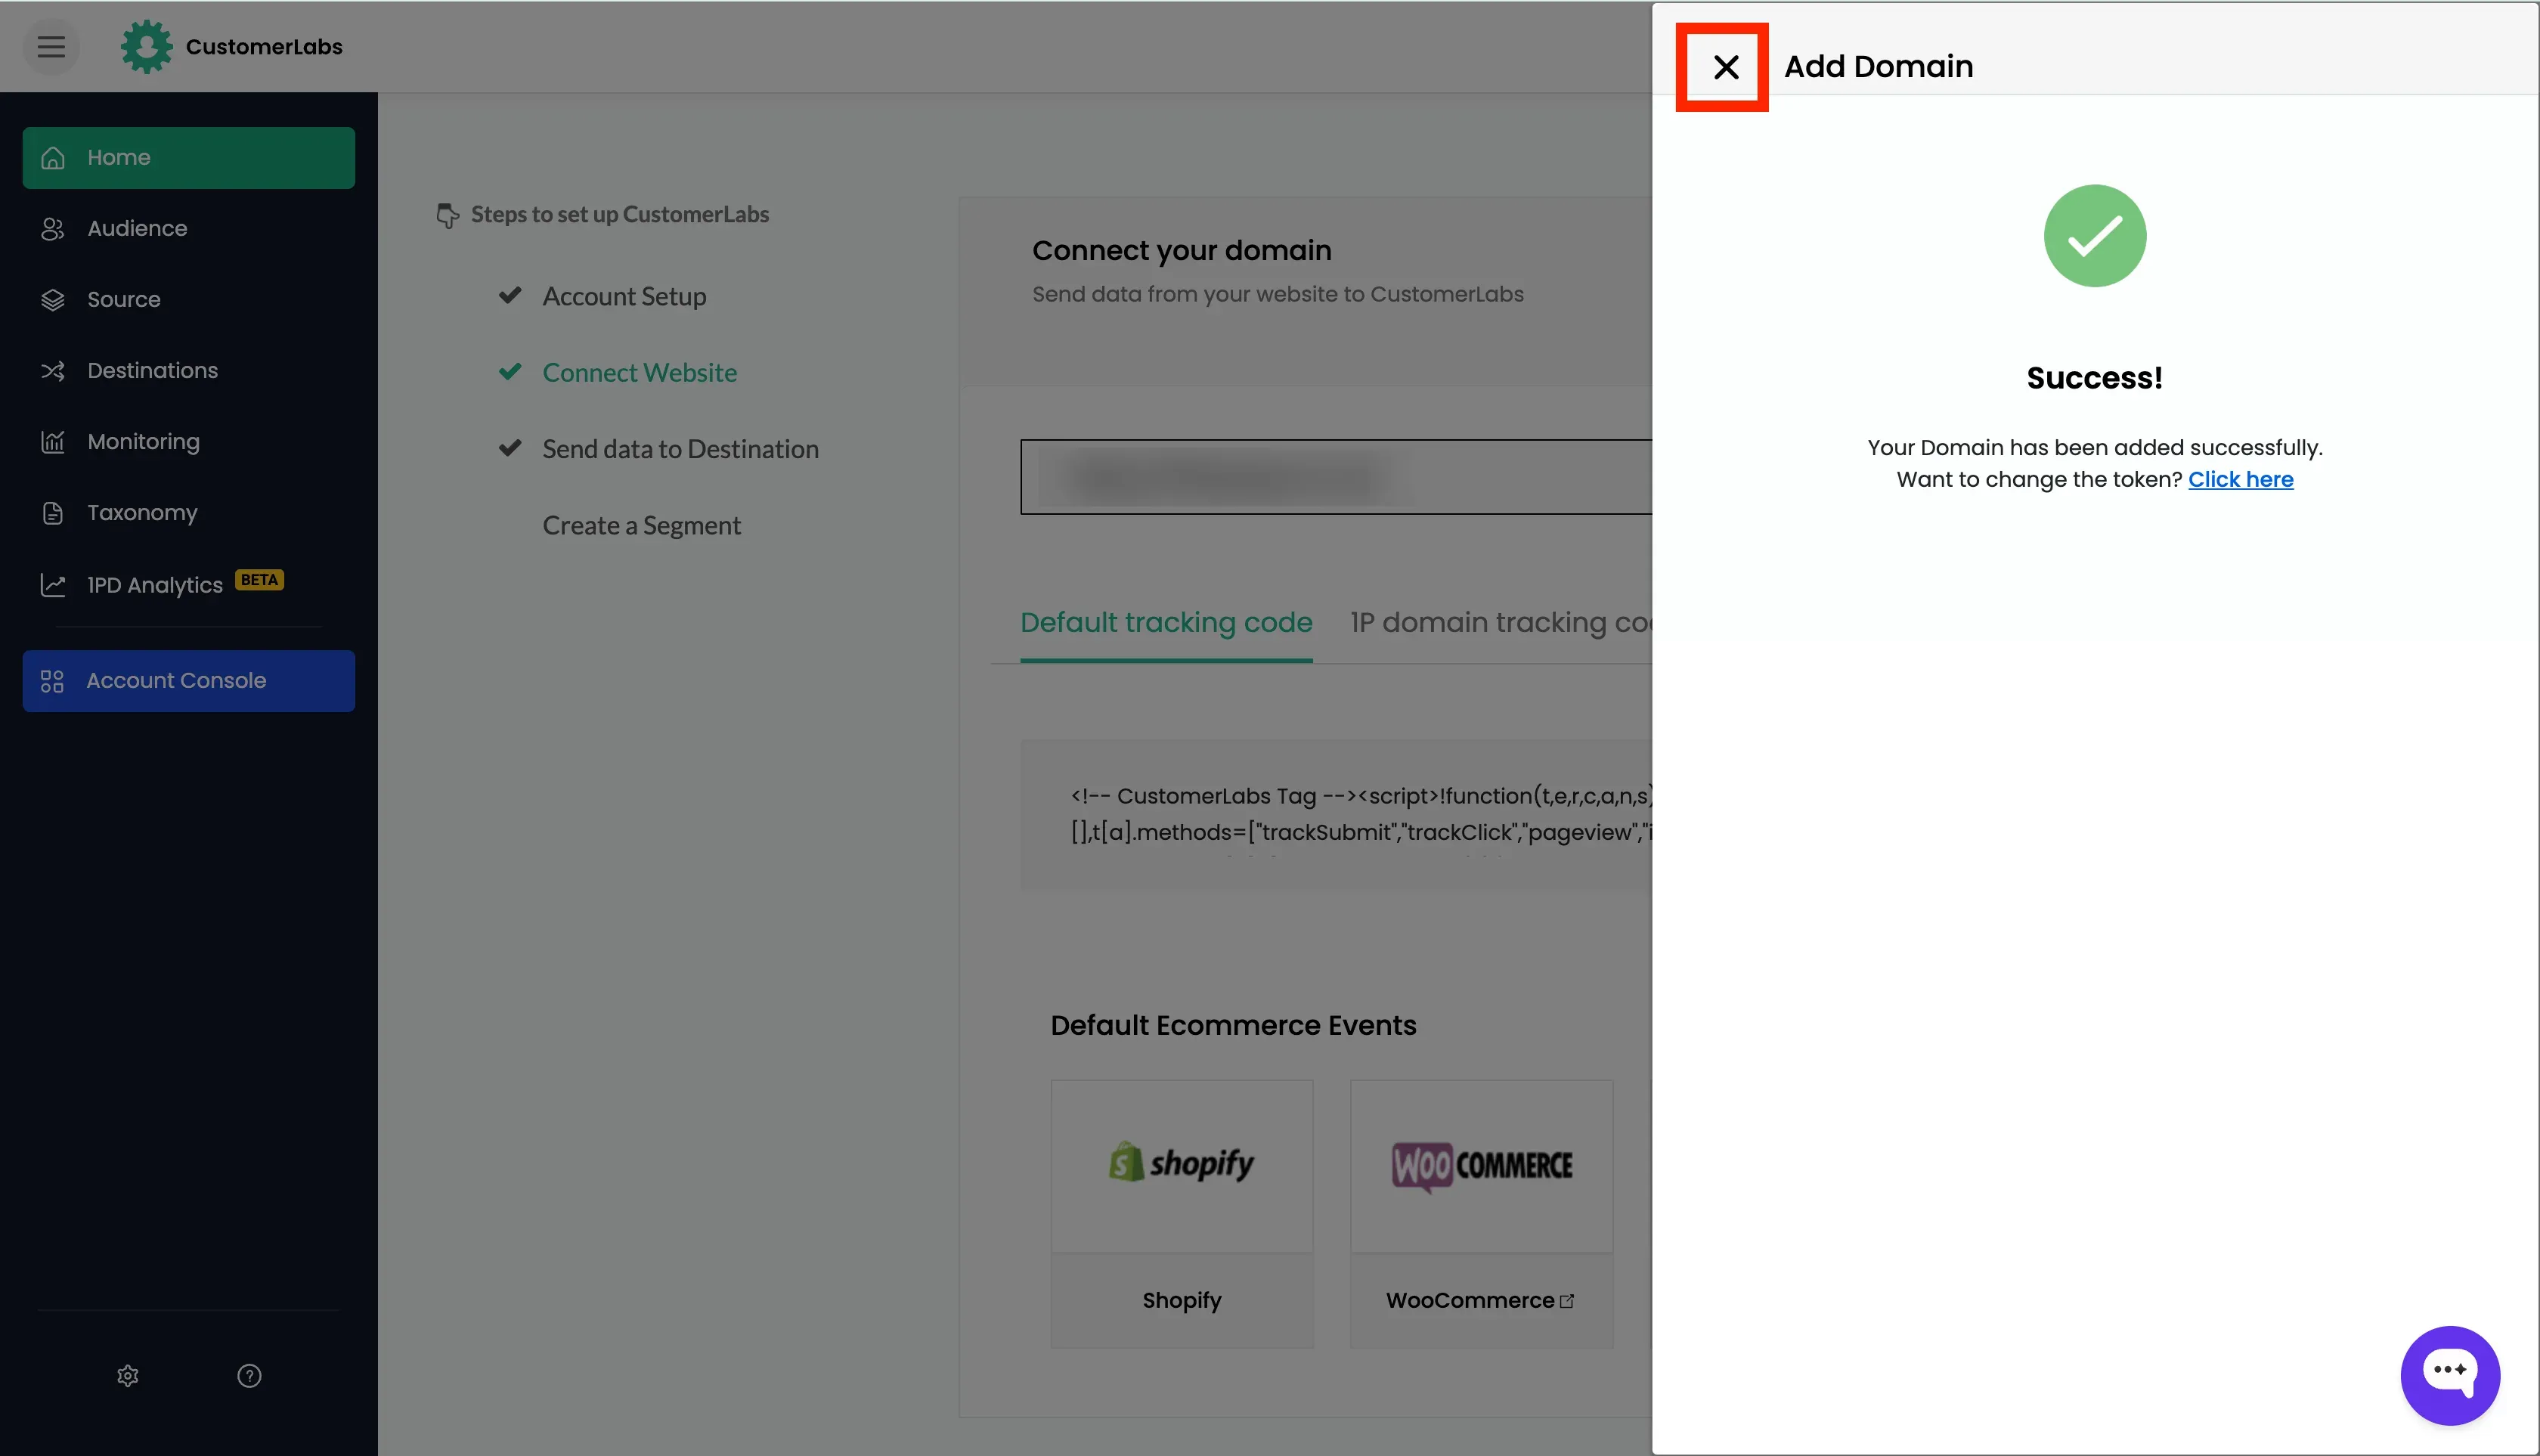
- Add your domain name by clicking the “Add Domain” button.
- Open Shopify → Domain Settings, copy the domain name, and paste it into the setup.
- Click Next and close the modal.

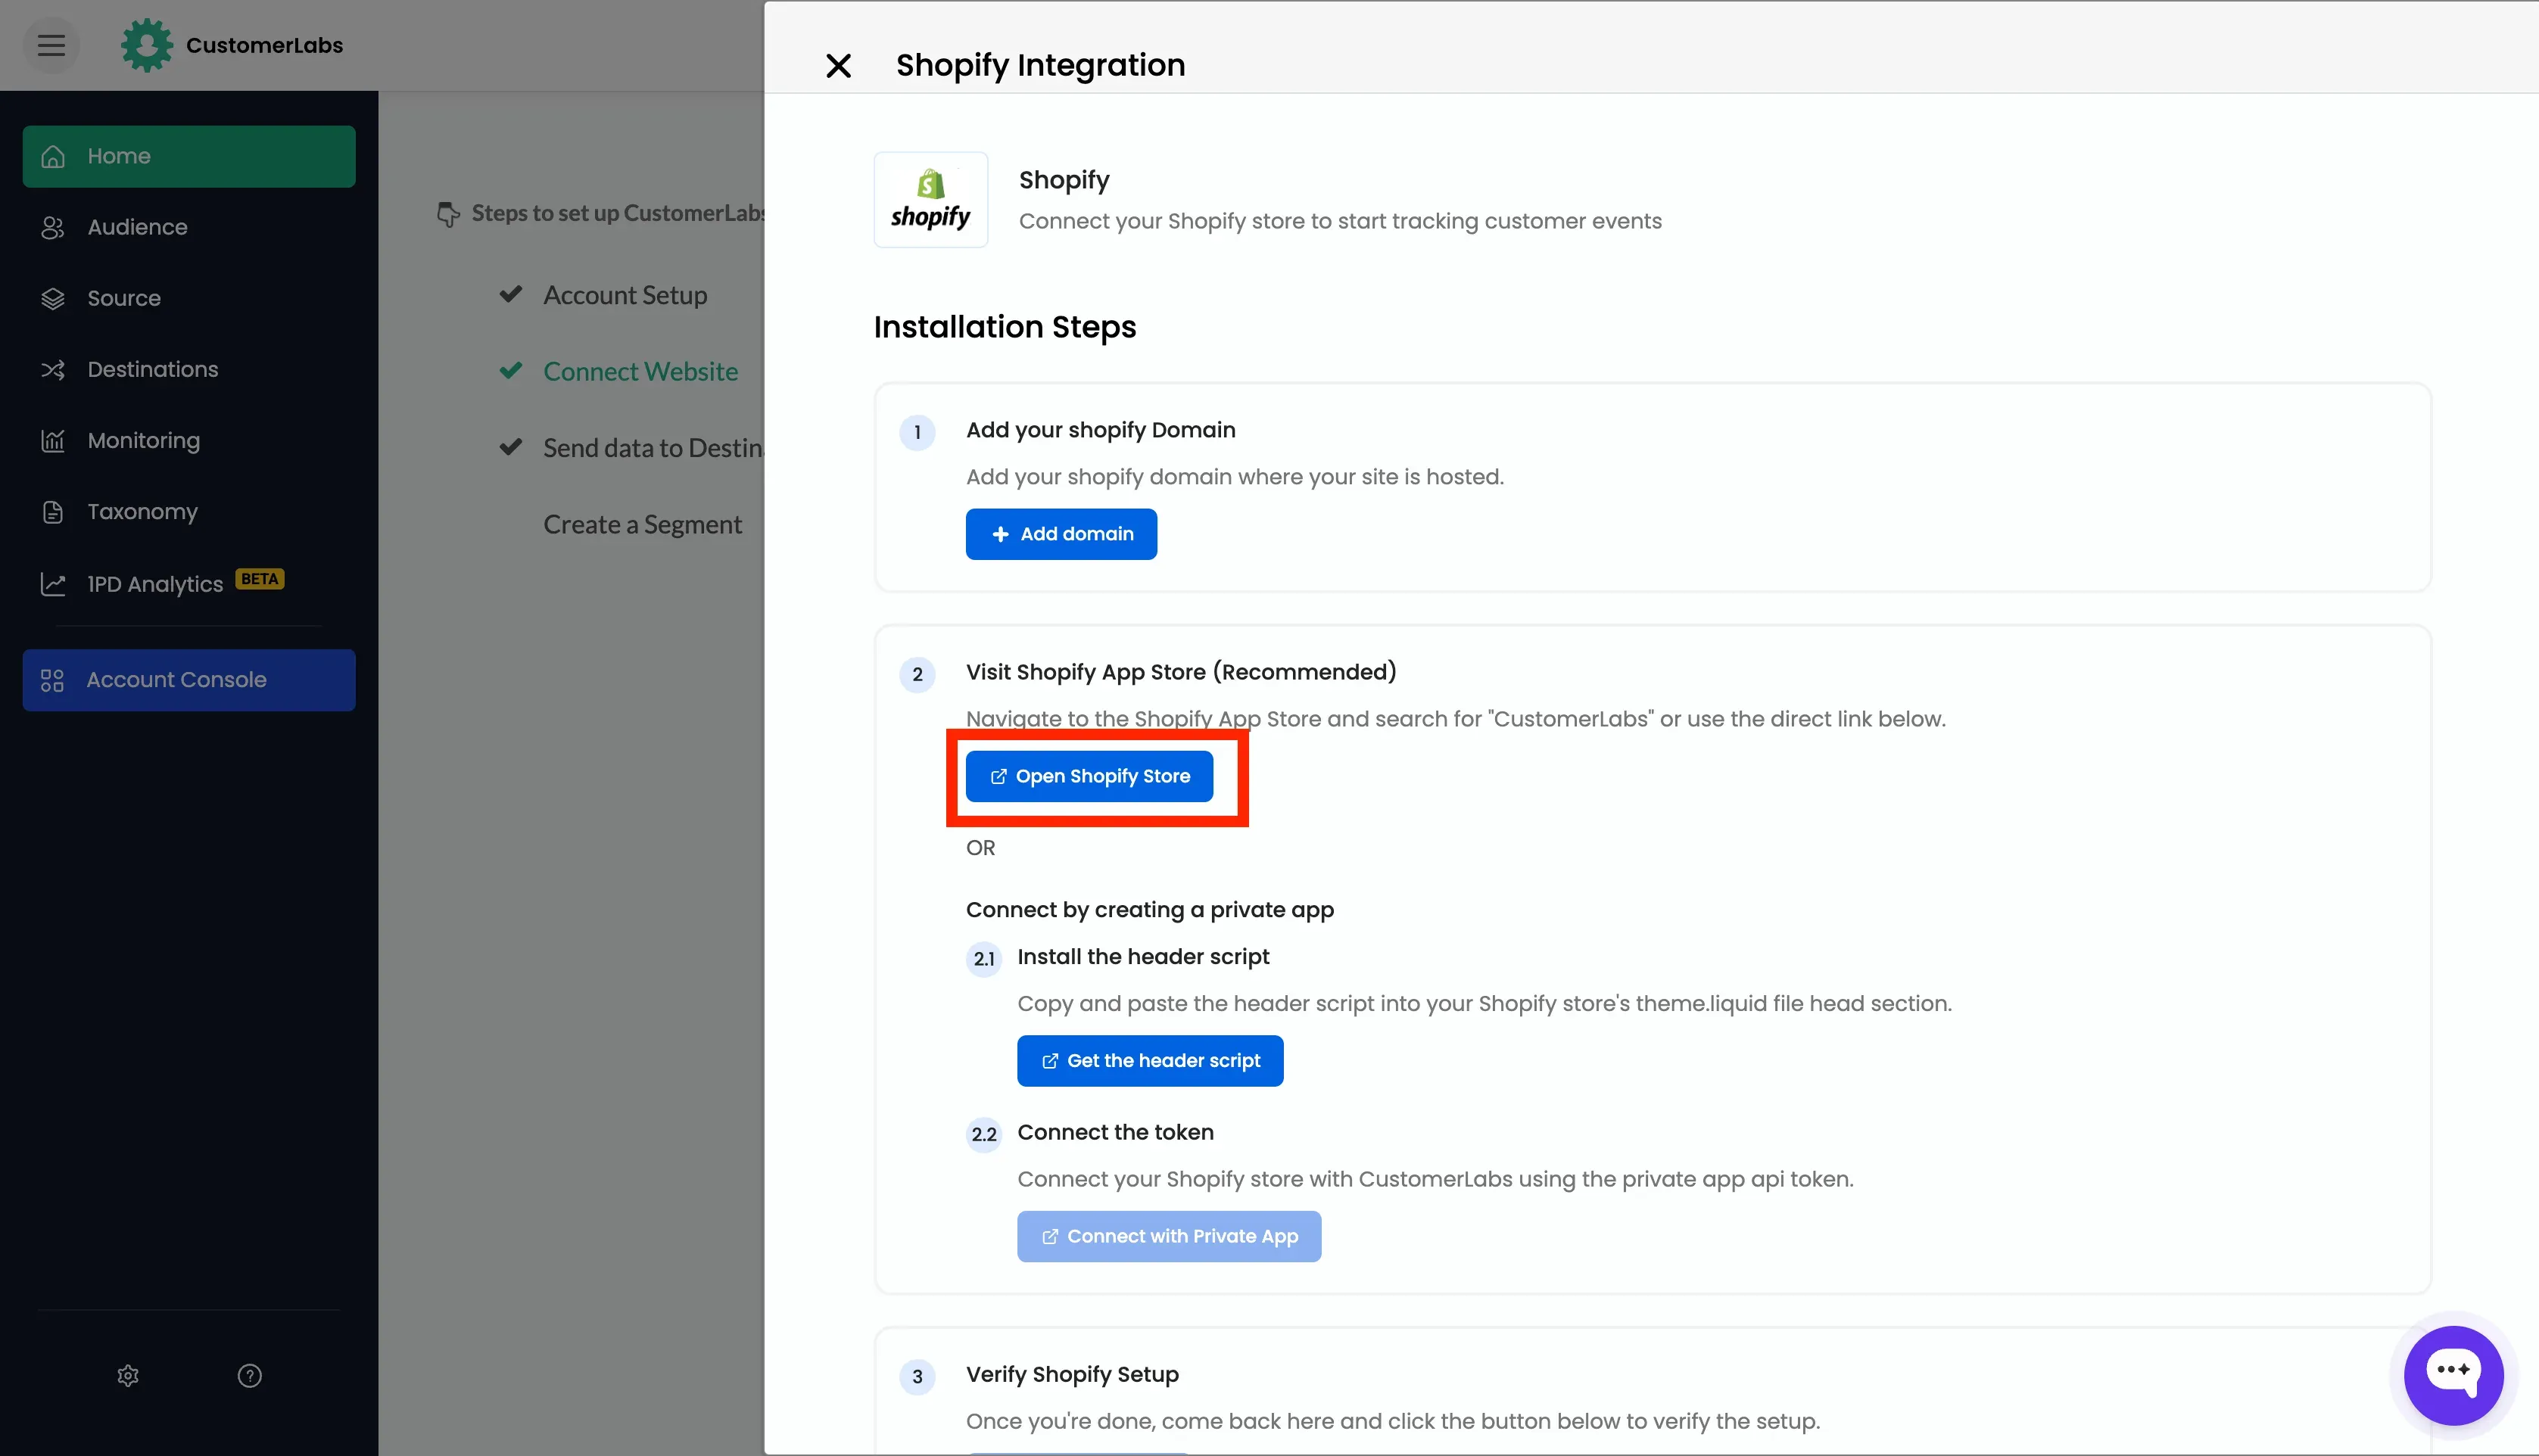
Install the App and Authenticate
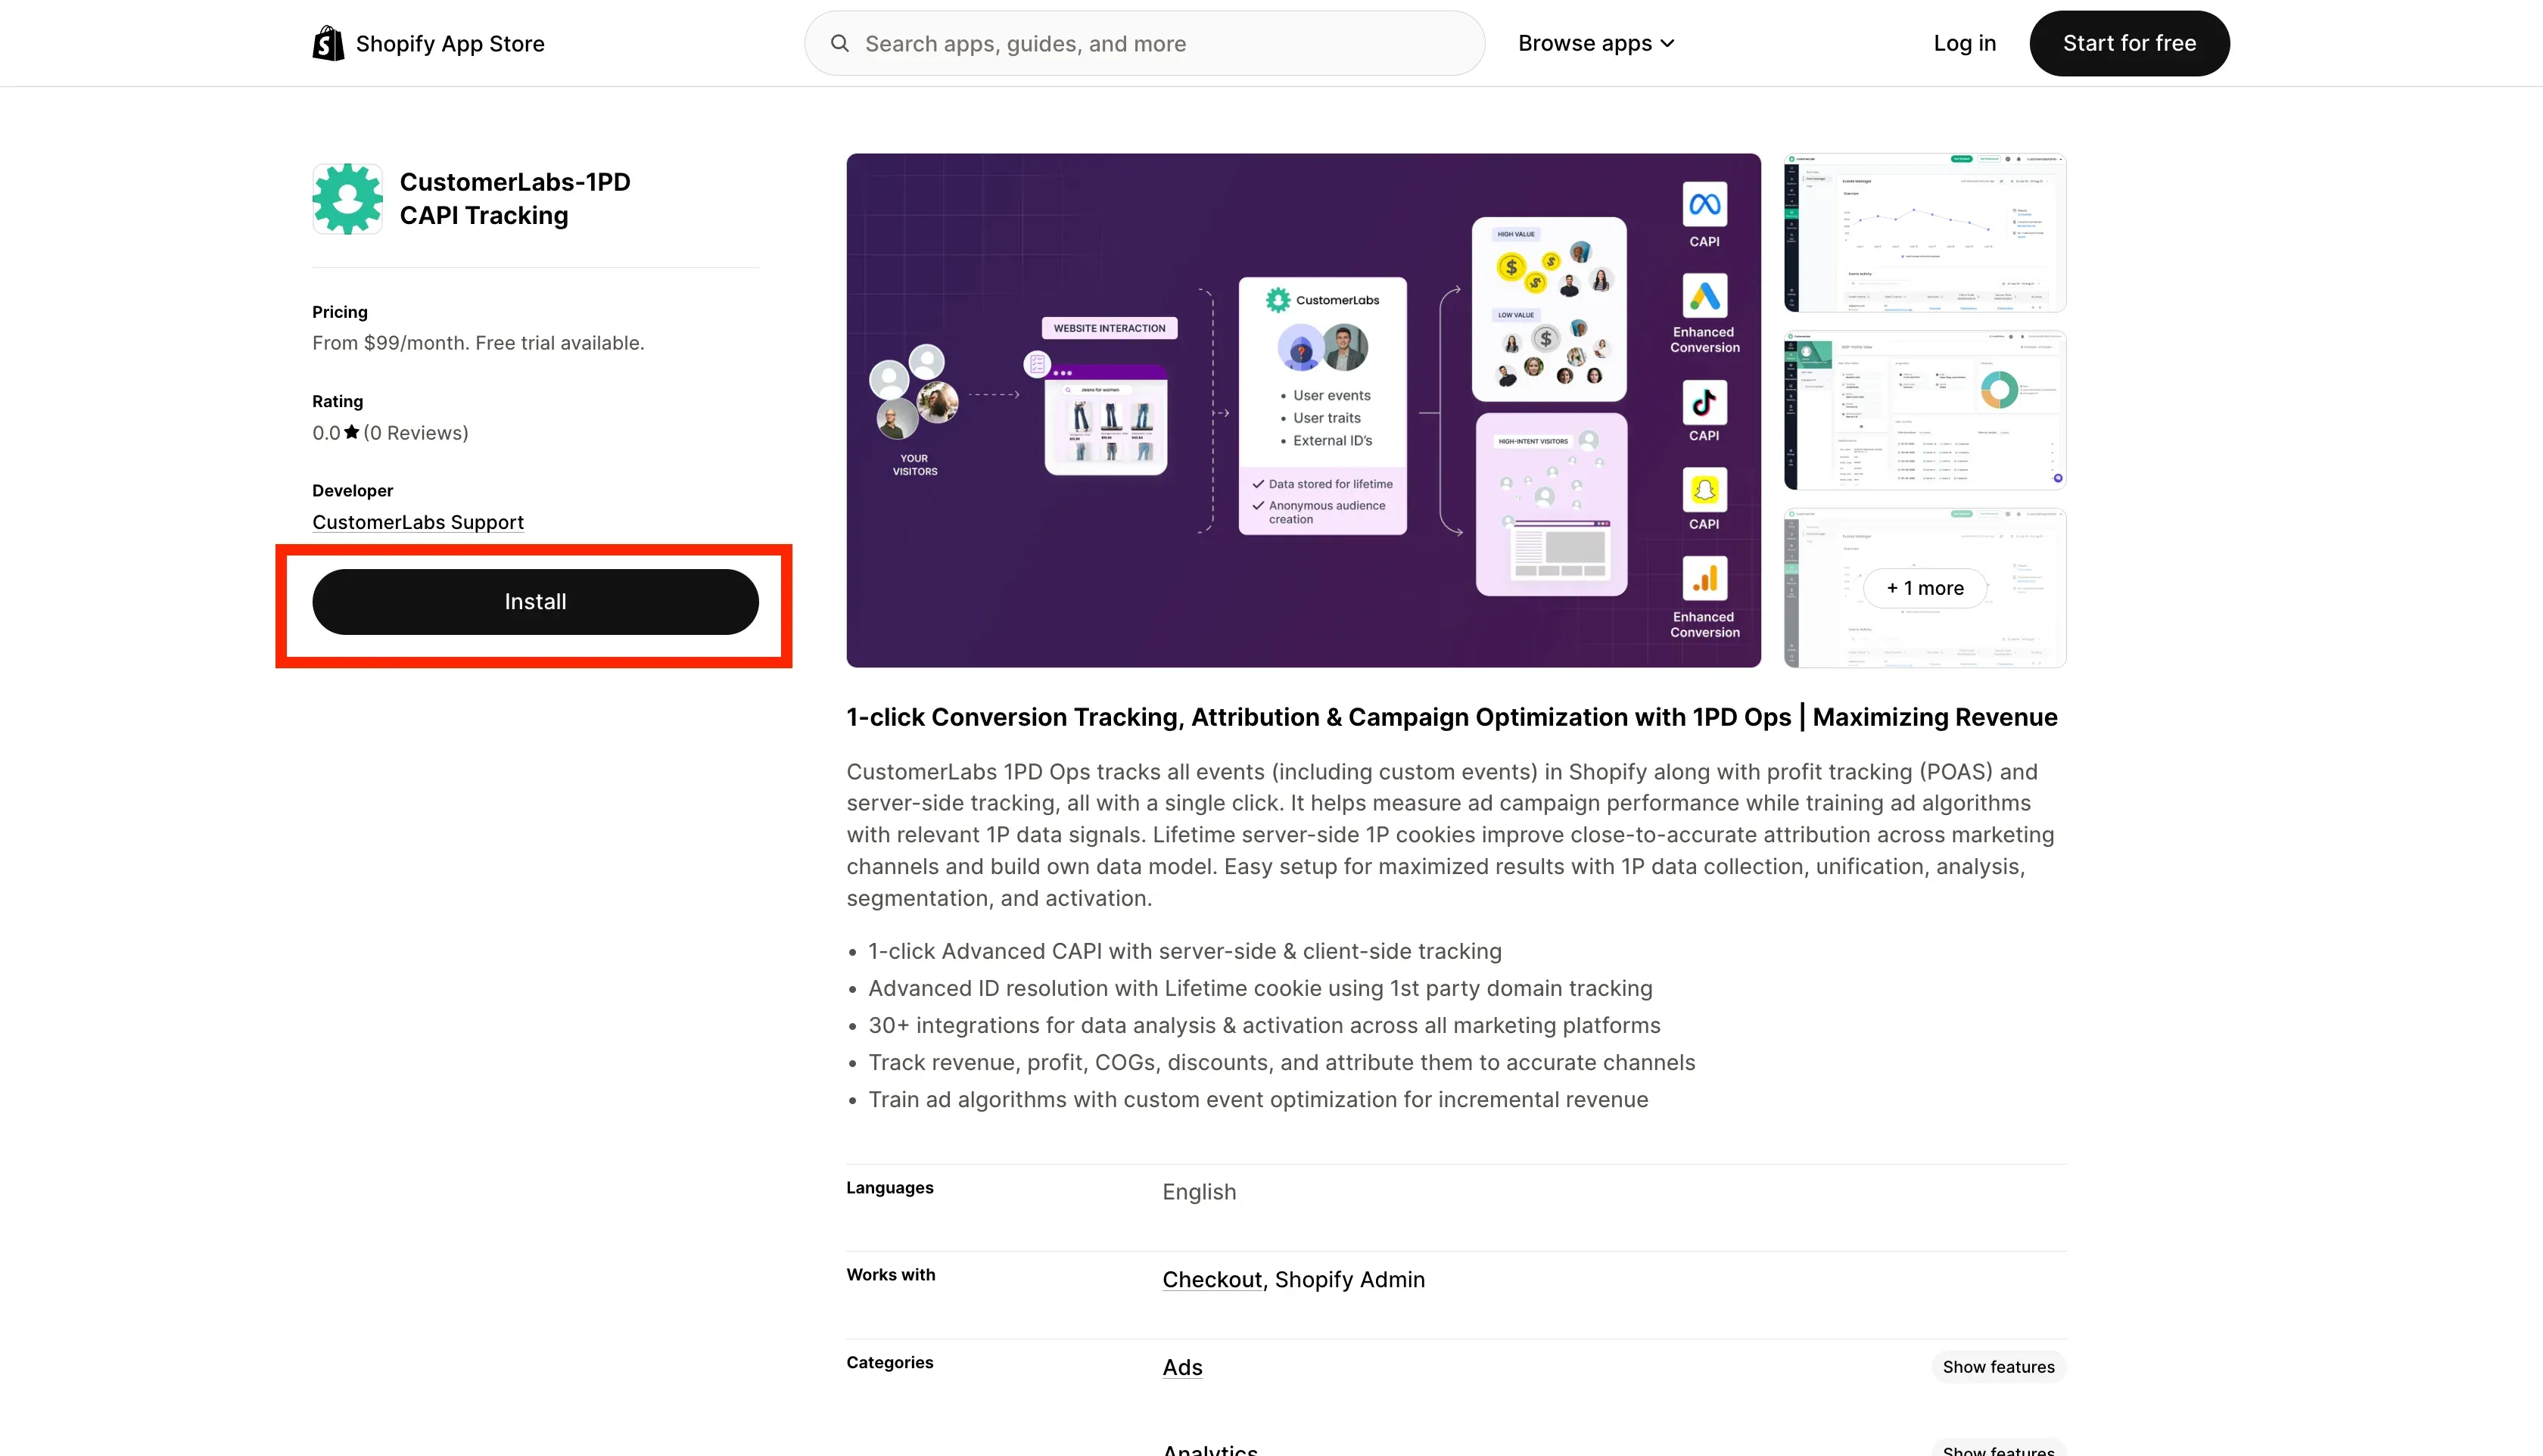
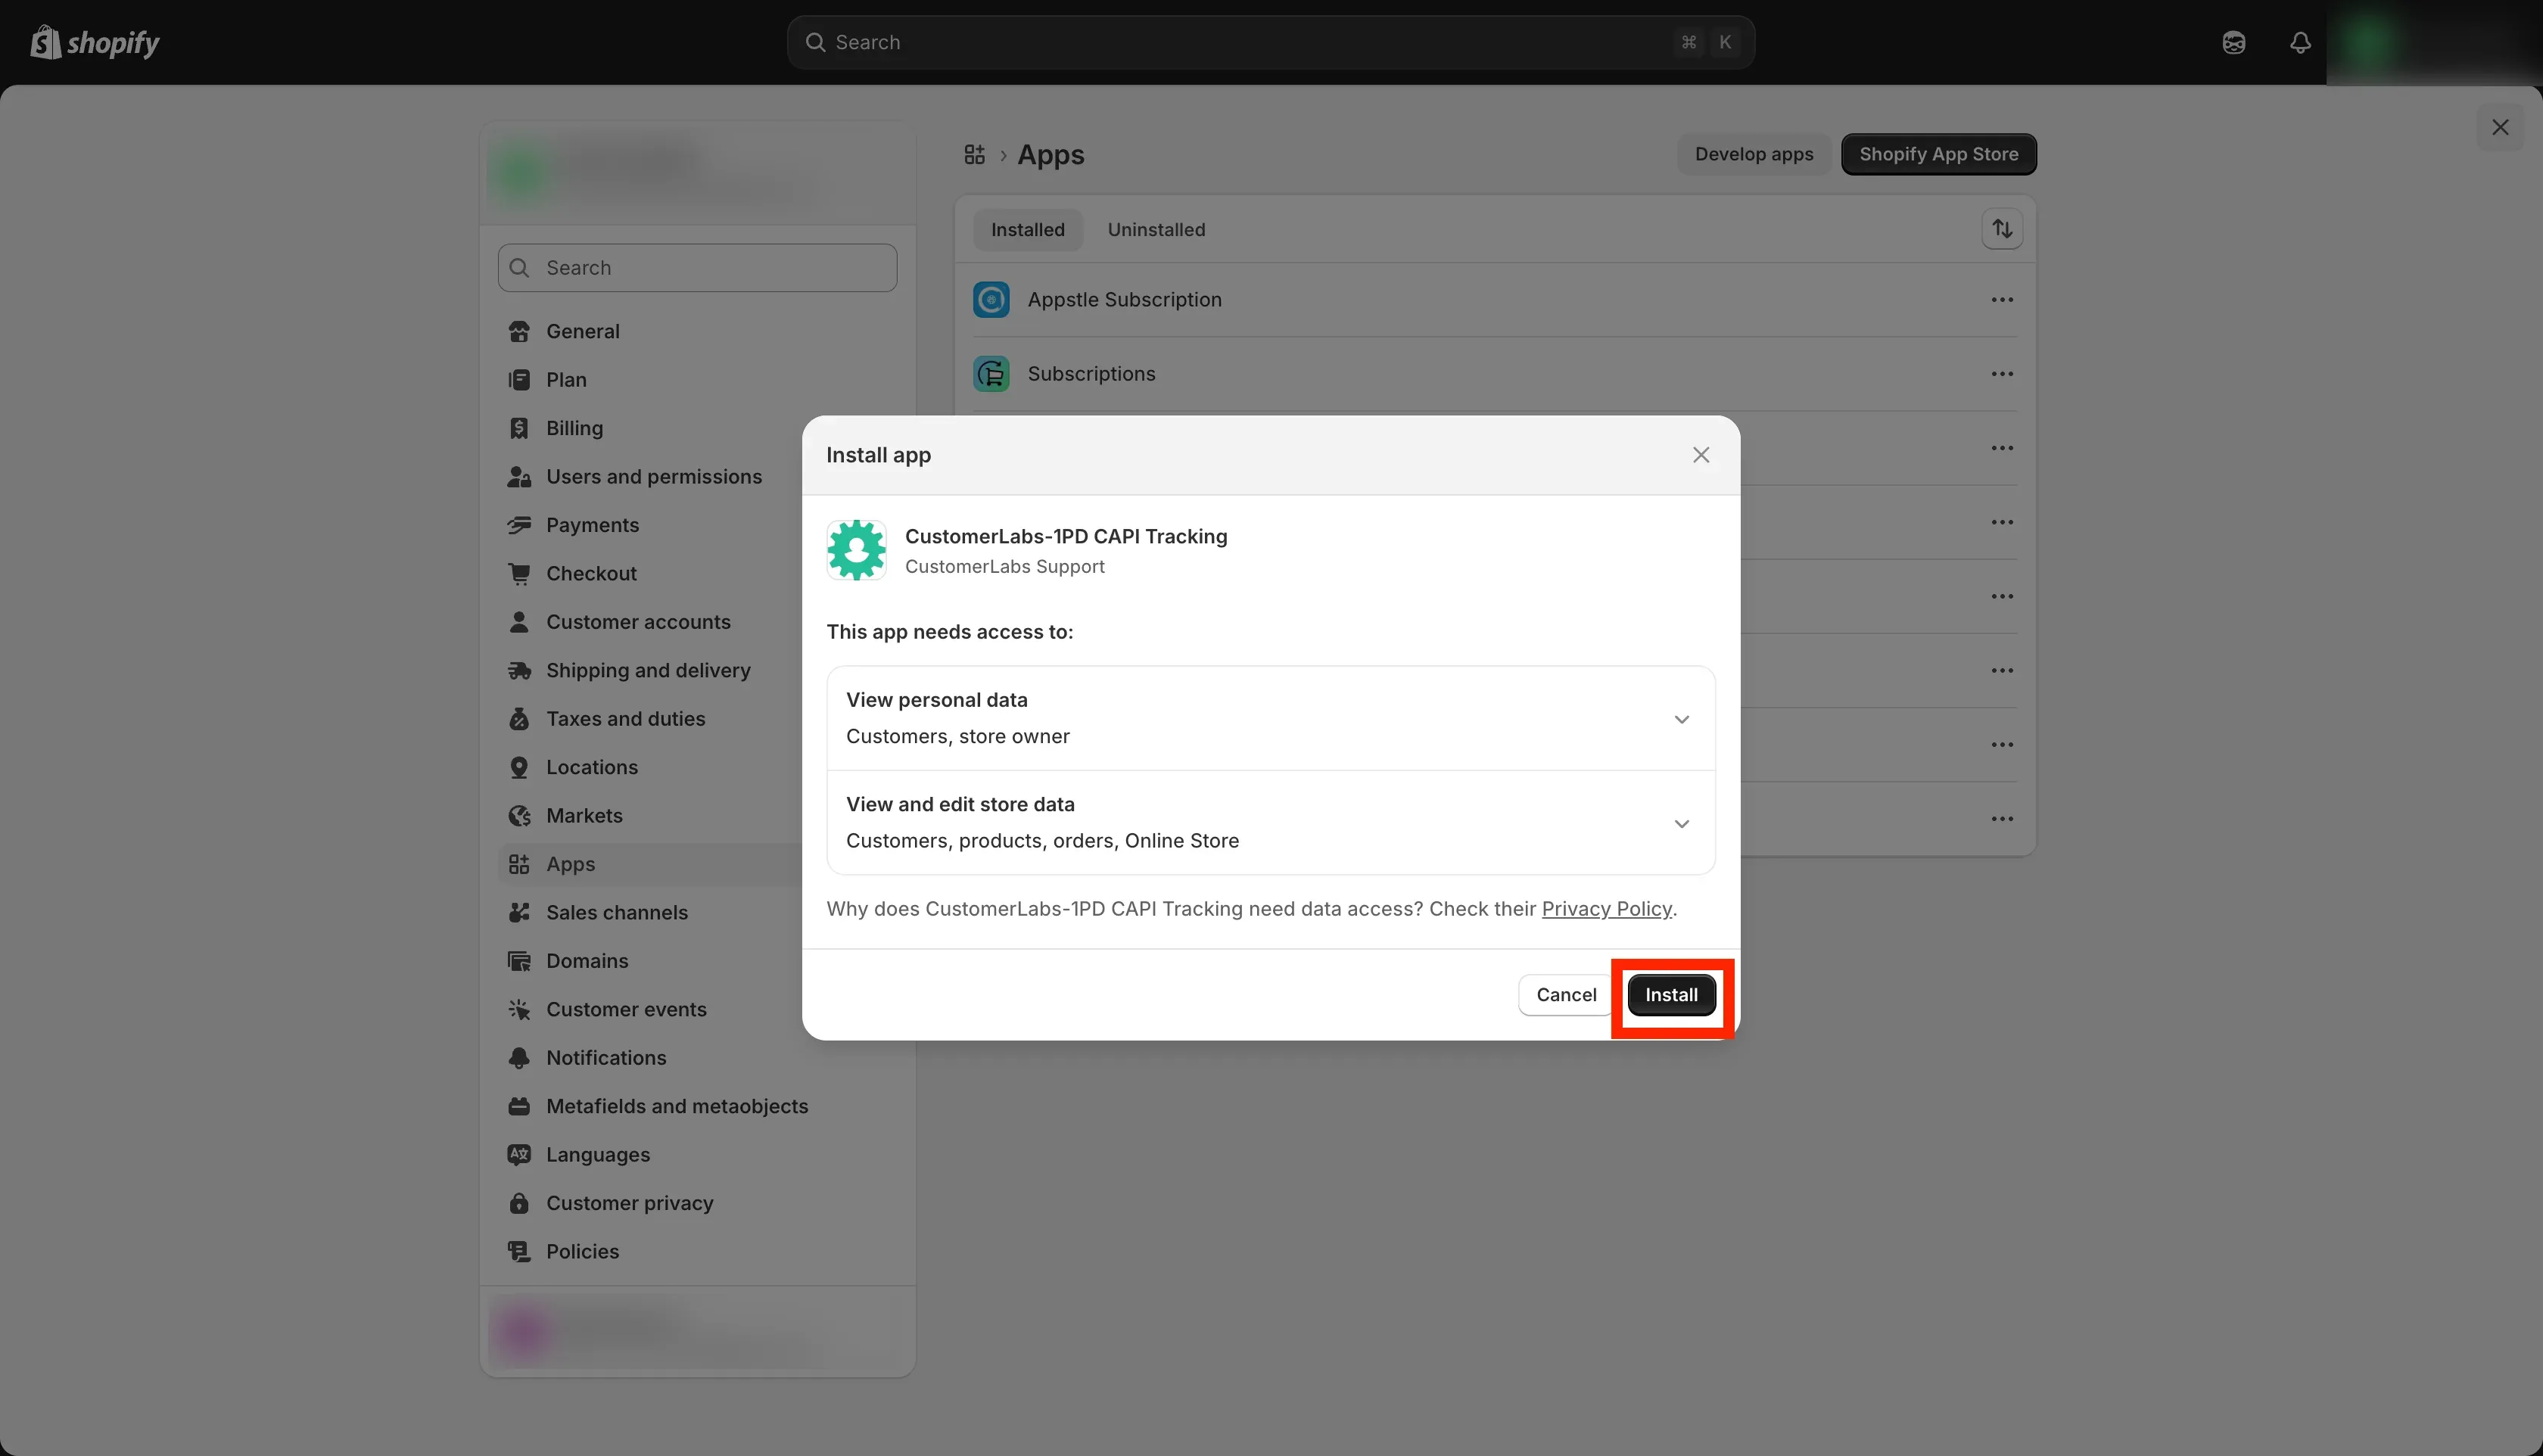
Section titled “Install the App and Authenticate”- Click “Open Shopify App Store” button and install the CustomerLabs App from Shopify App Store.
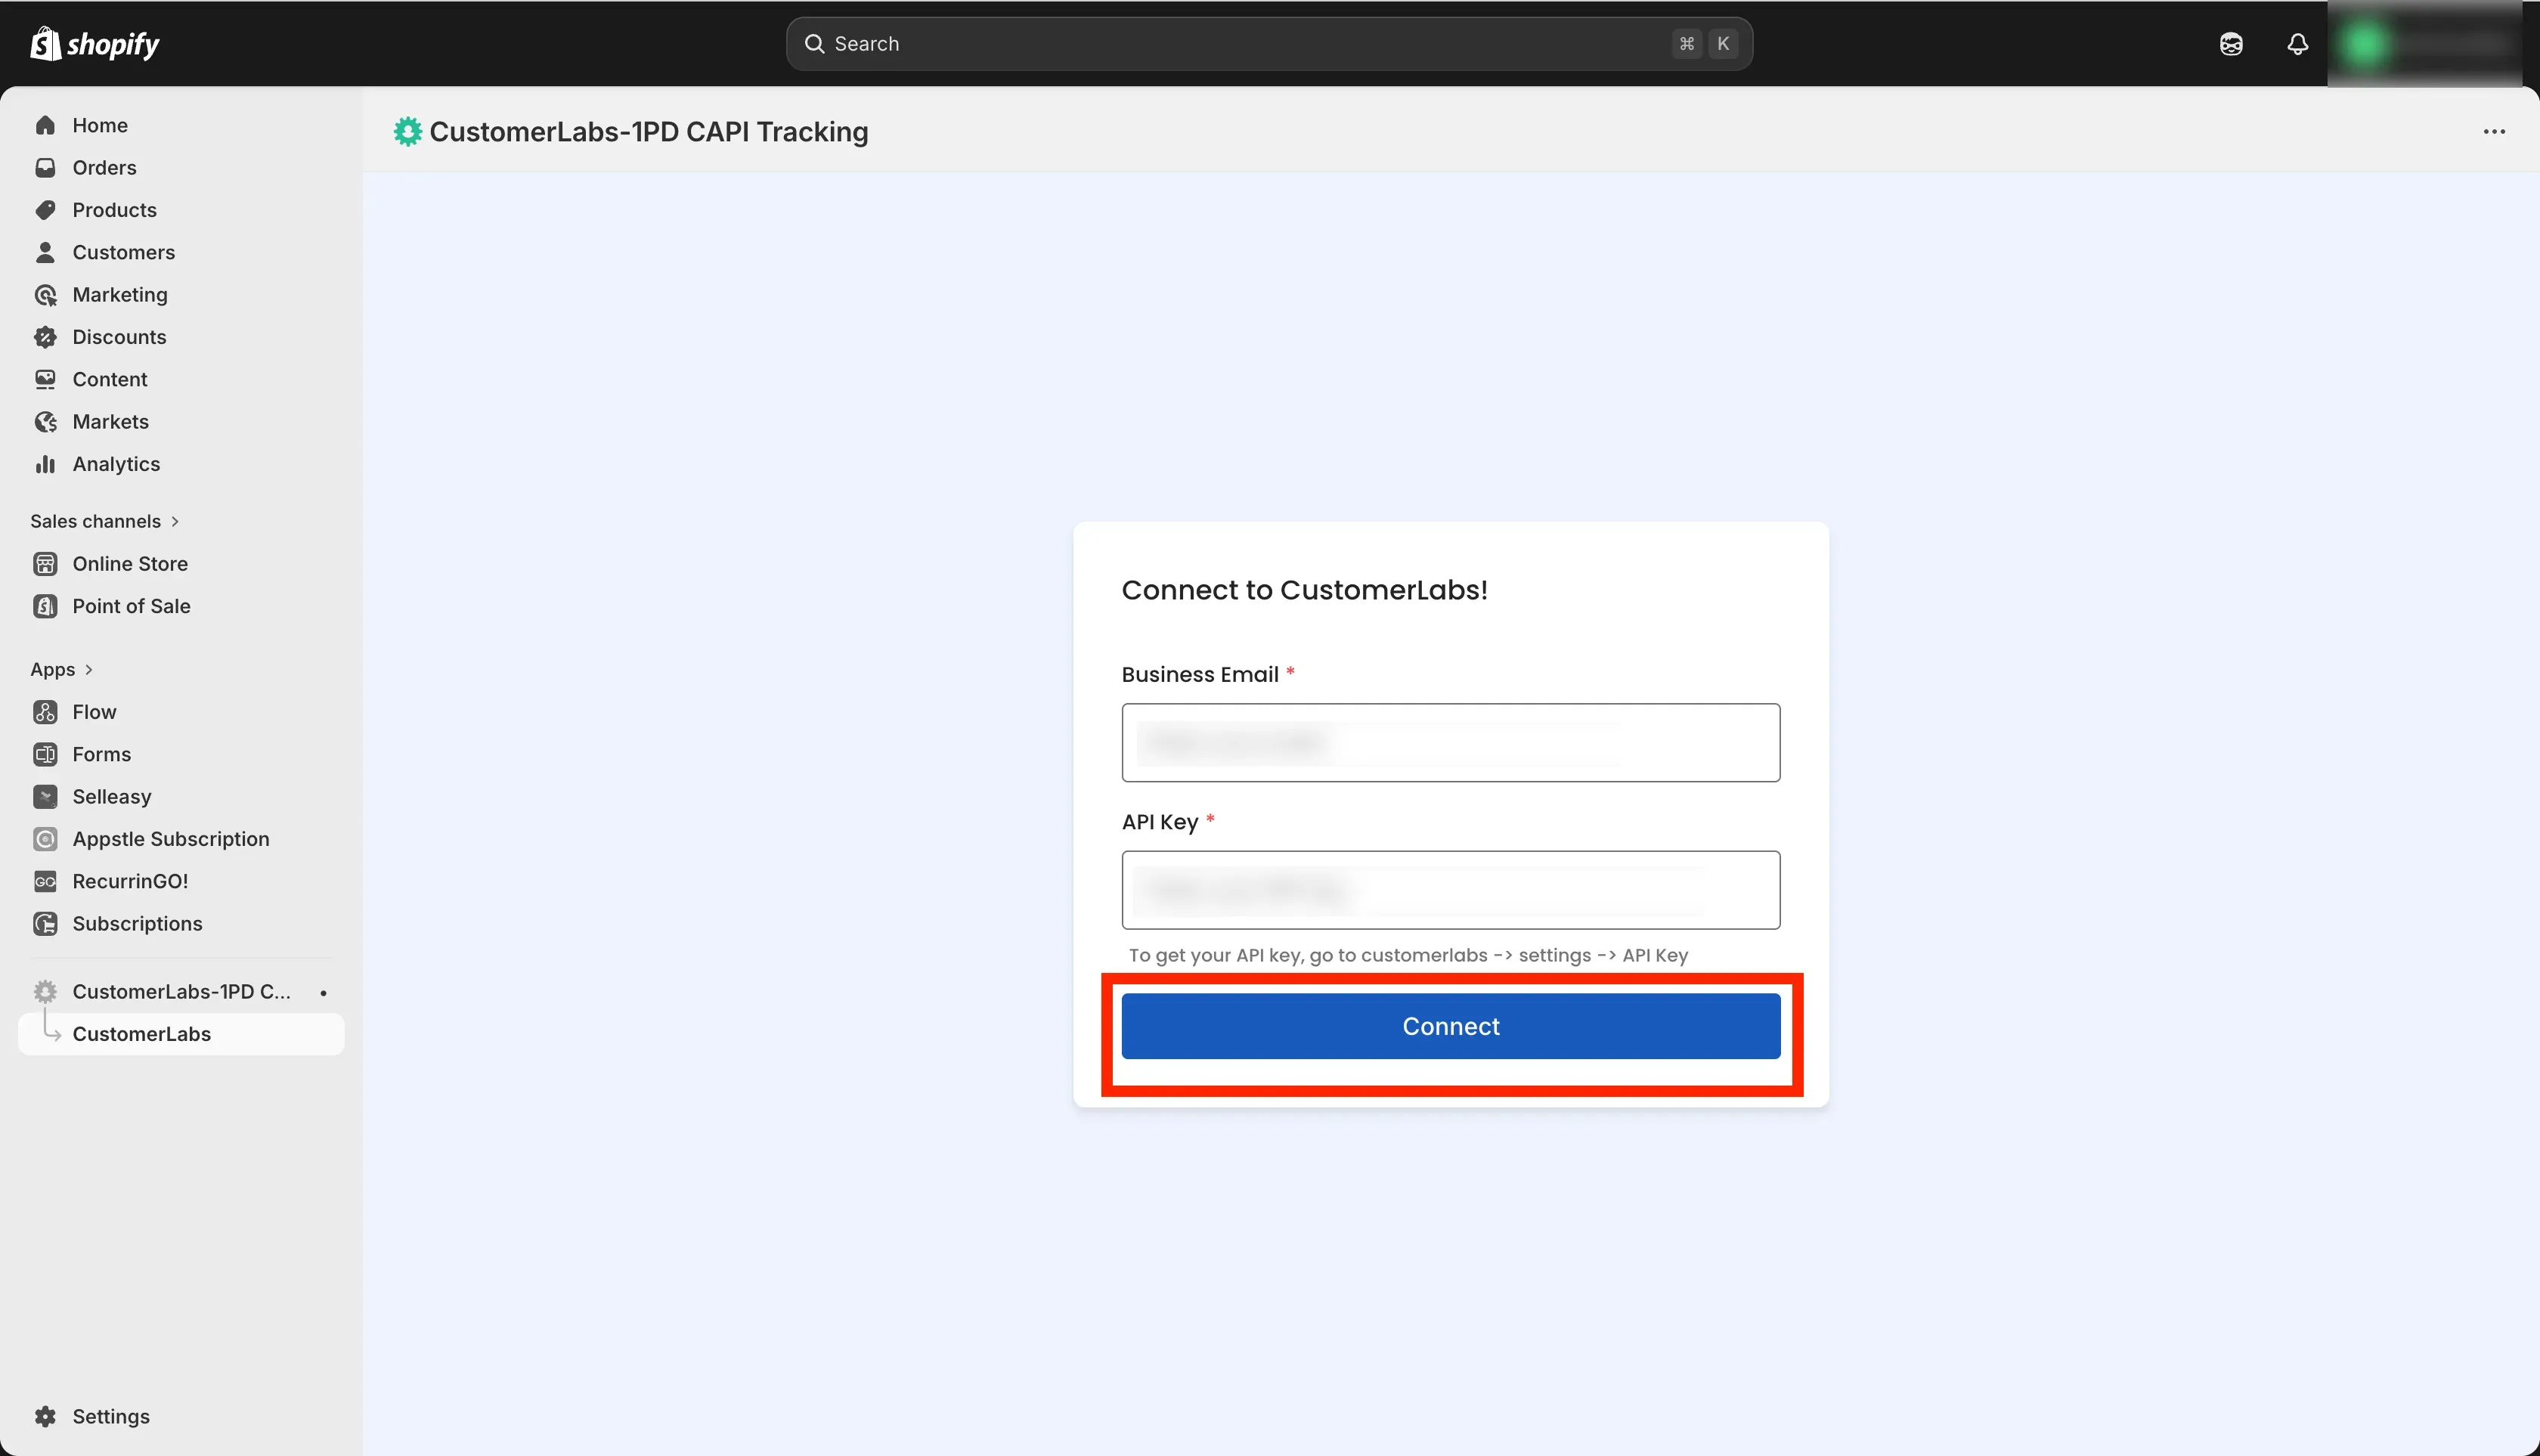
- Enter your CustomerLabs account email and API key.
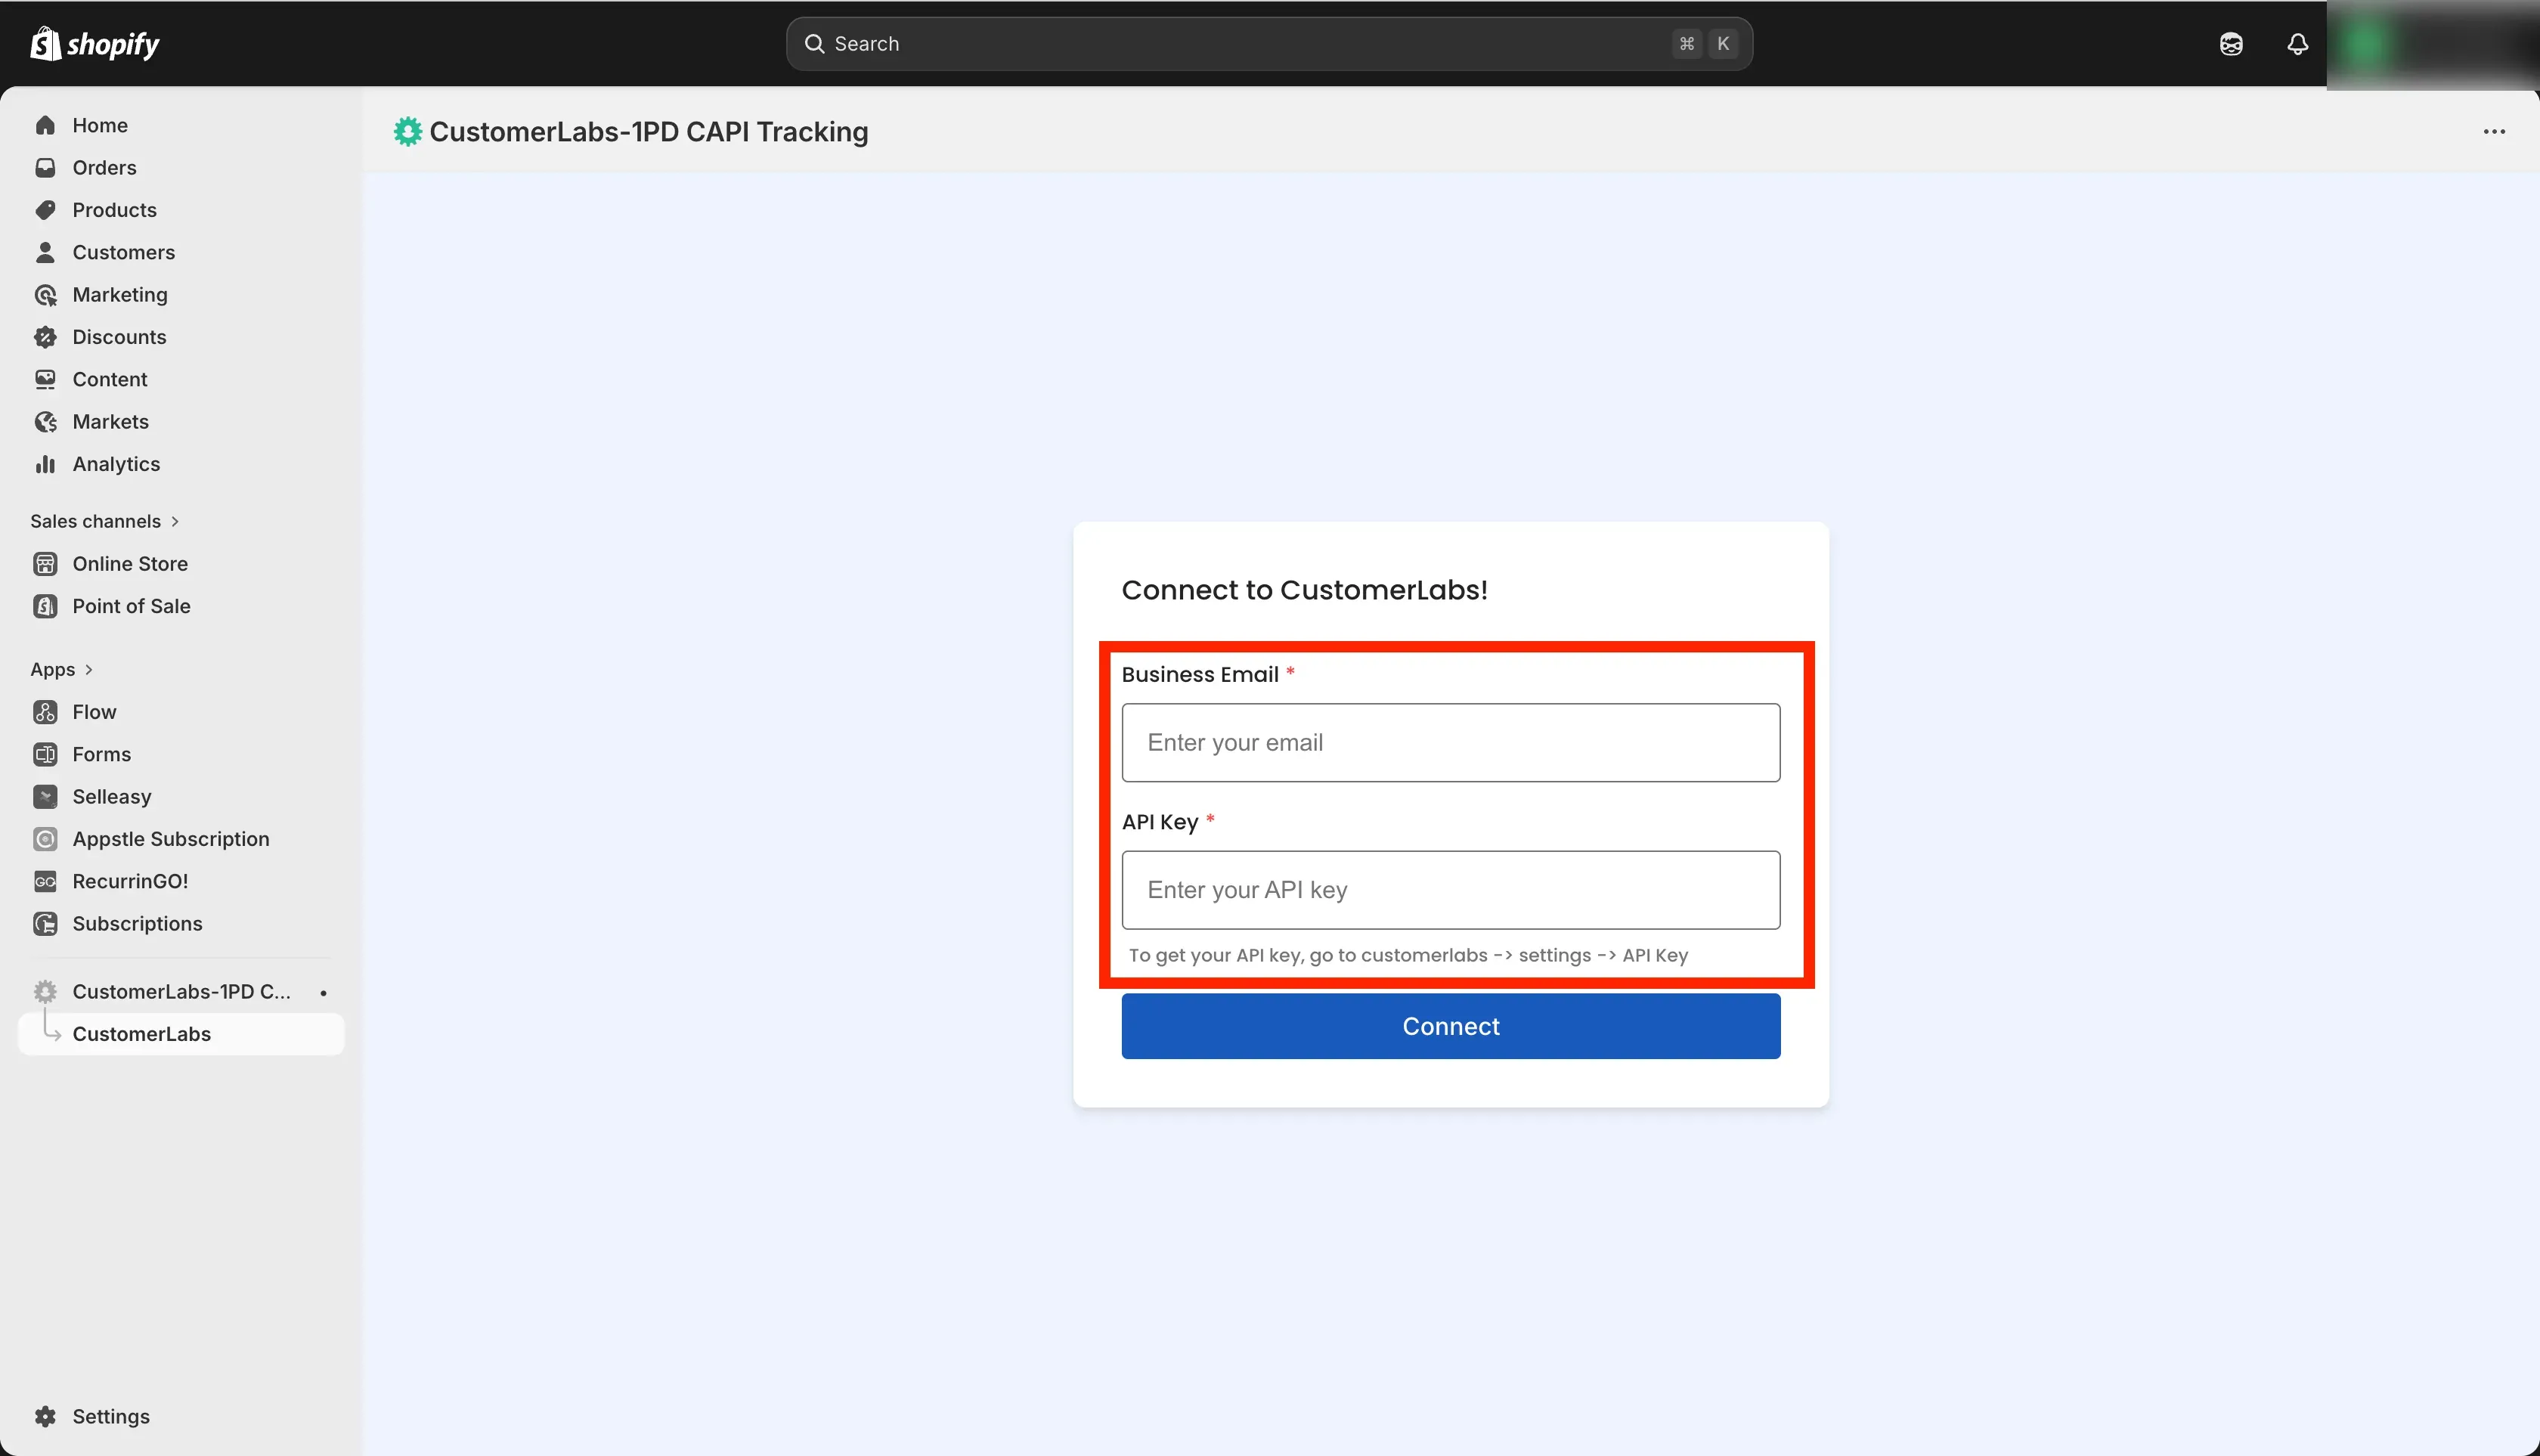
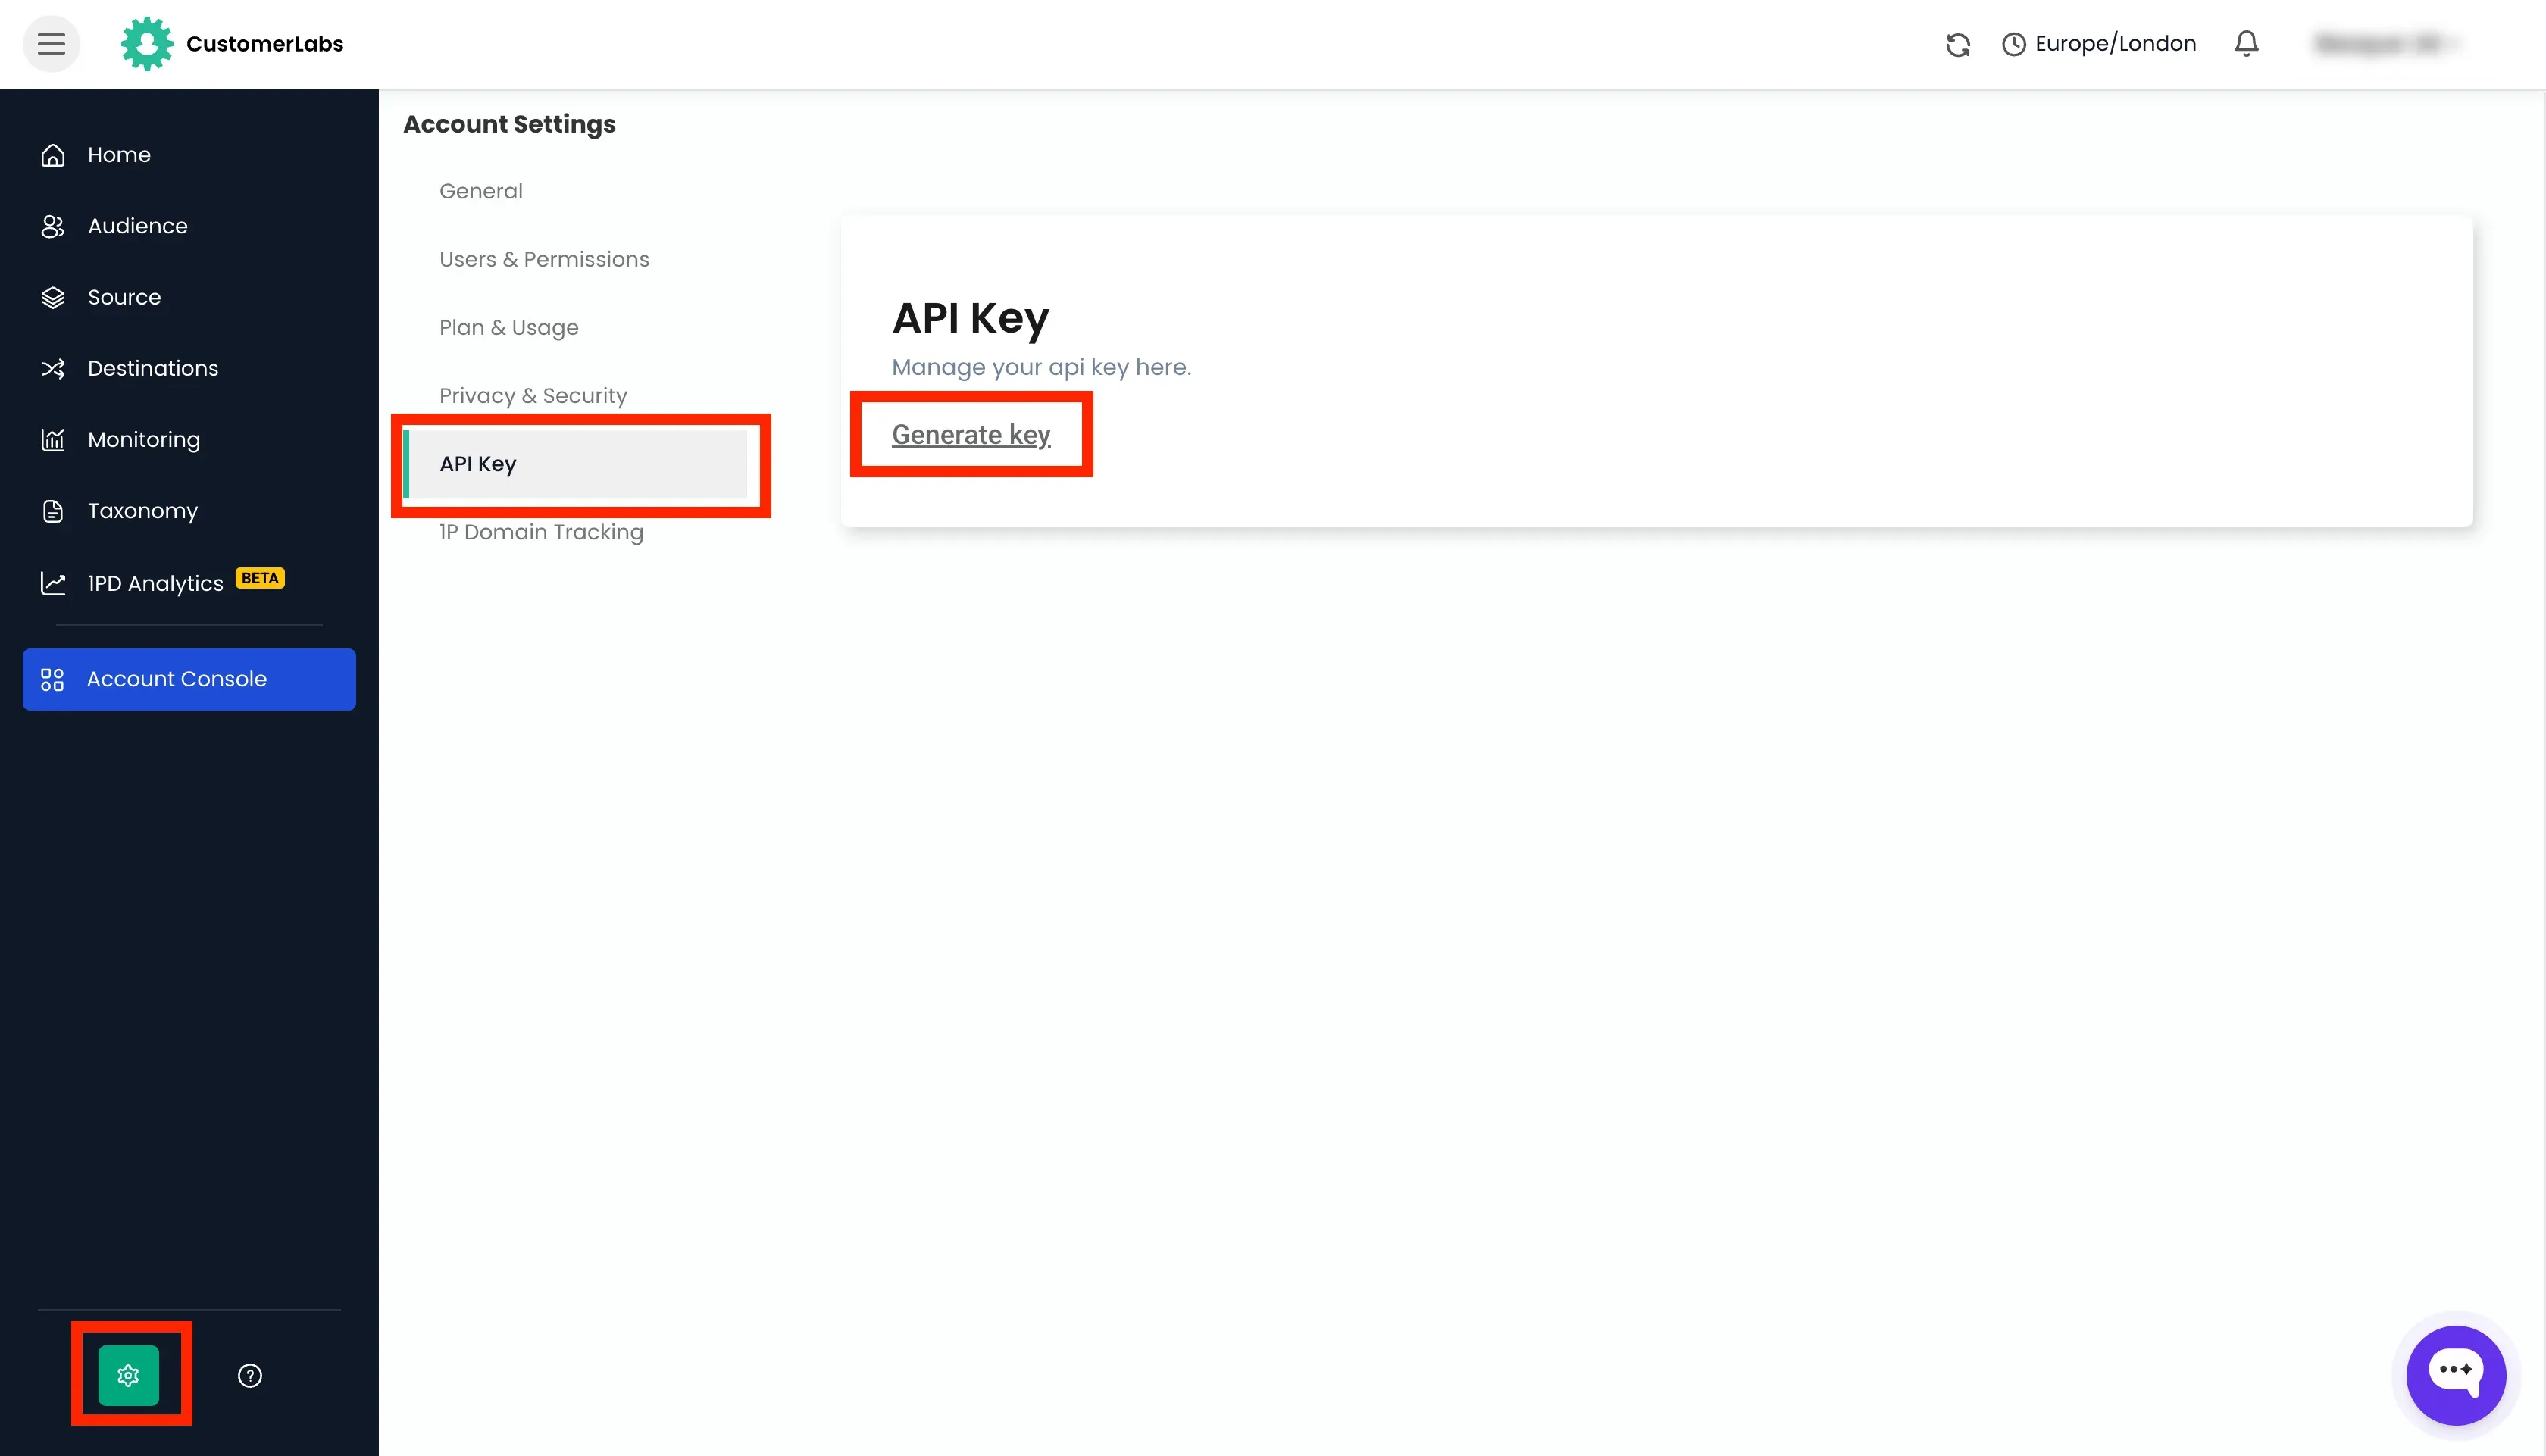
- To get the API key, go to CustomerLabs → Account Settings → API Key, and copy it.
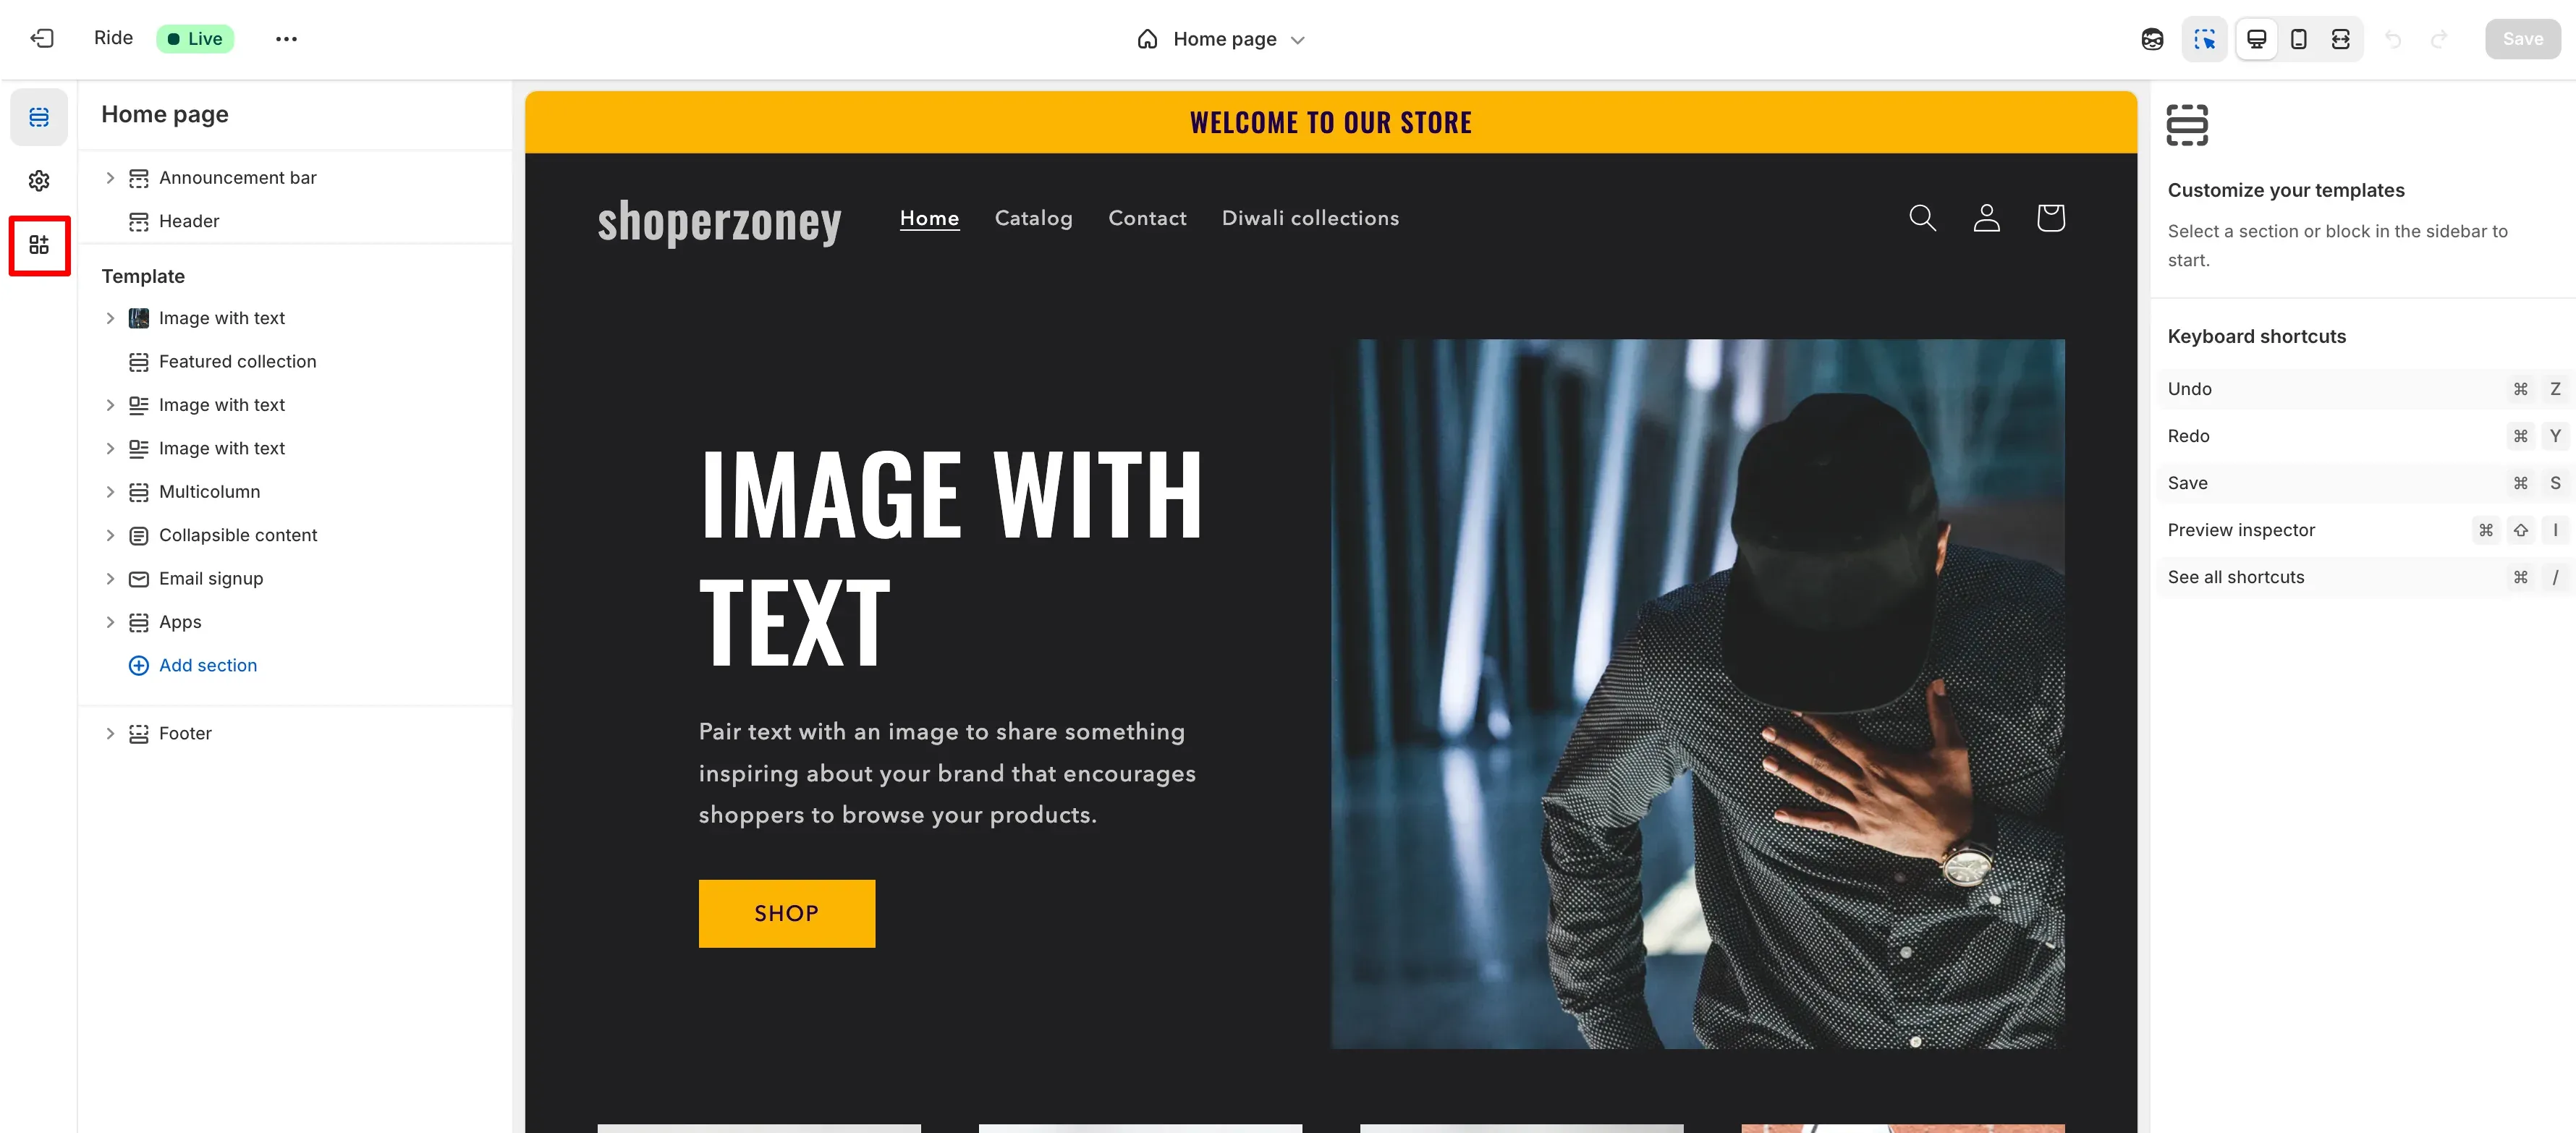
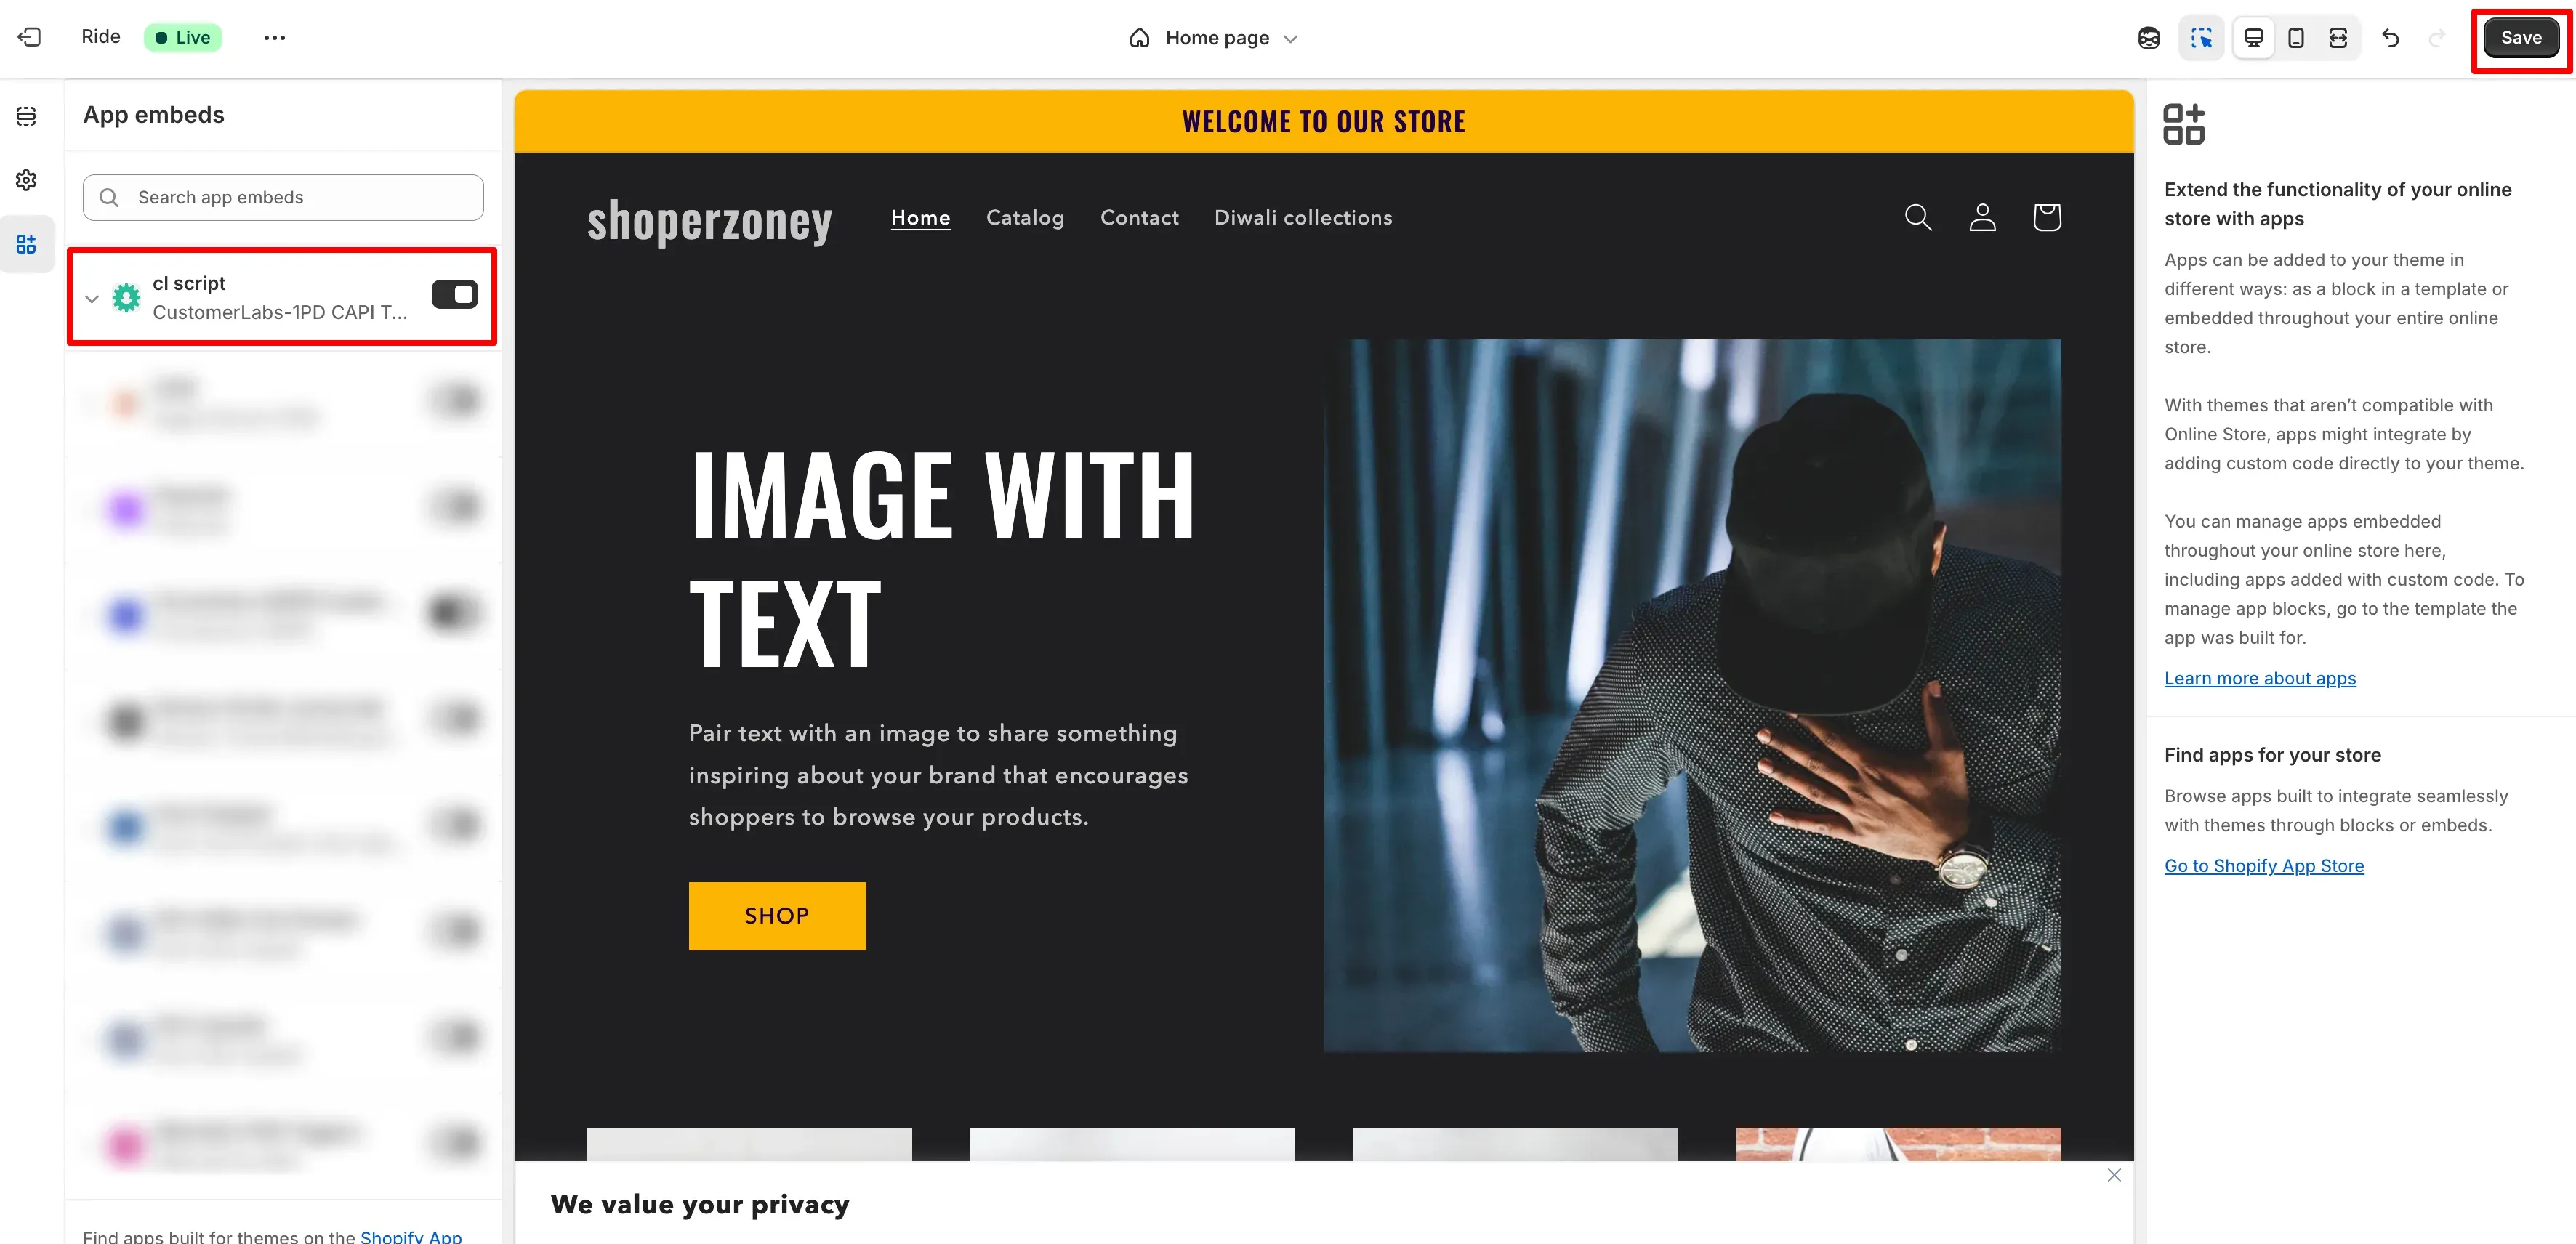
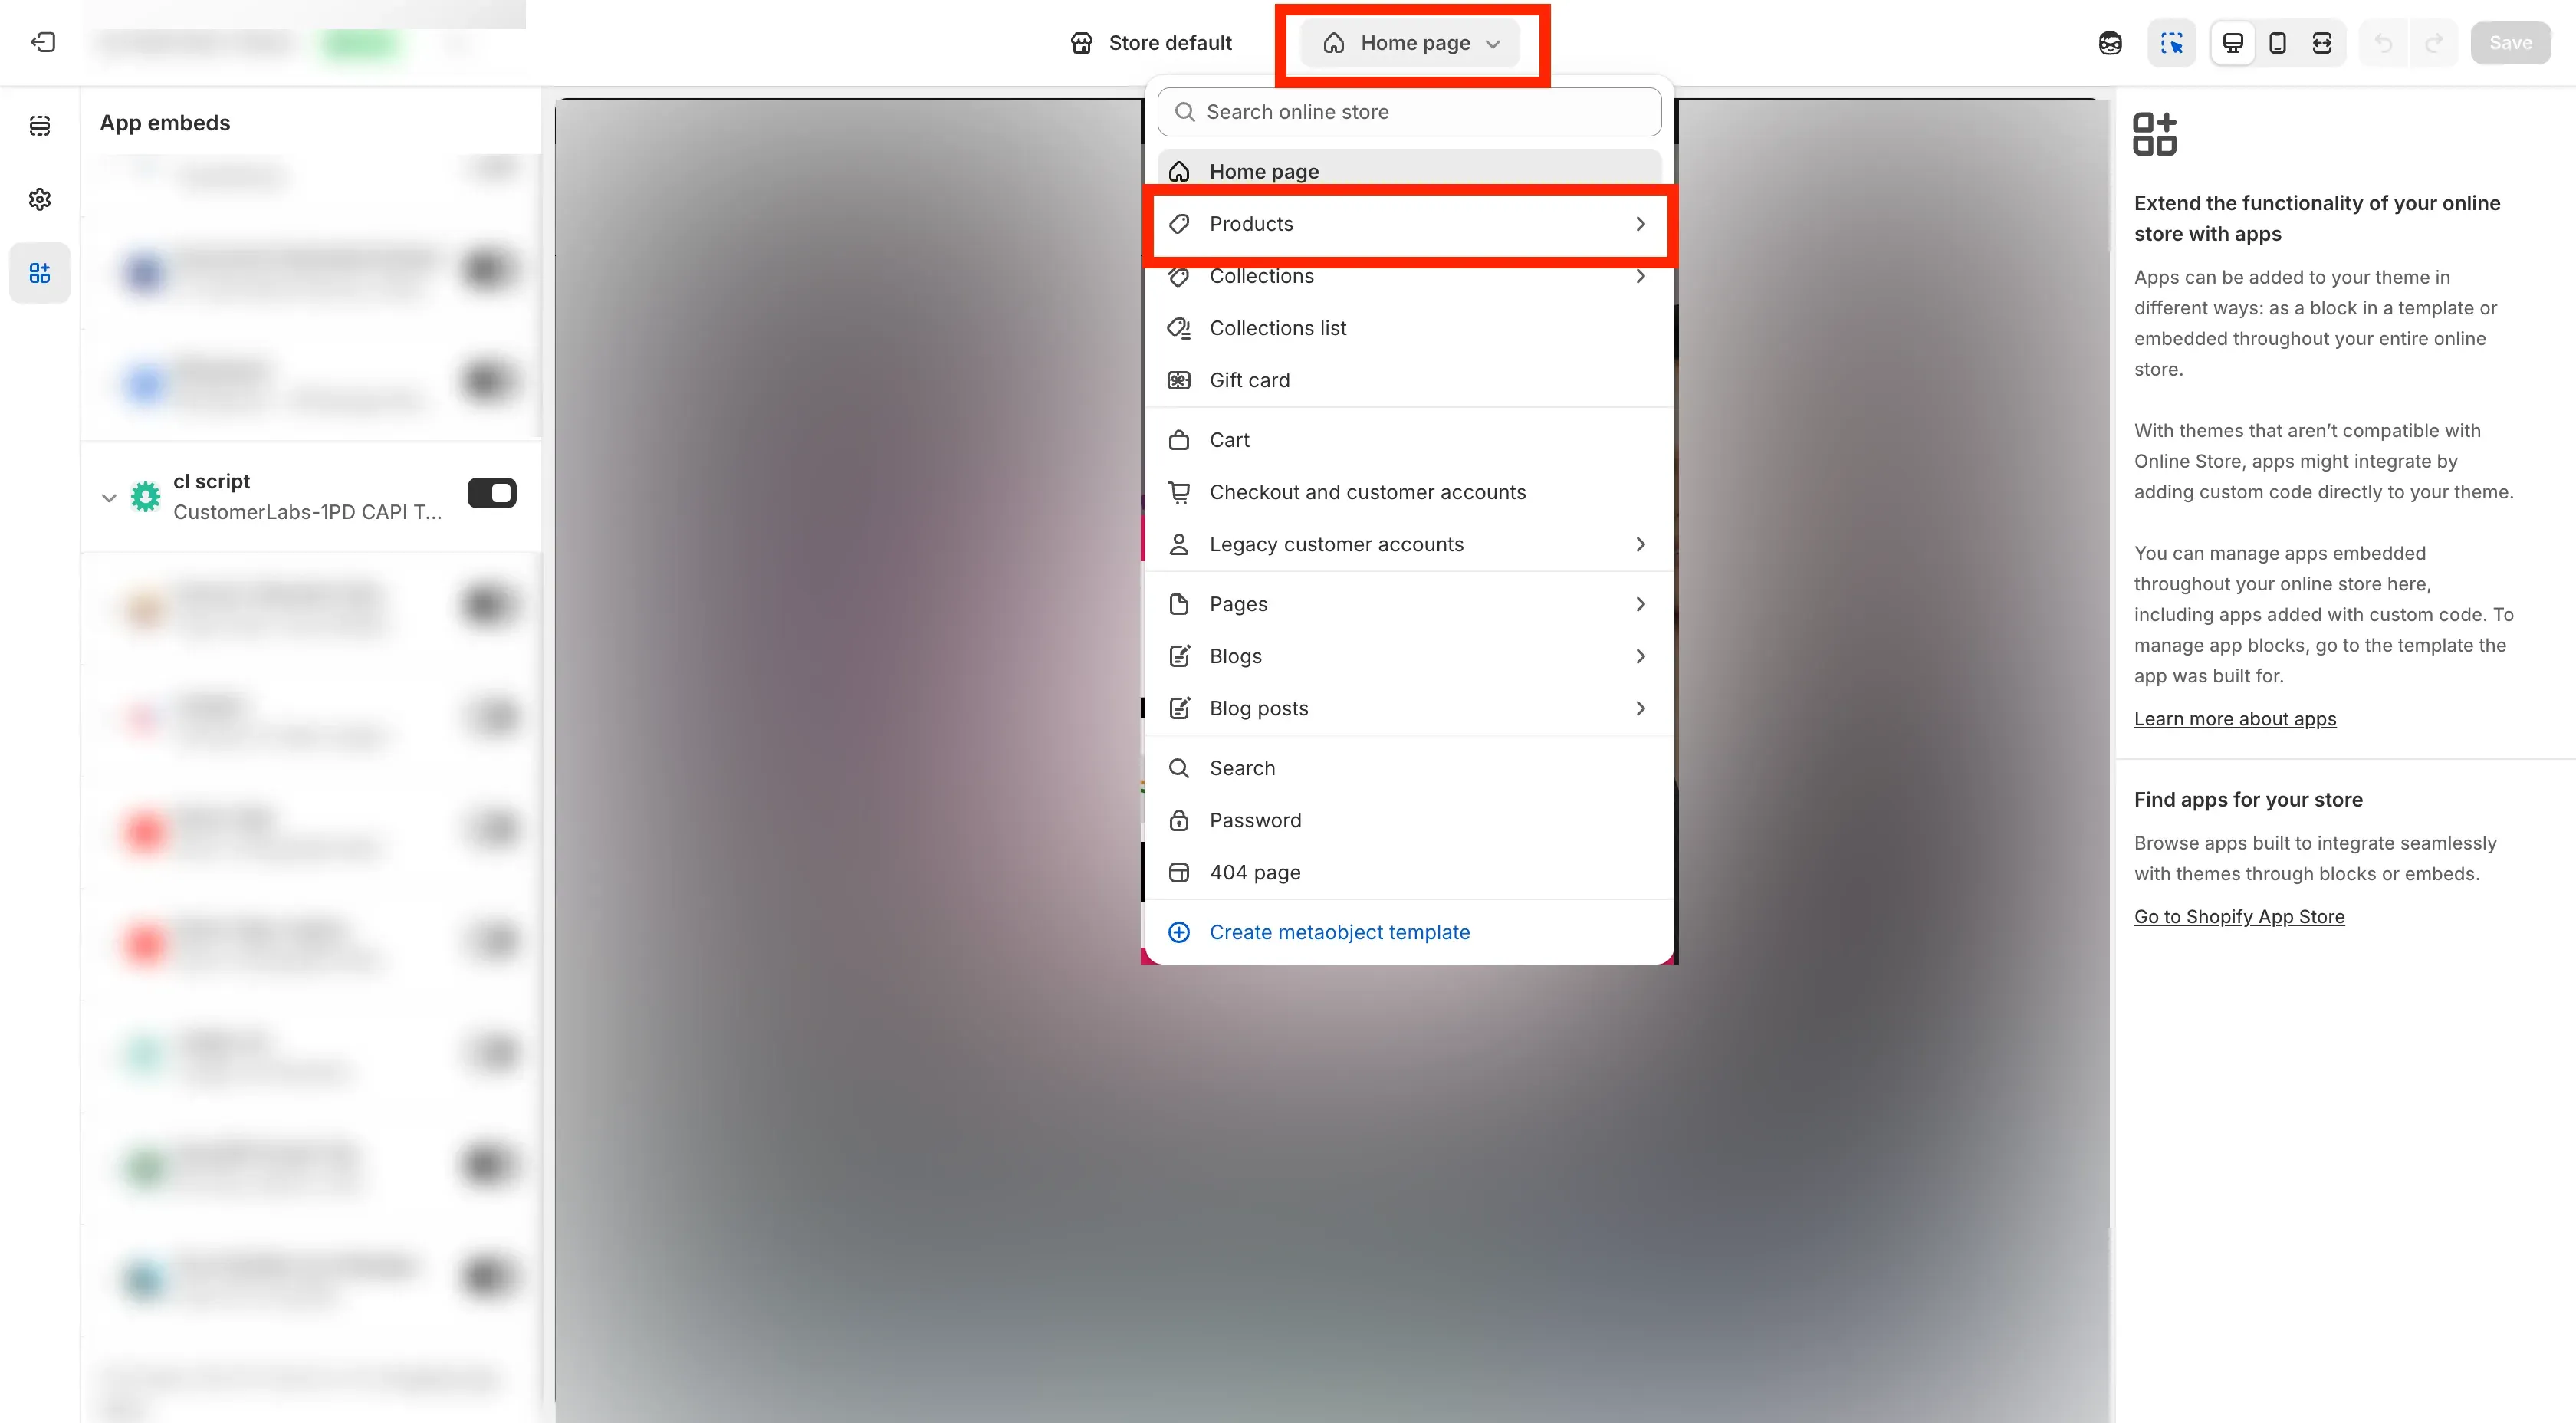
Add Tracking Scripts to Theme
Section titled “Add Tracking Scripts to Theme”- Click Open the Theme Editor.
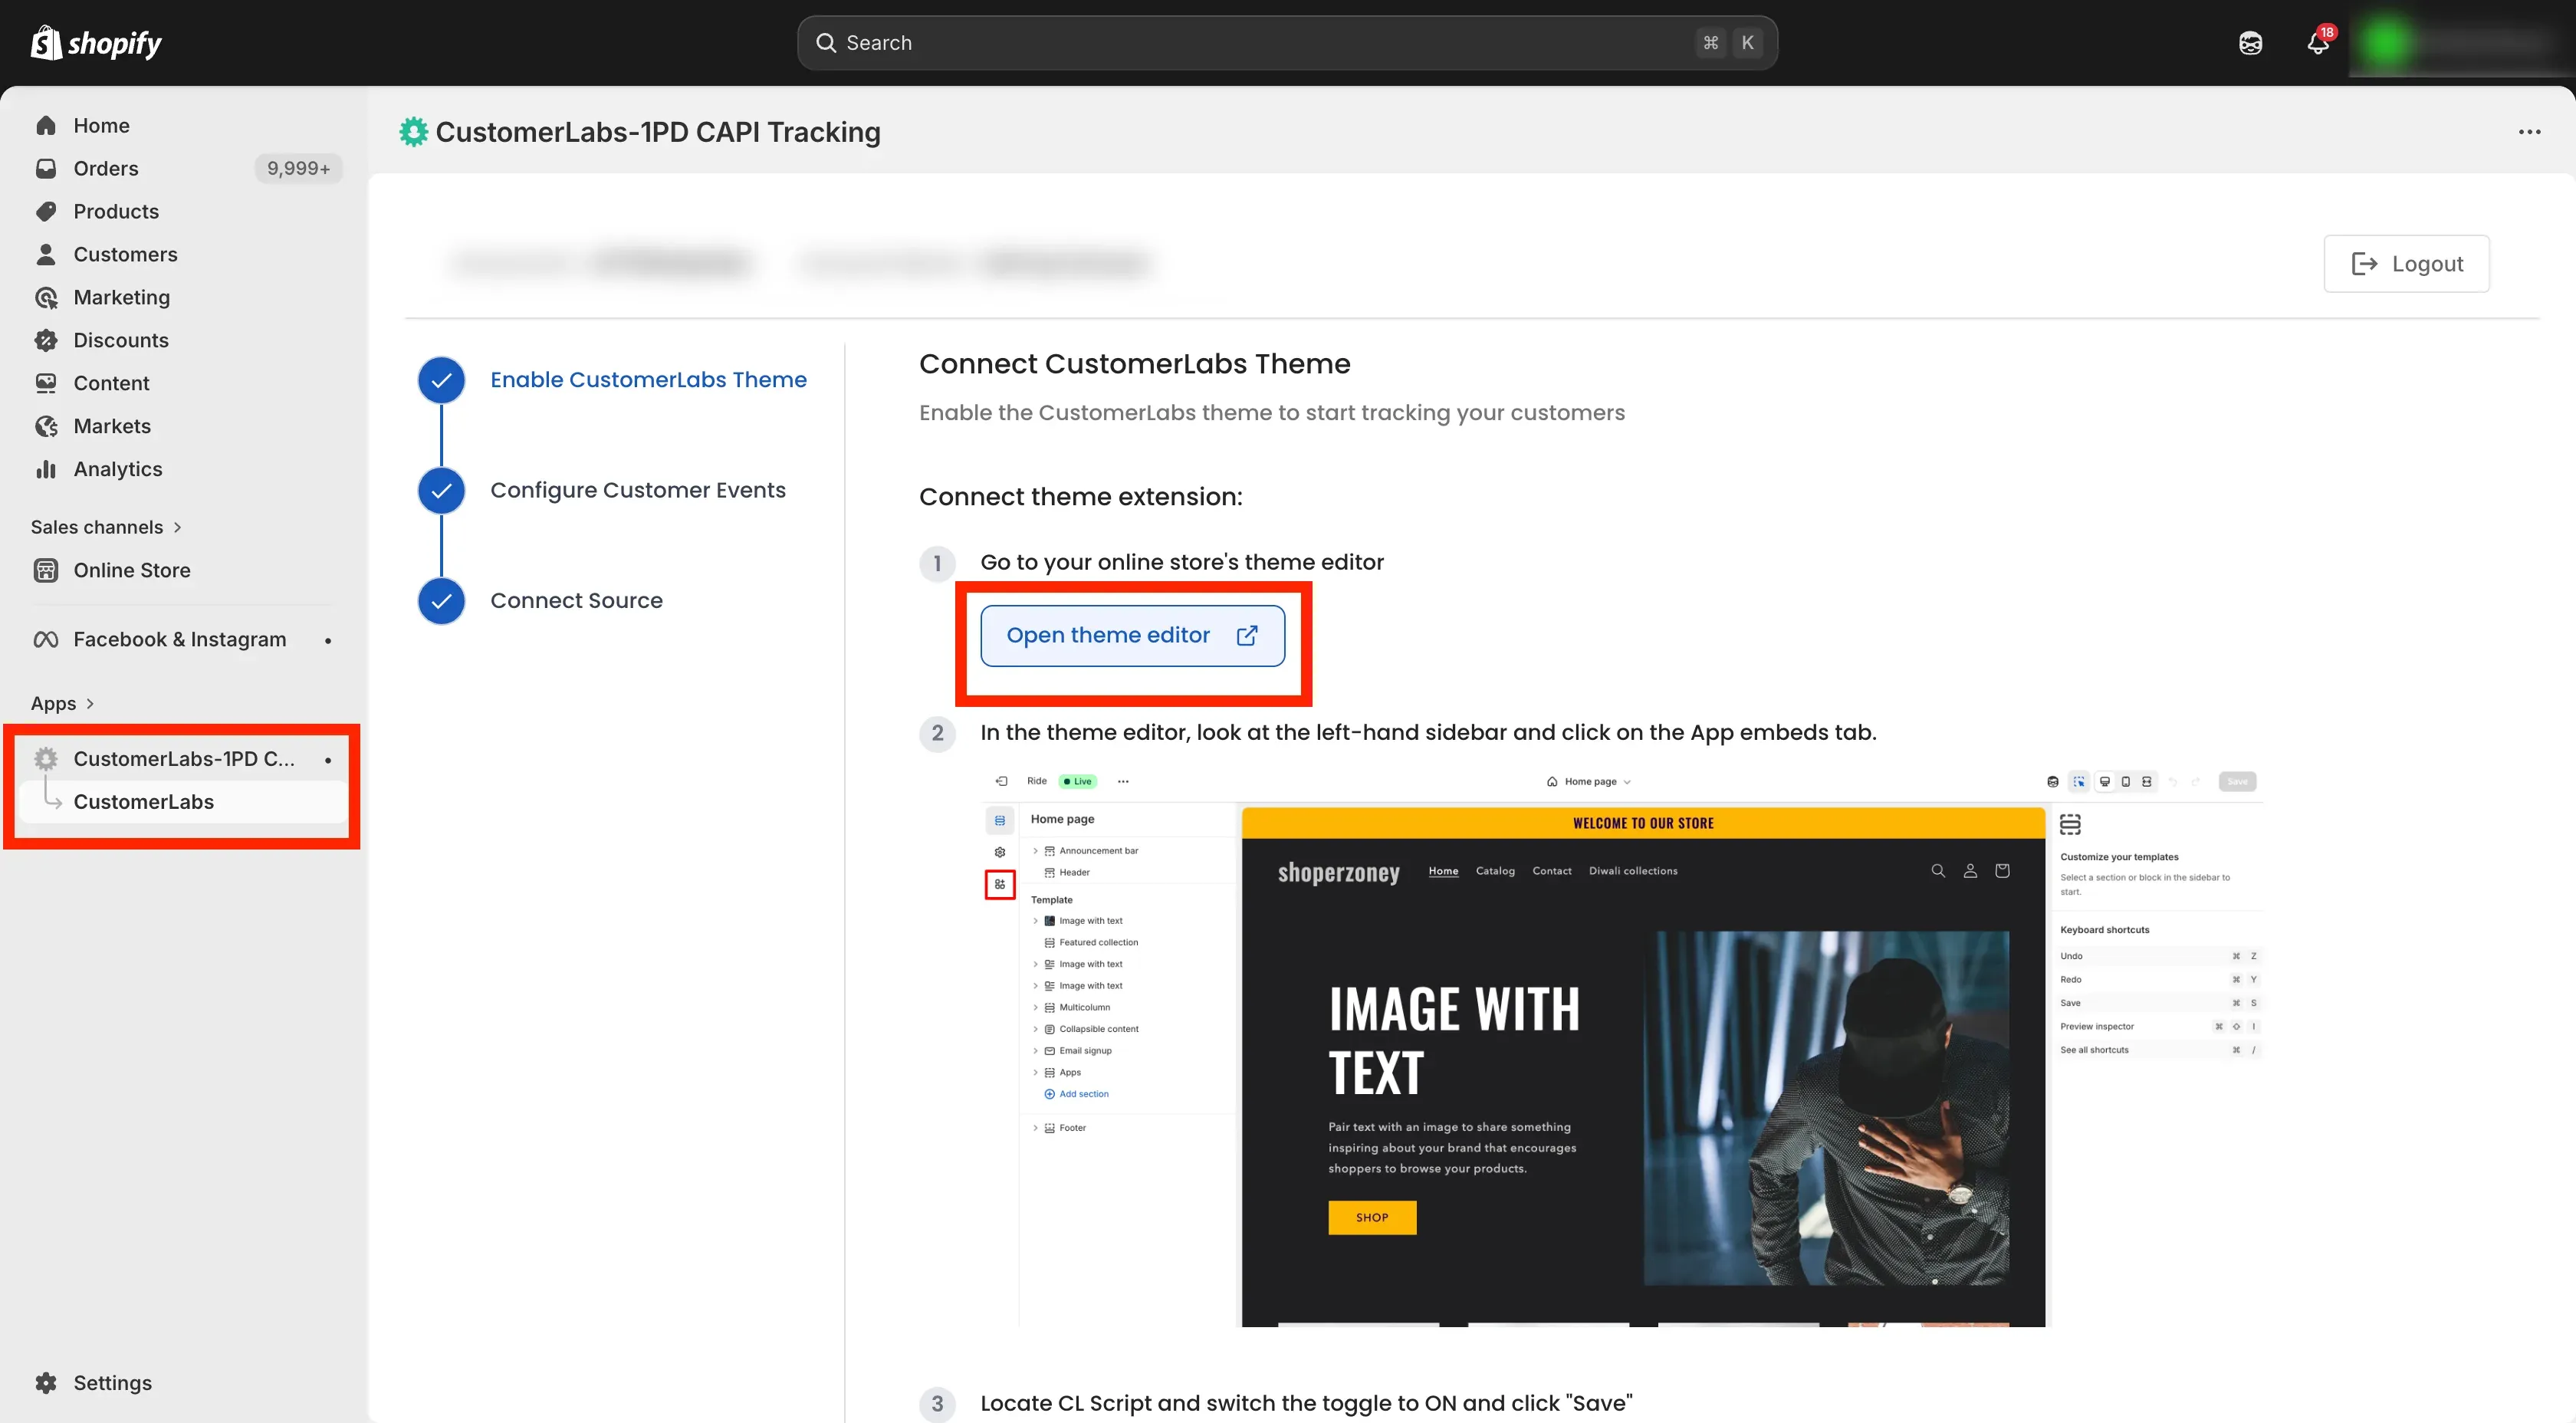
- Navigate to the App embeds and enable the toggle CL script.
- Click Save to apply the changes.
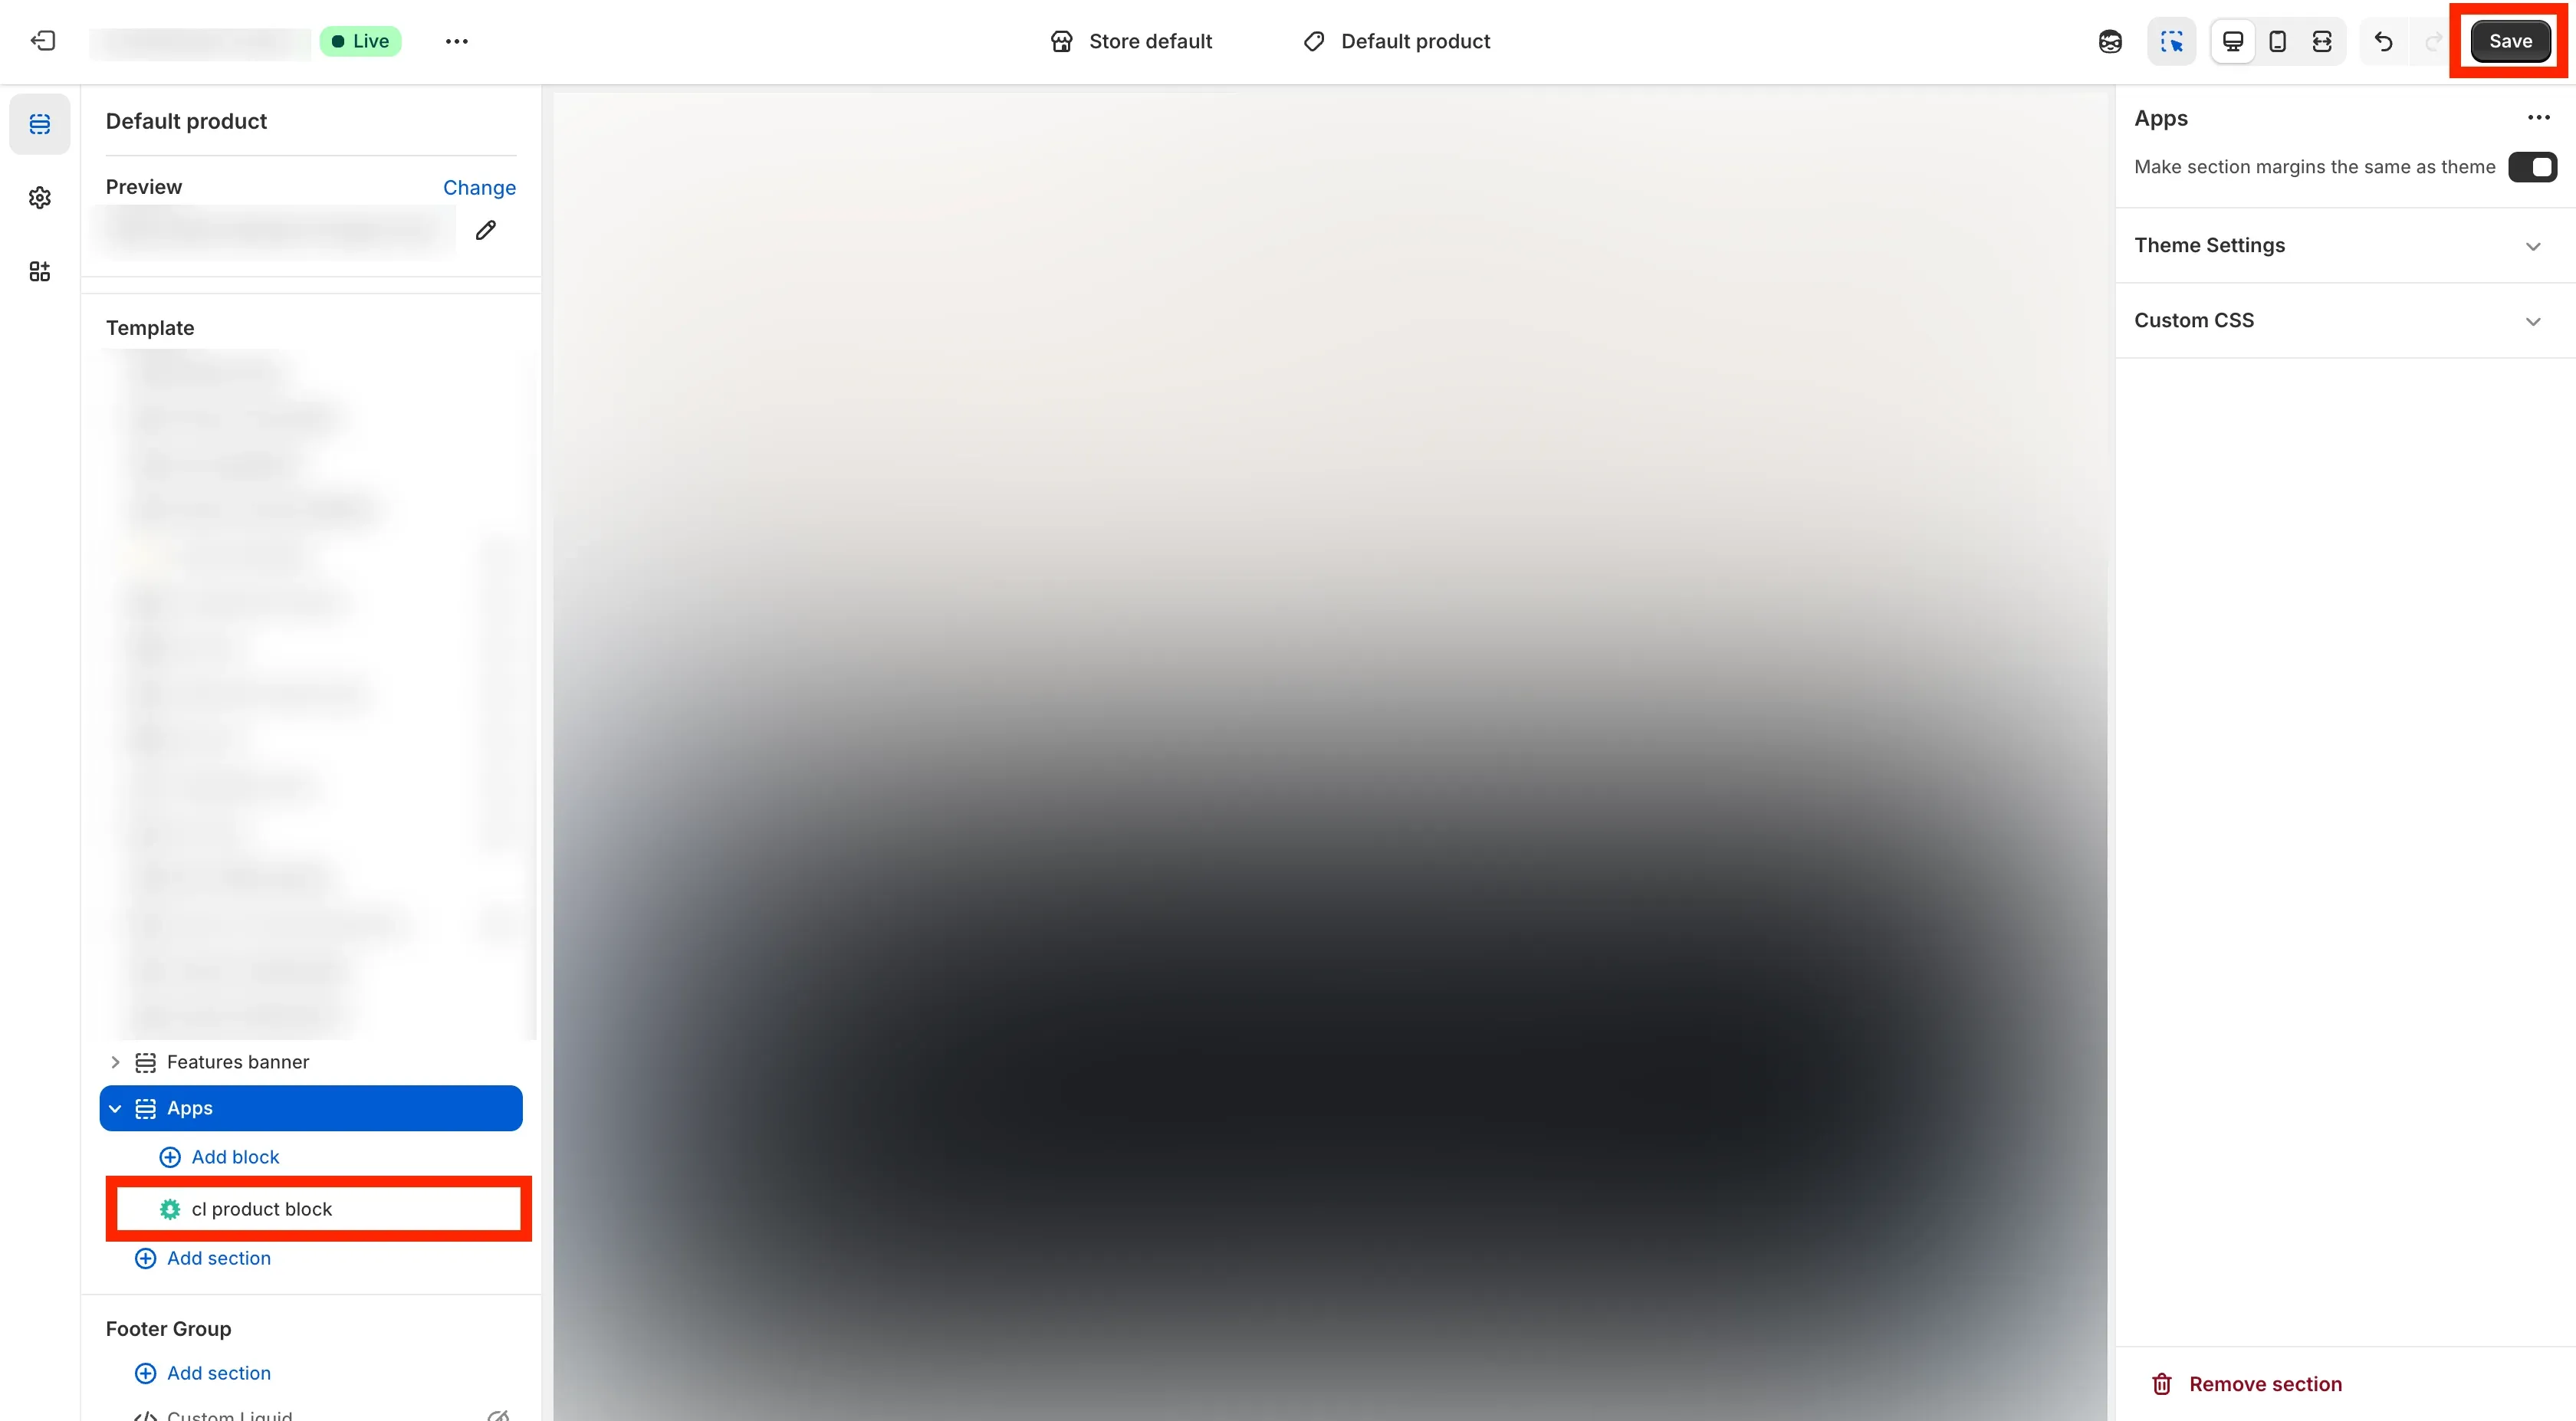
Add Product Tracking Script
Section titled “Add Product Tracking Script”- Navigate to the Default Product Page in your Shopify website.
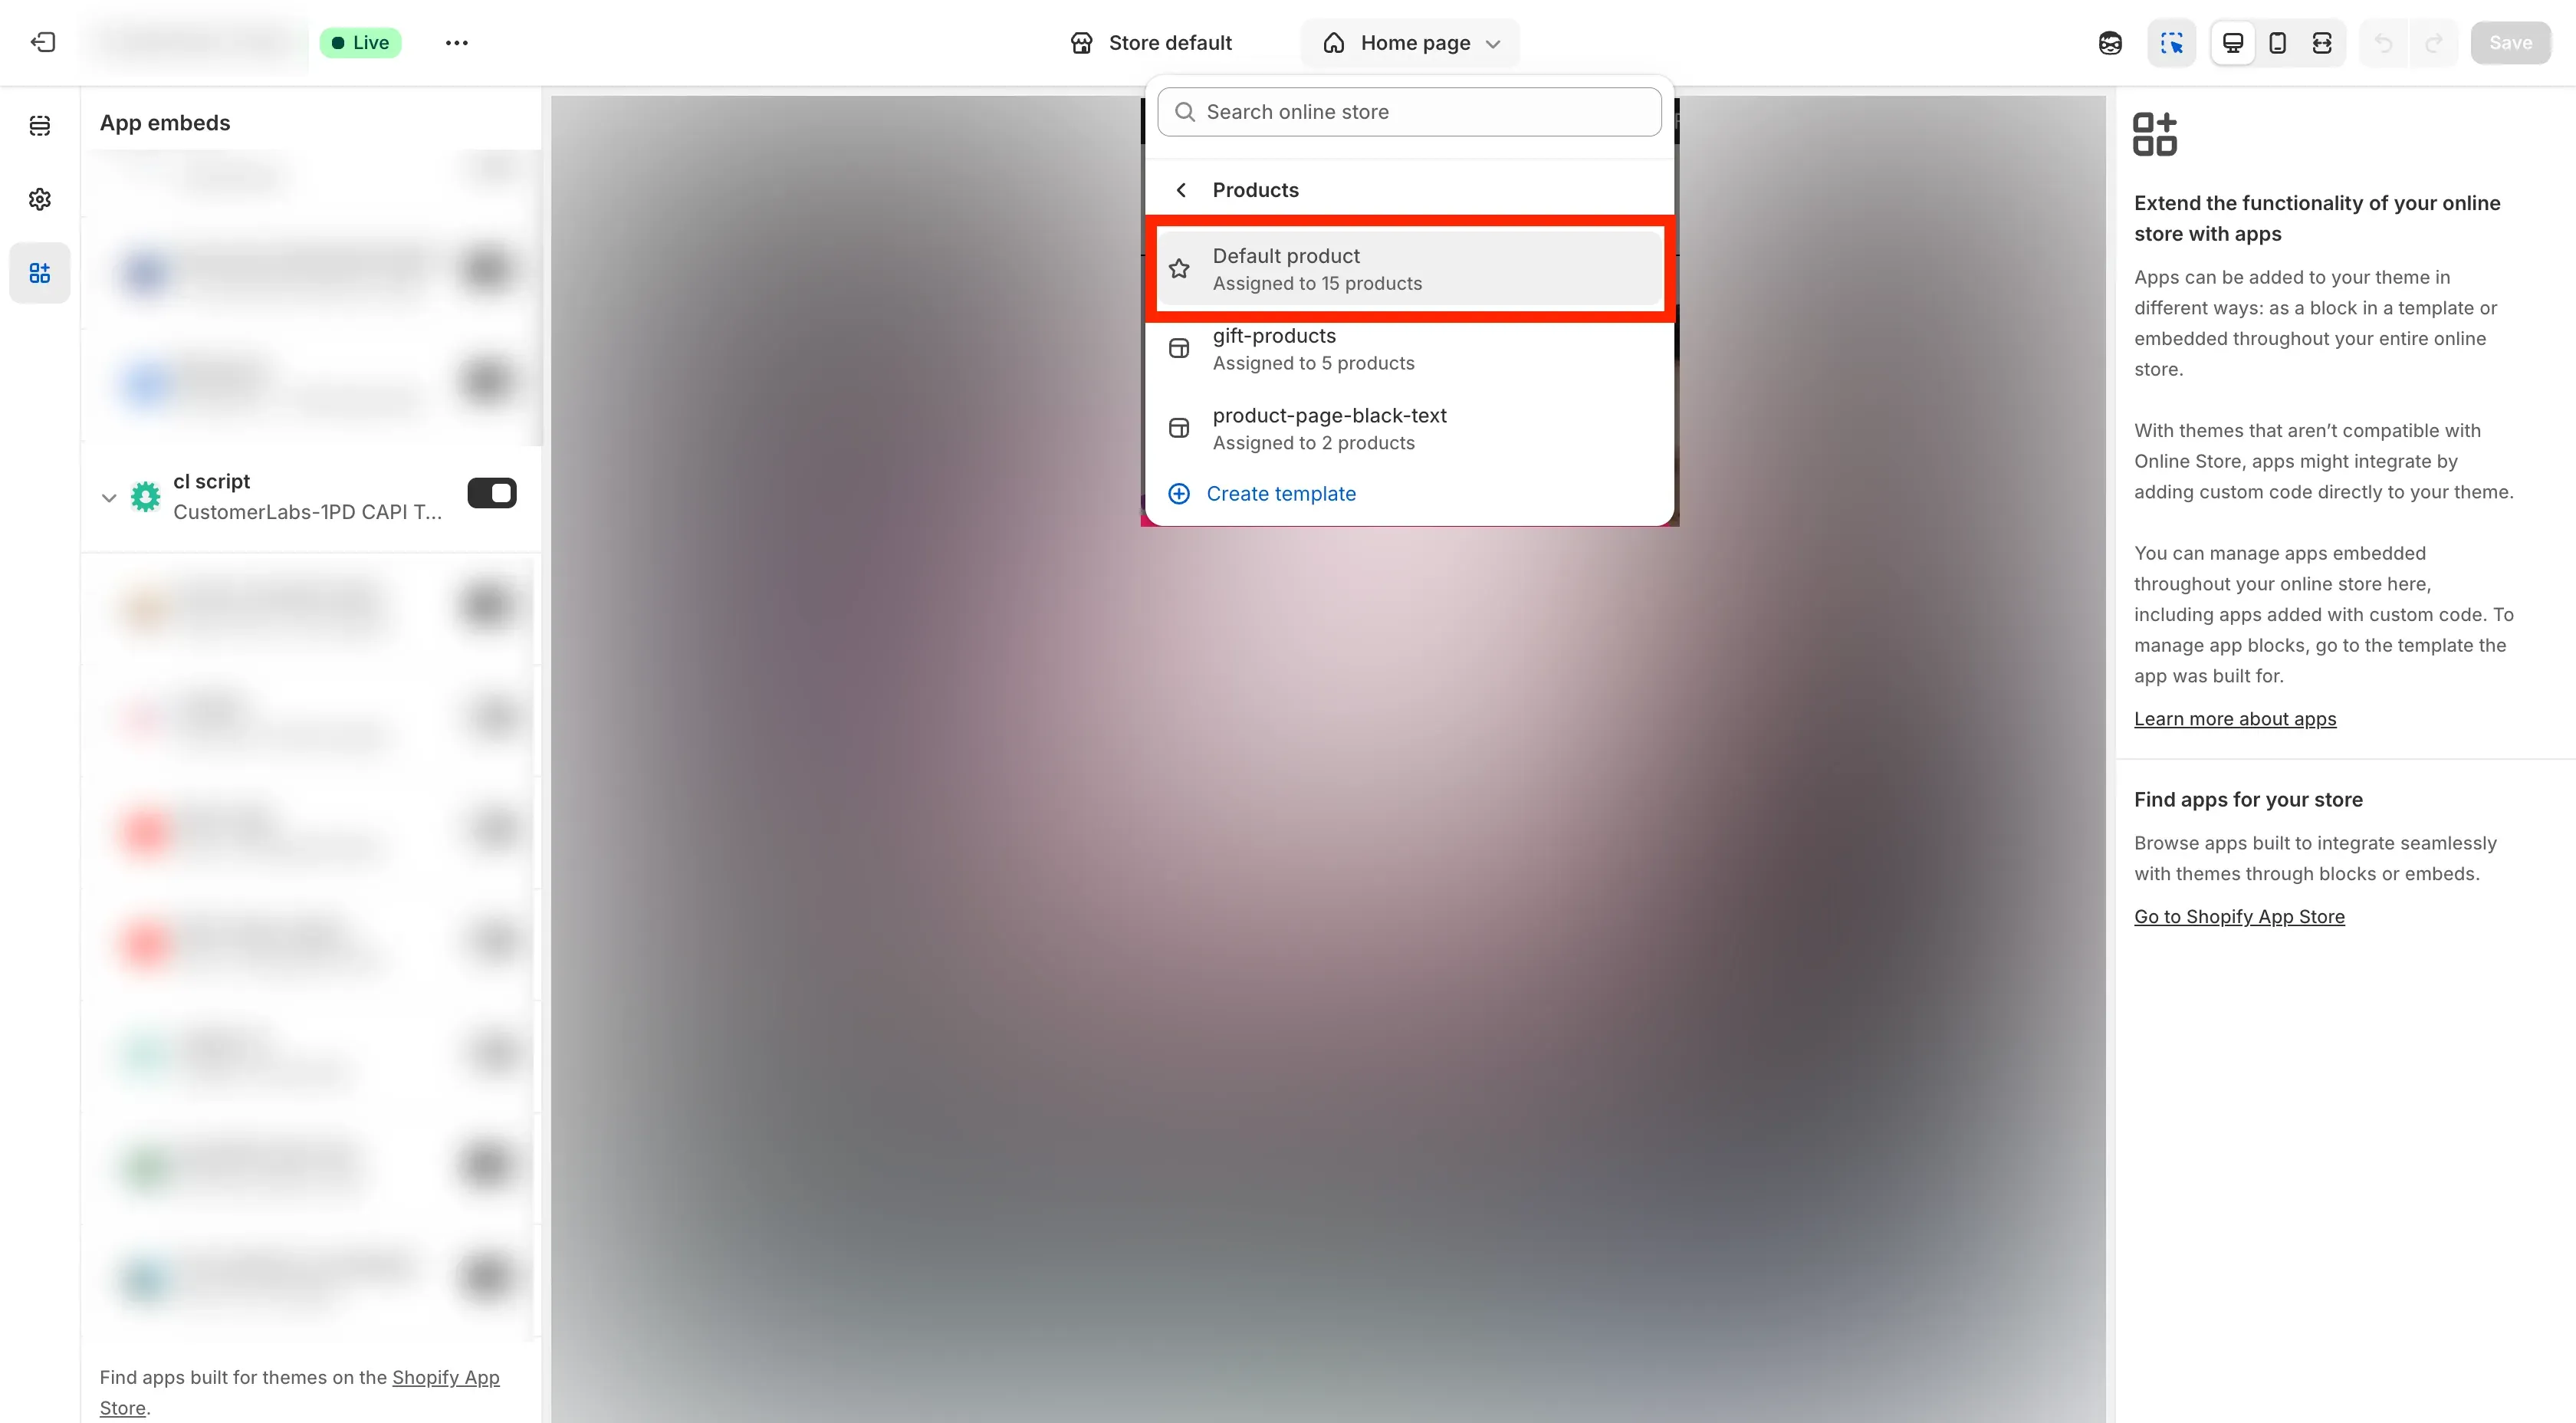
- Navigate to the Template section, click on Add Section.
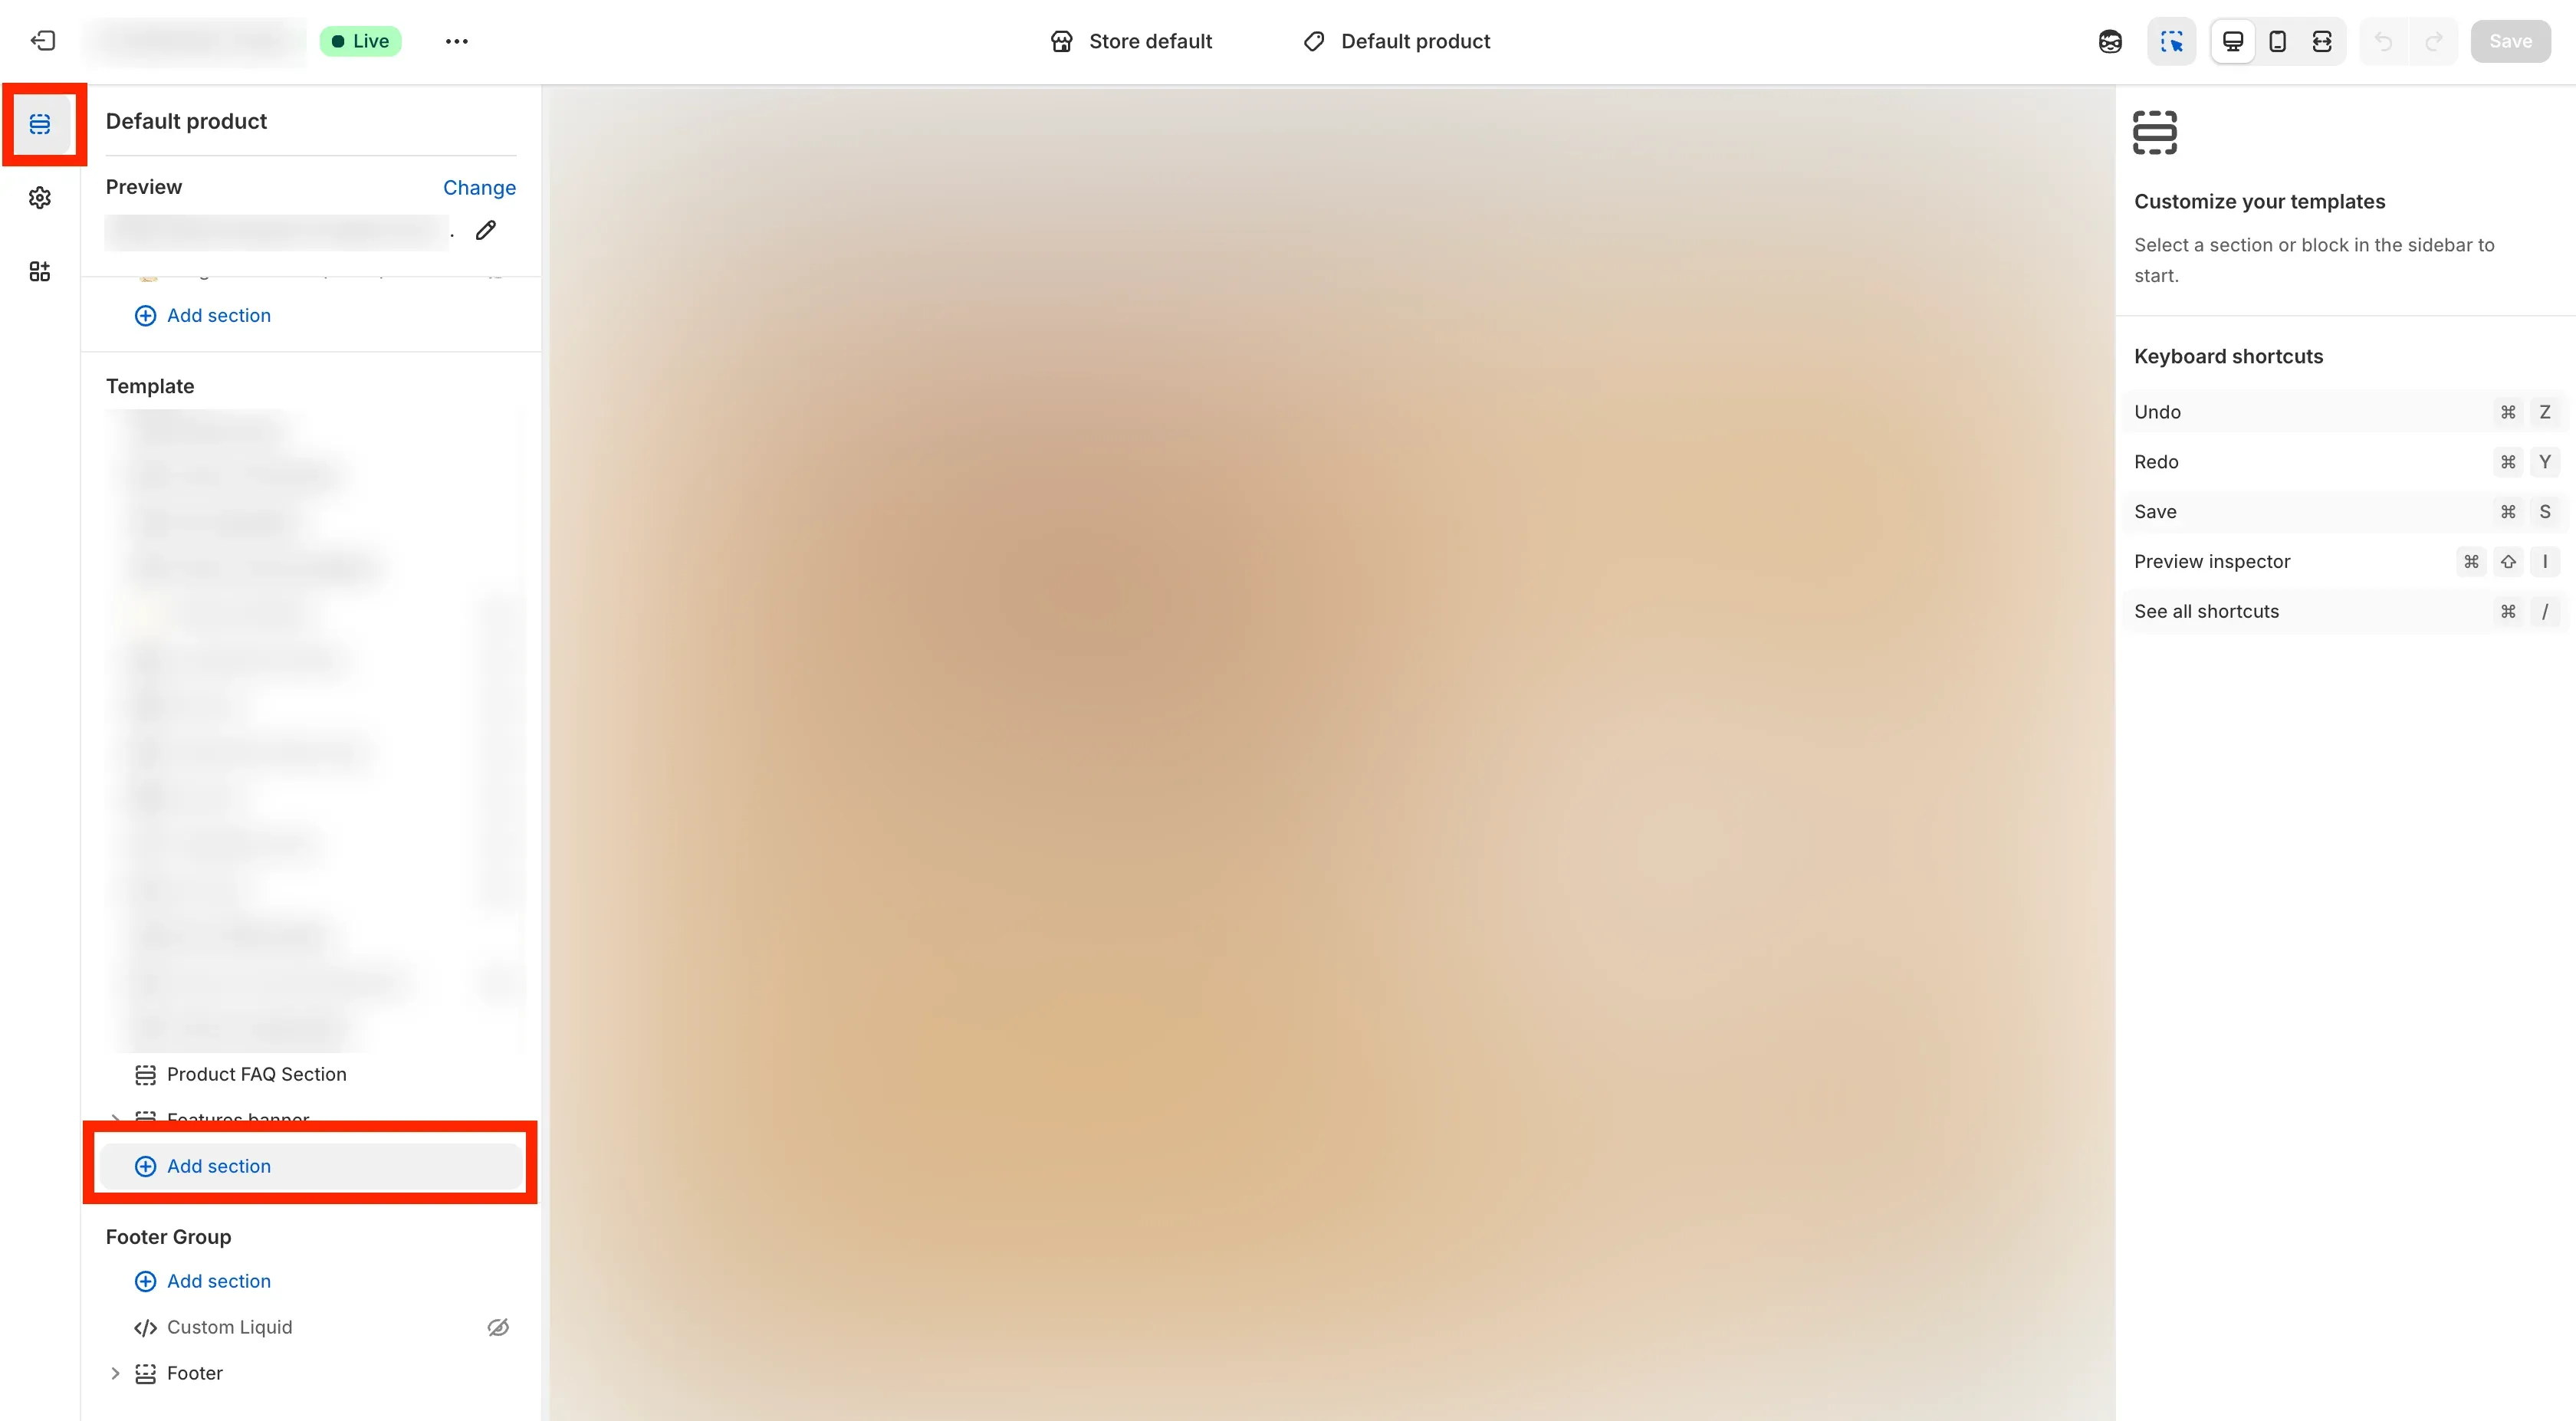
- Go to the Apps tab, select CL Product block.

- Click Save to apply the changes.
Add Checkout Extension
Section titled “Add Checkout Extension”- Go back to the instructions page → Click on the Open Checkout Settings.
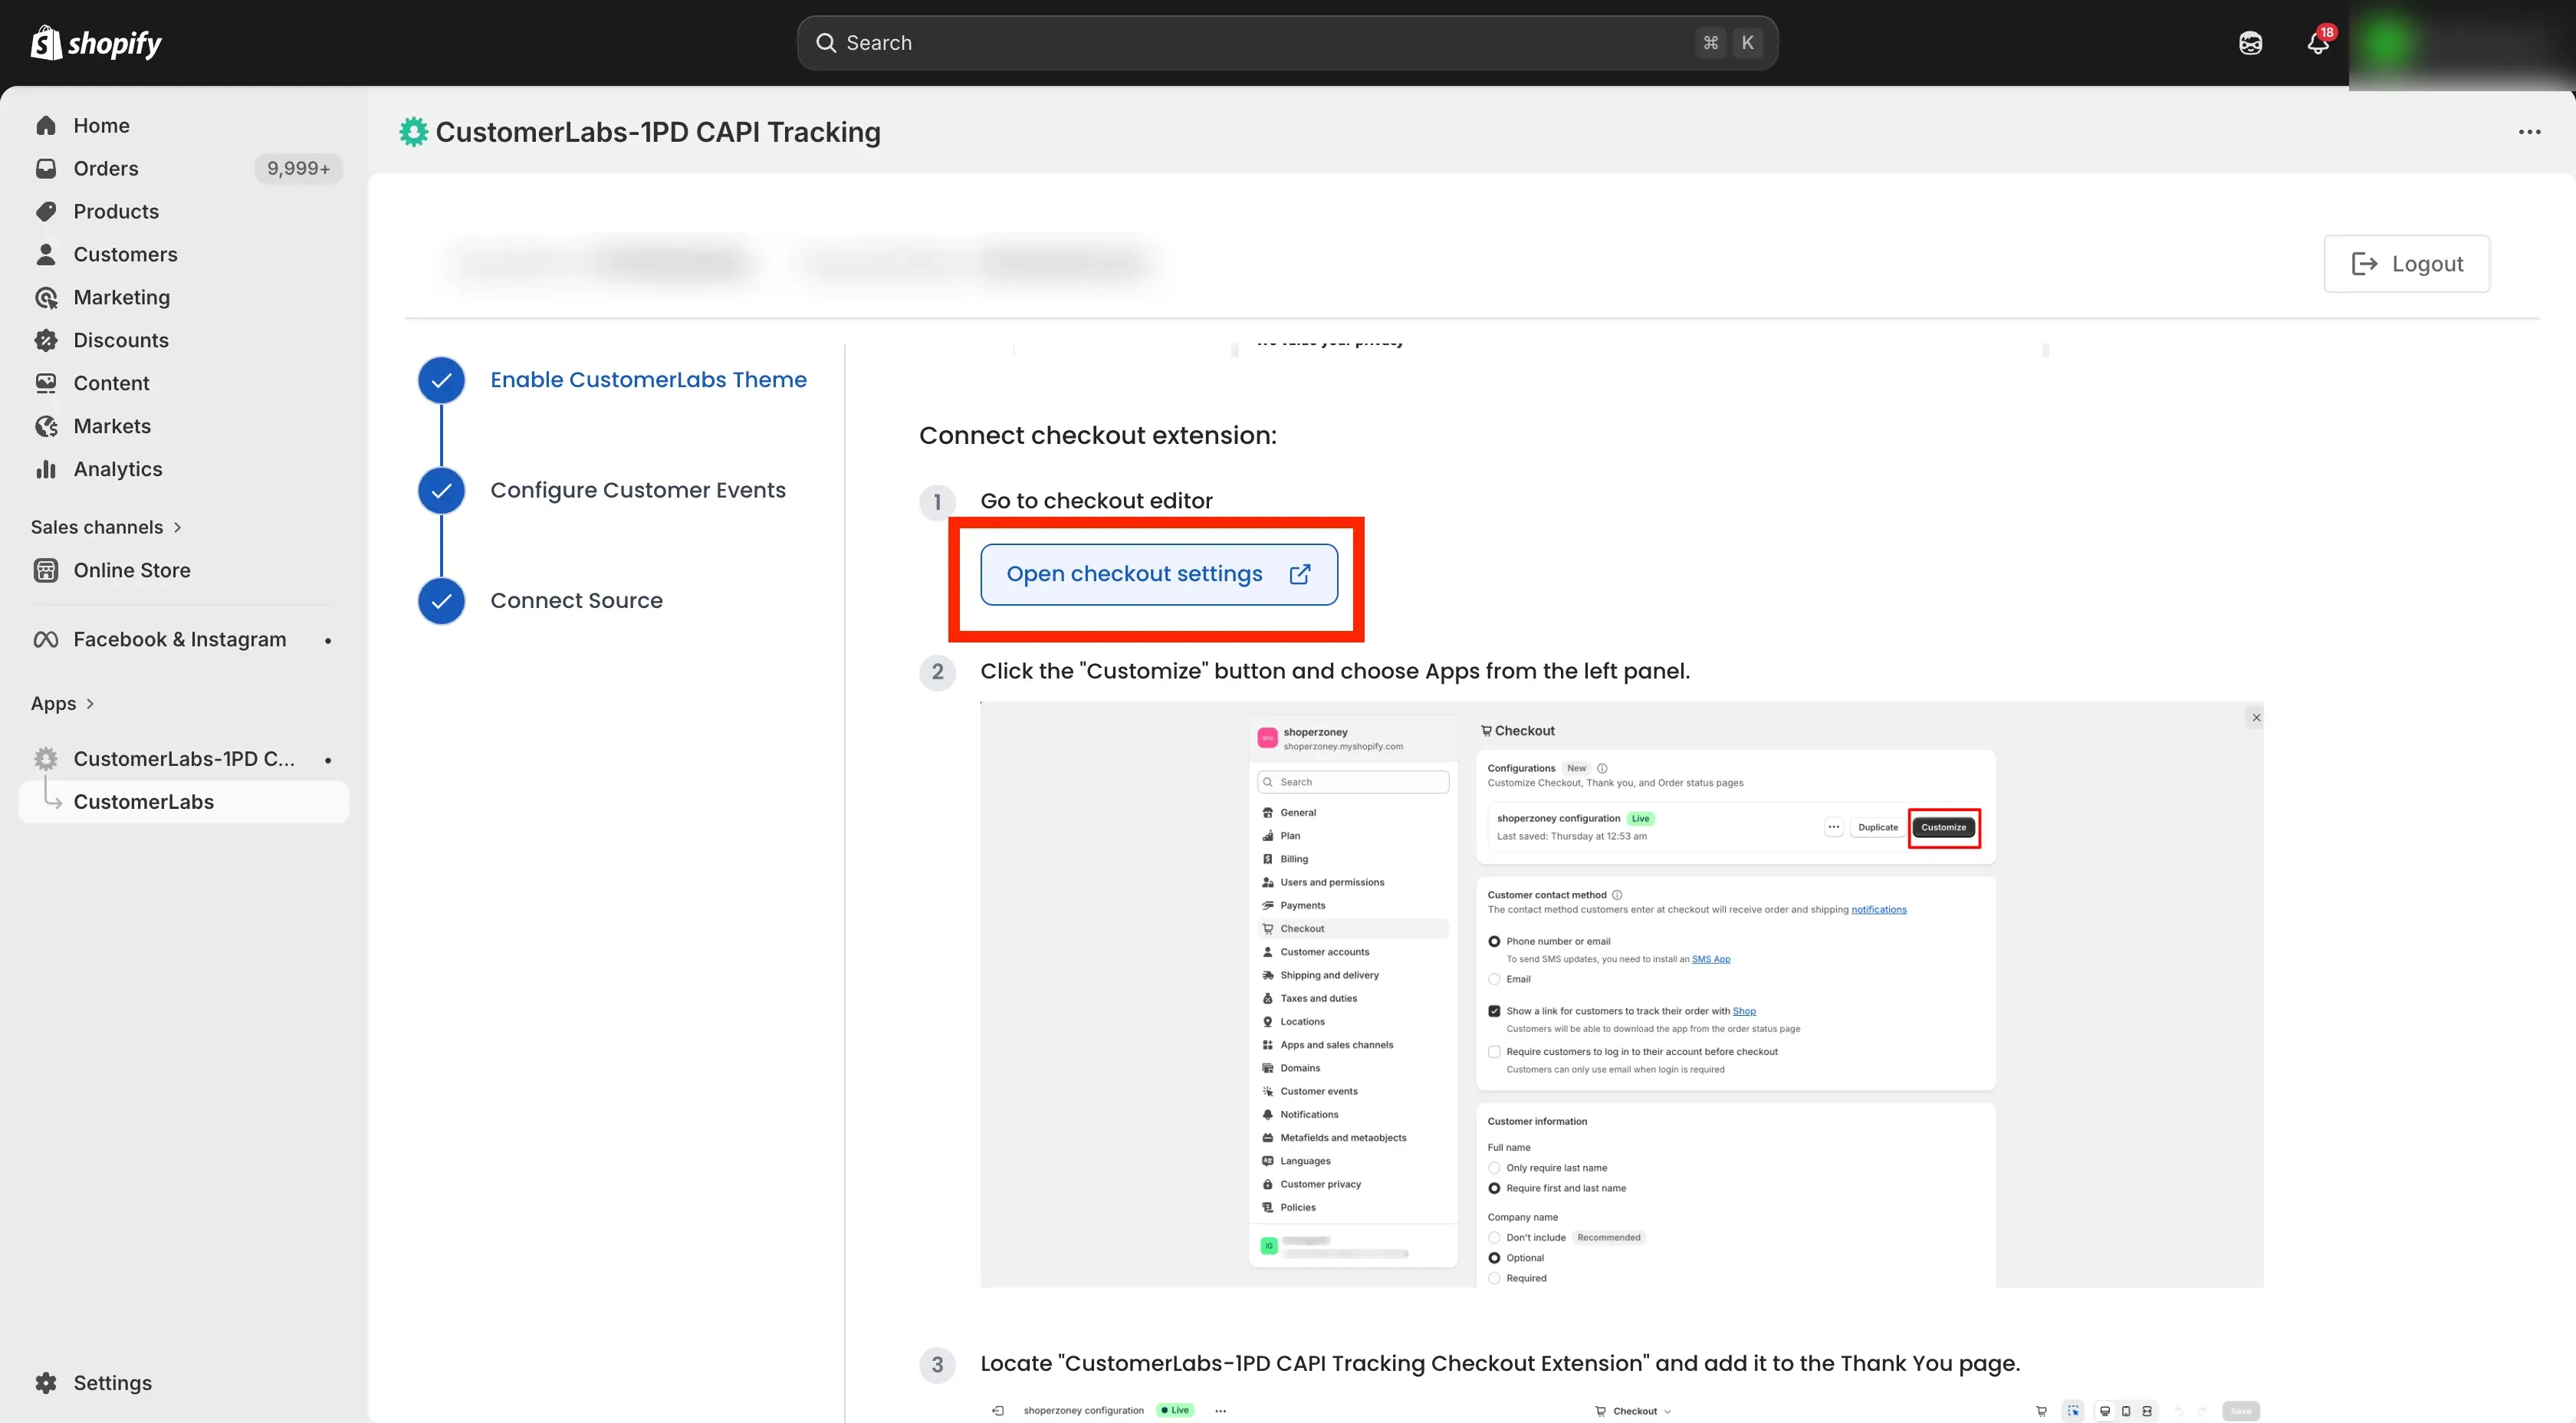
- In the Checkout Settings panel, click Customize.
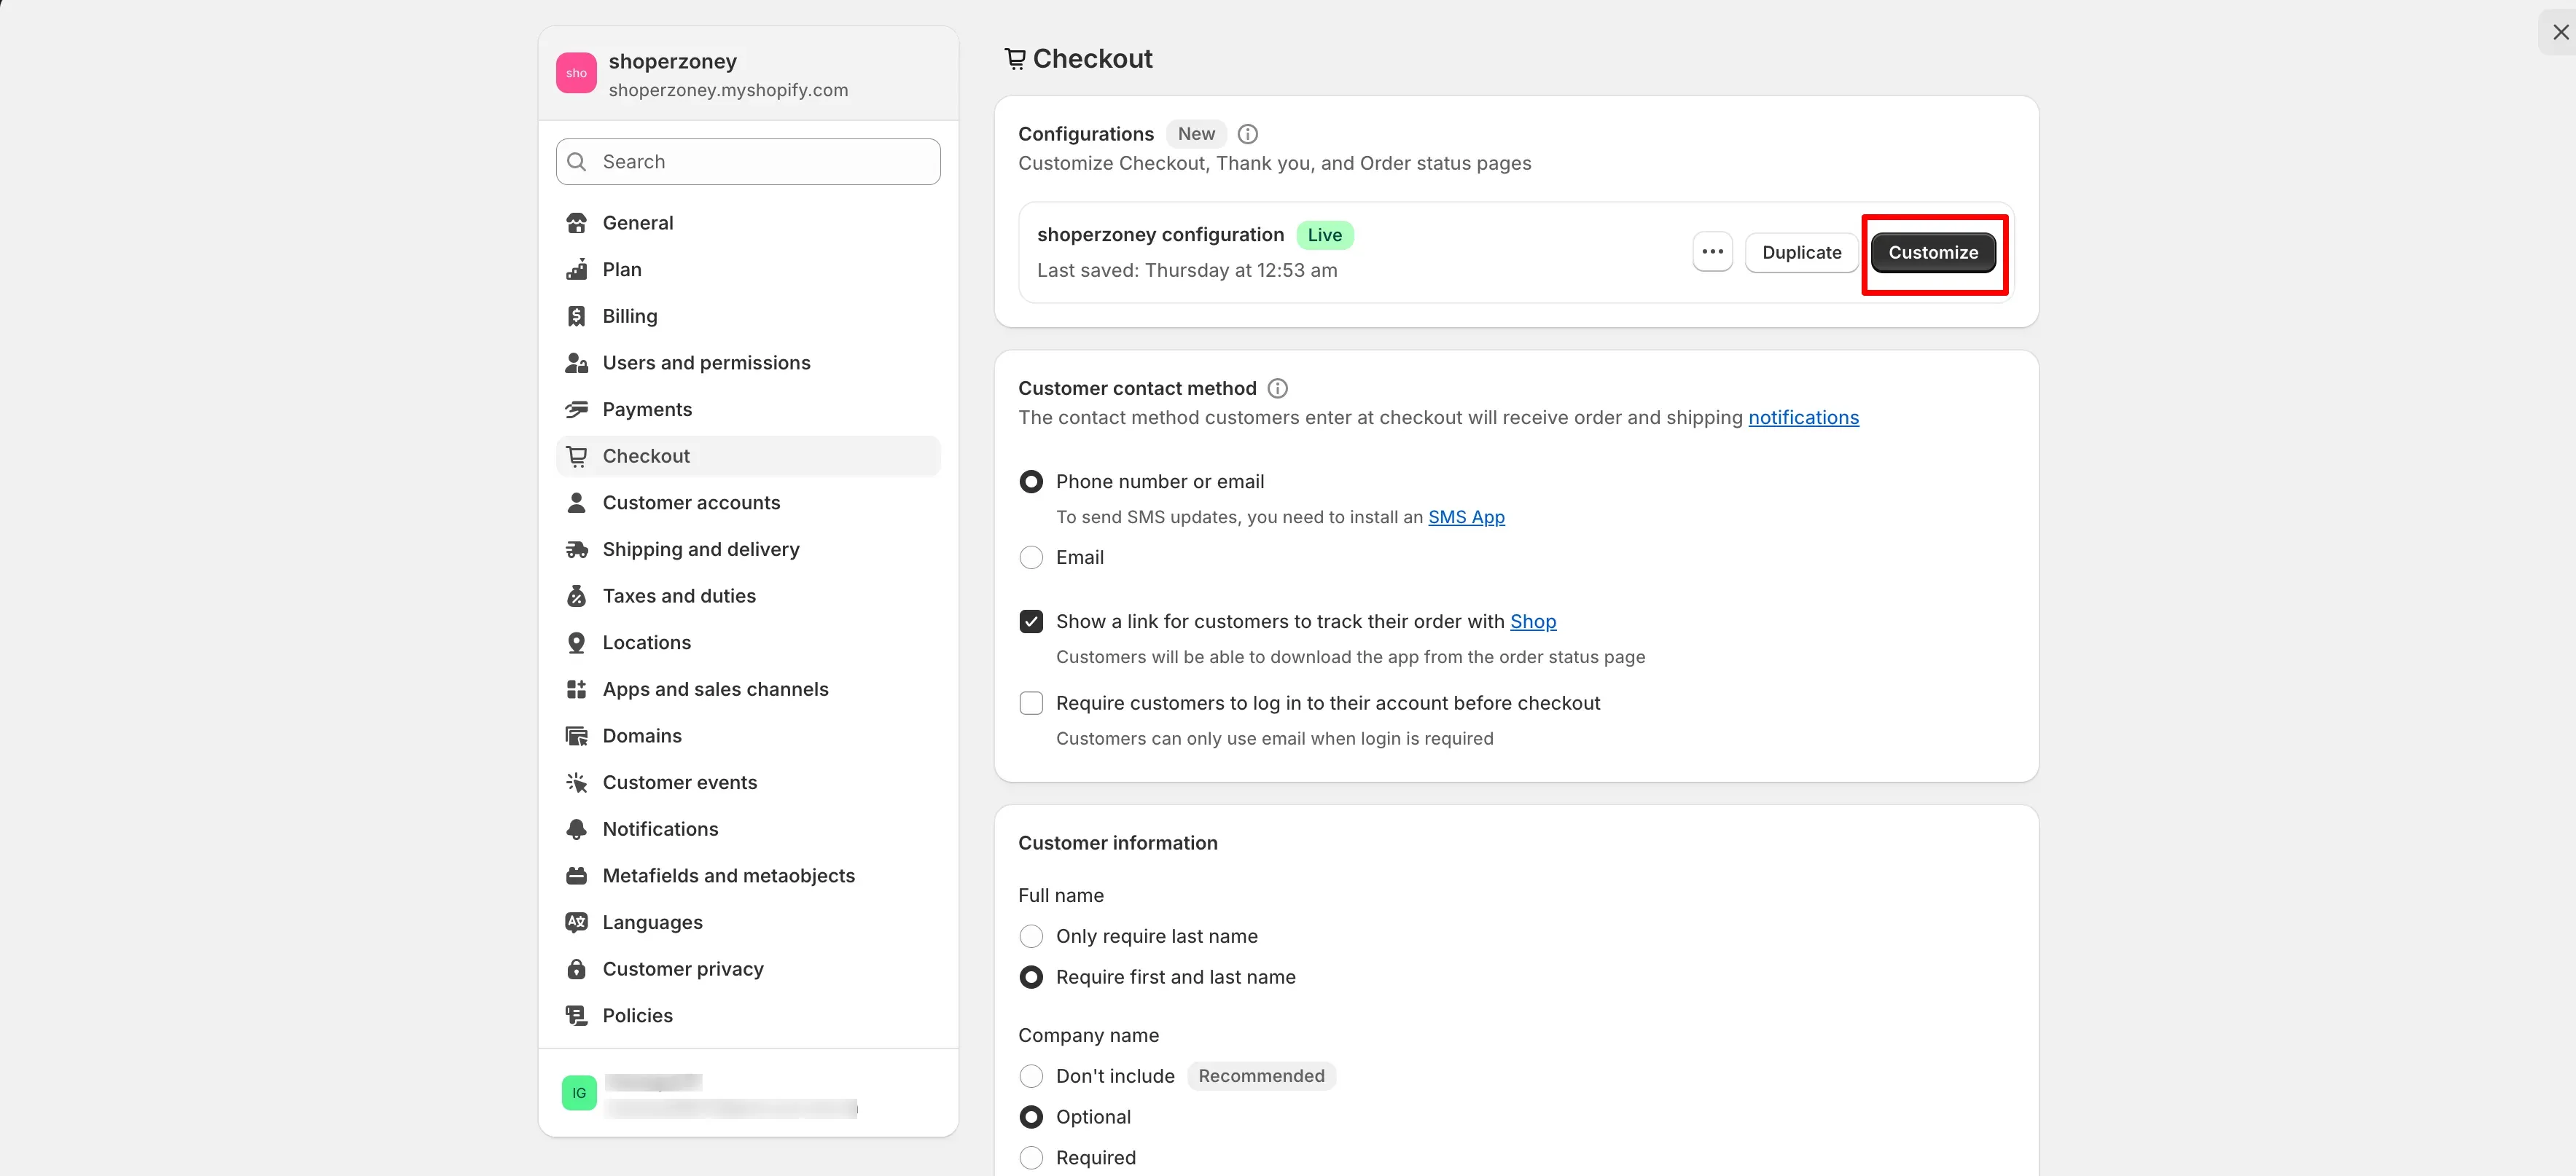
- Go to App Embeds and on the left sidebar, Scroll to bottom → click on the
+icon in Checkout Extension.
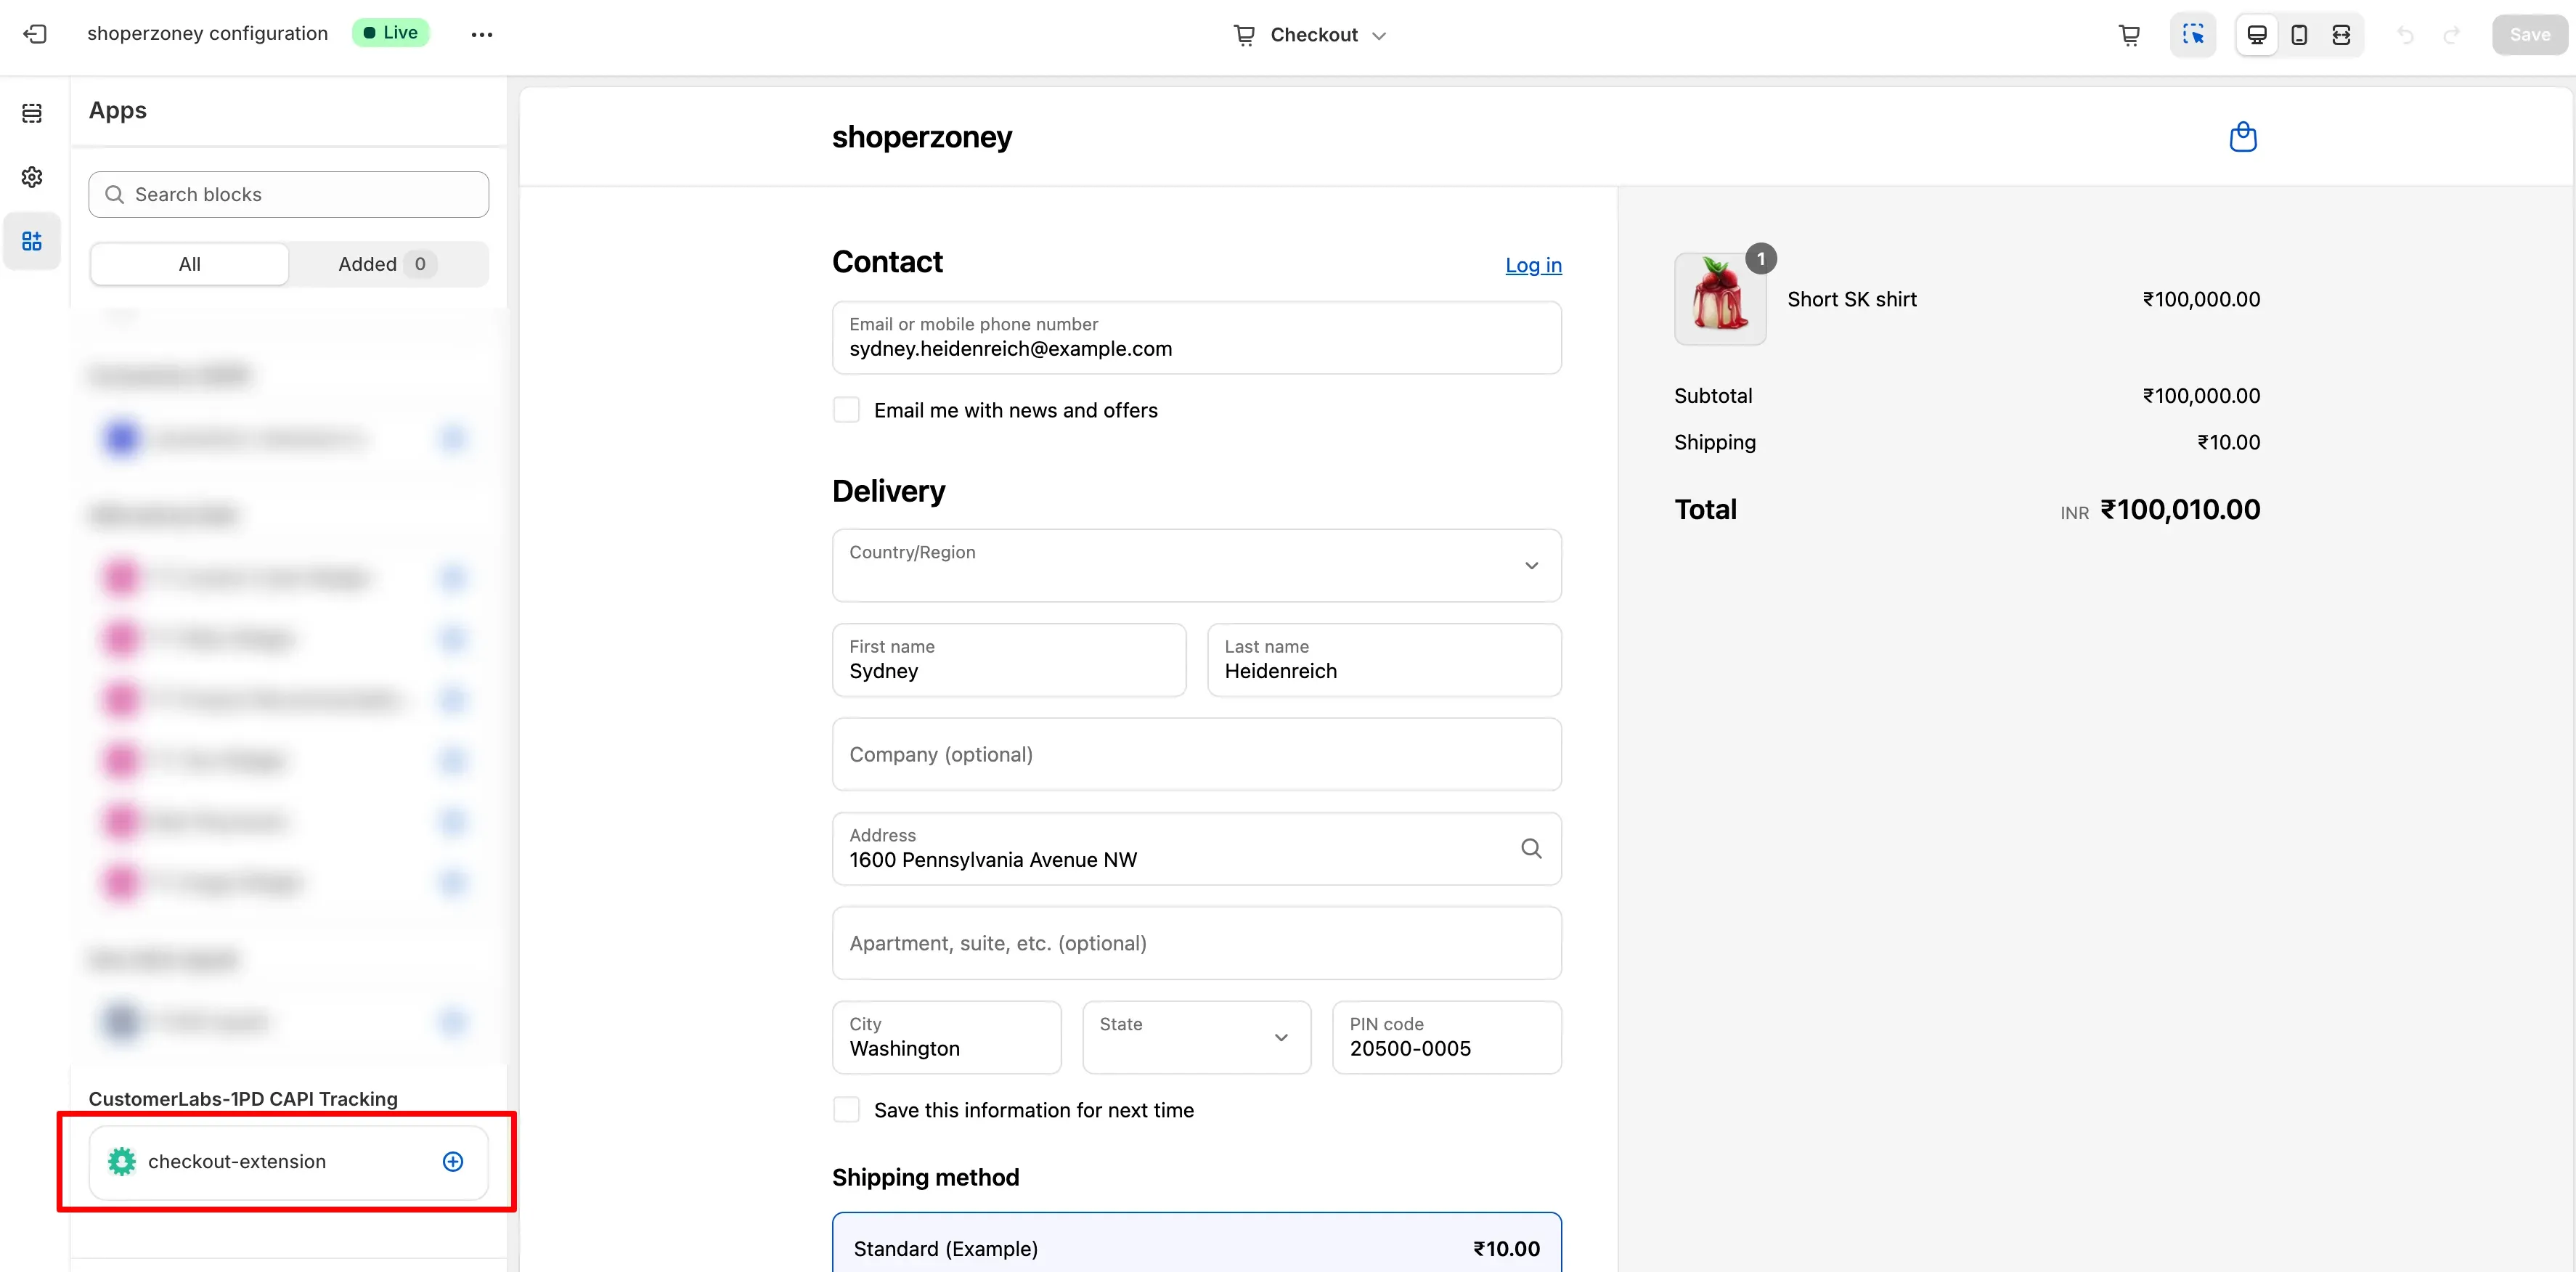
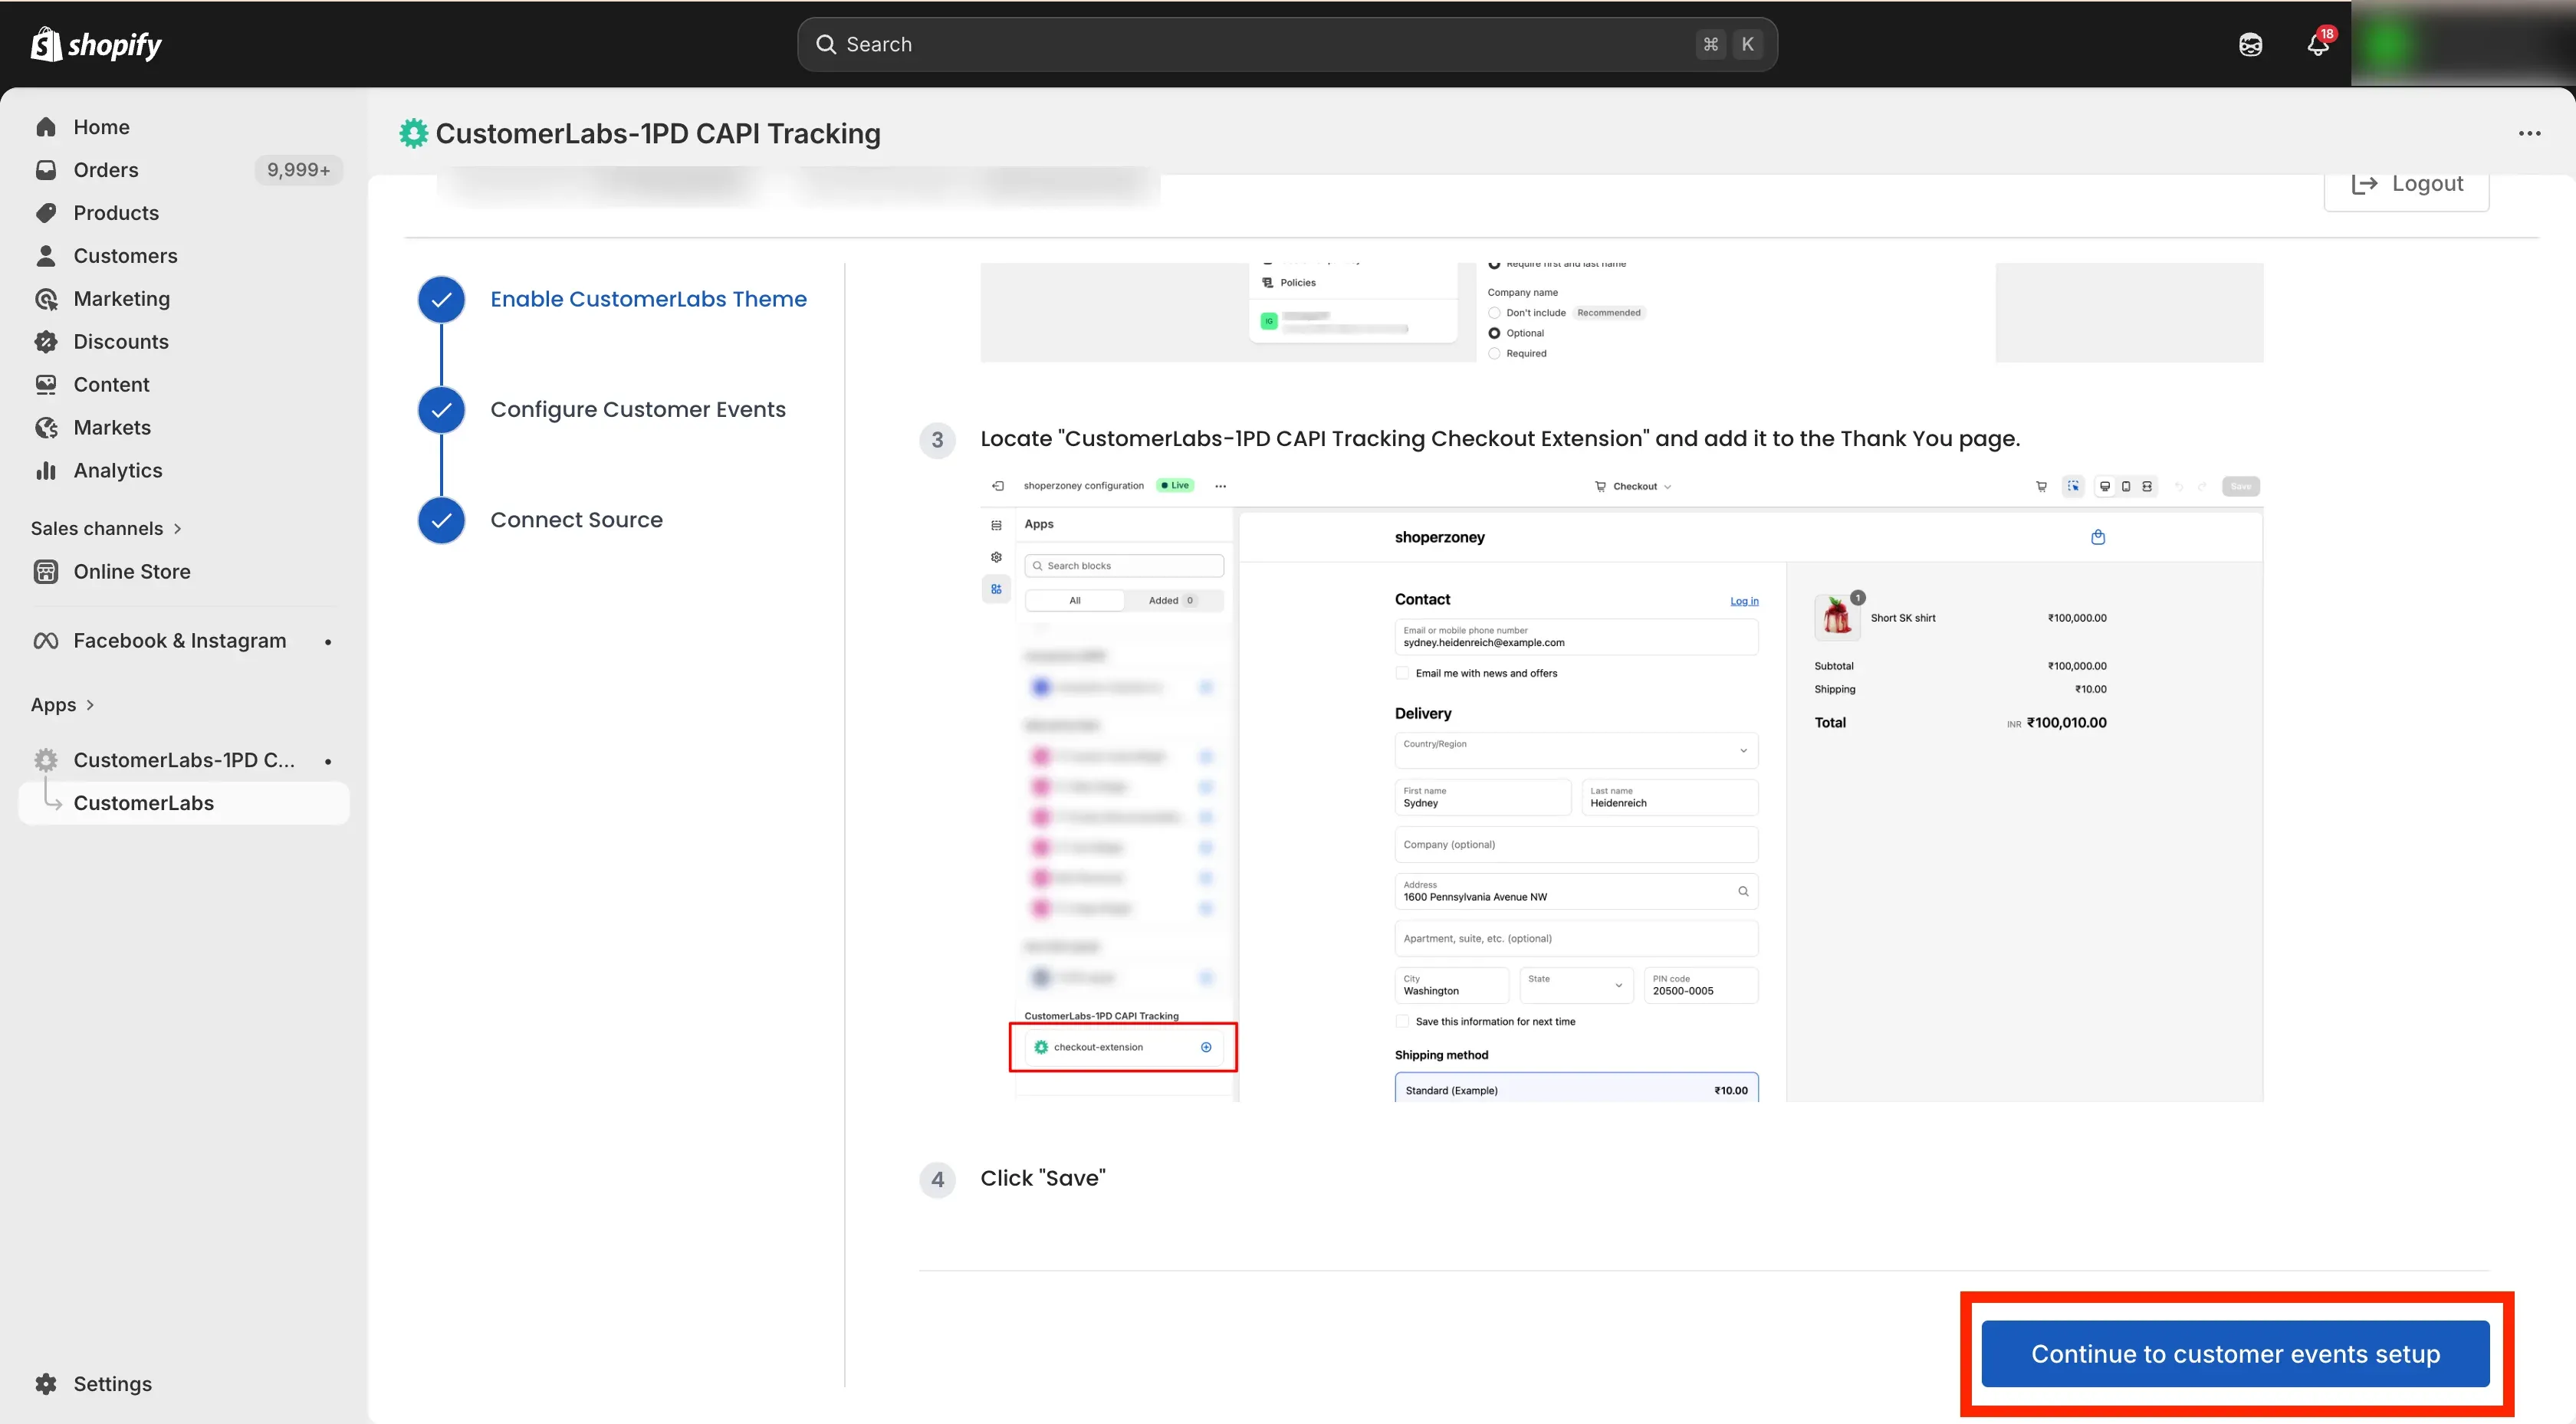
- Add the Checkout Extension to the Thank You page.
- Click Save.
- Go back to instructions page → click on Continue to Customer Events setup.
Section 2: Customer Events Setup
Section titled “Section 2: Customer Events Setup”Add Custom Pixel
Section titled “Add Custom Pixel”- Go to the instructions page
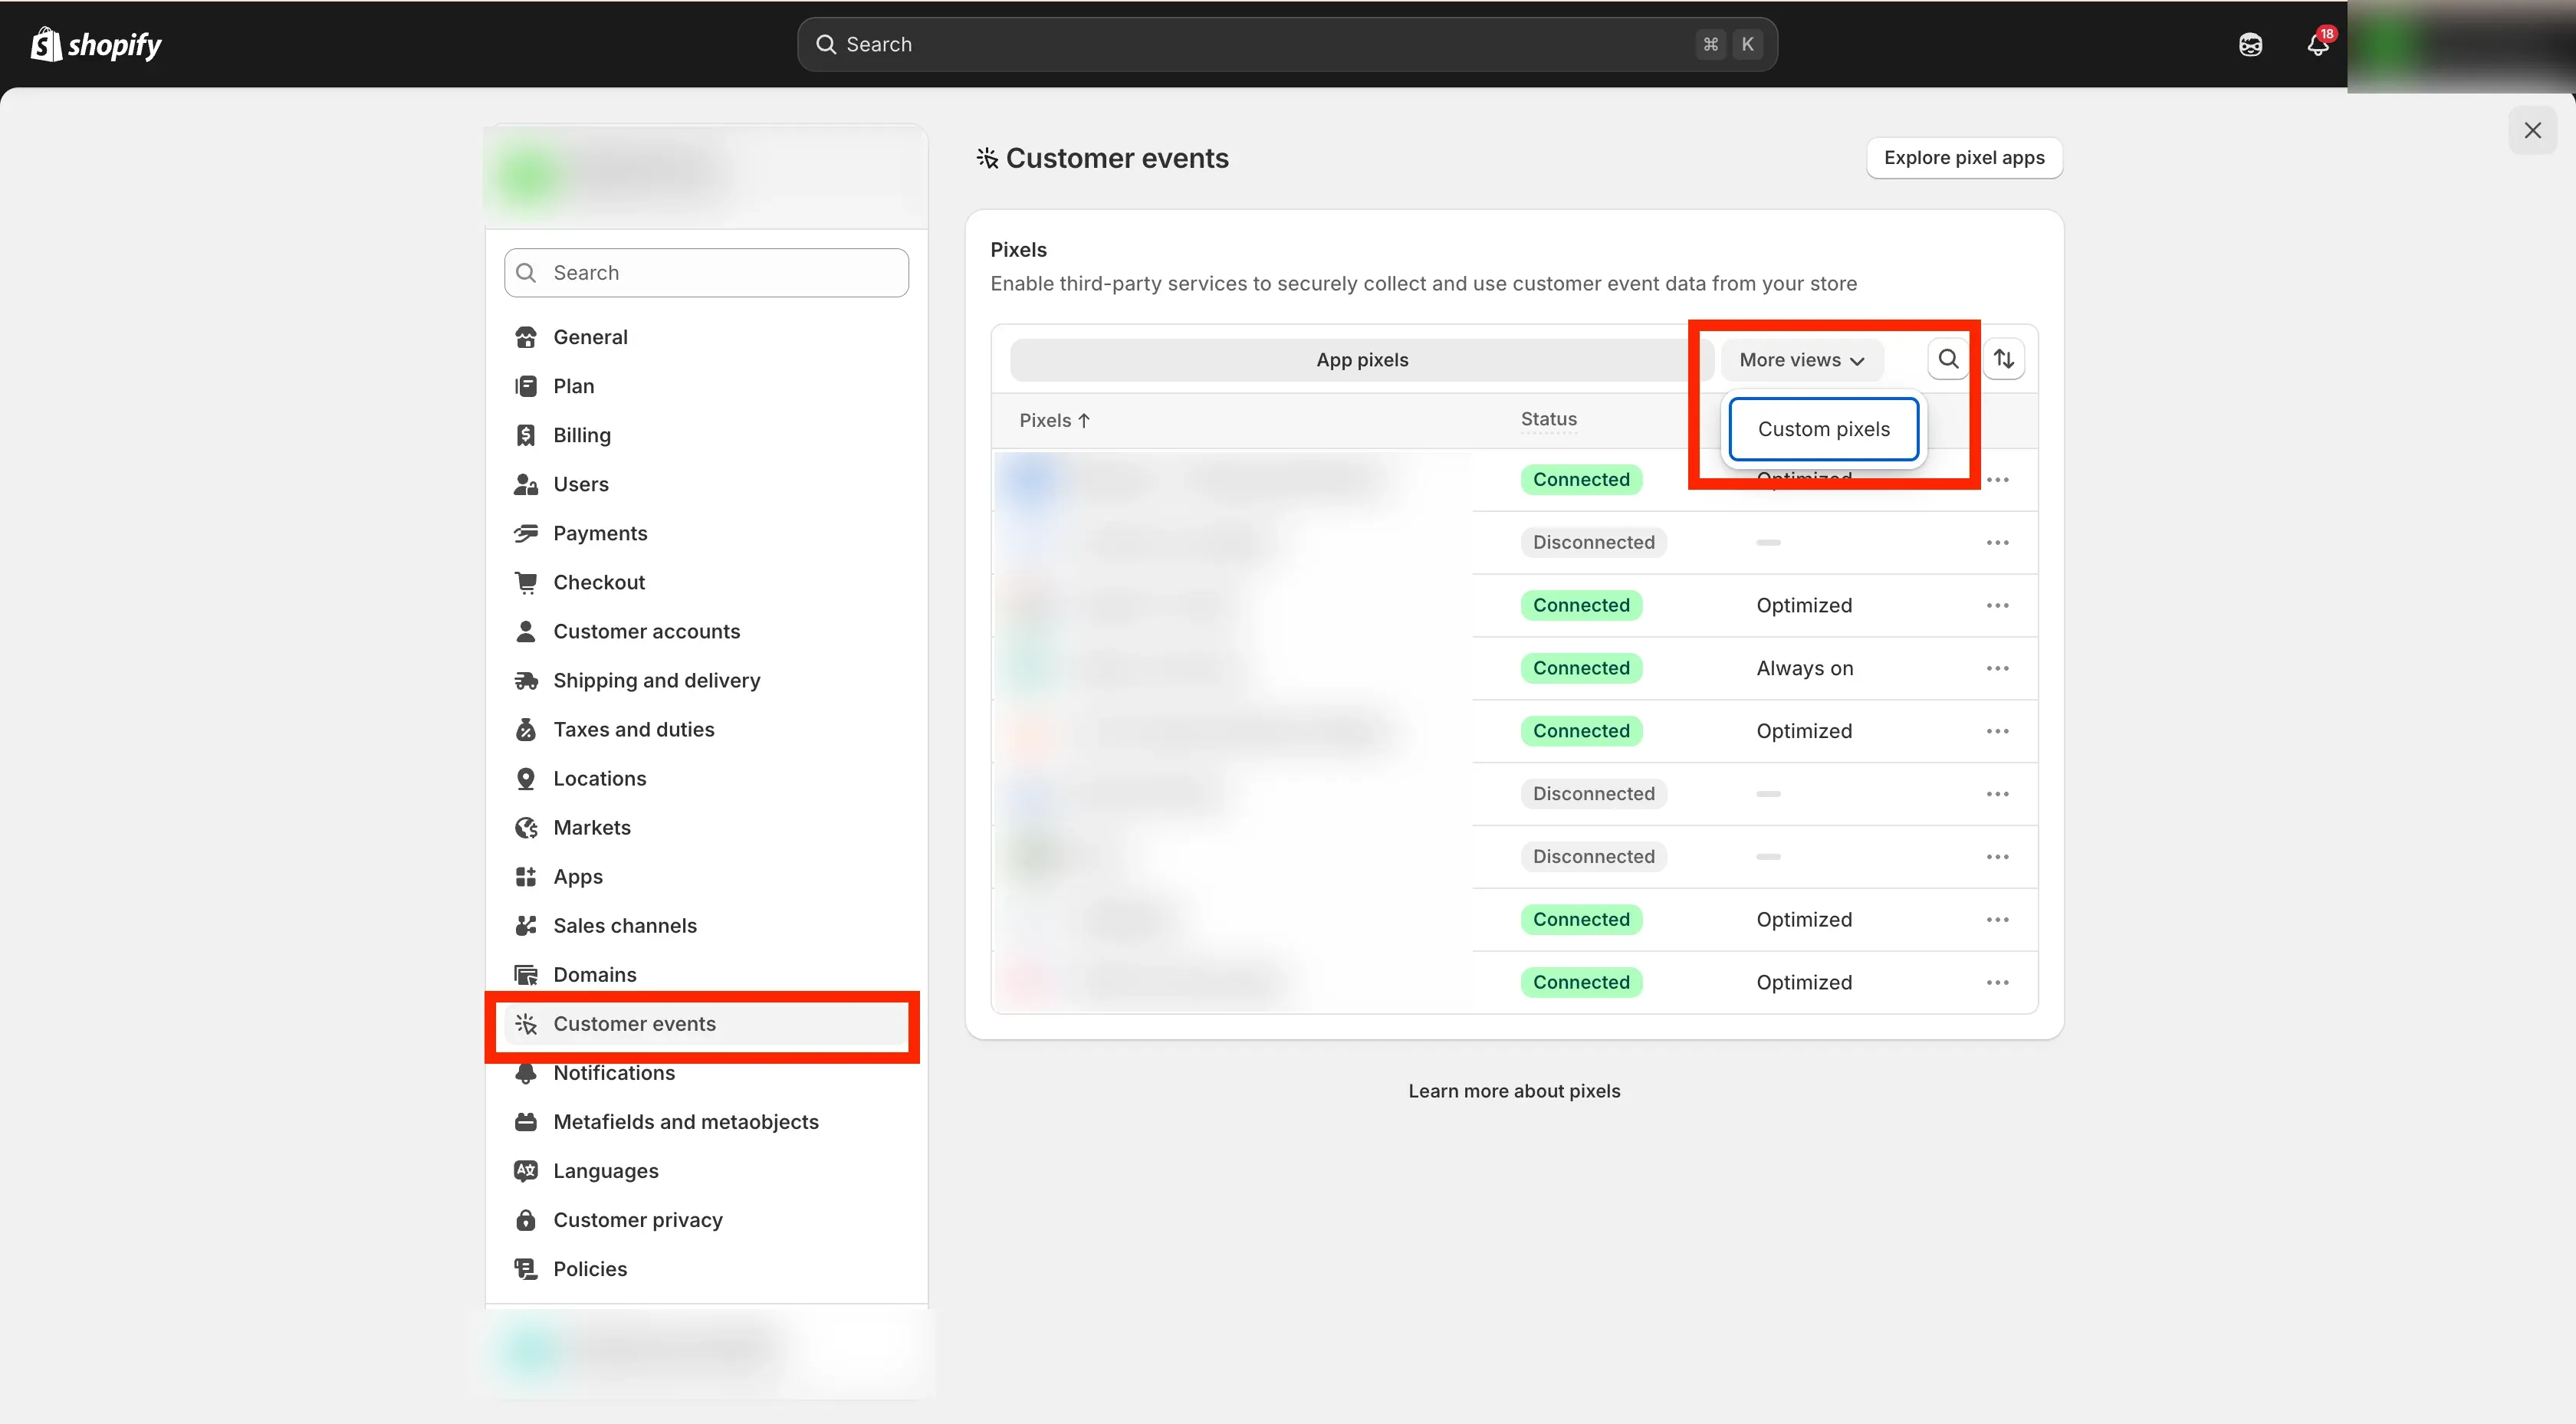
- Copy the code and click Open Customer Events Settings.
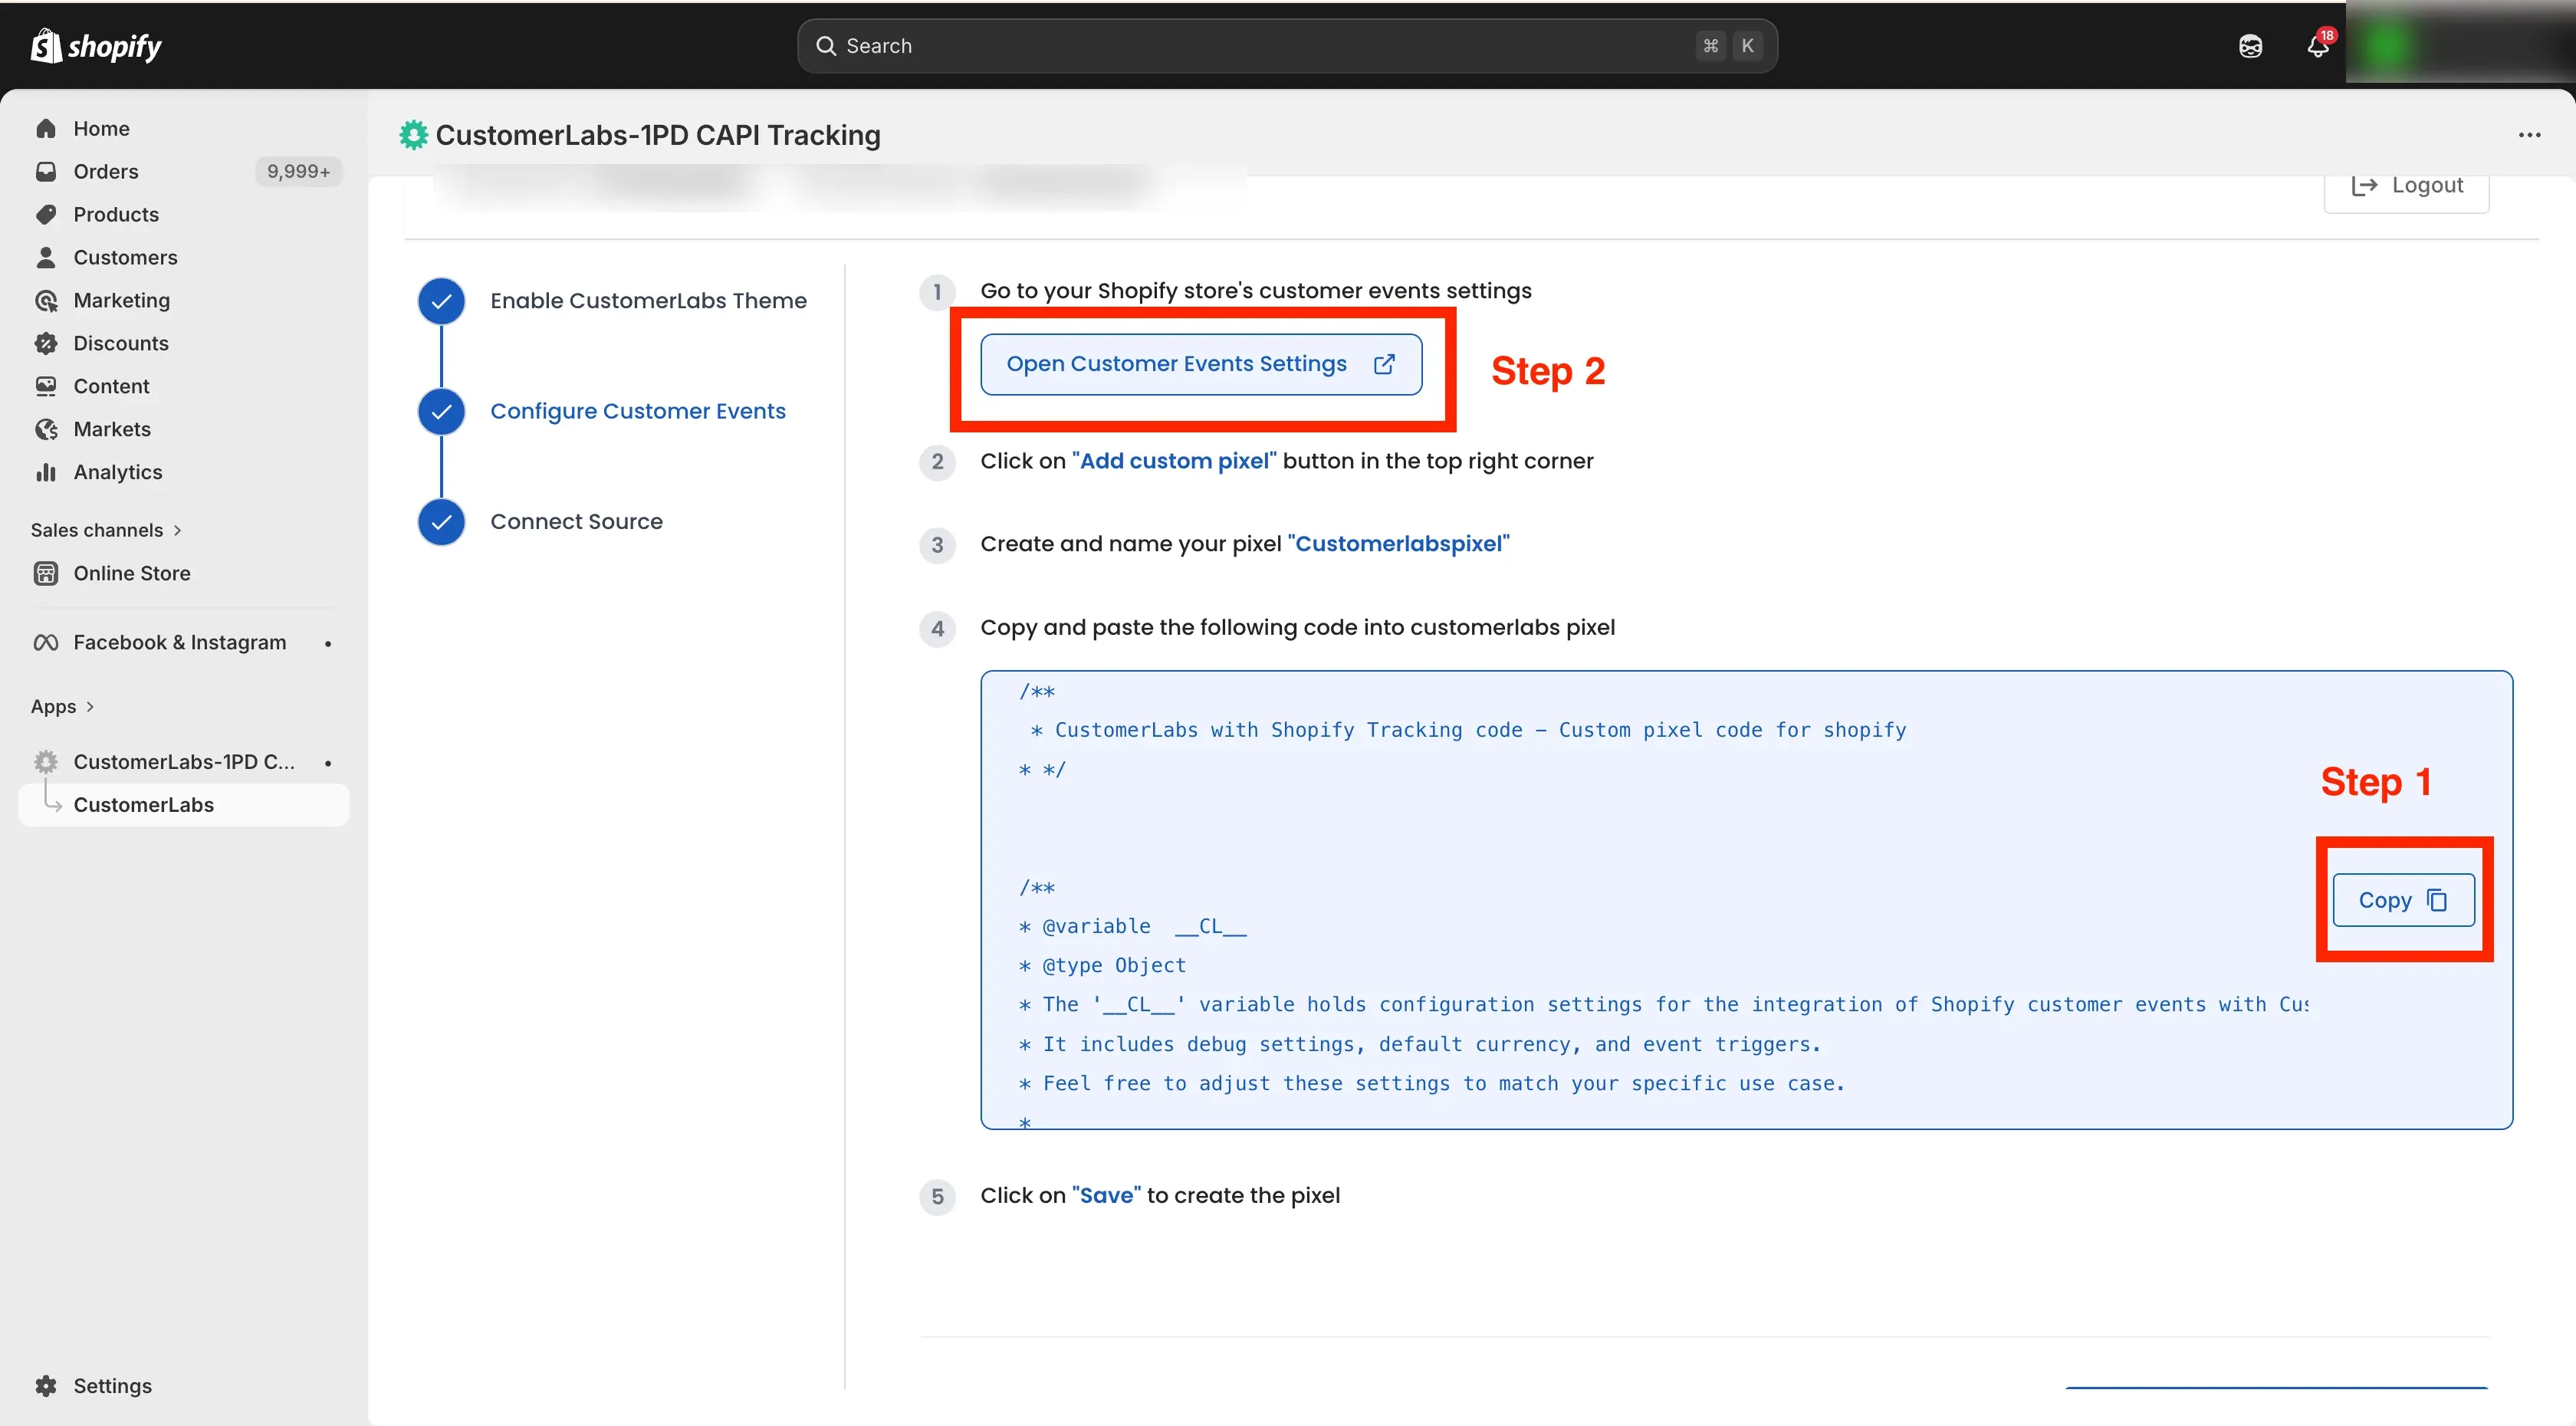
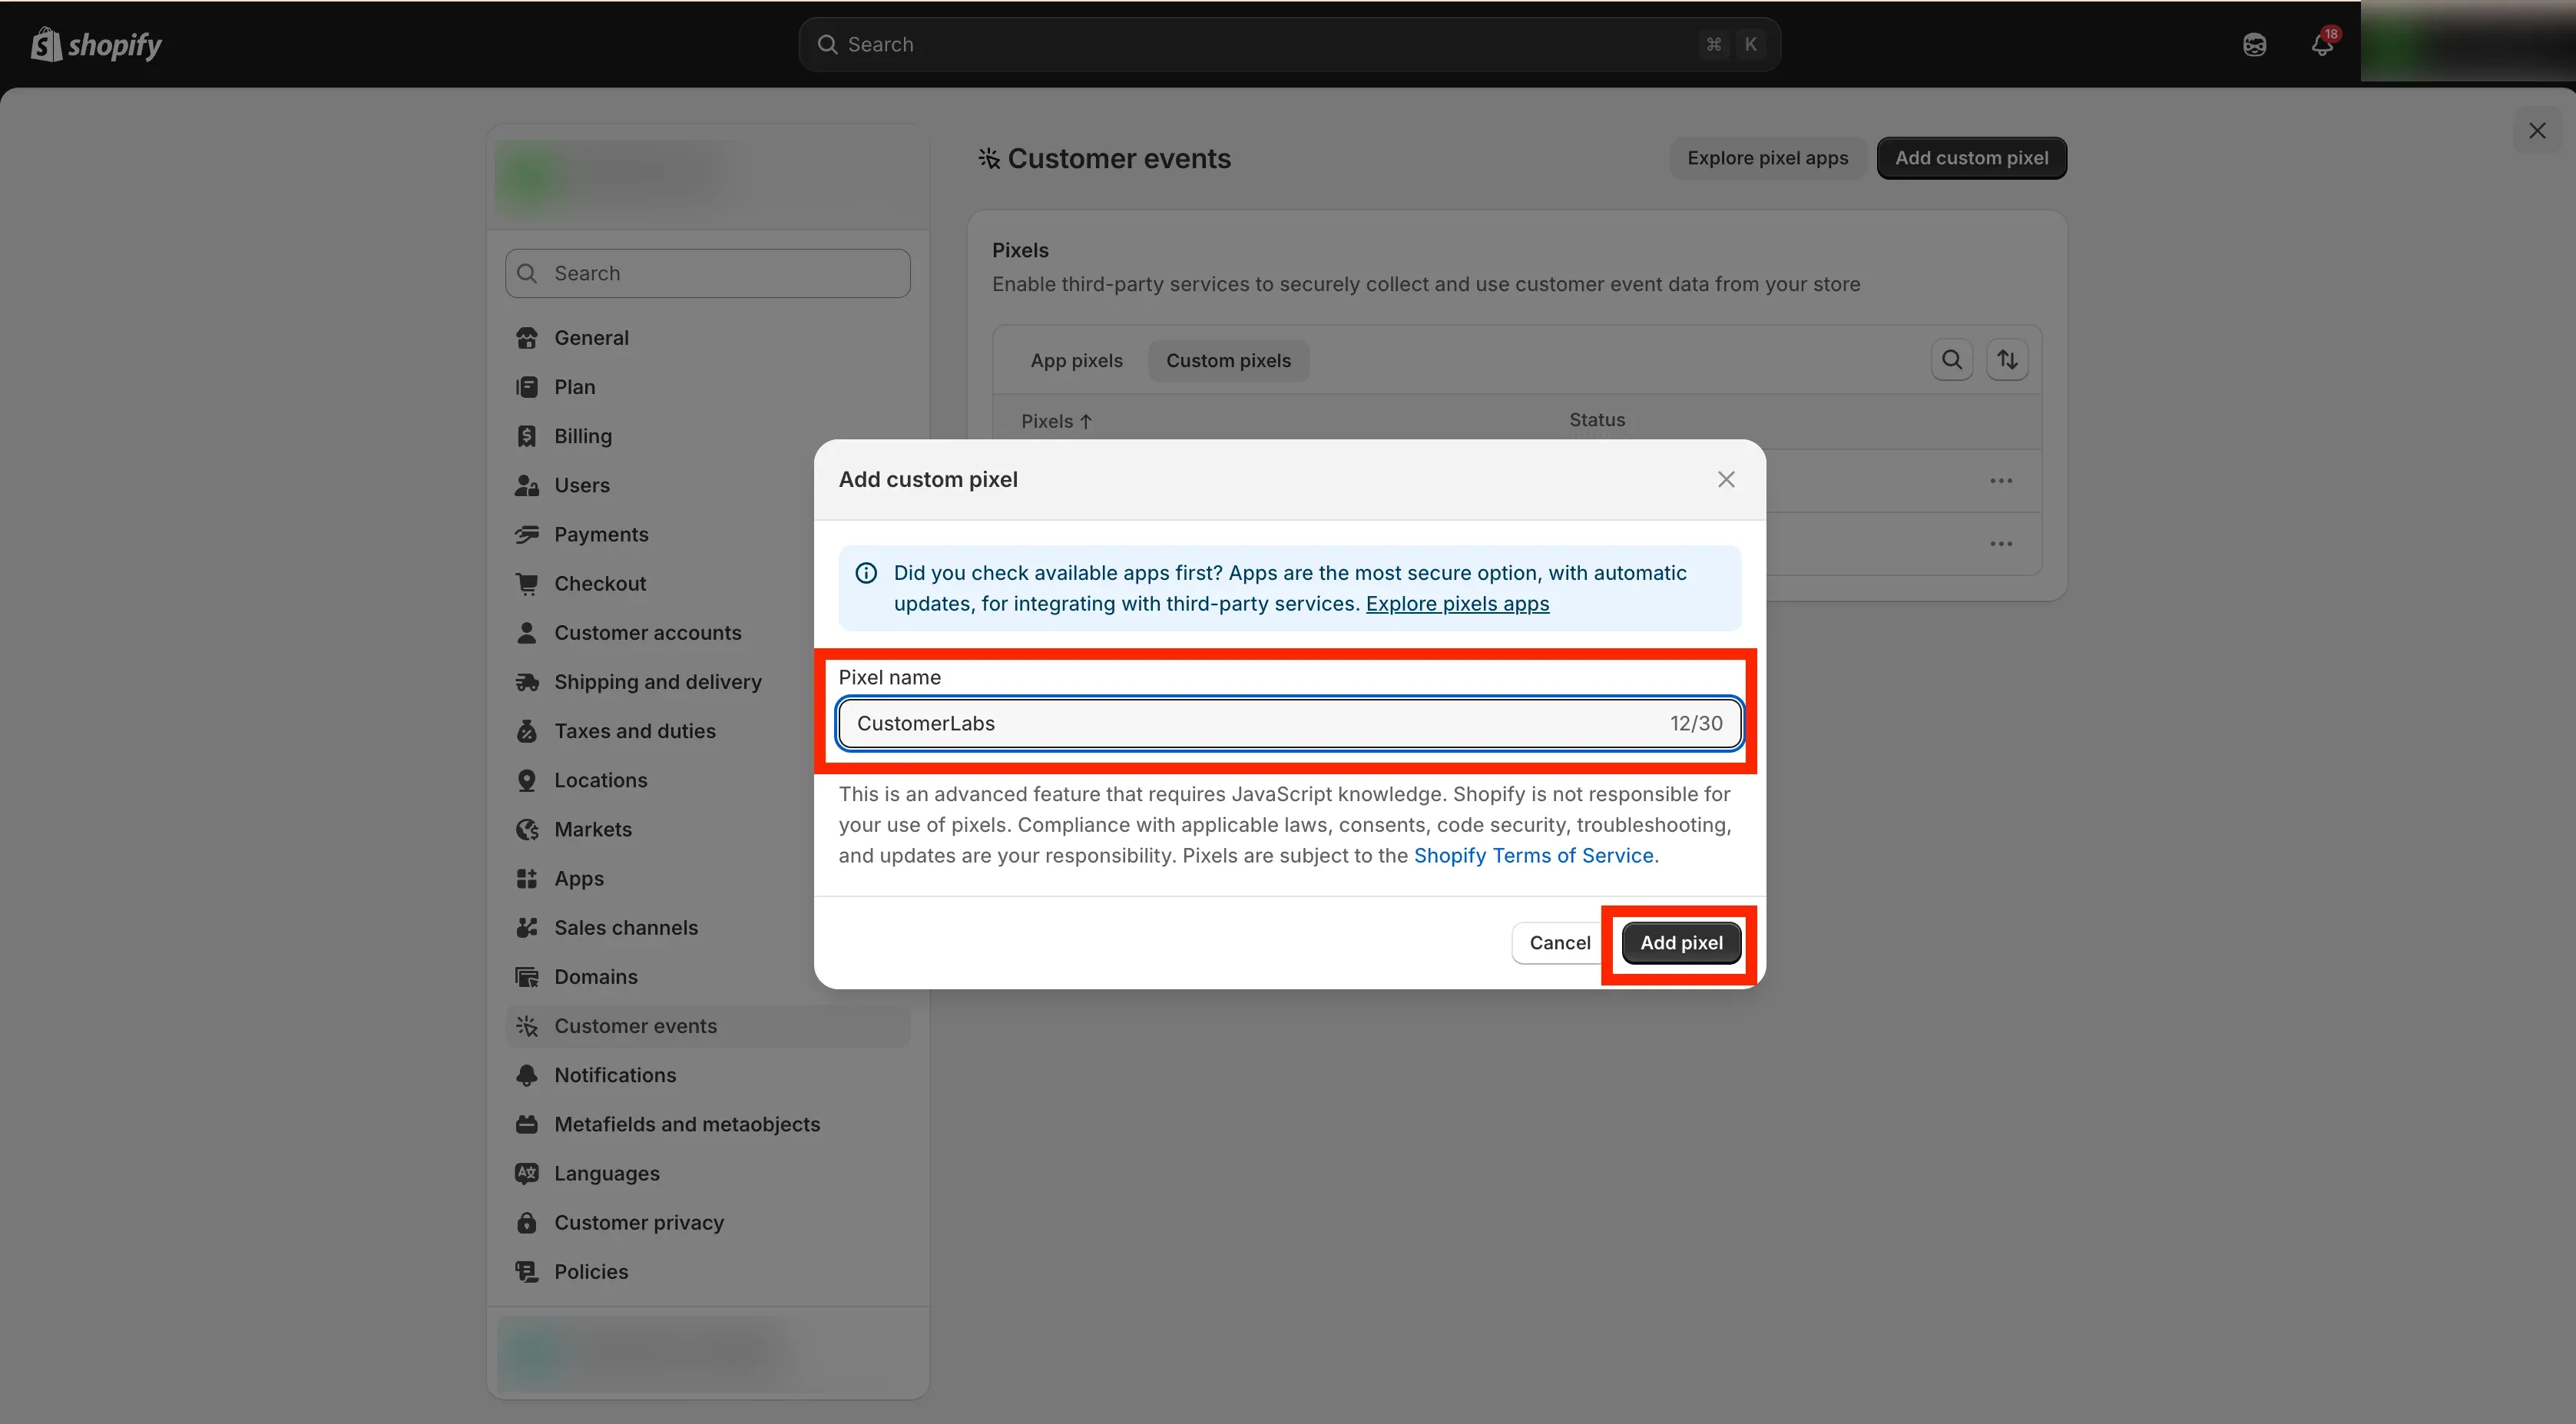
- Click on more views ** → click Custom Pixel → Click Add Custom Pixel.
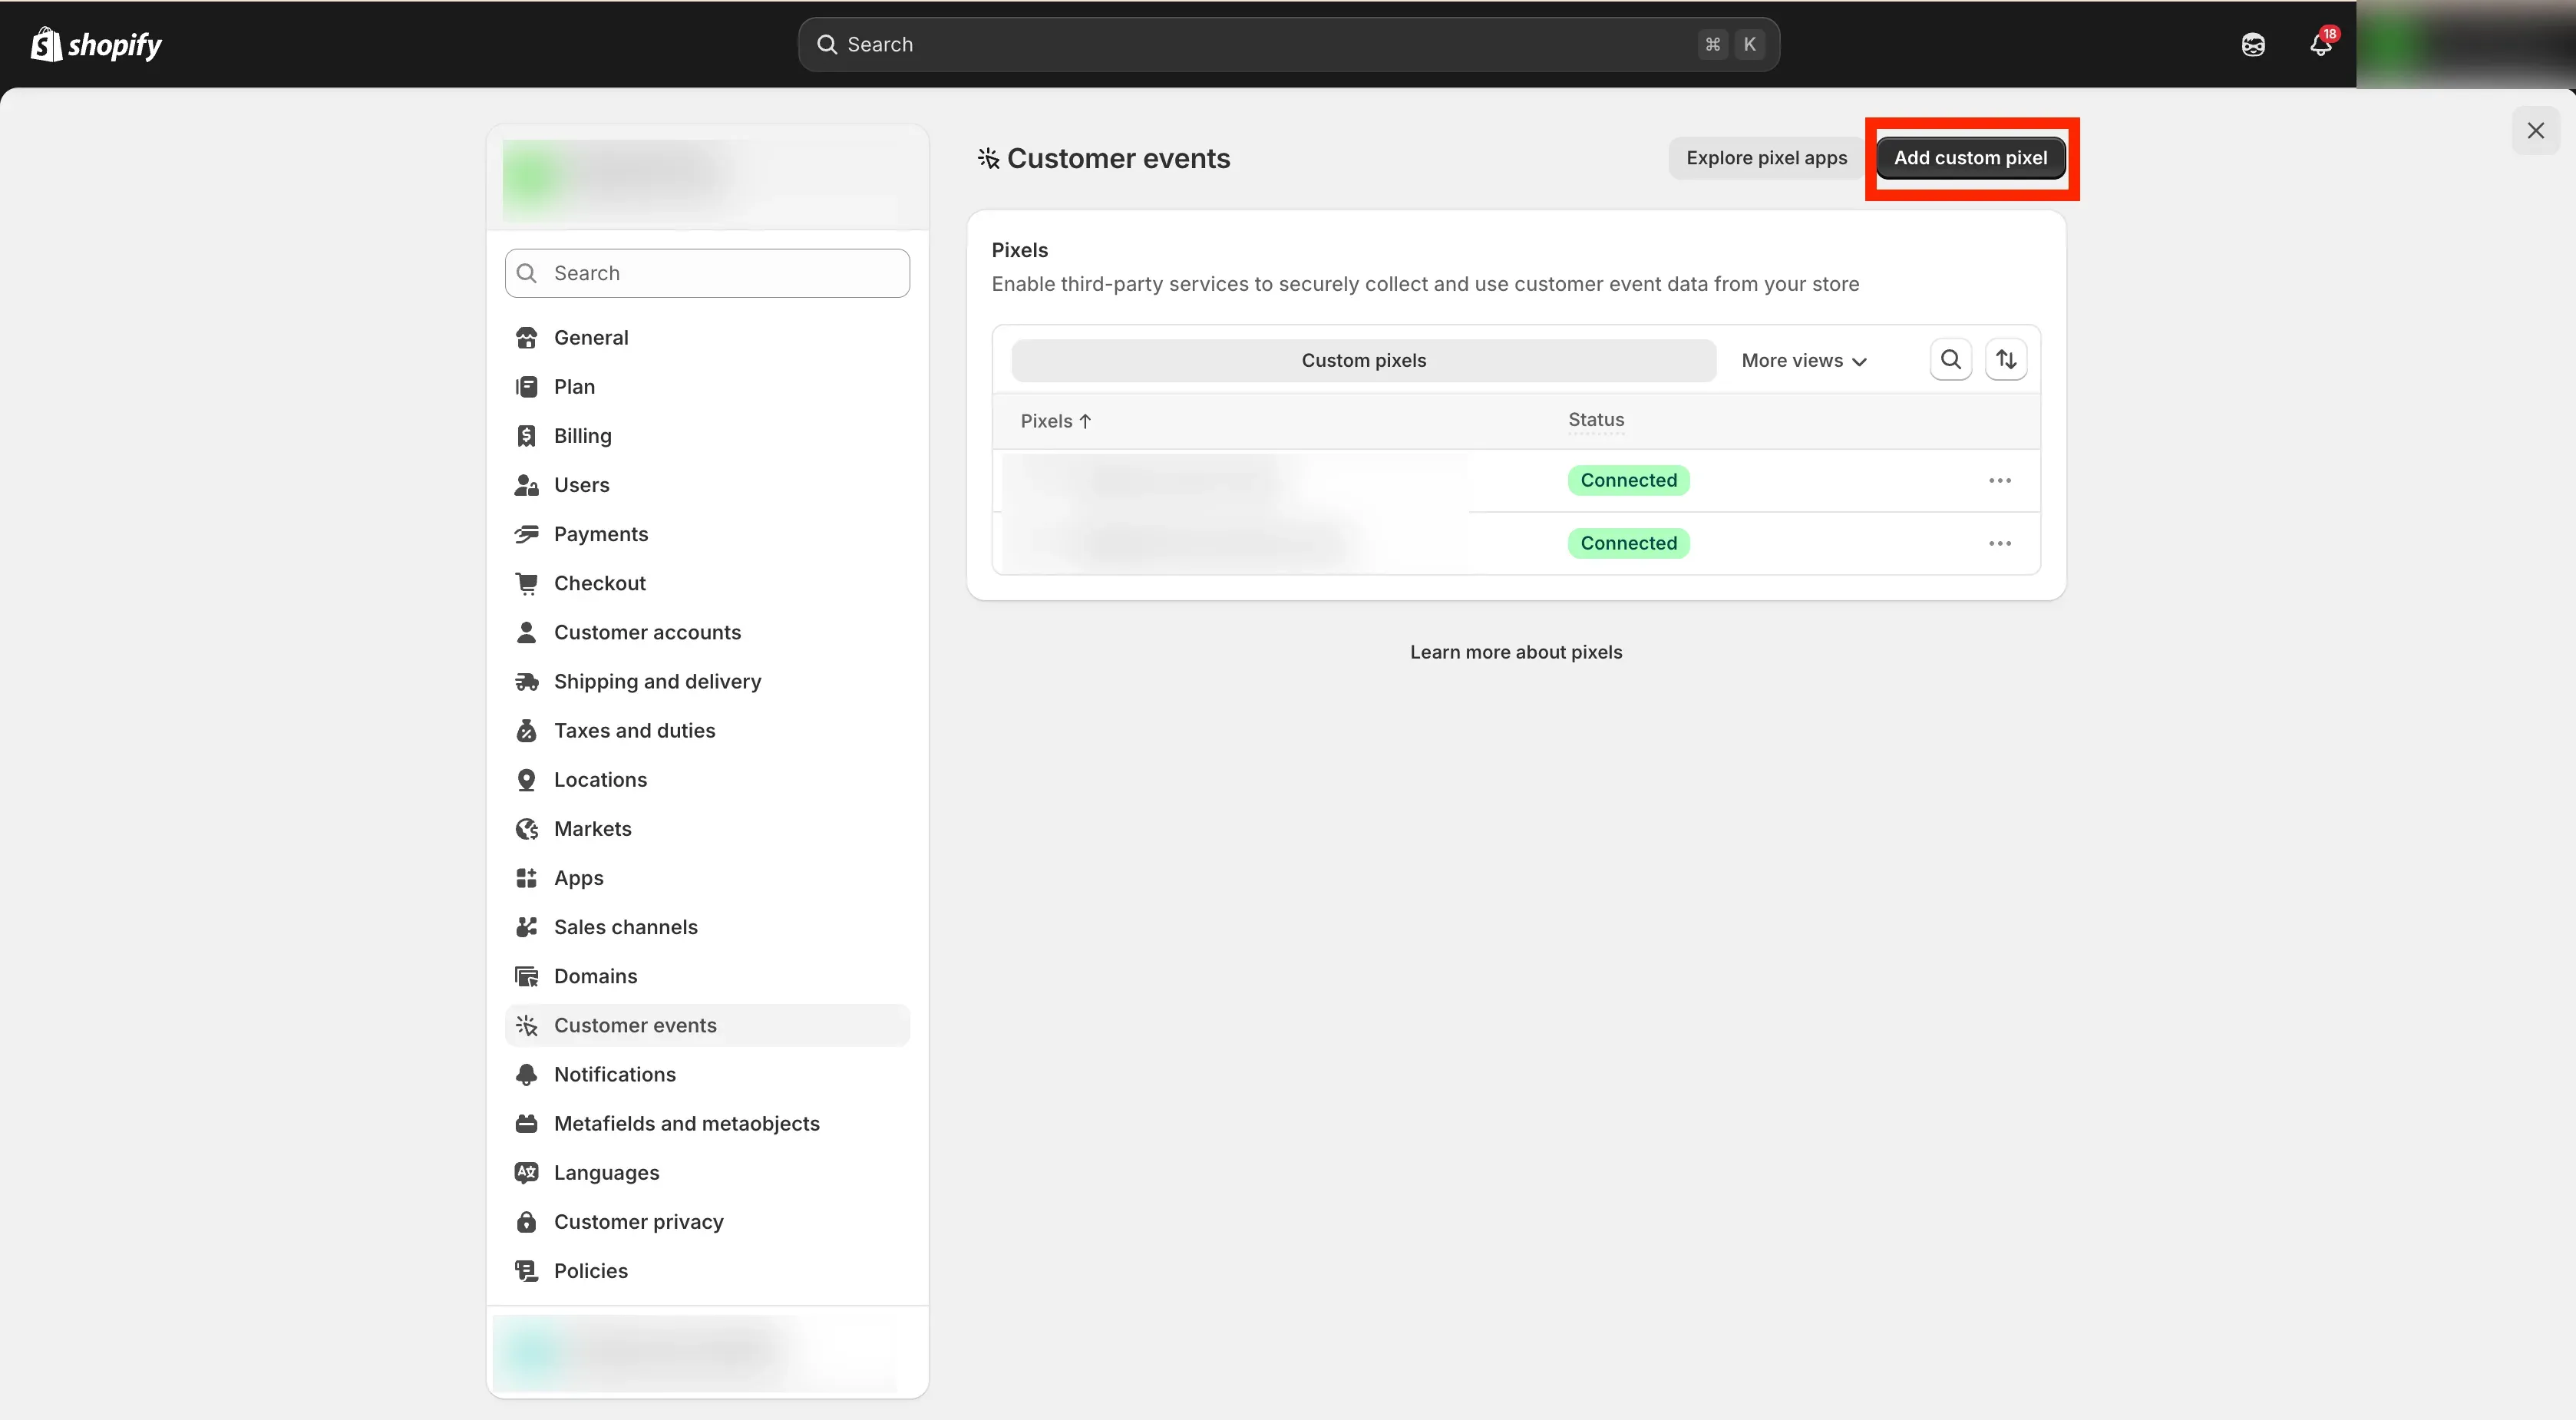
- Enter a name for your new pixel and name it “CustomerLabsPixel”.
- Paste the copied code snippet into the custom event script section.
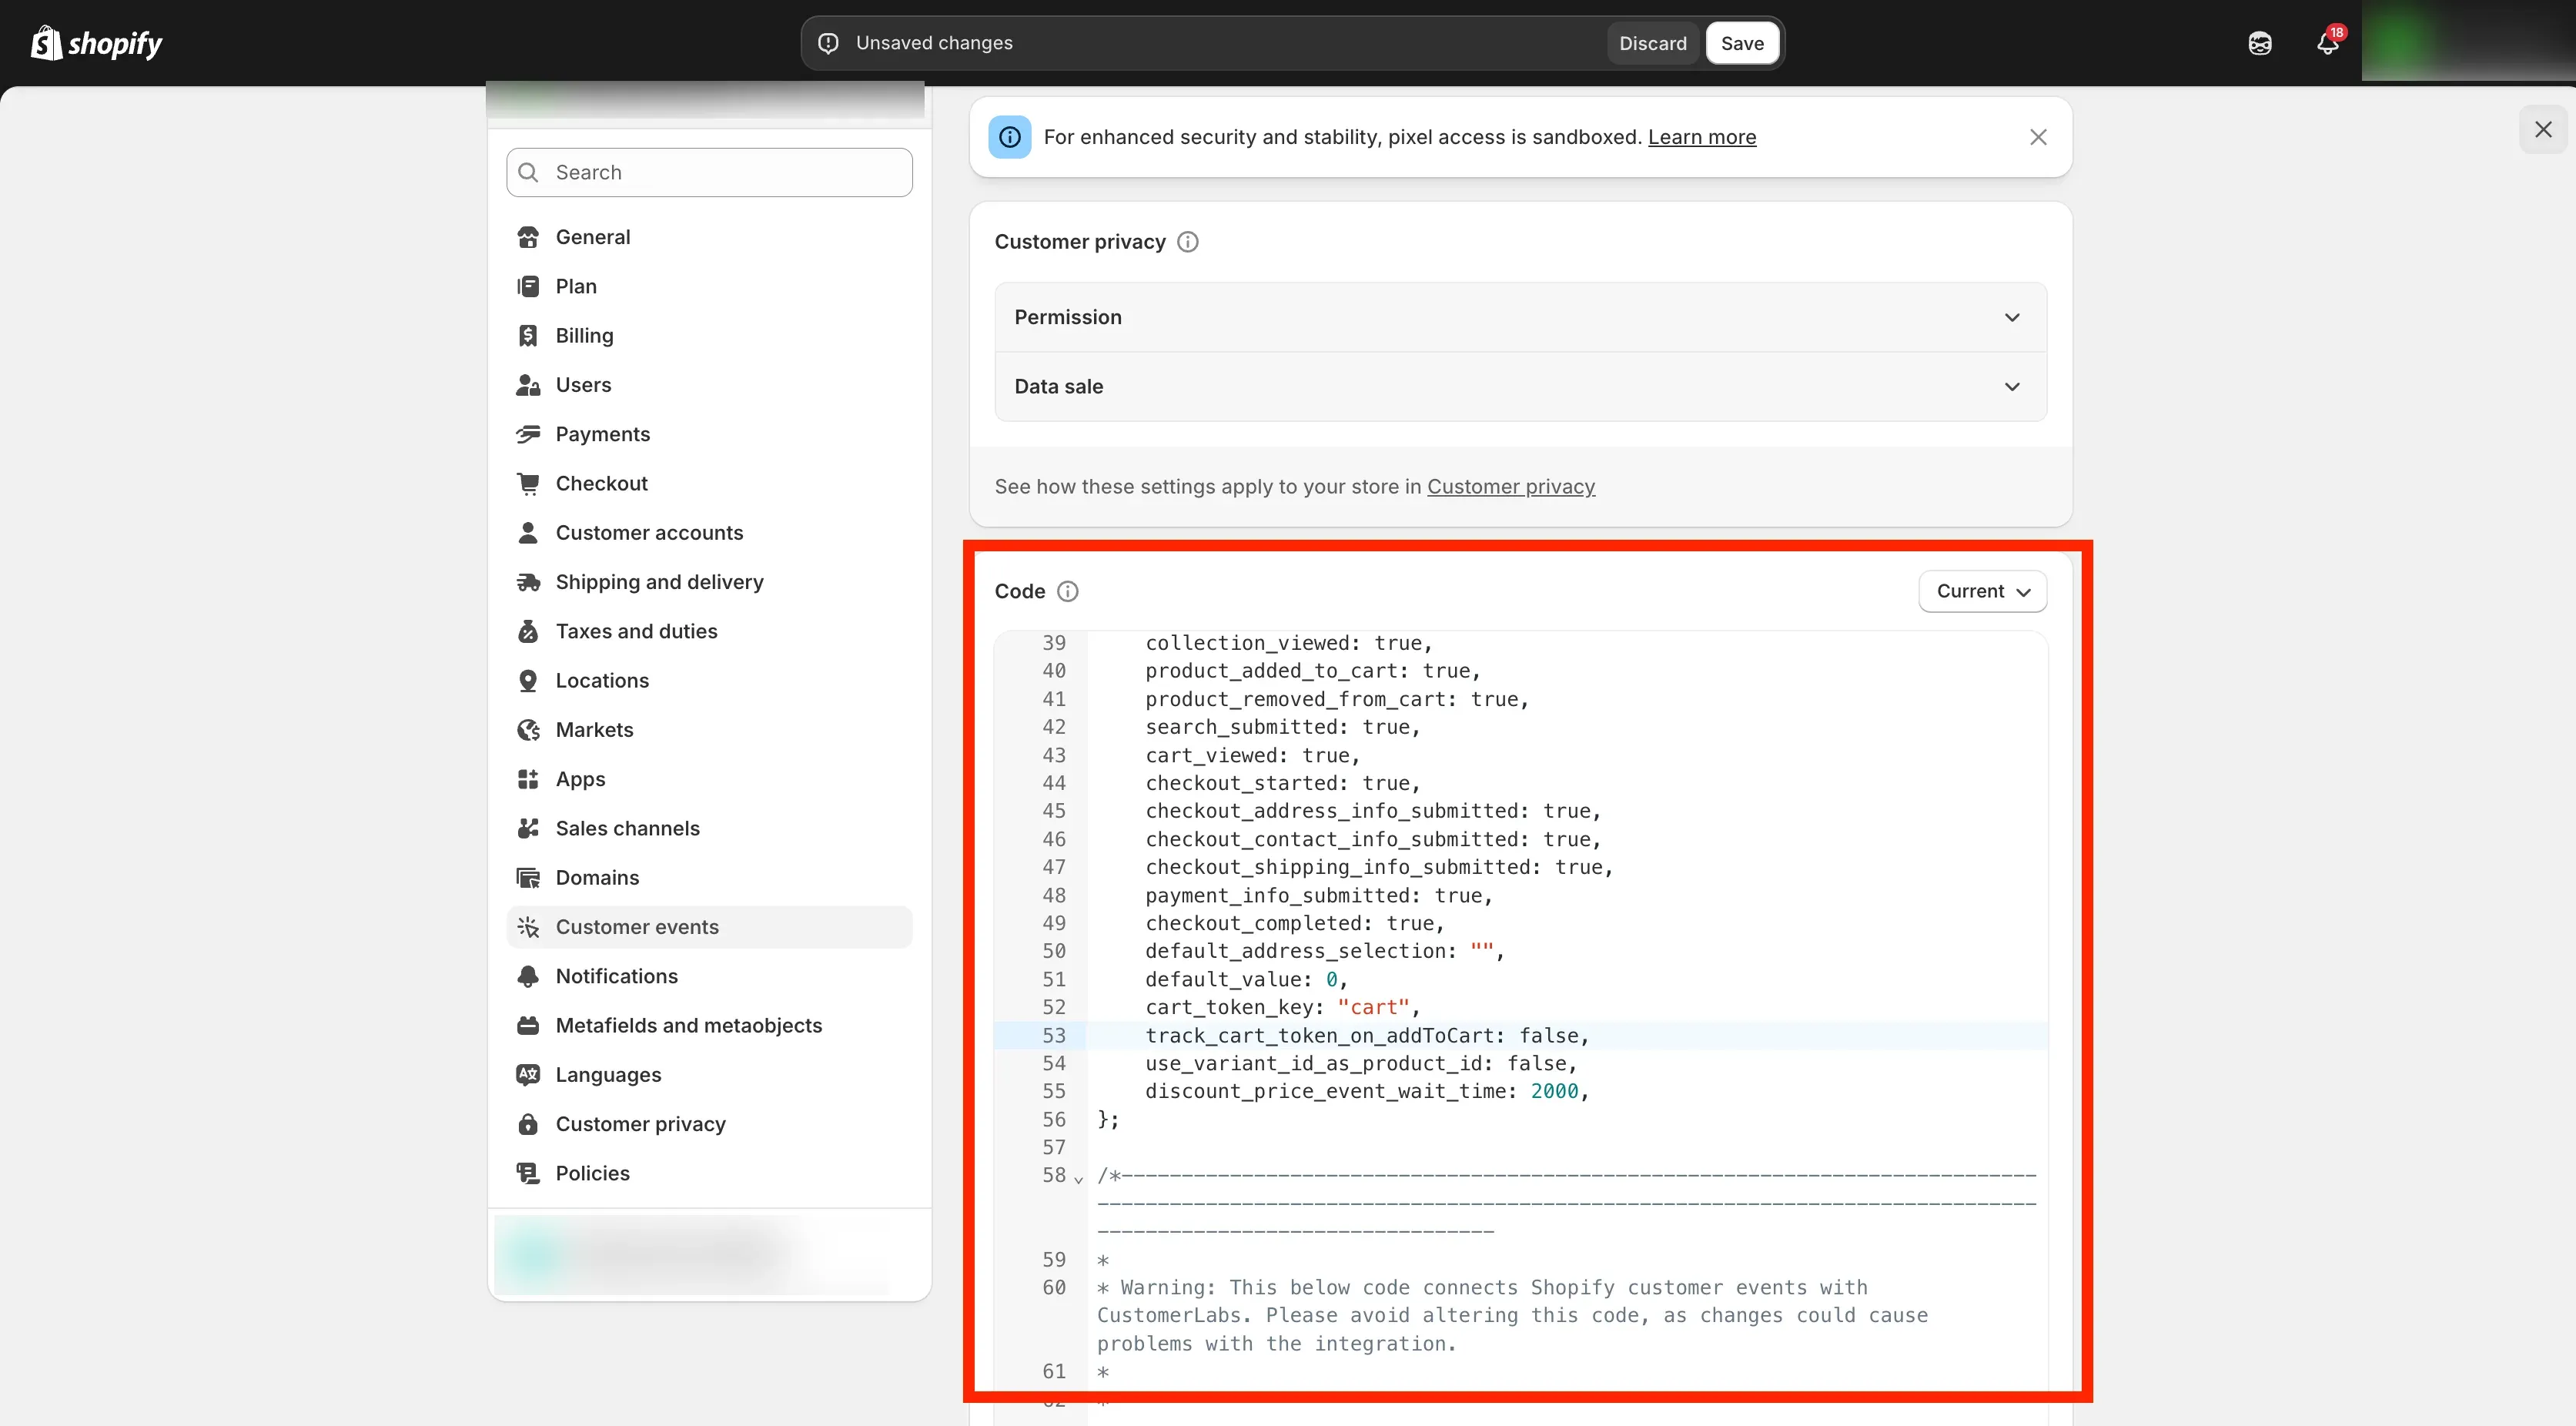
- Scroll to lines 53 & 54 in the code and update them as
true:
track_cart_token_on_addToCart: true,use_variant_id_as_product_id: true,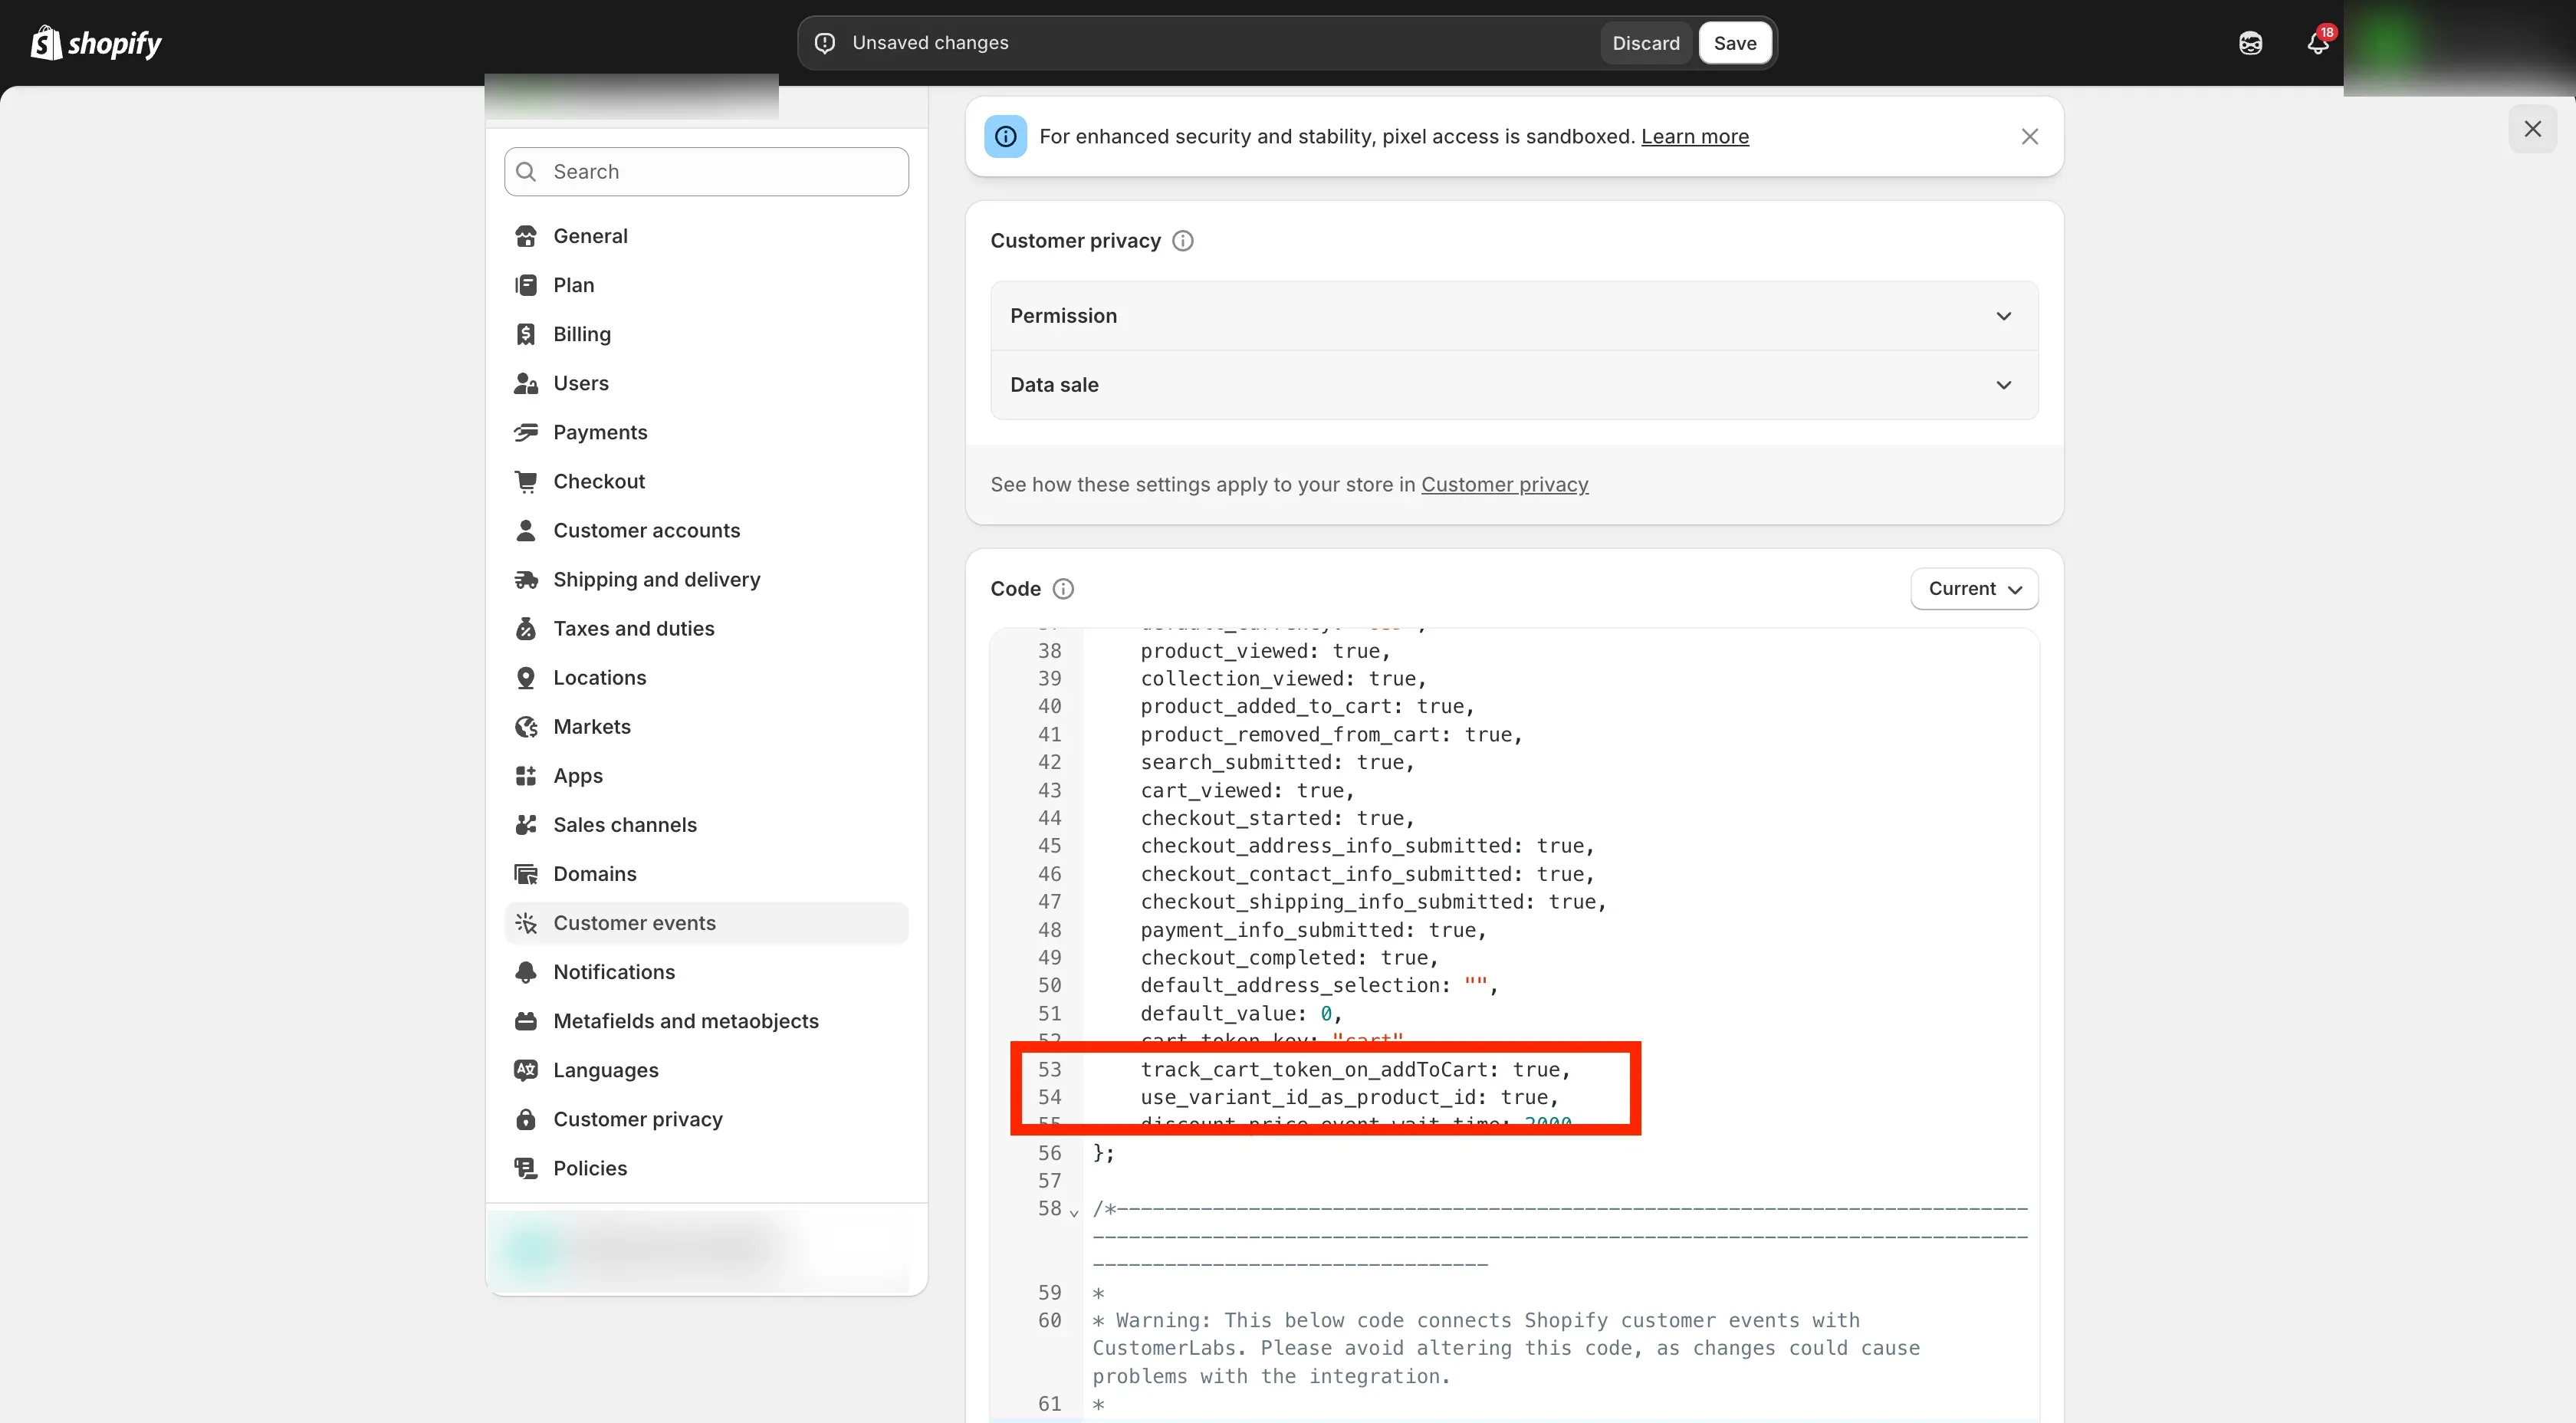
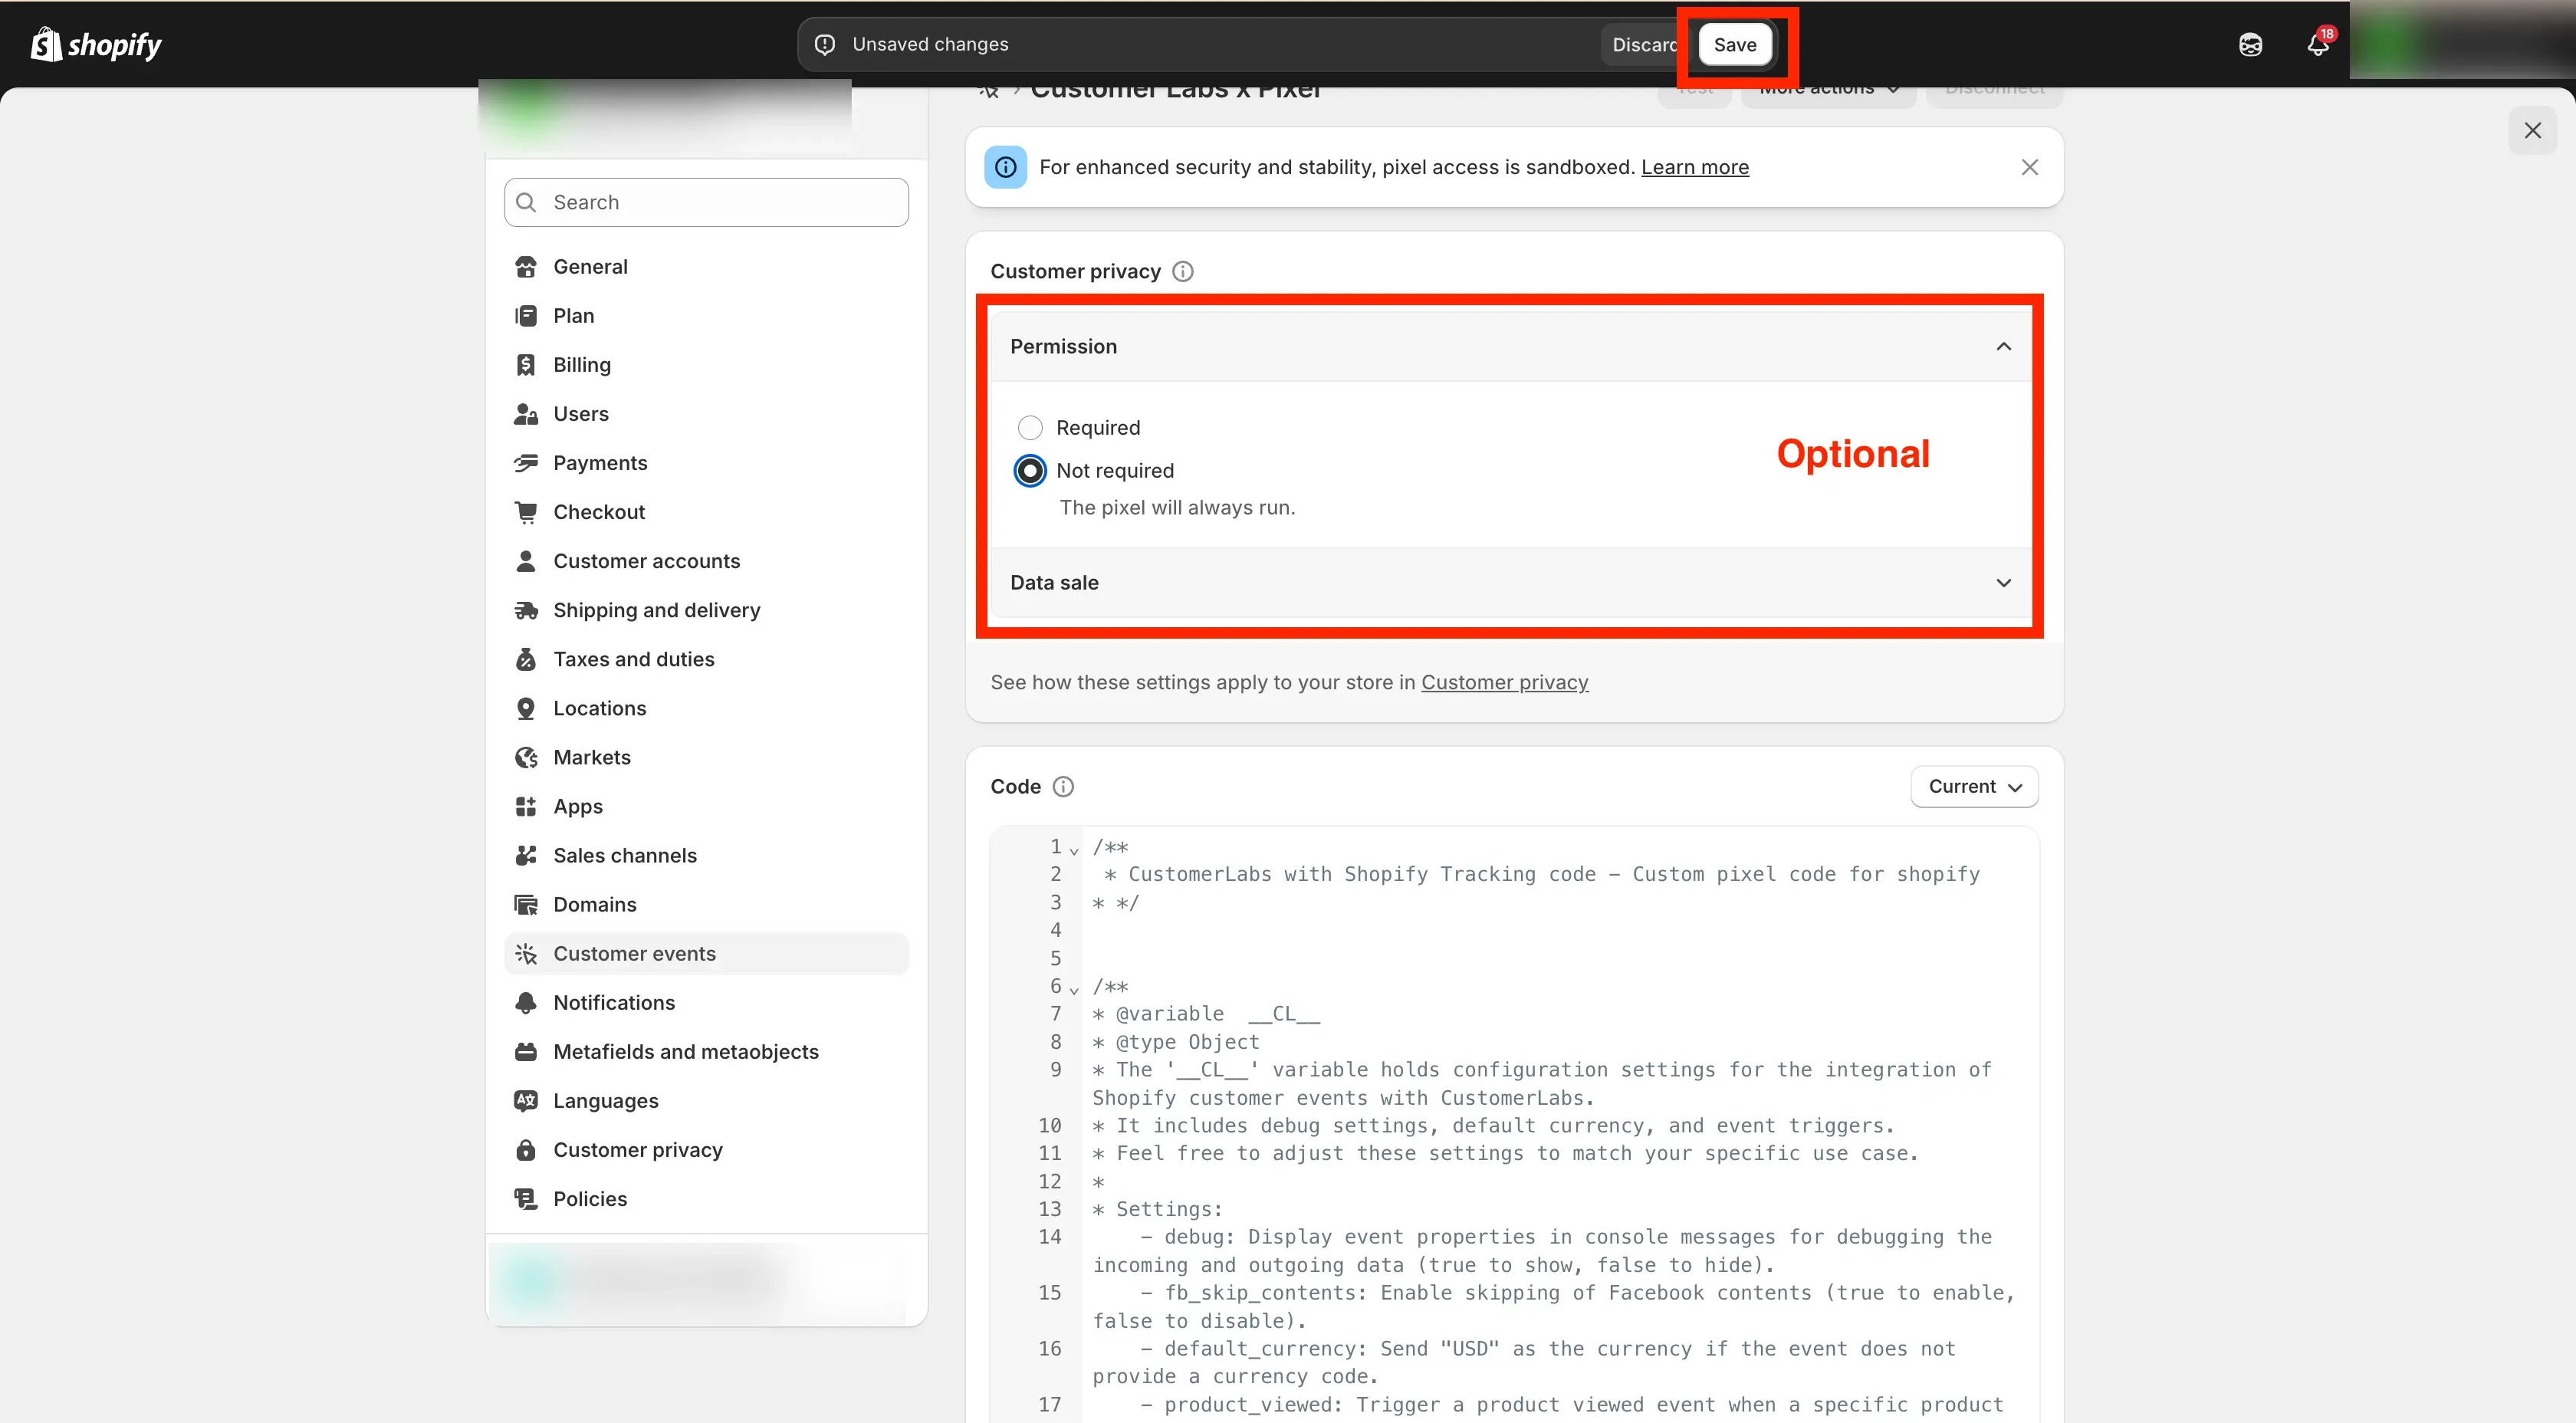
- If required, change the permissions to comply with privacy laws of your region. Click Save.
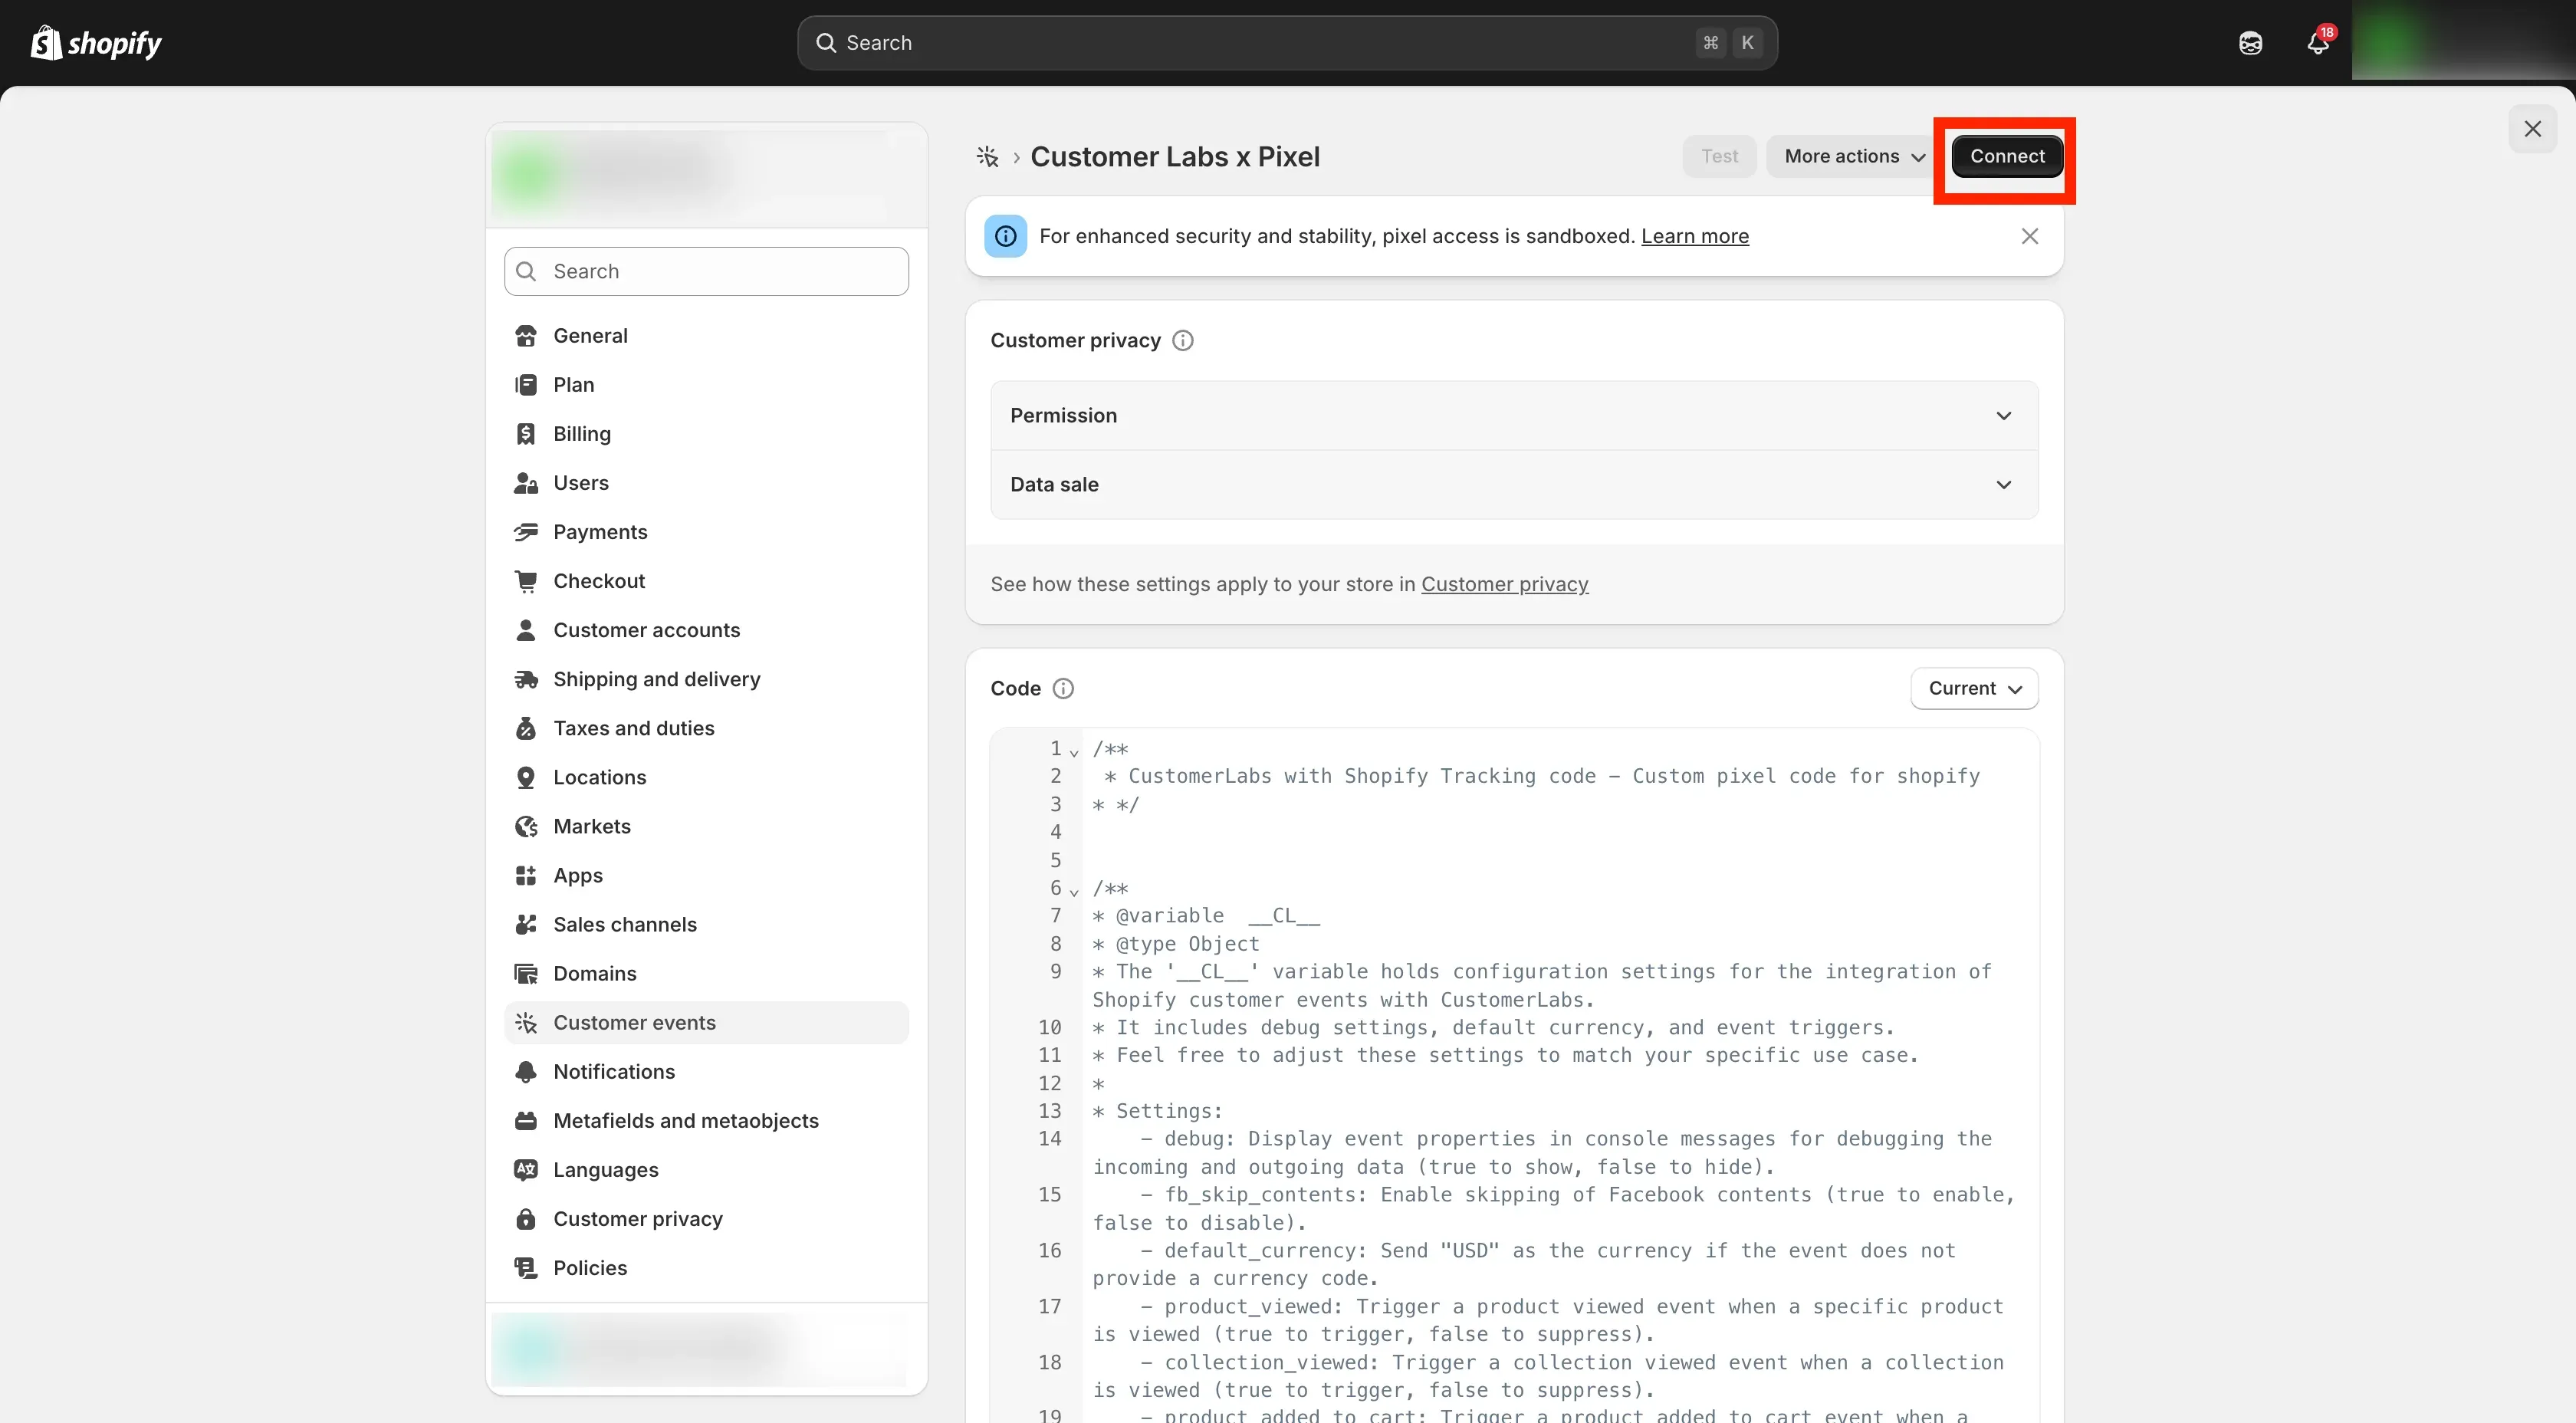
- Click Connect to connect the pixel.
- Go back to instructions page → click on Continue to Webhook setup.
Connect Webhook for Purchase Events
Section titled “Connect Webhook for Purchase Events”For the Purchase event data to be tracked correctly, we recommend bringing Purchase data from your Shopify store directly through Shopify Source (Webhook).
Connect Your Store
Section titled “Connect Your Store”- Click the Connect button to start the webhook setup.
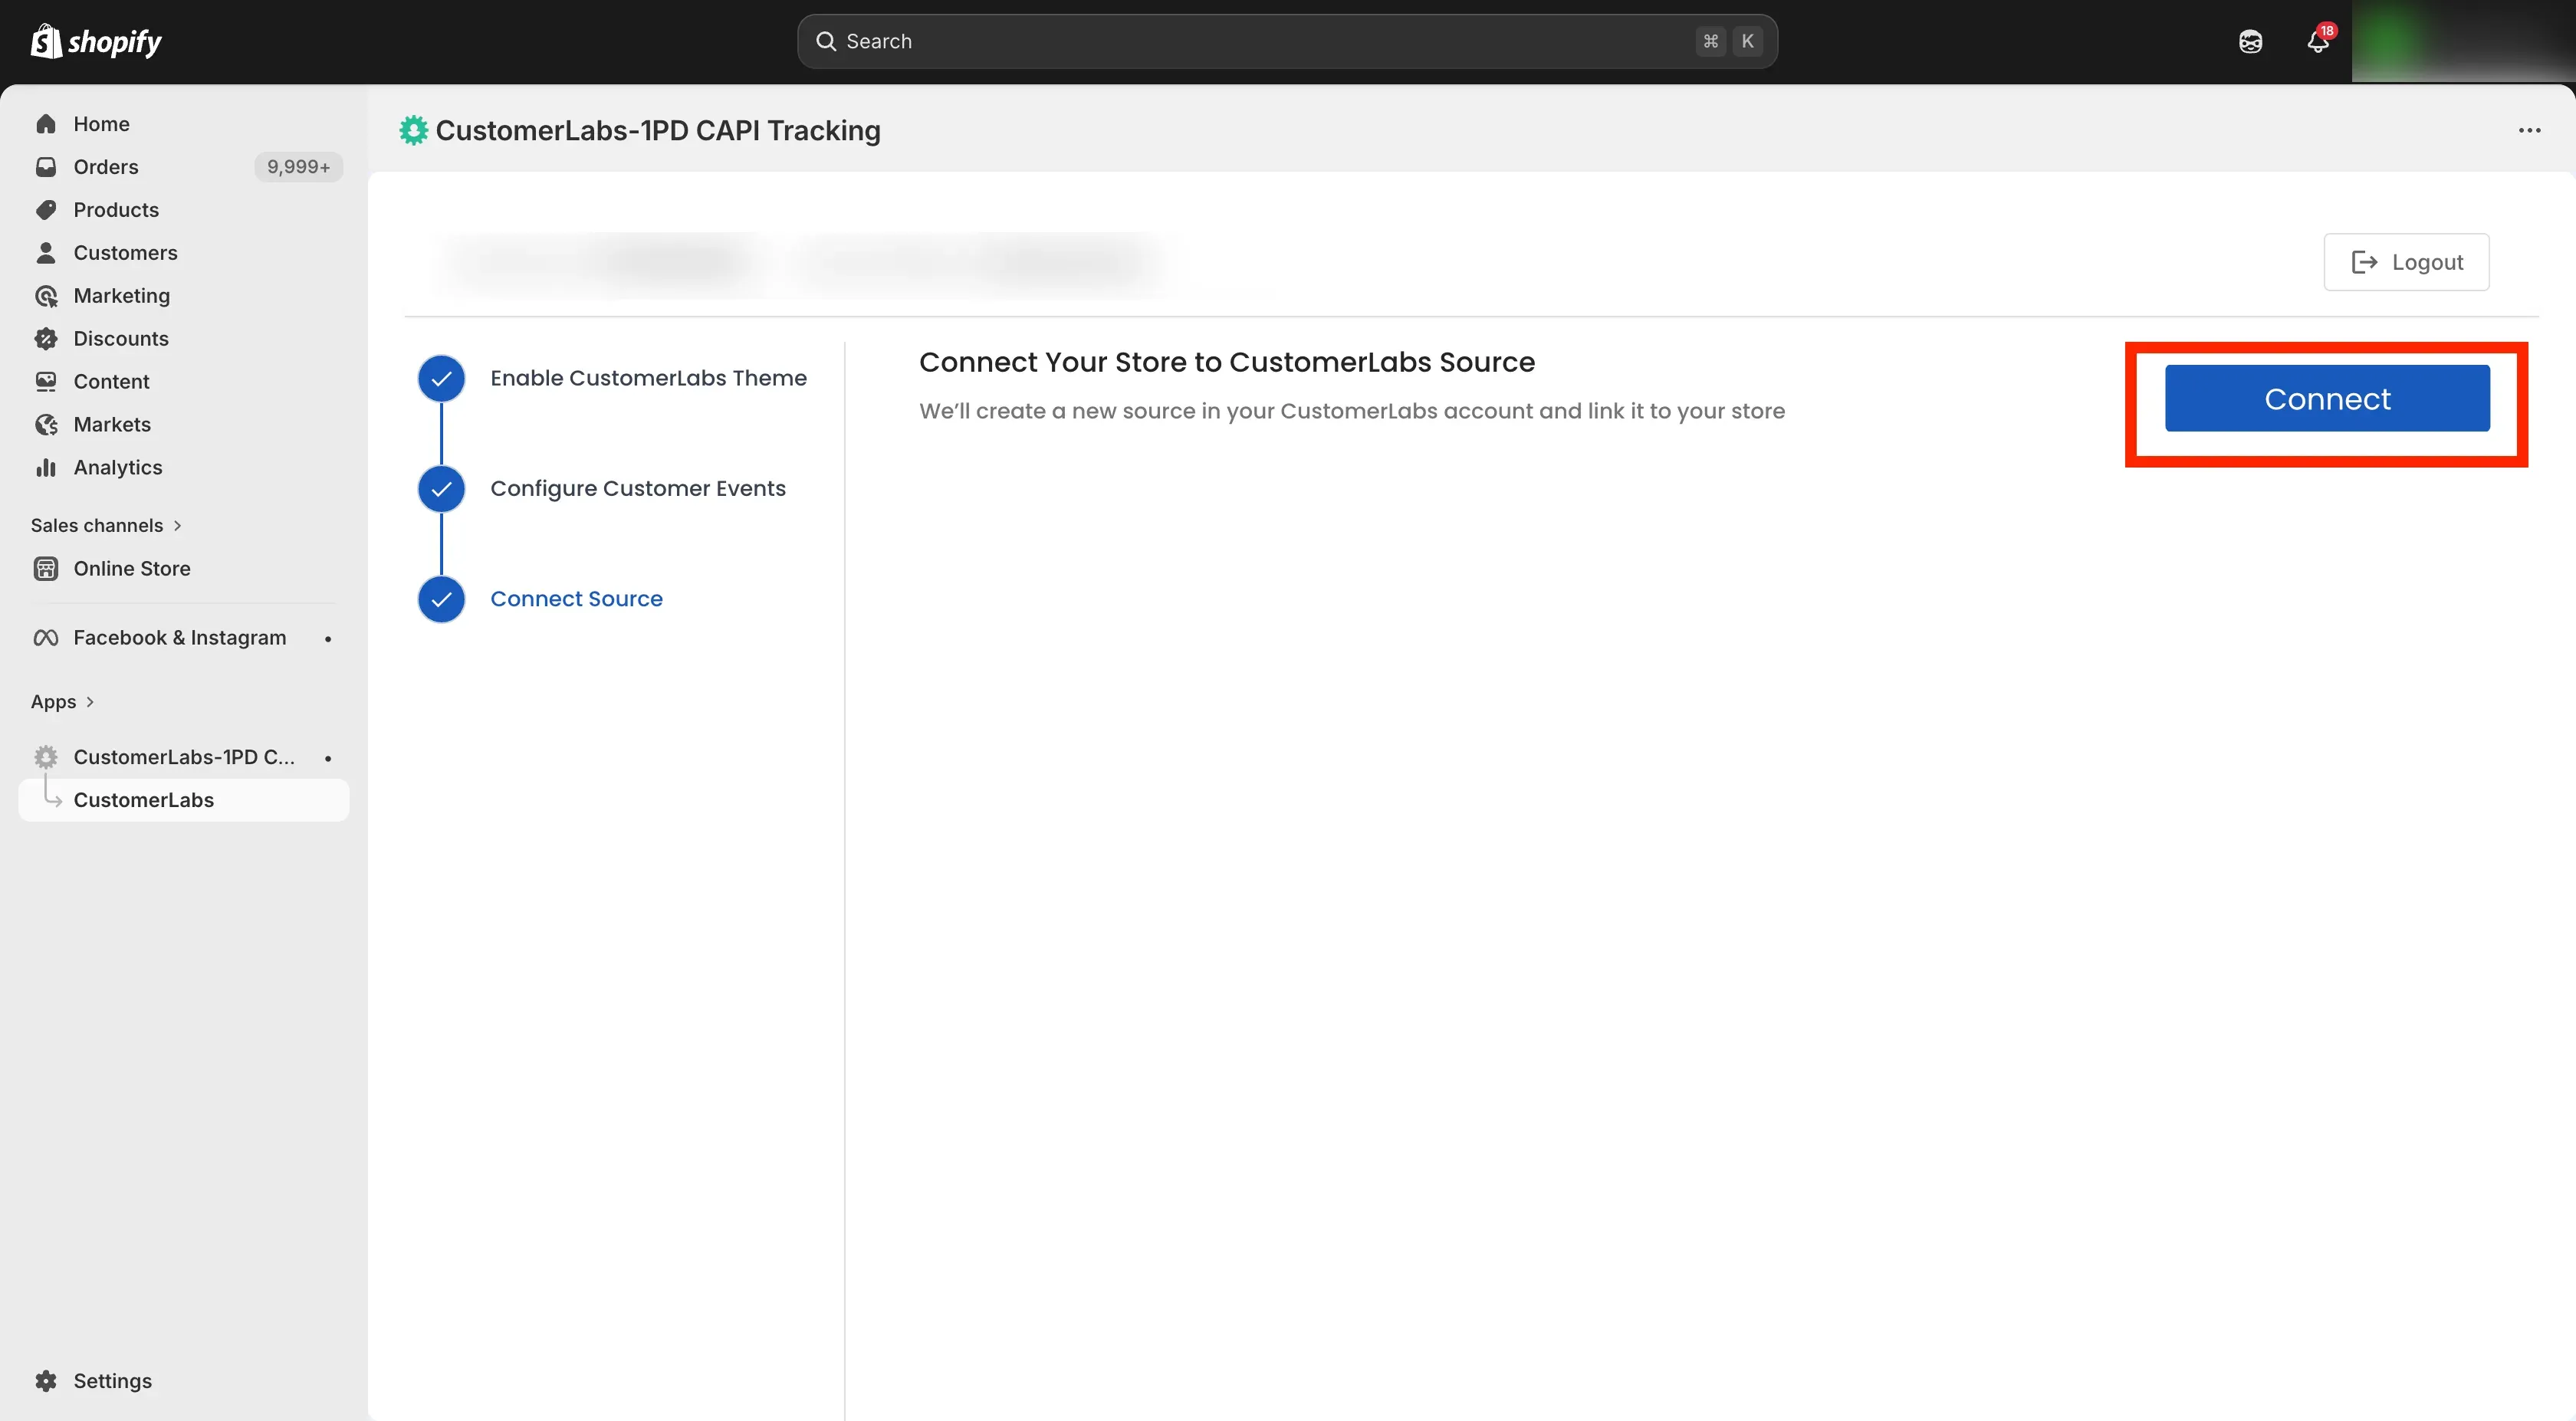
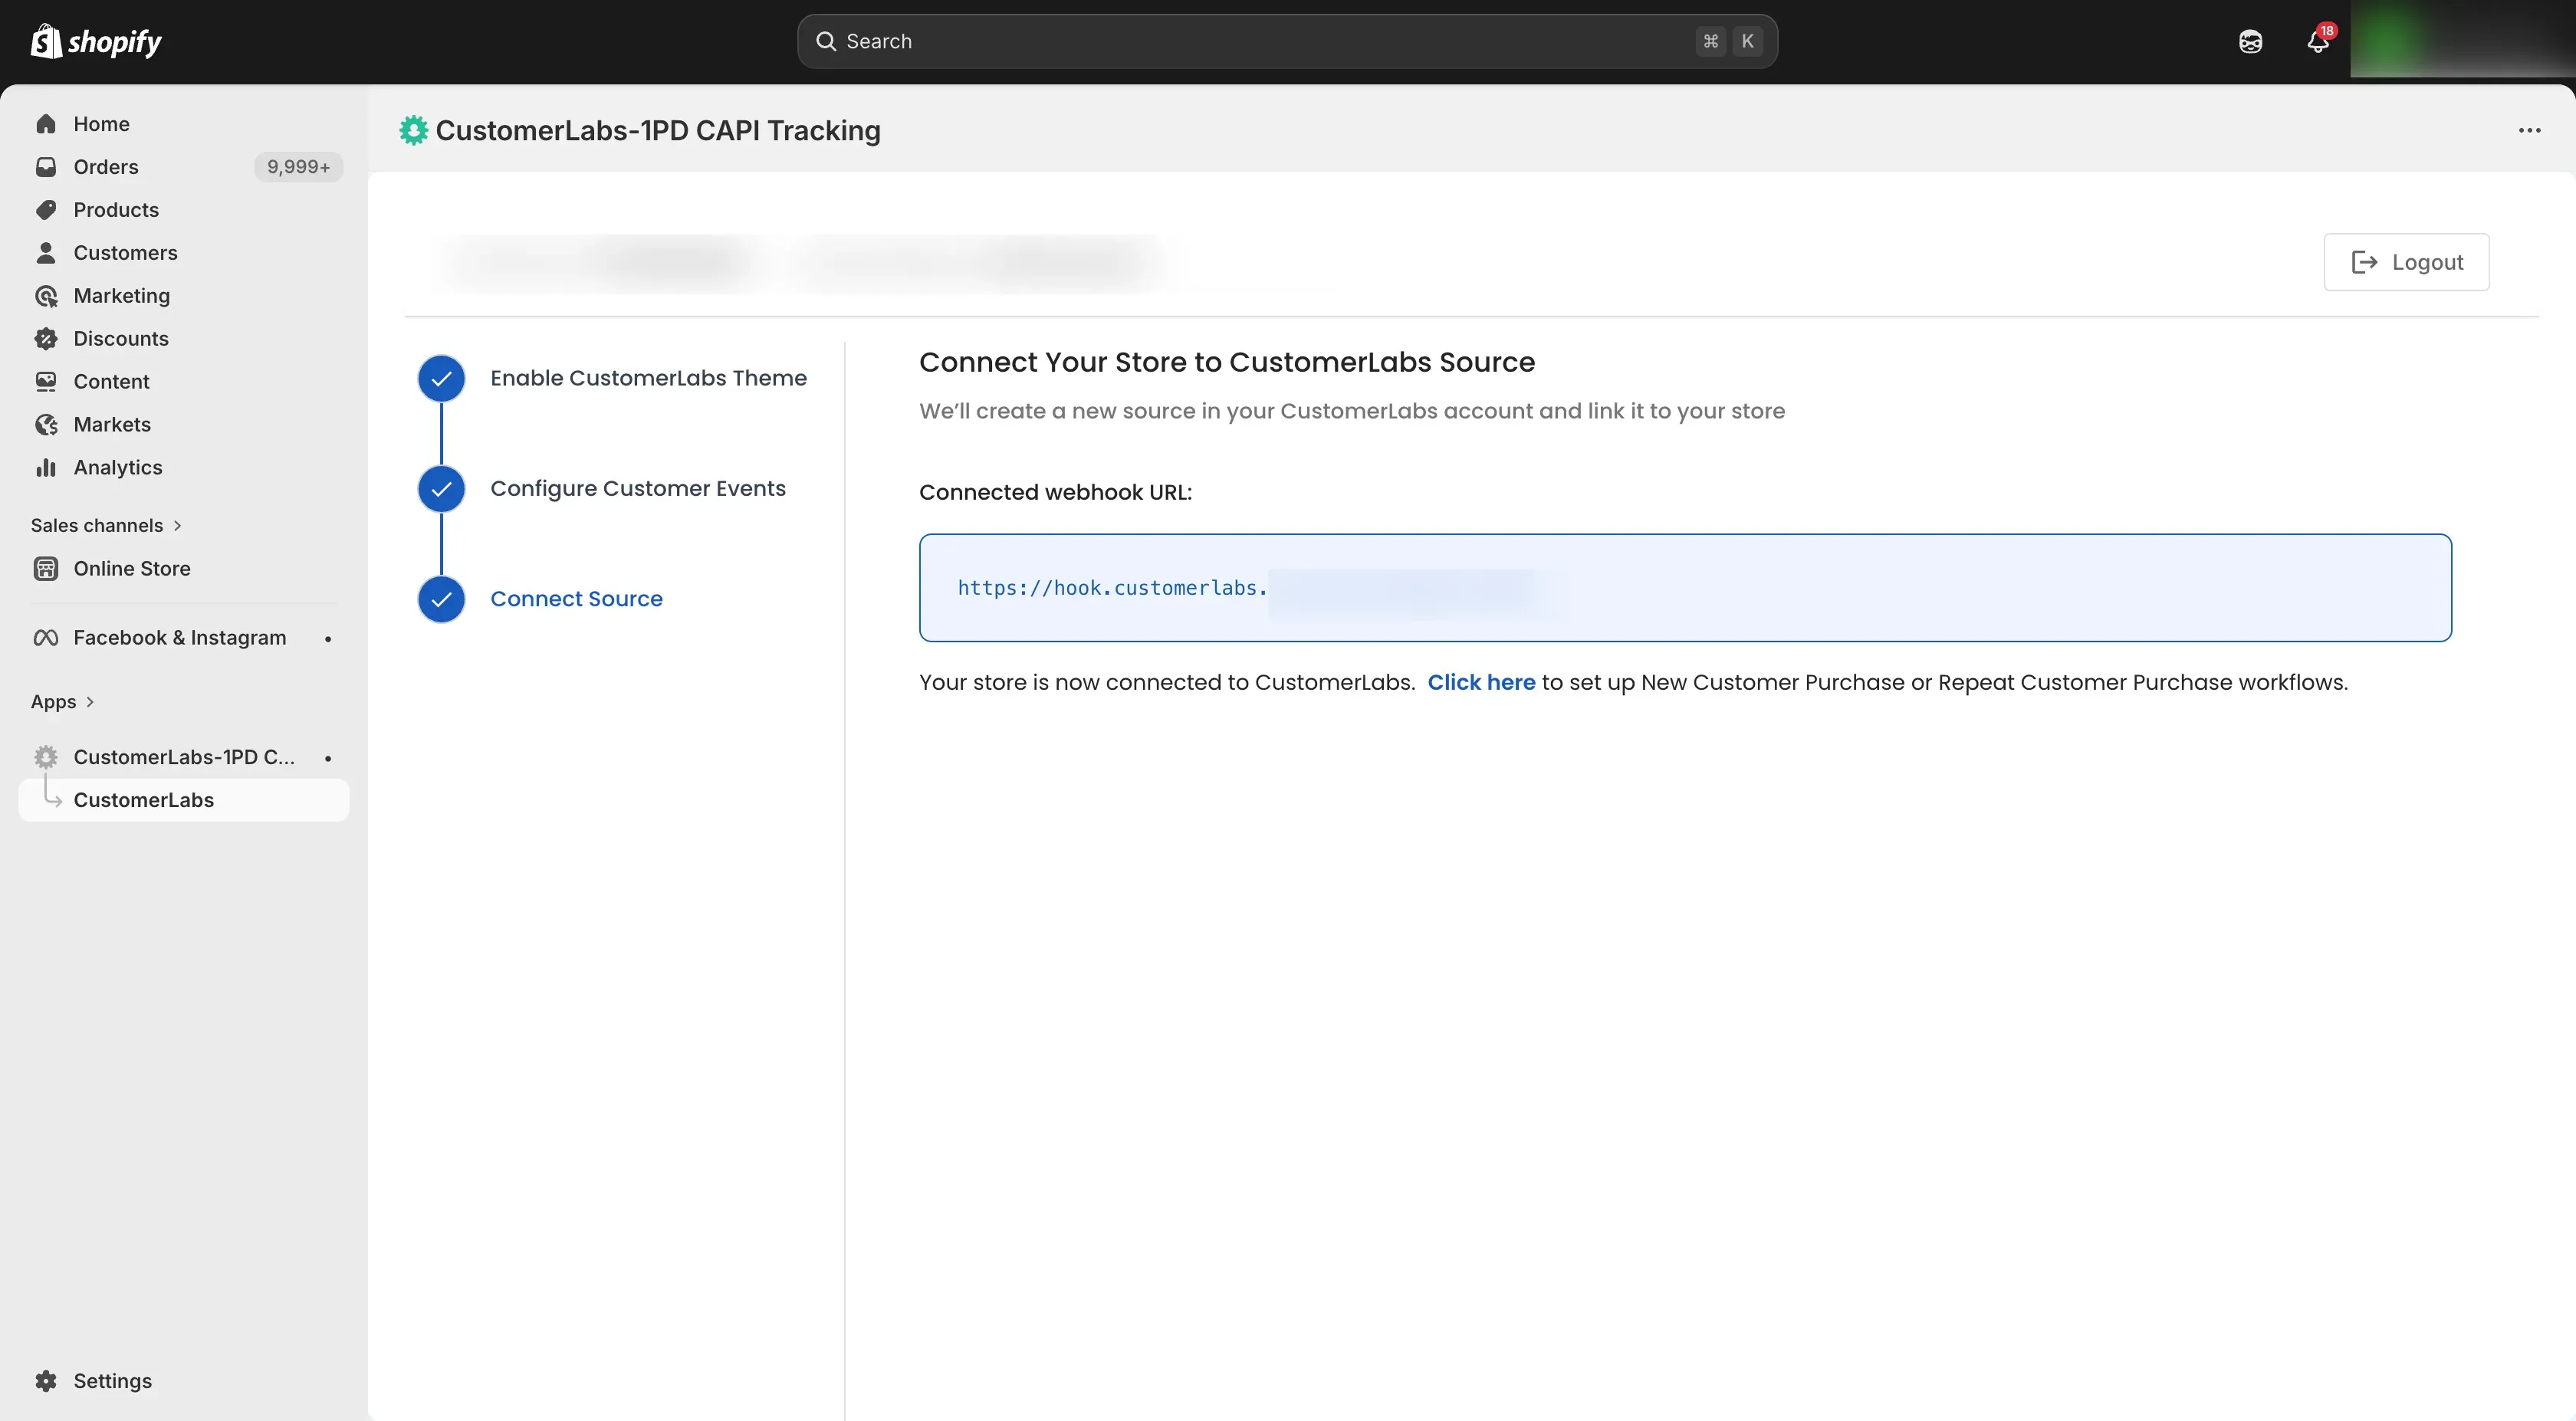
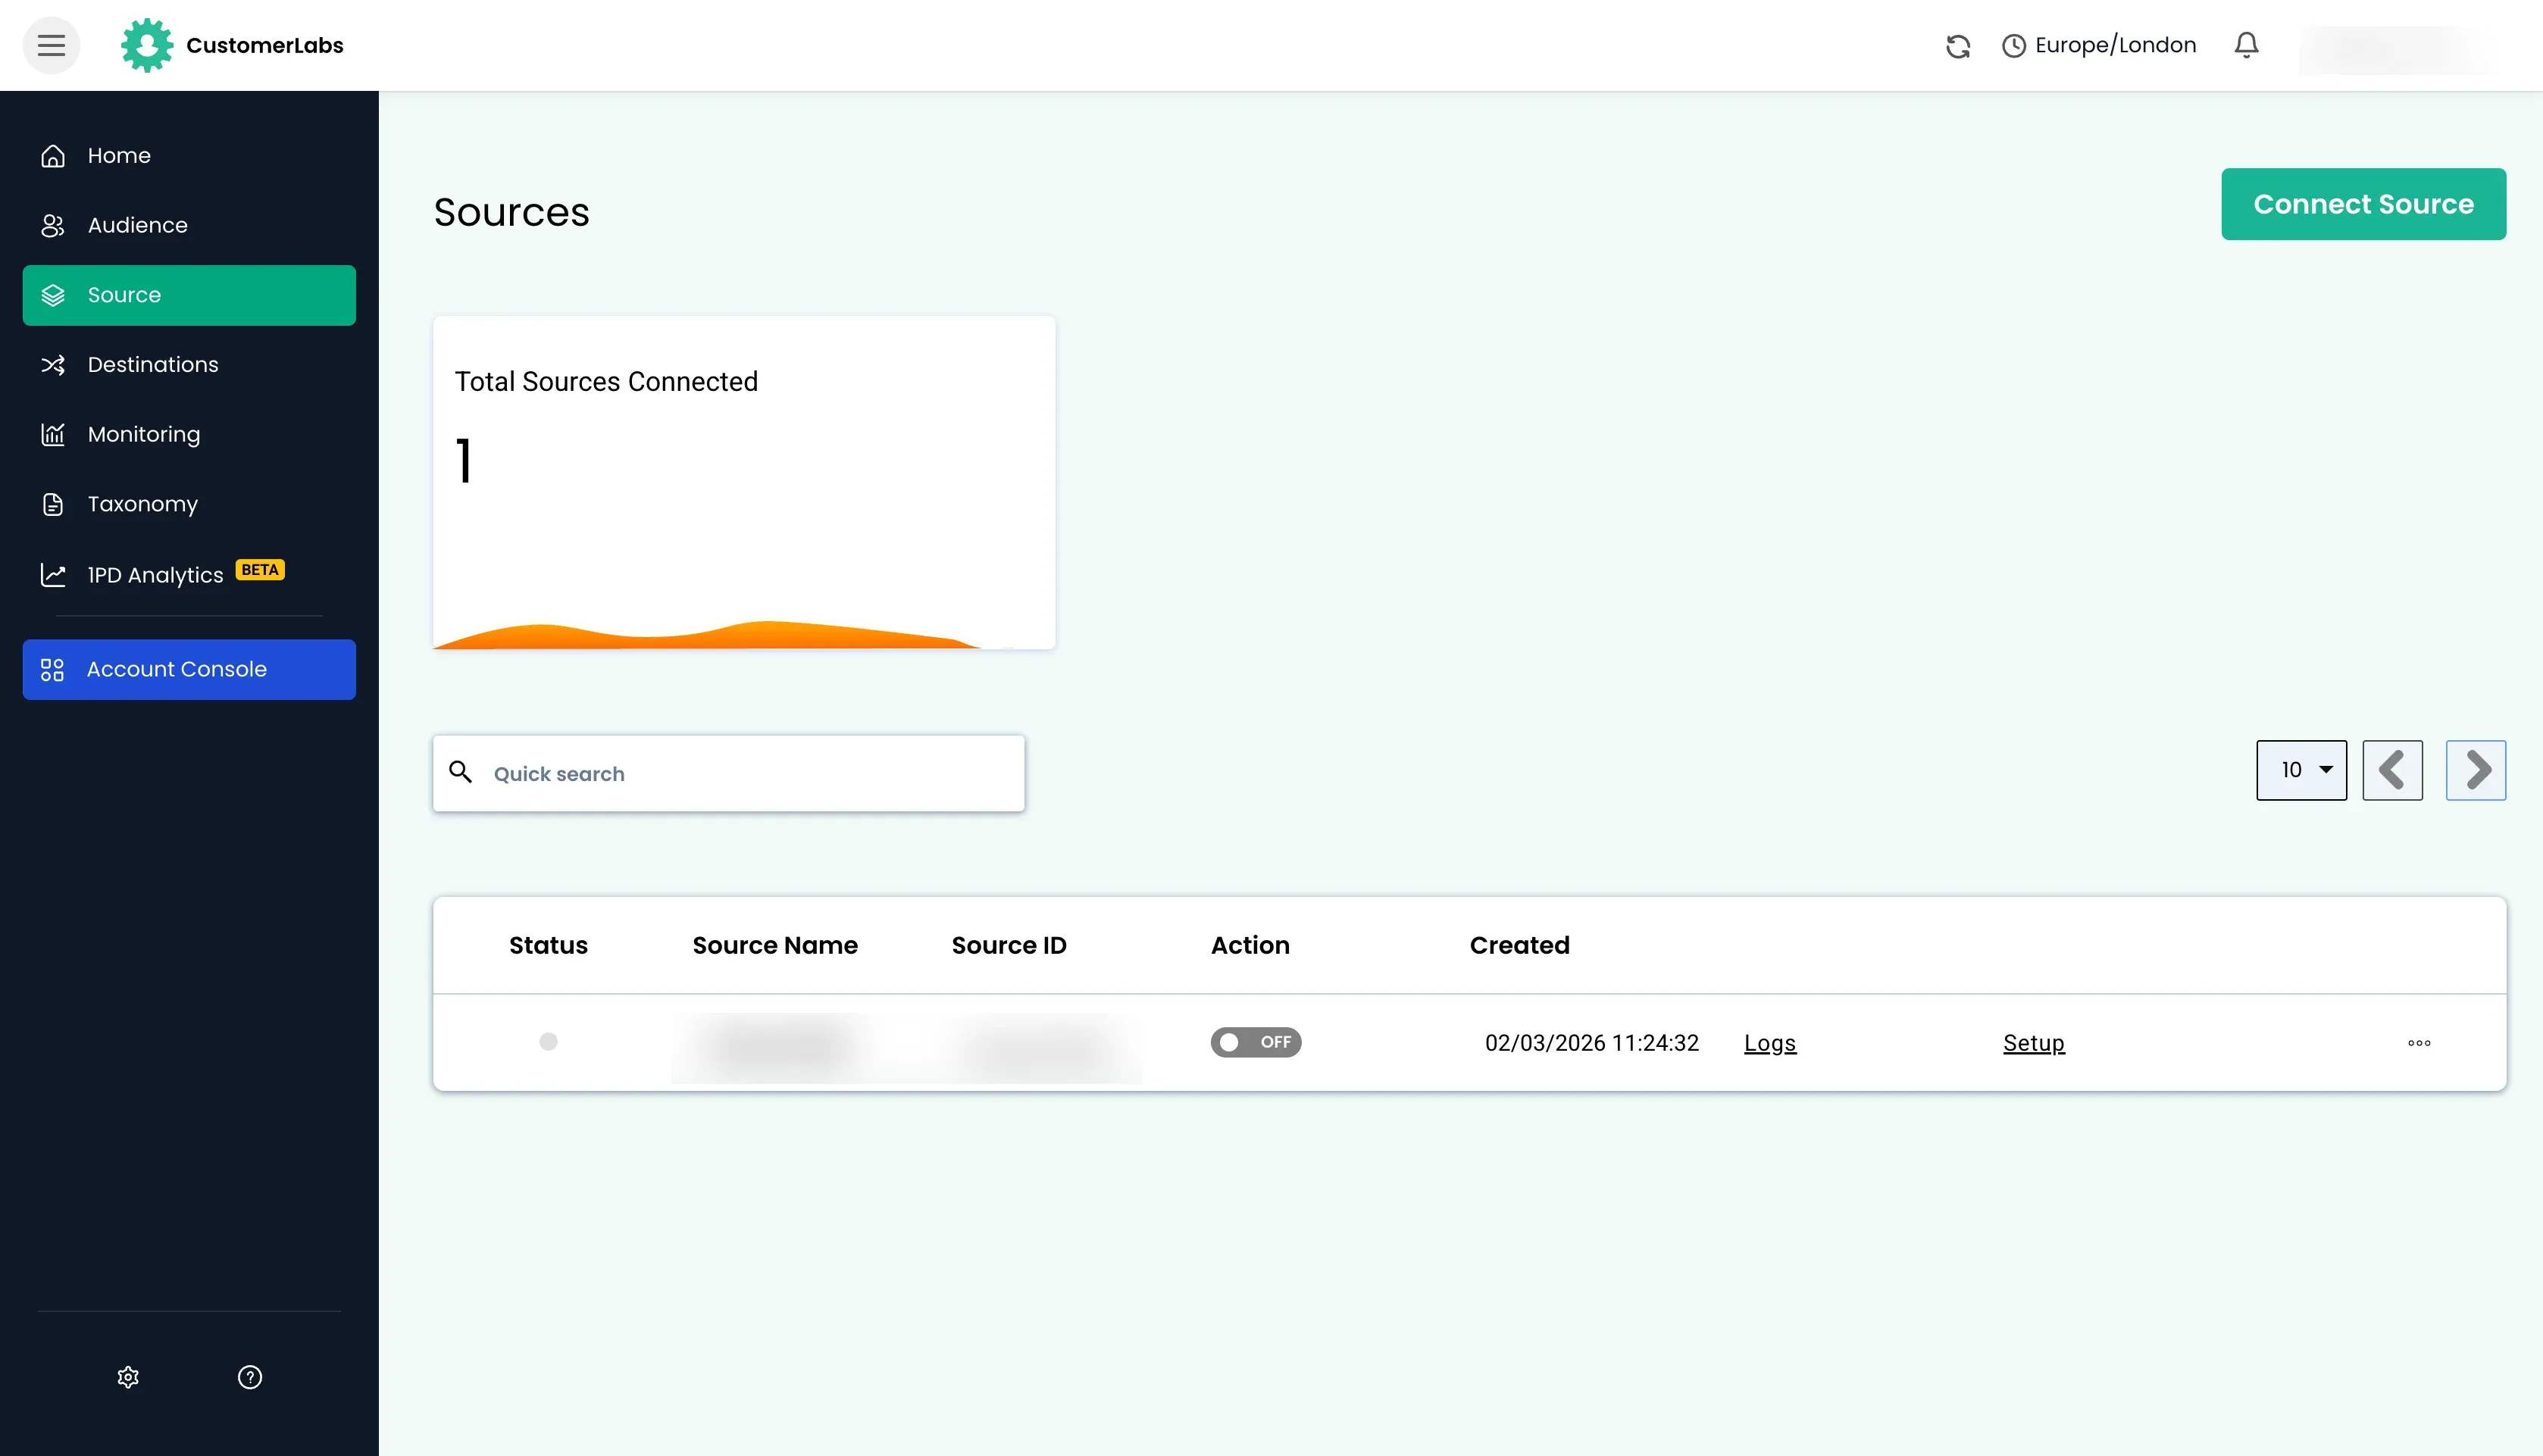
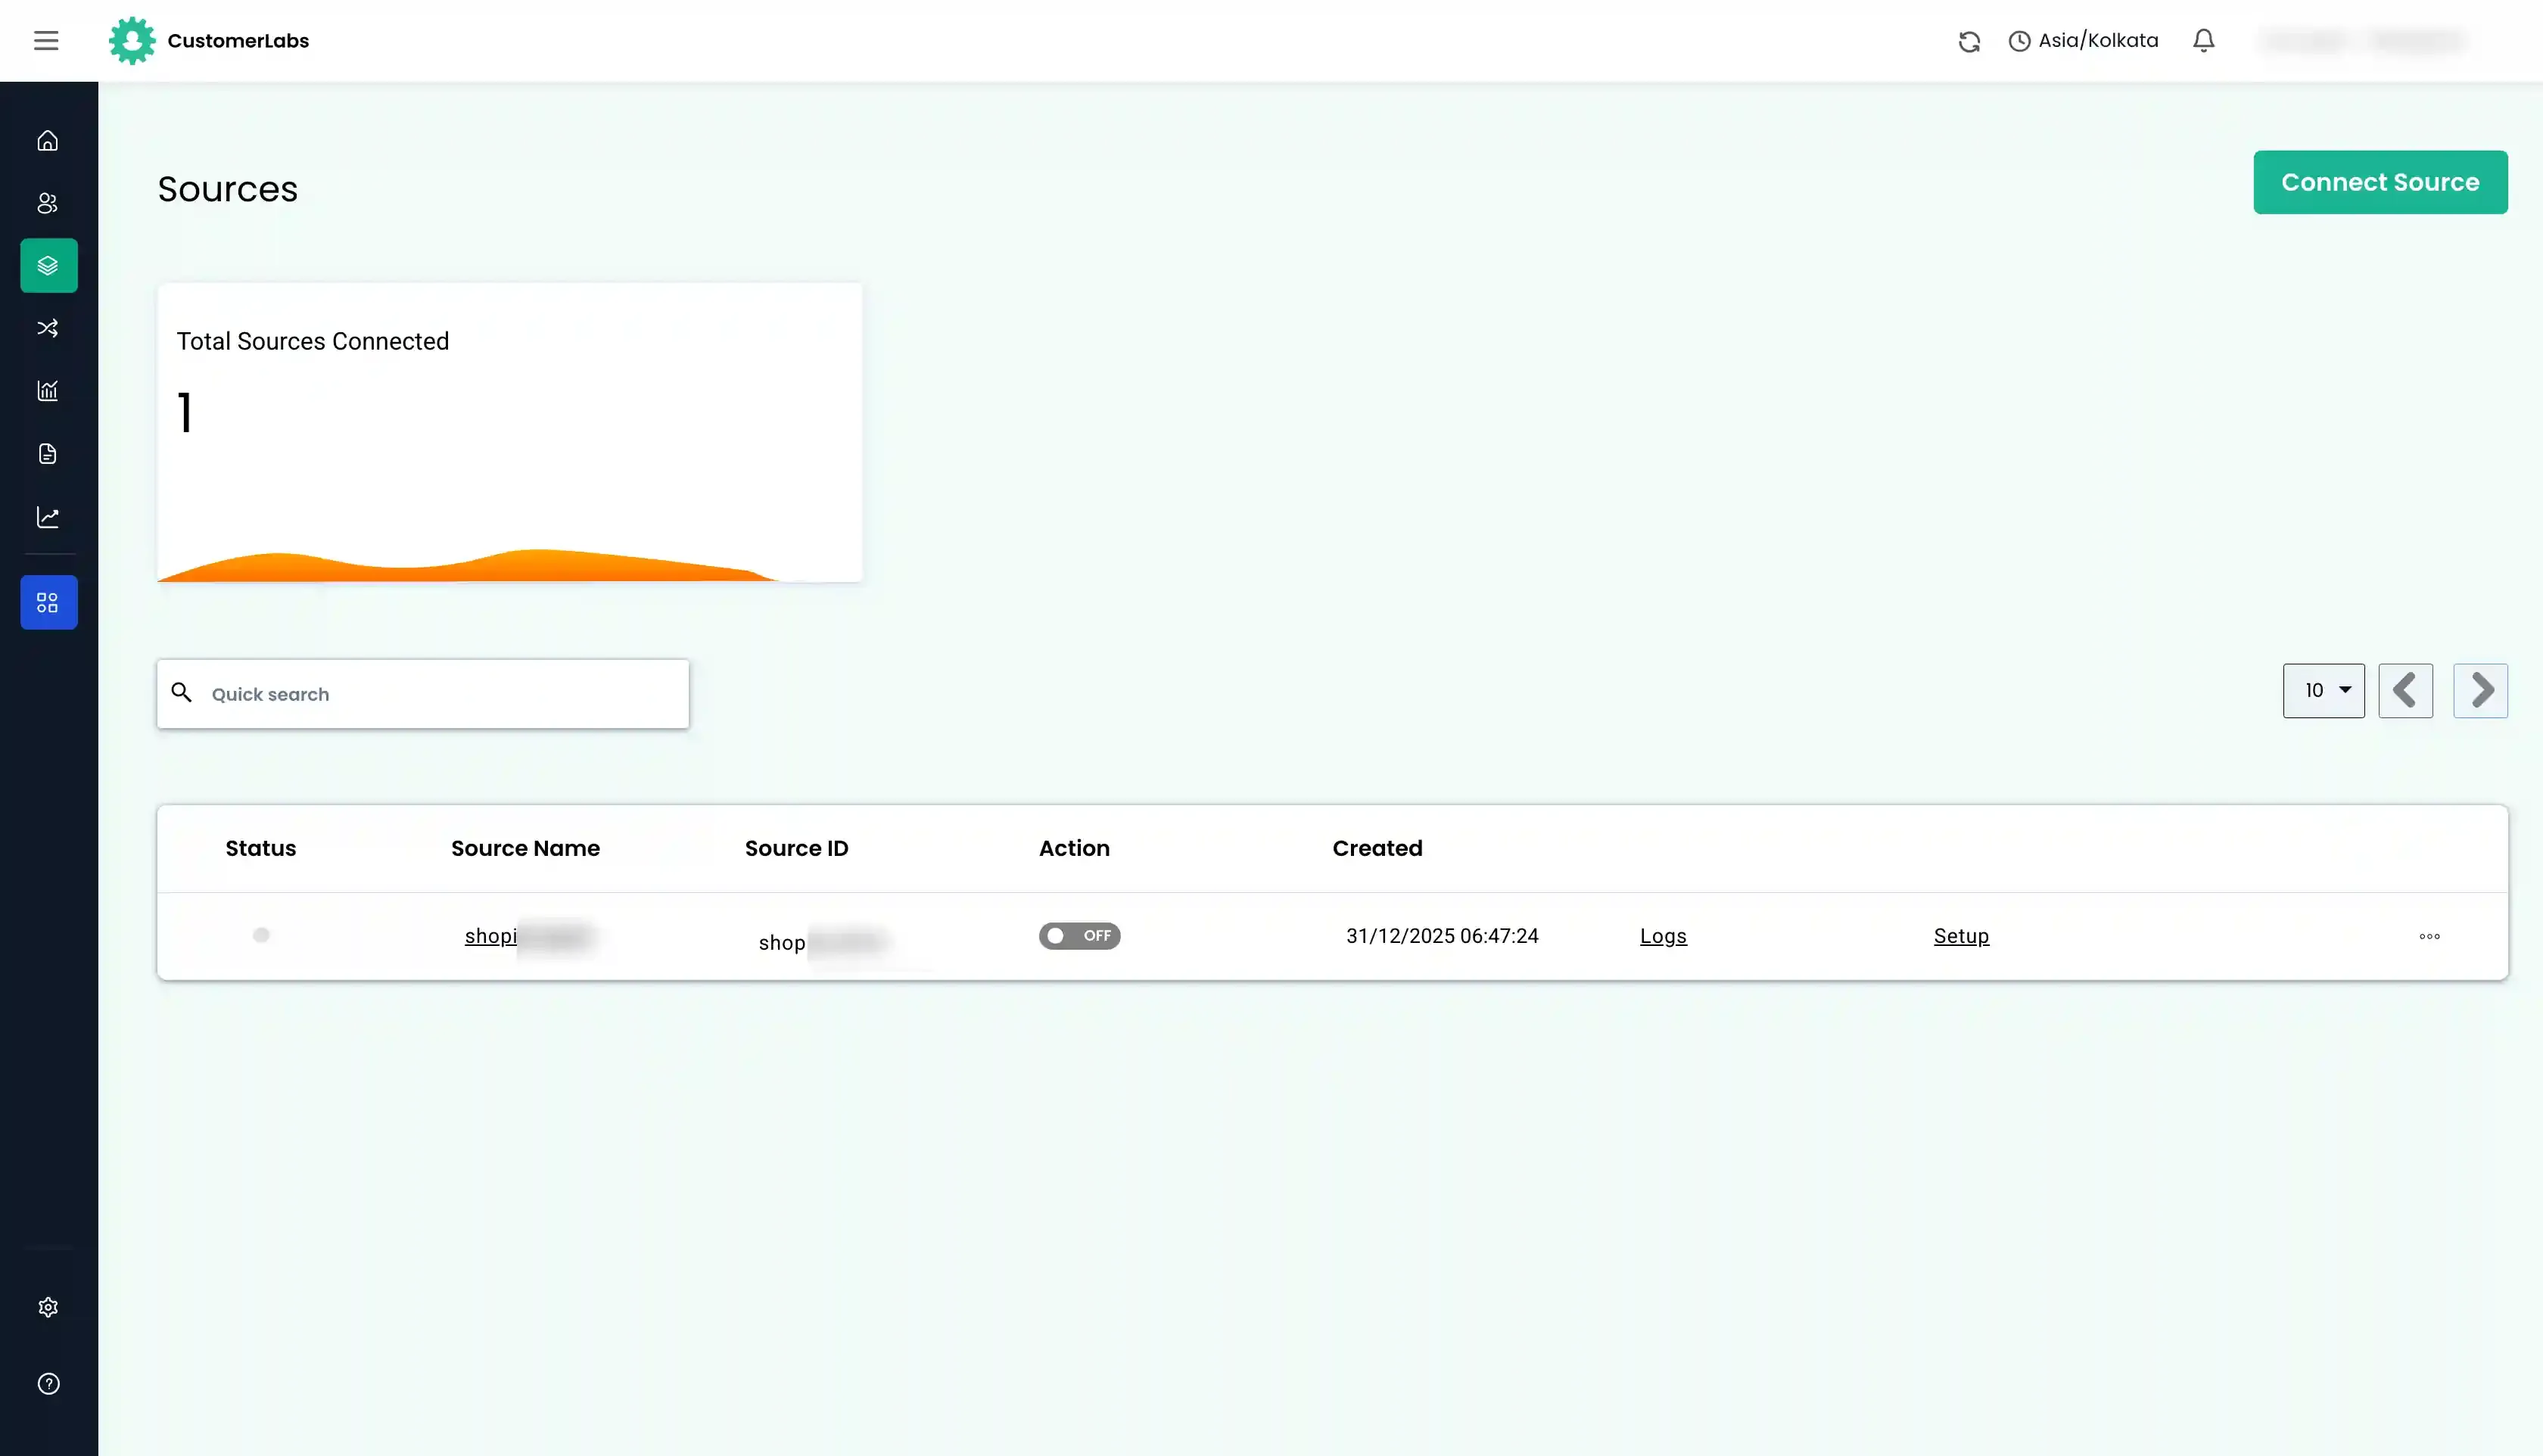
- Once the webhook is connected, Go to CustomerLabs and navigate to the Sources section to see if the source has been created successfully.
Workflow Setup in CustomerLabs
Section titled “Workflow Setup in CustomerLabs”When we click Connect button in the Shopify, the system would have created a workflow automatically using a test trigger. We will have to verify the field mappings and re-name the workflow.
-
Go to CustomerLabs → Sources. Find the shopify source.
-
Click on the source name. Click on “Edit” in
purchase_orderworkflow.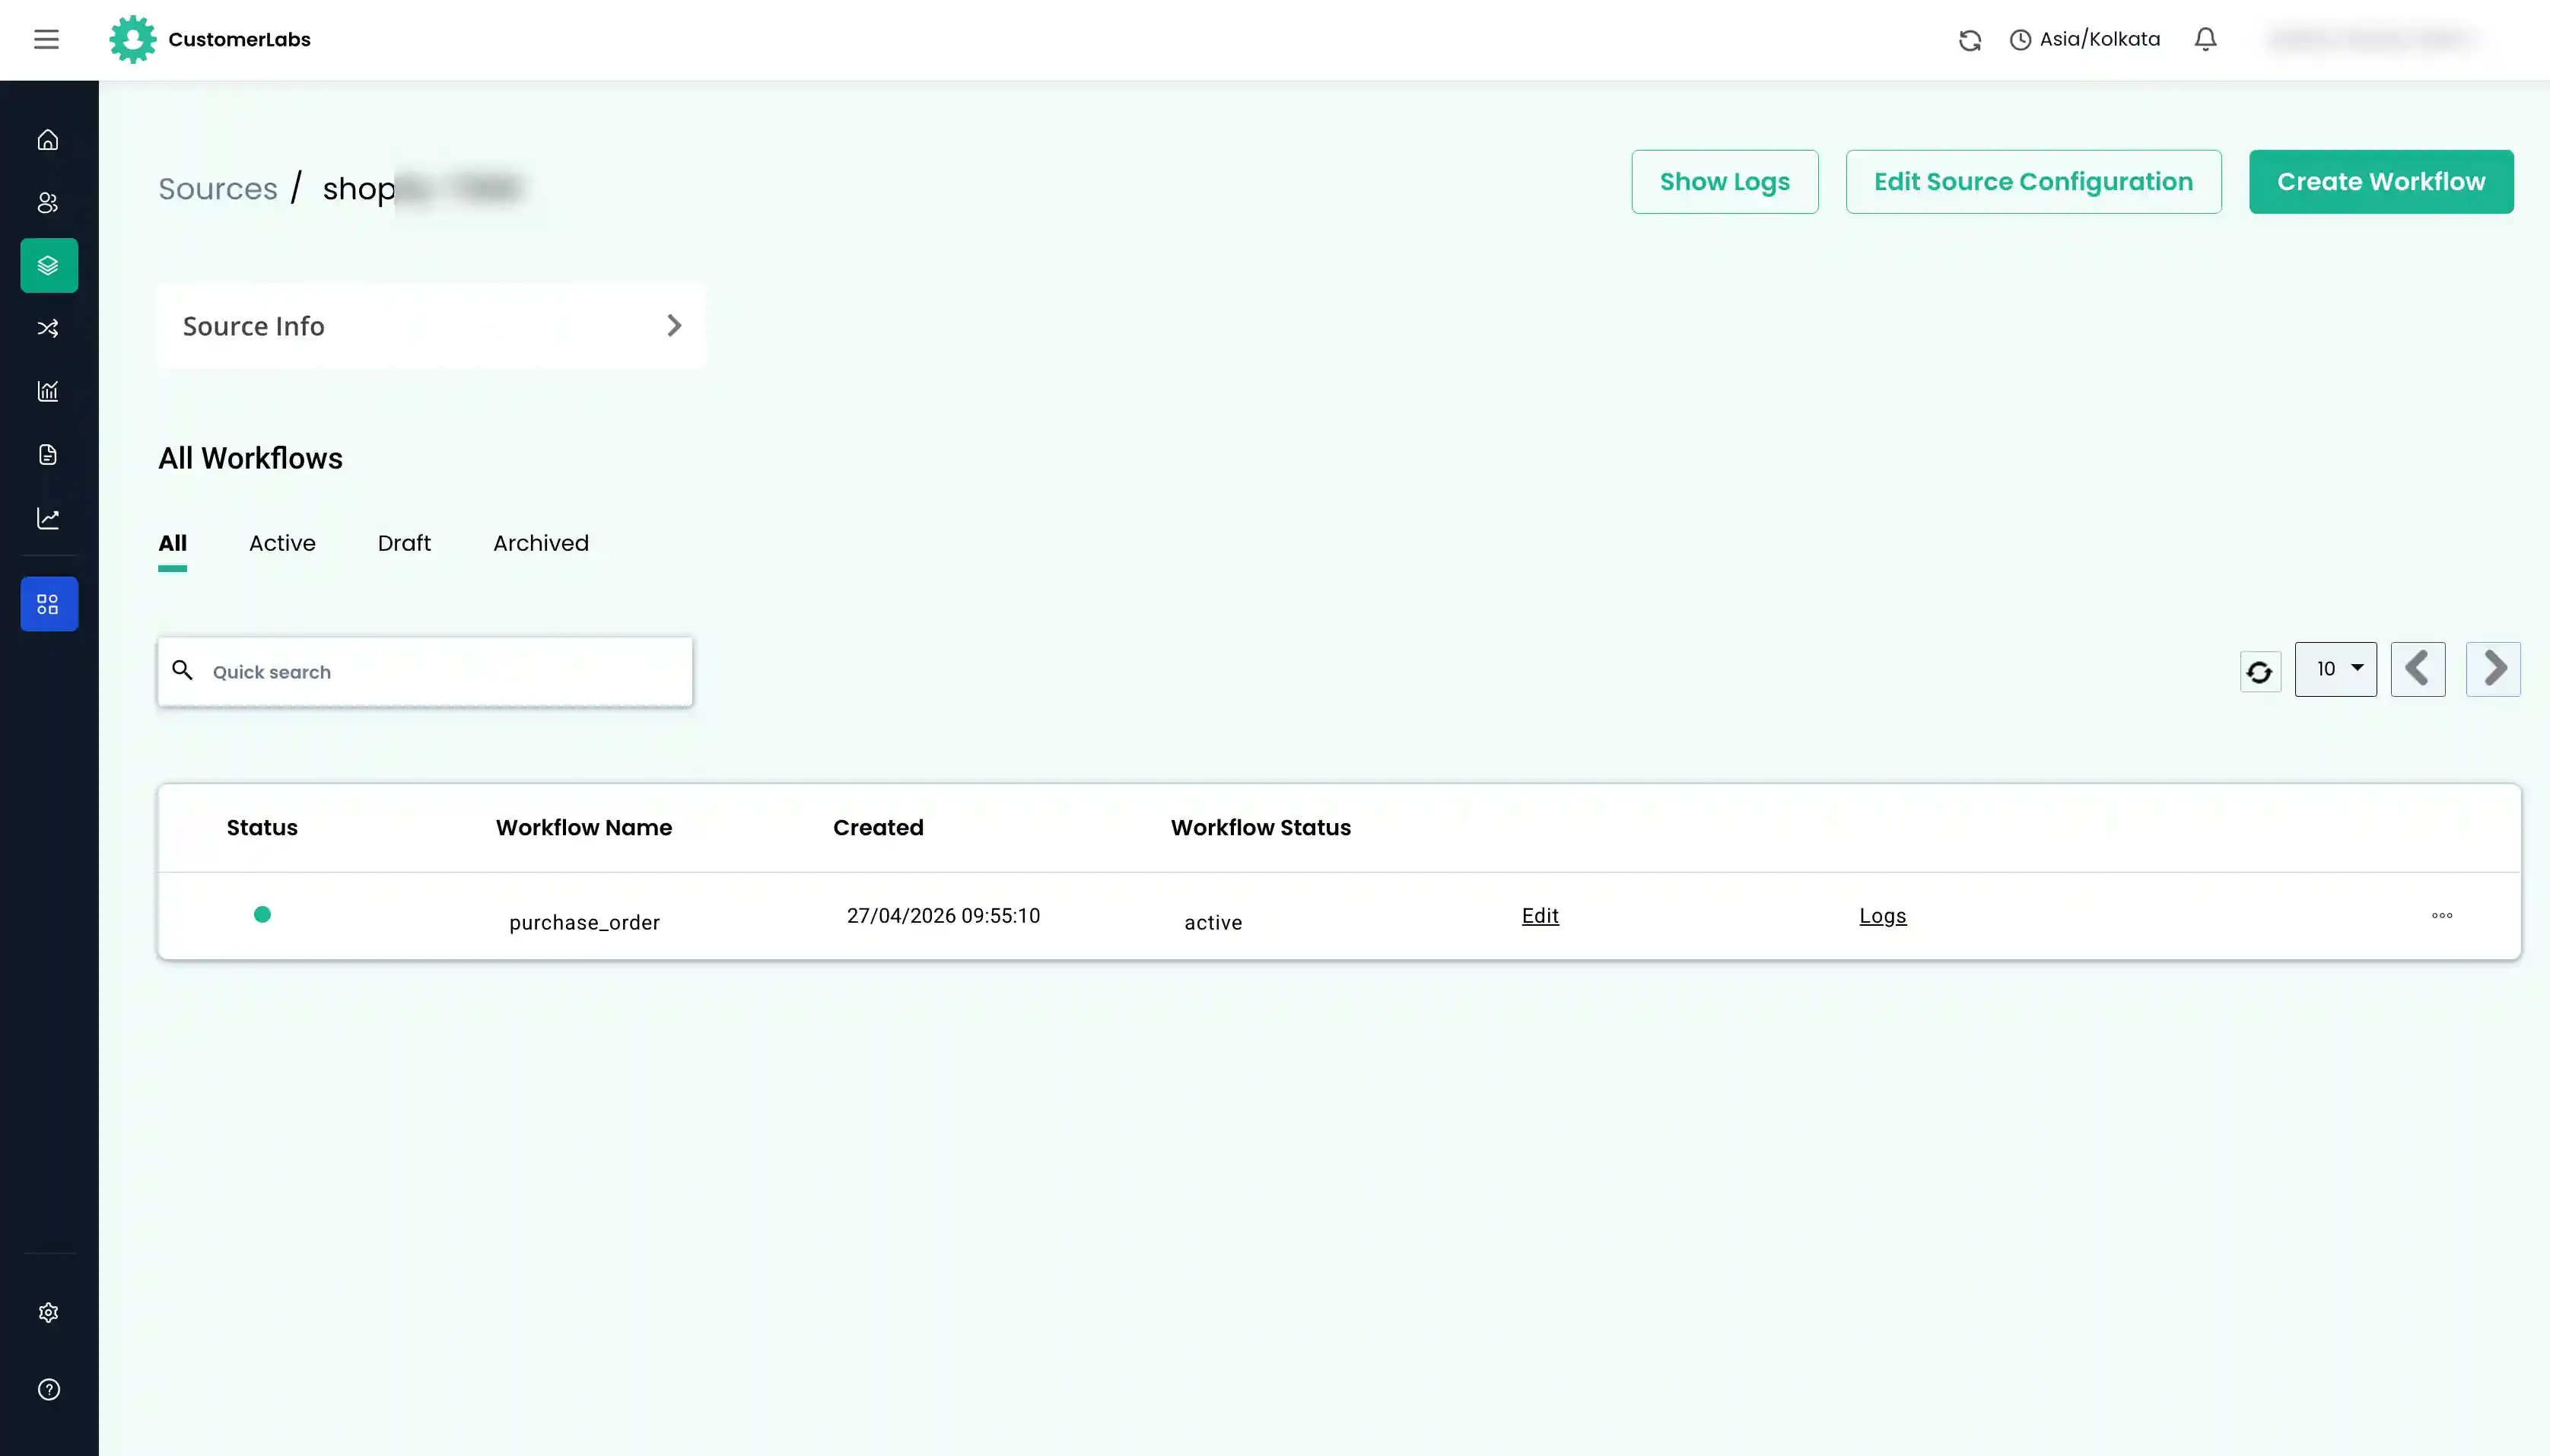
-
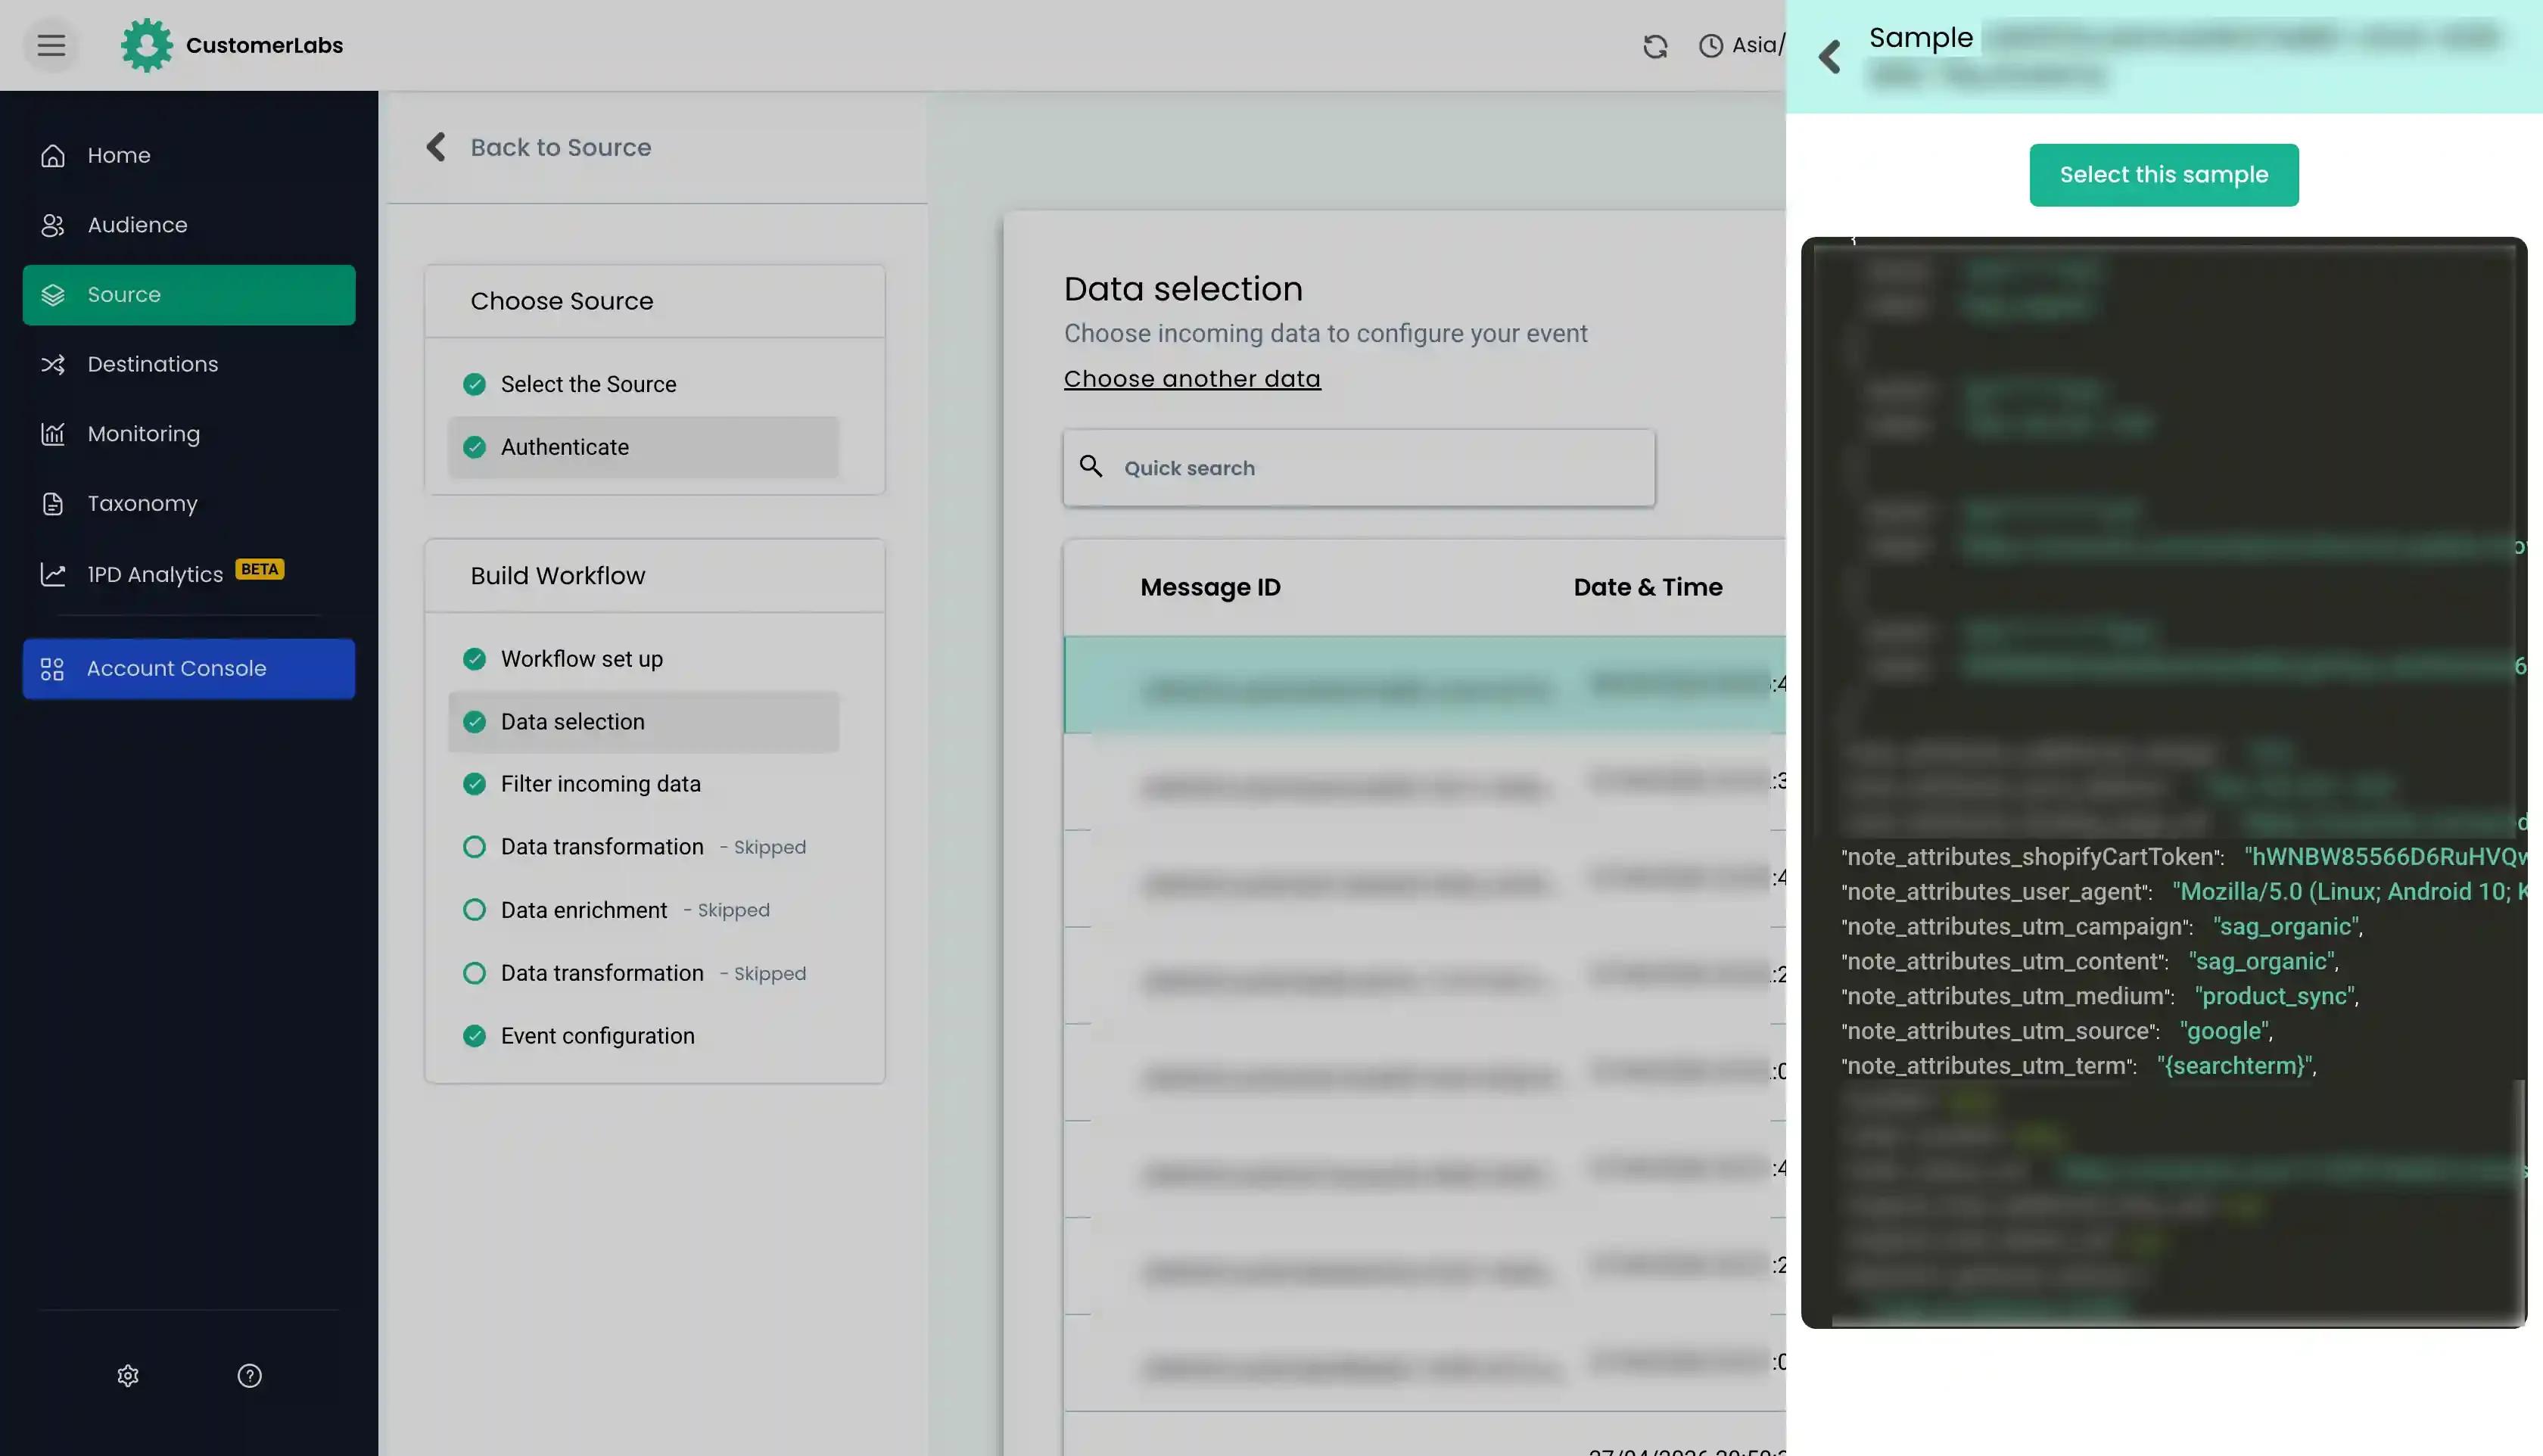
In the Workflow setup, it is mandatory to update the delay. Click Choose Sample Data.

-
Go to Event Configuration, change the event name to
cl_purchaseto differentiate with the purchase event received from browser side.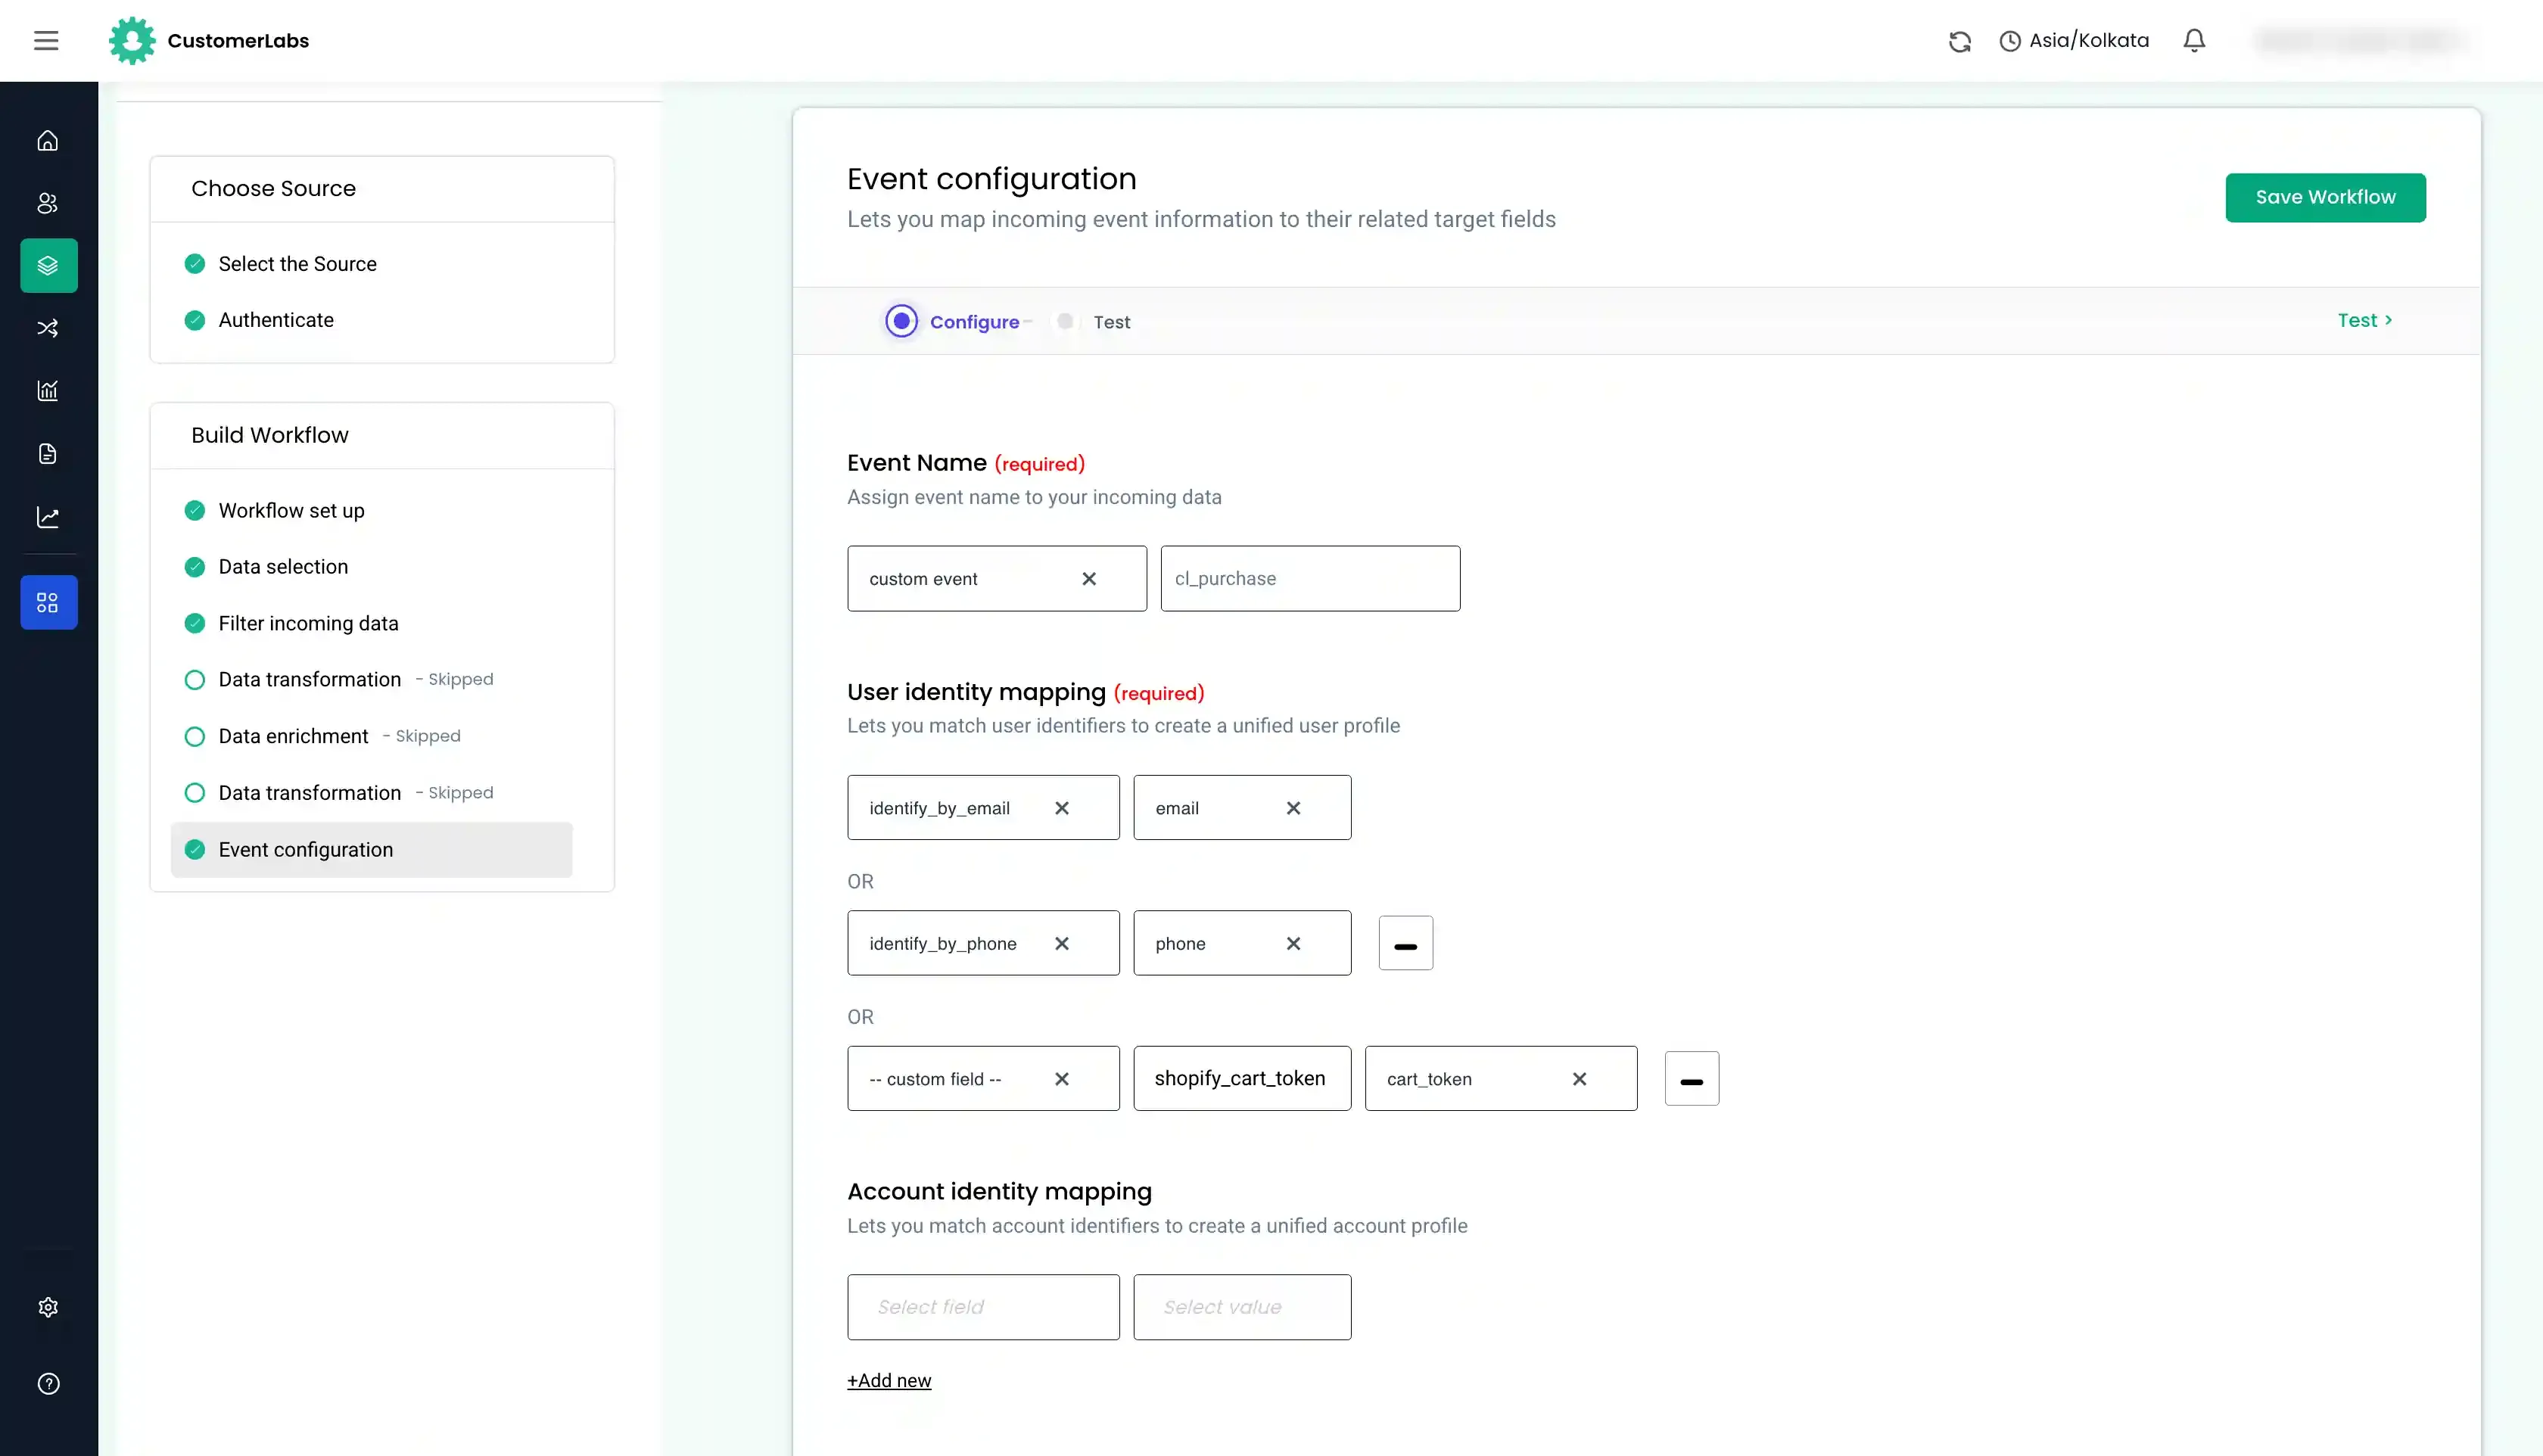
Auditing the workflow setup
Section titled “Auditing the workflow setup”-
Selecting the Sample: Select the sample with the cart token. Ensure data contains no parameters with null values.
-
Filtering the Data (Optional): Here we can set filters for the data that comes from the source. Here, we set the filter to only when topic is
order/create. Other filters can be Examples:- Filter out the order where
emailis null. - Filter out orders coming from a test store.
- To capture only first time buyers, the filter can be set as
customer__user_typeasnew. - To filter subscription purchase, the filter can be set by checking the
source_name. It will containsubscriptionin the name or Shopify Sales Channel ID. Filter can be set accordingly.
- Filter out the order where
-
Event Configuration: Give the event name as
cl_purchaseby selecting a custom event. If filters are set up to capture specific data, then modify the event name accordingly. Example:- Subscription Purchases can be named as
cl_subscription_purchase. - First time purchase can be named as
cl_new_customer_purchase
- Subscription Purchases can be named as
-
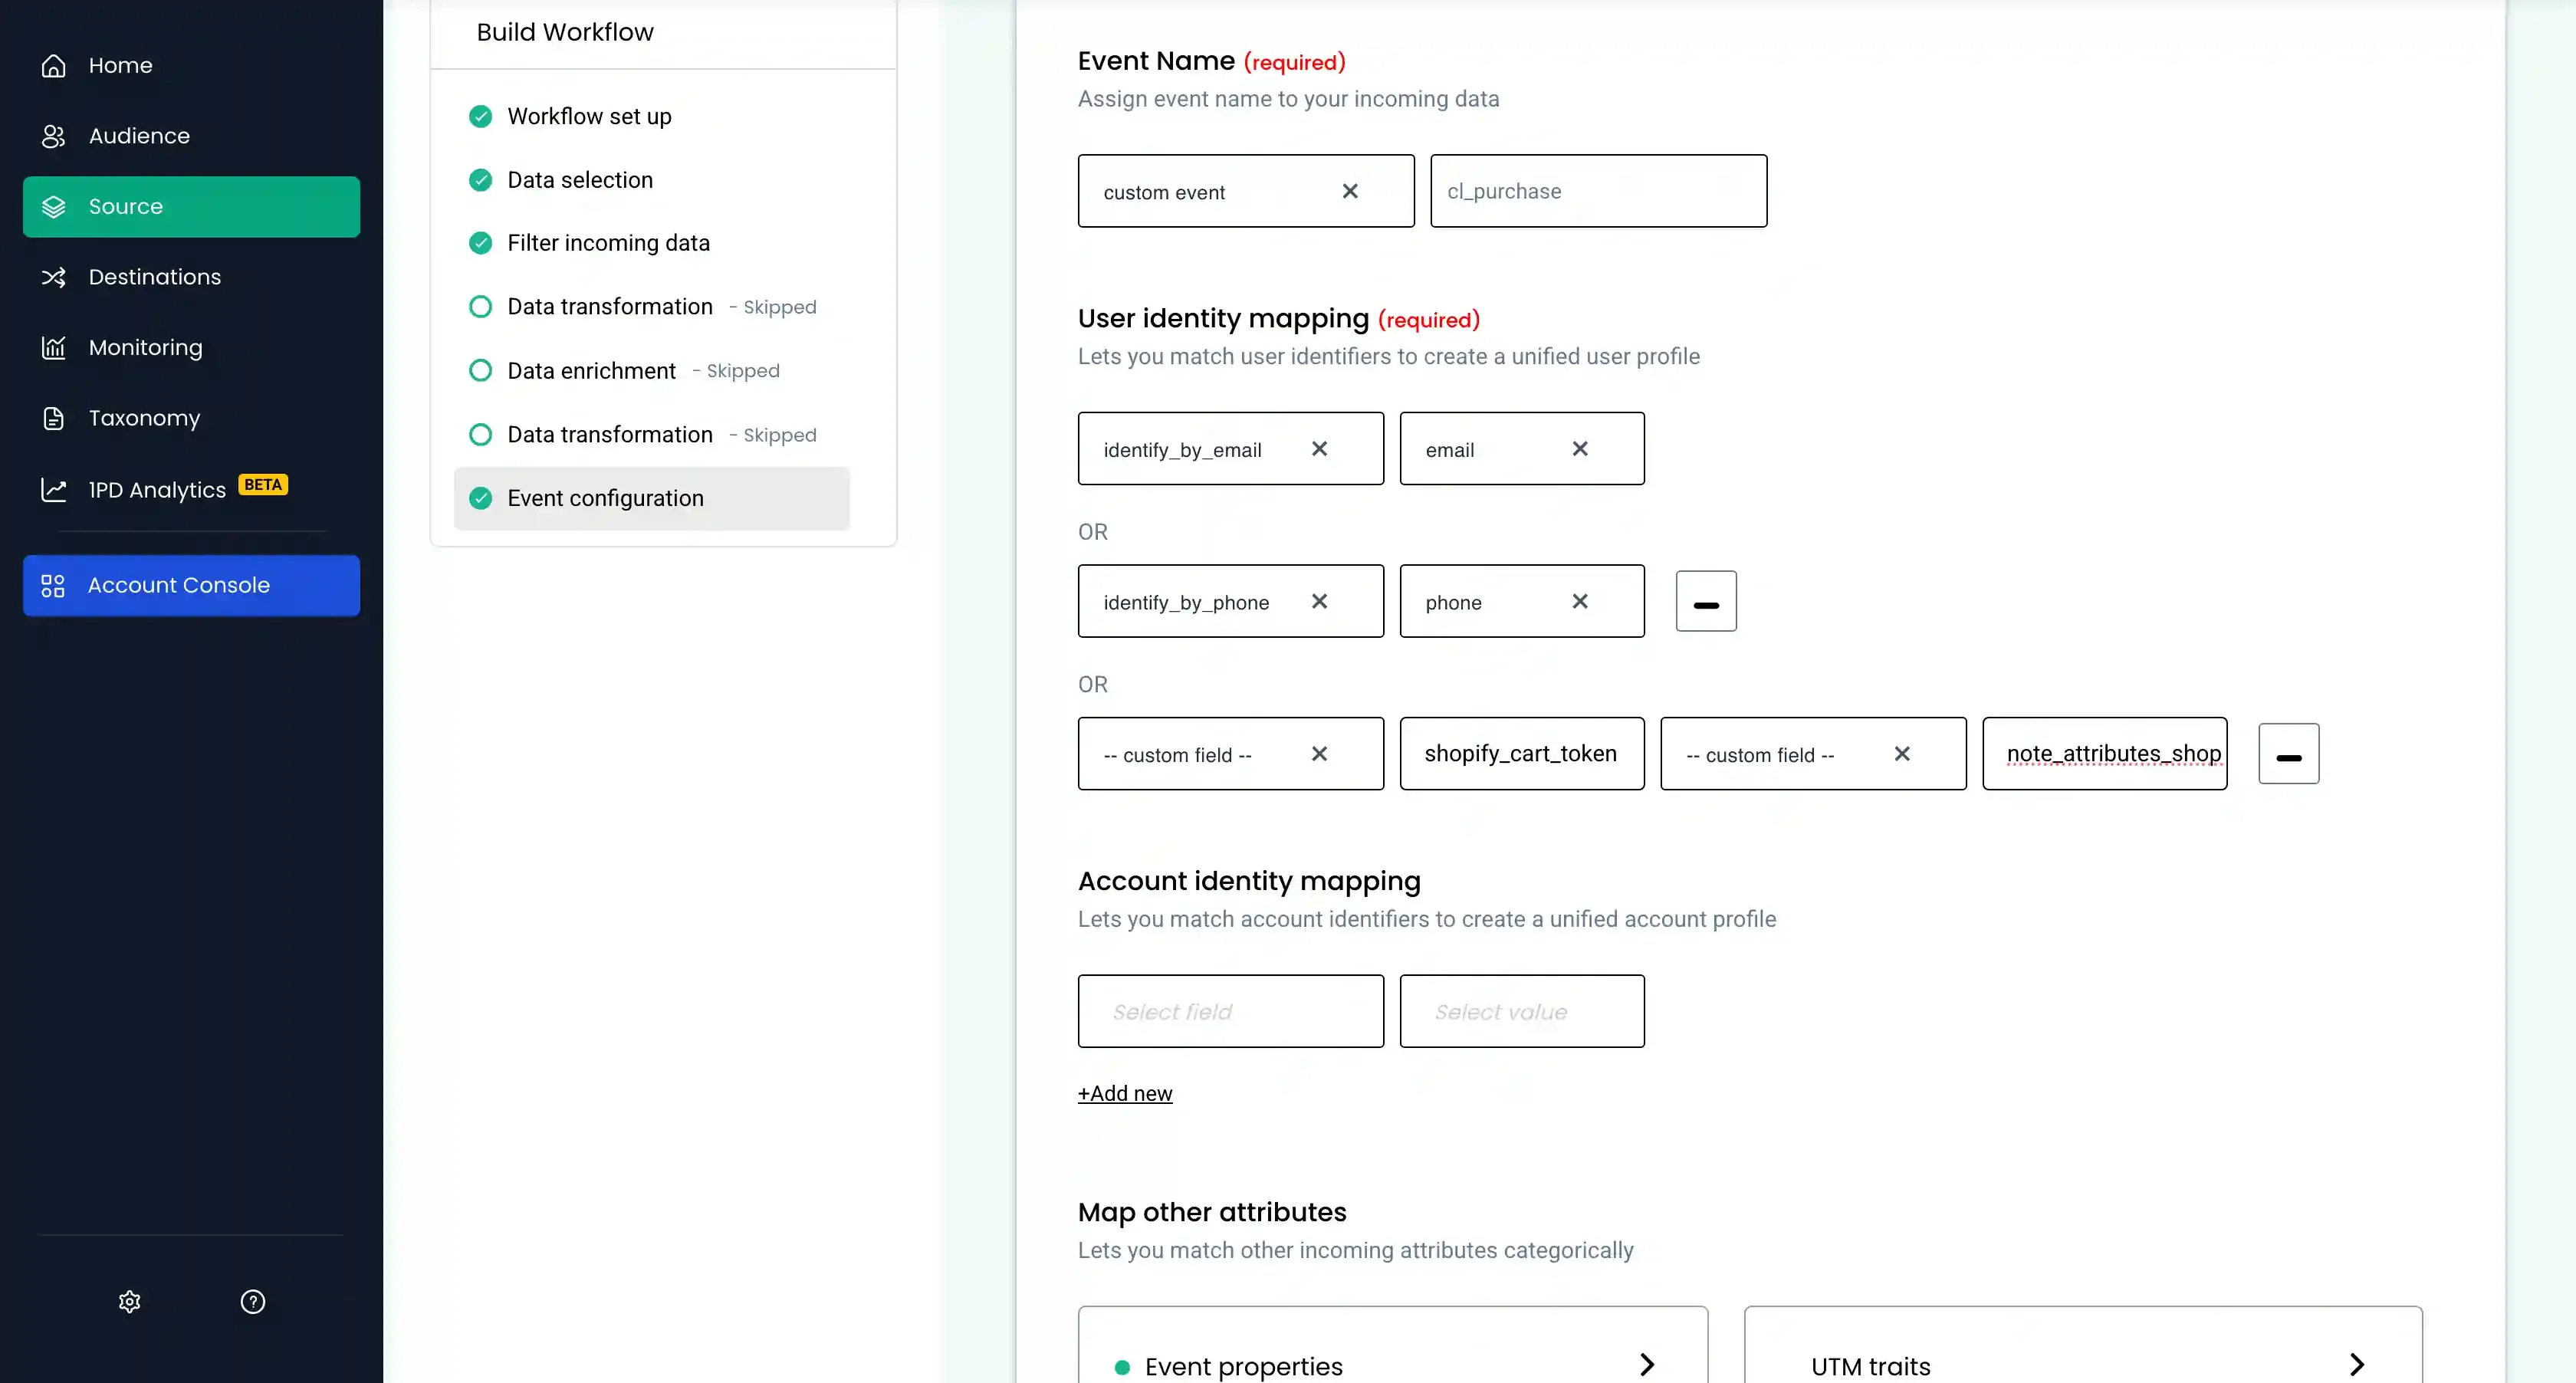
Identity Mapping:
- Ensure to keep
identify_by_emailoridentify_by_phoneorshopify_cart_token. - Search for shopify cart token that starts with
hWNin the payload. It is usually undercart_tokenor inside thenote_attributes.
- Ensure to keep
-
Map Attributes: Map incoming attributes under User traits (first name, city, etc.).
-
Product Details: Map product attributes (sku, ID, variant, line_items) under product details.
-
Event Properties: Map value, currency, transaction_id, order_id.
-
Click Save Workflow.