Customerlabs CDP Documentation
CustomerLabs + Facebook Integration
Integrate Facebook with CustomerLabs and sync your audience segments created in CustomerLabs with Facebook through events by creating a custom audience. Using this, you can retarget your high-intent audience based on their behavioral data with personalized ads.
Here are the steps to integrate Facebook:
Note: To create a new pixel and enhance it with first-party data signals without disrupting your existing Meta setup, please follow the instructions in the provided document for creating a new pixel.
Authentication
Recommended Authentication
To connect your Facebook Ad account via our recommended authentication, you need to have admin access to your Facebook Business Manager account to create a system user.
This authentication is recommended to avoid discrepancies in data sharing with Facebook in cases of the authenticated account’s password being changed or any other manual update being done on the Facebook Ad account that disrupts the authentication and the flow of data
1. Login to your CustomerLabs account.
2. Navigate to Facebook from Menu → Destinations.

3. Click on Enable and go to Configuration Settings

4. Authenticate by clicking on Authenticate Facebook account.

5. You will be redirected to choose the business manager account and other assets.
6. Select Business Manager account.

7. Select Business Asset Group

Note: If you don’t have a business asset group, create one to authorize CustomerLabs to add a system user that enables CustomerLabs to seamlessly work without any issues even when there are any updates or changes (like password changes) that disrupt Facebook authentication.
Business asset group is a collection of assets like pages, Ad accounts, pixels, Instagram accounts, etc. managed by business admins to give access collectively to individual people. Click here to know how to create an asset group. While adding assets when creating an asset group, you can add your Ad account to the asset group for now.
8. Select the Ad account that you want to connect
9. Choose pixel from the drop-down.
10. Click Submit
11. Click Save Changes
12. [Highly Recommended] To use and attribute conversions to the first-party audience in your Advantage+ Shopping Campaigns, turn ON the toggle under “Audience type URL parameters”.

This will automatically add the relevant UTM parameters in your Advantage+ Shopping Campaigns setting at your Ad account level as shown in the image below.

13. Turn on the toggle for Send data via server-side if you would wish to send the data via server. (It is advisable to do so to track better)
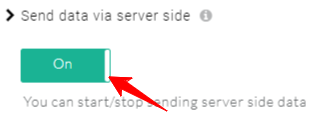
14. Click on Save Changes once the updates have been made.
Not Recommended Authentication
We don’t recommend connecting your Facebook account through this way of authentication. But if you don’t have admin access to your Facebook Business Manager account, you can connect your Facebook account using this authentication method to integrate your pixel and start sending data.
1. In CustomerLabs, under Destinations → Facebook → Configurations Settings, you will see Not Recommended authentication. Click on it to authenticate your Facebook account.

2. Choose Facebook Ad account

3. Choose pixel from the drop-down
4. Click Submit
5. Click Save Changes.
Updating configuration or authentication details
If you want to change any of the details such as Ad account, pixel, Business manager account, etc after authentication, you can do so by clicking on the Reauthenticate Facebook account button and update the details.

If you have already connected Facebook account through the old authentication way, you can change and connect via the new recommended authentication method by clicking near “Recommended Authentication”

Setup Event Workflow
After authentication of your Facebook account, you need to set up the event workflow configuration to send your events and sync your audience segments with Facebook.
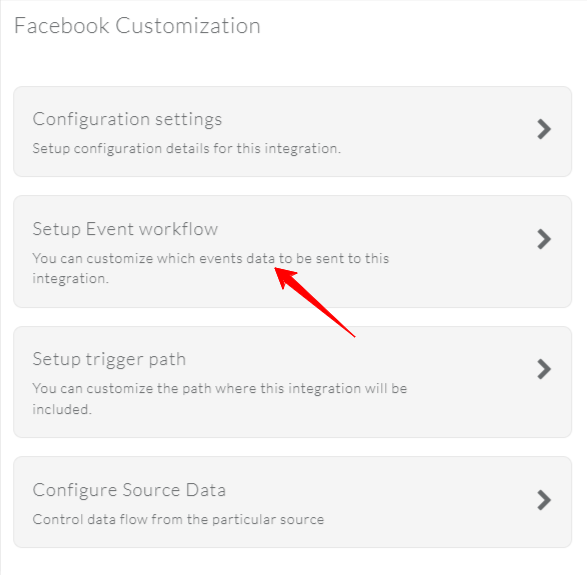
1. Go to Destinations → Facebook → Setup event workflow in your CustomerLabs account.
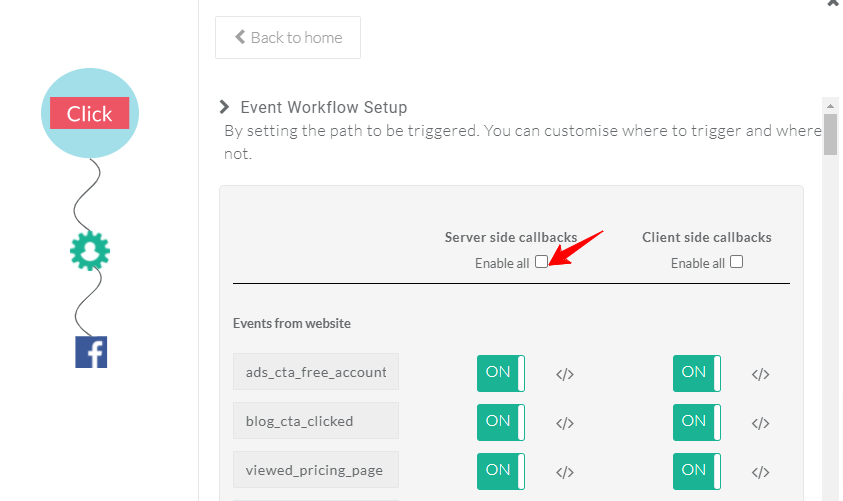
2. Click on “enable all server-side callbacks” to send all the events to Facebook. This is suggested to give a better Event Match Quality (EMQ)
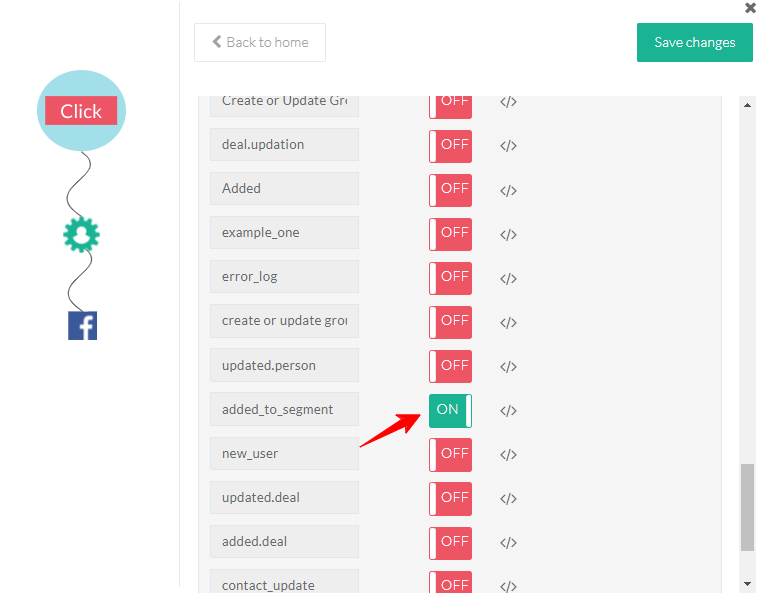
3. After creating an audience in CustomerLabs, turn on the toggle for all the “added_to_segment” events to send the audiences to Facebook (Note: If you would want to use “removed_from_segment”, turn on the toggle for those events also)
Based on the minimum refresh interval you have given for any of the audience segments created in CustomerLabs, the “added_to_segment” event gets refreshed on Facebook.
You can choose to send all the events like pageview, purchased, added_to_cart, etc to Facebook by turning the toggle on for all the events or if you want to send only the segments to Facebook, you can turn on the toggle for “added_to_segment” event only.
Note: It may approximately take 24-48 hours for the added_to_segment event to get populated on Facebook.
4. Click on “Save changes” once you are done with the setup.
5. You have now integrated Facebook with your CustomerLabs account.
After integrating, you can sync the audience segments created in CustomerLabs with Facebook as an event using the “added_to_segment”. Click here → Sync your audience with Facebook.
Limited Data Use
Limited Data Use is a data processing option in Facebook to restrict the usage of users’ data for marketing purposes following compliance with various US state privacy regulations.
Limited Data Use option in Facebook is currently applicable for California, Colorado and Connecticut states in the US.
Based on the consent received from the users who reside in these states, you need to flag these users with Limited Data Use (LDU). Facebook will process data in accordance with its role as a service provider or processor with respect to flagged personal information from people in states where Limited Data Use is available. This means that Facebook will restrict the use of that data as specified in Facebook’s State-Specific Terms.
Learn more about Limited Data Use
Set up Limited Data Use for Facebook
We, CustomerLabs, have upgraded our system to include LDU flag for users in the above-mentioned states.
On your website, you have to get consent from the users regarding the usage of their information for marketing purposes. It can either be a cookie plugin that states about CCPA compliance or a separate plugin that gets consent to comply with CCPA.

This consent would be stored in a cookie with a cookie name and cookie value that provides boolean information about the consent.
Enable LDU in CustomerLabs
1. Now, log into your CustomerLabs account → Destinations → Facebook
2. Go to Configuration Settings → Limited Data Use (LDU) Configuration section
3. Turn on the Toggle to enable Limited Data Use on Facebook.

This will flag the users based on the consent collected on your website for the US states mentioned (California, Colorado and Connecticut).
4. For receiving the consent information from your website, you need to mention the Cookie name and cookie value where the consent of each user is stored in the boxes given under LDU Cookie Configuration section → Save Changes

5. The cookie value should be a true value (eg. 1, true, y, etc). This means that the user has opted out from using their personal information for marketing purposes. We will flag this user with LDU and send it to Facebook.

After setting this up, whenever a user lands on your website, and gives consent with true value, the LDU flag will be sent to Facebook for that specific user.

LDU flagged users will be synced through events and audiences. Facebook identifies the users with their respective states and applies LDU (if applicable) while processing the data from their side.
Note: Businesses may notice an impact to campaign performance and effectiveness, and retargeting and measurement capabilities will be limited when Limited Data Use is enabled.
Send Consent Signals without Consent banner
No Consent Banner? No problem. Send LDU Consent Signals to Meta. Click here.
Need Assistance – happy to help, always!

