Calendly + Customerlabs 1PD Ops Integration
Calendly is a popular scheduling tool used by customers to book appointments and meetings via personal scheduling links. When Calendly bookings are forwarded to ad platforms such as Meta, insufficient user identity data results in low event match quality — which degrades campaign attribution accuracy.
This integration resolves that by passing the CustomerLabs UID (cluid) as the utm_term query parameter on every Calendly link at page load. The cluid is then captured in the booking payload and forwarded to Customerlabs 1PD Ops via a webhook, linking the server-side booking event to the originating browser session and enabling accurate event unification.
Prerequisites
Section titled “Prerequisites”- Calendly account with API & Webhooks access
- Active CustomerLabs Account
- Postman (or equivalent API client) for webhook subscription setup
How It Works
Section titled “How It Works”The integration uses three components working together:
- UTM Term injection — At page load, the CustomerLabs tracking script appends the
cluidto every Calendly link on the page as autm_termquery parameter. - Calendly Webhook — When an invitee books a meeting, Calendly forwards the booking data (including the
utm_termfield containing thecluid) to the CustomerLabs webhook URL. - Event unification — CustomerLabs matches the webhook payload to the originating browser session using the
cluid, enabling full browser-to-server event unification.
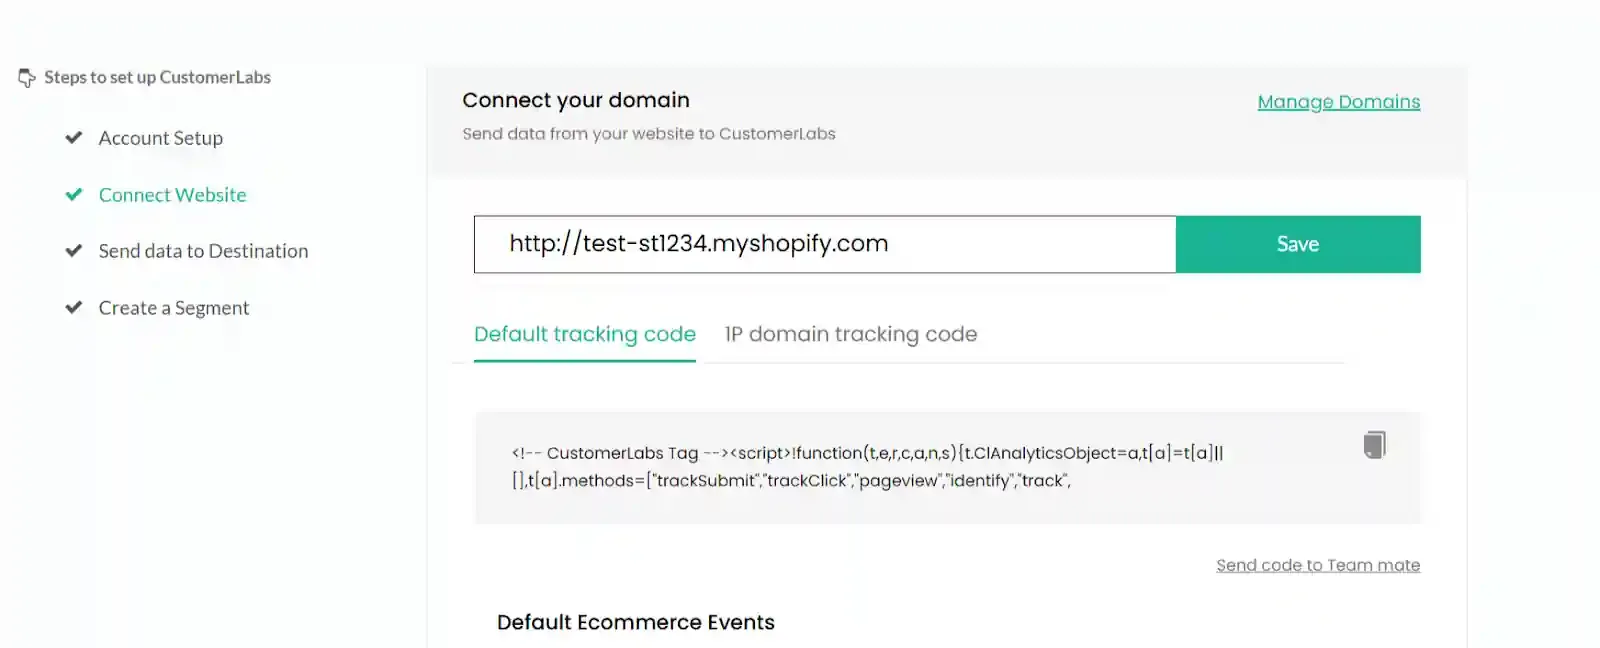
Step 1: Install the CustomerLabs Tracking Script
Section titled “Step 1: Install the CustomerLabs Tracking Script”Sign in to your CustomerLabs account and place the tracking script above the </head> tag on your website. This script generates and stores the cluid for each visitor.
Step 2: Configure the Custom Destination in CustomerLabs
Section titled “Step 2: Configure the Custom Destination in CustomerLabs”The Custom Destination script appends the cluid to every Calendly link on the page as a utm_term parameter. This ensures the booking payload includes the visitor’s unique identifier.
Create a Custom Destination
Section titled “Create a Custom Destination”In CustomerLabs, navigate to Destinations, search for Custom Integration, and click View Details.
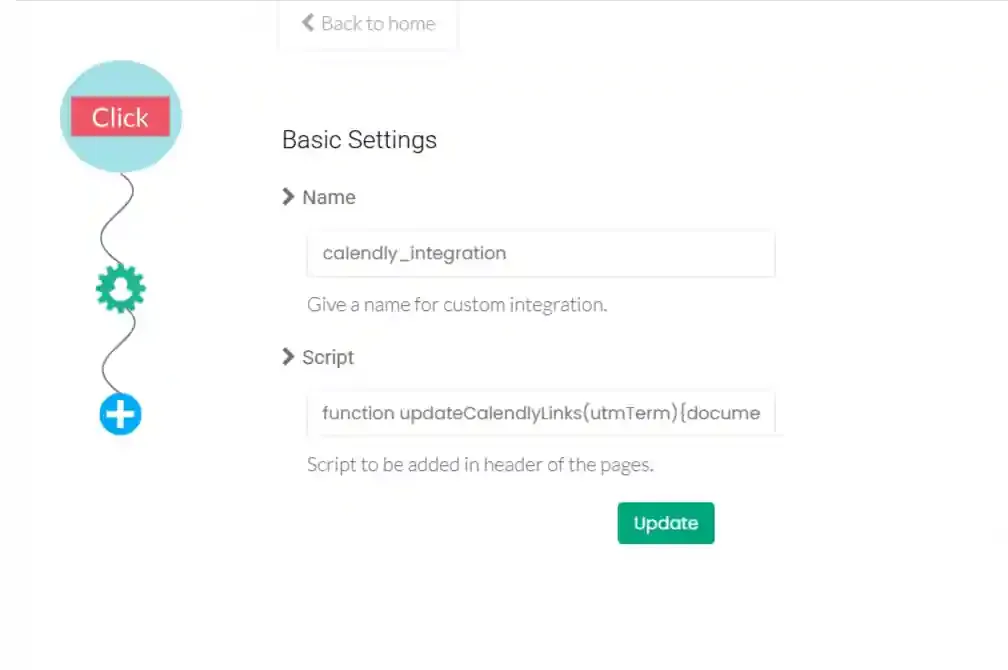
Name the Integration and Add the Script
Section titled “Name the Integration and Add the Script”Provide a name for the integration (for example, calendly_integration) and paste the following script into the code editor.
function updateCalendlyLinks(utmTerm) { document.querySelectorAll('a[href^="https://calendly.com"]').forEach(link => { try { const url = new URL(link.href); url.searchParams.set('utm_term', utmTerm); link.href = url.toString(); } catch (error) { console.error('Error updating Calendly link:', error); } });}updateCalendlyLinks(window.CLabsgbVar.generalProps.uid);The script selects all anchor tags pointing to calendly.com and appends the cluid as the utm_term parameter. When an invitee books a meeting, Calendly captures this value in the booking payload.
Save the integration after pasting the script.
Step 3: Generate a Calendly API Token
Section titled “Step 3: Generate a Calendly API Token”To create a webhook subscription, you must authenticate with the Calendly API using a personal access token.
- Sign in to your Calendly account.
- Navigate to Integrations & Apps → API & Webhooks.
- Click Generate New Token.
- Name the token (for example,
Calendly token) and generate it.
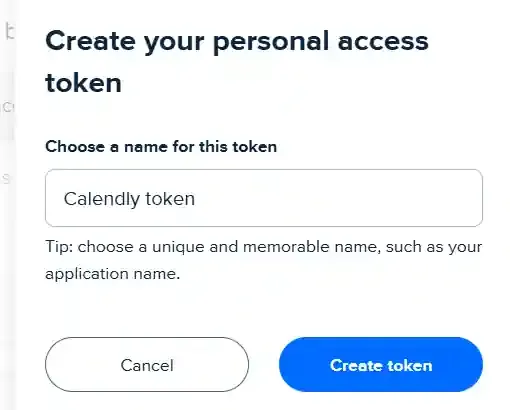
- Copy the token immediately and save it — you will need it in the following steps.
Step 4: Retrieve Your User and Organization URIs
Section titled “Step 4: Retrieve Your User and Organization URIs”The Calendly webhook subscription requires your organization URI. Use the Calendly API to retrieve it.
Open Postman (or any API client), import the following request, and replace {access_token} with the token generated above:
curl --request GET \ --url https://api.calendly.com/users/me \ --header 'authorization: Bearer {access_token}'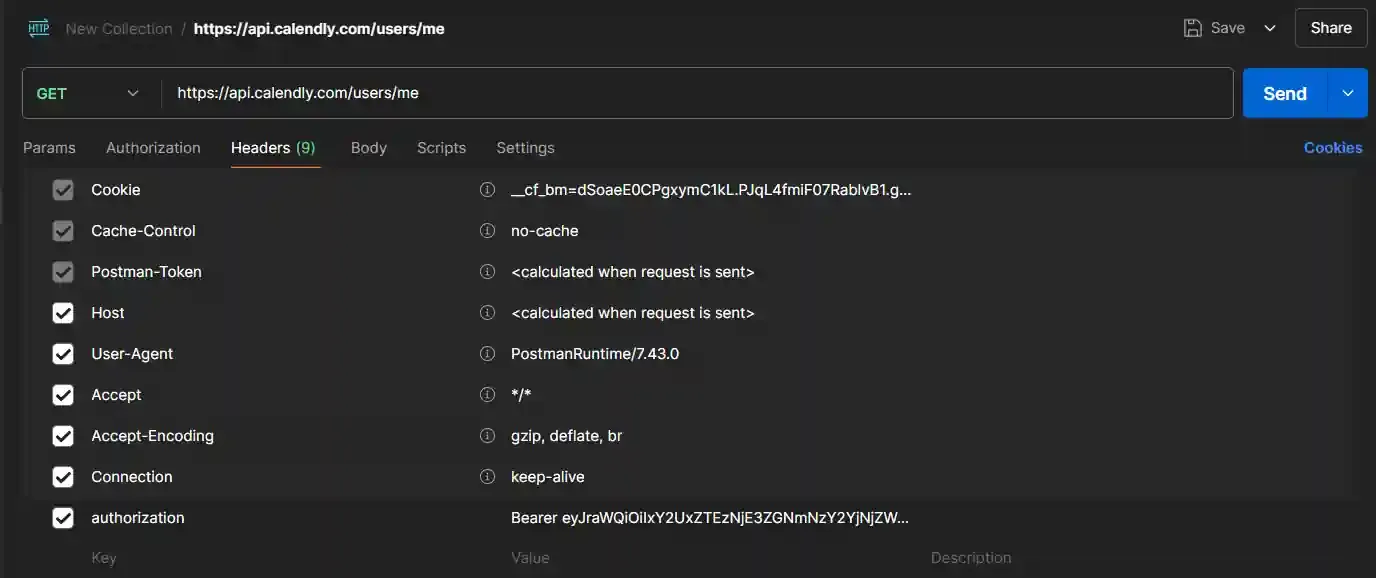
Review the response payload:
uri— your user URIcurrent_organization— your organization URI
Save the organization URI — it is required when creating the webhook subscription.
Step 5: Create a Custom Source in CustomerLabs
Section titled “Step 5: Create a Custom Source in CustomerLabs”CustomerLabs generates a unique webhook URL to receive Calendly booking data.
- In CustomerLabs, navigate to Sources → Connect Source → Custom Source.
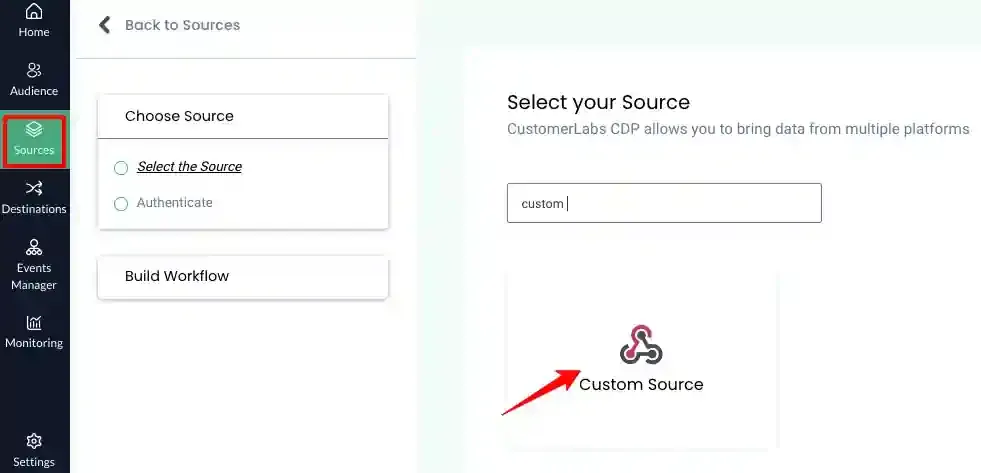
- Name the source (for example,
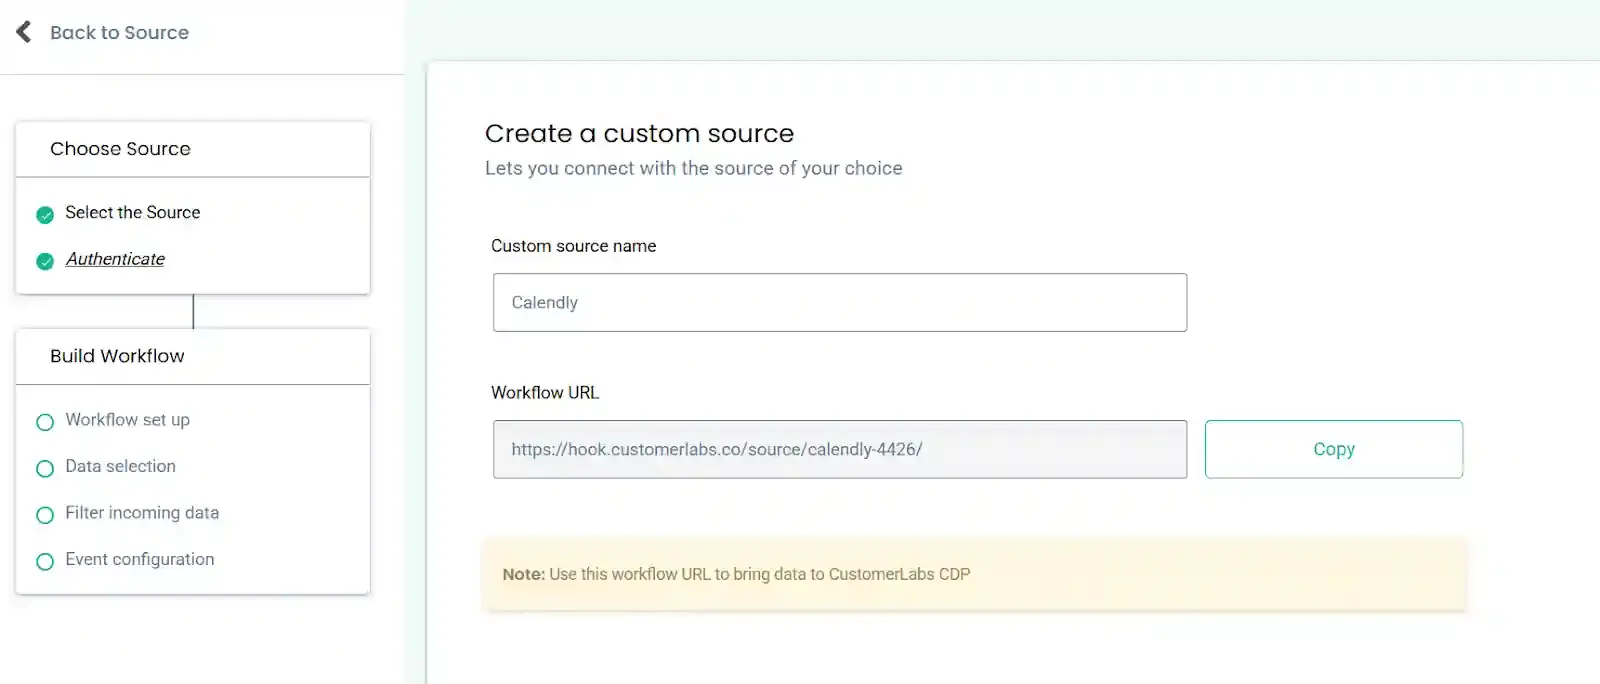
Calendly Integration). - Once created, copy the webhook URL displayed by CustomerLabs. This URL will receive the Calendly booking payloads.
Step 6: Create the Webhook Subscription in Calendly
Section titled “Step 6: Create the Webhook Subscription in Calendly”Use the Calendly API to register the CustomerLabs webhook URL as the endpoint for booking events.
Open Postman, import the following request, and replace the placeholder values as described below:
curl --request POST \ --url https://api.calendly.com/webhook_subscriptions \ --header 'Content-Type: application/json' \ --header 'authorization: Bearer <your personal access token>' \ --data '{ "url": "<CustomerLabs webhook URL>", "events": ["invitee.created", "invitee.canceled"], "organization": "<your organization URI>", "scope": "organization" }'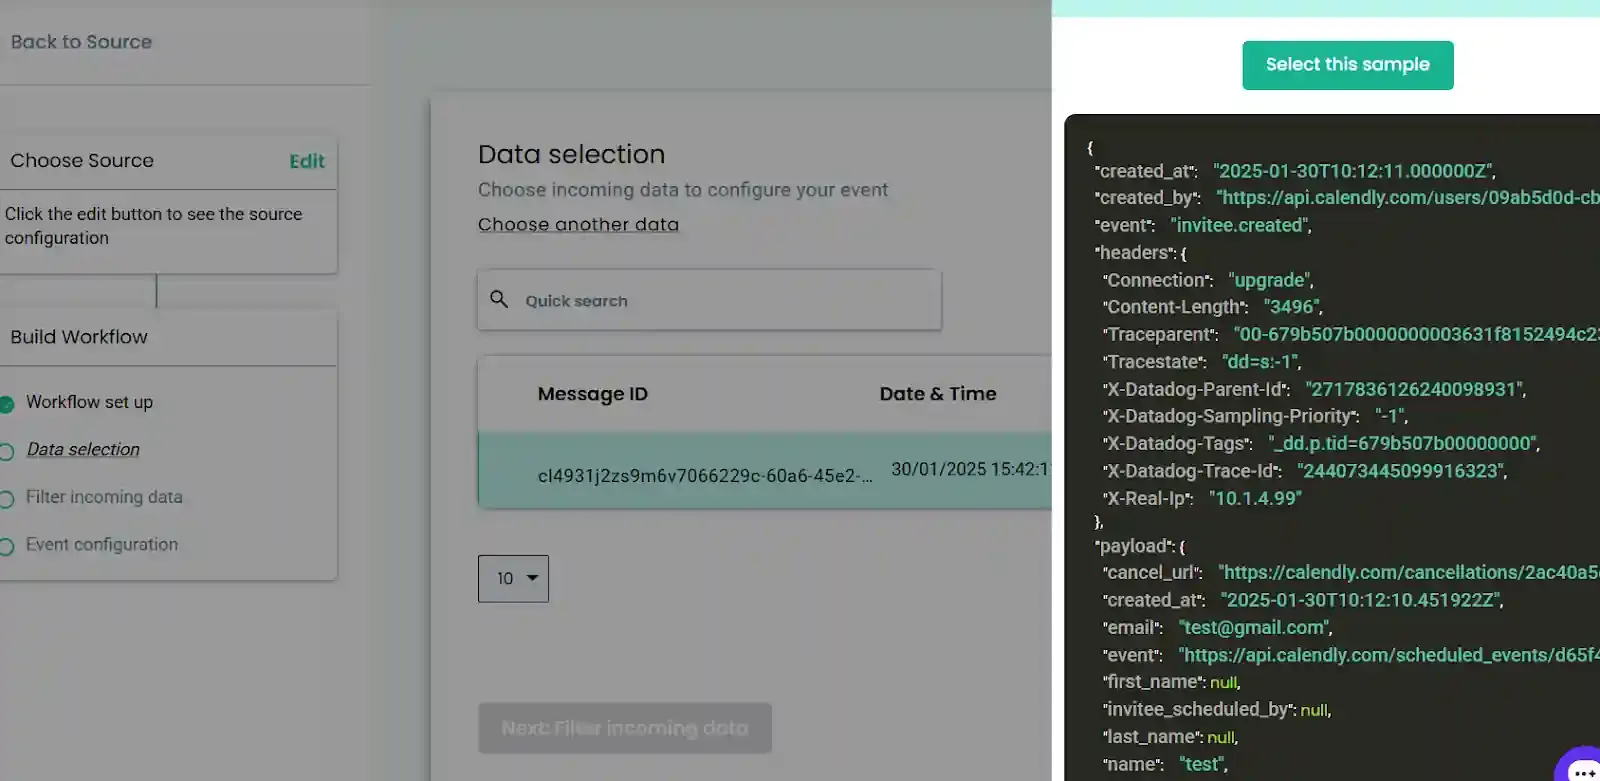
Replace the following values:
<your personal access token>— the API token created in Step 3<CustomerLabs webhook URL>— the webhook URL copied from CustomerLabs in Step 5<your organization URI>— the organization URI retrieved in Step 4
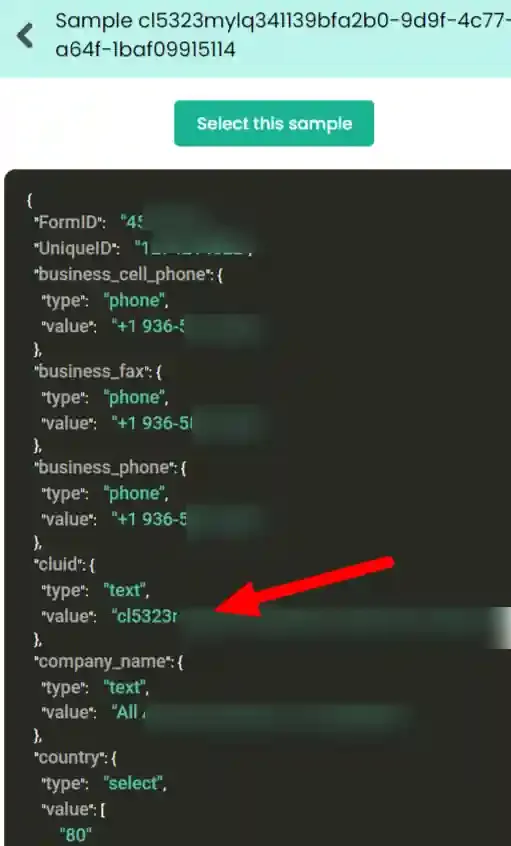
Verify Incoming Data
Section titled “Verify Incoming Data”To test the webhook, book a meeting using your Calendly link. This triggers the invitee.created event and sends the booking payload to your CustomerLabs webhook URL.
In CustomerLabs, navigate to the source and open the incoming data log to verify that the cluid is present in the utm_term field of the received payload. Once confirmed, proceed to configure the workflow.
Configuring a Workflow
Section titled “Configuring a Workflow”A Workflow processes the raw data received from a source and transforms it into structured event data. Workflows apply field mappings, filters, and event configurations. Multiple workflows can be created per source, and each workflow runs continuously, updating user profiles in real time.
Workflow Setup
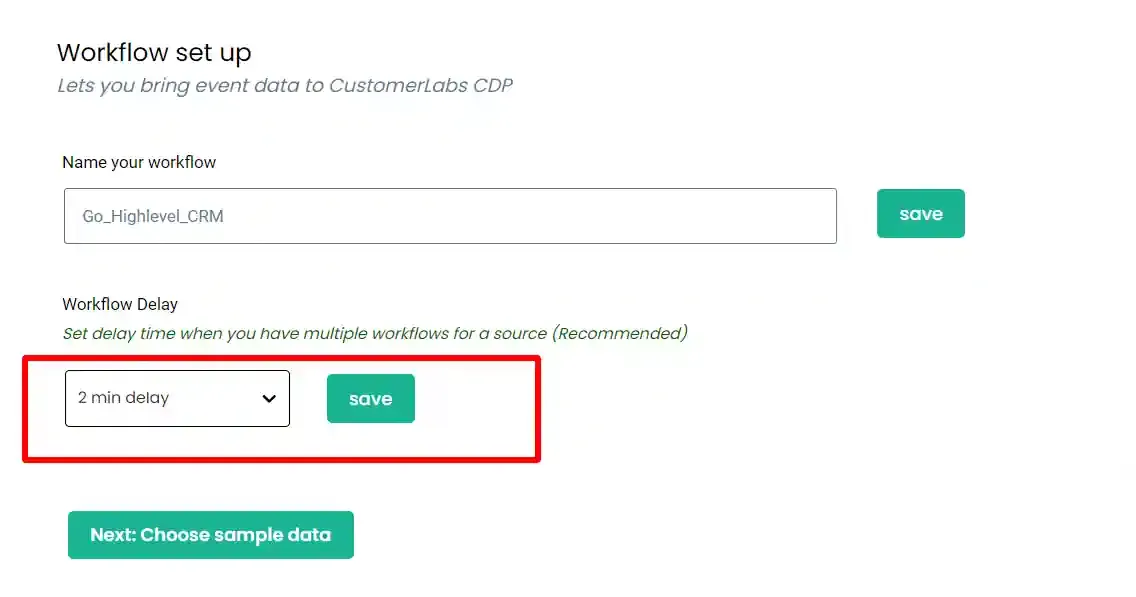
Section titled “Workflow Setup”Naming the Workflow
Section titled “Naming the Workflow”Assign a descriptive name that reflects the data being processed.
Example: A workflow receiving booking data from Calendly can be named
cl_leadsorcalendly_booking.
Workflow Delay
Section titled “Workflow Delay”Configure a workflow delay when multiple workflows are attached to the same source. Without a delay, all workflows receive the incoming payload simultaneously. Under concurrent execution, Customerlabs 1PD Ops may create separate user records across workflows before the first workflow has committed the new user identity to the database. Setting a delay ensures that user identity is resolved before subsequent workflows process the same event.
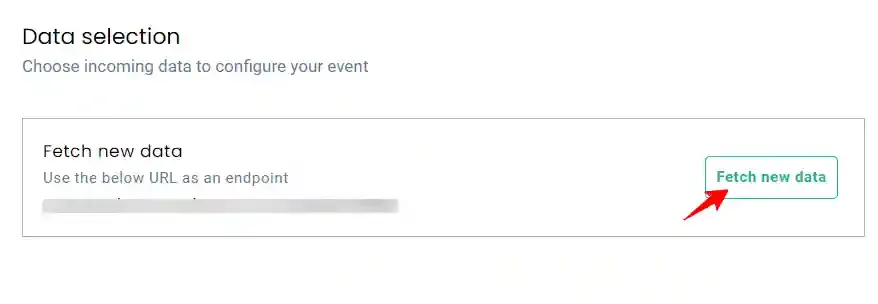
Selecting Sample Data
Section titled “Selecting Sample Data”To configure event mappings, a sample payload must be available. Book a test meeting using your Calendly link to populate the sample data panel. Up to five samples can be fetched at a time.
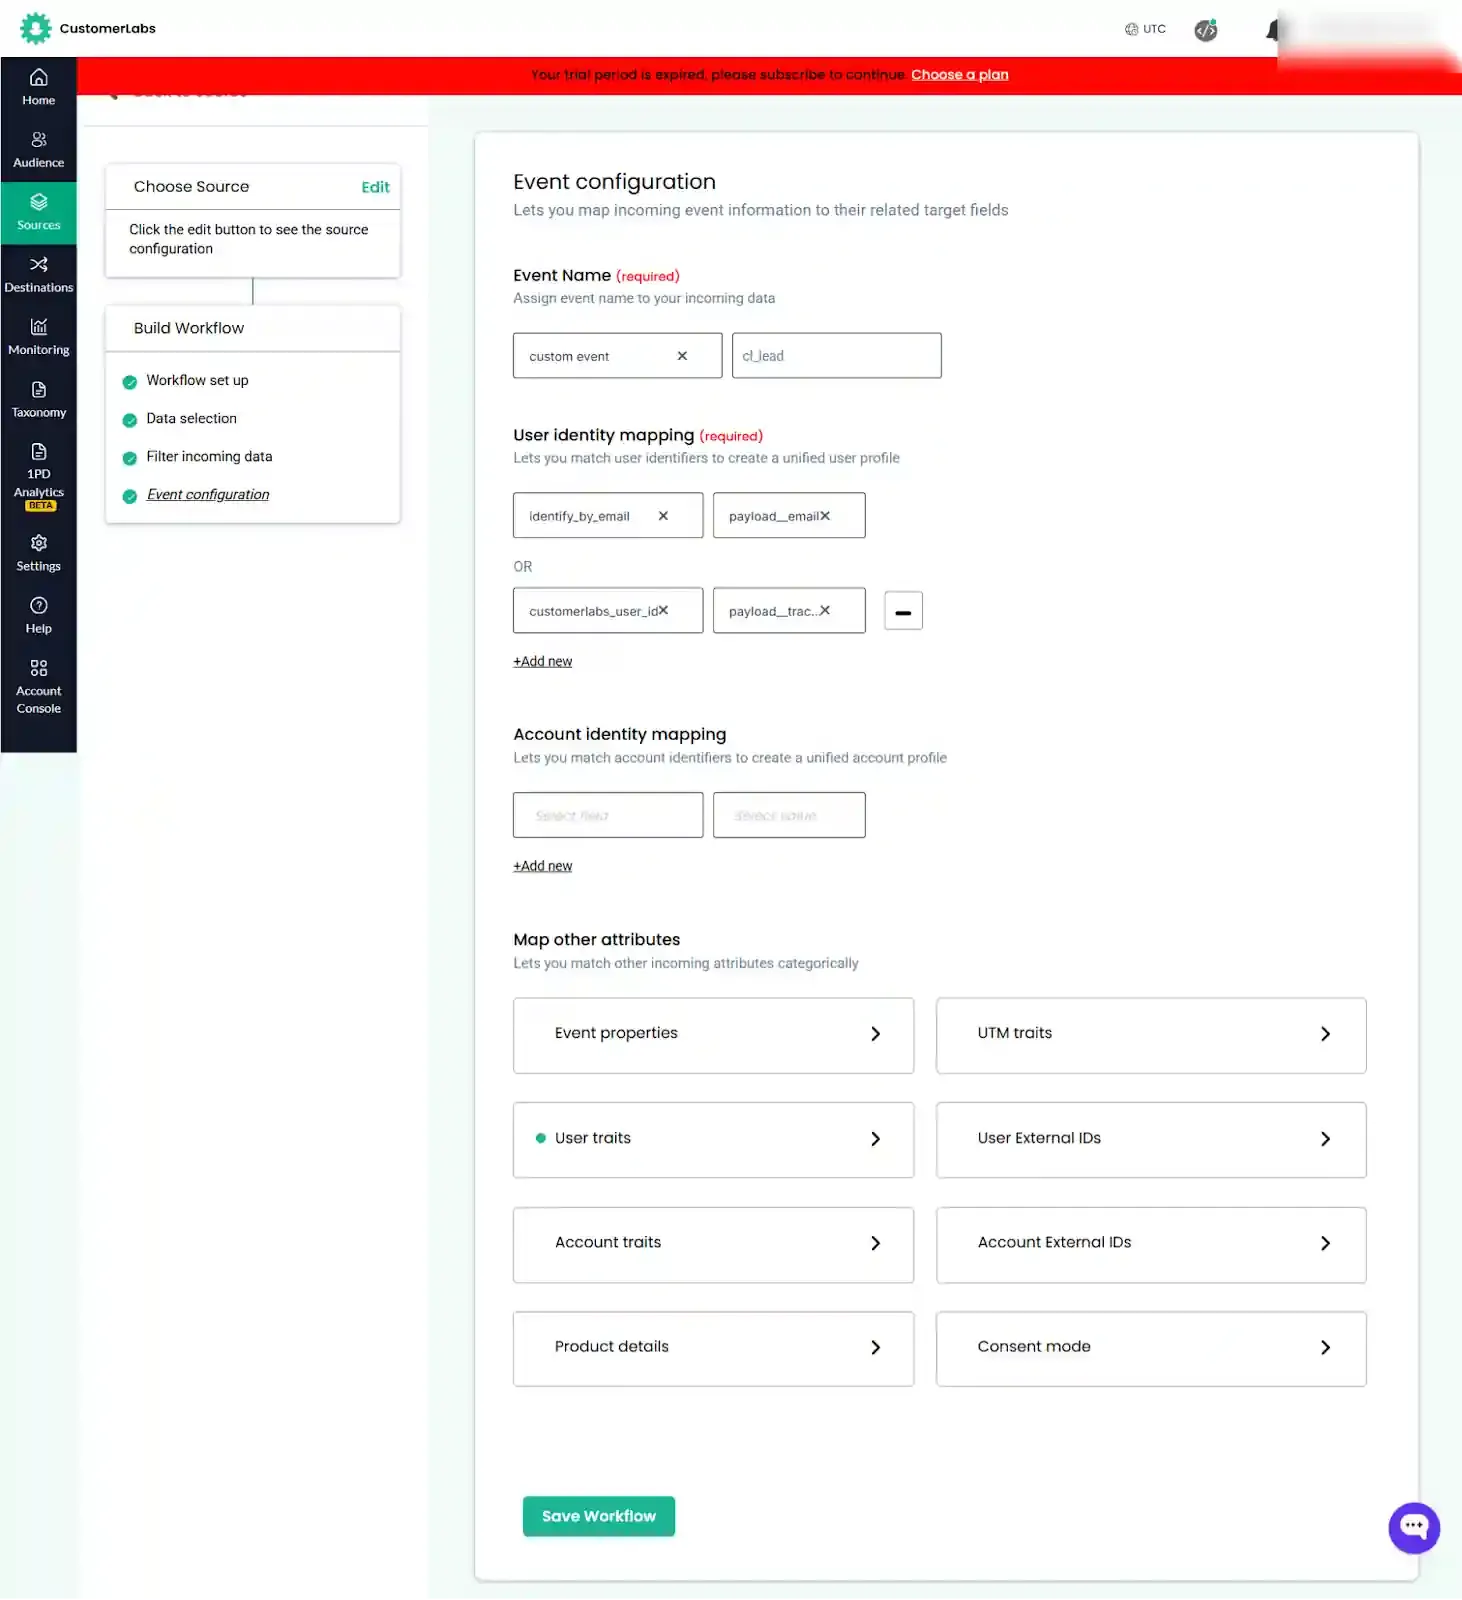
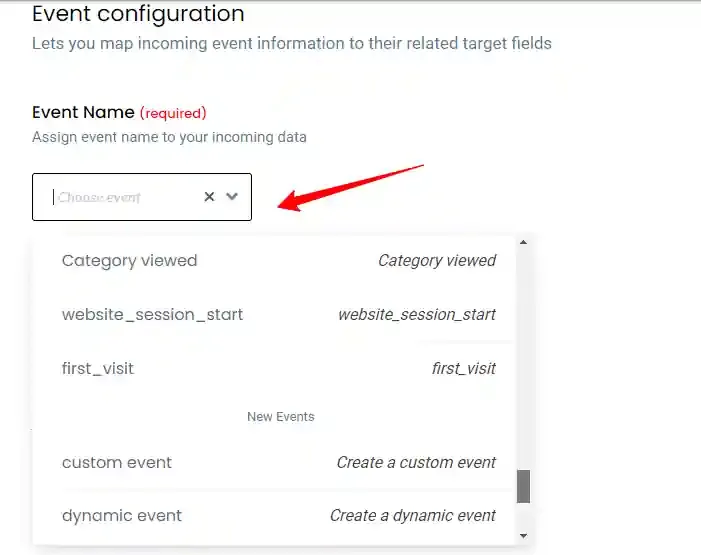
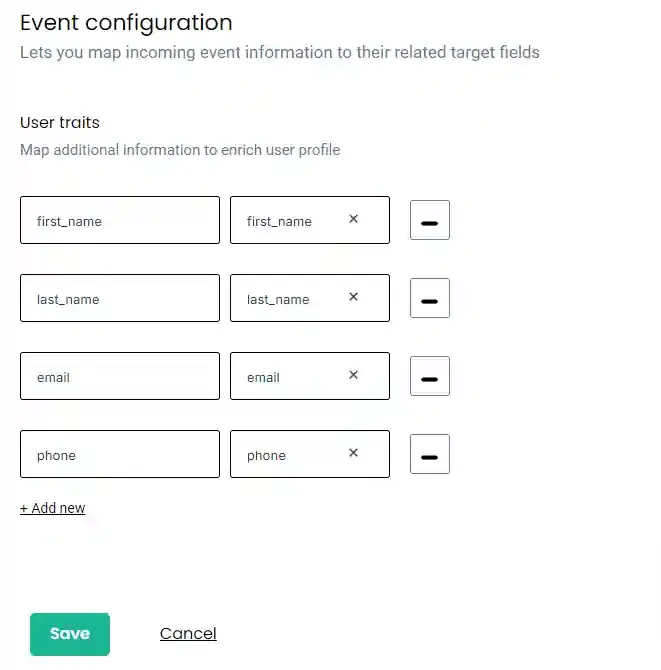
Event Configuration
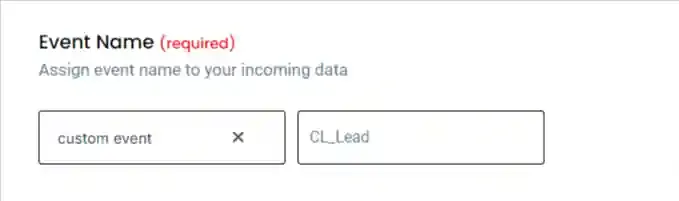
Section titled “Event Configuration”Event Name
Section titled “Event Name”Select the event name from the dropdown or define a custom event name. For Calendly booking submissions, use a custom event name such as cl_leads or cl_booking.
User Identity Mapping
Section titled “User Identity Mapping”Map the cluid from the utm_term field as the primary user identifier. The cluid links the server-side booking event to the originating browser session, enabling unification of browser and server-side events in Customerlabs 1PD Ops.
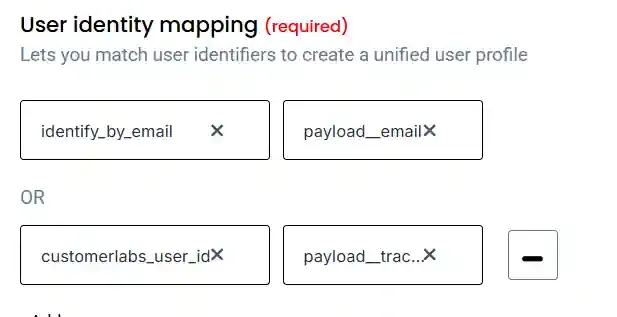
Up to three user identifiers can be configured per workflow, including external IDs. Customerlabs 1PD Ops stores these identifiers to build an enriched, unified user profile.
User Traits
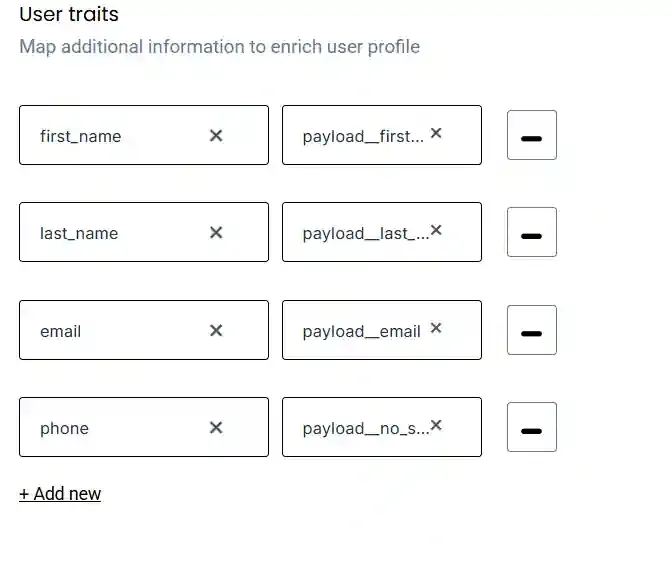
Section titled “User Traits”Map all user-level attributes from the Calendly booking payload under User Traits. These traits are forwarded to connected destinations and are required for accurate audience targeting and personalization.
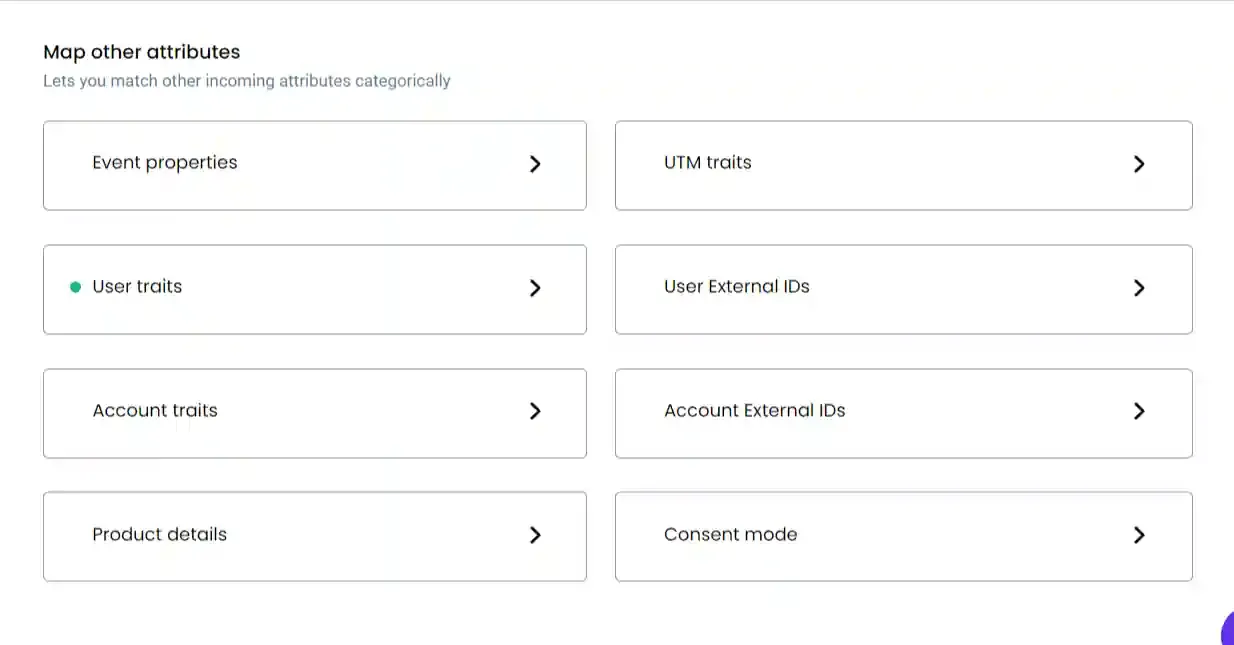
Common traits to map include first_name, last_name, email, and phone. For destination-specific requirements — such as forwarding an email address to an email platform like Klaviyo — the relevant trait must be explicitly mapped in this section.
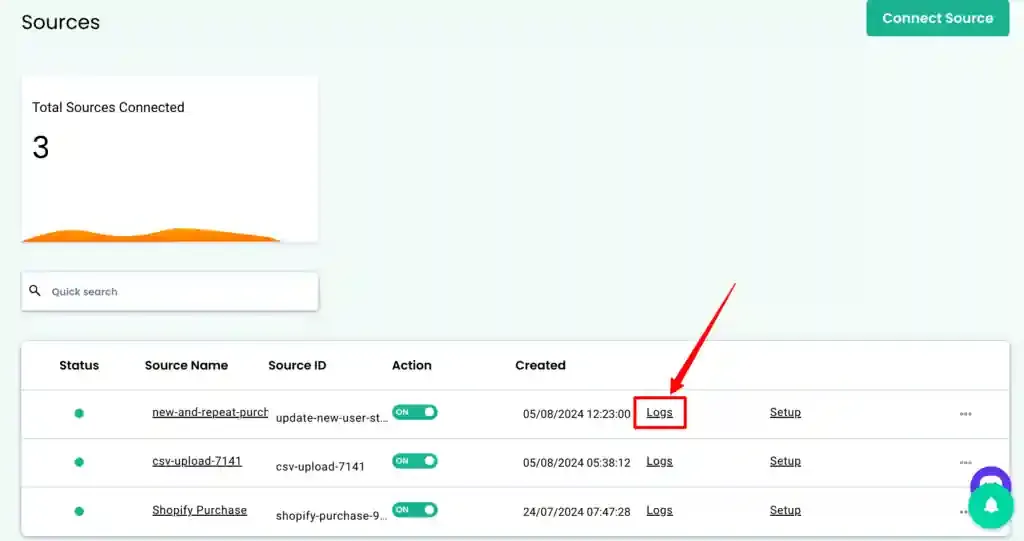
Source Logs
Section titled “Source Logs”Source Logs record all payloads received by the source webhook prior to workflow processing. Logs may have a display latency of up to 10 minutes. Access logs by navigating to the source and clicking Logs.
Each inbound message is assigned a unique message ID for traceability across workflows and the event manager.
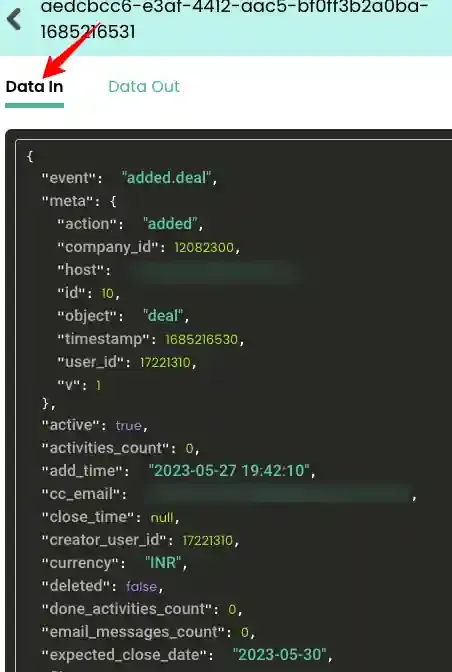
Data In Log
Section titled “Data In Log”Displays the raw payload received from the Calendly webhook in JSON format.
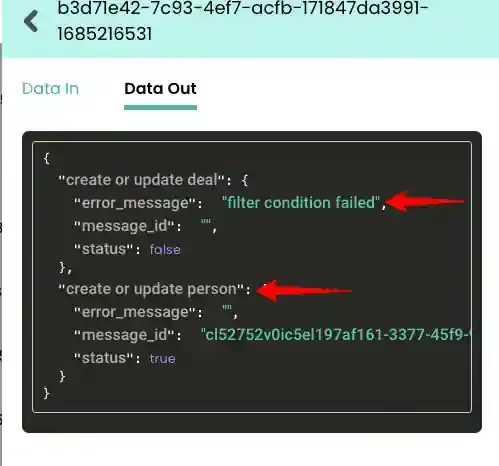
Data Out Log
Section titled “Data Out Log”Displays the processed payload forwarded to configured workflows, along with the generated message ID.
Workflow Logs
Section titled “Workflow Logs”Each workflow maintains its own log, showing how incoming events are transformed — including user traits, event attributes, group traits, external IDs, and group identities.
Workflow Status Messages
Section titled “Workflow Status Messages”The following status messages may appear in the Data Out log:
| Status | Description |
|---|---|
| Mapping not found | The workflow is in draft mode and has not been published. |
| Filter condition failed | The incoming event did not satisfy the configured filter criteria and was not processed. |
| User ID missing / Account ID missing | The payload does not contain a required user or account identity field. The event will not be processed further. |
| Data not found | The event is still being processed. Under high load, processing may take up to 10 minutes. |
Destinations
Section titled “Destinations”Once events are processed through workflows, the resulting data can be forwarded to connected third-party destinations to support advertising, analytics, and marketing automation use cases.