CustomerLabs + Google Sheets Integration
Google Sheets lets you create, edit, and collaborate on spreadsheets—anywhere, for free. The CustomerLabs Action Recorder can export your event data directly to Google Sheets with a single click, without writing any code.
Prerequisites
Section titled “Prerequisites”Before you begin, make sure you have:
- An active CustomerLabs account
- A Google account with access to Google Sheets
- A Google Sheet (spreadsheet) ready to receive event data
Connect Google Sheets to CustomerLabs
Section titled “Connect Google Sheets to CustomerLabs”Follow these steps to authorize your Google account and enable the Google Sheets destination in CustomerLabs.
-
Log in to your CustomerLabs account.
-
Navigate to the Destinations section from the home page. You will be redirected to the Destinations page.
-
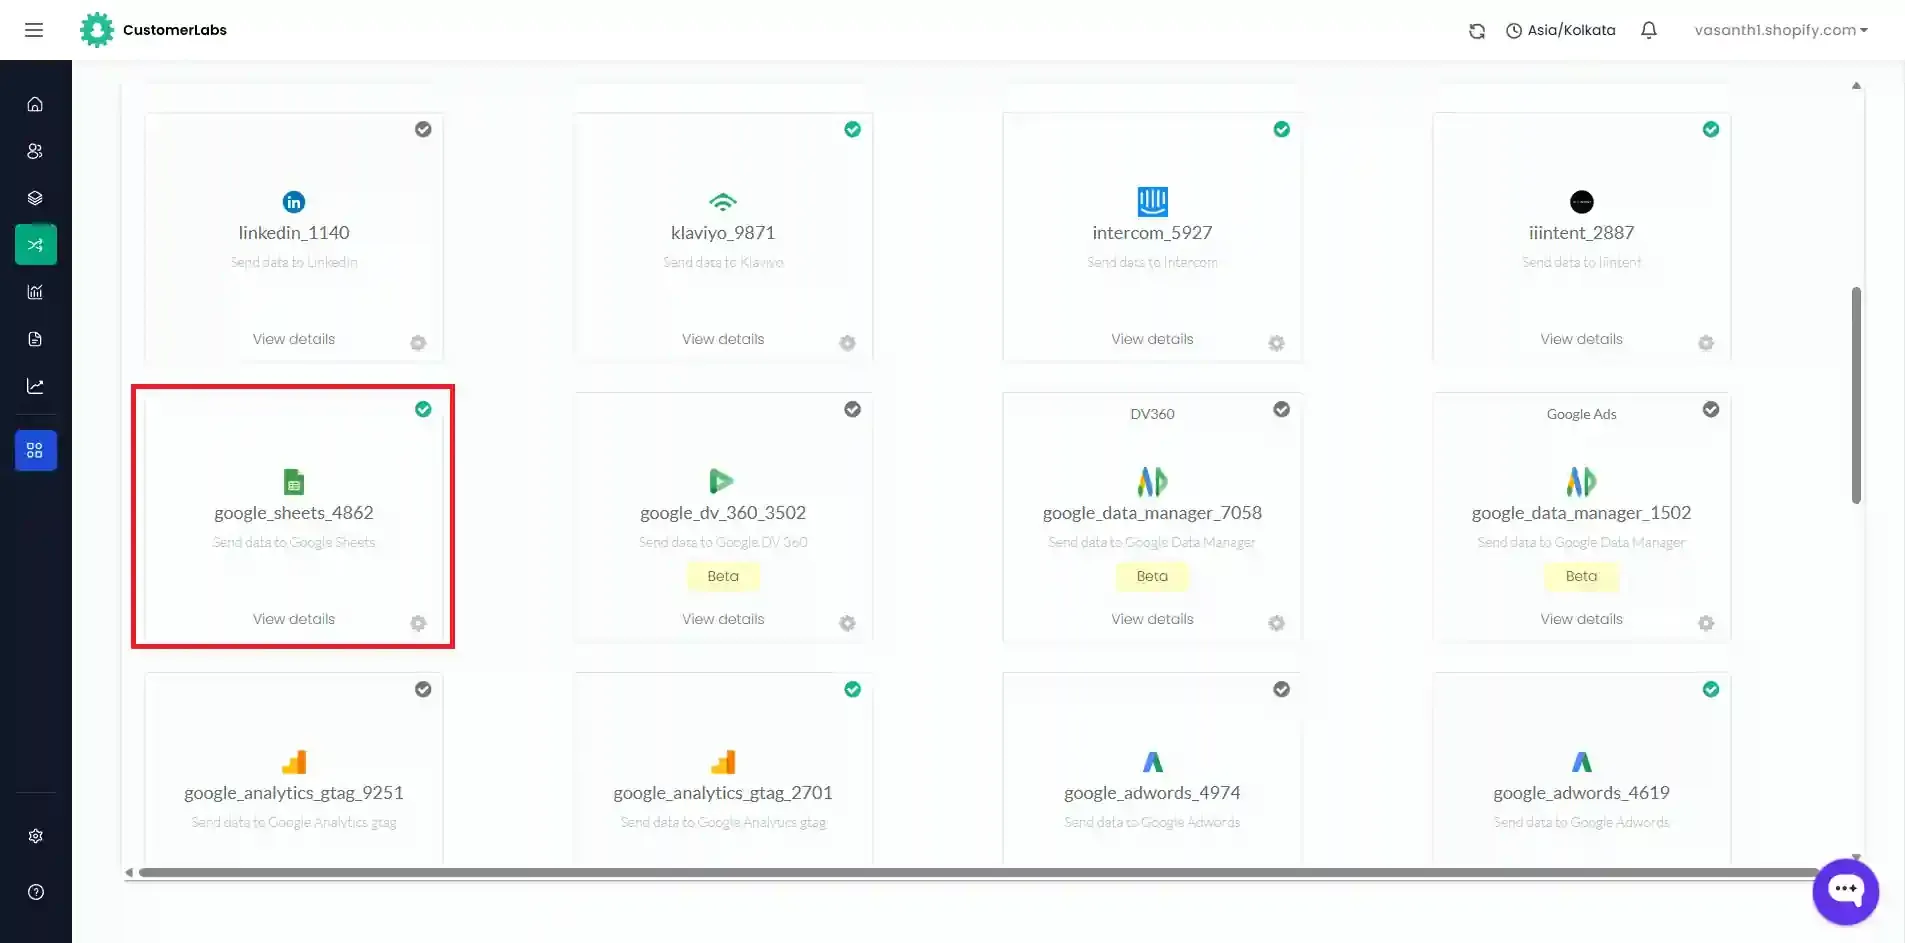
Go to All Destinations and select Google Sheets from the list.
-
A pop-up screen will appear.
-
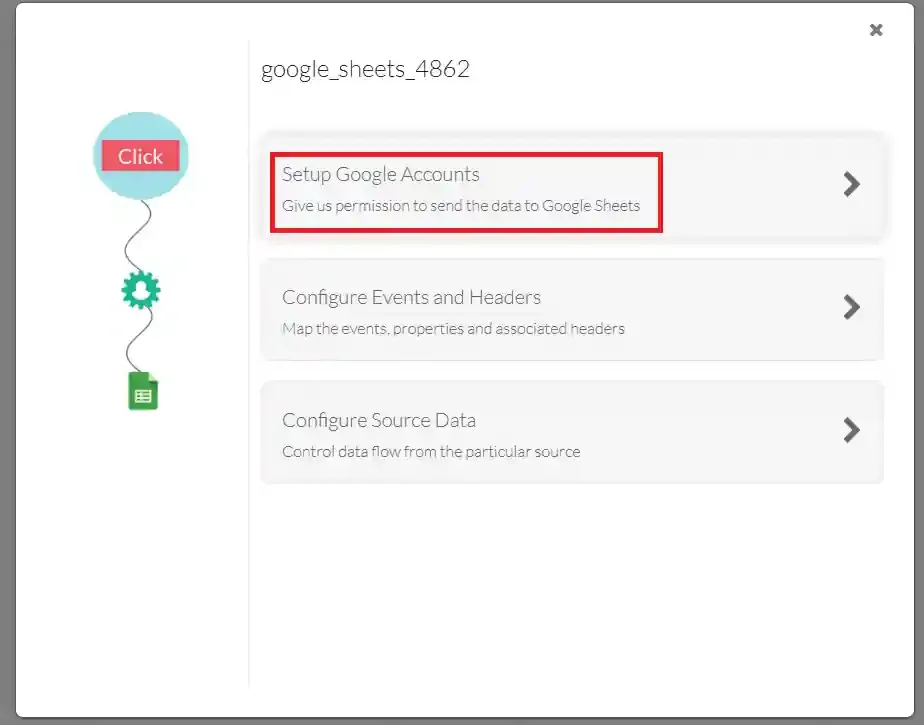
Click Save and Enable, then click Setup Google Accounts.
-
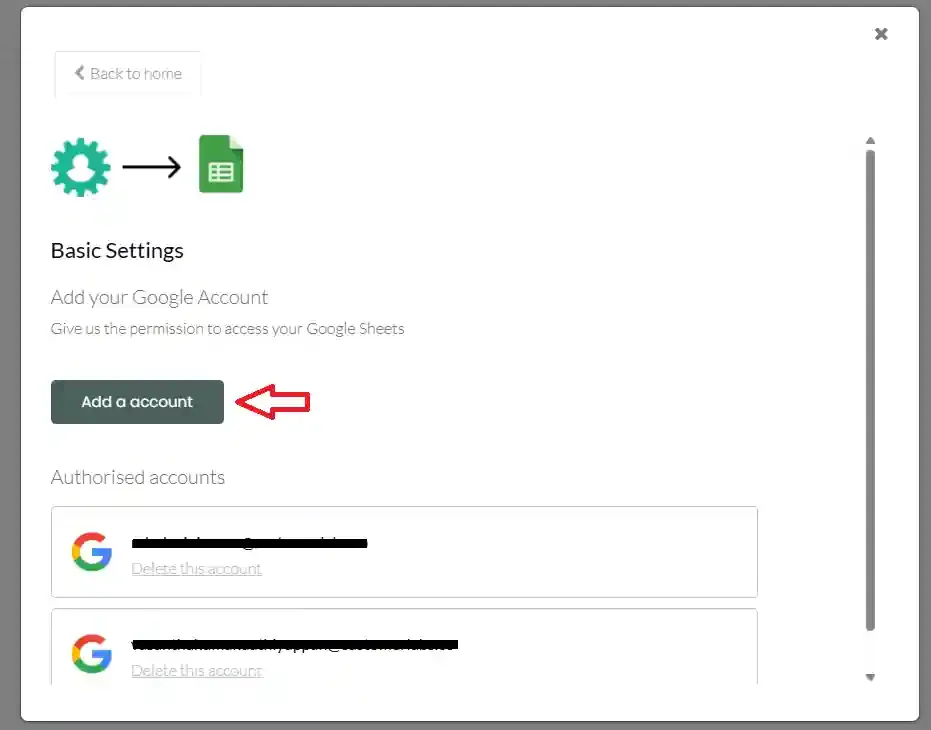
Click Add an Account.
-
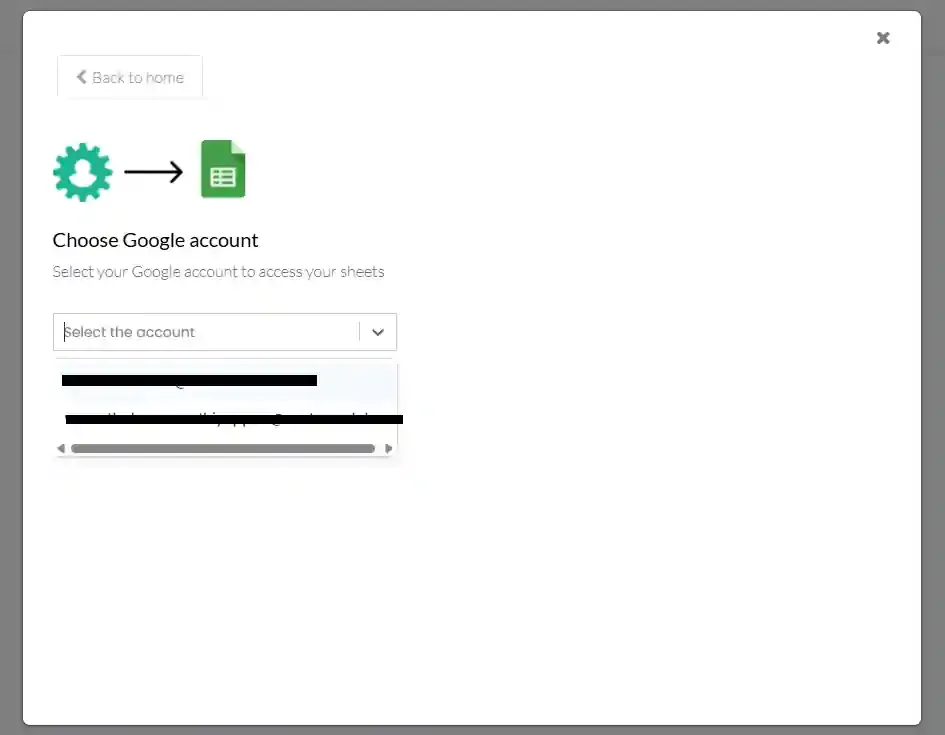
Choose the Google account you would like to link with CustomerLabs.
-
CustomerLabs will request permission to access your Google account. Click Allow to grant access.
-
Once permission is granted, your chosen Google account will appear under the Authorised Google Accounts section.
-
You have now successfully connected Google Sheets with CustomerLabs.
Configure Event Headers and Add Events to Sheets
Section titled “Configure Event Headers and Add Events to Sheets”After authorizing your Google account, the next step is to configure which events to sync and map event properties to your sheet headers.
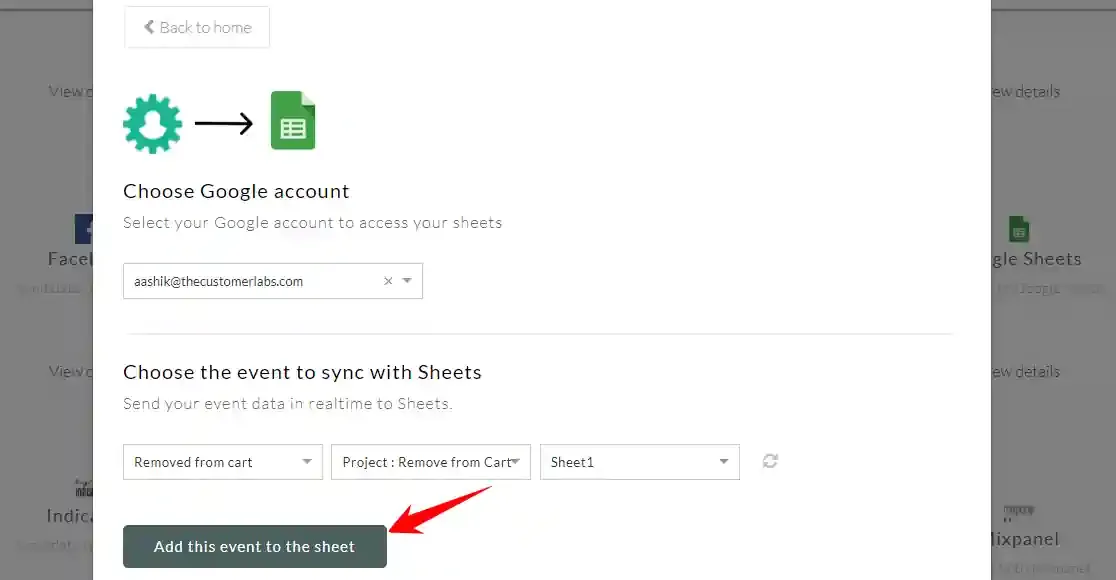
Part 1 — Choose an Event to Sync
Section titled “Part 1 — Choose an Event to Sync”-
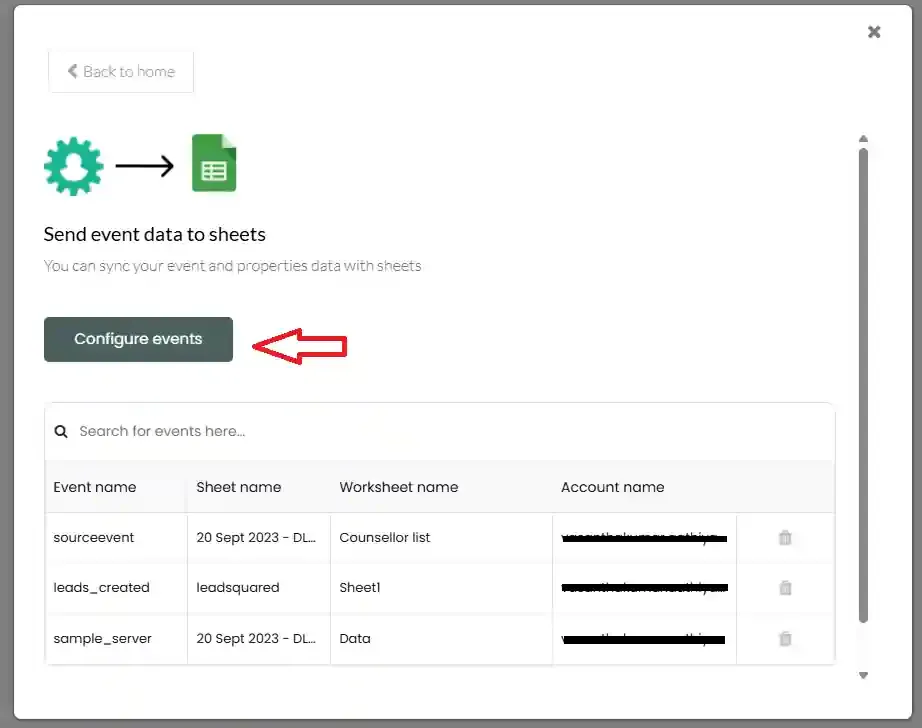
Click Configure Events and Headers from the Google Sheets customization screen.
-
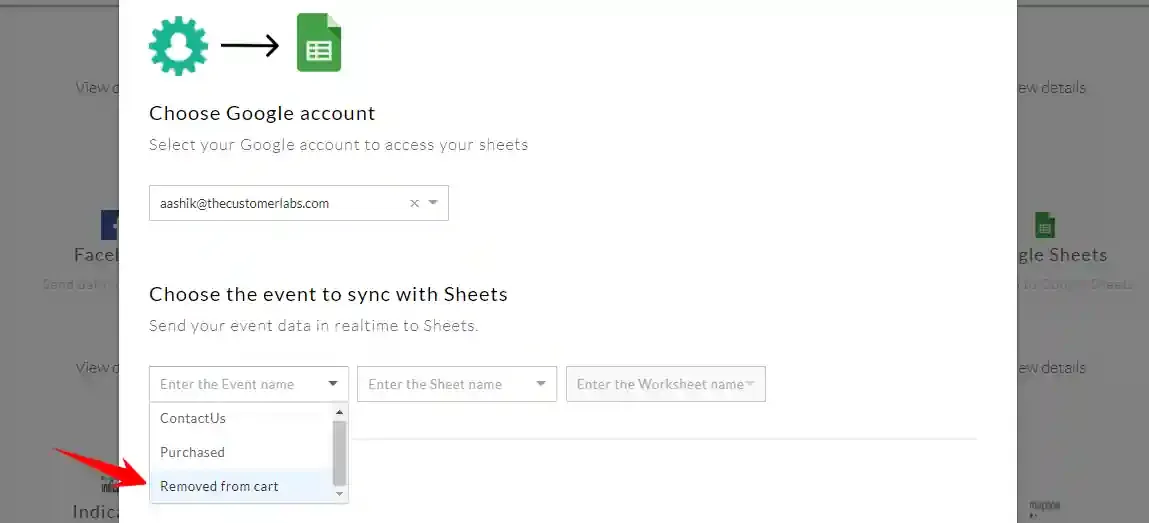
Select your preferred Google account to access your sheets.
-
Choose the event you would like to sync with Google Sheets.
- For example, select the Removed from Cart event.
-
Choose the Google Sheet (spreadsheet) where you want to send the event data.
-
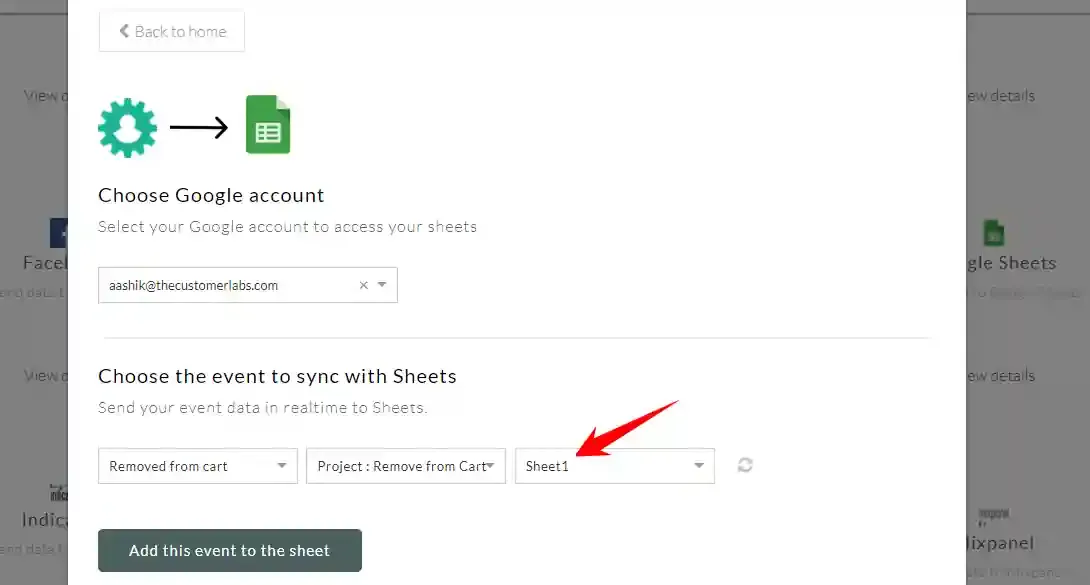
Select the worksheet name (e.g.,
Sheet 1) within that spreadsheet.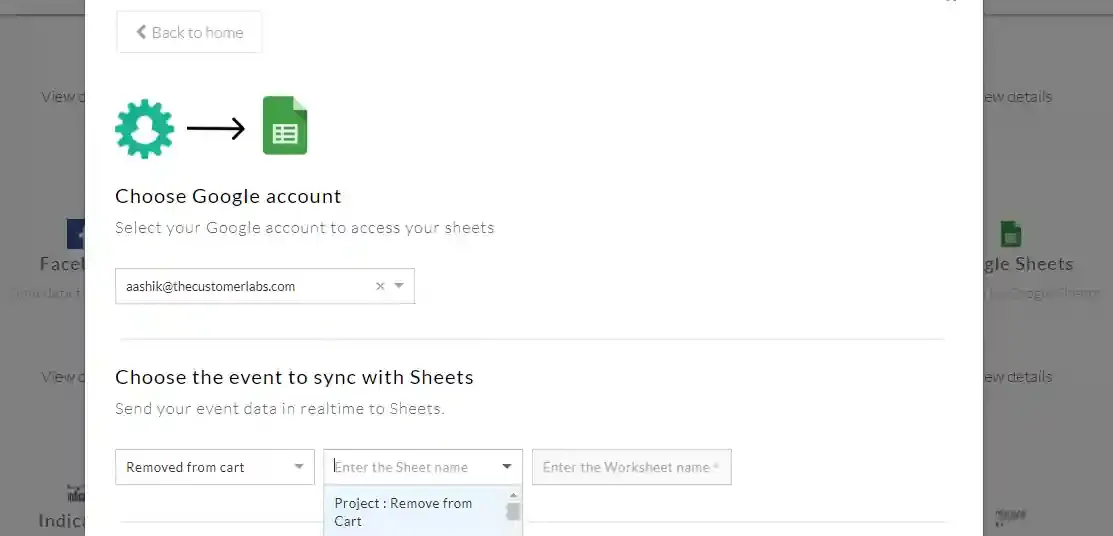
-
Click Add this event to the sheet to confirm.
Part 2 — Map Event Properties to Sheet Headers
Section titled “Part 2 — Map Event Properties to Sheet Headers”-
In your Google Sheet, add column headers for easier reference (e.g.,
Product Name,Price,Location).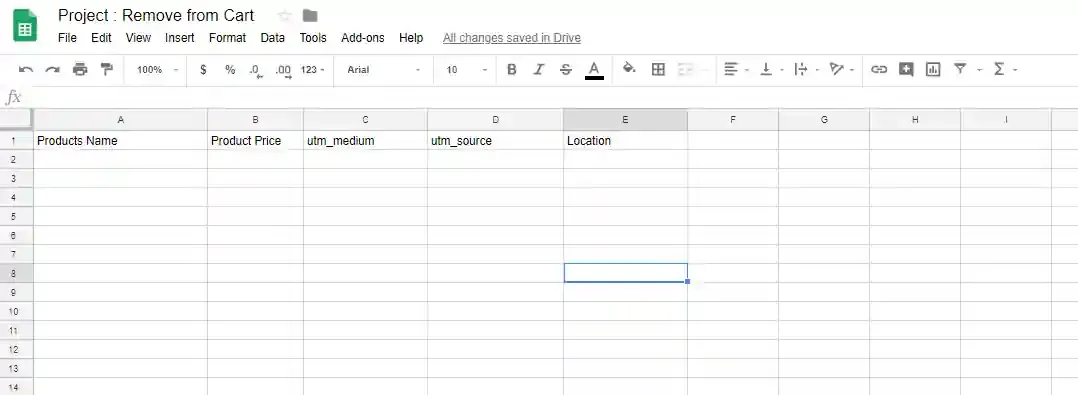
-
Return to the CustomerLabs Action Recorder customization screen.
-
For each event property, select the corresponding sheet header to map it to.
-
Click Add Mapping once the property and header are paired.

-
Repeat for all the event properties you want to appear in the sheet.
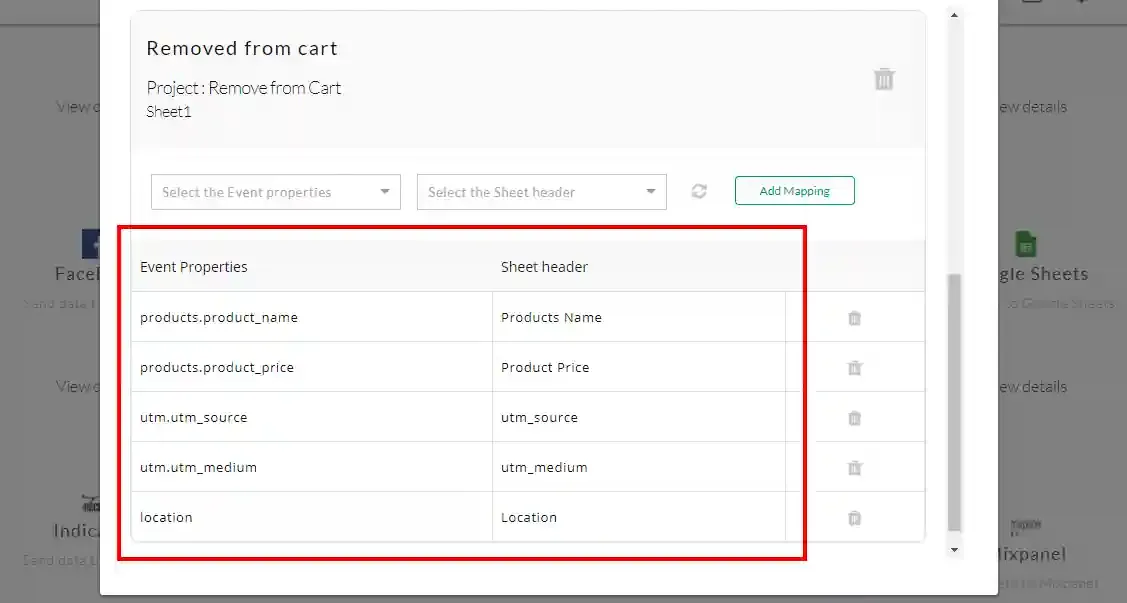
Example: Field Mapping
Section titled “Example: Field Mapping”| Event Property | Sheet Header |
|---|---|
product_name | Product Name |
price | Price |
location | Location |
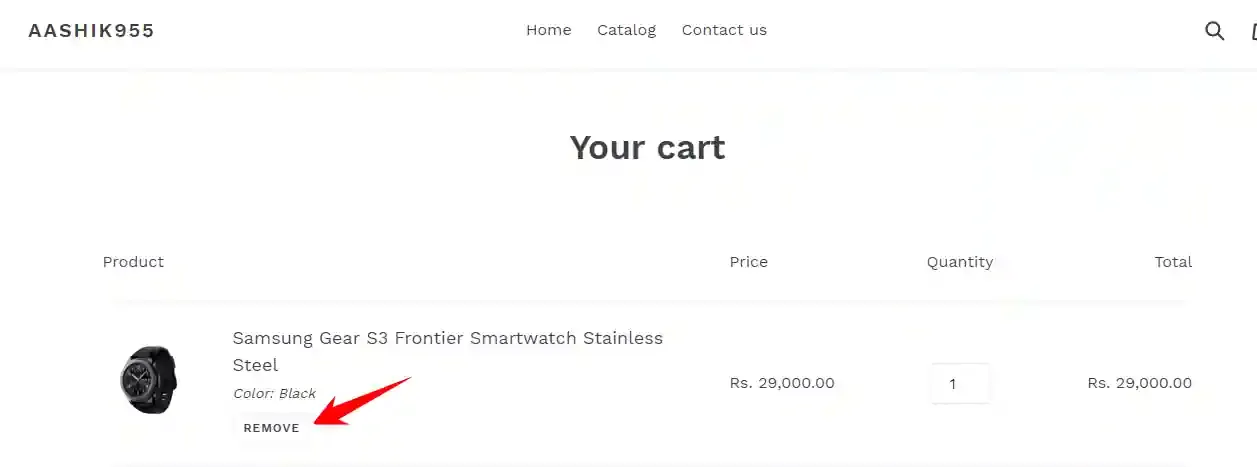
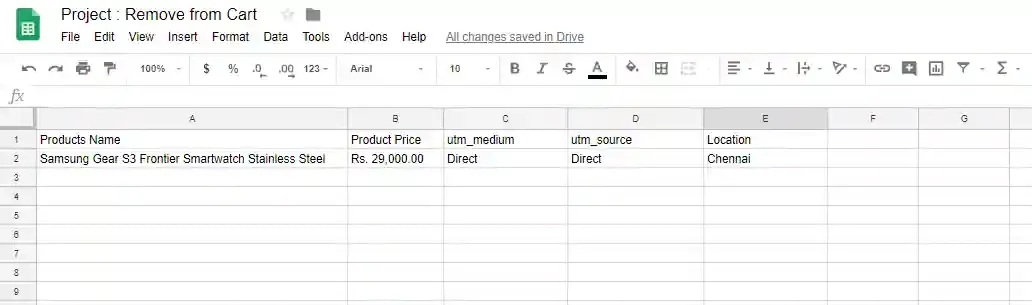
Part 3 — Test Your Event Data
Section titled “Part 3 — Test Your Event Data”-
Open your website and trigger the event you configured (e.g., remove an item from the cart to fire the Removed from Cart event).
-
Return to your Google Sheet and verify the data.
-
The event data from the performed action on your website should now appear in the sheet.
Summary
Section titled “Summary”You have now successfully integrated Google Sheets with CustomerLabs. You can begin sending your preferred event data to Google Sheets automatically using CustomerLabs.
Quick Reference
Section titled “Quick Reference”| Step | Description |
|---|---|
| Connect Google Account | Authorize your Google account under Destinations → Google Sheets |
| Choose Event | Select which event to sync to the sheet |
| Select Sheet & Worksheet | Pick the target Google Sheet and worksheet name |
| Map Fields | Map event properties to column headers in your sheet |
| Test | Trigger the event on your website and verify data in the sheet |
Troubleshooting
Section titled “Troubleshooting”If you encounter any issues during setup or while syncing events, contact the CustomerLabs support team:
📧 Email: [email protected]