Google Analytics 4 Integration
Google Analytics 4 (GA4) helps you understand how visitors engage with your website — from page views and clicks to conversions and user journeys. By integrating CustomerLabs with GA4, you can leverage enriched first-party data to improve goal tracking, funnel analysis, attribution modeling, and audience building.
Prerequisites: Set Up Google Analytics 4
Section titled “Prerequisites: Set Up Google Analytics 4”Before connecting to CustomerLabs, you need a GA4 property and a Web Data Stream to obtain your Measurement ID. Skip this section if you already have both.
Create a GA4 Property
Section titled “Create a GA4 Property”-
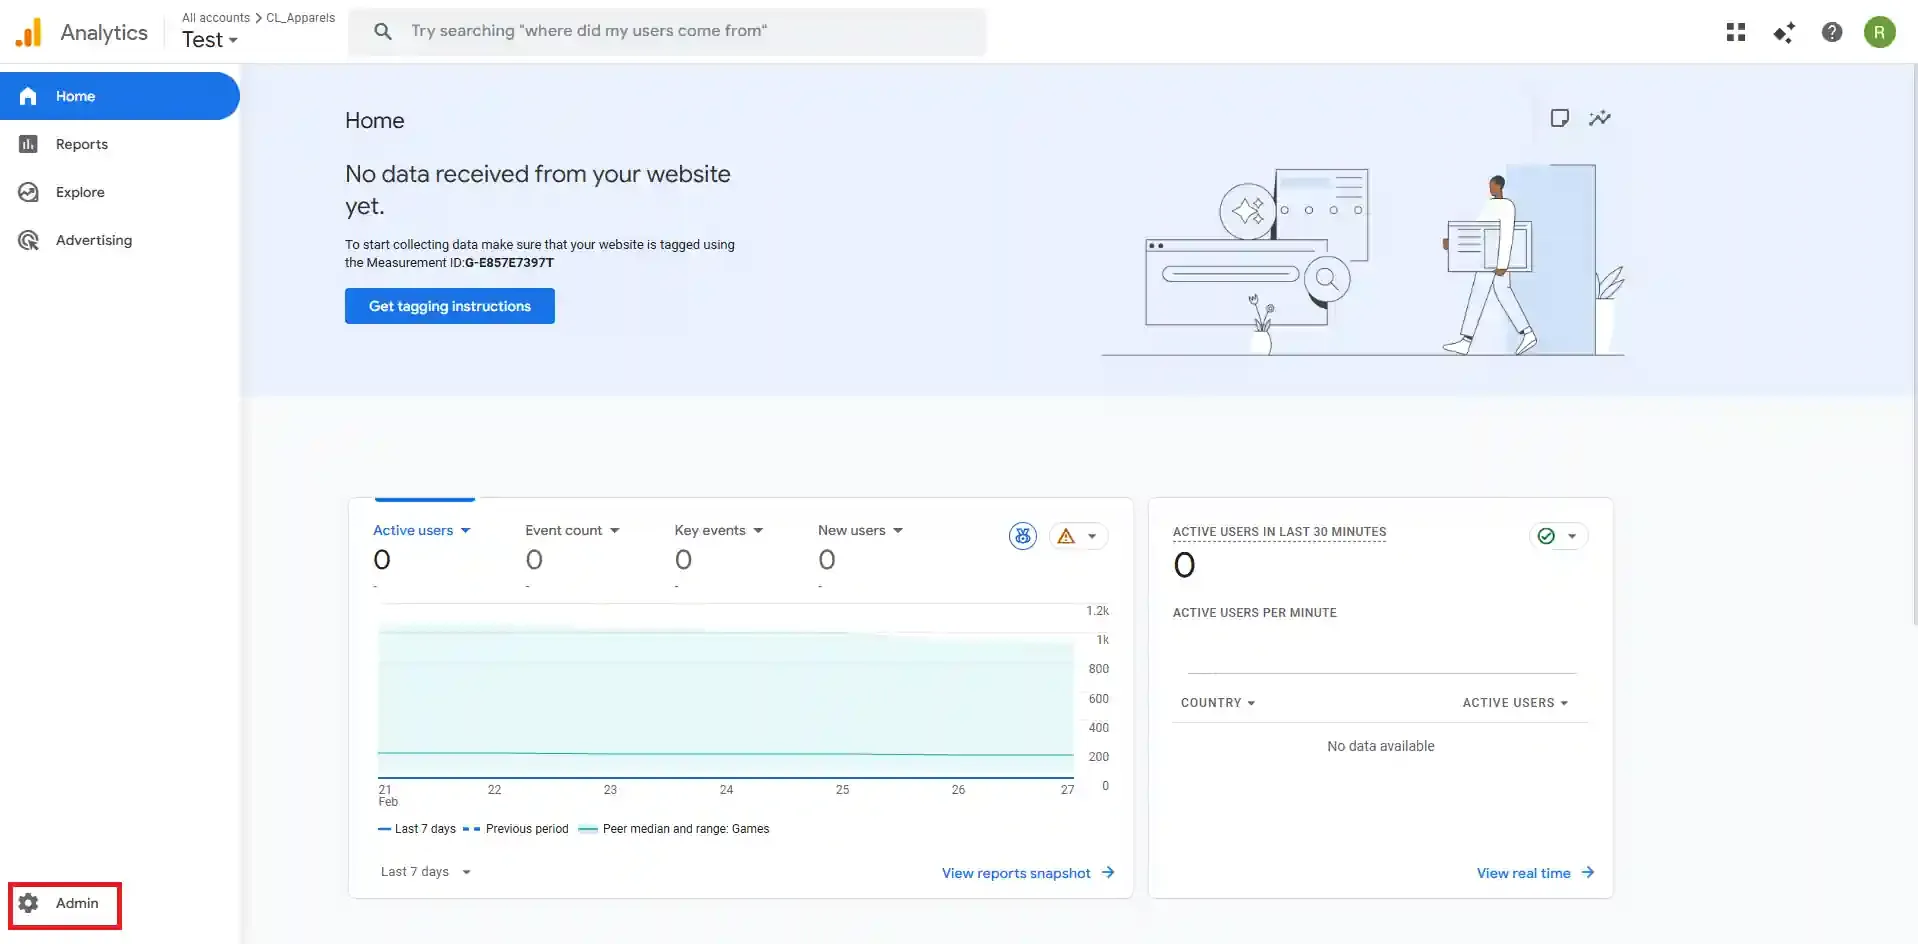
Log in to your Google Analytics account.
-
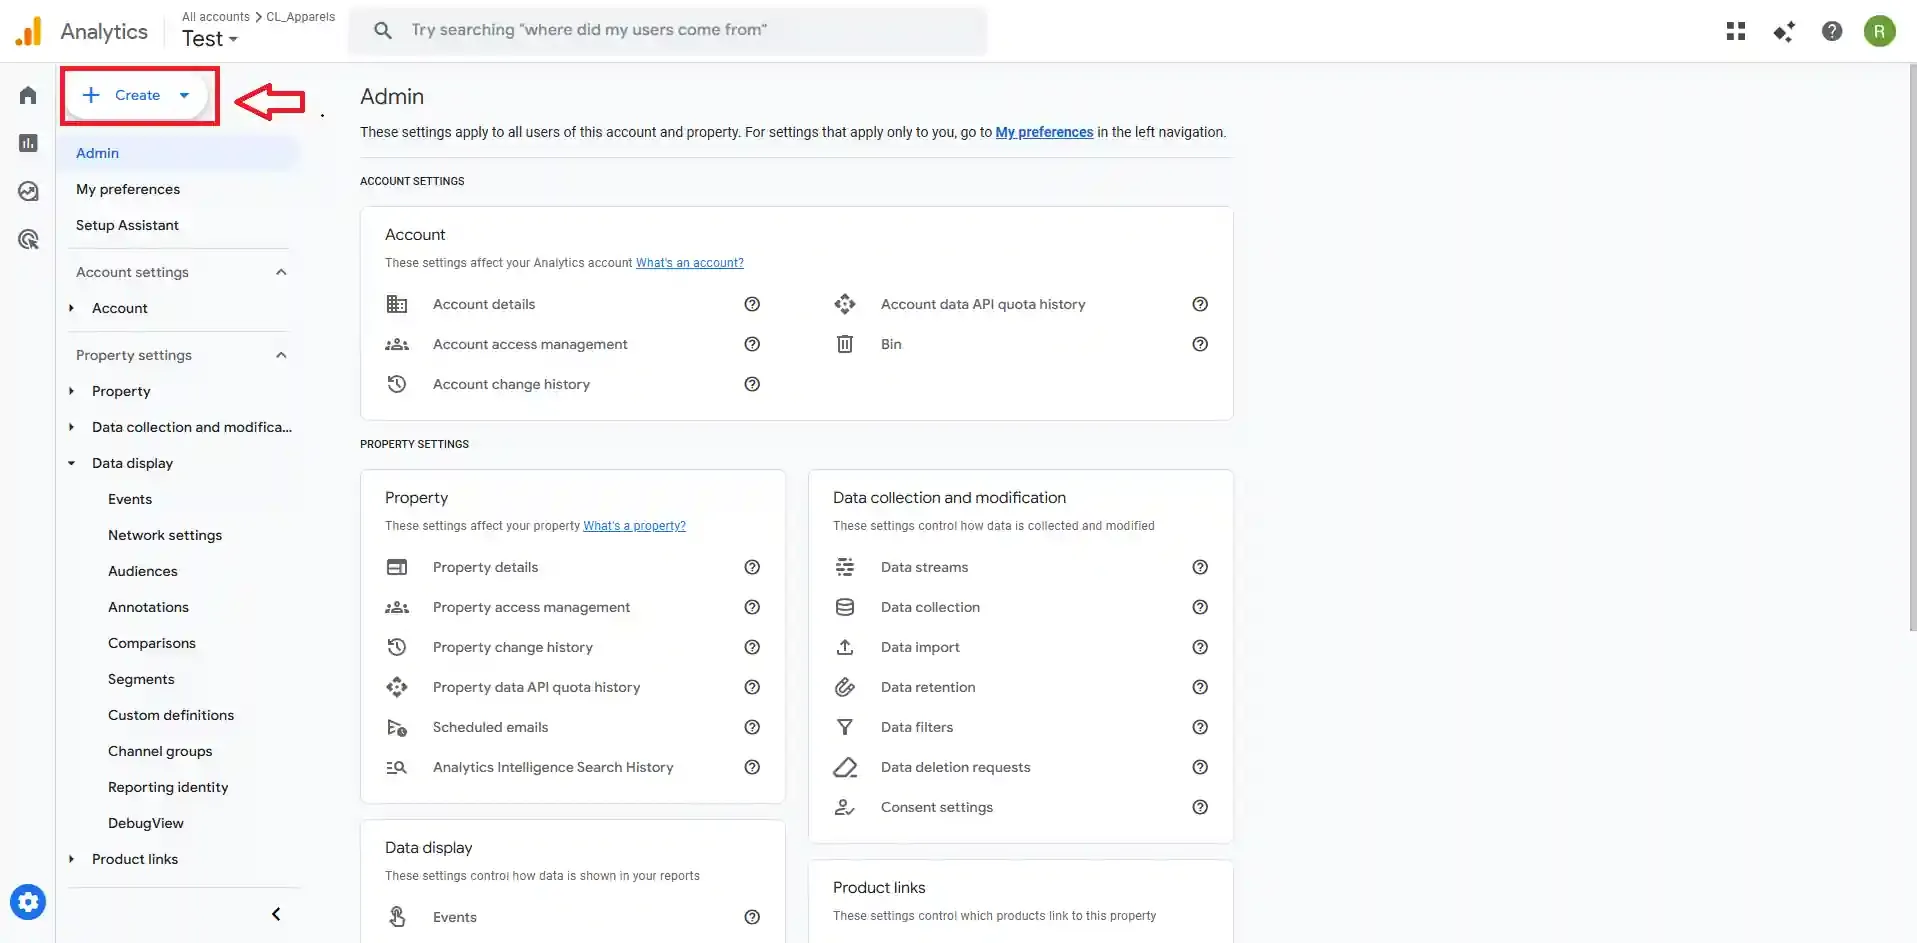
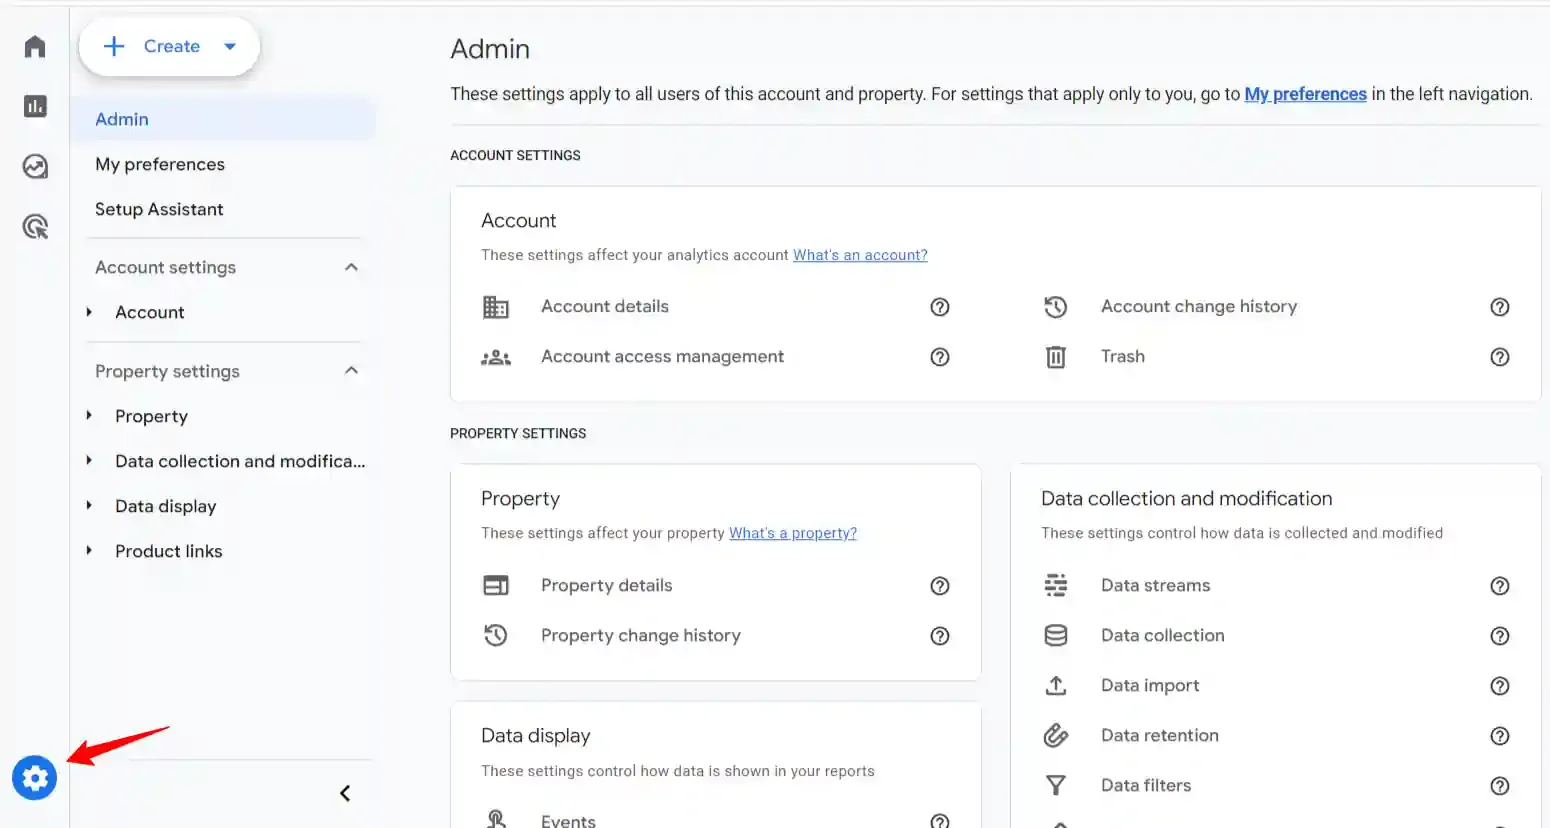
Click the Admin (gear) icon at the bottom of the left sidebar.
-
Click + Create and select Property.

-
Enter the Property name, Timezone, and Currency, then click Next.

-
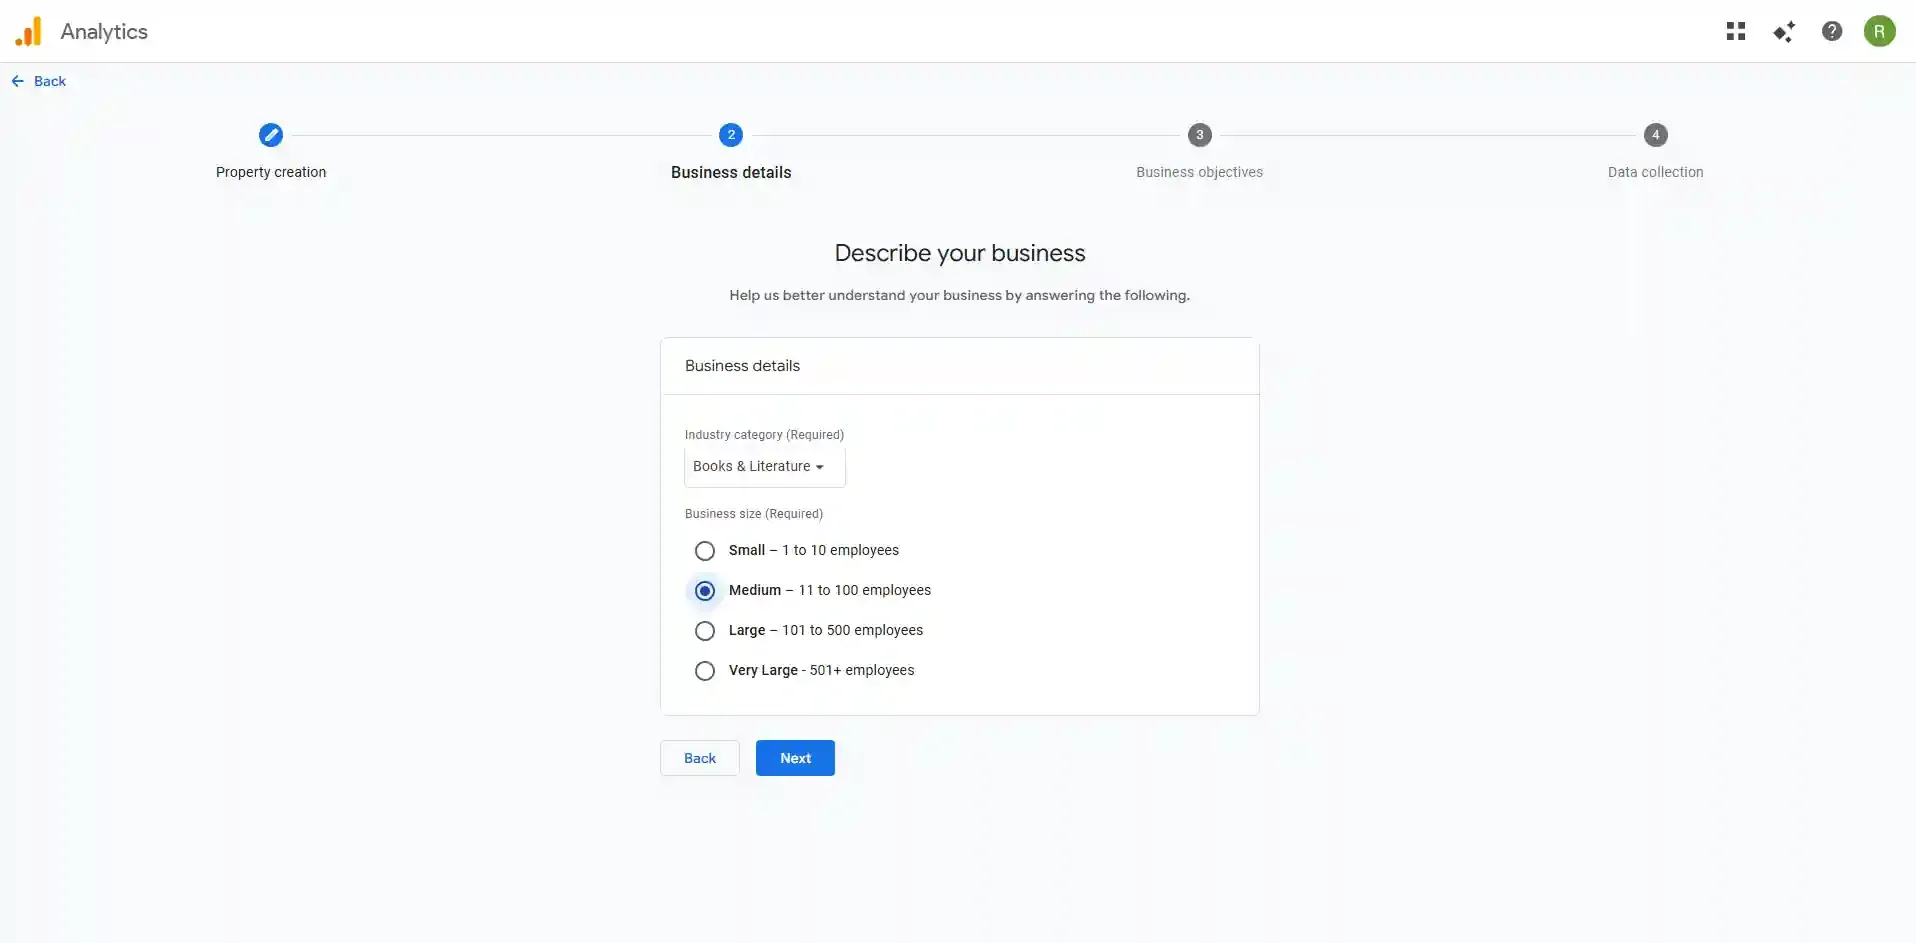
Select your Industry category and Business size, then click Next.
-
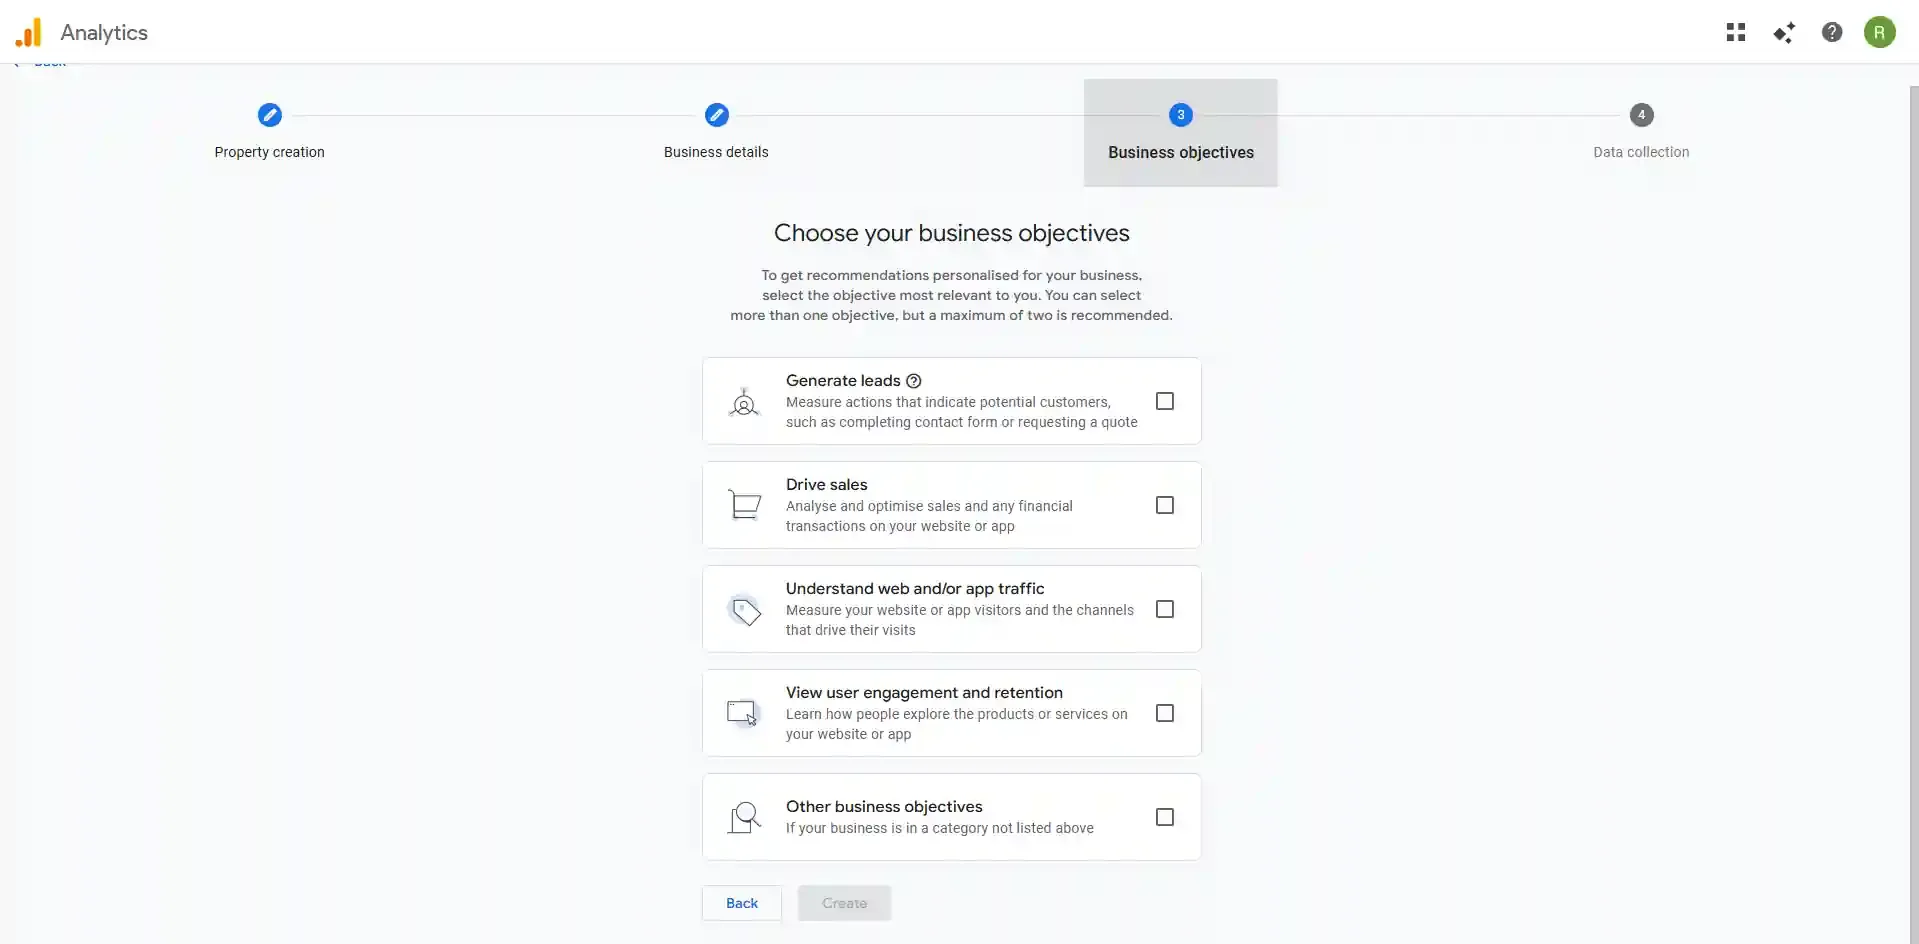
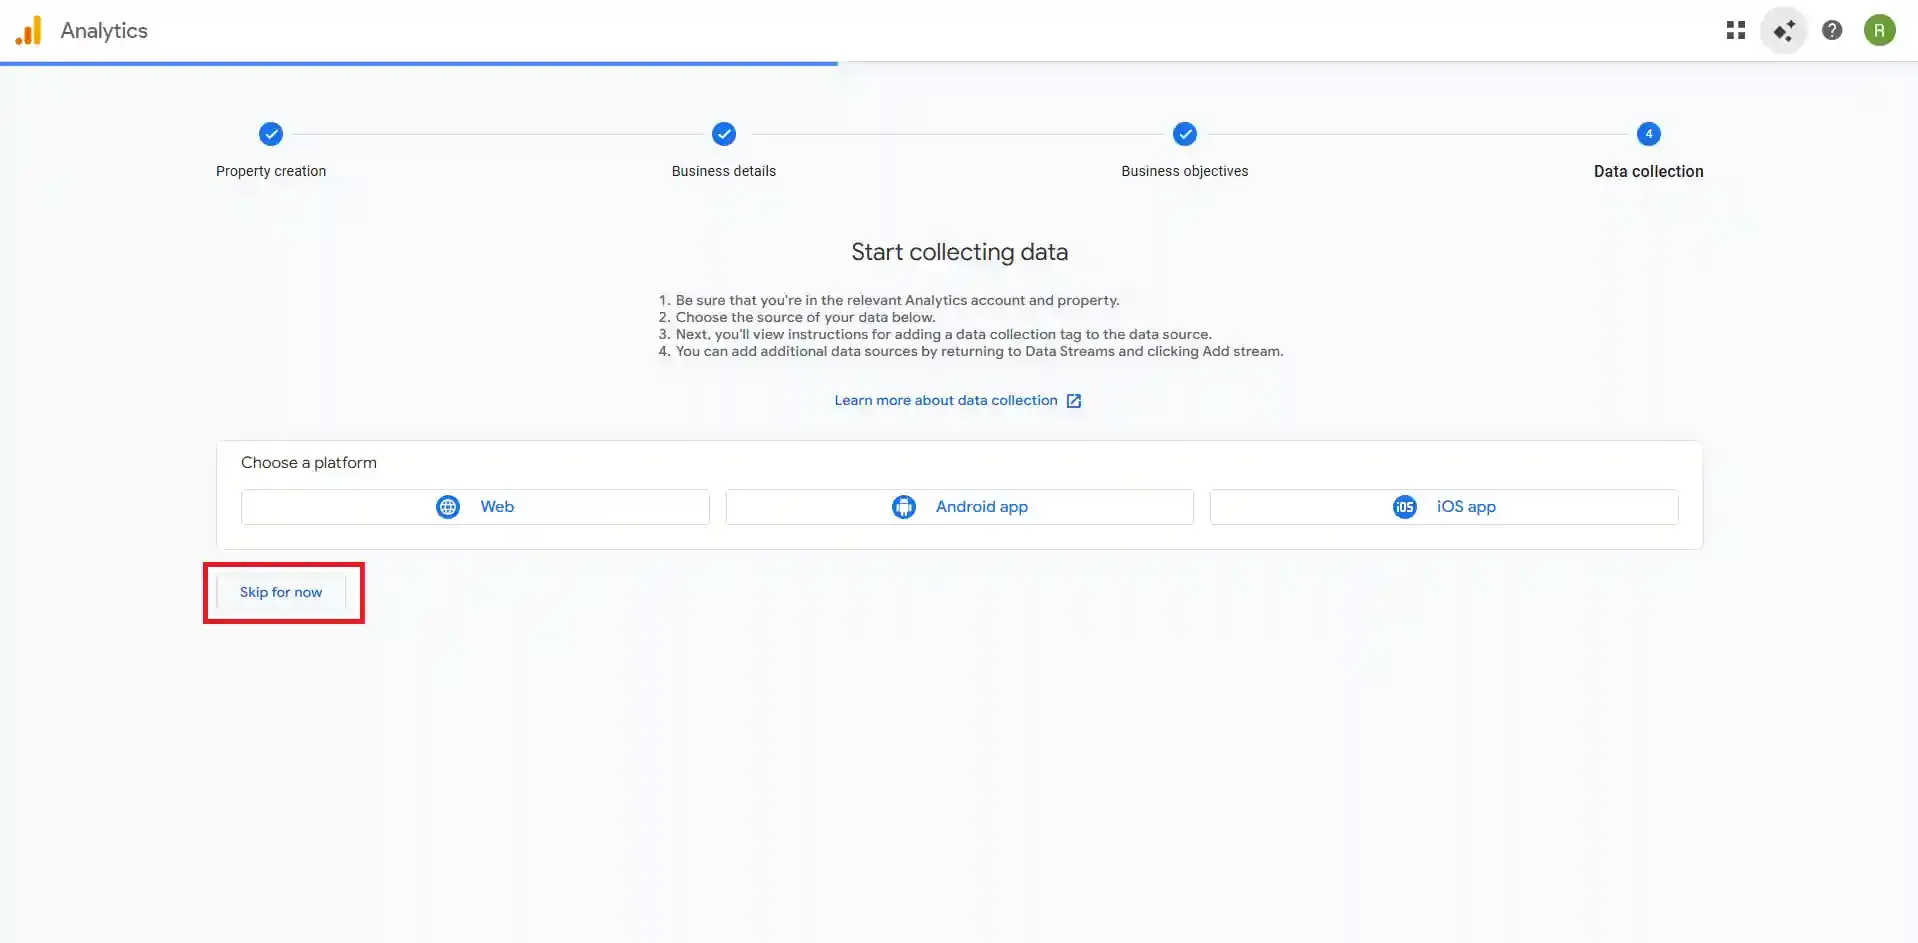
Choose your Business Objective and click Create.
-
On the “Start collecting data” screen, you can choose a platform or click Skip for now.
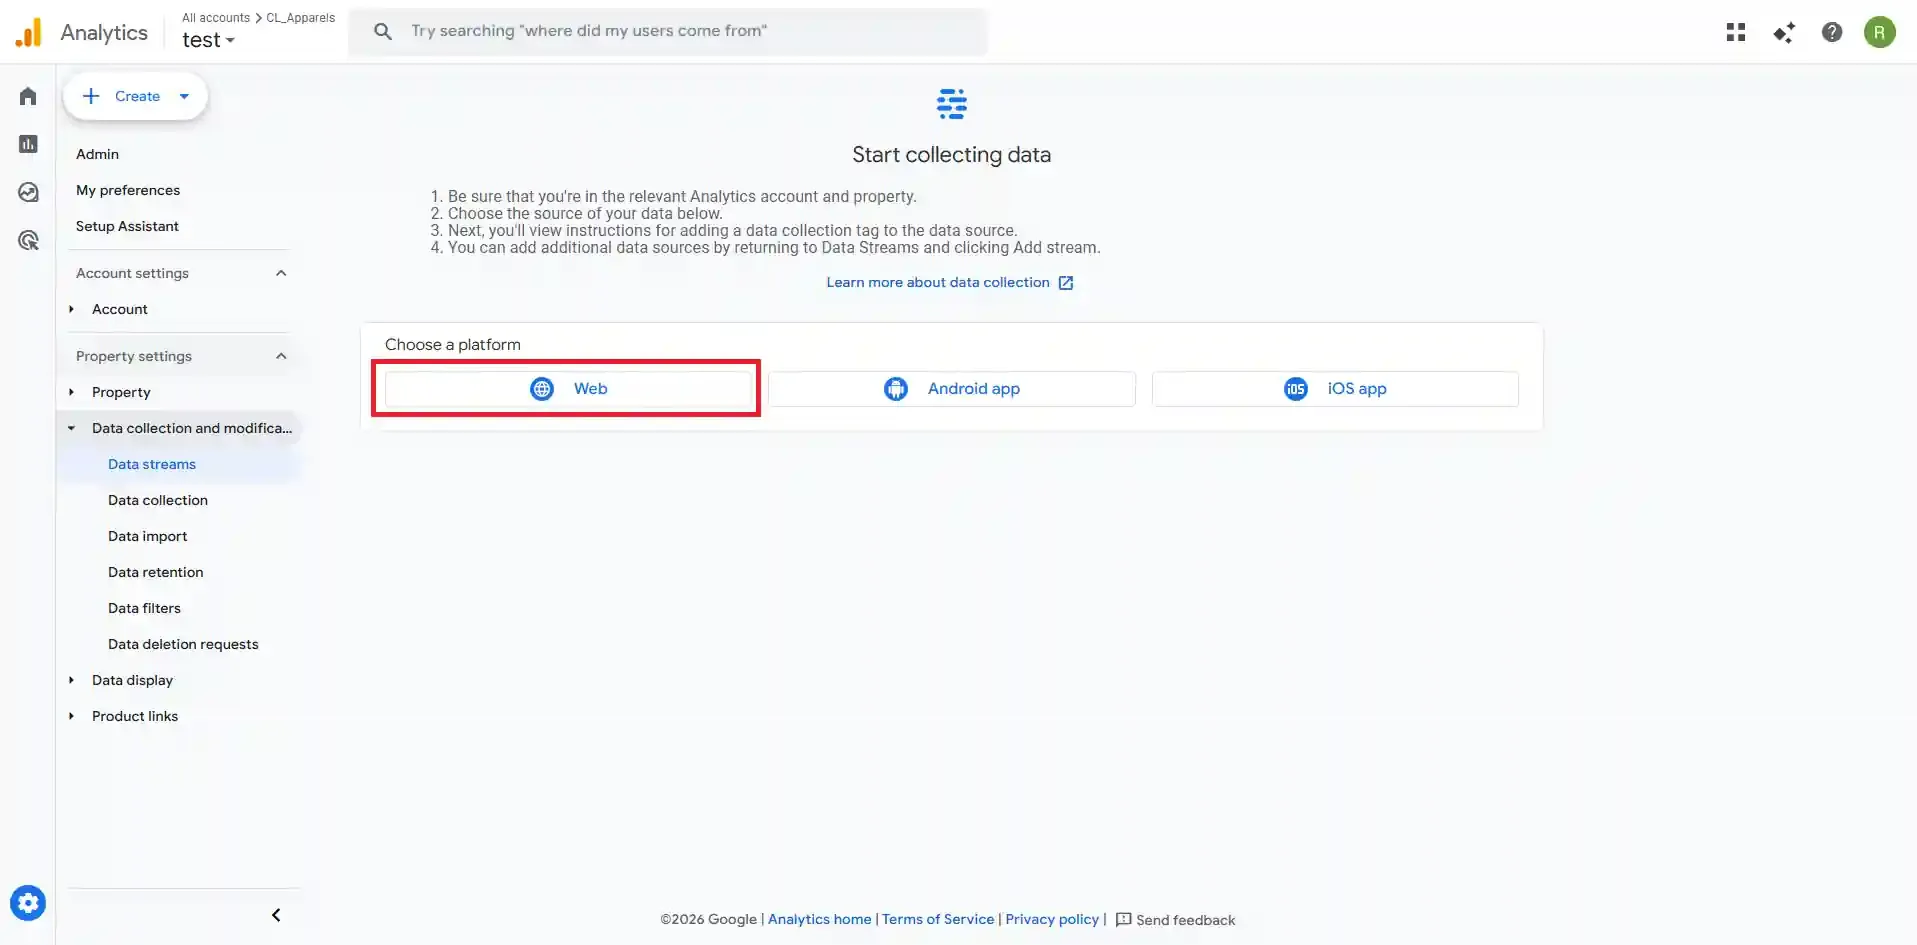
Set Up a Web Data Stream
Section titled “Set Up a Web Data Stream”A Data Stream channels data from your website into your GA4 property and generates the Measurement ID you need in CustomerLabs.
-
In the Admin section, go to Data collection and modifications → Data Streams.
-
Select Web as the platform.
-
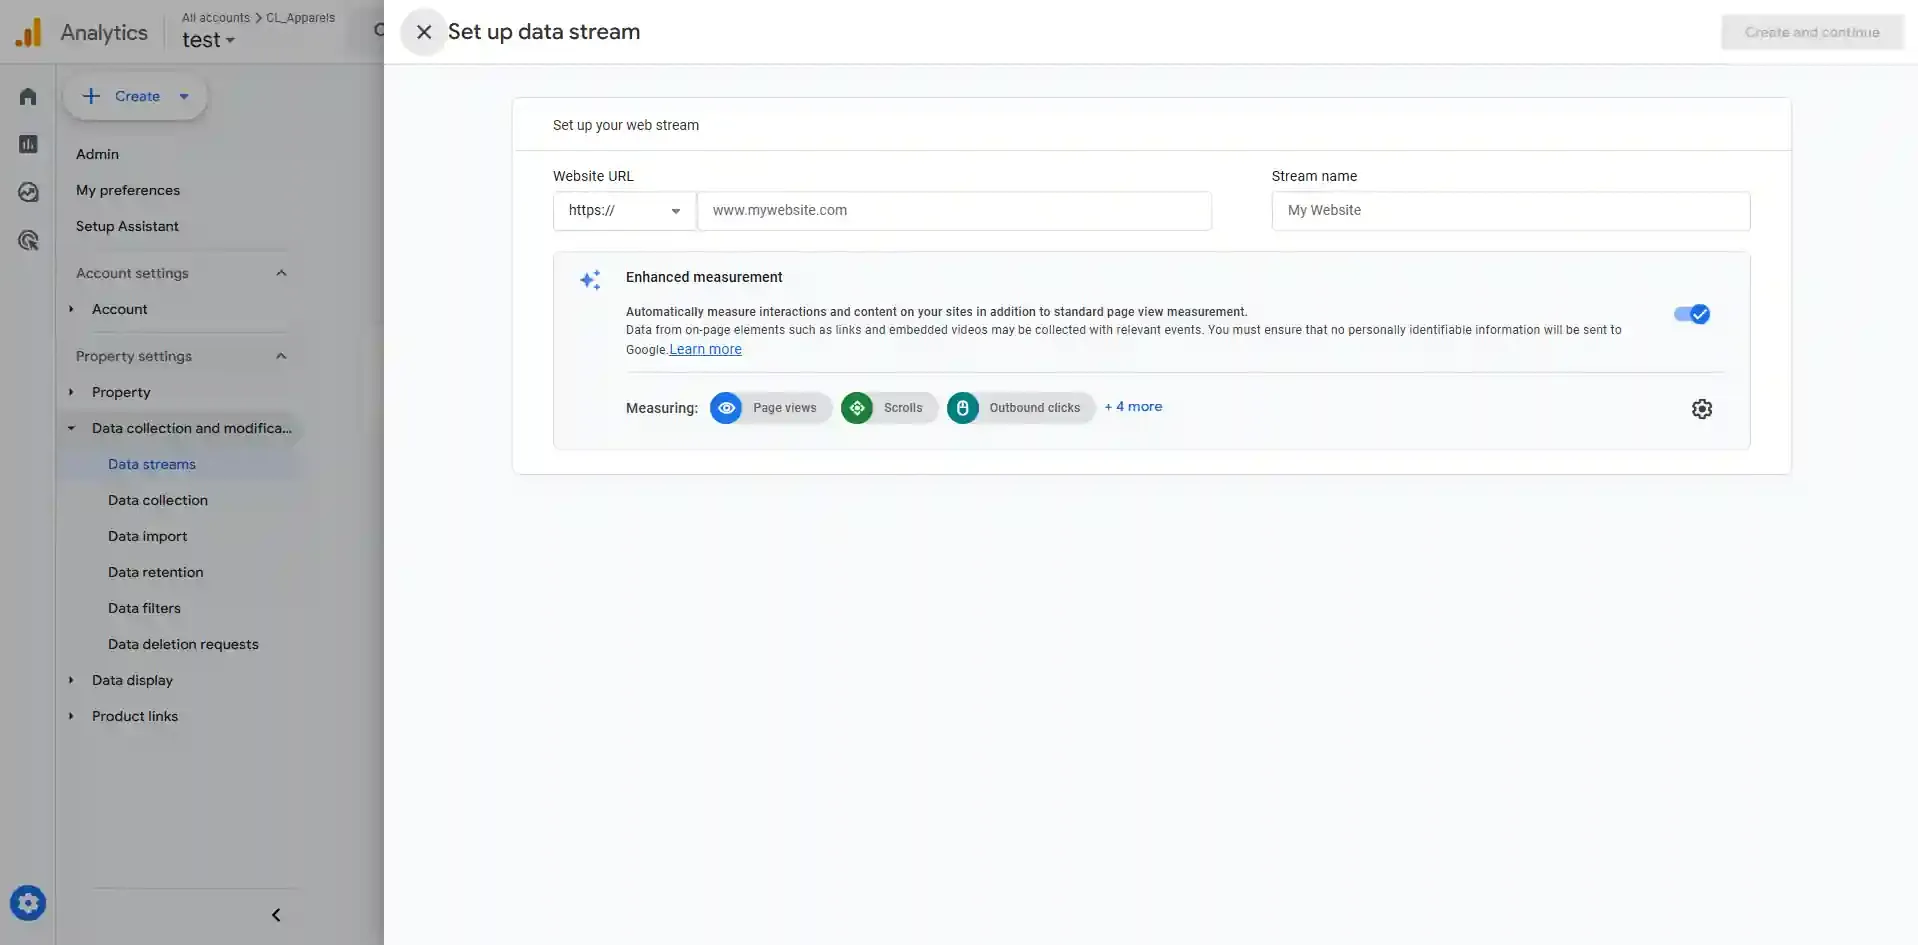
Enter your Website URL and a Stream name, then click Create and Continue.
-
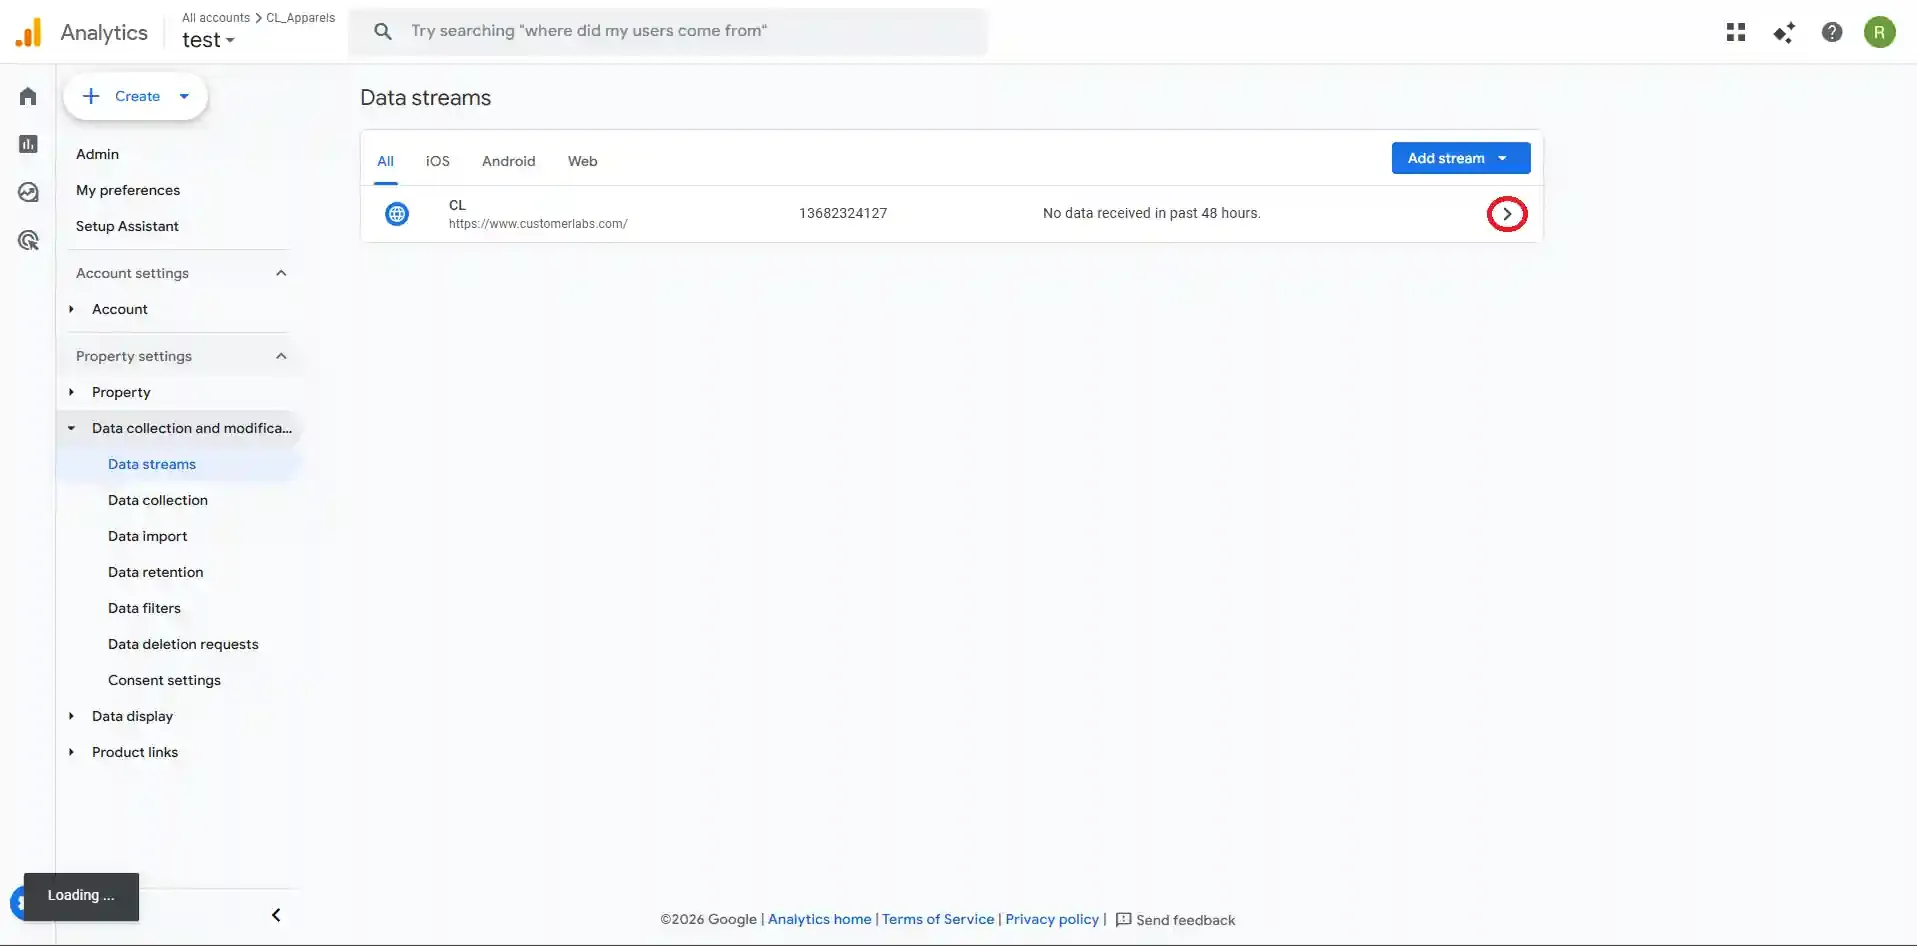
Open the newly created data stream and copy the Measurement ID (formatted as
G-XXXXXXXXXX).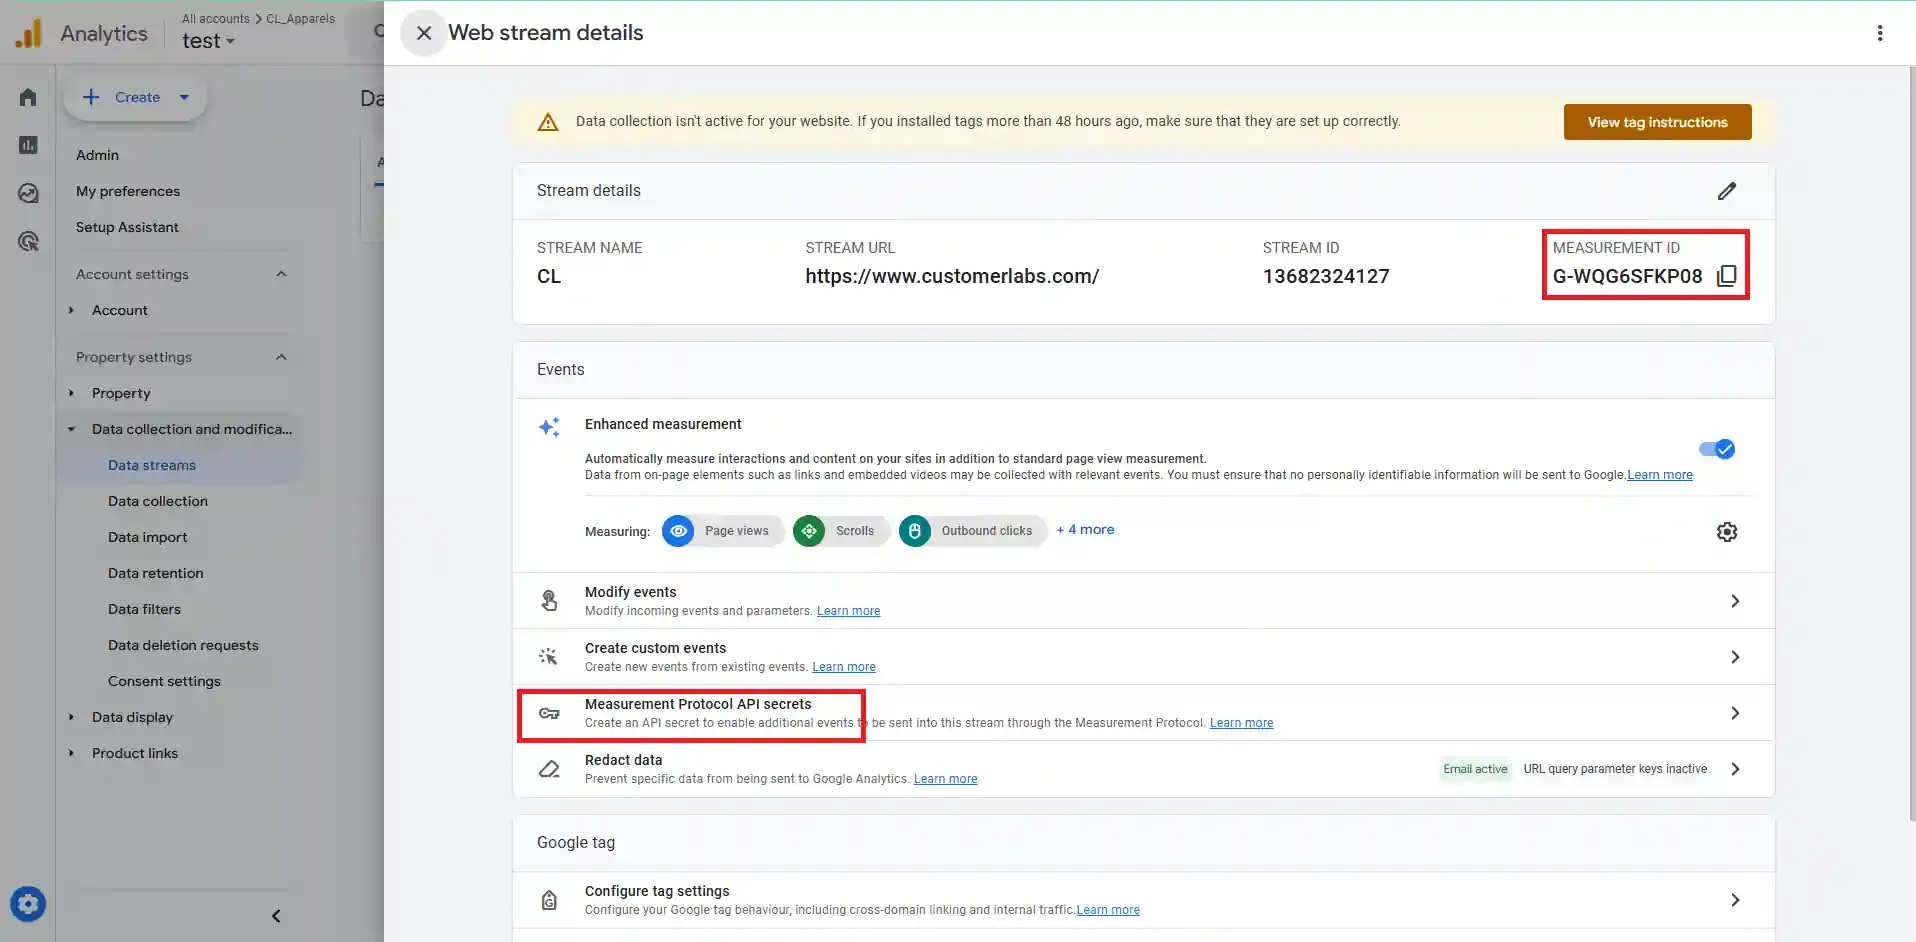
You now have everything you need to connect GA4 to CustomerLabs.
Step 1: Add GA4 as a Destination in CustomerLabs
Section titled “Step 1: Add GA4 as a Destination in CustomerLabs”-
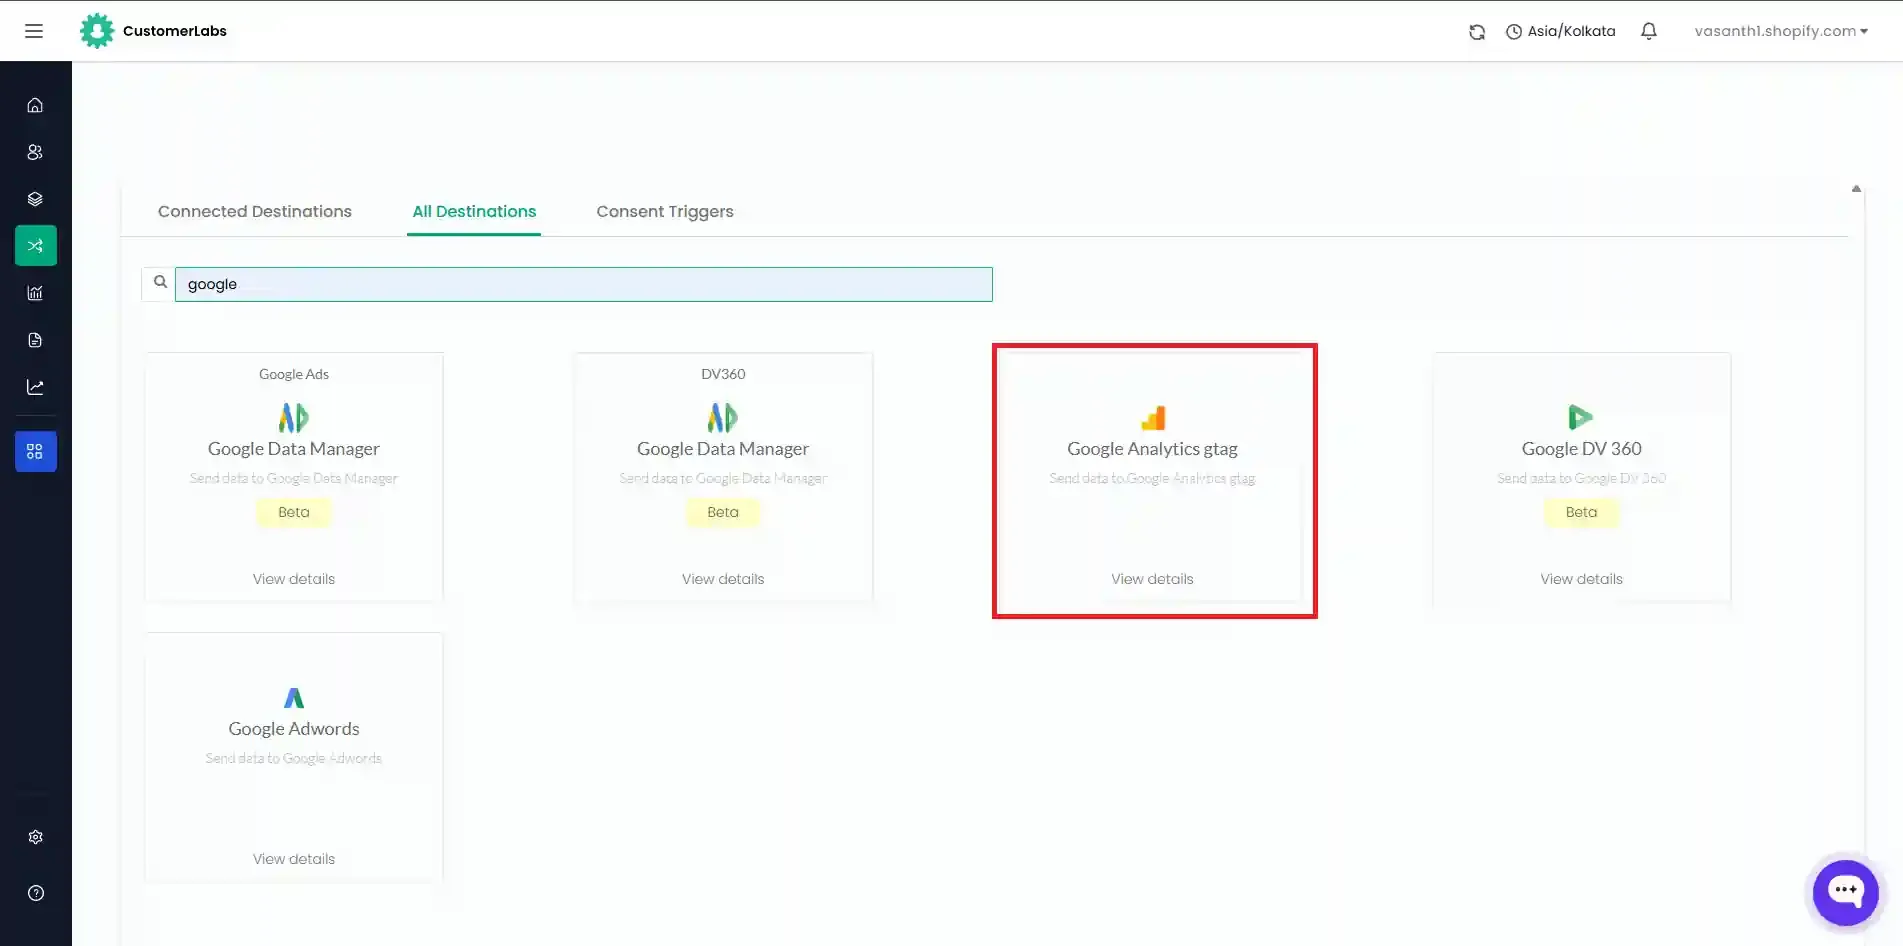
Log in to your CustomerLabs account and navigate to Destinations from the left menu.
-
Search for and select Google Analytics gtag.
-
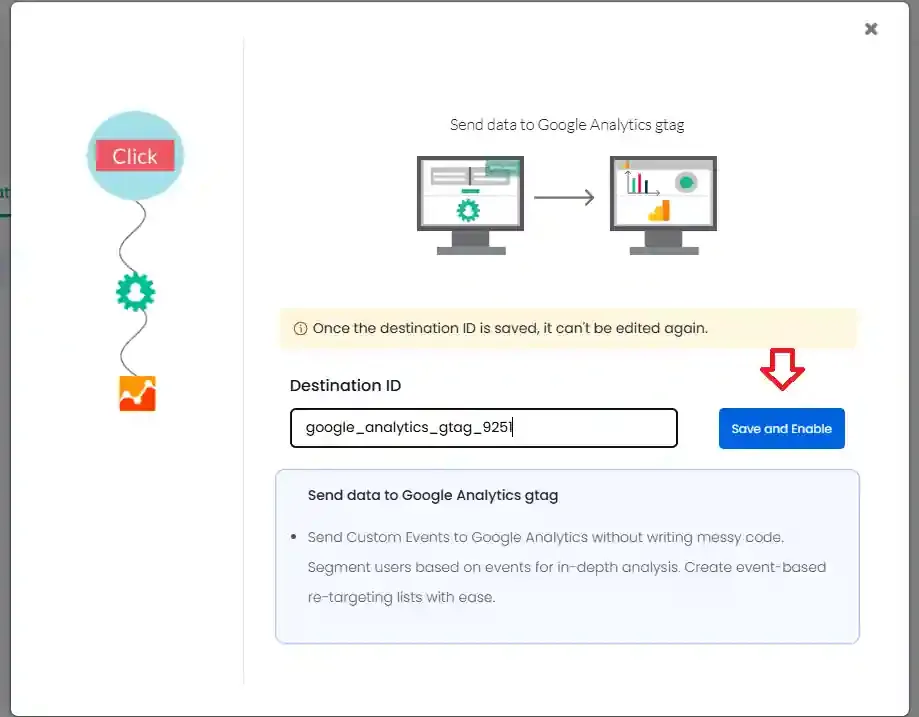
Enter a Destination ID and click Save and Enable.
-
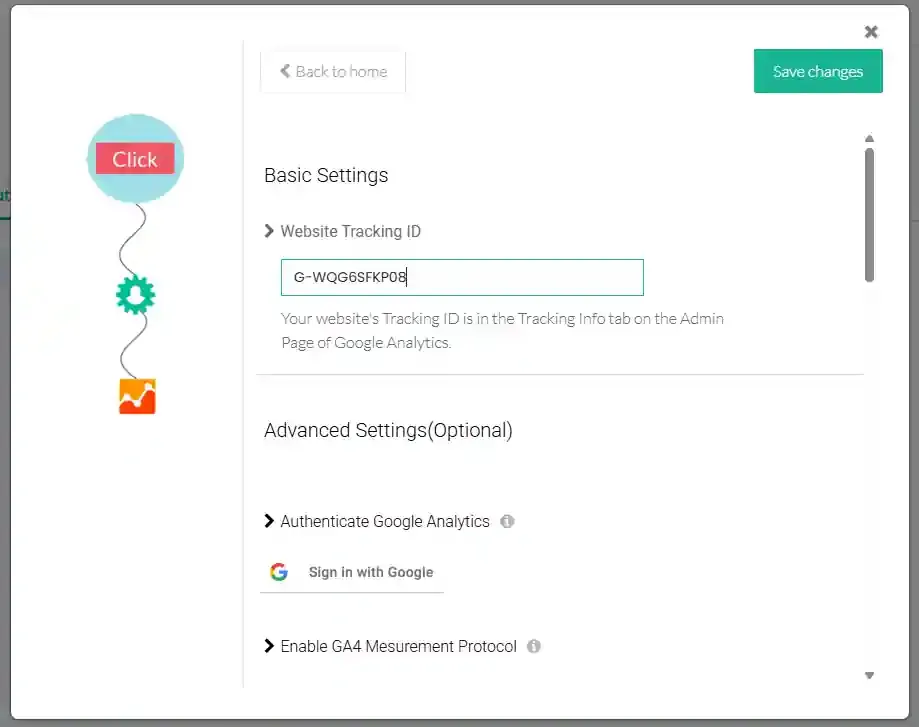
Click Configuration settings.

-
Click Sign in with Google to authenticate your GA4 property.
-
Paste the Measurement ID you copied earlier into the Website Tracking ID field under Basic Settings.
-
Click Save Changes.
Step 2: Server-Side Integration (Measurement Protocol)
Section titled “Step 2: Server-Side Integration (Measurement Protocol)”The Measurement Protocol lets you send event data directly from your server to GA4 — useful for offline conversions, CRM events, and interactions that can’t be captured in the browser.
Generate an API Secret in GA4
Section titled “Generate an API Secret in GA4”-
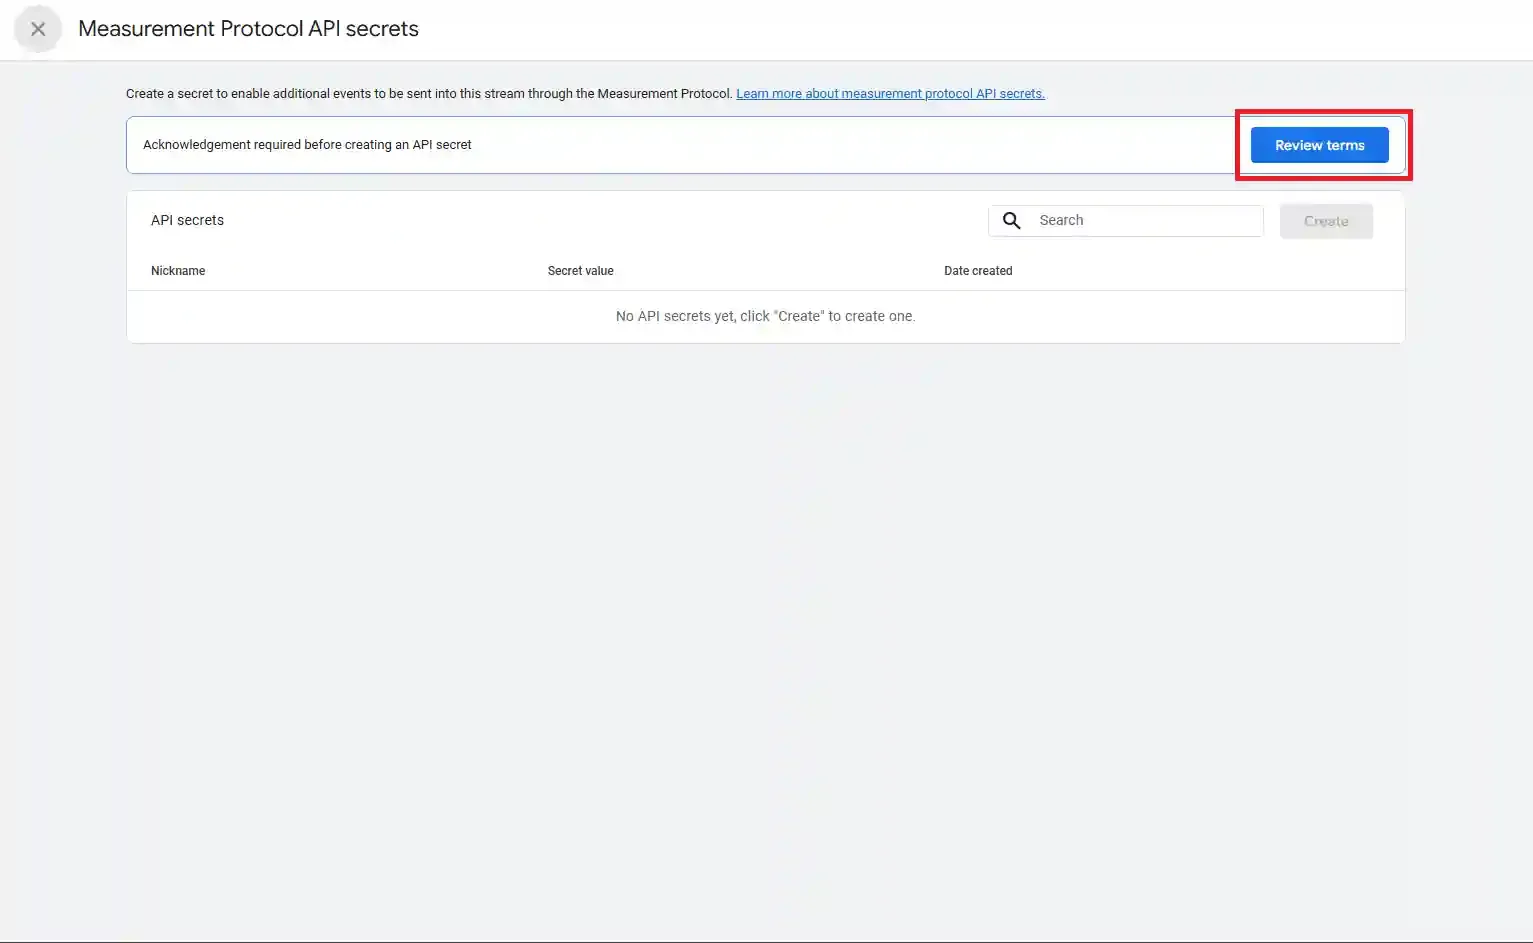
Inside your data stream, scroll to Measurement Protocol API Secrets.
-
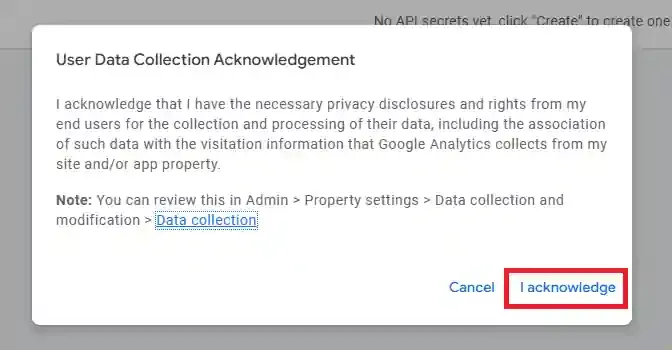
Accept the terms and acknowledge to create API key secret.
-
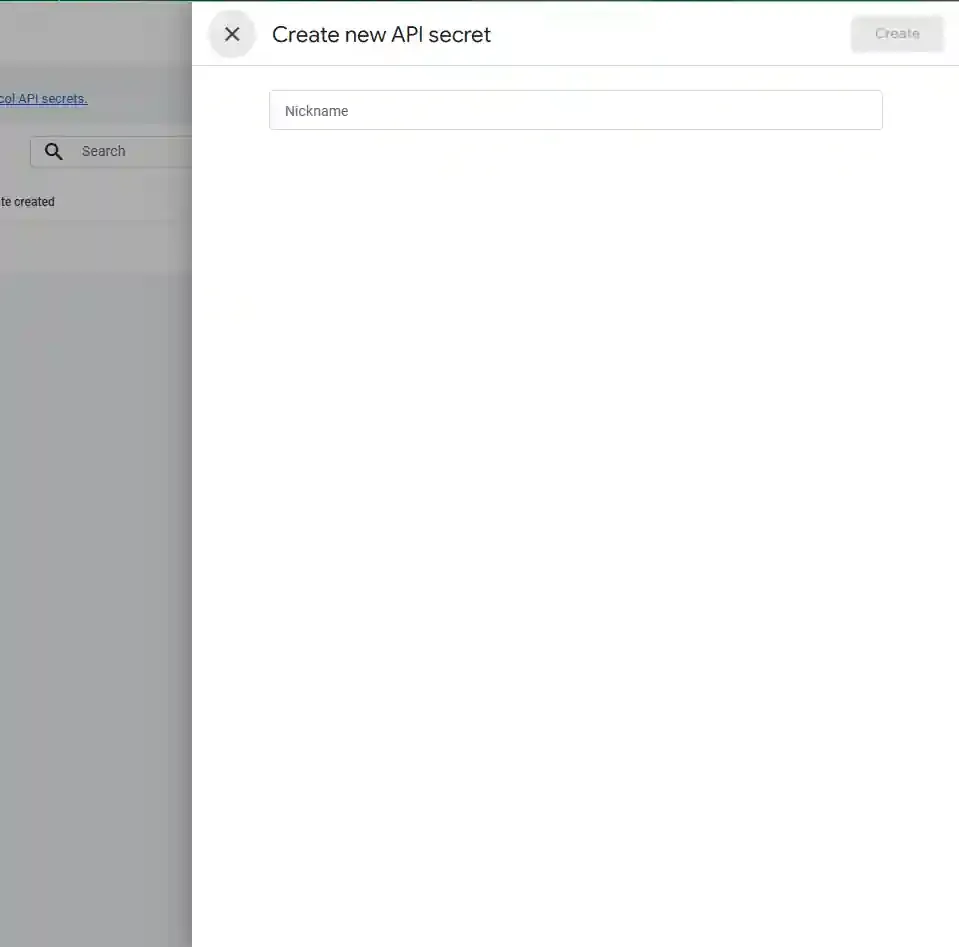
Click Create, enter a Nickname (e.g., “CustomerLabs Key”), and click Create.
-
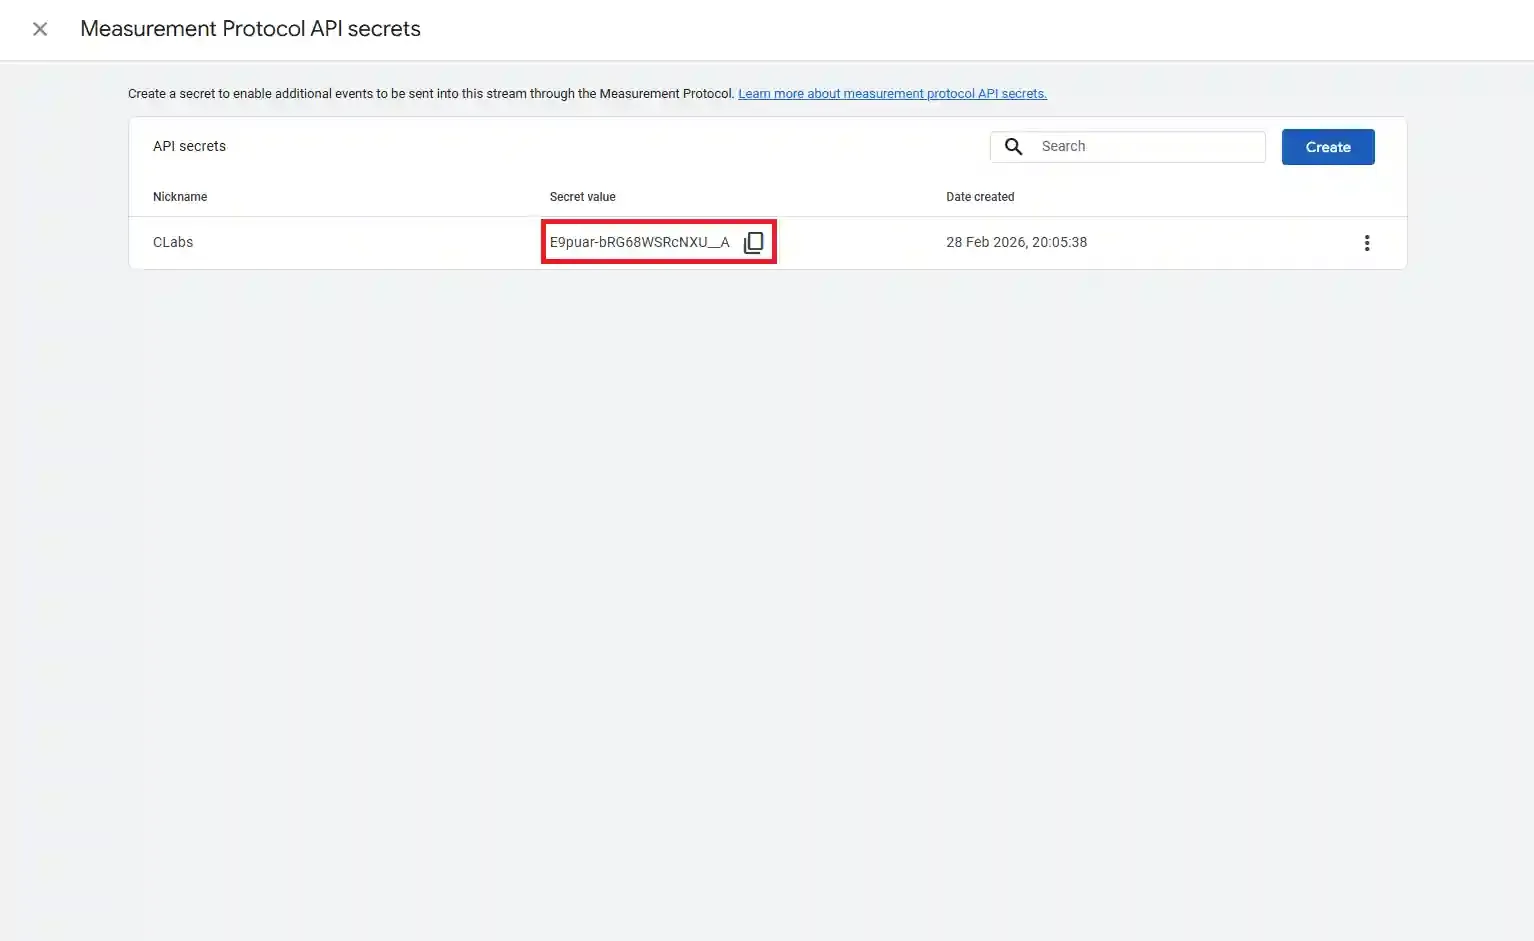
Copy the Secret Value shown.
Configure in CustomerLabs
Section titled “Configure in CustomerLabs”-
In CustomerLabs, go to Destinations → Google Analytics gtag → Configuration settings.
-
Under Advanced Settings, toggle ON the Enable GA4 Measurement Protocol option.
-
Paste the Secret Value into the API Secret field.
-
Click Save Changes.
Enhanced Ecommerce
Section titled “Enhanced Ecommerce”Enabling Enhanced Ecommerce sends additional product and transaction data to GA4 for standard e-commerce events, unlocking detailed purchase funnel reports.
Enable the Enhanced Ecommerce toggle in Advanced Settings.
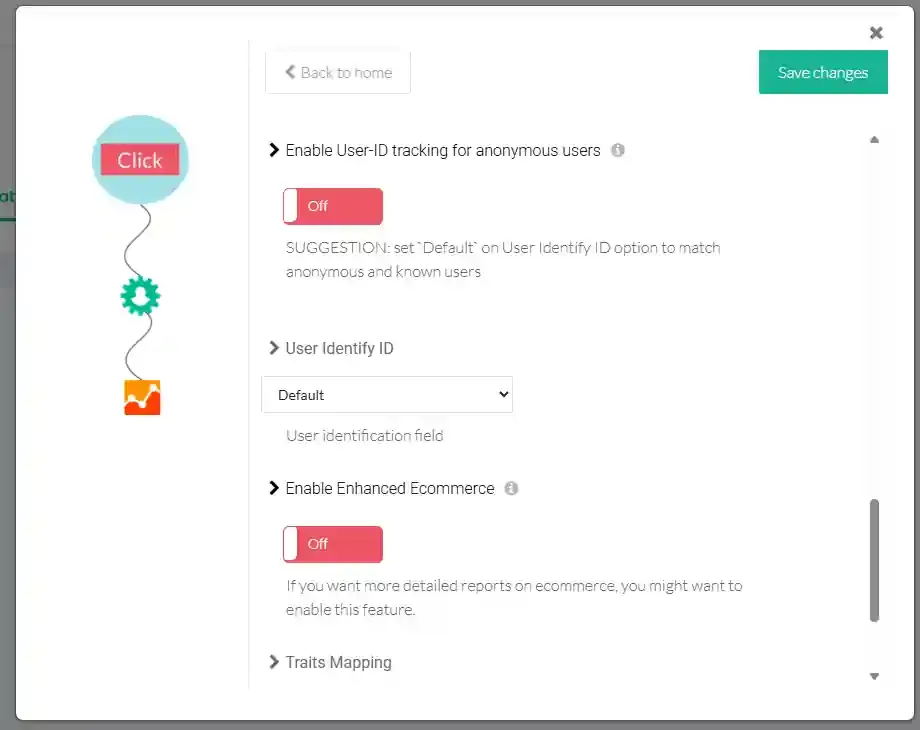
User-ID Tracking
Section titled “User-ID Tracking”User-ID Tracking assigns a consistent identifier to each user across sessions and devices, enabling more accurate cross-session reporting and audience segmentation in GA4.
Enable the User-ID Tracking toggle in Advanced Settings and set User Identify ID to Customerlabs user ID.
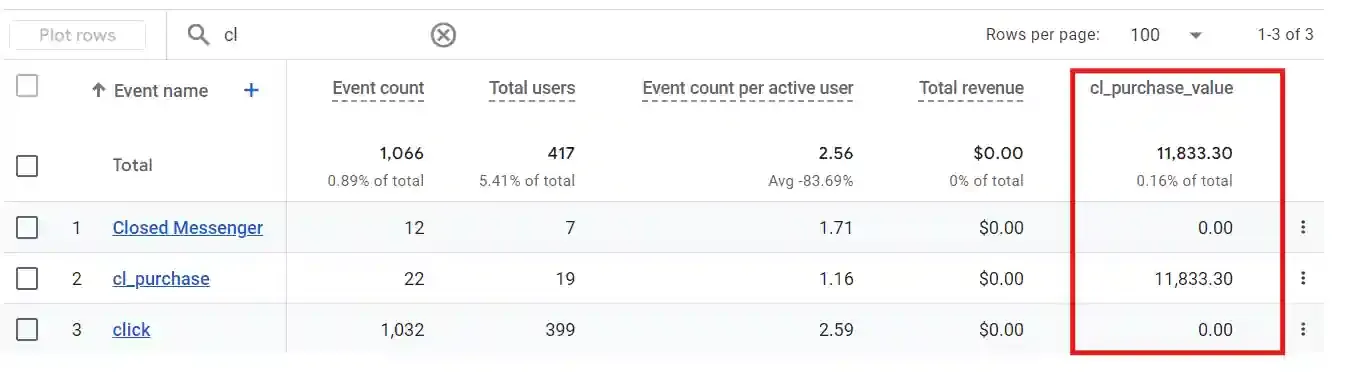
Custom Conversion Metrics
Section titled “Custom Conversion Metrics”To measure the value of specific events (such as purchase revenue or lead value) in GA4 reports, you need to create Custom Metrics that map to the event parameters CustomerLabs sends.
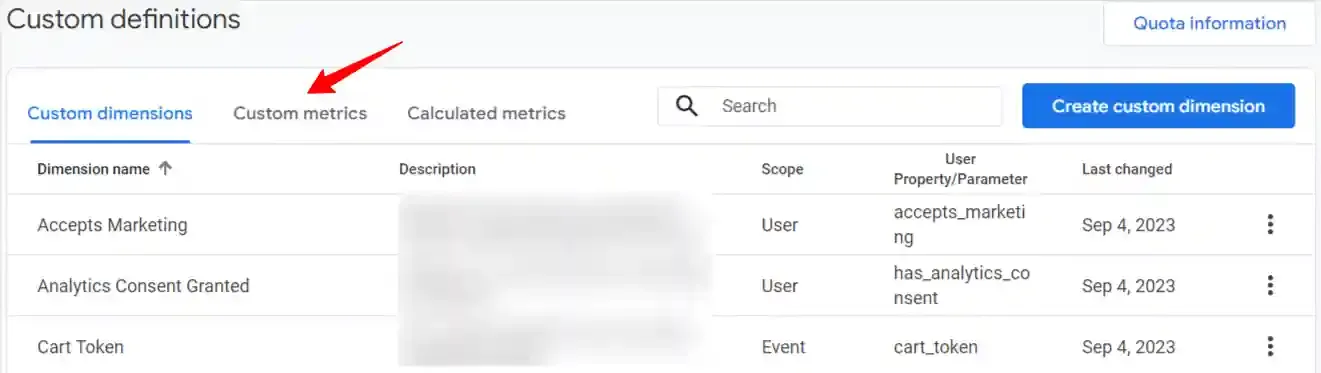
Access Custom Definitions in GA4
Section titled “Access Custom Definitions in GA4”-
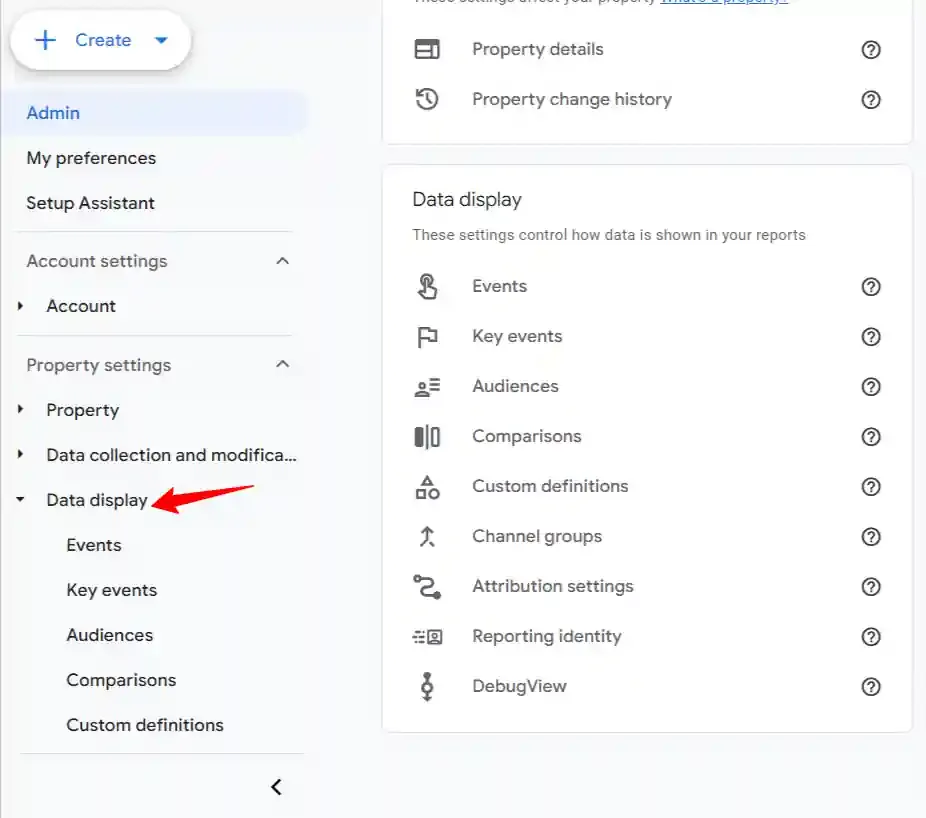
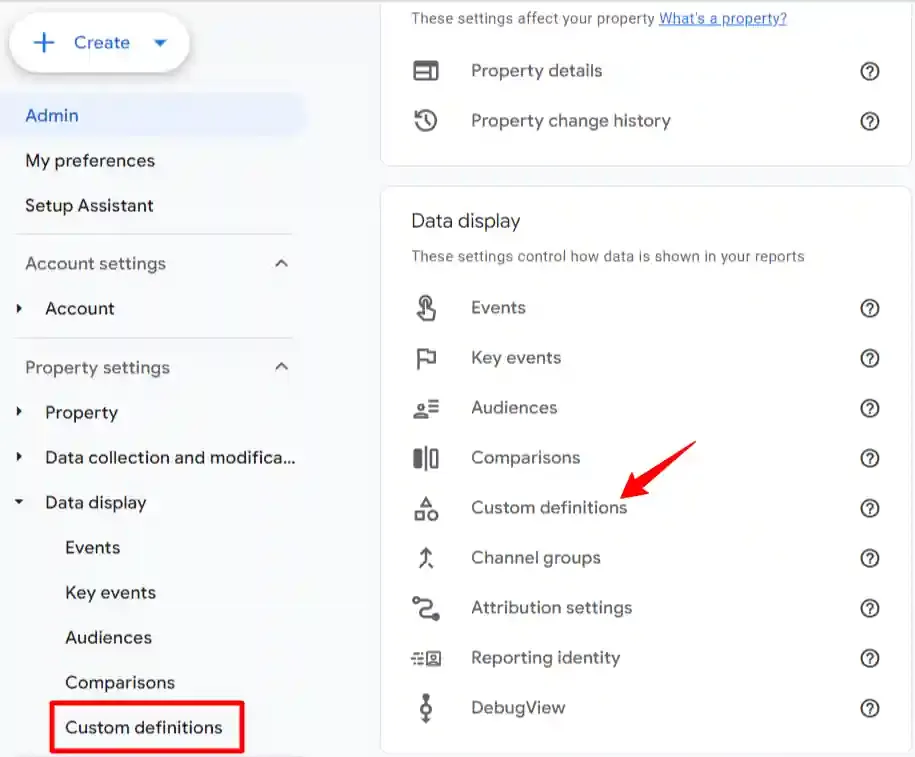
In GA4, go to Admin → Data display → Custom definitions.
-
Click the Custom metrics tab, then click Create custom metric.

-
Fill in the details:
Field Value Metric name A descriptive label (e.g., Purchase Revenue)Event parameter The parameter CustomerLabs sends (e.g., valueorecomm_totalvalue)Unit of measurement Select Currency for monetary values 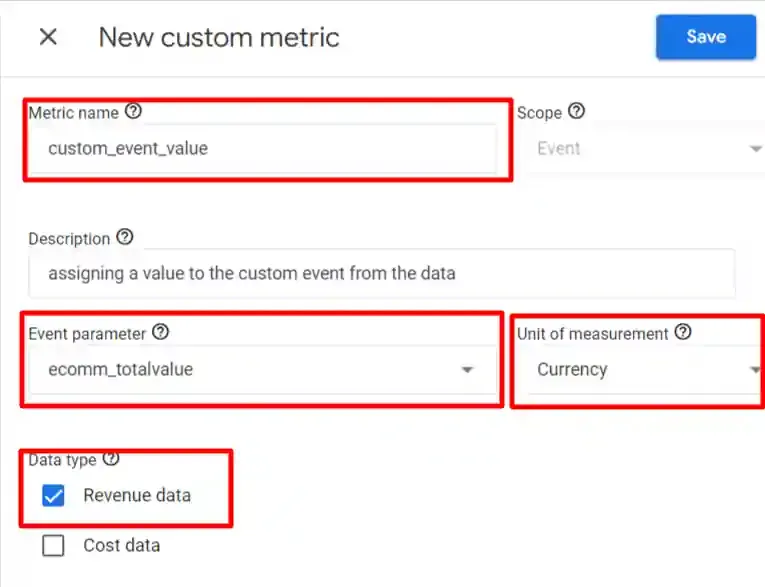
-
Click Save.
Add the Custom Metric to Reports
Section titled “Add the Custom Metric to Reports”-
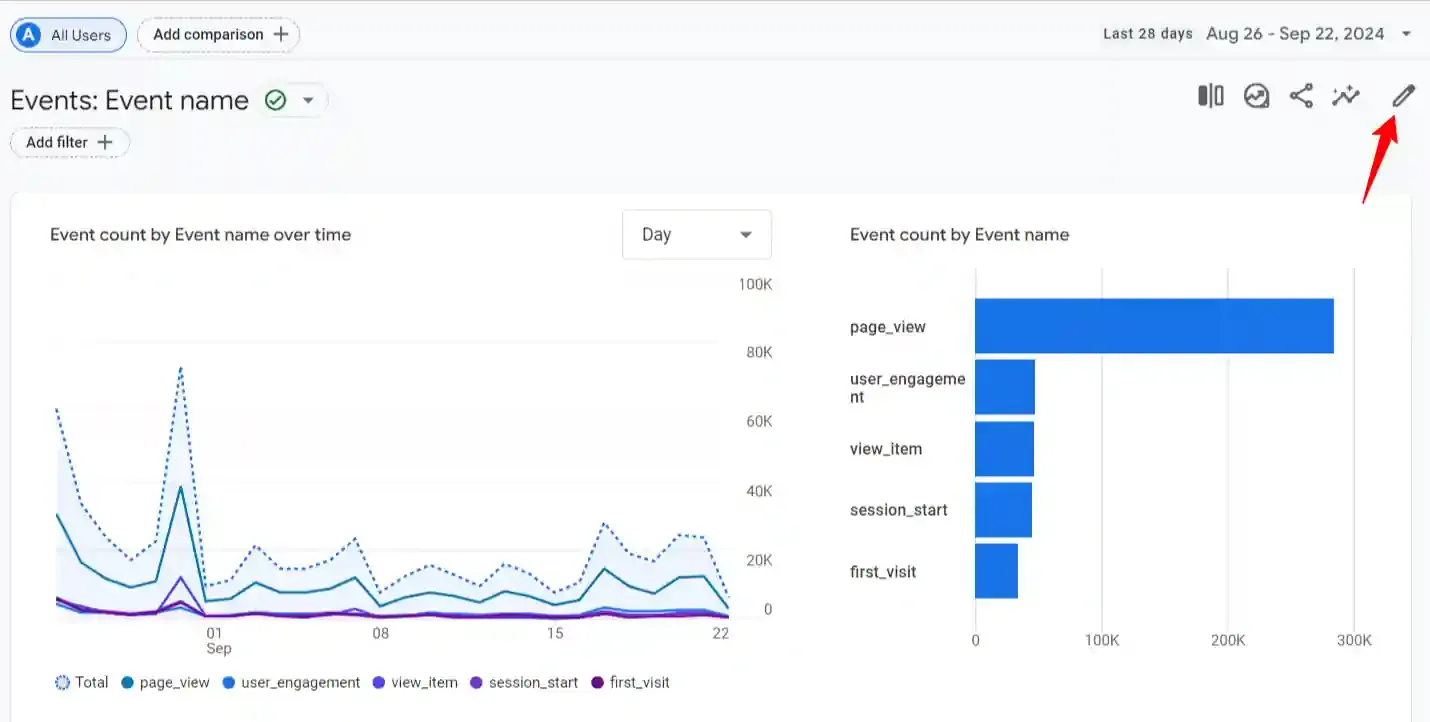
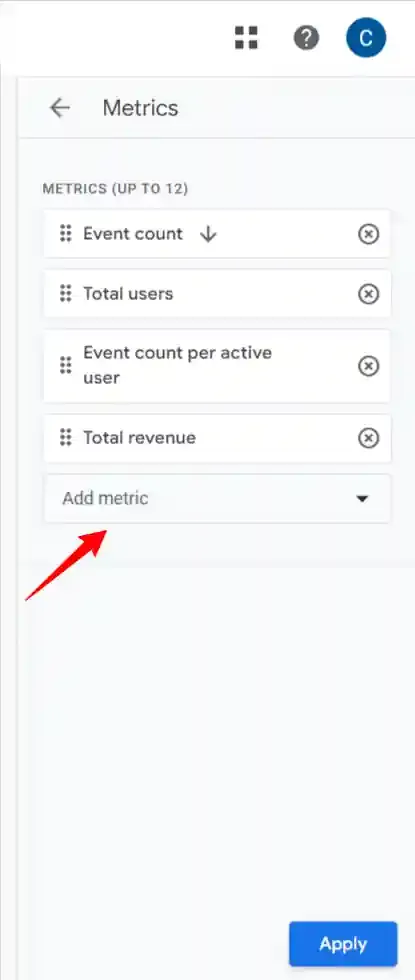
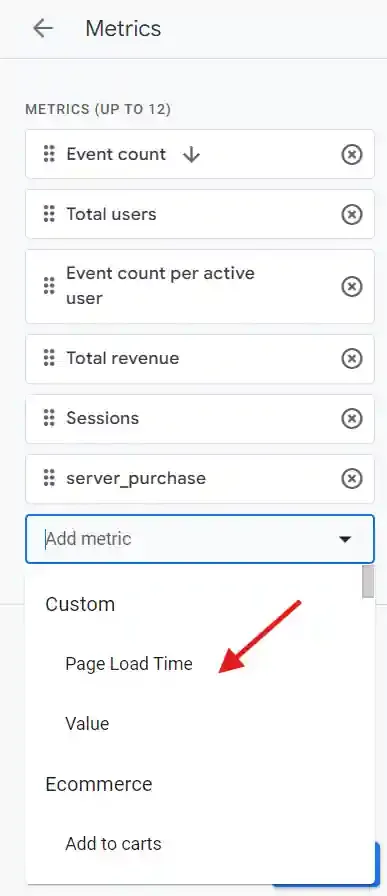
In GA4, navigate to Reports → Engagement → Events.
-
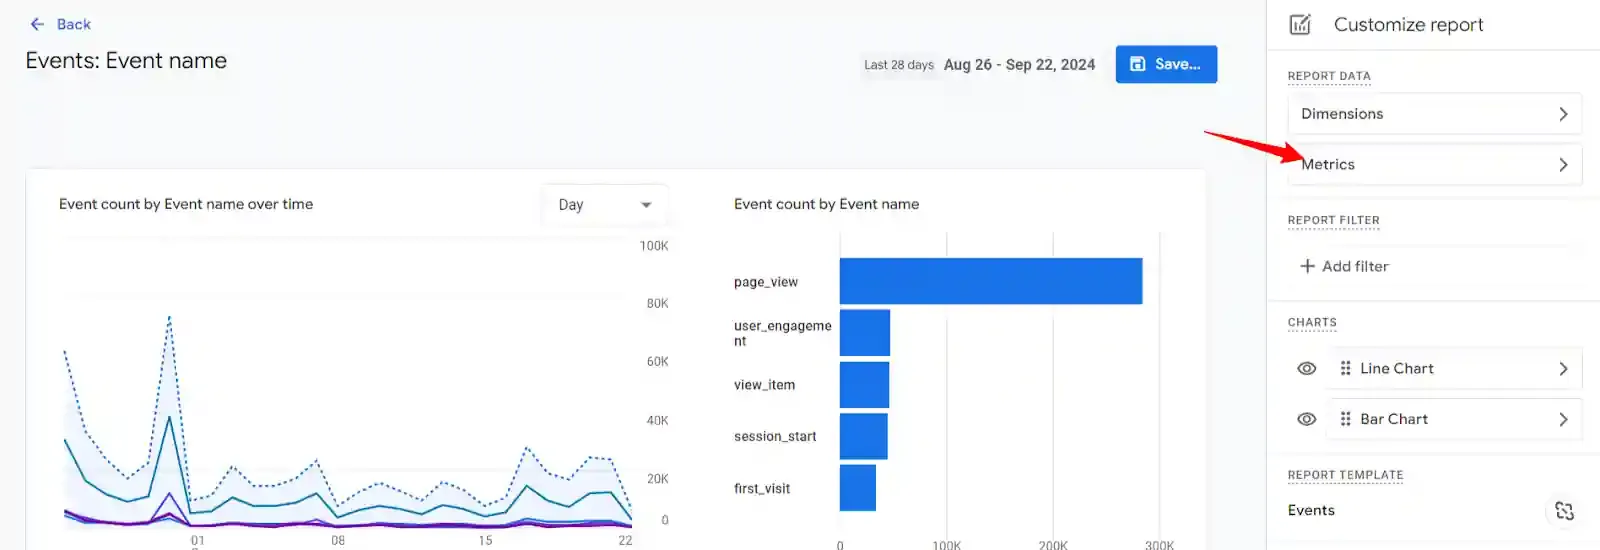
Click the Edit (pencil) icon to customize the report.

-
Click Metrics → Add metric, and select your custom metric from the dropdown.
-
Click Apply and save the report.
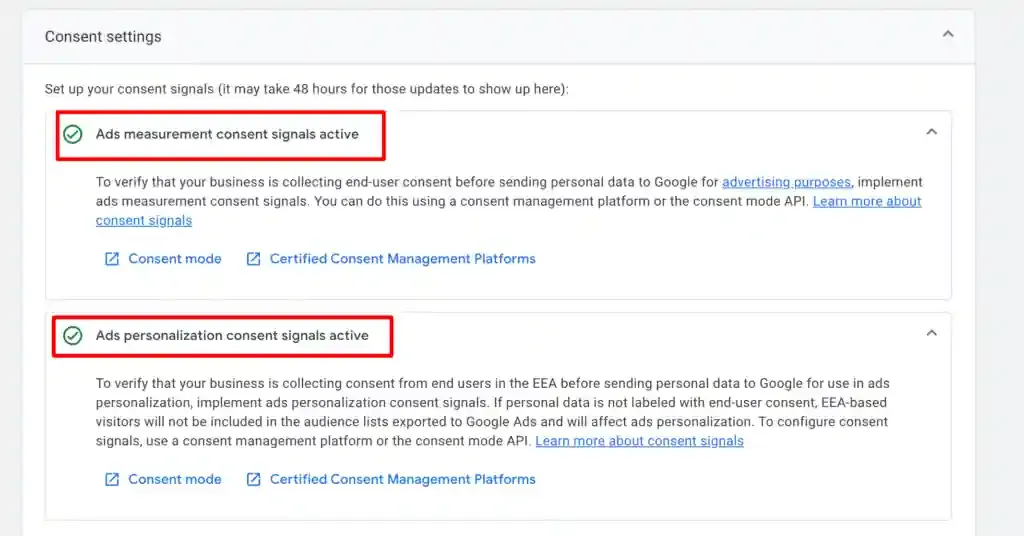
Consent Mode V2
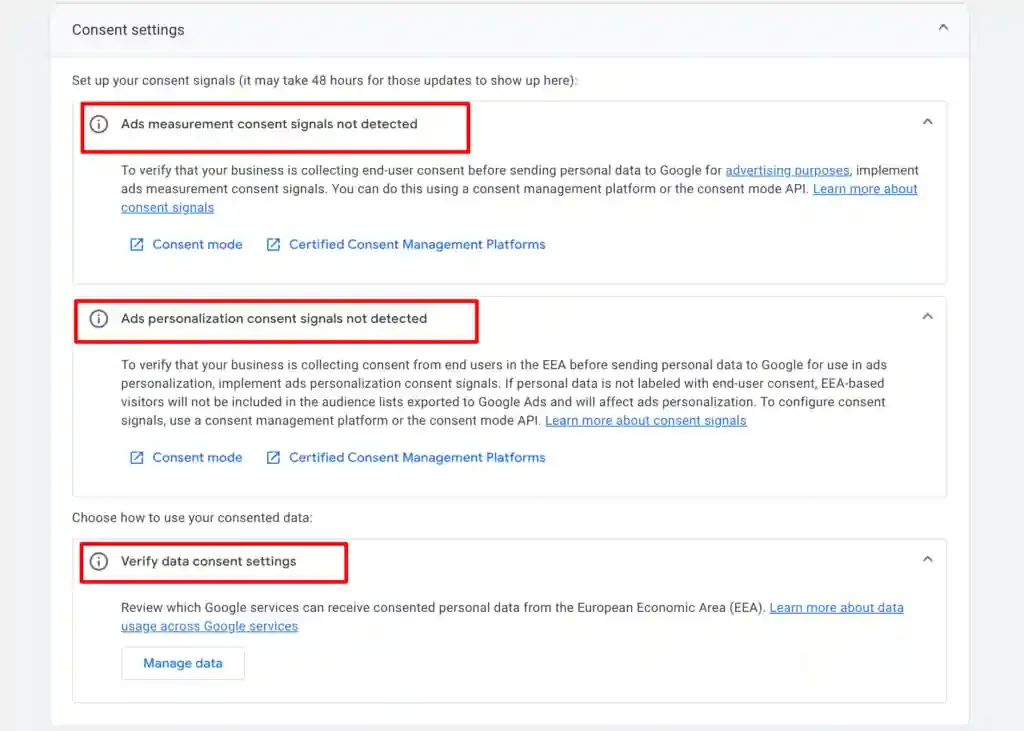
Section titled “Consent Mode V2”Google’s Consent Mode V2 helps you comply with EU consent policies. Based on user consent choices, Google dynamically adjusts how it stores and uses analytics and advertising data.
Set Up Consent Mode in CustomerLabs
Section titled “Set Up Consent Mode in CustomerLabs”-
Go to Destinations → Google Analytics gtag → Configuration settings → Consent Mode Configuration.
-
Toggle Consent Mode ON.
-
Set default values for each consent parameter using the dropdowns. These defaults apply before a user makes a consent choice.
Parameter Purpose analytics_storageControls whether analytics cookies can be stored ad_user_dataControls whether user data can be sent to Google for advertising ad_personalizationControls whether data can be used for personalized advertising -
Client-Side Consent Initialization:
- Using a Google-certified CMP: The CMP handles initialization automatically.
- Not using a CMP: Toggle ON Client Side Consent Initialization so CustomerLabs sets the defaults.

-
Click Save Changes.
Updating Consent Preferences Programmatically
Section titled “Updating Consent Preferences Programmatically”When a user updates their consent choice through your banner, call the following function to pass the updated state to CustomerLabs:
_cl.trackConsent({ "ad_user_data": "granted", "ad_personalization": "granted", "analytics_storage": "denied"});All available parameters:
{ "ad_user_data": "granted", "analytics_storage": "granted", "ad_personalization": "granted", "ad_storage": "granted", "functionality_storage": "granted", "personalization_storage": "granted", "security_storage": "granted"}Event Workflow Setup
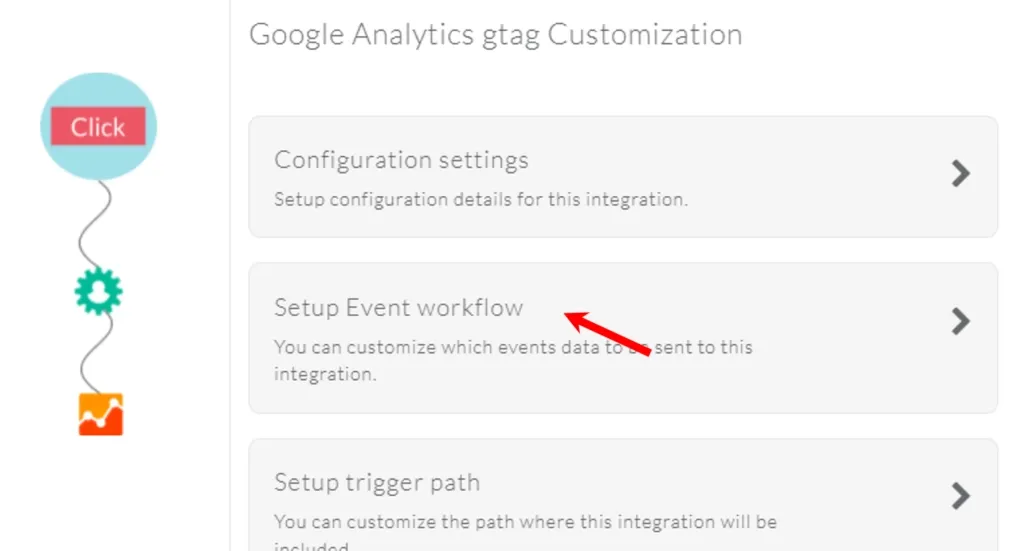
Section titled “Event Workflow Setup”The Event Workflow controls which events CustomerLabs sends to GA4 and whether they go via the browser (client-side) or server (server-side).
-
From the GA4 destination screen, click Setup Event Workflow.
-
Toggle ON the events you want to send either on client-side or server-side.
-
To sync audiences with GA4, ensure the
added_to_segmentevent is enabled under Server-side callbacks.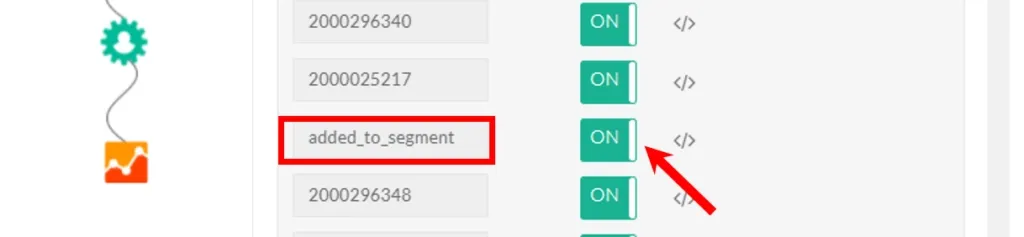
-
Click Save Changes.