Sync First-Party Audience from CustomerLabs to Google Ads
You can create an audience in CustomerLabs and sync it with Google Ads as a customer list by mapping the identifiers with the Google Ads schema. This makes it easier for you to run targeted ads on Google networks without having to manually update the list of users.
Step-by-Step Guide to Sync Audience to Google Ads
Section titled “Step-by-Step Guide to Sync Audience to Google Ads”- Create an audience as required and after creating, “view” the audience to set up the sync with Google Ads.
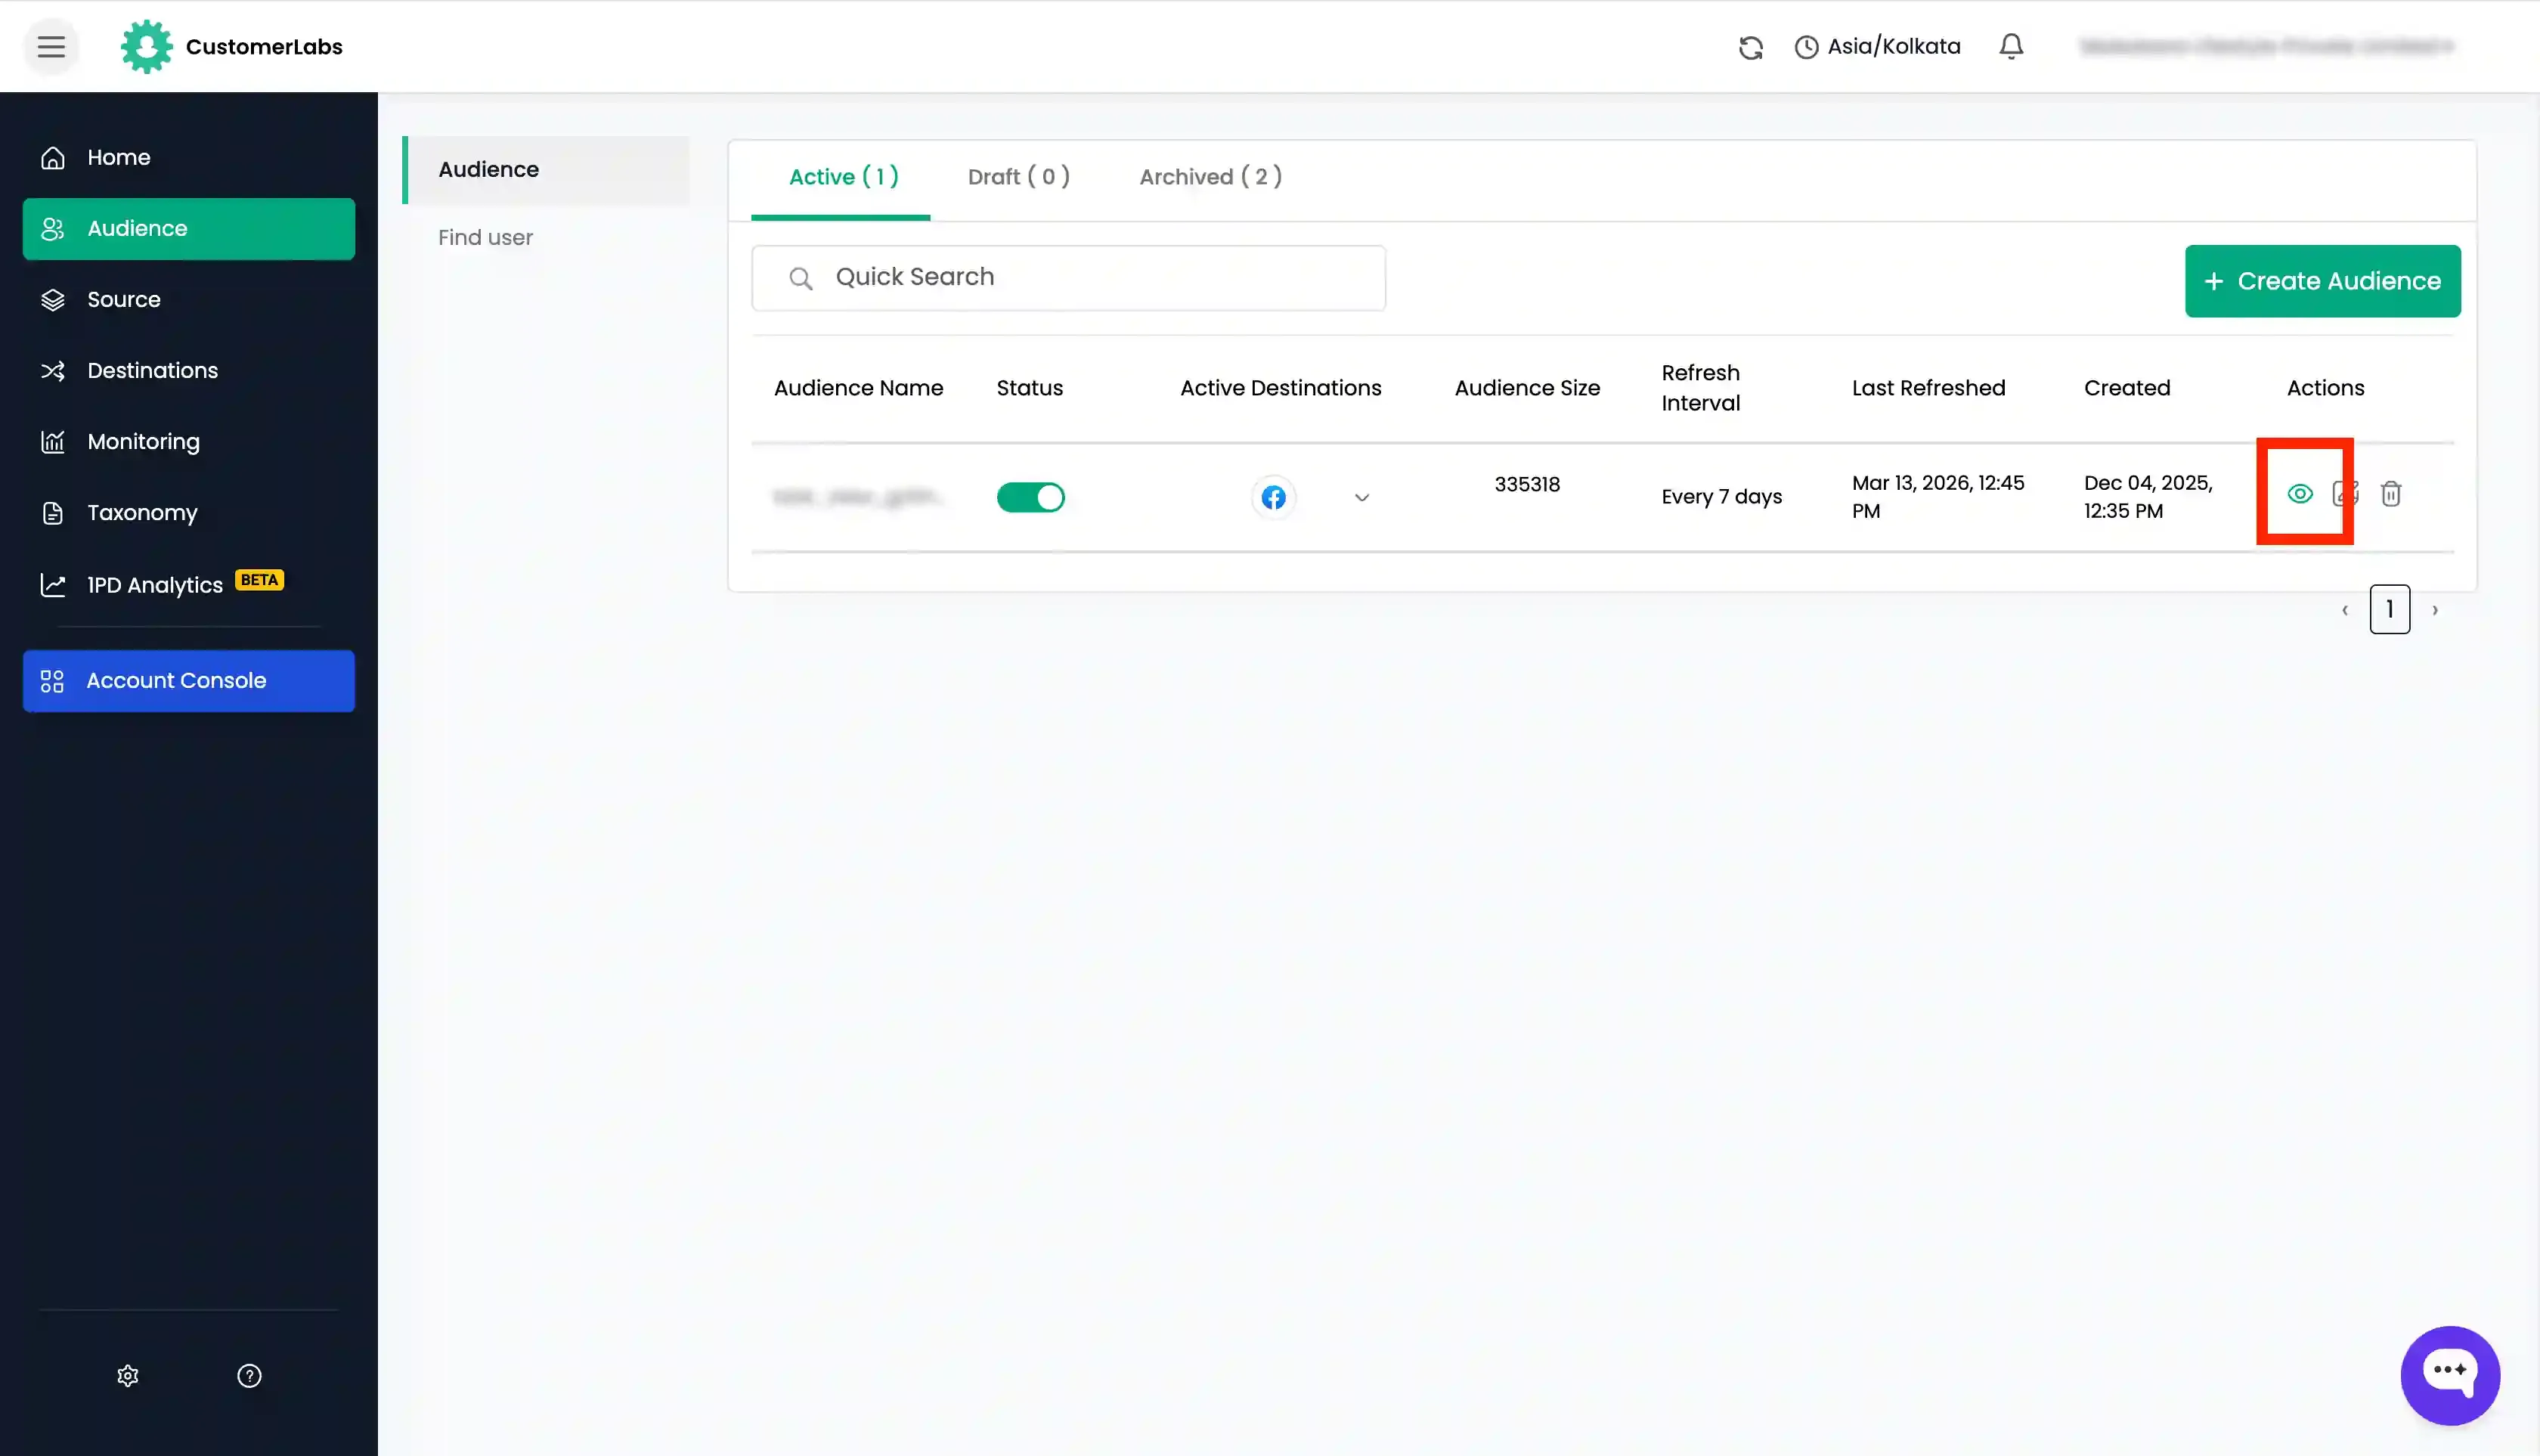
-
Go to the “Schema” tab and add the necessary schema based on the list sync requirement for Google Ads like
email,phone,customerlabs_user_id, etc. which you want to send to Google Ads one by one by choosing it from the dropdown and click “Update Schema”.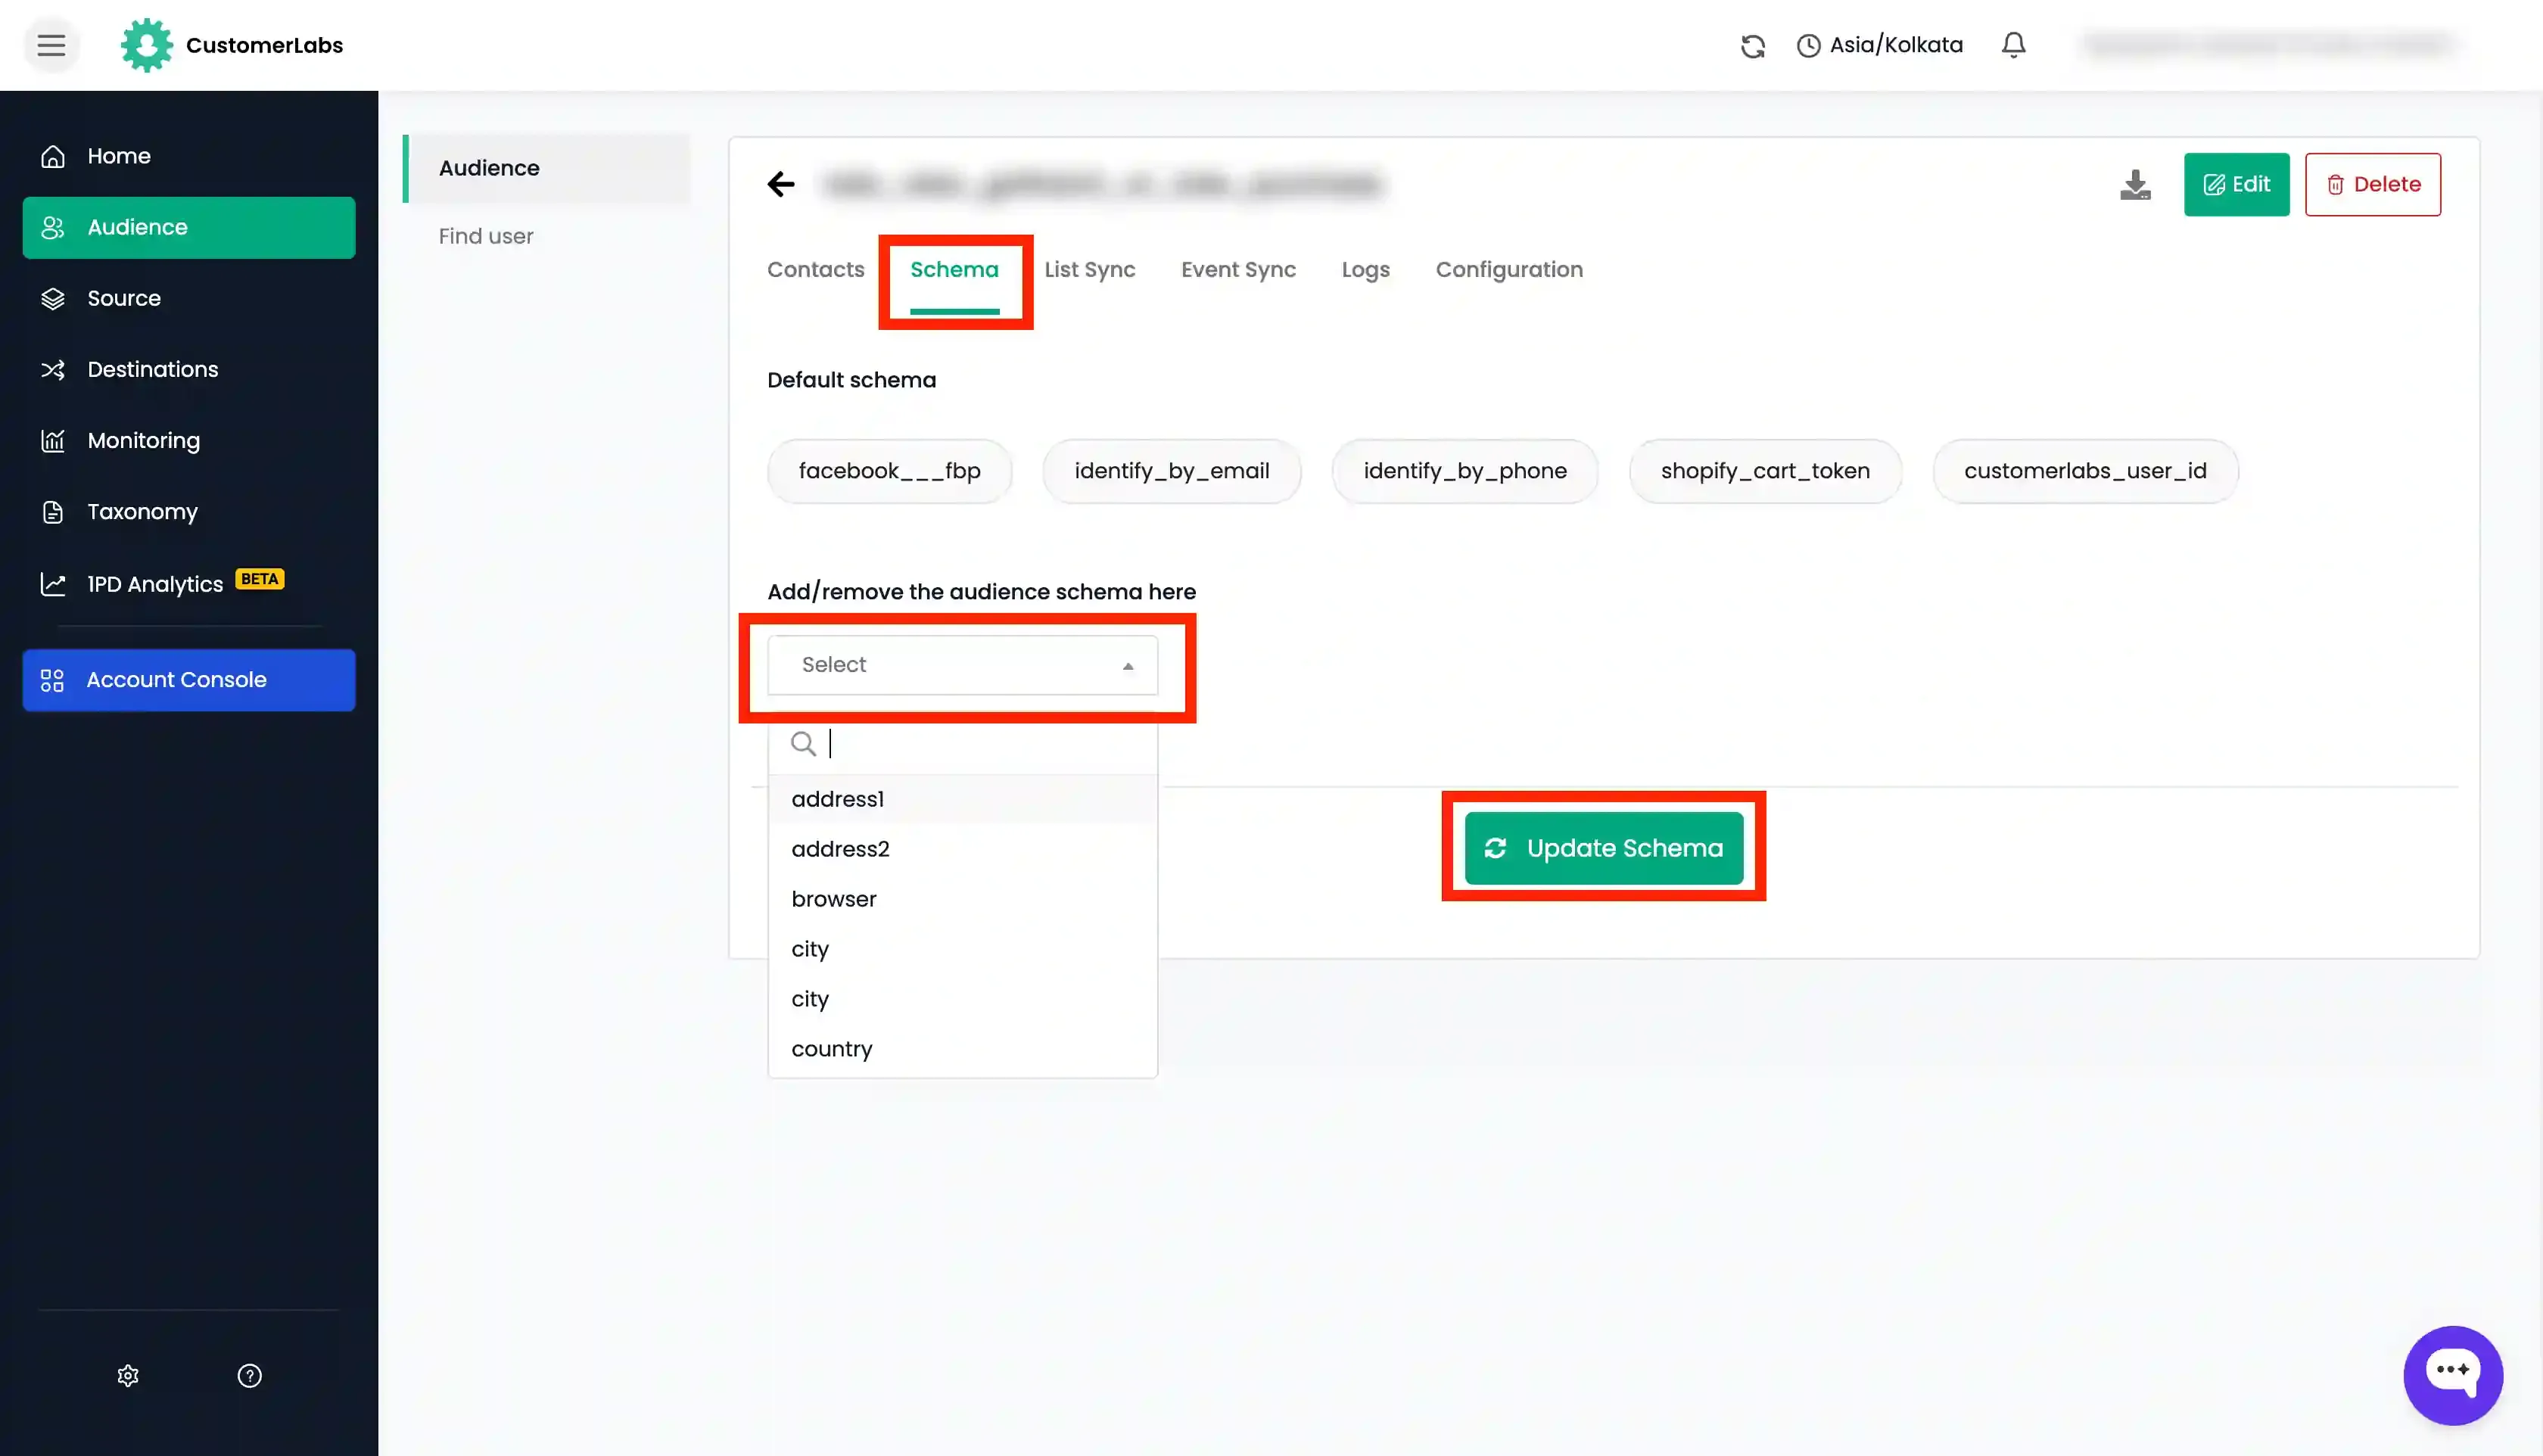
-
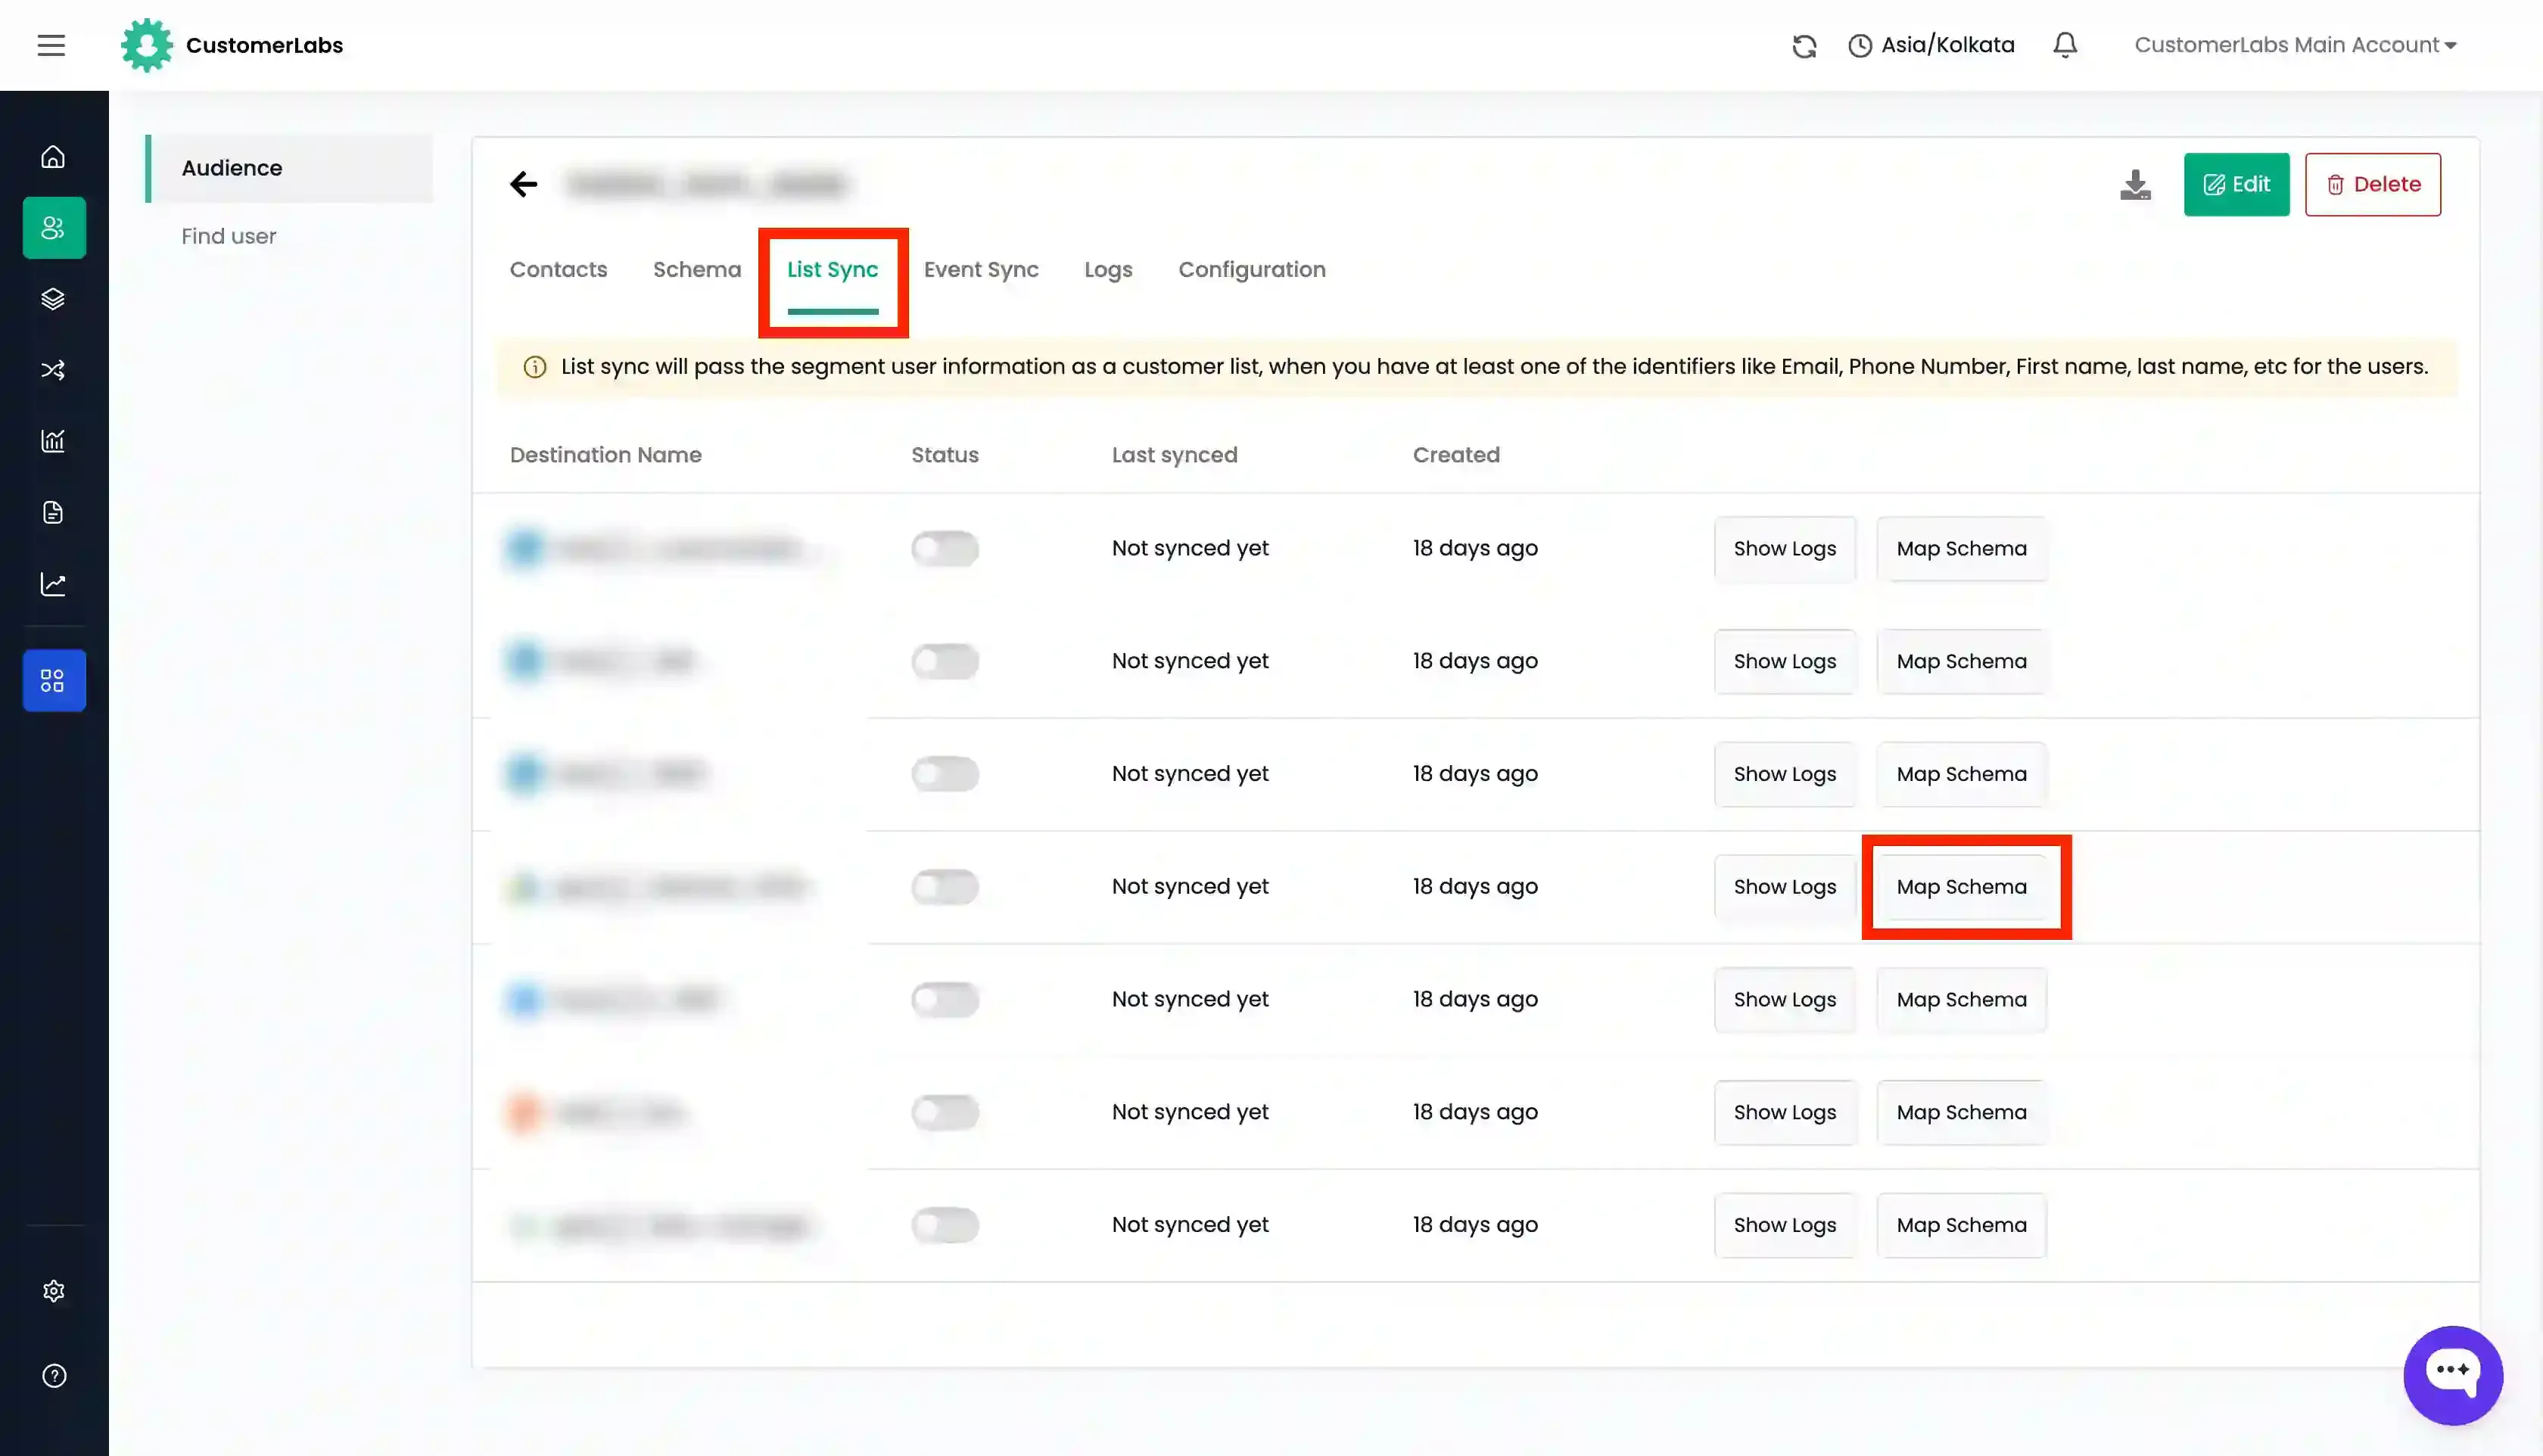
Now go to the “List Sync” tab and click on “Map Schema” for Google Ads.
-
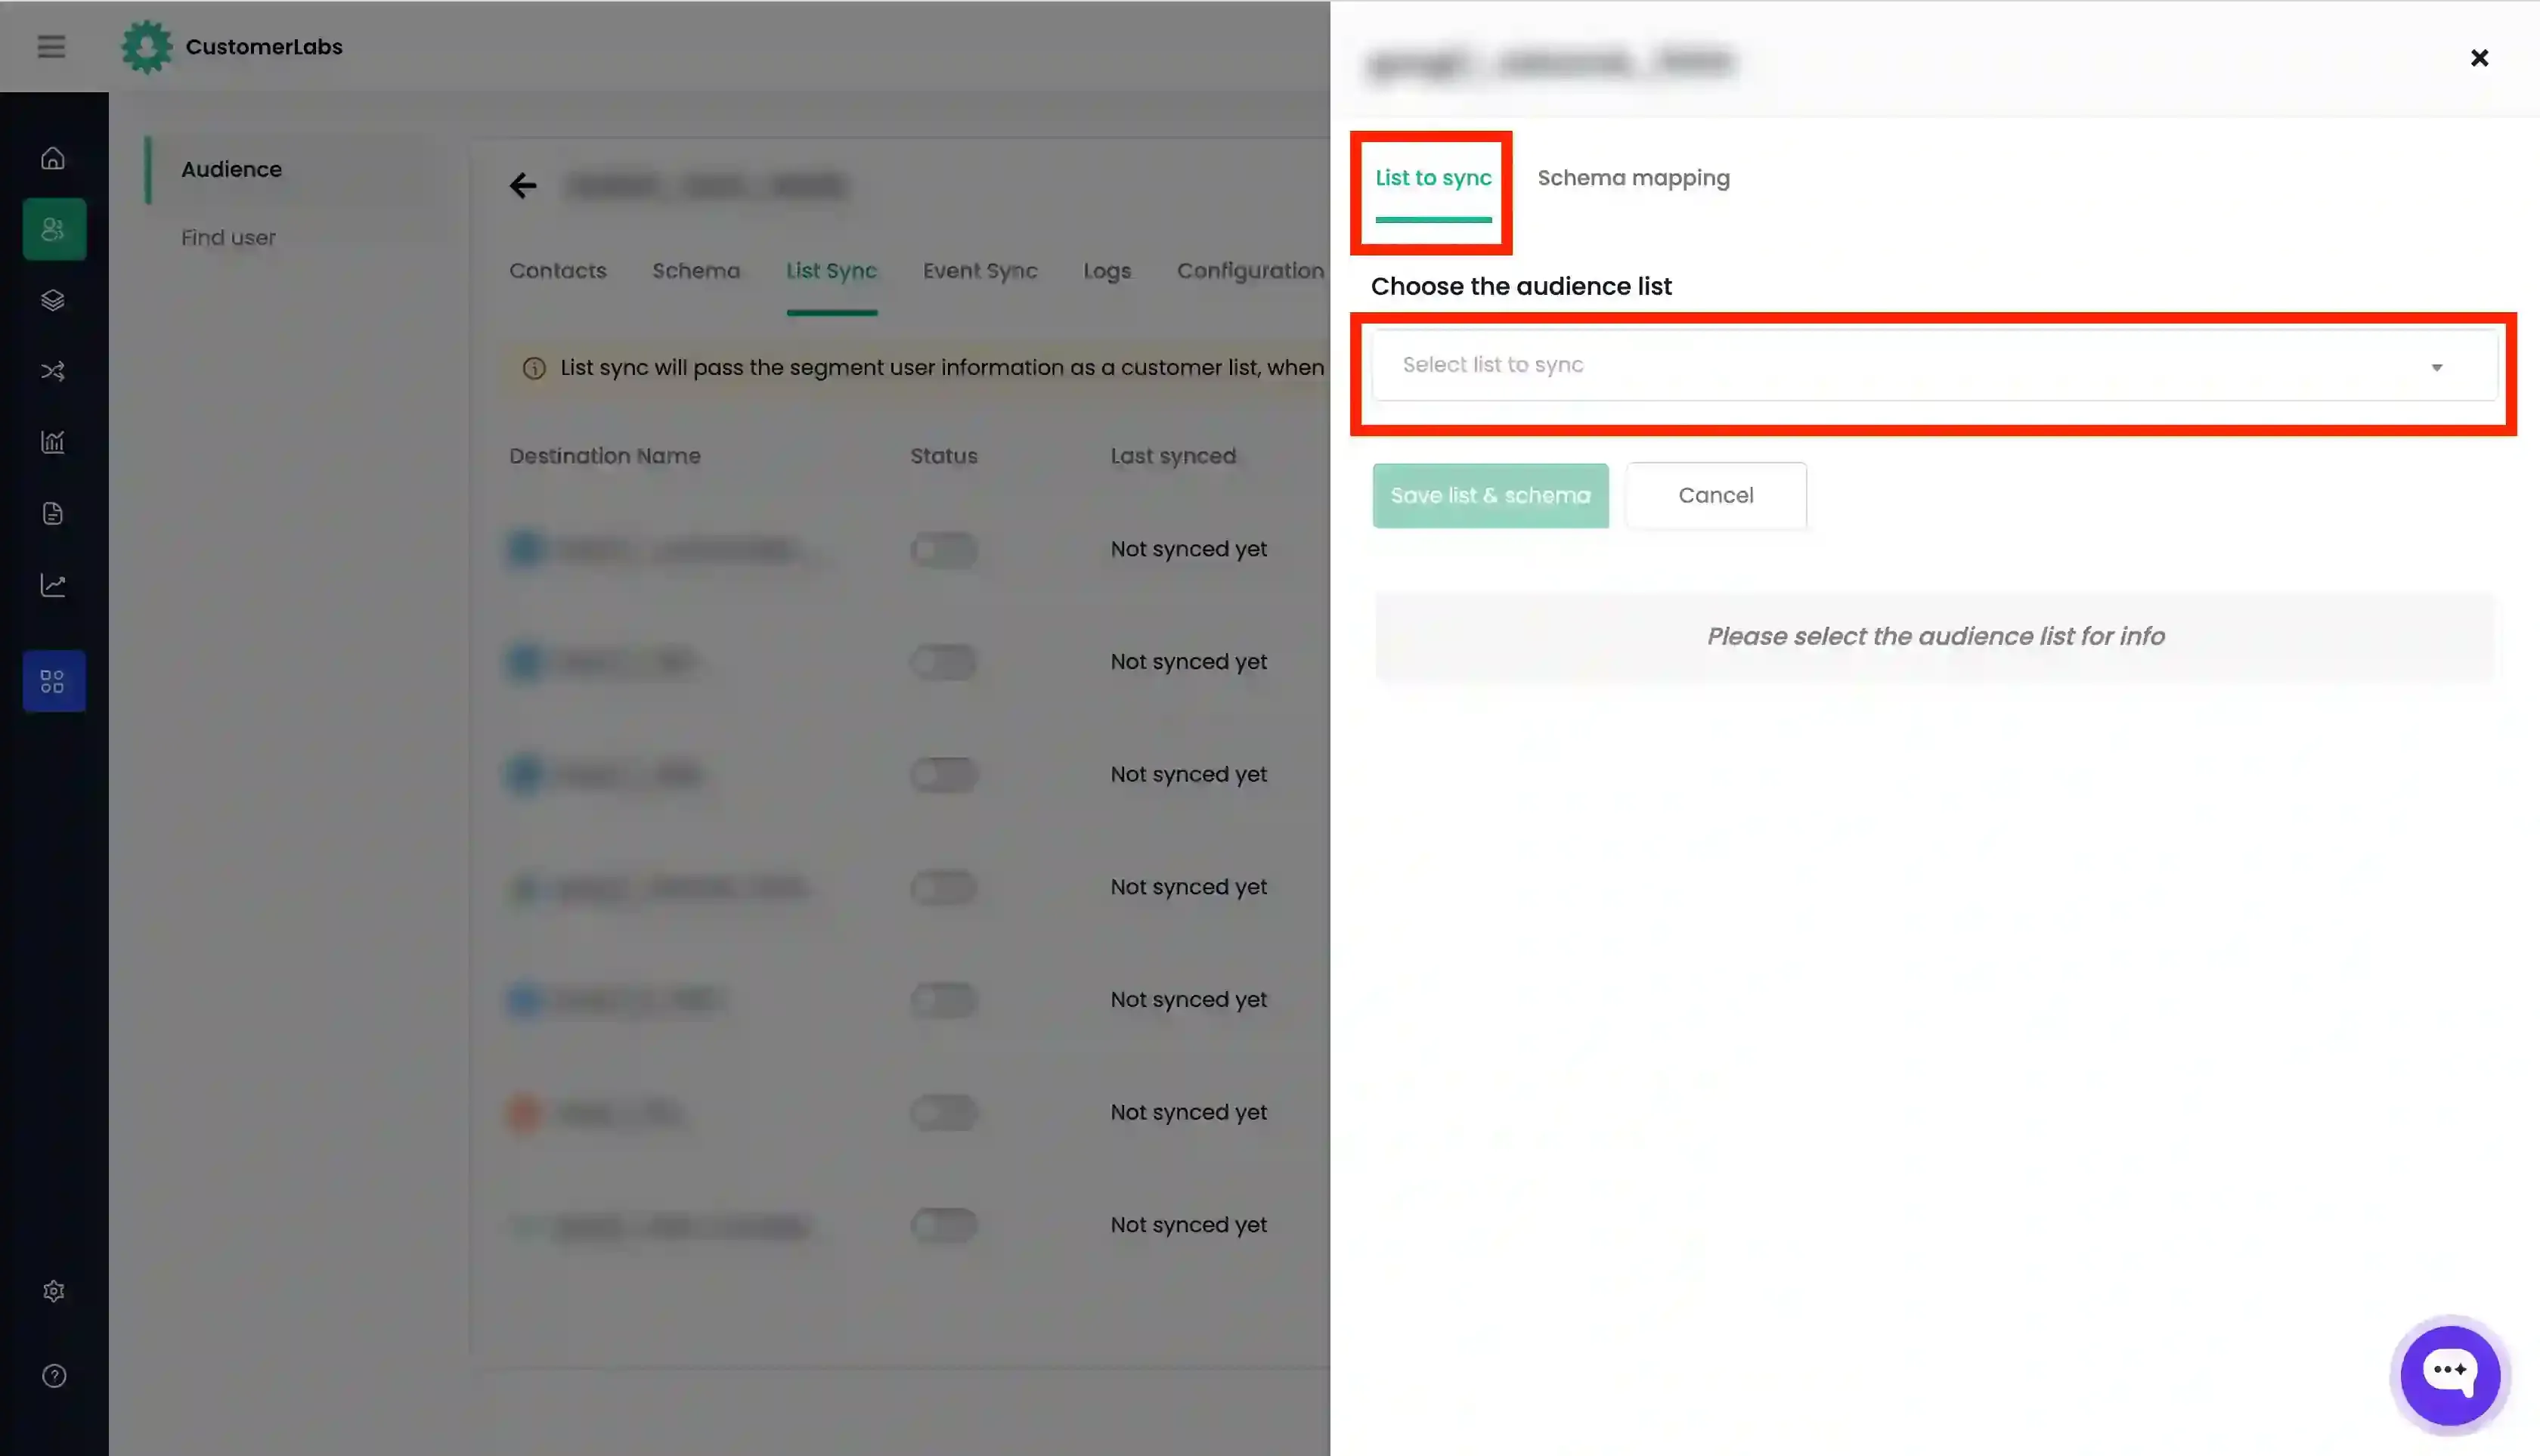
In the “List to sync” tab, click the dropdown under “Choose the audience list”. Here you can either:
- Select the audience list from the lists that are already created in Google Ads (OR)
- Choose “Create New List” and enter the name for the new audience list to be created in Google Ads.
-
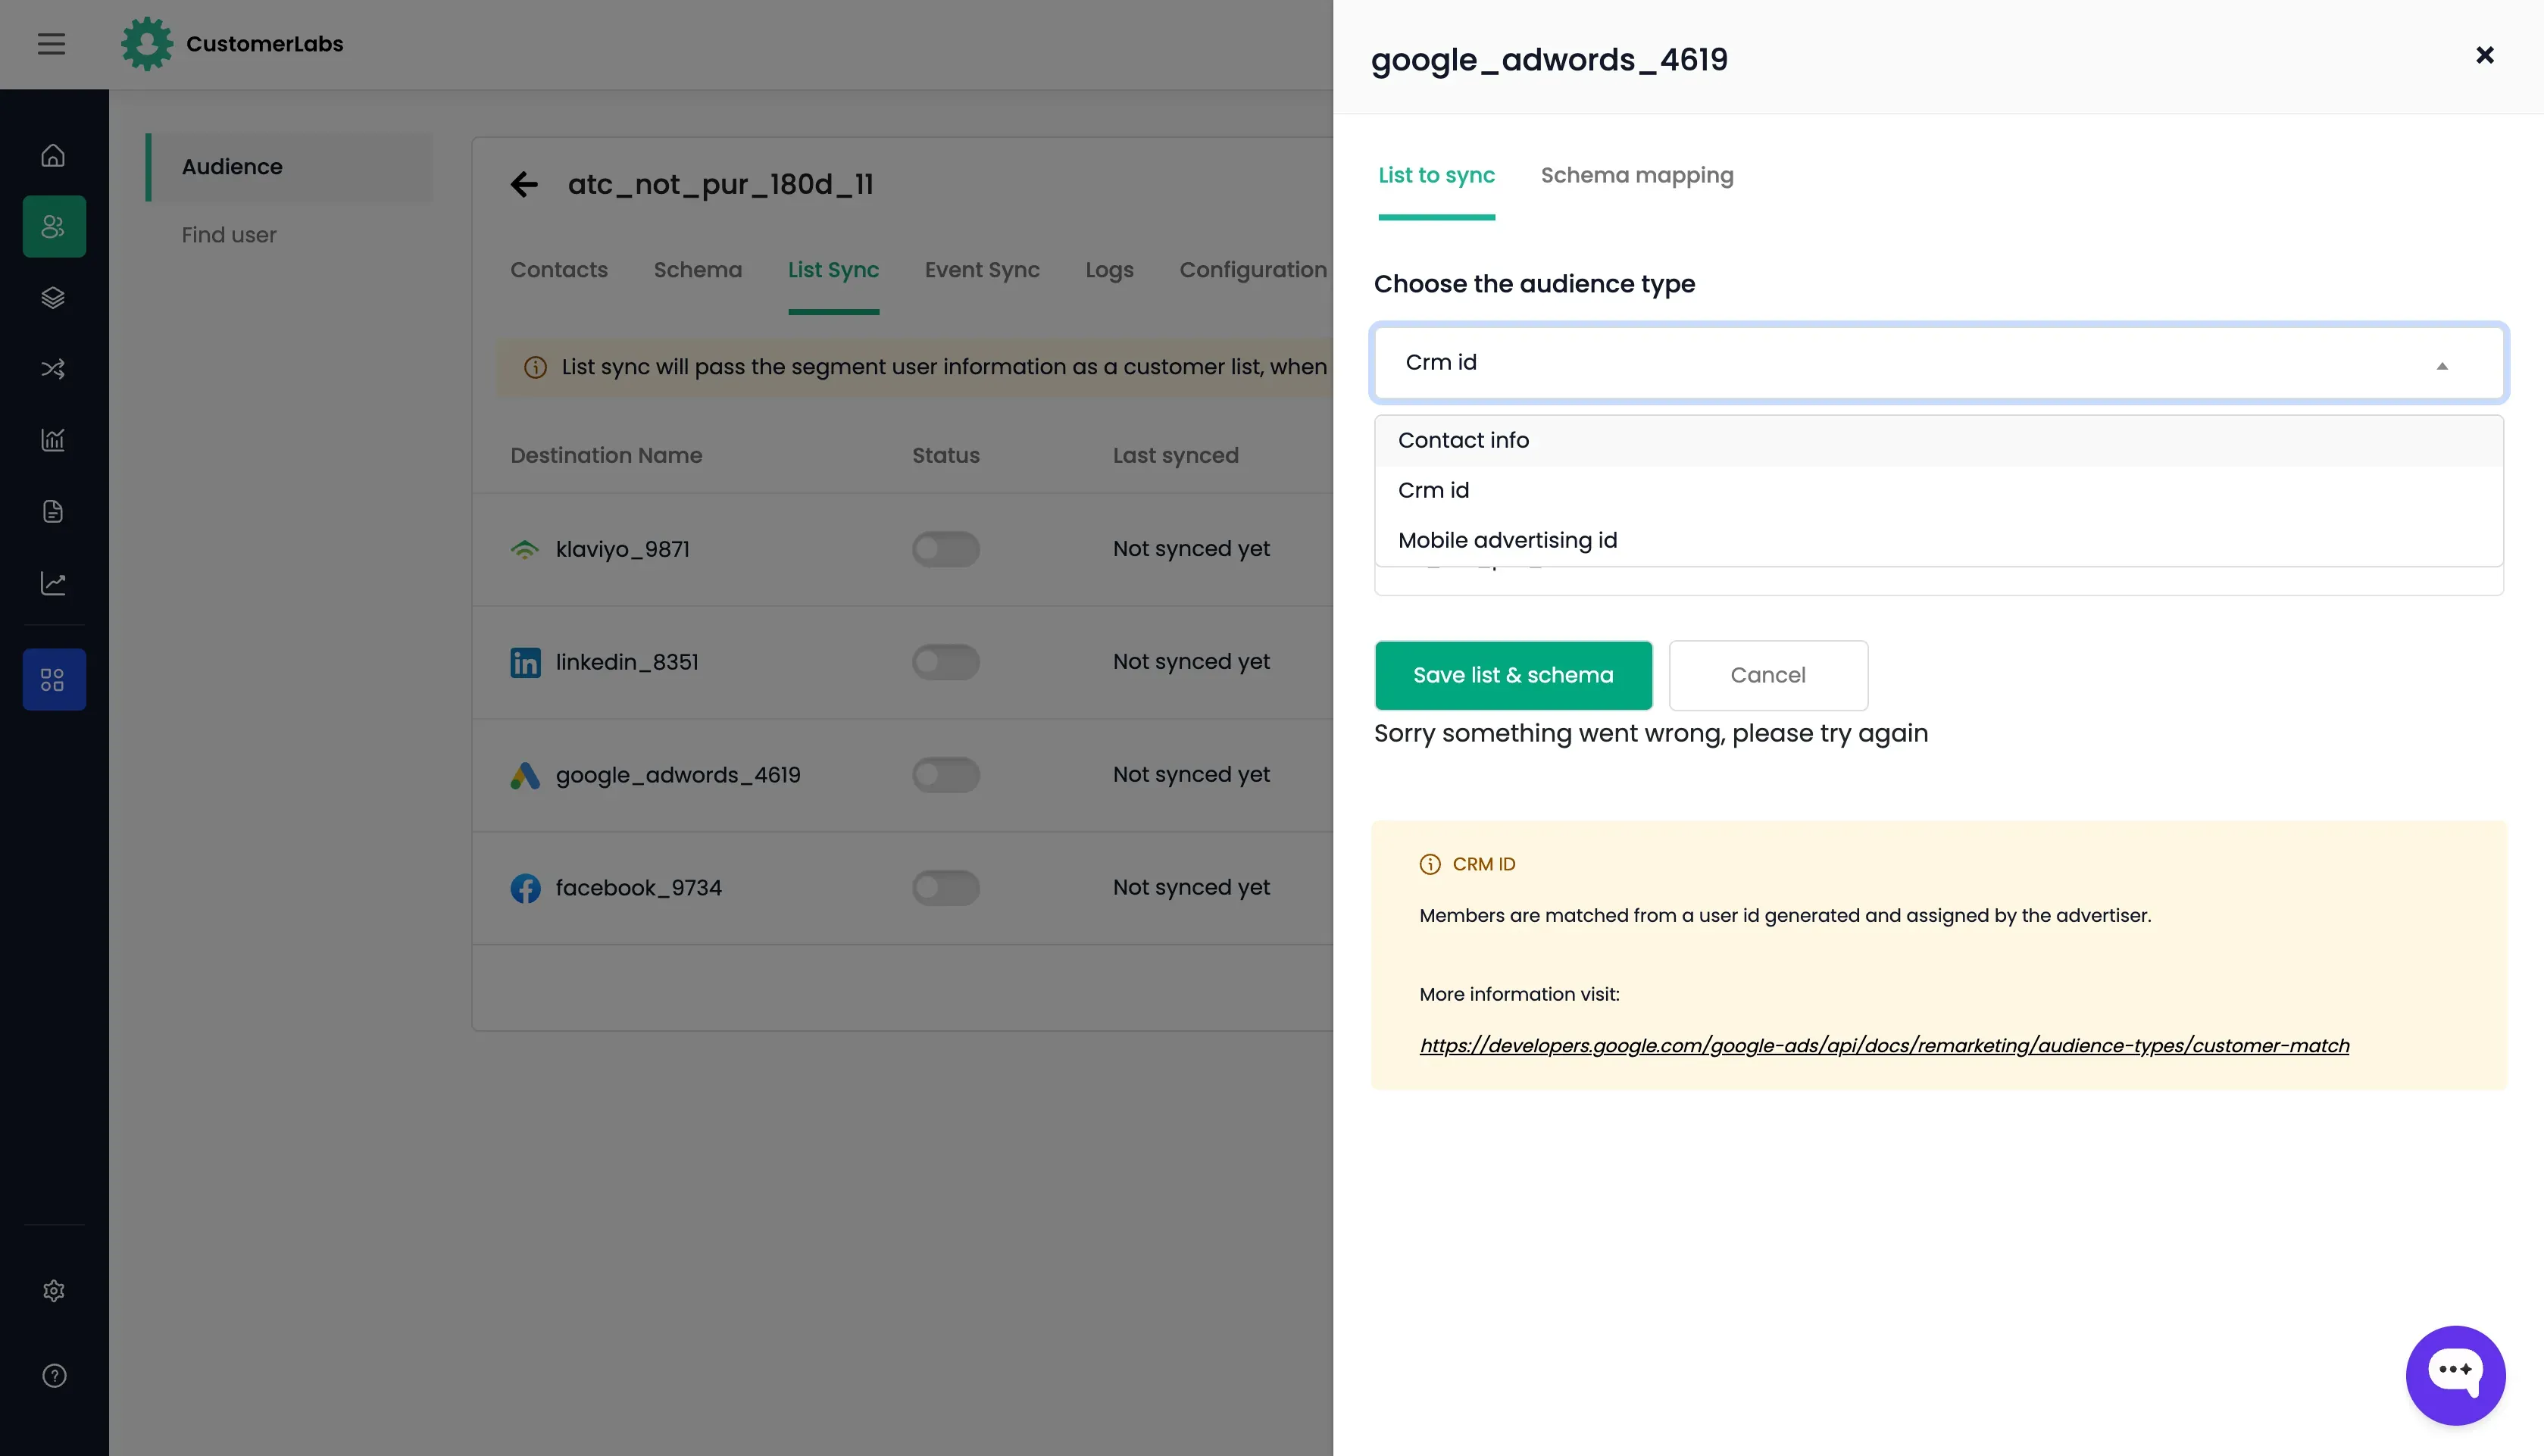
If “Create New List” is chosen, you have the option to choose the “Audience Type”. The following are the audience types available in Google Ads:
- Contact Info: If the audience synced is based on contact info schema such as
emailorphone. - CRM ID: If the audience synced is based on user ID schema such as
customerlabs_user_id,hubspot_user_id, etc. or any other user ID schema. - Mobile advertising ID: If the audience synced is based on mobile advertising ID schema such as Apple’s IDFA (iOS) and Google’s Advertising ID (Android).
- Contact Info: If the audience synced is based on contact info schema such as
-
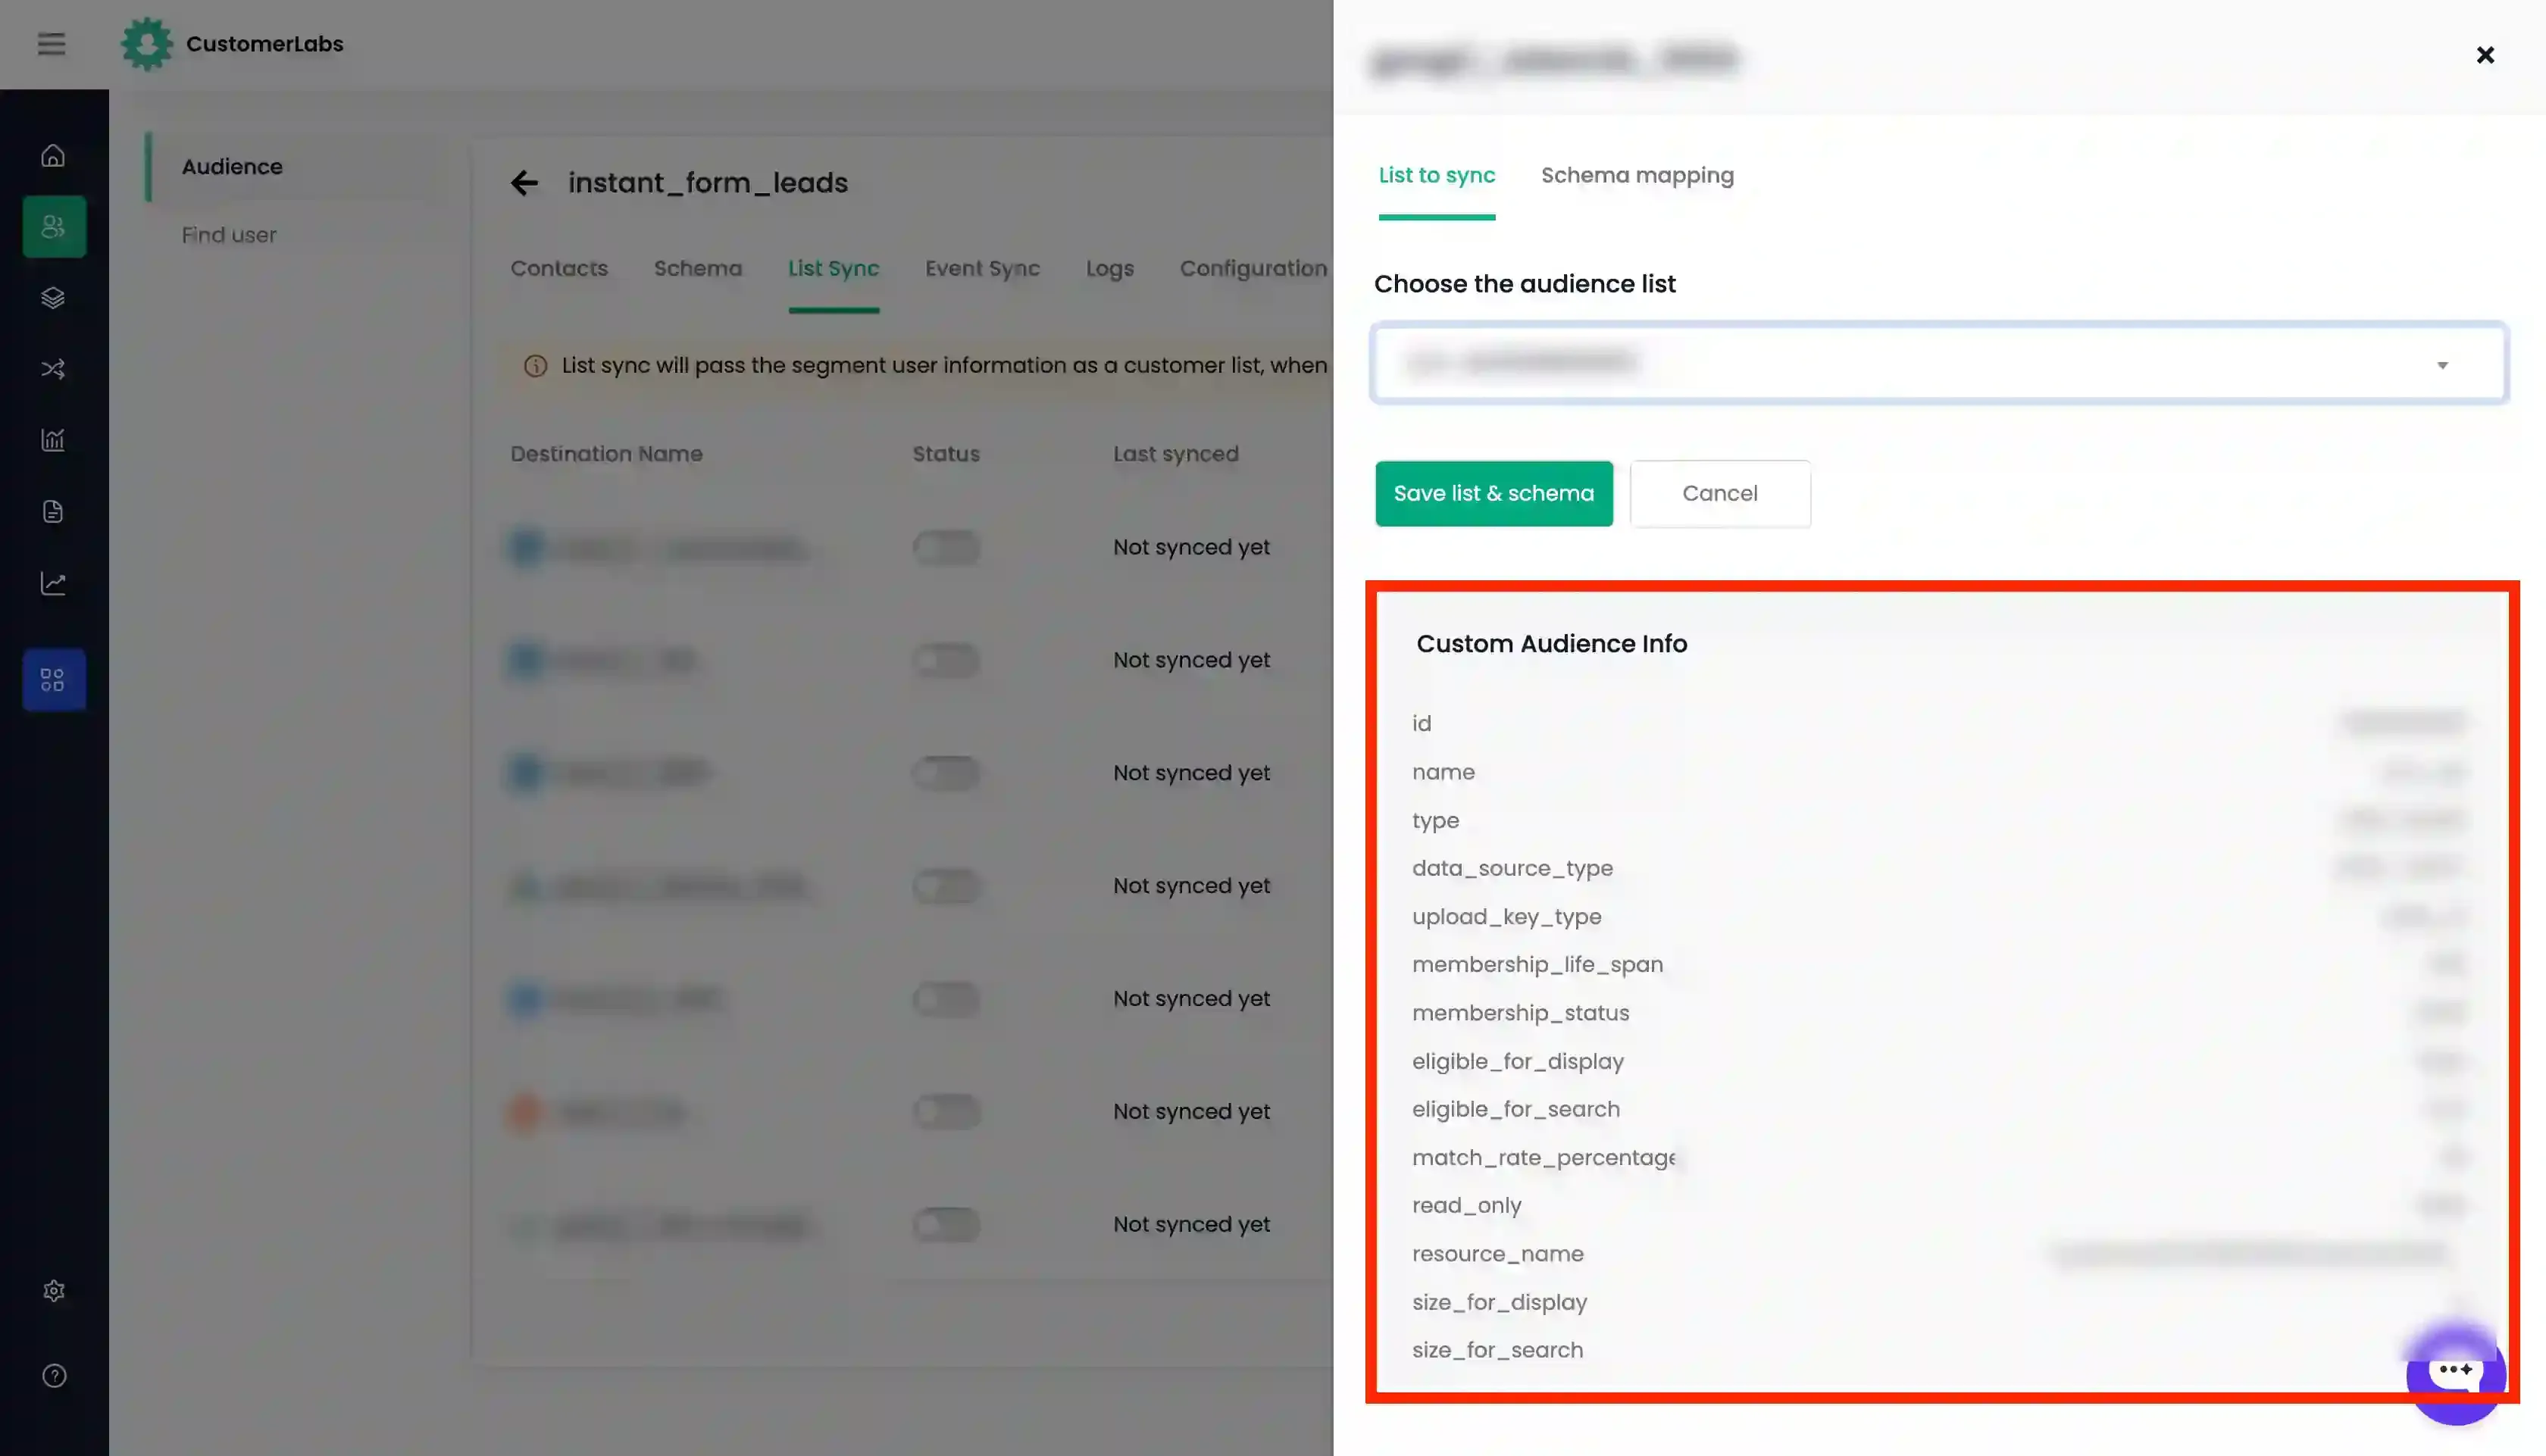
Once the audience list is selected or created, “Custom audience Info” will be displayed.
-
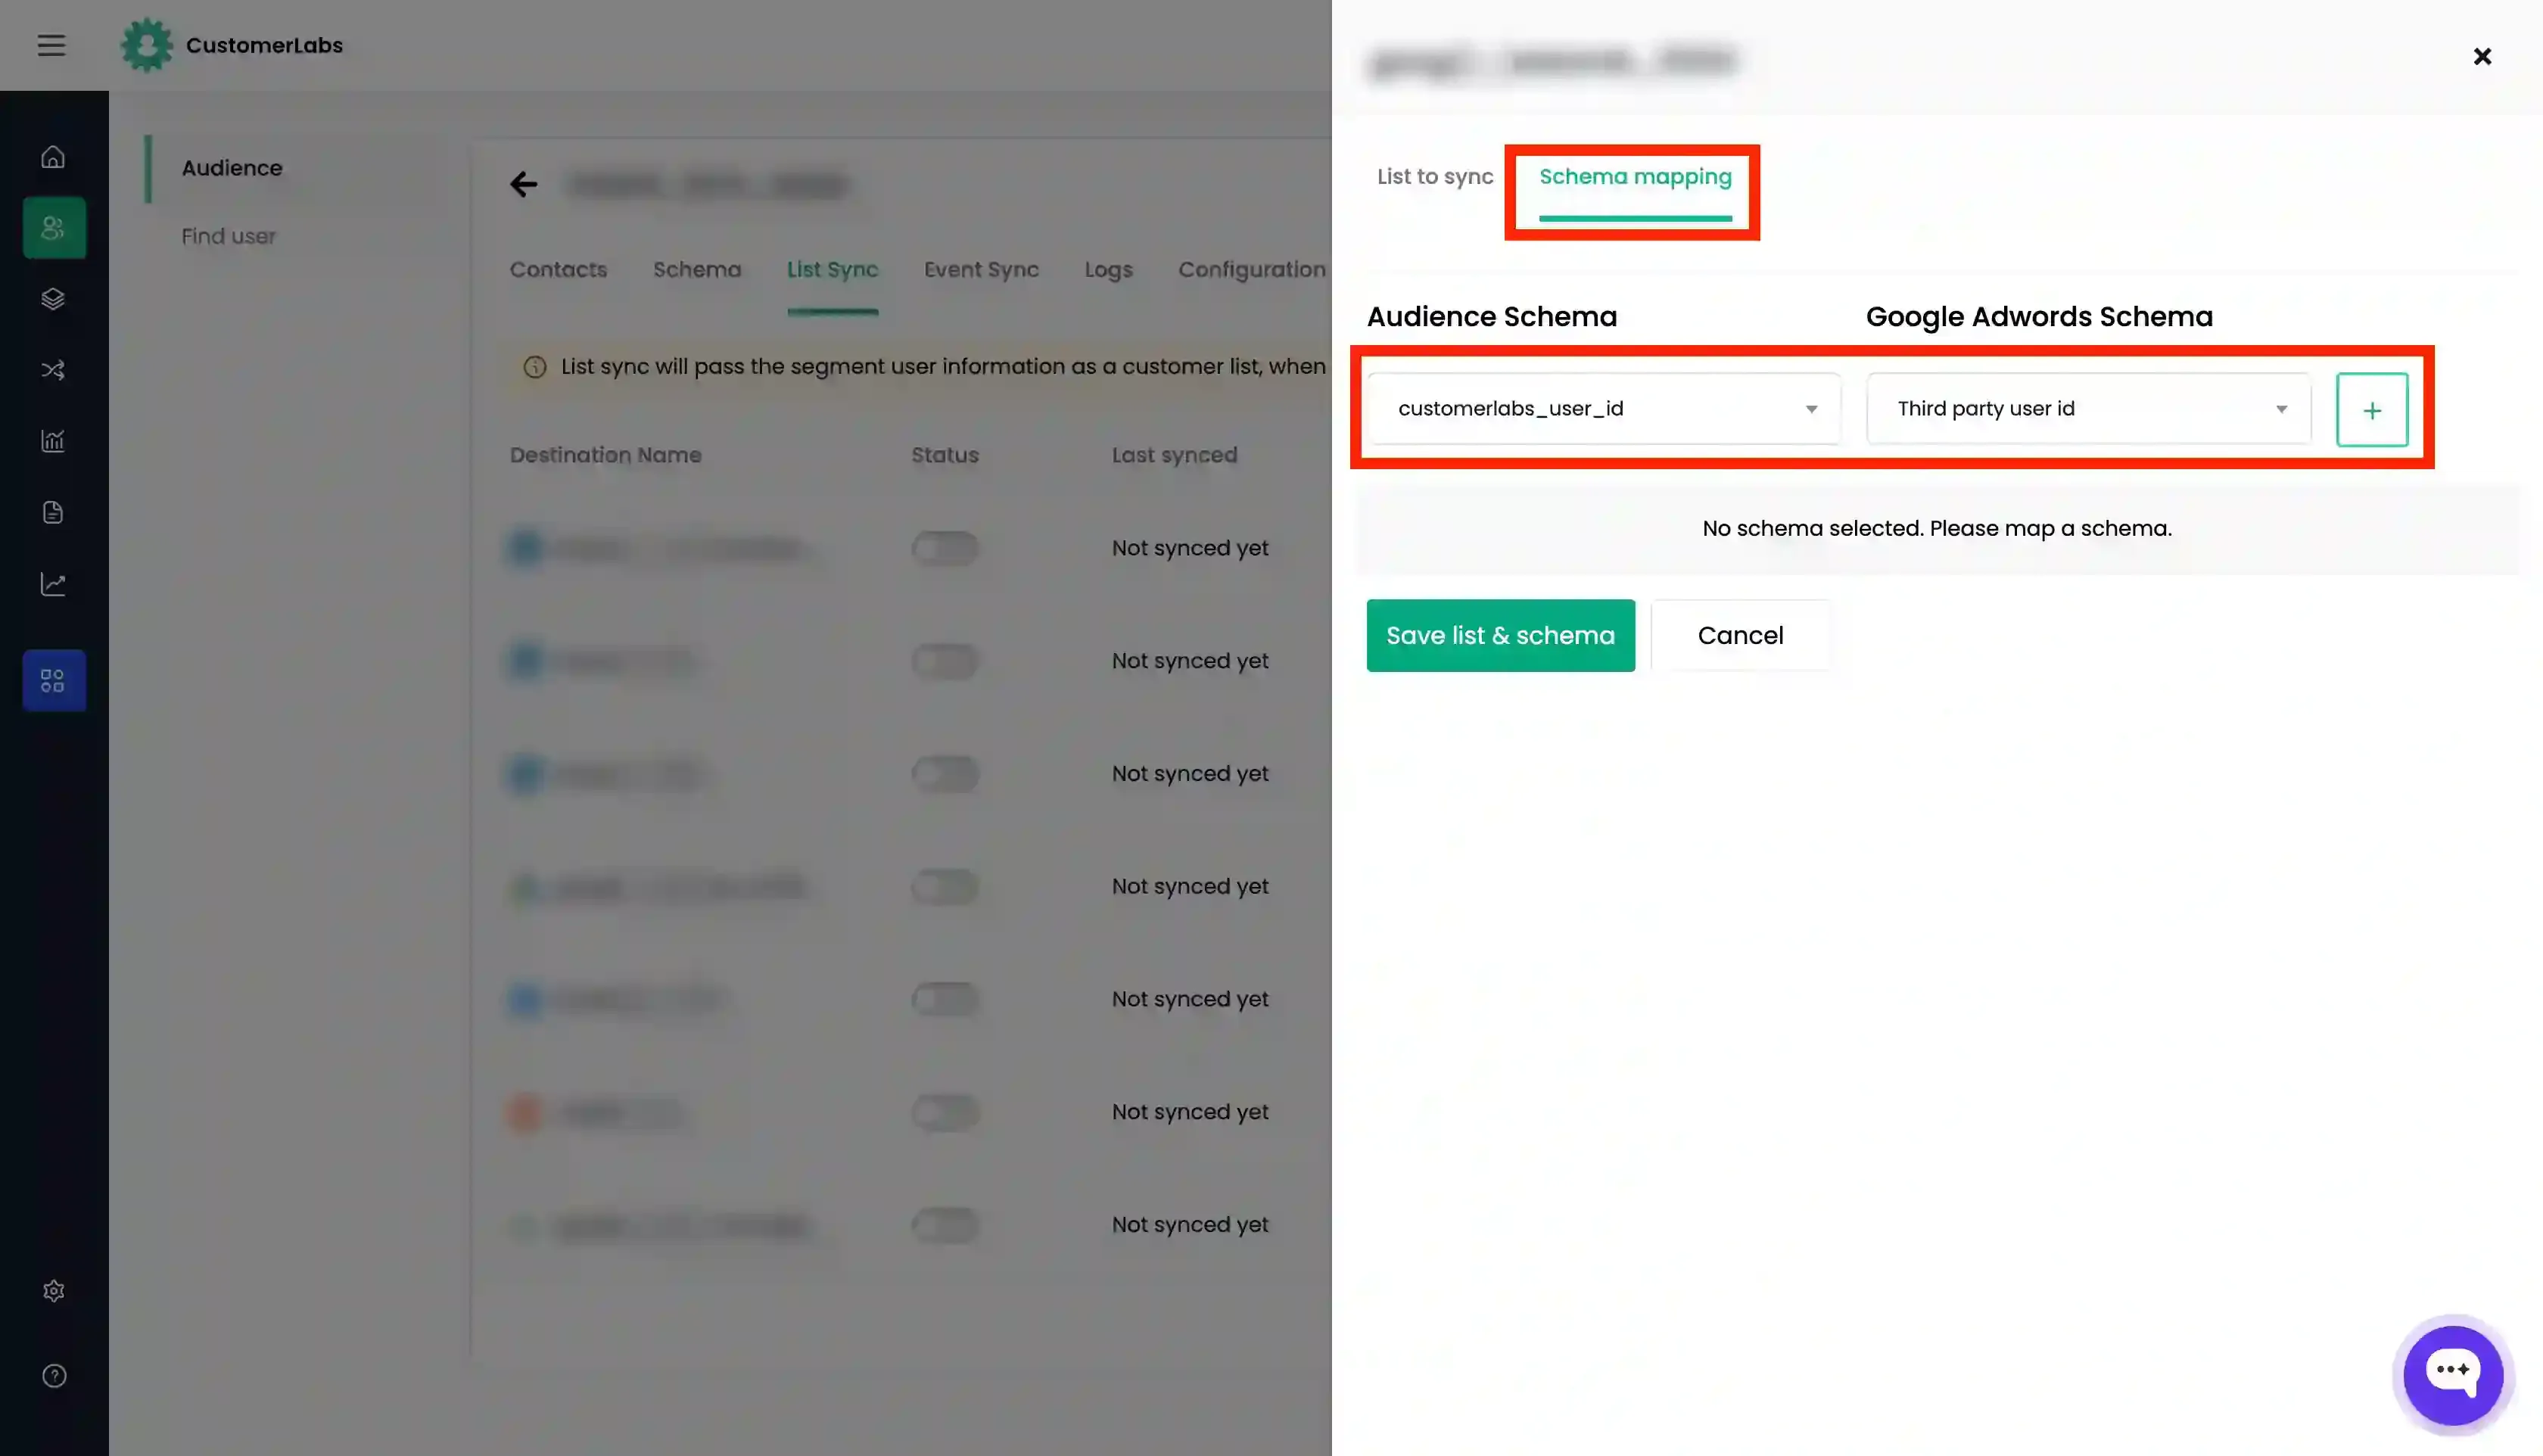
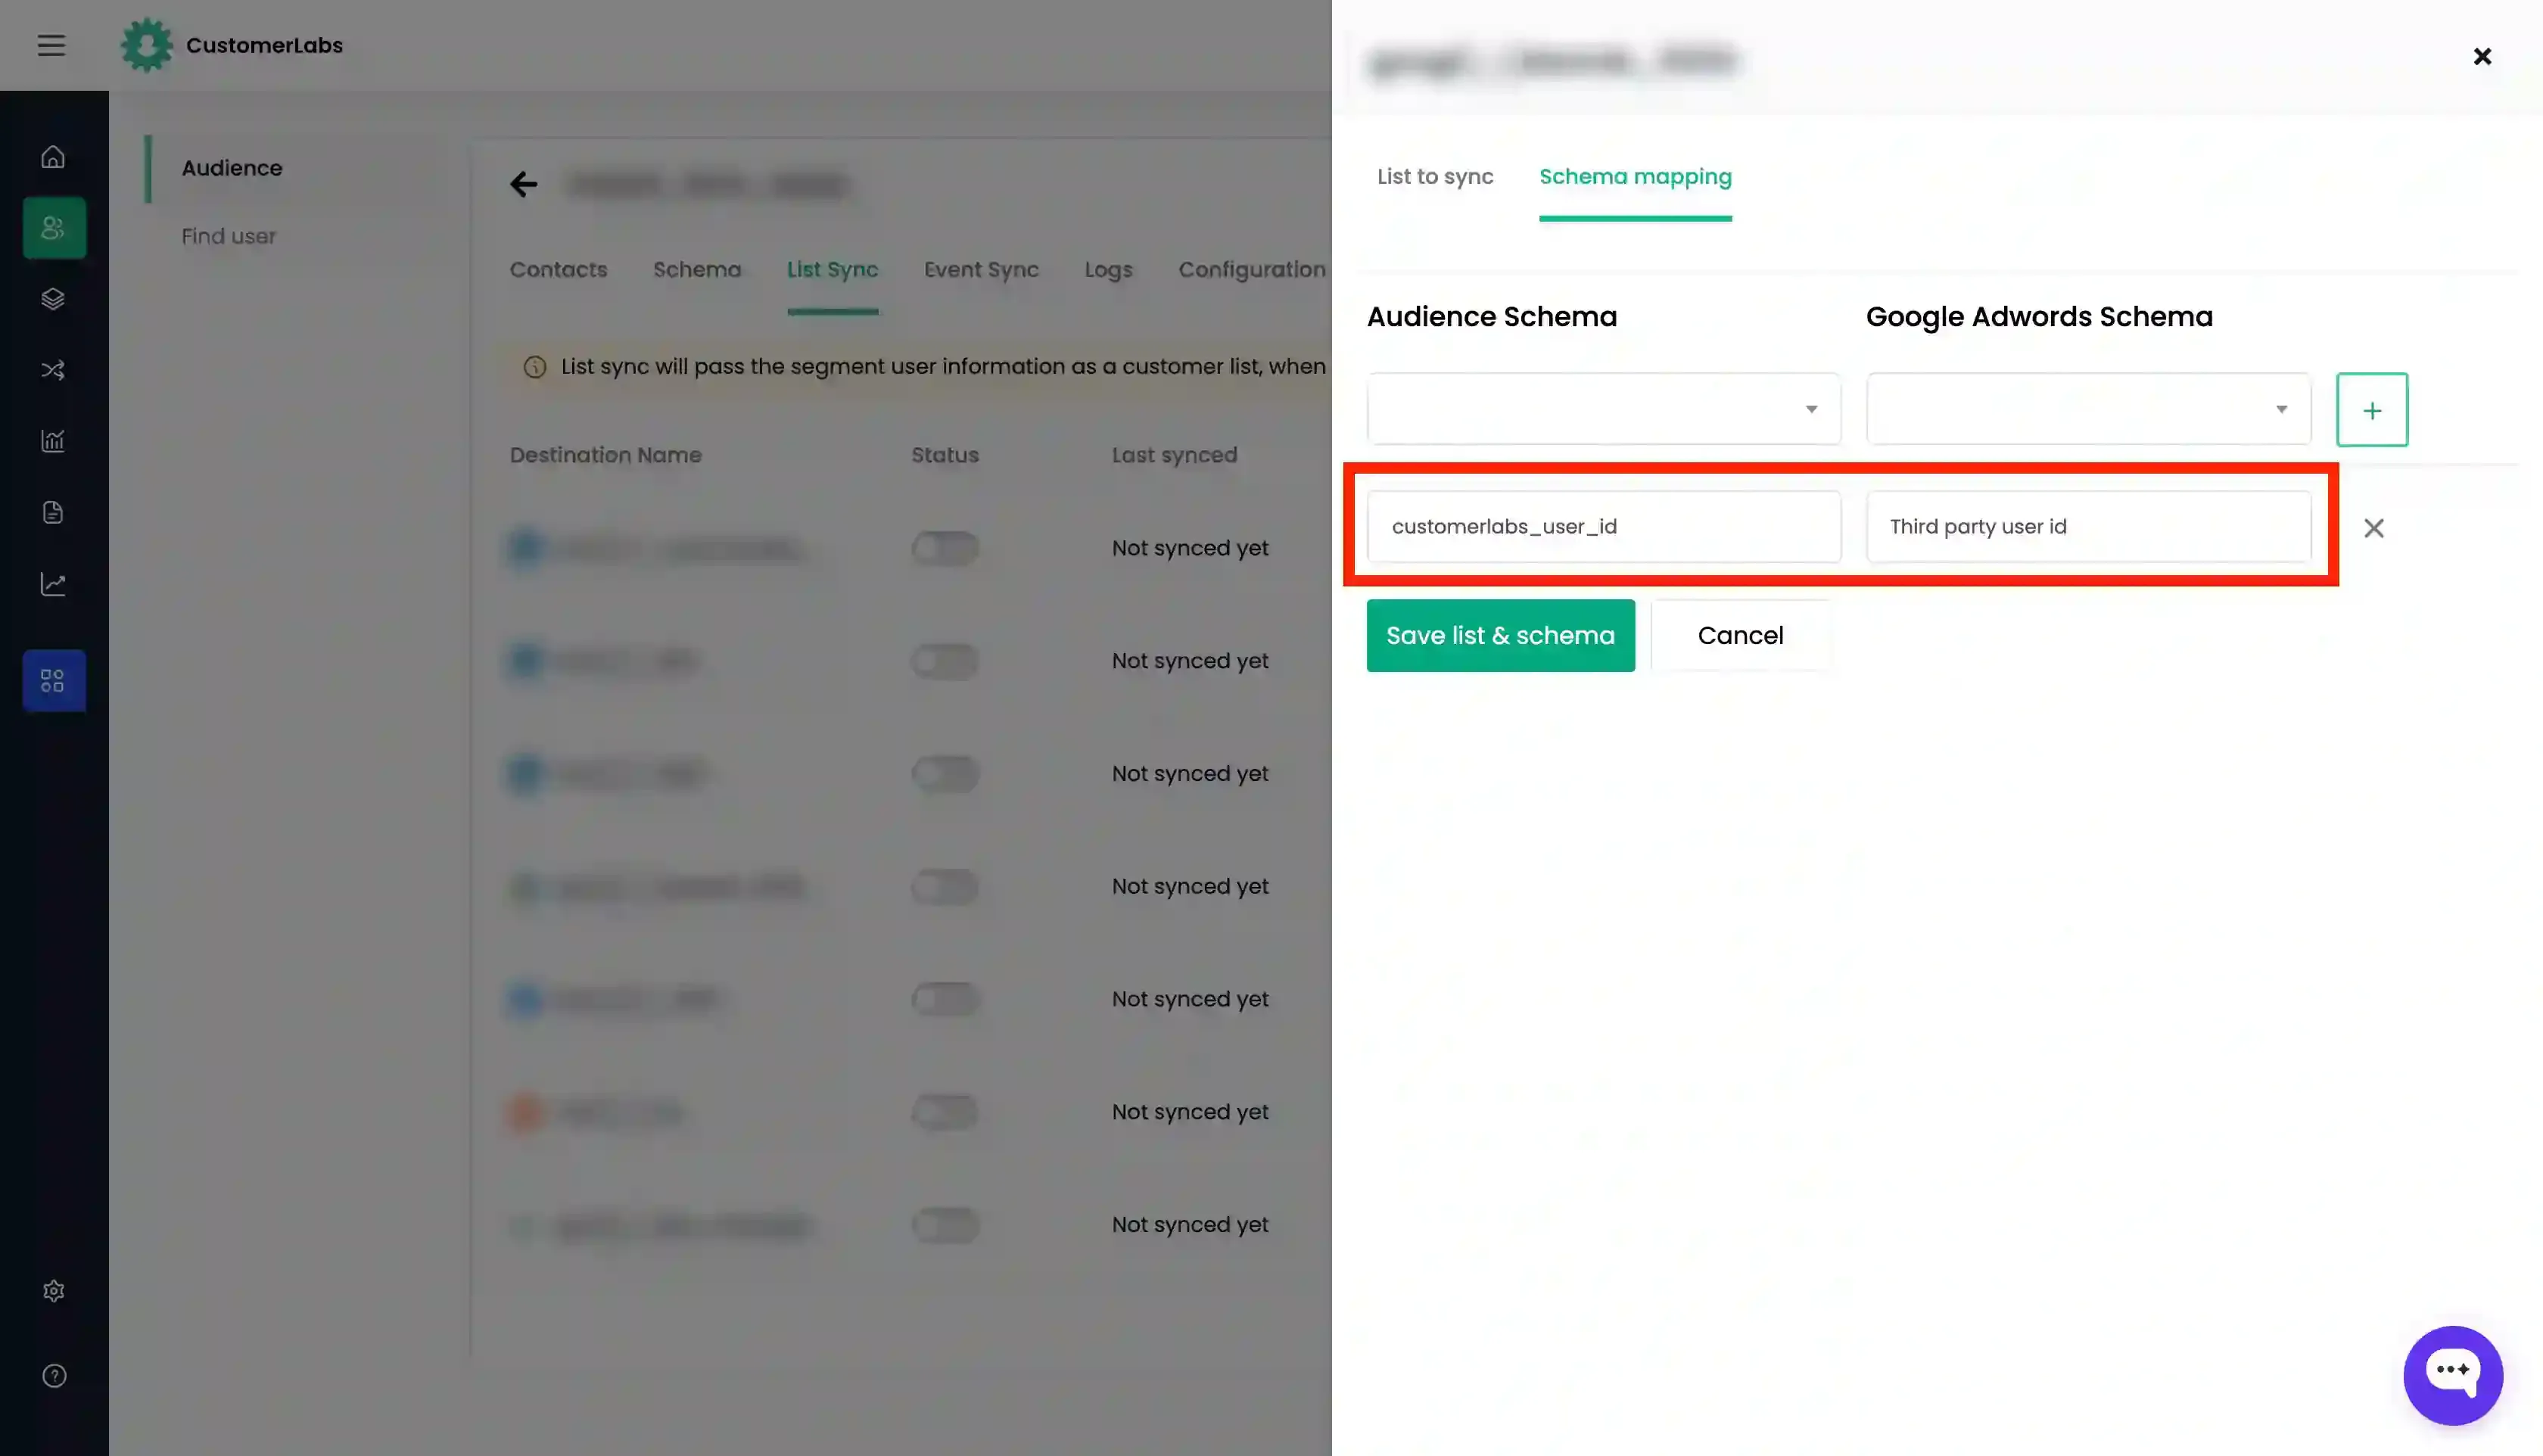
Go to the “Schema Mapping” tab and map the audience schema with the Google Ads destination schema for the identifiers that you have added in Step 2 by adding each schema using the “+” button.
-
Once this is done, click “Save List and Schema”.
-
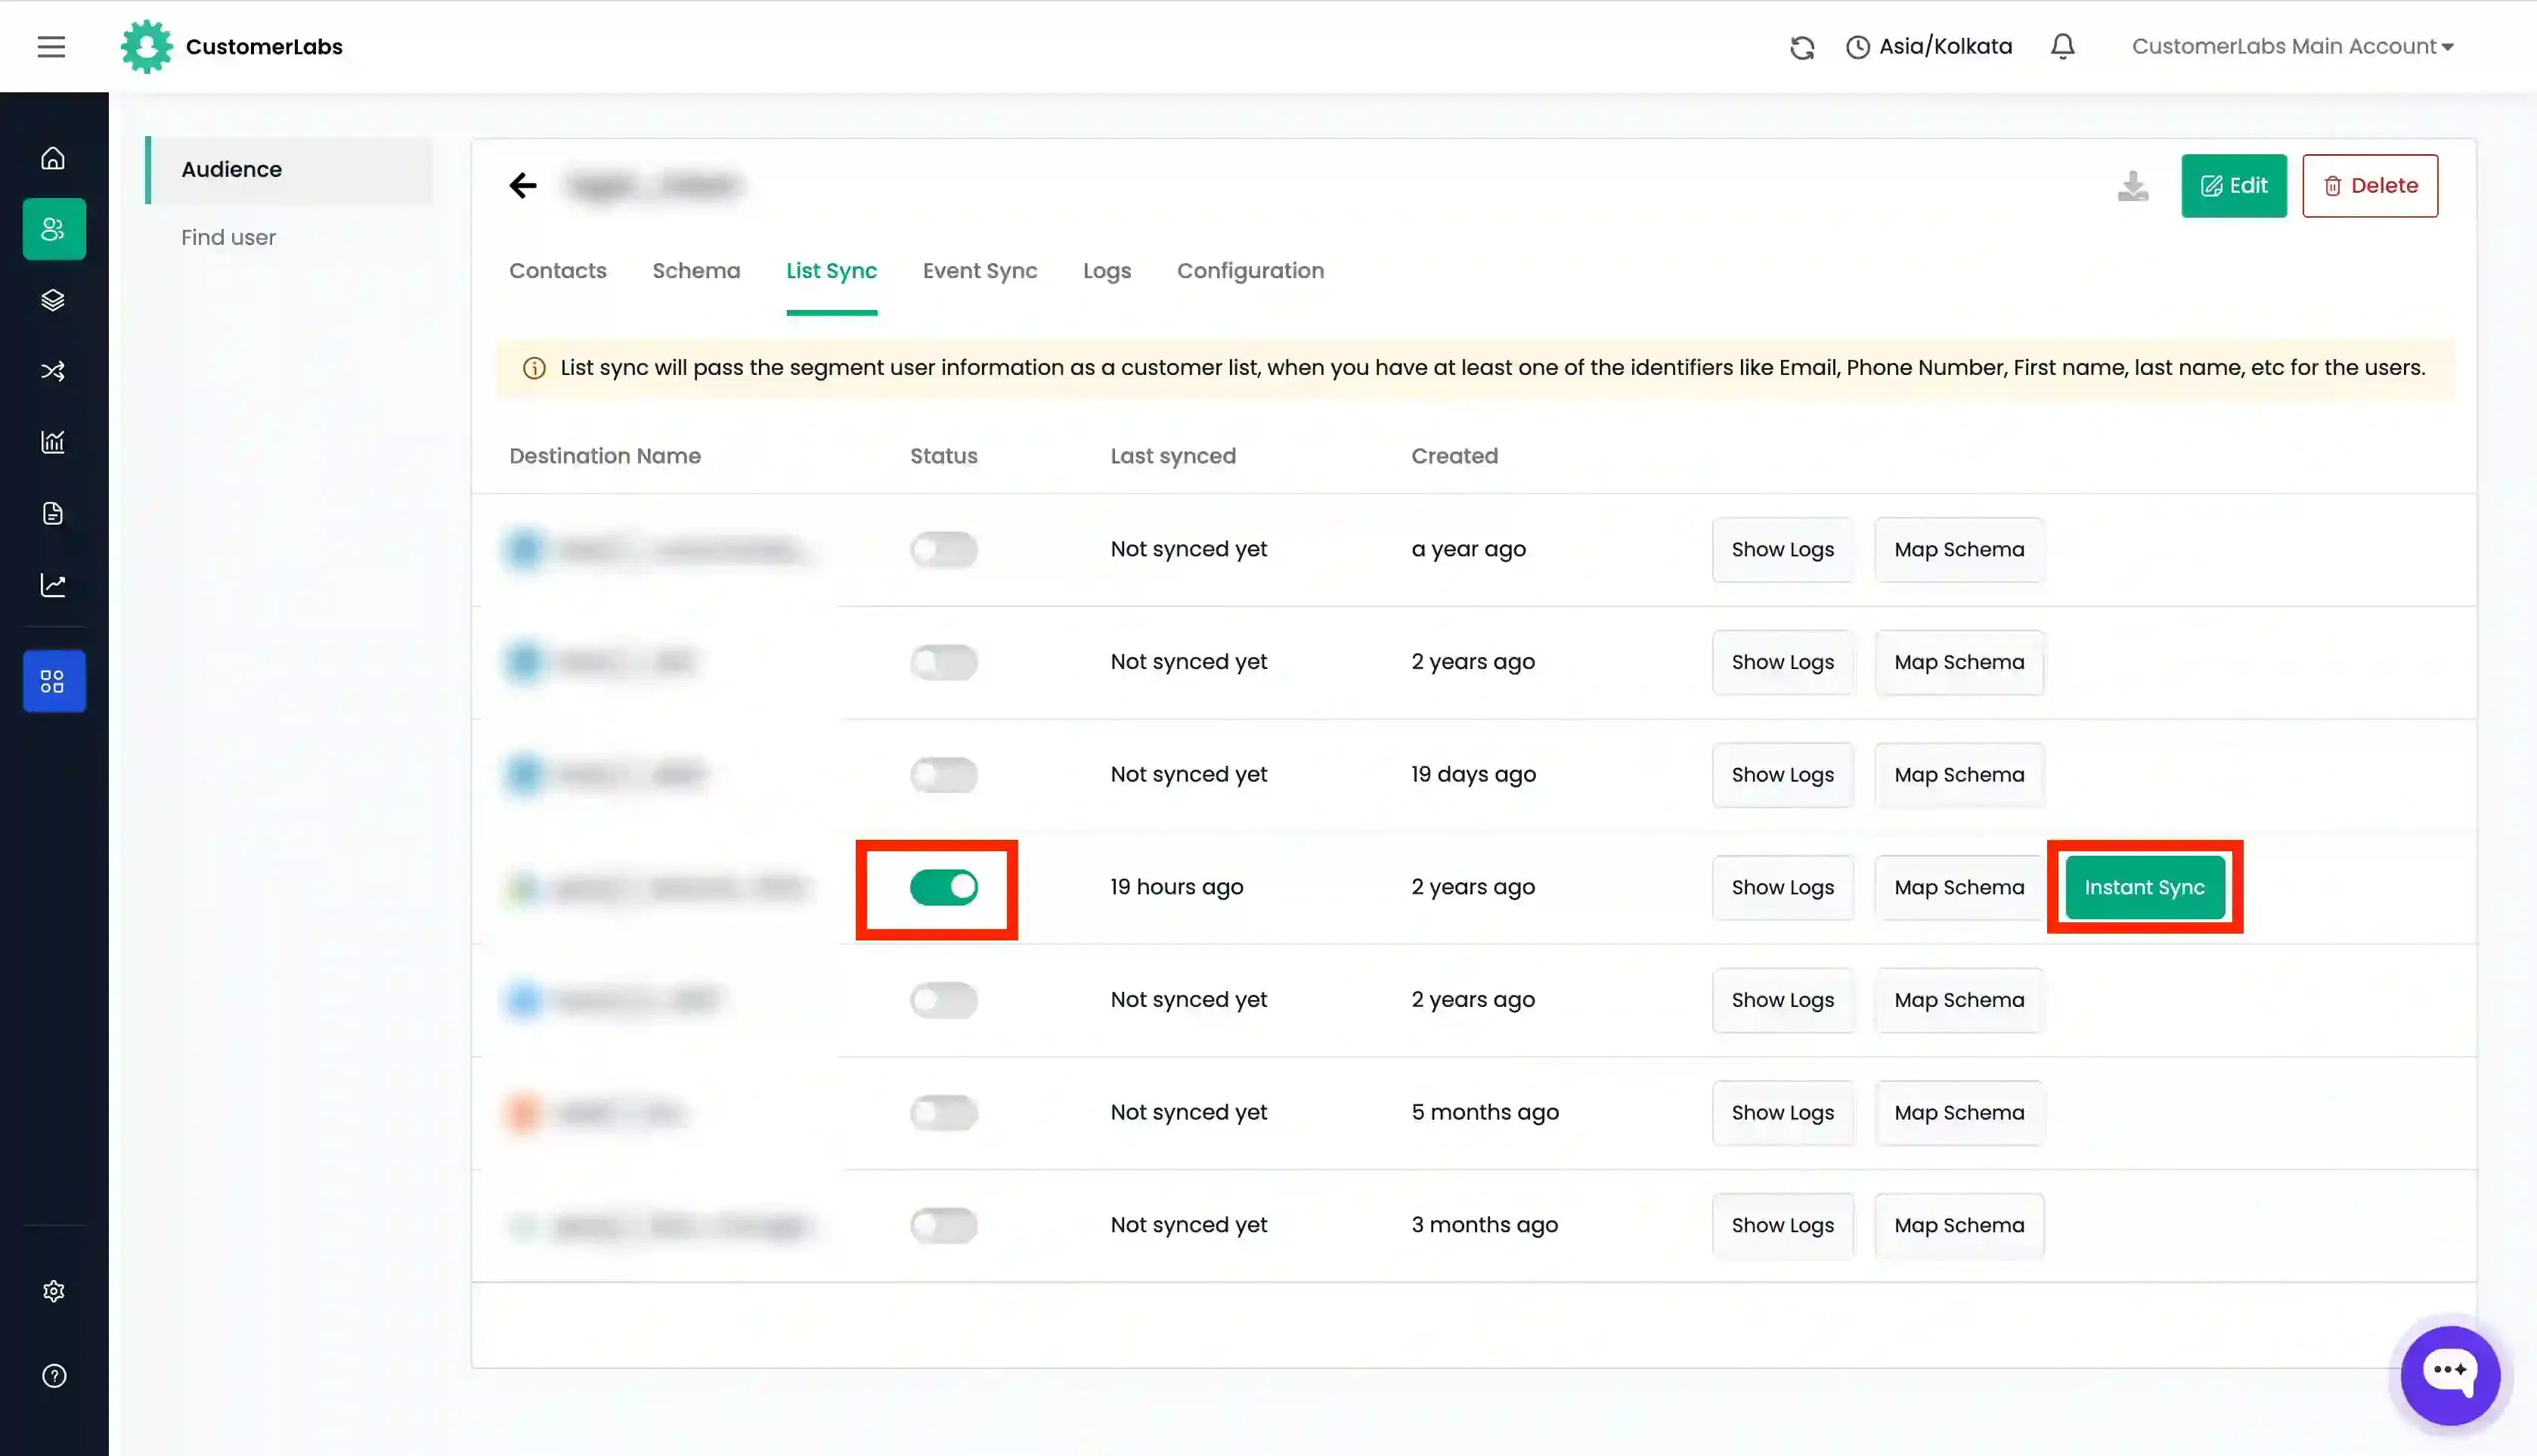
Now enable the toggle under “Status” for Google Ads.
-
Click “Instant Sync” to sync the list immediately.
-
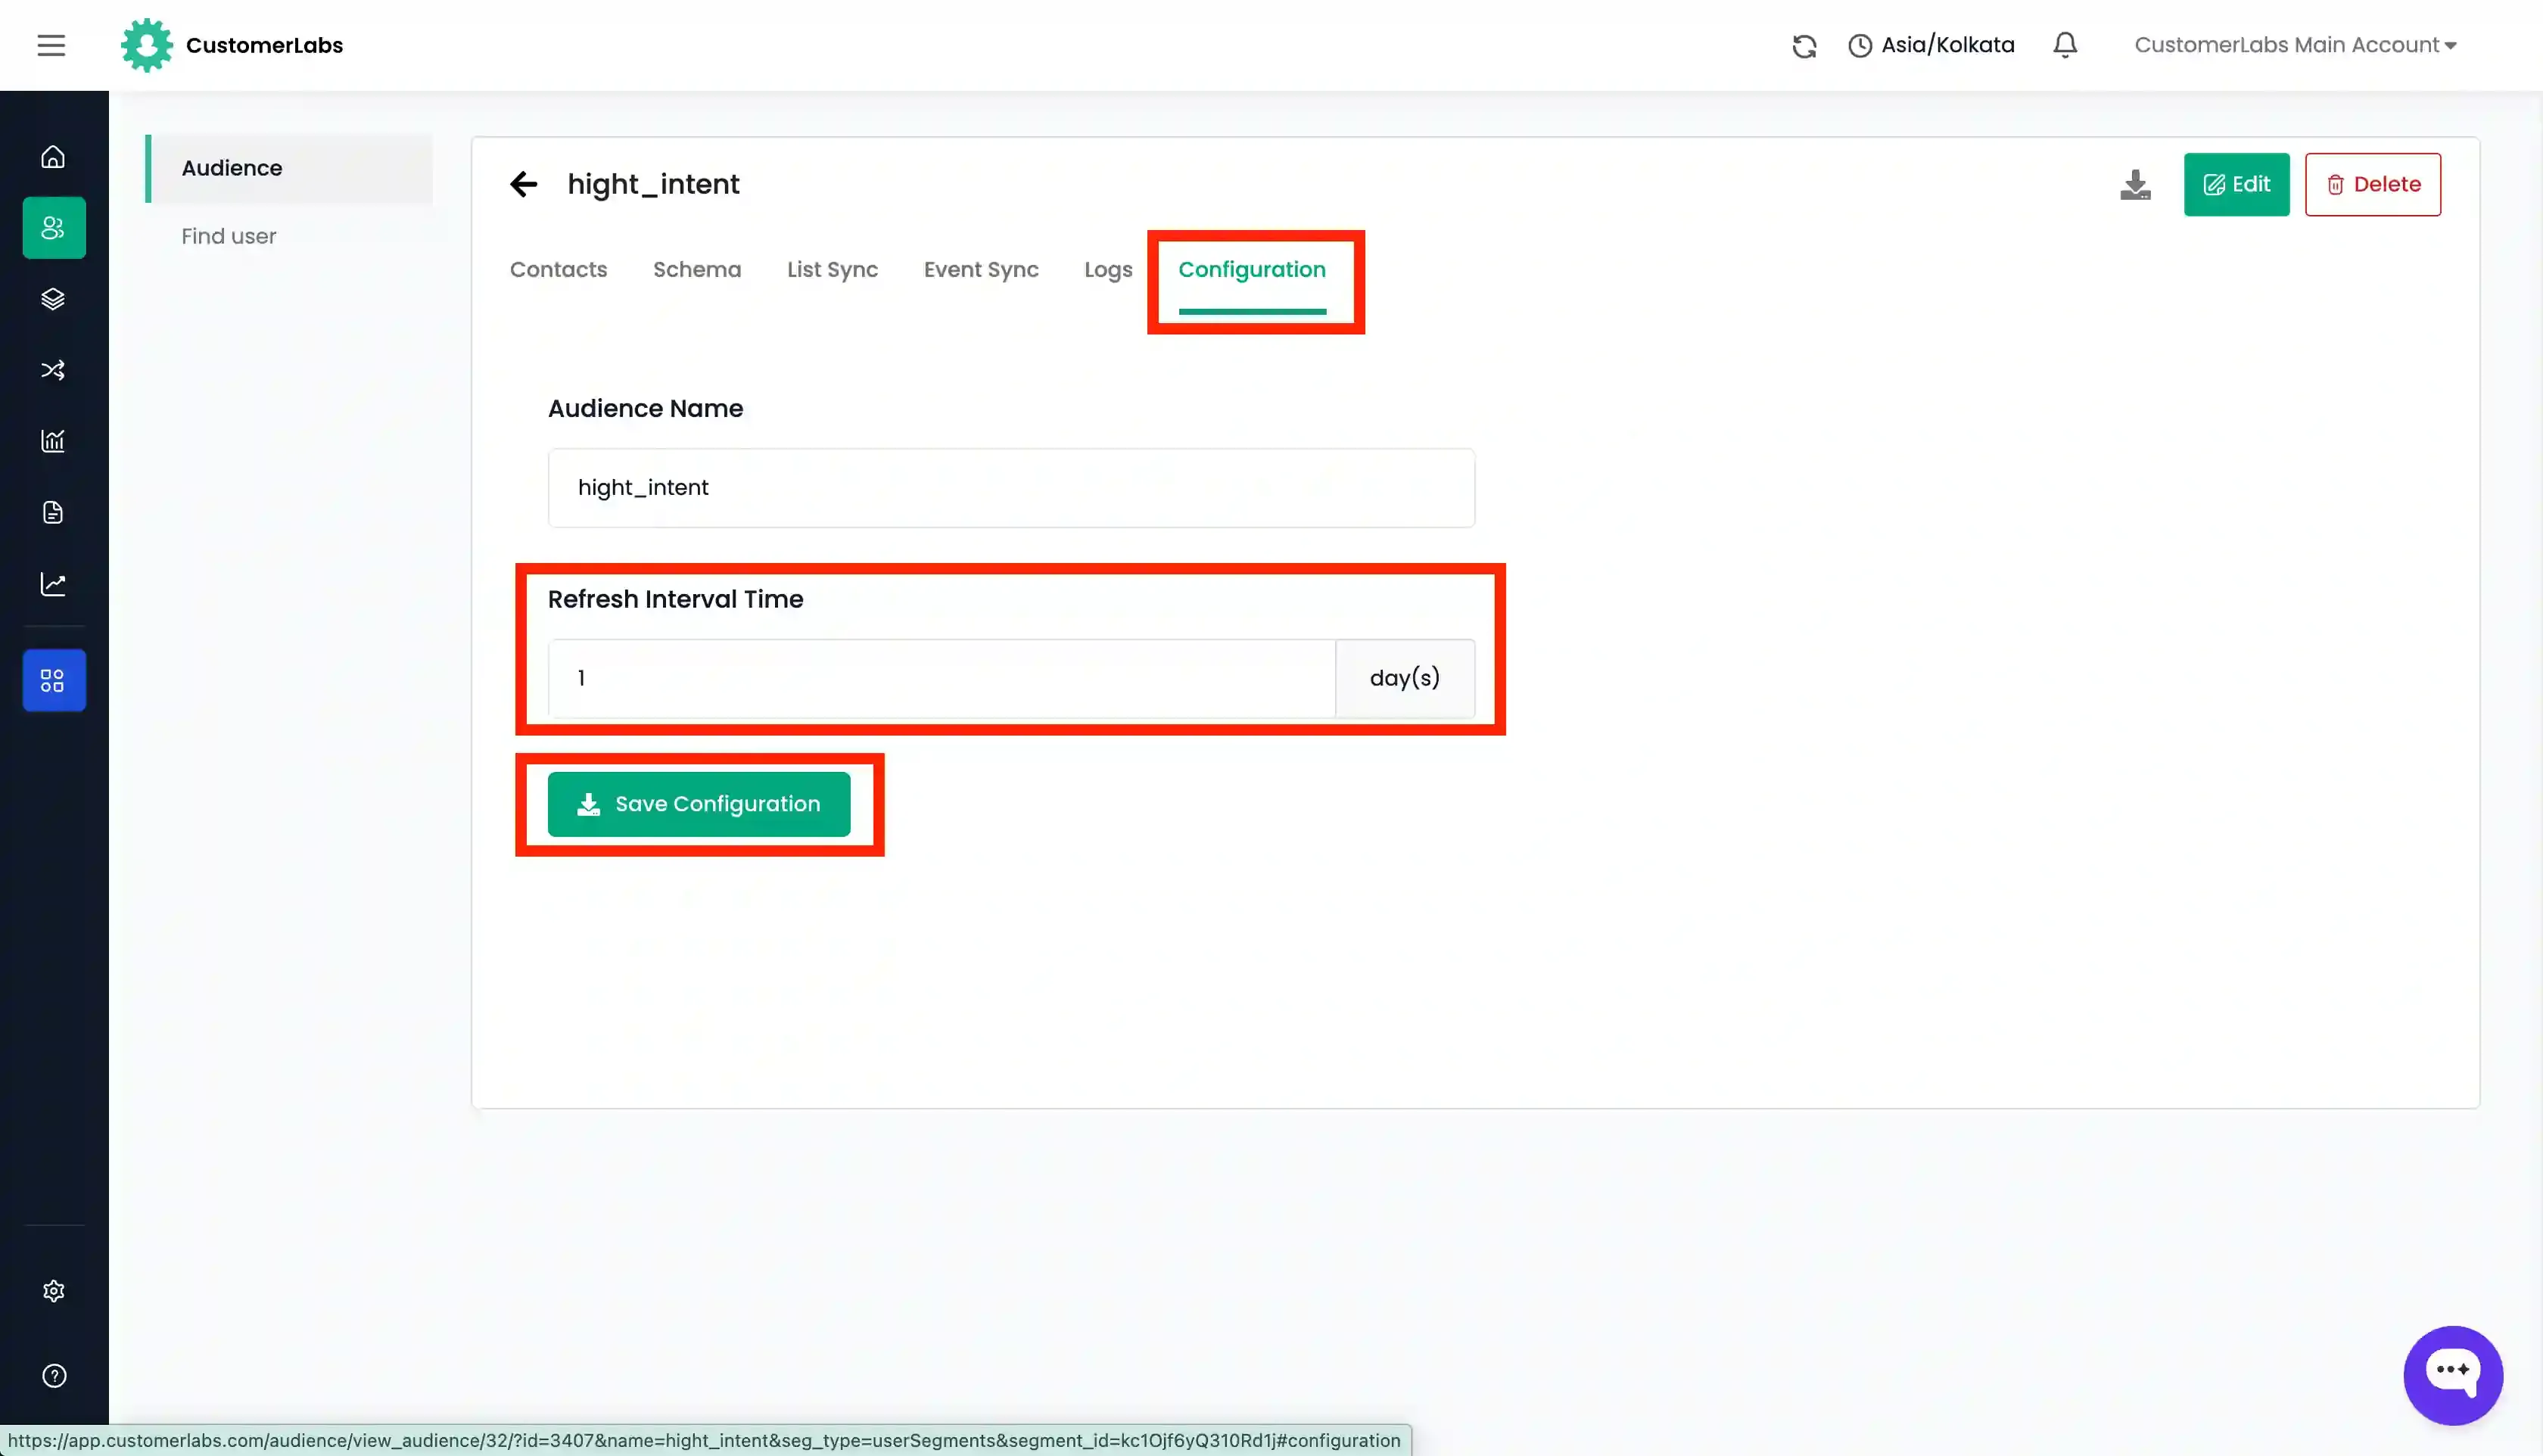
Go to the “Configuration” tab and set the “Refresh interval” as required. This ensures your Google Ads audience stays up-to-date automatically.
-
You can check the sync logs for the audience from the “Logs” tab and also the log specifically for Google Ads by going to the “List sync” tab → “Show Logs” for Google Ads.
-
You can verify if the list has synced correctly within the Google Ads platform after 10 minutes if you have enabled “Instant Sync” or based on the refresh interval days set.