Customerlabs CDP Documentation
Add to Cart Tracking
Add to cart tracking helps marketers retarget visitors who did not convert with personalized messaging. It also helps them to easily optimize the website for better conversions. Set up add to cart tracking by following the steps below.
1. Login to your CustomerLabs account
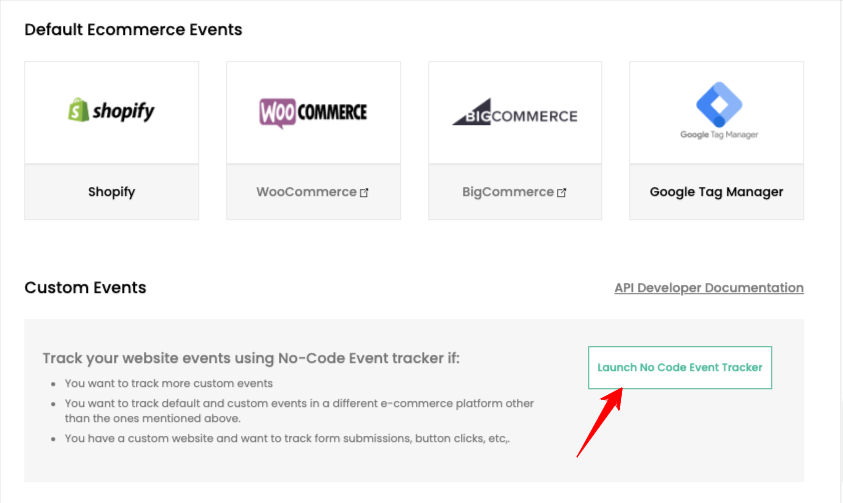
2. Launch the No-Code Event Tracker from the Home page
3. You will be redirected to your website and the No-Code Event Tracker panel will open up.
4. Click on Record Action to start recording the event.
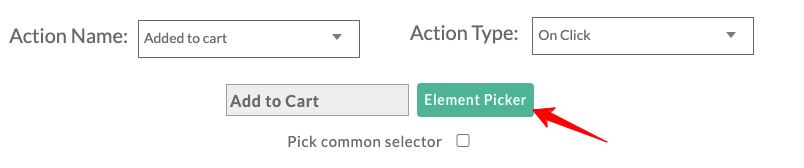
5. Select Added to Cart for Action Name from the dropdown or create a custom name if you wish and choose action type as On click.

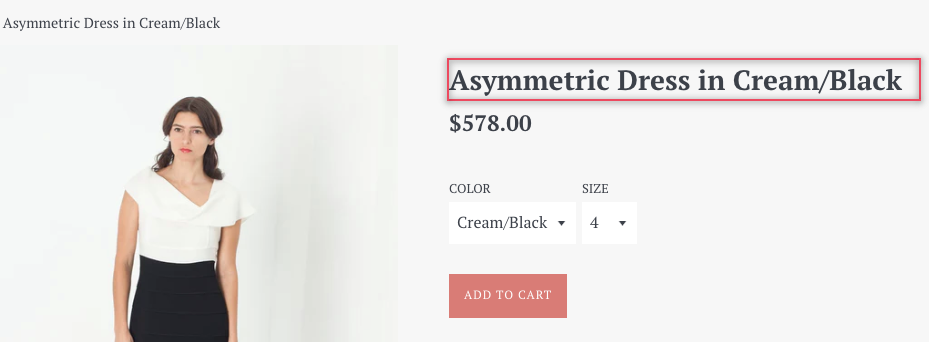
6. Now click on the Element picker which will re-direct to your website. Now, select the Add to Cart button that you want to track on your website

7. After selecting the add to cart button, you will be redirected to the No-Code Event Tracker panel.
8. Select Pick a common selector checkbox and click Add details. Learn more about Pick common selector.

9. Select the attributes you want to track, product_name, currency, product_price and more from the drop-down.
10. For example, select product_name and click on the Element picker button to select any product name from your website and tick Pick a common selector checkbox

11. Click Save.
12. Similarly, you can add the attribute, product_price. Click on the Element picker button to select product price from your website, and Select Pick a common selector.

13. For currency, you should select Javascript, choose the currency from the dropdown, and mention the currency format (for example USD, INR). Once you verify, click on save.

14. Repeat steps 10 and 11 to add multiple product attributes such as Product variant, Size, Quantity, and more
15. Configuring Success scenario:
a. If you want to track the success page (such as the thank you page, success page, or link) where the user lands after performing the action, you can add the path as shown in the image below.
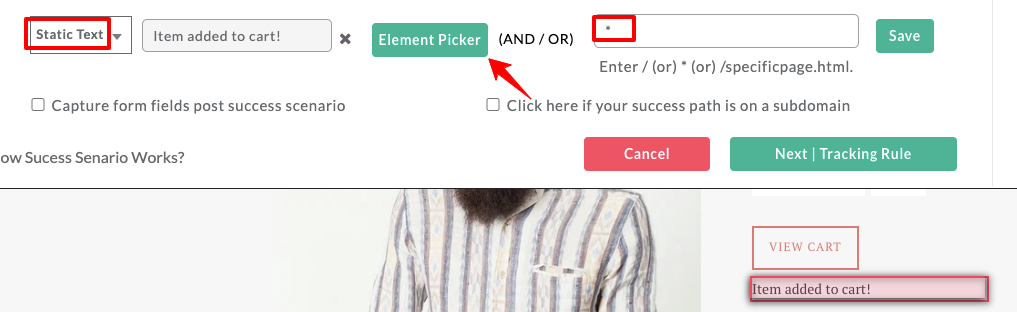
b. In this case for ‘add to cart’, there is no separate thank you page but just a small note to track the success scenario.
Select static text, and click on the Element picker button to select text Item added to cart from the website mention (asterisk) as shown below, and click on ‘Save’.
(Or) You can skip this step by clicking on the Next | Tracking rule.
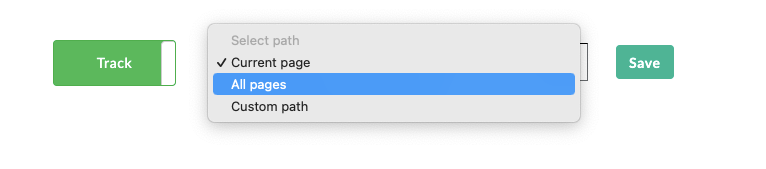
16. Choose the pages that you would like to start tracking for the above-defined action and click on Save.
17. Now click on the save icon to save the event setup.

18. Awesome! Your eCommerce Add to cart event has been successfully configured!


