Customerlabs CDP Documentation
-
Getting Started
-
Core Concepts
-
Website Event Tracking
-
- Shopify+CustomerLabs CDP Integration Guide
- E-commerce Platform Integration
- WooCommerce + CustomerLabs Integration Guide
- BigCommerce + CustomerLabs Integration Guide
- Custom conversion or synthetic events for Shopify and WooCommerce
- Hubspot + CustomerLabs integration
- Go High Level+ CustomerLabs Integration Tracking
- Typeform + CustomerLabs Integration Tracking
- Formstack + CustomerLabs Integration Tracking
- Swipe Pages + CustomerLabs Integration Tracking
- Calendly + CustomerLabs Integration
- Clickfunnels + CustomerLabs Integration
- Funnelish + CustomerLabs Integration Tracking
- Jotform+ CustomerLabs Intergration
- Show all articles ( 4 ) Collapse Articles
-
-
-
Destinations
- CustomerLabs + Google Analytics (GA4) Integration
- CustomerLabs + Google Adwords Integration
- Customerlabs + Facebook Offline Conversion Integration
- CustomerLabs + Meta CRM Pixel Integration
- CustomerLabs + Intercom Integration
- CustomerLabs + iiintent.io Integration
- CustomerLabs + LinkedIn Integration
- CustomerLabs + Zapier Integration
- CustomerLabs + Drip Integration
- CustomerLabs + Segment Integration
- CustomerLabs + Google Sheets Integration
- CustomerLabs + Gist (ConvertFox) Integration
- CustomerLabs + Webhooks Integration
- CustomerLabs + BigQuery Integration
- CustomerLabs + Mixpanel Integration
- CustomerLabs + Customer.io integration
- CustomerLabs + Sendinblue Integration
- CustomerLabs + Klaviyo Integration
- CustomerLabs + TikTok Integration (Beta)
- CustomerLabs + Audience Lab Integration
- CustomerLabs + Maropost Integration
- CustomerLabs + LimeChat Integration
- CustomerLabs + KickBox Integration
- CustomerLabs + Snapchat Integration
- CustomerLabs + Taboola Integration
- CustomerLabs + Bing Ads Integration
- Show all articles ( 16 ) Collapse Articles
-
Sources
- Introduction to CustomerLabs Sources
- Source - Freshsales
- Source - HubSpot
- Source - Drift
- Source - Intercom
- Source - Facebook
- Source – Salesforce
- Source - iiintent.io
- Custom Source
- Source - CSV Upload
- Source - Pipedrive
- Source - Jotform
- Source - Typeform
- Source - Google Ads
- Source – Vivenu
- Zoho CRM + CustomerLabs
- Show all articles ( 6 ) Collapse Articles
-
Segmentation
-
Monitoring
-
Privacy
-
Help
-
Change Log
-
Custom Branding
Creating new pixel on Meta for sending first-party data signals
Step 1 :
Creating a new pixel for powering the first party data inside the customer labs.
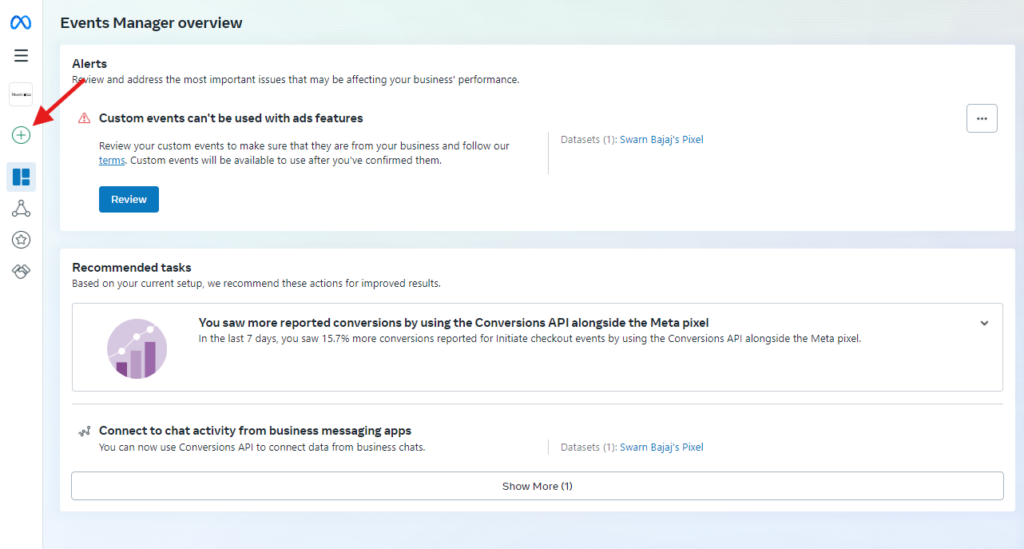
Step 2 :
Click on the “+” icon on the events manager as shown in the above screen shot.
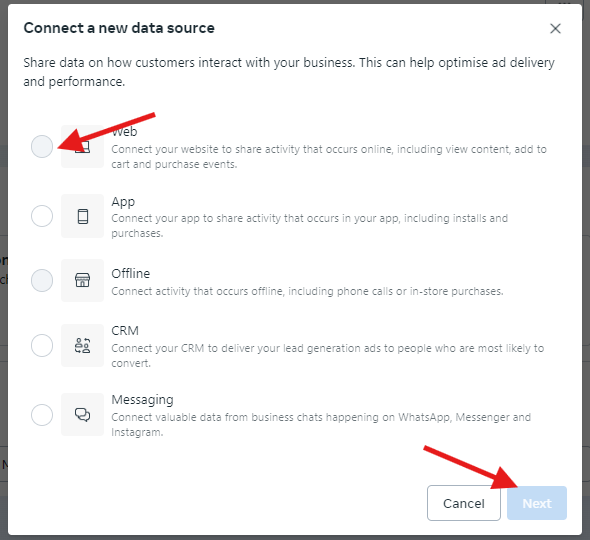
Step 3 :
Then choose “Web” and click next, you will see another screen to name the pixel, as per the below screenshot.
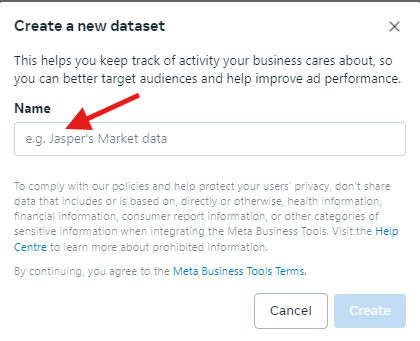
After naming the pixel click the “create” button and then add the website URL.
Note : Don’t proceed for any integration on the next screen.
Creating business asset group on Facebook
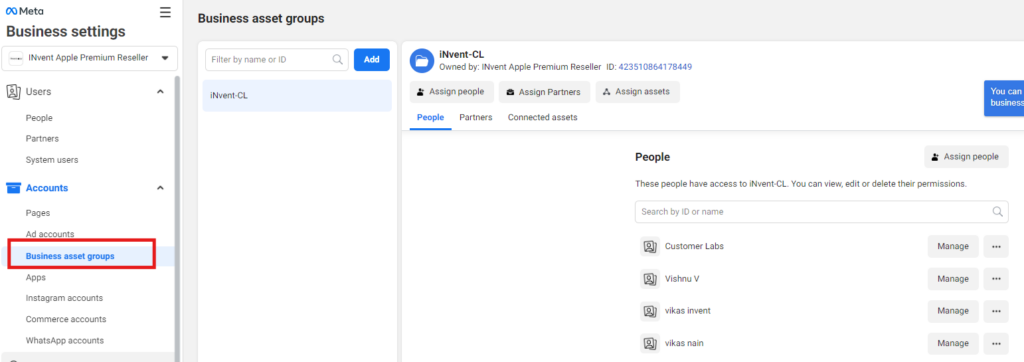
Step 4 :
Now click on the “business asset setting” and create a new business asset group
Step 5 :
Once the “business asset group” is created then click on the “Assign Assets” as shown below.
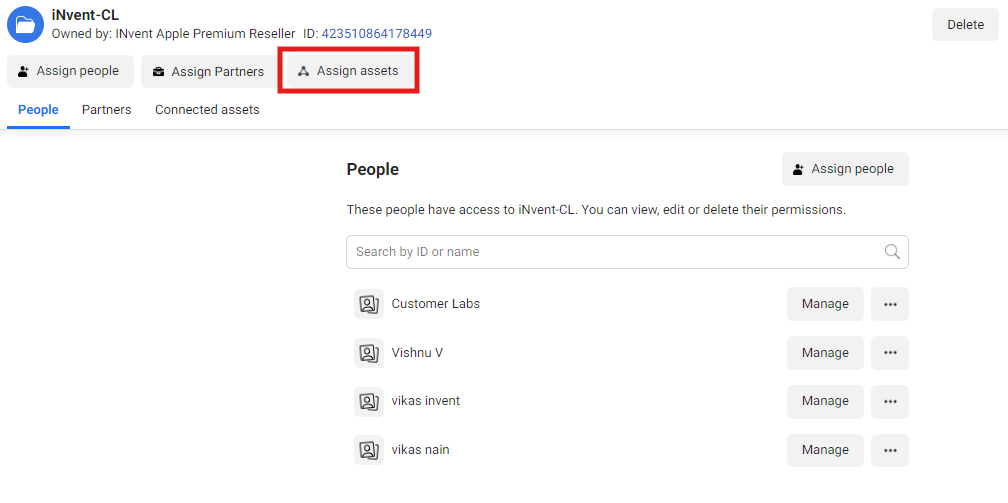
Step 6 :
From the assign asset choose the Pages, Ad accounts, catalogs
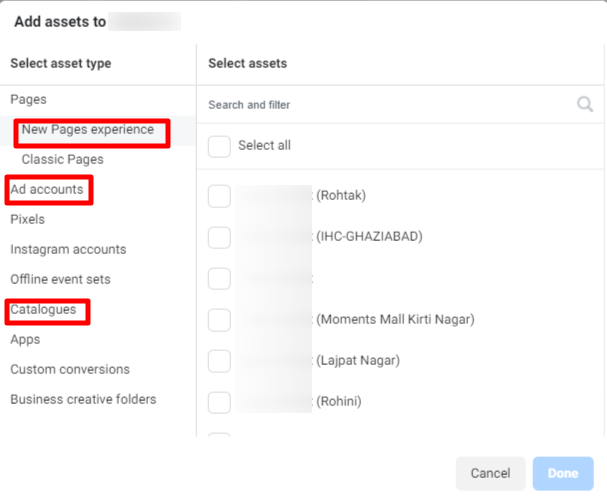
Then Select all the asset for which you would like to use the pixel under this business asset group.
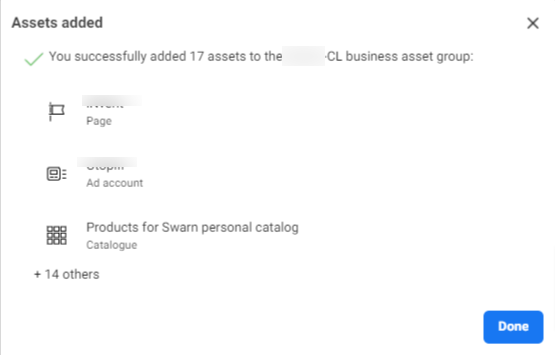
Step 7 :
Once the access and assigning is done you will get this success screen and done
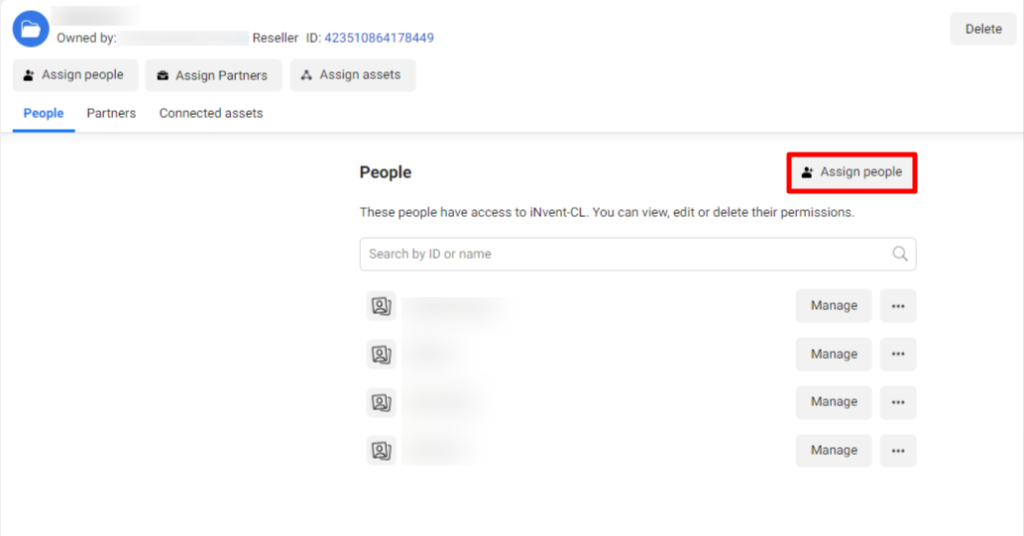
Step 8 :
Once your asset is successfully added you can click done and you need to assign the people for accessing this business asset group as follows.
Step 9 :
Once the business asset group is done then move on to the Data sources and click on the data sets.
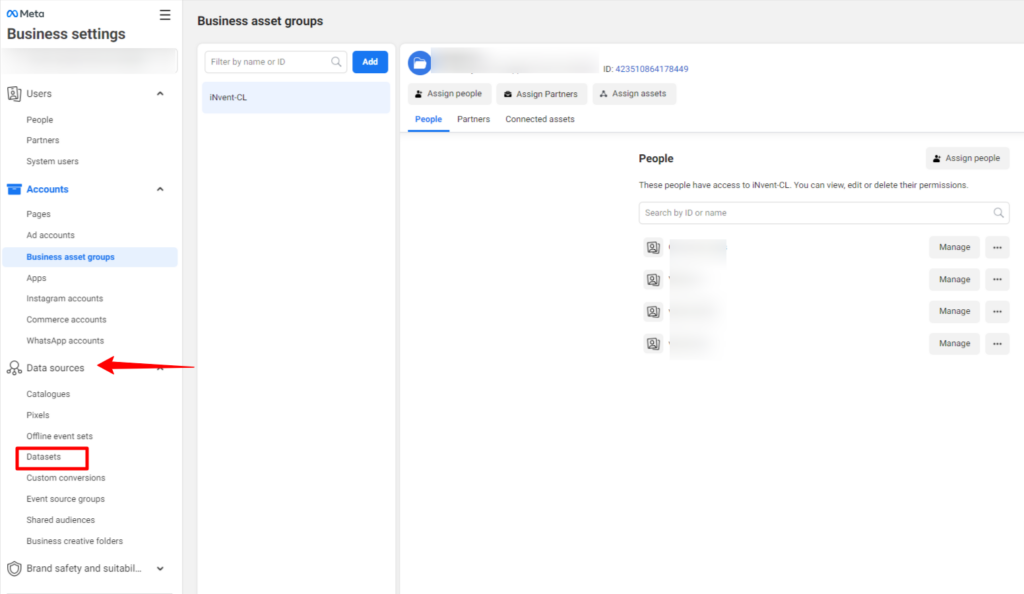
Inside the data sets you will see the pixel which is created on step 1, now you have to repeat steps 5,6,7 & 8.
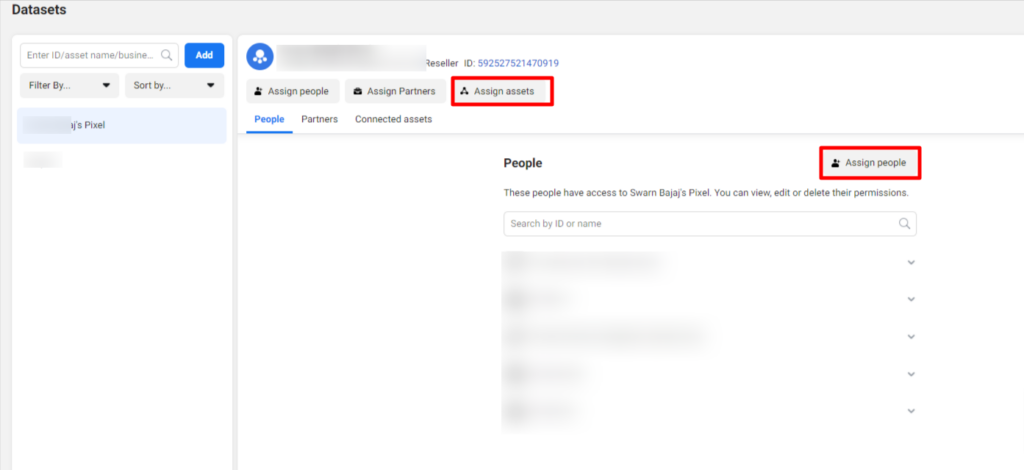
Once all the above steps are completed then Log in to customerlabs —> Destination —> Select Facebook and follow the integration as shown in the attached document.
0 out Of 5 Stars
5 Stars | 0% | |
4 Stars | 0% | |
3 Stars | 0% | |
2 Stars | 0% | |
1 Stars | 0% |