Customerlabs CDP Documentation
Shopflo is a popular one-click checkout platform that helps improve eCommerce conversions, but many users face challenges with event tracking and data accuracy on Meta. Customers often experience duplicated purchase counts and discrepancies in Meta Ads reporting due to duplicated pixel firing and browser limitations affecting client-side tracking.
By leveraging CustomerLabs’ first-party data (1PD) platform, businesses can implement server-side tracking via Meta’s Conversions API, overcoming Breeze’s native tracking restrictions. This ensures more accurate event data, reduces data loss, and improves ad attribution and campaign optimization on Meta and Google Ads.
Prerequisites:
Before initiating the integration, ensure you have access to coordinate with the Shopflo POC or Support Team to set up the webhook and bring the Shopflo checkout events
Email Template – Request to Shopflo Team for Webhook Configuration
- We’re currently onboarding with CustomerLabs. To enable customer profiling, we require your help in sending the following events(initiate_checkout,addpayment_info, purchase) to CustomerLabs via a webhook and it’s important to include the CustomerLabs user ID with each event for profile unification
Steps to Configure Webhook on CustomerLabs
- Login to CustomerLabs.
- Navigate to: Sources → Connect Source → Custom Source.

- Name the source as: Shopflo Purchase.
- A Webhook URL will be generated ans share the Webhook URL along with email

Post-Webhook Setup: Event Configuration in CustomerLabs
- Event Configuration- CheckOutMade
To process the data received from the webhook, configure the events in the workflow as follow the steps below
- CustomerLabs → Source → Shopflo Purchase → Click on “View Workflow List” at the top, then click “Create Workflow.”

- Name the workflow as “Shopflo Checkout” and set the workflow delay to 2 minutes.
- In the data selection section, click on “Fetch New Data” — you’ll then see the events that have been pushed to the webhook.
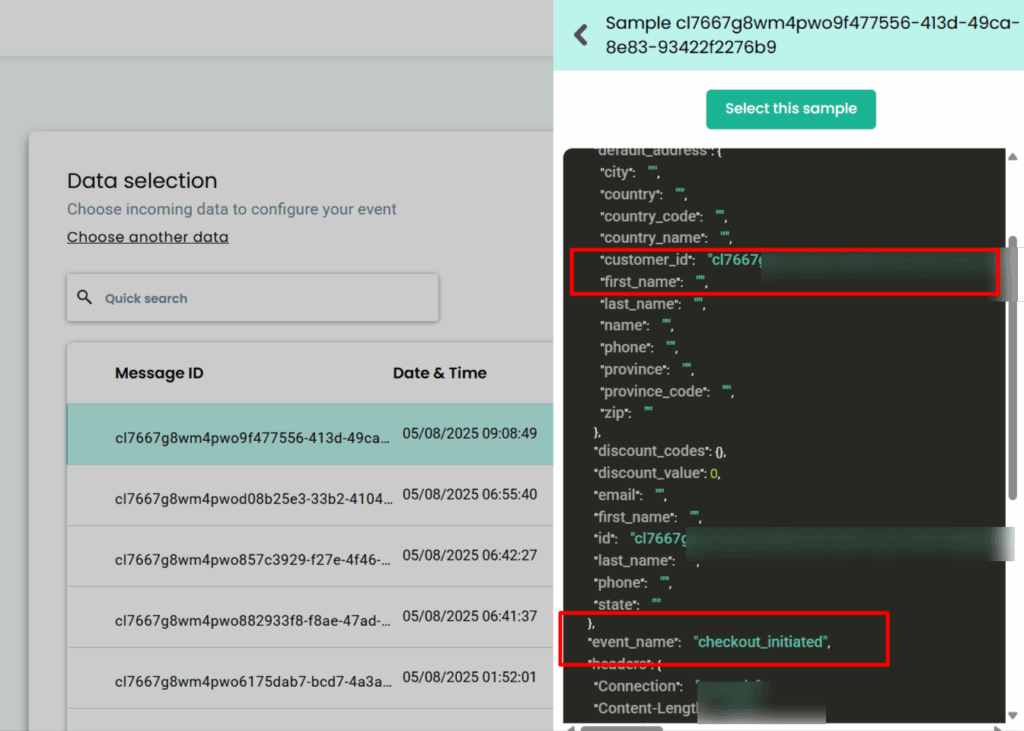
- To make sure the system only picks up checkout-related actions, add a filter condition that says event name should include ‘checkout_initiated’ and make sure Customer Labs User Id is included in the payload as given in the screenshot above

- In the event setup, select “Custom Event” and name it “cl_shoplo_checkout_made”.

- In the User identity mappingYou can choose up to 3 different identifiers, including external IDs, to map user information. These external IDs will be stored by CustomerLabs CDP to create an enriched user profile.

- Map Attributes: Post-user identity mapping, you can map incoming attributes under one major field
- User traits refer to specific characteristics or attributes associated with an individual user. The user traits include first name, last name, city, state, company, zip code & other similar information that can be added under User traits.
- To send users’ attributes to the ads platforms, you must map them as user traits under event configuration. The more user details you share with platforms like Facebook, the higher the Event Match Quality will be.

- Product attributes can be added for events related to E-commerce/other business categories, such as Product viewed, Product clicked, Purchases, etc. Details such as product sku, product ID, product variant, and product size can be added under product details and choose line_items from the dropdown.

- Additional information pertaining to the event can be added under event properties. The Mandate fields are: value, currency, transaction ID

Similarly, configure workflows for Payment Information and Purchase Events the steps shown below
- Event Configuration- AddPaymentInfo
- Navigate to CustomerLabs → Source → Shopify Purchase → Shopify Checkout
- Click on the three dots (⋮) next to the existing workflow and select “Clone”.

- Rename the cloned workflow to Shopflo – Payment Info.
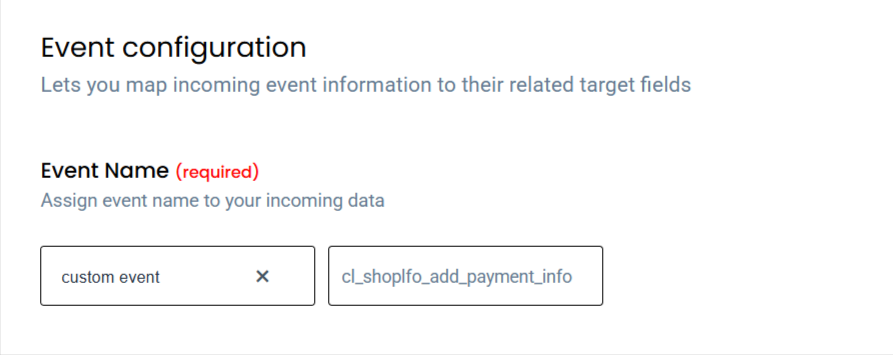
- In the filter section, update the filter condition to event_name contains add_payment.

- Set the event name in the configuration to “cl_shoplfo_add_payment_info” and save the workflow.
- Event Configuration- Purchased
- Navigate to CustomerLabs → Source → Shopify Purchase → Shopify Checkout
- Click on the three dots (⋮) next to the existing workflow and select “Clone”.
- Rename the cloned workflow to shopflo-purchase
- In the filter section, update the filter condition to event_name contains order_placed

- Set the event name in the configuration to Purchased and save the workflow.

Events Audit:
- Once the event is configured and purchase events begin to come in, you’ll be able to view them in CustomerLabs.
- To check the events: Go to CustomerLabs → Monitoring → Event Manager

Here, you can verify that the purchase and other configured events are being received successfully.


