Customerlabs CDP Documentation
(A ‘Source’ platform is one where data can be brought in from any platform into CustomerLabs CDP)
Pipedrive is a sales management tool that helps visualize your sales pipeline and helps to make sure important activities and conversations won’t get dropped. Salespeople really like it because it’s easy to use and intuitive. And managers like it because they don’t need to nag their team to use their CRM. It also supports built-in forecasting, integrations with other software such as Google Apps, MailChimp and Zapier and a powerful API for those that like to “roll their own” software solutions.
Marketing teams connect Pipedrive with CustomerLabs CDP to send their Organization, Users & Deals related information to create unified customer profiles in CustomerLabs CDP and sync the enriched customer data to all their favorite tools in their tech stack.
Getting started
Here’s a step-by-step process that helps you connect Pipedrive with CustomerLabs CDP,
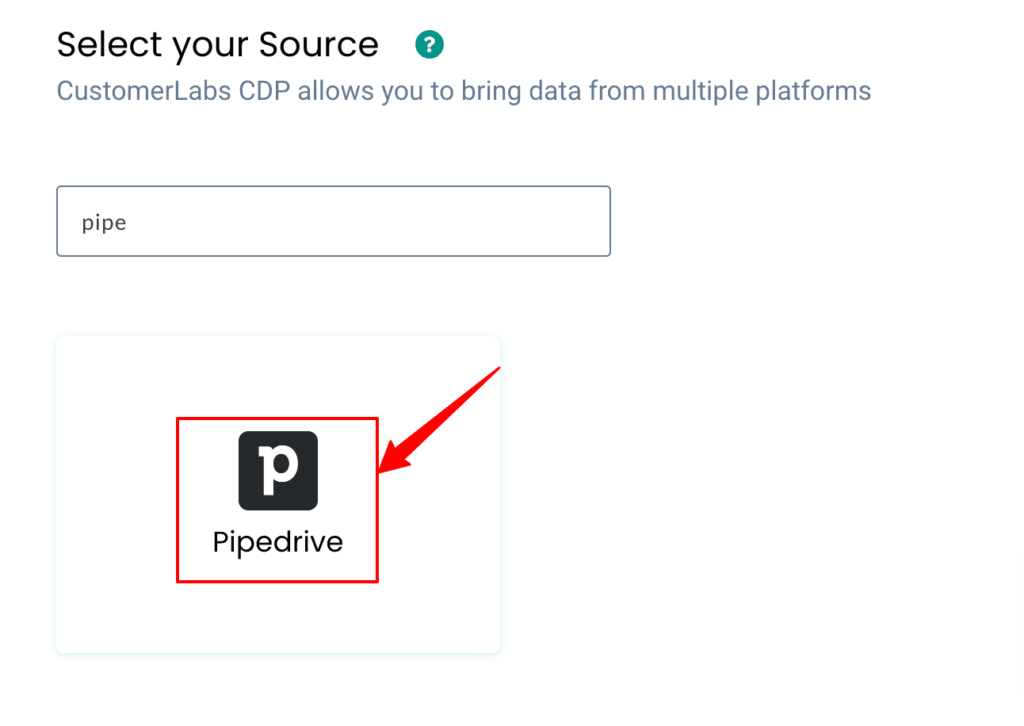
1. Login to CustomerLabs → Sources

2. Select Pipedrive from the list of Sources
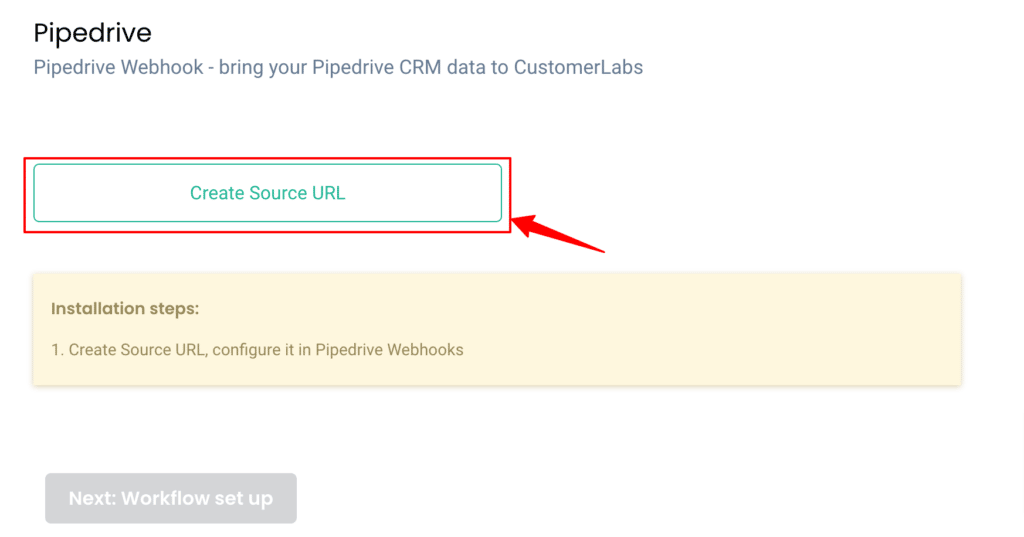
3. Click on Create source URL
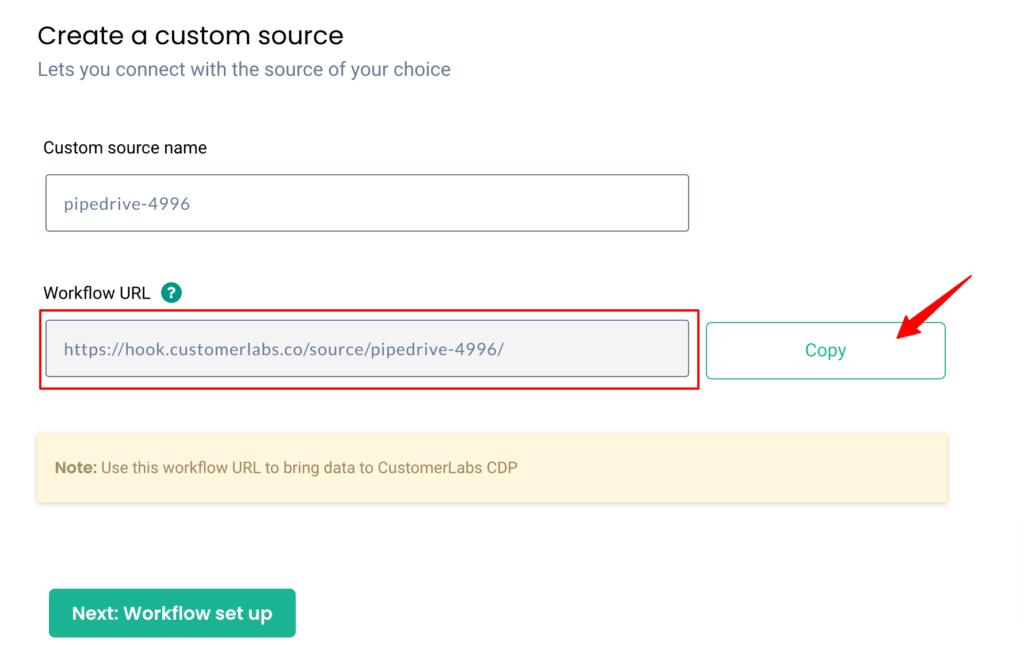
4. Copy the Workflow URL provided
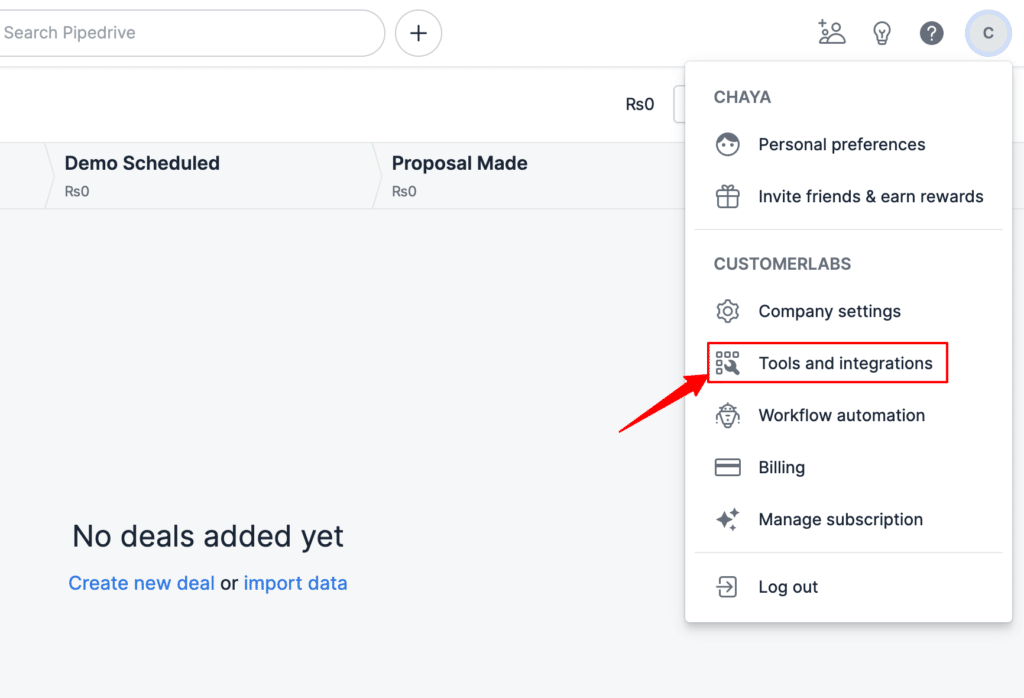
5. Now log into your Pipedrive account and navigate to Tools & Integrations
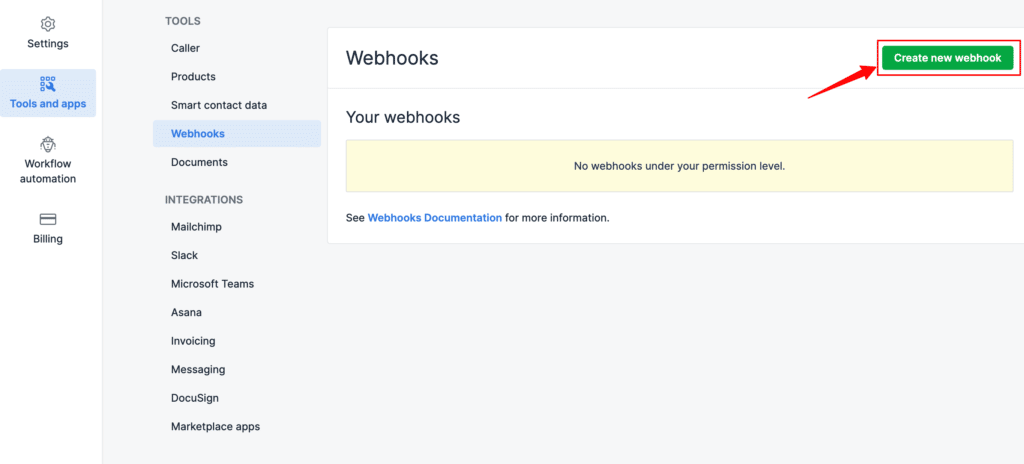
6. Under Tools & Integrations click on Webhooks.
7. Click on Create new webhook
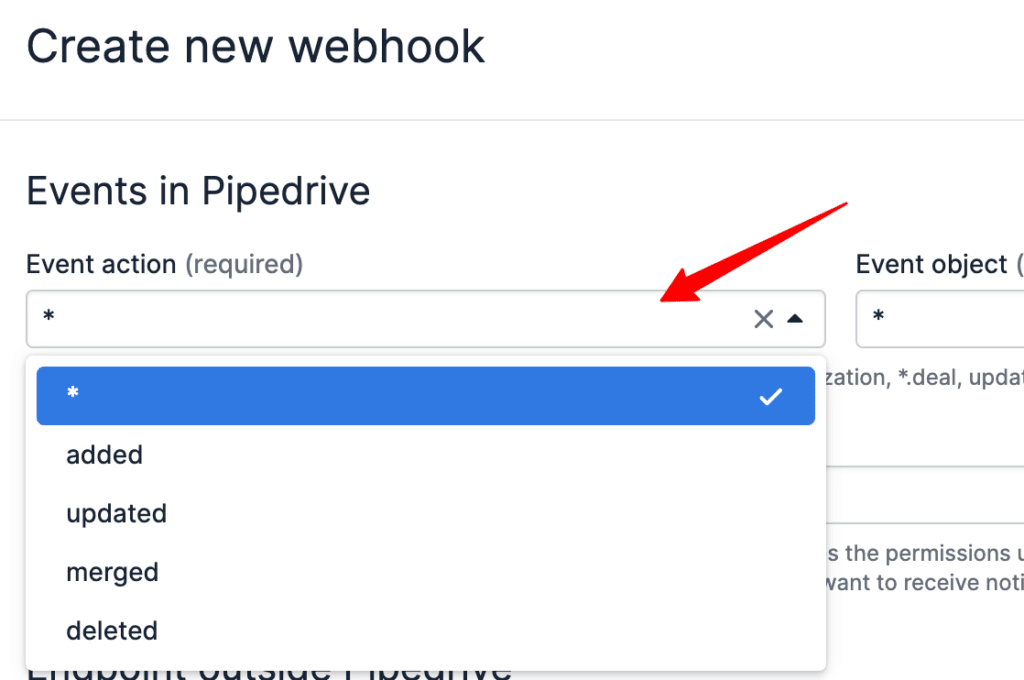
8. Choose the desired Event action
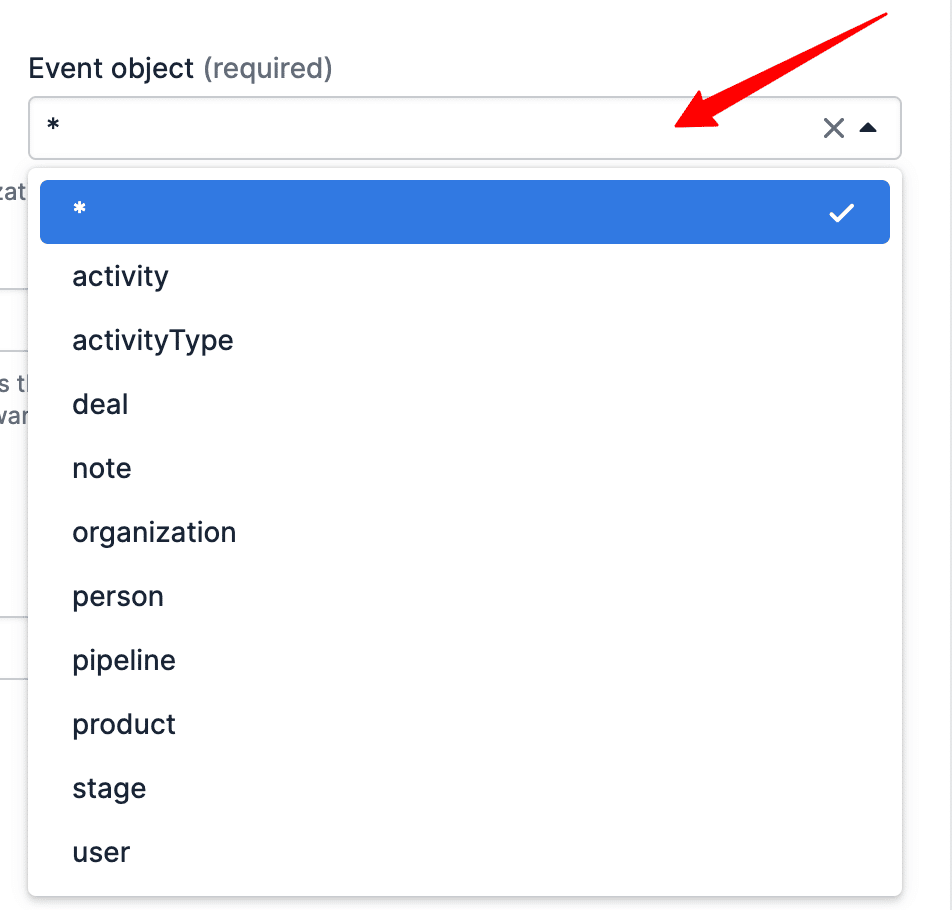
9. Then choose the desired Event object
10. Then paste the copied Workflow URL from CustomerLabs CDP under Endpoint URL and click Save

11. Voila! Your Pipedrive account is now linked with CustomerLabs CDP
Note: To bring multiple events objects, click on create new webhook & configure the objects using the same endpoint URL
Building Workflows in CustomerLabs CDP
Setting up a workflow in CustomerLabs CDP will allow you to receive notifications about changes that happen to your Pipedrive data in real-time.
For example, you can set up a workflow that will trigger a notification to be pushed to the CustomerLabs CDP specified every time a person/organization/deal has been updated in your Pipedrive account.
Workflow #1 – How to send data to CustomerLabs CDP when a new user is created in Pipedrive
The below steps explain how you can filter and map incoming contact information from Pipedrive to Customerlabs CDP
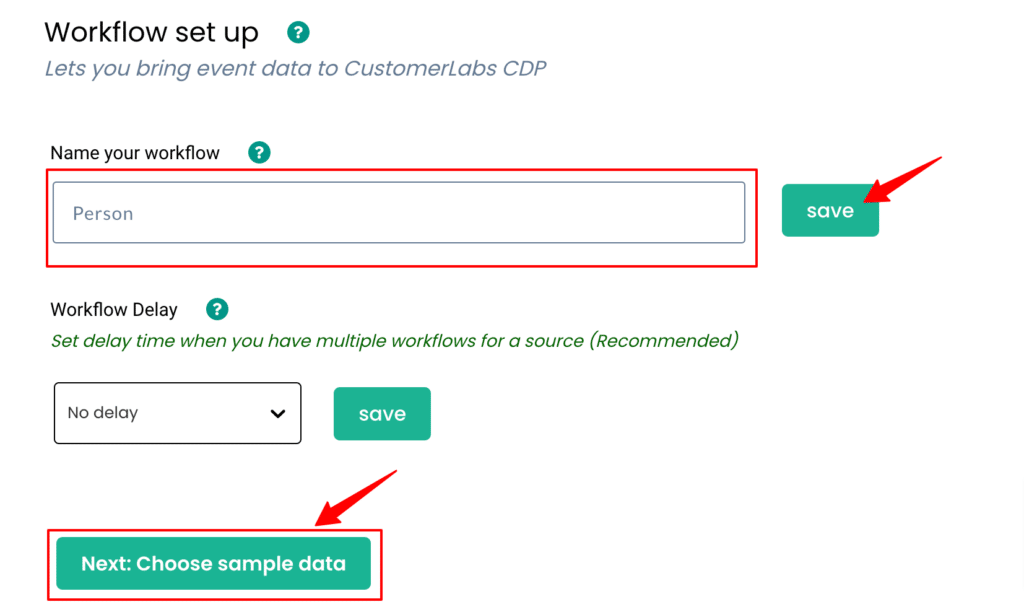
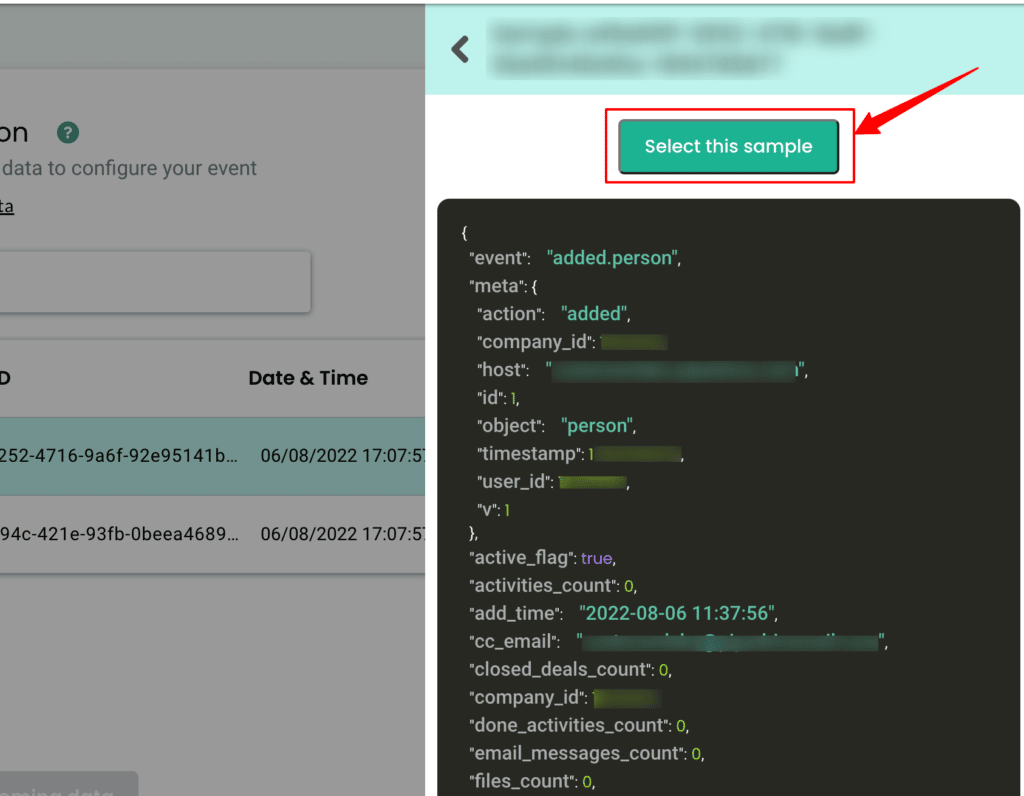
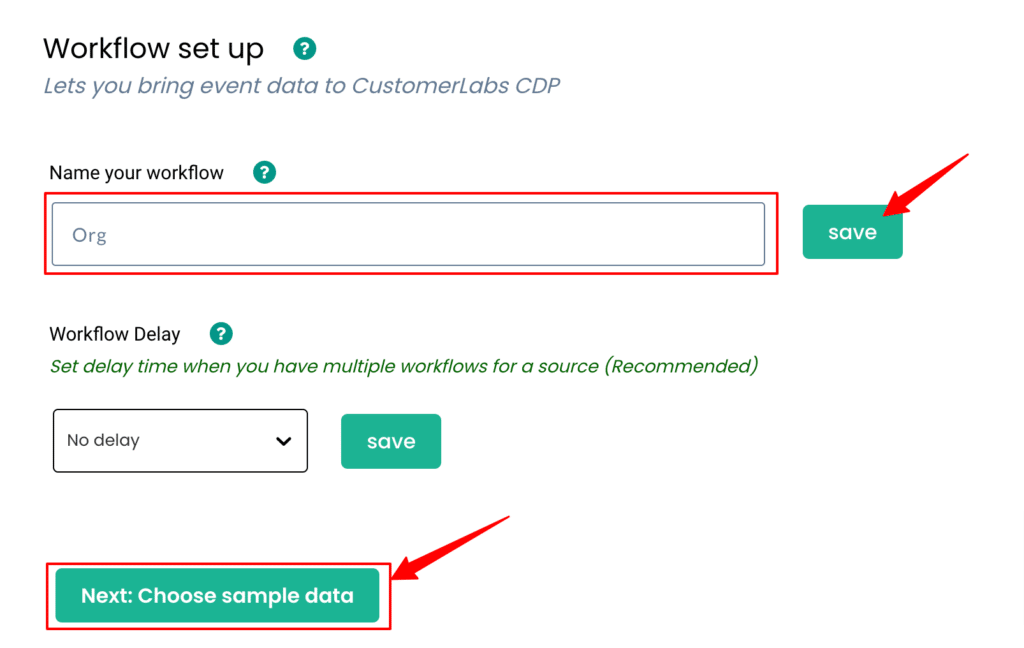
1. Give a name to your workflow and before proceeding, create a test person in Pipedrive to get related data samples. Once a new user is created, click on Choose sample data.
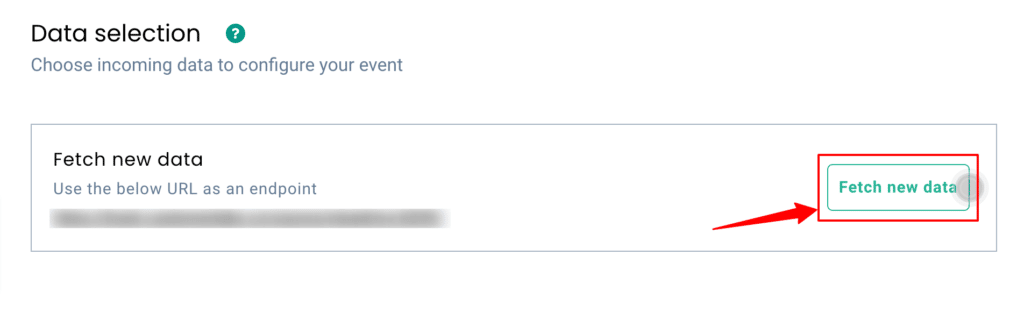
2. Click on Fetch new data to see sample person data created in Pipedrive inside CustomerLabs CDP

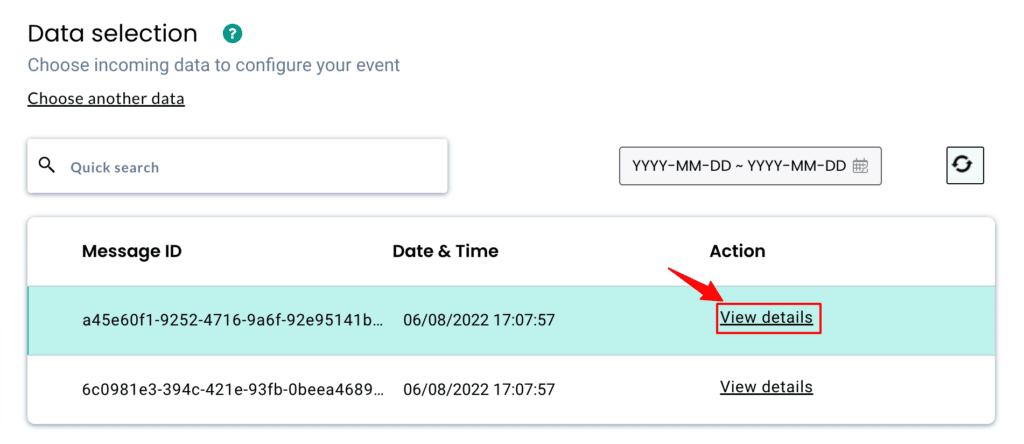
3. By clicking on View details you’ll be able to see a JSON format of the same

4. Now Select this sample & move to the next step.
5. You can add your filter criteria to remove irrelevant information or simply skip this step.

6. Lastly, in the event configuration screen, you’ll be able to map the incoming data to their respective fields in CustomerLabs CDP
7. Give a name to your incoming event. You can select a predefined event name as shown below or give a custom name based on your requirements. (Note: Selecting dynamic will let you take the name of the incoming event directly)

8. User Identity mapping lets you combine all user-related events, since an incoming person has an email address & is assigned a Pipedrive Object ID we can select two identifiers (identify_by_email and user_id) from the drop-down and assign relevant values.

9. Repeat the same step as above to add Account level identifiers.
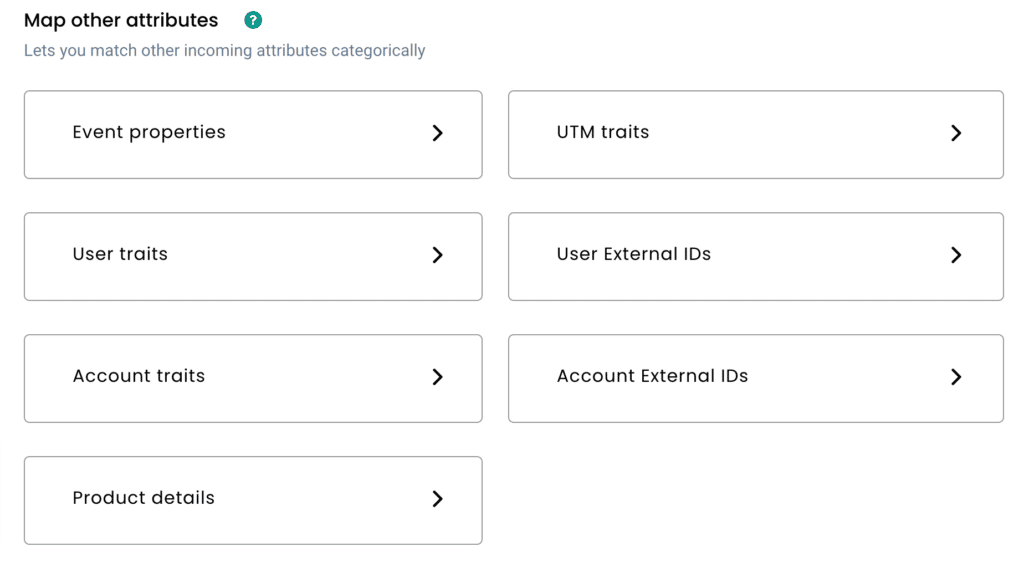
10. Once the user mapping is done, you can categorically map other incoming information into different buckets as shown below

Workflow #2 – How to send data to CustomerLabs CDP when a new Organization is created in Pipedrive
The below steps explain how you can filter and map incoming organization information from Pipedrive to Customerlabs CDP
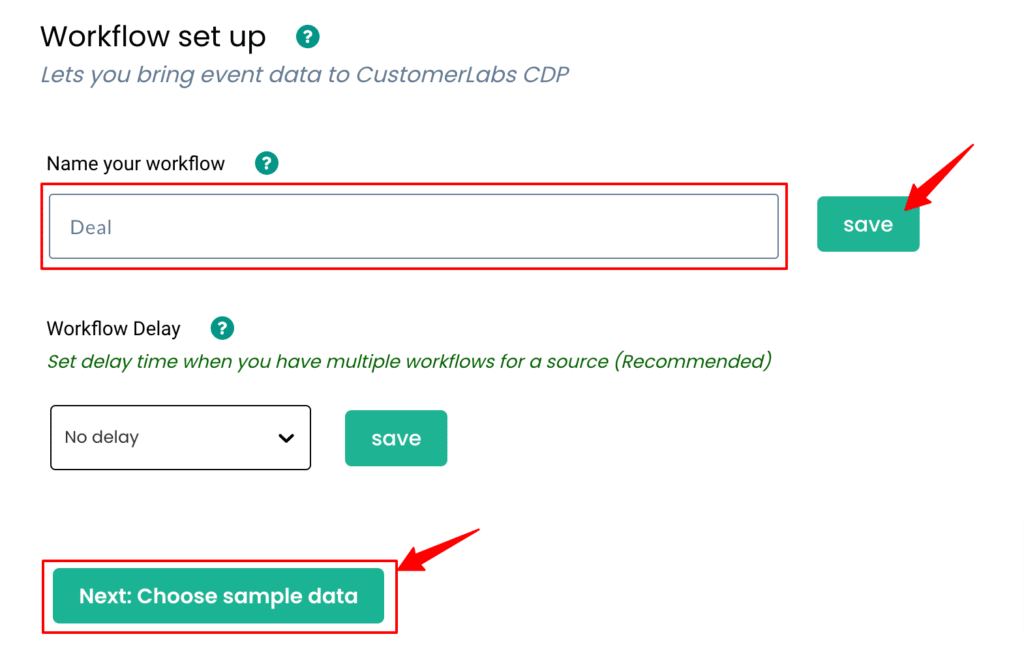
1. Give a name to your workflow and before proceeding, create a test organization in Pipedrive to get related data samples. Once a new organization is created, click on Choose sample data.
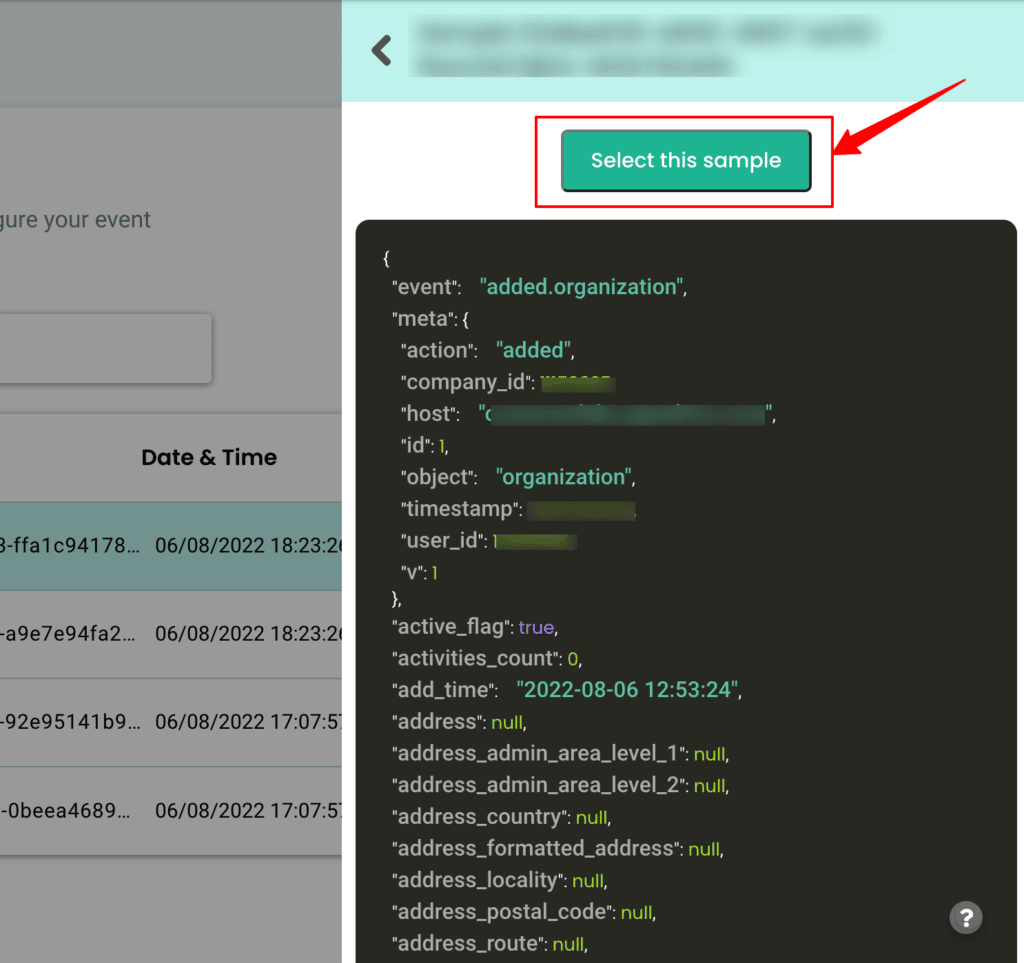
2. Click on Fetch new data to see sample organization data created in Pipedrive inside CustomerLabs CDP.
3. By clicking on View details you’ll be able to see a JSON format of the same.
4. Now Select this sample & move to the next step.
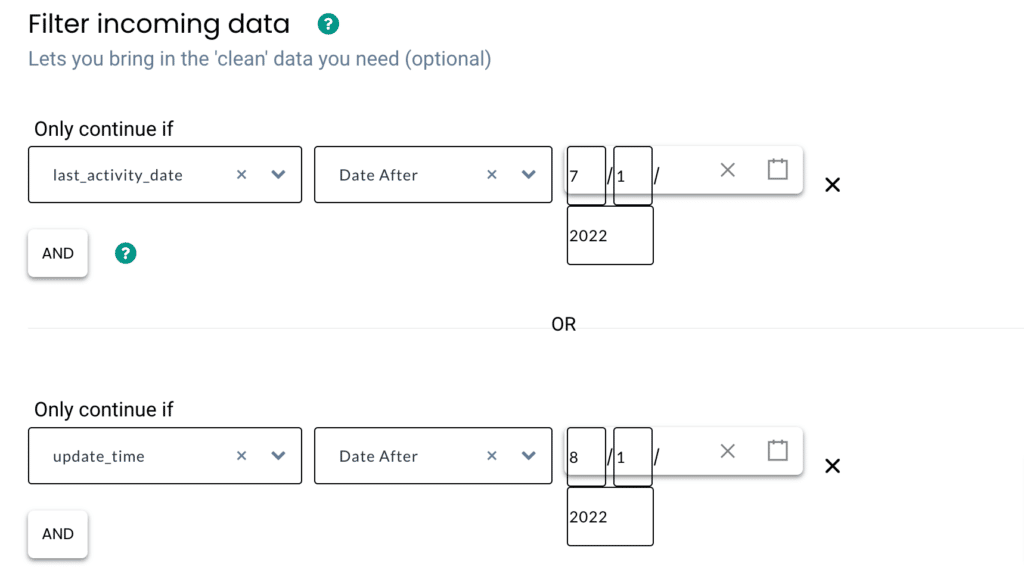
5. You can add your filter criteria to remove irrelevant information or simply skip this step. The screenshot below shows the filter criteria created to send only two events into the workflow.
6. Lastly, in the event configuration screen, you’ll be able to map the incoming data to their respective fields in CustomerLabs CDP
7. Give a name to your incoming event. You can select a predefined event name as shown below or give a custom name based on your requirements. (Note: Selecting dynamic will let you take the name of the incoming event directly)

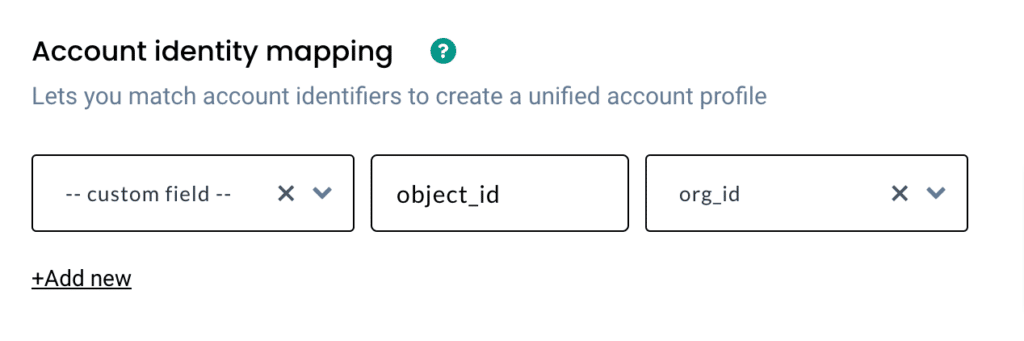
8. Account Identity mapping lets you combine all organization-related events, since an incoming organization has Pipedrive Object ID, you can use it to map them as shown below,
9. Once the account mapping is done, you can categorically map other incoming information into different buckets as shown below,

Workflow #3 – How to send data to CustomerLabs CDP when a new Deal is created in Pipedrive
The below steps explain how you can filter and map incoming deal information from Pipedrive to Customerlabs CDP
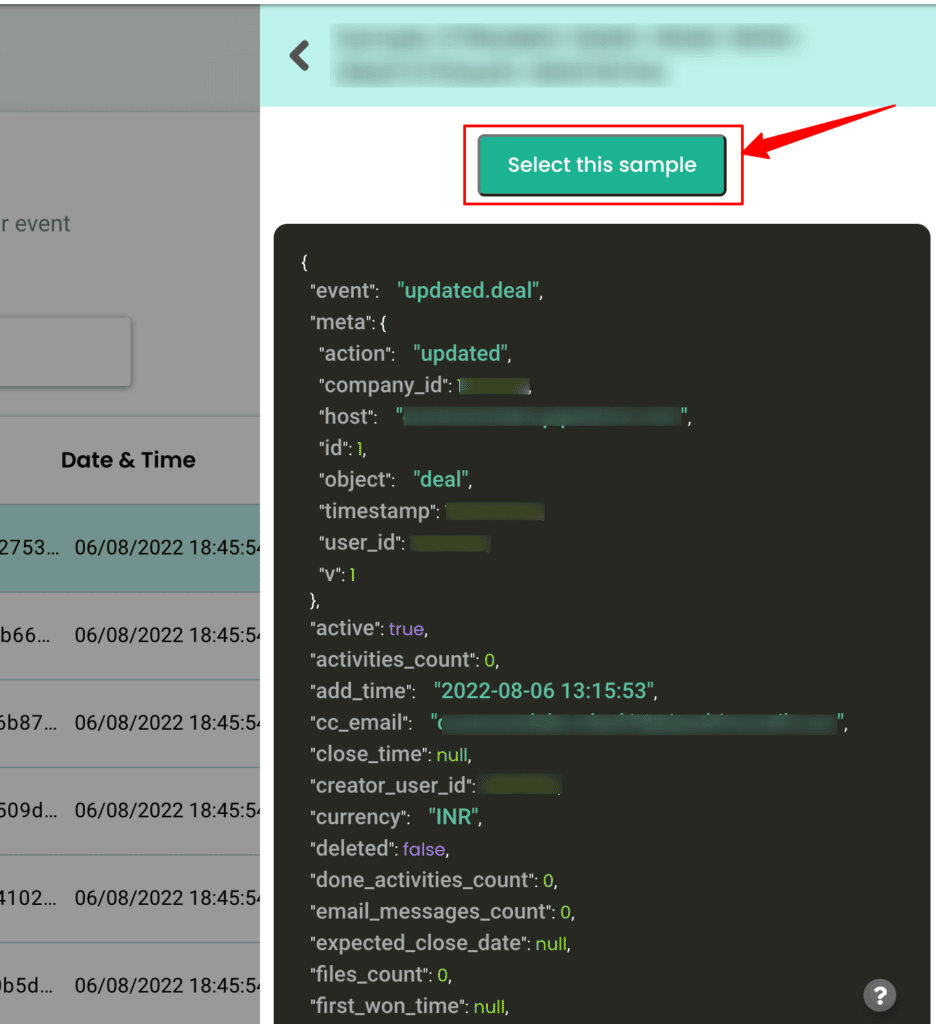
1. Give a name to your workflow and before proceeding, create a test deal in Pipedrive to get related data samples. Once a new deal is created, click on Choose sample data.
2. Click on Fetch new data to see sample organization data created in Pipedrive inside CustomerLabs CDP. Click on View details you’ll be able to see a JSON format of the same.

3. Now Select this sample & move to the next step
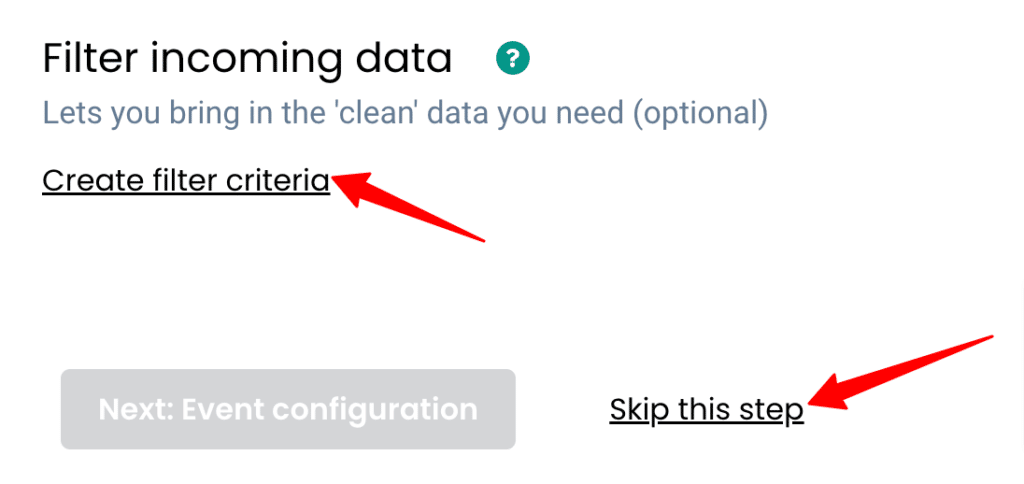
4. You can add your filter criteria to remove irrelevant information or simply skip this step.
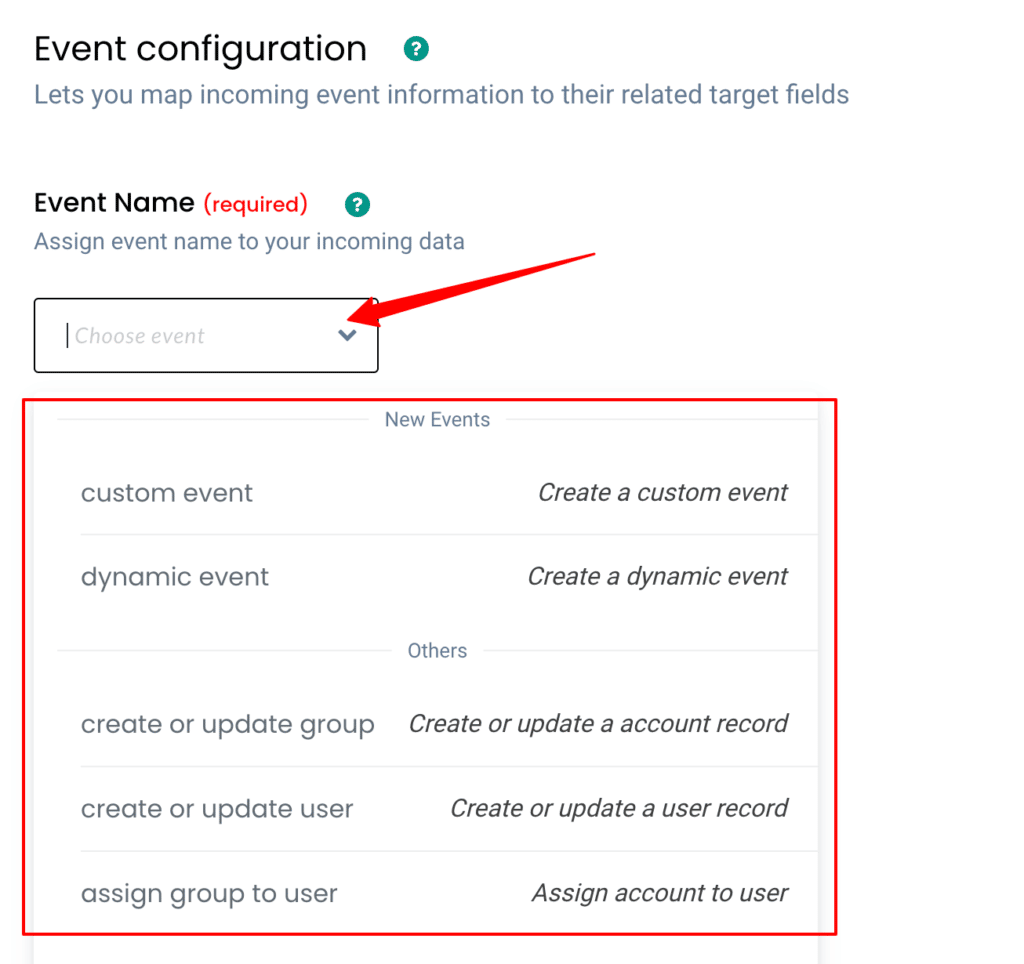
5. Lastly, in the event configuration screen, you’ll be able to map the incoming data to their respective fields in CustomerLabs CDP
6. Give a name to your incoming event. You can select a predefined event name as shown below or give a custom name based on your requirements. (Note: Selecting dynamic will let you take the name of the incoming event directly)
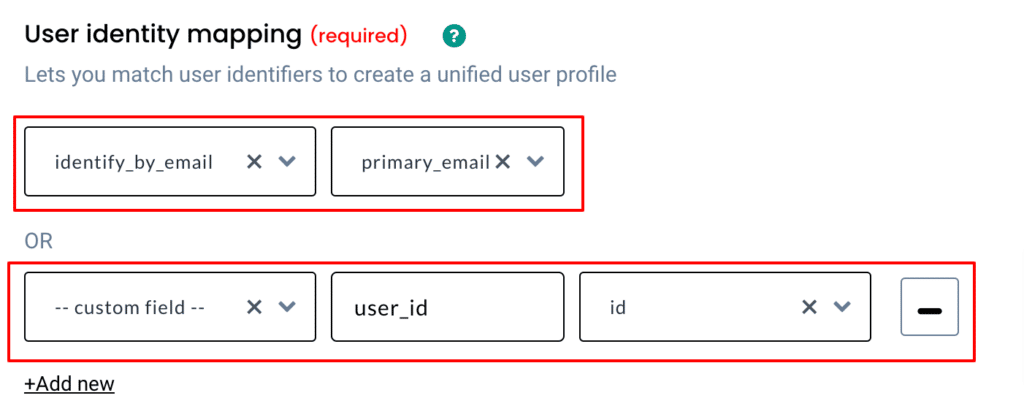
7. User Identity mapping lets you combine all user-related events, since an incoming person has an email address & is assigned a Pipedrive Object ID we can select two identifiers (identify_by_email and user_id) from the drop down and assign relevant values.
8. Account Identity mapping lets you combine all organization-related events, since an incoming organization has Pipedrive Object ID, you can use it to map them as shown below,

9. Once the user and account mappings are done, you can categorically map other incoming information into different buckets as shown below
Destination
Send incoming data to third-party apps to boost marketing effectiveness. Learn more about the destination tools that we support here.