single php

How to Integrate Recharge with Shopify Without GTM

·

·

Subscription-based commerce has exploded in popularity; from coffee and skincare to pet supplies. But as subscription models grow, so does the complexity of tracking recurring orders and understanding your most loyal customers.

In this blog, letโ€™s look into an easy, quick and effective setup without a single line of code or the need for GTM (Google Tag Manager). 

This setup lets you track first-time and recurring subscription orders, sync them, and use that data for advanced segmentation, personalized campaigns, and better retention.

Letโ€™s walk through the complete integration process, with just a few toggles on.

Before getting started, letโ€™s look at the things that you should have handy for the setup.

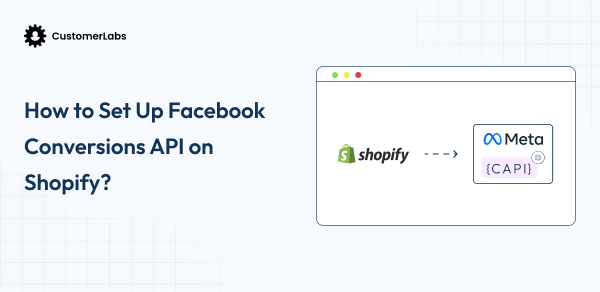
Bonus: Setup CAPI for your Shopify store under 30 minutes

Prerequisites

Before you start, make sure you have access to:

โ€œCustomerLabs banner highlighting code-free Recharge and Shopify setup without GTM, featuring a โ€˜14 days free trialโ€™ button.โ€

Steps to Integrate Recharge and Shopify Using 1PD Ops 

Step 1: Access Recharge Admin

  • Log in to your Recharge account.
  • From the left-side panel, open Tools & Apps.
Recharge dashboard overview โ€“ โ€œRecharge dashboard displaying subscription optimization score, storefront and retention progress bars, and subscription revenue comparison section.โ€
  • Find and click on โ€œAPI Tokensโ€
Navigate to API tokens โ€“ โ€œRecharge admin panel showing Tools & Apps section highlighted, with API tokens submenu selected.โ€
  • Click โ€œCreate an Admin API Tokenโ€
Create Admin API token button โ€“ โ€œRecharge API tokens page showing blurred list of existing tokens and an arrow pointing to the โ€˜Create an Admin API tokenโ€™ button.โ€
  • A new dialogue appears, like the one shown in the screenshot below.
Create API token form โ€“ โ€œRecharge โ€˜Create an API tokenโ€™ page showing input fields for token nickname, contact email, and API client secret, with permission scopes for orders, discounts, and subscriptions.โ€
  • Under โ€œPermission and Scopeโ€, you will find all the fields that you should give permission to access.
  • Change the access of โ€œOrdersโ€ and โ€œSubscriptionโ€ permission from โ€œNo accessโ€ to โ€œRead accessโ€.
Set read access permission โ€“ โ€œRecharge permission dropdown showing options for โ€˜No accessโ€™, โ€˜Read accessโ€™, and โ€˜Read and Write accessโ€™, with an arrow pointing to โ€˜Read accessโ€™.โ€
  • Once you have changed the permissions, click โ€œsaveโ€ in the top right corner.
Save API token โ€“ โ€œRecharge โ€˜Create an API tokenโ€™ form with filled details including contact email and permissions, highlighting the โ€˜Saveโ€™ button in the top-right corner.โ€

Now letโ€™s start connecting recharge and CustomerLabs. You will need a free postman account, keep it ready.

Also read on: Setting Up Shopify Server-Side Tracking

Recharge-Shopify Integration Banner โ€“ โ€œCustomerLabs banner promoting Recharge and Shopify integration for subscription tracking with a โ€˜Book a Demoโ€™ button.โ€

Step 2: Set Up Recharge Webhook in Postman

Create webhook in Recharge API โ€“ โ€œRecharge API documentation showing instructions to create a webhook using a cURL POST command, with an arrow pointing to the copy code button.โ€
  • Open Postman on your system
  • Go to Import, and paste the cURL request templateย 
Postman import screen โ€“ โ€œPostman workspace interface showing the Import button highlighted under the New tab in the My Workspace section.โ€
  • Once imported, youโ€™ll see the request appear in your Postman workspace.
Import cURL into Postman collection โ€“ โ€œPostman dialog box showing cURL command to import into a collection, with the โ€˜Import Into Collectionโ€™ button highlighted.โ€
  • Navigate to the Headers tab and paste the API Token you generated earlier into the authorization header.
  • Click โ€œImport into collectionโ€

This webhook will later send order data directly to CustomerLabs.

Step 3: Add API Token to Headers

  • In Postman, go to the Headers tab of the imported request.
  • Find the X-Recharge-Access-Token (or equivalent authorization field).
  • Paste the API Token you generated earlier in Recharge into this field.
Postman API headers setup โ€“ โ€œPostman request setup screen showing headers for a POST request including X-Recharge-Version, X-Recharge-Access-Token, Content-Type, and Accept fields.โ€
  • Double-check that all header details are prefilled from the imported cURL (content-type, endpoint, etc.).
  • Save the request. This will be used to push Recharge data into CustomerLabs.

Once this setup is complete, youโ€™re ready to connect the CustomerLabs Webhook URL in the next step.

Also read on: How to Use First-Party Data to Reduce RTO for Shopify

Step 4: Create Webhook Source in CustomerLabs

CustomerLabs Sources Dashboard โ€“ โ€œCustomerLabs dashboard showing Sources tab highlighted with total connected sources count and Connect Source button.โ€
  • Click Add Source โ†’ choose Custom Source.
Select Custom Source โ€“ โ€œCustomerLabs Sources page showing various integration options with Custom Source highlighted by a red arrow.โ€
  • Give it a clear name, like โ€œRecharge Subscription Webhook.โ€
Create Custom Source Form โ€“ โ€œCustomerLabs interface for creating a custom source showing fields for source name and workflow URL, with a Copied button and Next: Workflow setup option.โ€
  • Copy the Webhook URL that CustomerLabs provides.
  • Go back to Postman, and paste that webhook URL into the Body or URL field of your Recharge webhook request.
Postman Webhook Setup โ€“ โ€œPostman workspace displaying webhook API request to Recharge endpoint with JSON body parameters for address and topic.โ€
  • Hit Send in Postman to verify the connection.

Once done, data will start flowing from Recharge to CustomerLabs. Next, letโ€™s setup the workflow.

Also read on: TikTok Standard Events: Guide to Tracking, Implementing & Optimizing Conversions

Step 5: Setting up workflow for the orders

Workflow 1: First Subscription Order

  • In CustomerLabs, open the Recharge Webhook Source you created.
  • Click Create Workflow โ†’ name it something like Recharge_First_Order.
CustomerLabs Workflow Setup โ€“ โ€œWorkflow setup page in CustomerLabs showing fields for naming the workflow and selecting delay time before proceeding to the next step.โ€
  • Add a workflow delay (e.g., 10 seconds) to prevent duplicate user IDs if multiple workflows run simultaneously.
  • Click Fetch Sample Data and trigger a test order in Recharge to pull in event data.
Fetch New Data โ€“ โ€œCustomerLabs Data Selection screen showing Fetch new data button highlighted to retrieve incoming data for configuration.โ€
  • On the Filter screen, add a condition where the field order_type includes “Shopify”. This identifies first-time subscription checkouts.
  • In the Event Configuration section:
    • Event Name โ†’ cl_first_order_subscription
Event Configuration Dropdown โ€“ โ€œCustomerLabs Event Configuration interface showing dropdown menu to assign event name with options like Category viewed, website_session_start, and custom event.โ€
Custom Event Name โ€“ โ€œCustomerLabs event configuration showing custom event field filled with event name โ€˜cl_recharge_subscriptionโ€™.โ€
  • Map User Identity fields (Email, Customer ID, or External ID).
User Identity Mapping โ€“ โ€œCustomerLabs setup screen showing user identity mapping with identify_by_email and identify_by_phone fields for matching customer identifiers.โ€
  • Map User Traits (Name, Email, Address).
User Traits Mapping โ€“ โ€œCustomerLabs user traits section mapping fields like first_name, last_name, email, phone, and address1 to customer data attributes.โ€
  • Add Product Details (SKU, Variant, ID).
Product Data Mapping โ€“ โ€œCustomerLabs interface showing product data mapping section with fields like product name, ID, quantity, price, SKU, variant, and discount configured under line_items.โ€
  • Include Event Properties like Subscription ID and Order ID.
Event Configuration Mapping โ€“ โ€œCustomerLabs event configuration screen showing custom field mappings for event properties including currency, value, subtotal, tax, discount, transaction ID, and order.โ€
  • Save the workflow.

Workflow 2: Recurring Subscription Order

  • From the same source, click Create Workflow again.
  • Name it something like Recharge_Recurring_Order.
  • Fetch sample data again from the Recharge source.
  • In the Filter, look for events where order_type includes “recurring”.
  • In Event Configuration:
    • Event Name โ†’ cl_recurring_subscription_order
    • Map identities, traits, product info, and event details just like before.
    • Save and activate the workflow.

Step 6: Monitor Events with Source Logs

  • In CustomerLabs, open your Recharge Source.
  • Click Logs โ†’ this shows all data received and processed.
Sources Log Overview โ€“ โ€œCustomerLabs Sources dashboard showing connected sources list with Logs button highlighted to view raw JSON payloads.โ€
  • Data In Log โ†’ shows raw JSON payloads coming from Recharge.
Data In Log Example โ€“ โ€œCustomerLabs Data In Log displaying JSON payload with event details such as event type, metadata, company ID, timestamp, and currency.โ€
  • Data Out Log โ†’ shows the processed data that passed your filters and workflows.
Data Out Log Example โ€“ โ€œCustomerLabs Data Out Log showing JSON response with filter condition failed error for create or update deal and successful status for create or update person.โ€
  • Use message IDs to troubleshoot issues:
    • Mapping not found โ†’ workflow is still in draft.
    • Filter condition failed โ†’ data didnโ€™t match the logic.
    • User ID missing โ†’ user identity not mapped.

After validation, you can forward this data to any destination integrated with CustomerLabs like Klaviyo, Meta Ads, or Google Ads.

Also read on: A Guide to Calculating Shopify Average Order Value (AOV)

Send Subscription Data Banner โ€“ โ€œCustomerLabs banner showing how to send subscription data back to ad platforms using 1PD Ops, with a โ€˜Try now for freeโ€™ button.โ€

Step 7: Send Data to Destinations

  • Click Destinations in the sidebar on the CustomerLabs dashboard
Navigate to Destinations โ€“ โ€œCustomerLabs left navigation panel showing Destinations tab highlighted below Source.โ€
  • Choose any destination that you want to send the data to for targeting
All Destinations List โ€“ โ€œCustomerLabs All Destinations tab displaying integration options such as Audience Lab, BigQuery, Bing Ads, Customer.io, Drip, Facebook, and Custom Integration.โ€

Example automations:

  • Trigger a welcome email when cl_first_order_subscription fires.
  • Run retargeting ads when cl_recurring_subscription_order triggers.

We are all set.

Get this setup for free.

Conclusion

Youโ€™ve now connected Recharge, Shopify, and CustomerLabs, enabling full visibility into every subscription event and bringing your entire subscription funnel into one connected system.

With this setup, you can:

Instead of letting your subscription data stay siloed inside Recharge, CustomerLabs helps you activate it across your marketing stack, giving you complete visibility and control over your customersโ€™ journeys.

Want to see this in action?

Book a free demo to connect Recharge and Shopify with your marketing tools in minutes. Or start your 14-day free trial here and set up your first workflow today, no code, no GTM, no developer needed.

Frequently Asked Questions (FAQs)

No. The entire setup can be completed without writing a single line of code or using Google Tag Manager (GTM). You only need access to Recharge, Shopify, CustomerLabs, and Postman.
Postman acts as the bridge between Rechargeโ€™s API and CustomerLabs Webhook. It helps you test and verify that the webhook is correctly passing data before it goes live.
Yes, this integration works with all Shopify stores that use Recharge for subscription management.
Absolutely. This method simply bypasses the need for GTM โ€” it wonโ€™t interfere with any existing GTM setup.
Data flows in real-time from Recharge to CustomerLabs once the webhook is active. Every new or recurring order triggers data sync automatically.
Yes. Once the workflows are live in CustomerLabs, you can send subscription event data to: - Klaviyo for email automation - Meta Ads / Google Ads for retargeting - CRM tools for lifecycle tracking
- First Subscription Order โ†’ triggers when a user subscribes for the first time. - Recurring Subscription Order โ†’ triggers for renewals or repeat billing cycles.
In CustomerLabs: - Data In Log โ†’ shows raw data received from Recharge. - Data Out Log โ†’ shows processed data sent to destinations. Use these logs to check mapping, troubleshoot filters, or fix missing identities.
Yes. By syncing subscription data to your ad and email tools, you can: - Re-engage customers before renewals lapse - Send personalized loyalty offers - Build lookalike audiences based on active subscribers
Yes. The process uses Rechargeโ€™s Admin API Token and secure HTTPS webhooks. All data is transferred through encrypted channels.
You can sign up for a free trial on CustomerLabs and complete this setup in under 30 minutes โ€” no developer or GTM needed.

Seasoned content marketer, creating impactful content in a wide range of topics relating to Digital marketing, SEO, Food and Cosmetics industry and lately into SaaS technology. Optimizing brands amplify their online presence through strategic storytelling and technical precision. Additionally, has interest into drawing and occasionally poses as a motivational speaker.

The latest news, perspectives, and insights from CustomerLabs

More Blogs

View all
Top 3 mistakes eCommerce Marketers are making in 2025
1PD Ops Strategy: Your Secret Weapon for Marketing Success in 2025 &...

1st party data ops is essential for first party data activation in 2025. It enables AI-driven algorithms to offer hyper-personalized customer experiences.

Read more
This image explians about how to setup Facebook Conversion API for shopify
How to Set Up Meta Conversions API on Shopify: A Step-by-Step Guide

Understand how to set up Shopify Meta Conversions API natively, optimize data sharing, and ensure event match rate quality.

Read more
Facebook Conversion API for Magento
Facebook Conversion API for Magento and how to implement it?

Learn the step-by-step guide on how to set up a Facebook conversion API for Magento without the help of developers

Read more

Get started with
CustomerLabs 1PD Ops

Schedule a 1-1 Demo