Subscription-based commerce has exploded in popularity; from coffee and skincare to pet supplies. But as subscription models grow, so does the complexity of tracking recurring orders and understanding your most loyal customers.
In this blog, let’s look into an easy, quick and effective setup without a single line of code or the need for GTM (Google Tag Manager).
This setup lets you track first-time and recurring subscription orders, sync them, and use that data for advanced segmentation, personalized campaigns, and better retention.
Let’s walk through the complete integration process, with just a few toggles on.
Before getting started, let’s look at the things that you should have handy for the setup.
Bonus: Setup CAPI for your Shopify store under 30 minutes
Prerequisites
Before you start, make sure you have access to:
- Your Recharge Admin account
- Shopify Admin access
- A CustomerLabs account
- A free Postman account (for connecting Recharge API and CustomerLabs webhook)

Steps to Integrate Recharge and Shopify Using 1PD Ops
Step 1: Access Recharge Admin
- Log in to your Recharge account.
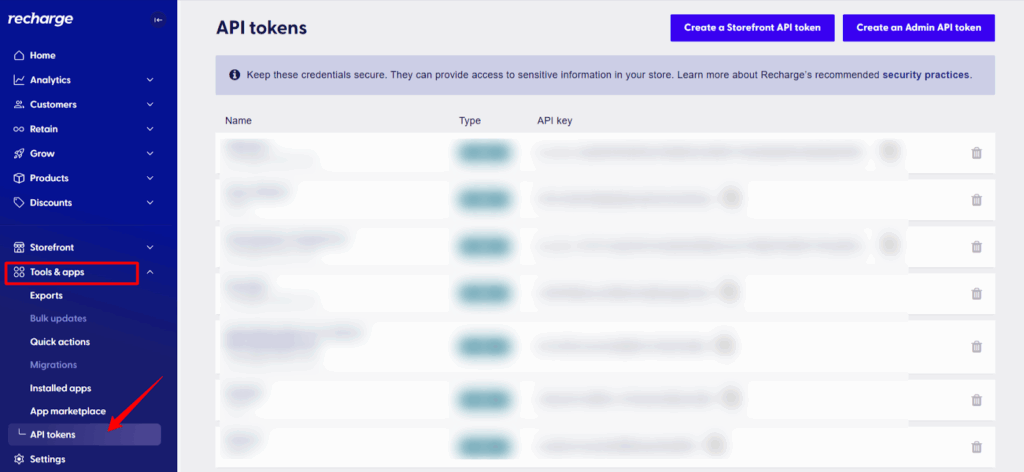
- From the left-side panel, open Tools & Apps.
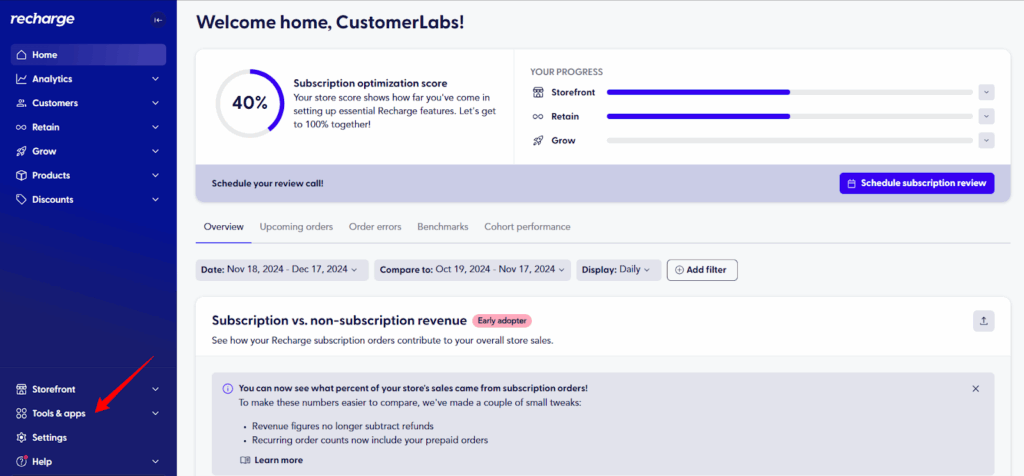
- Find and click on “API Tokens”
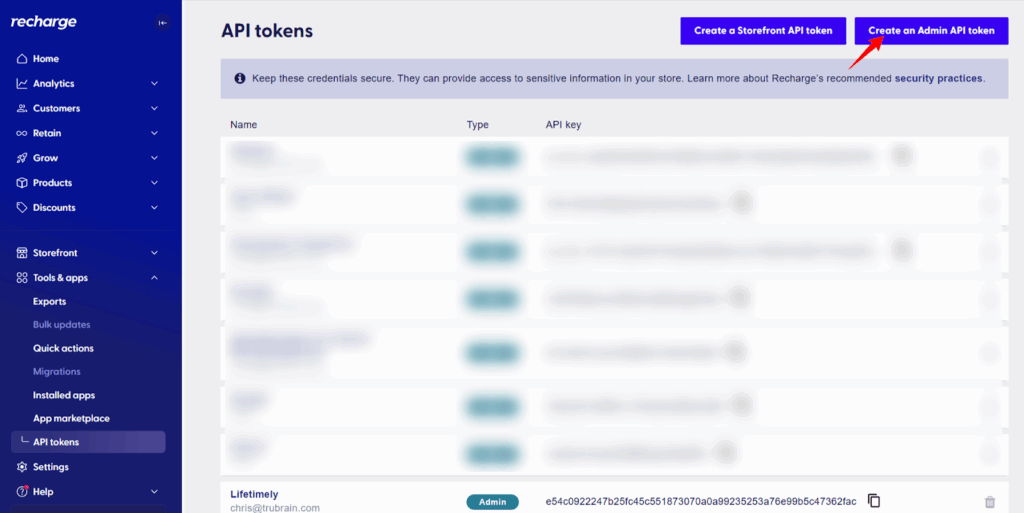
- Click “Create an Admin API Token”
- A new dialogue appears, like the one shown in the screenshot below.
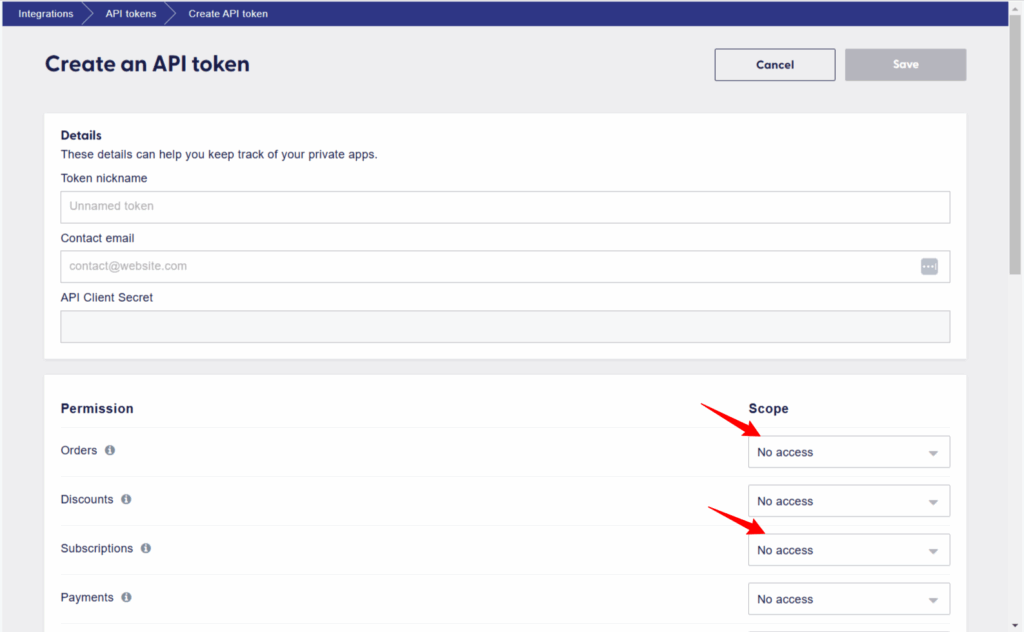
- Under “Permission and Scope”, you will find all the fields that you should give permission to access.
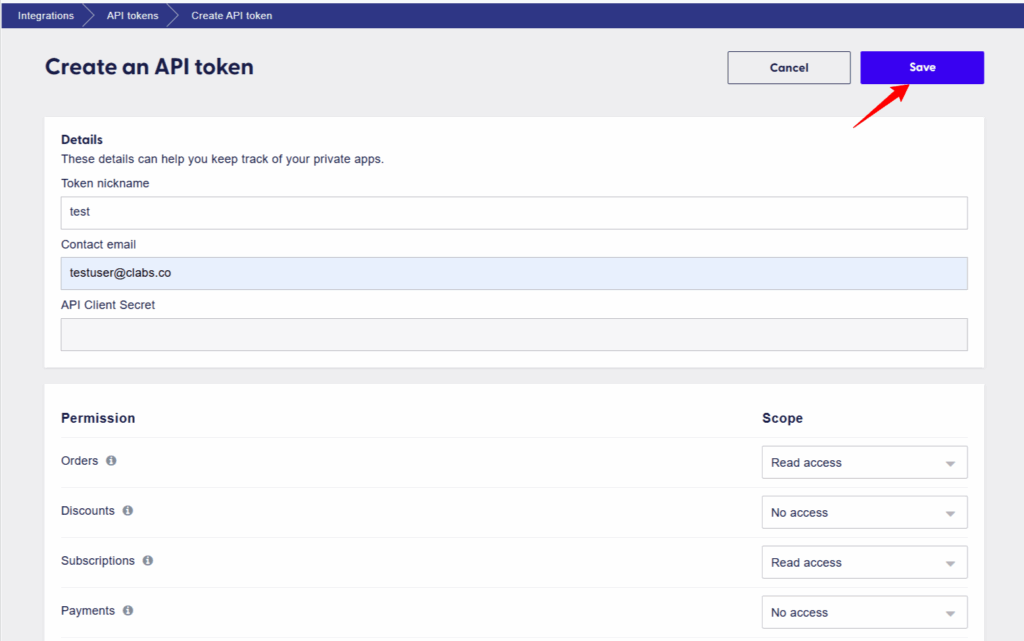
- Change the access of “Orders” and “Subscription” permission from “No access” to “Read access”.

- Once you have changed the permissions, click “save” in the top right corner.
Now let’s start connecting recharge and CustomerLabs. You will need a free postman account, keep it ready.
Also read on: Setting Up Shopify Server-Side Tracking

Step 2: Set Up Recharge Webhook in Postman
- Open theRecharge’s Webhook API documentation
- Copy the POST/Webhook – cURL example shown in the docs

- Open Postman on your system
- Go to Import, and paste the cURL request template

- Once imported, you’ll see the request appear in your Postman workspace.
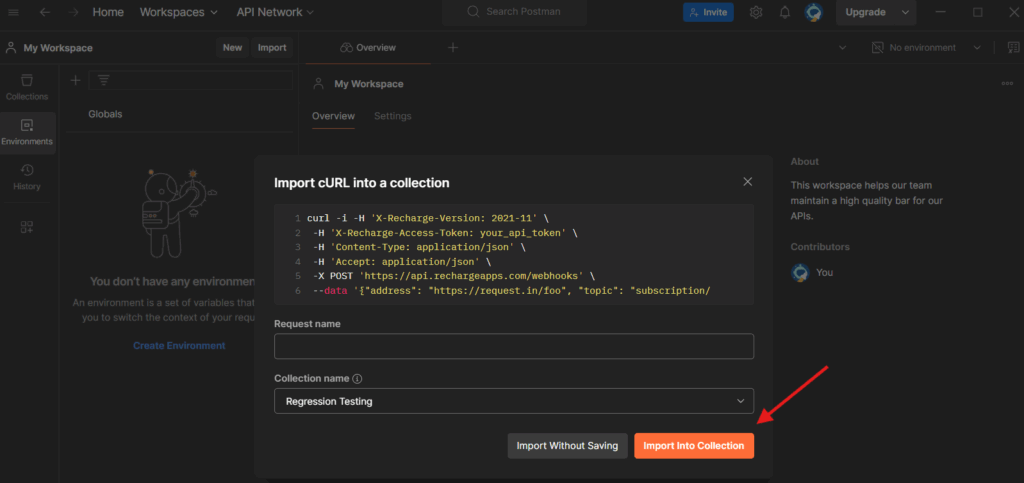
- Navigate to the Headers tab and paste the API Token you generated earlier into the authorization header.
- Click “Import into collection”
This webhook will later send order data directly to CustomerLabs.
Step 3: Add API Token to Headers
- In Postman, go to the Headers tab of the imported request.
- Find the X-Recharge-Access-Token (or equivalent authorization field).
- Paste the API Token you generated earlier in Recharge into this field.
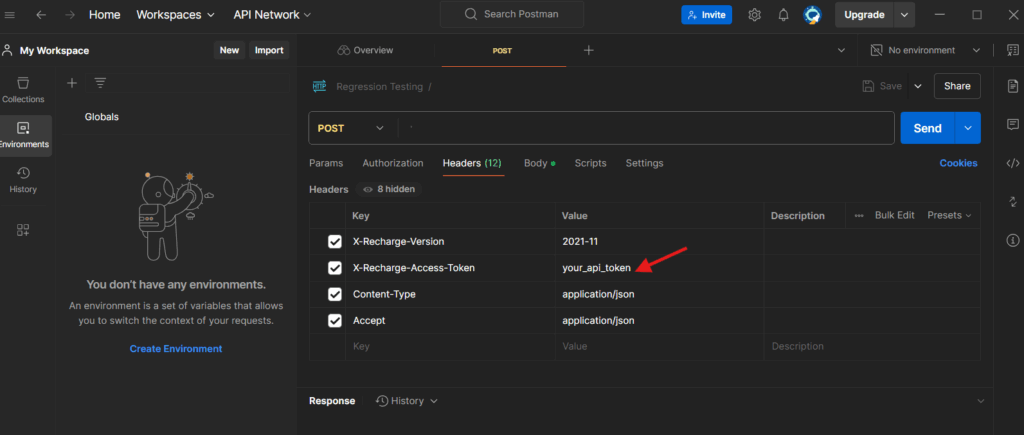
- Double-check that all header details are prefilled from the imported cURL (content-type, endpoint, etc.).
- Save the request. This will be used to push Recharge data into CustomerLabs.
Once this setup is complete, you’re ready to connect the CustomerLabs Webhook URL in the next step.
Also read on: How to Use First-Party Data to Reduce RTO for Shopify
Step 4: Create Webhook Source in CustomerLabs
- Log in to your CustomerLabs 1PD Ops account.
- From the top navigation, open Sources.

- Click Add Source → choose Custom Source.

- Give it a clear name, like “Recharge Subscription Webhook.”

- Copy the Webhook URL that CustomerLabs provides.
- Go back to Postman, and paste that webhook URL into the Body or URL field of your Recharge webhook request.
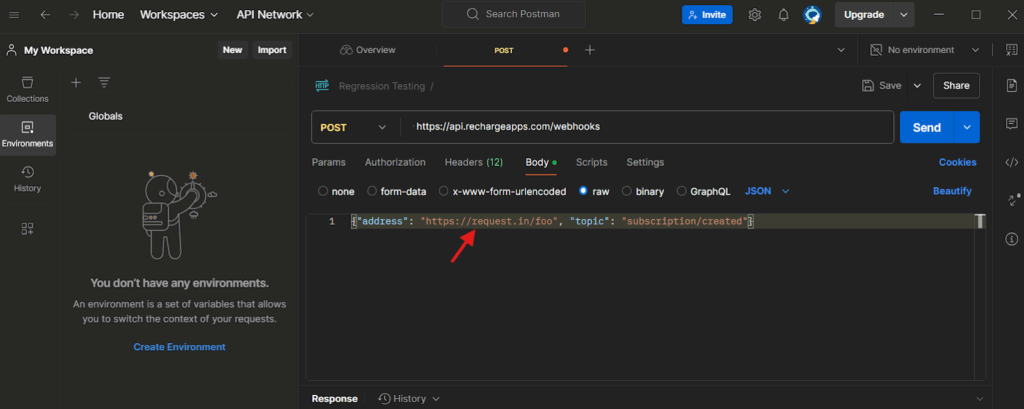
- Hit Send in Postman to verify the connection.
Once done, data will start flowing from Recharge to CustomerLabs. Next, let’s setup the workflow.
Also read on: TikTok Standard Events: Guide to Tracking, Implementing & Optimizing Conversions
Step 5: Setting up workflow for the orders
Workflow 1: First Subscription Order
- In CustomerLabs, open the Recharge Webhook Source you created.
- Click Create Workflow → name it something like Recharge_First_Order.

- Add a workflow delay (e.g., 10 seconds) to prevent duplicate user IDs if multiple workflows run simultaneously.
- Click Fetch Sample Data and trigger a test order in Recharge to pull in event data.

- On the Filter screen, add a condition where the field order_type includes “Shopify”. This identifies first-time subscription checkouts.
- In the Event Configuration section:
- Event Name → cl_first_order_subscription


- Map User Identity fields (Email, Customer ID, or External ID).

- Map User Traits (Name, Email, Address).

- Add Product Details (SKU, Variant, ID).

- Include Event Properties like Subscription ID and Order ID.

- Save the workflow.
Workflow 2: Recurring Subscription Order
- From the same source, click Create Workflow again.
- Name it something like Recharge_Recurring_Order.
- Fetch sample data again from the Recharge source.
- In the Filter, look for events where order_type includes “recurring”.
- In Event Configuration:
- Event Name → cl_recurring_subscription_order
- Map identities, traits, product info, and event details just like before.
- Save and activate the workflow.
Step 6: Monitor Events with Source Logs
- In CustomerLabs, open your Recharge Source.
- Click Logs → this shows all data received and processed.

- Data In Log → shows raw JSON payloads coming from Recharge.

- Data Out Log → shows the processed data that passed your filters and workflows.

- Use message IDs to troubleshoot issues:
- Mapping not found → workflow is still in draft.
- Filter condition failed → data didn’t match the logic.
- User ID missing → user identity not mapped.
After validation, you can forward this data to any destination integrated with CustomerLabs like Klaviyo, Meta Ads, or Google Ads.
Also read on: A Guide to Calculating Shopify Average Order Value (AOV)

Step 7: Send Data to Destinations
- Click Destinations in the sidebar on the CustomerLabs dashboard

- Choose any destination that you want to send the data to for targeting
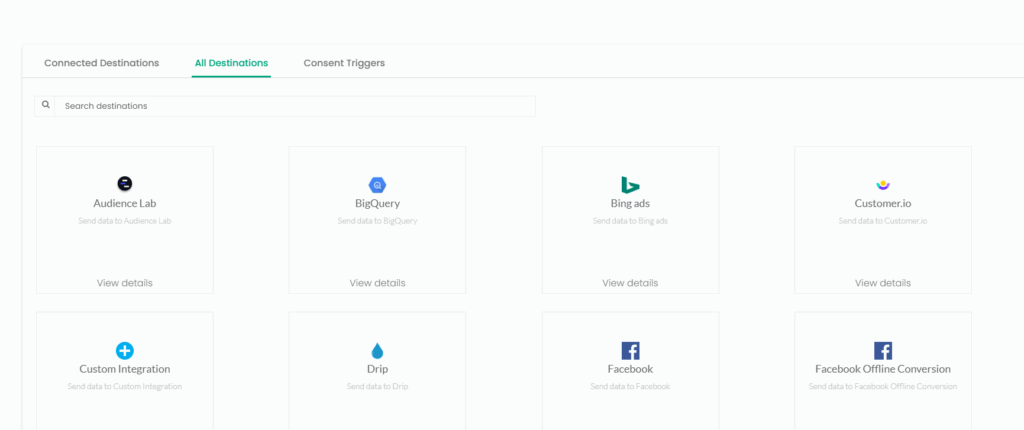
Example automations:
- Trigger a welcome email when cl_first_order_subscription fires.
- Run retargeting ads when cl_recurring_subscription_order triggers.
We are all set.
Get this setup for free.
Conclusion
You’ve now connected Recharge, Shopify, and CustomerLabs, enabling full visibility into every subscription event and bringing your entire subscription funnel into one connected system.
With this setup, you can:
- Track both first-time and recurring subscription orders in real-time.
- Segment your subscribers based on renewal behavior, lifetime value, and churn risk.
- Sync enriched data to ad platforms and email tools to boost retention and revenue automatically.
Instead of letting your subscription data stay siloed inside Recharge, CustomerLabs helps you activate it across your marketing stack, giving you complete visibility and control over your customers’ journeys.
Want to see this in action?
Book a free demo to connect Recharge and Shopify with your marketing tools in minutes. Or start your 14-day free trial here and set up your first workflow today, no code, no GTM, no developer needed.
