By deploying this playbook you will be able to send your CRM data to Facebook (now Meta) & Google Ads to re-engage cold leads or the missed opportunities with relevant messages.
The Blueprint
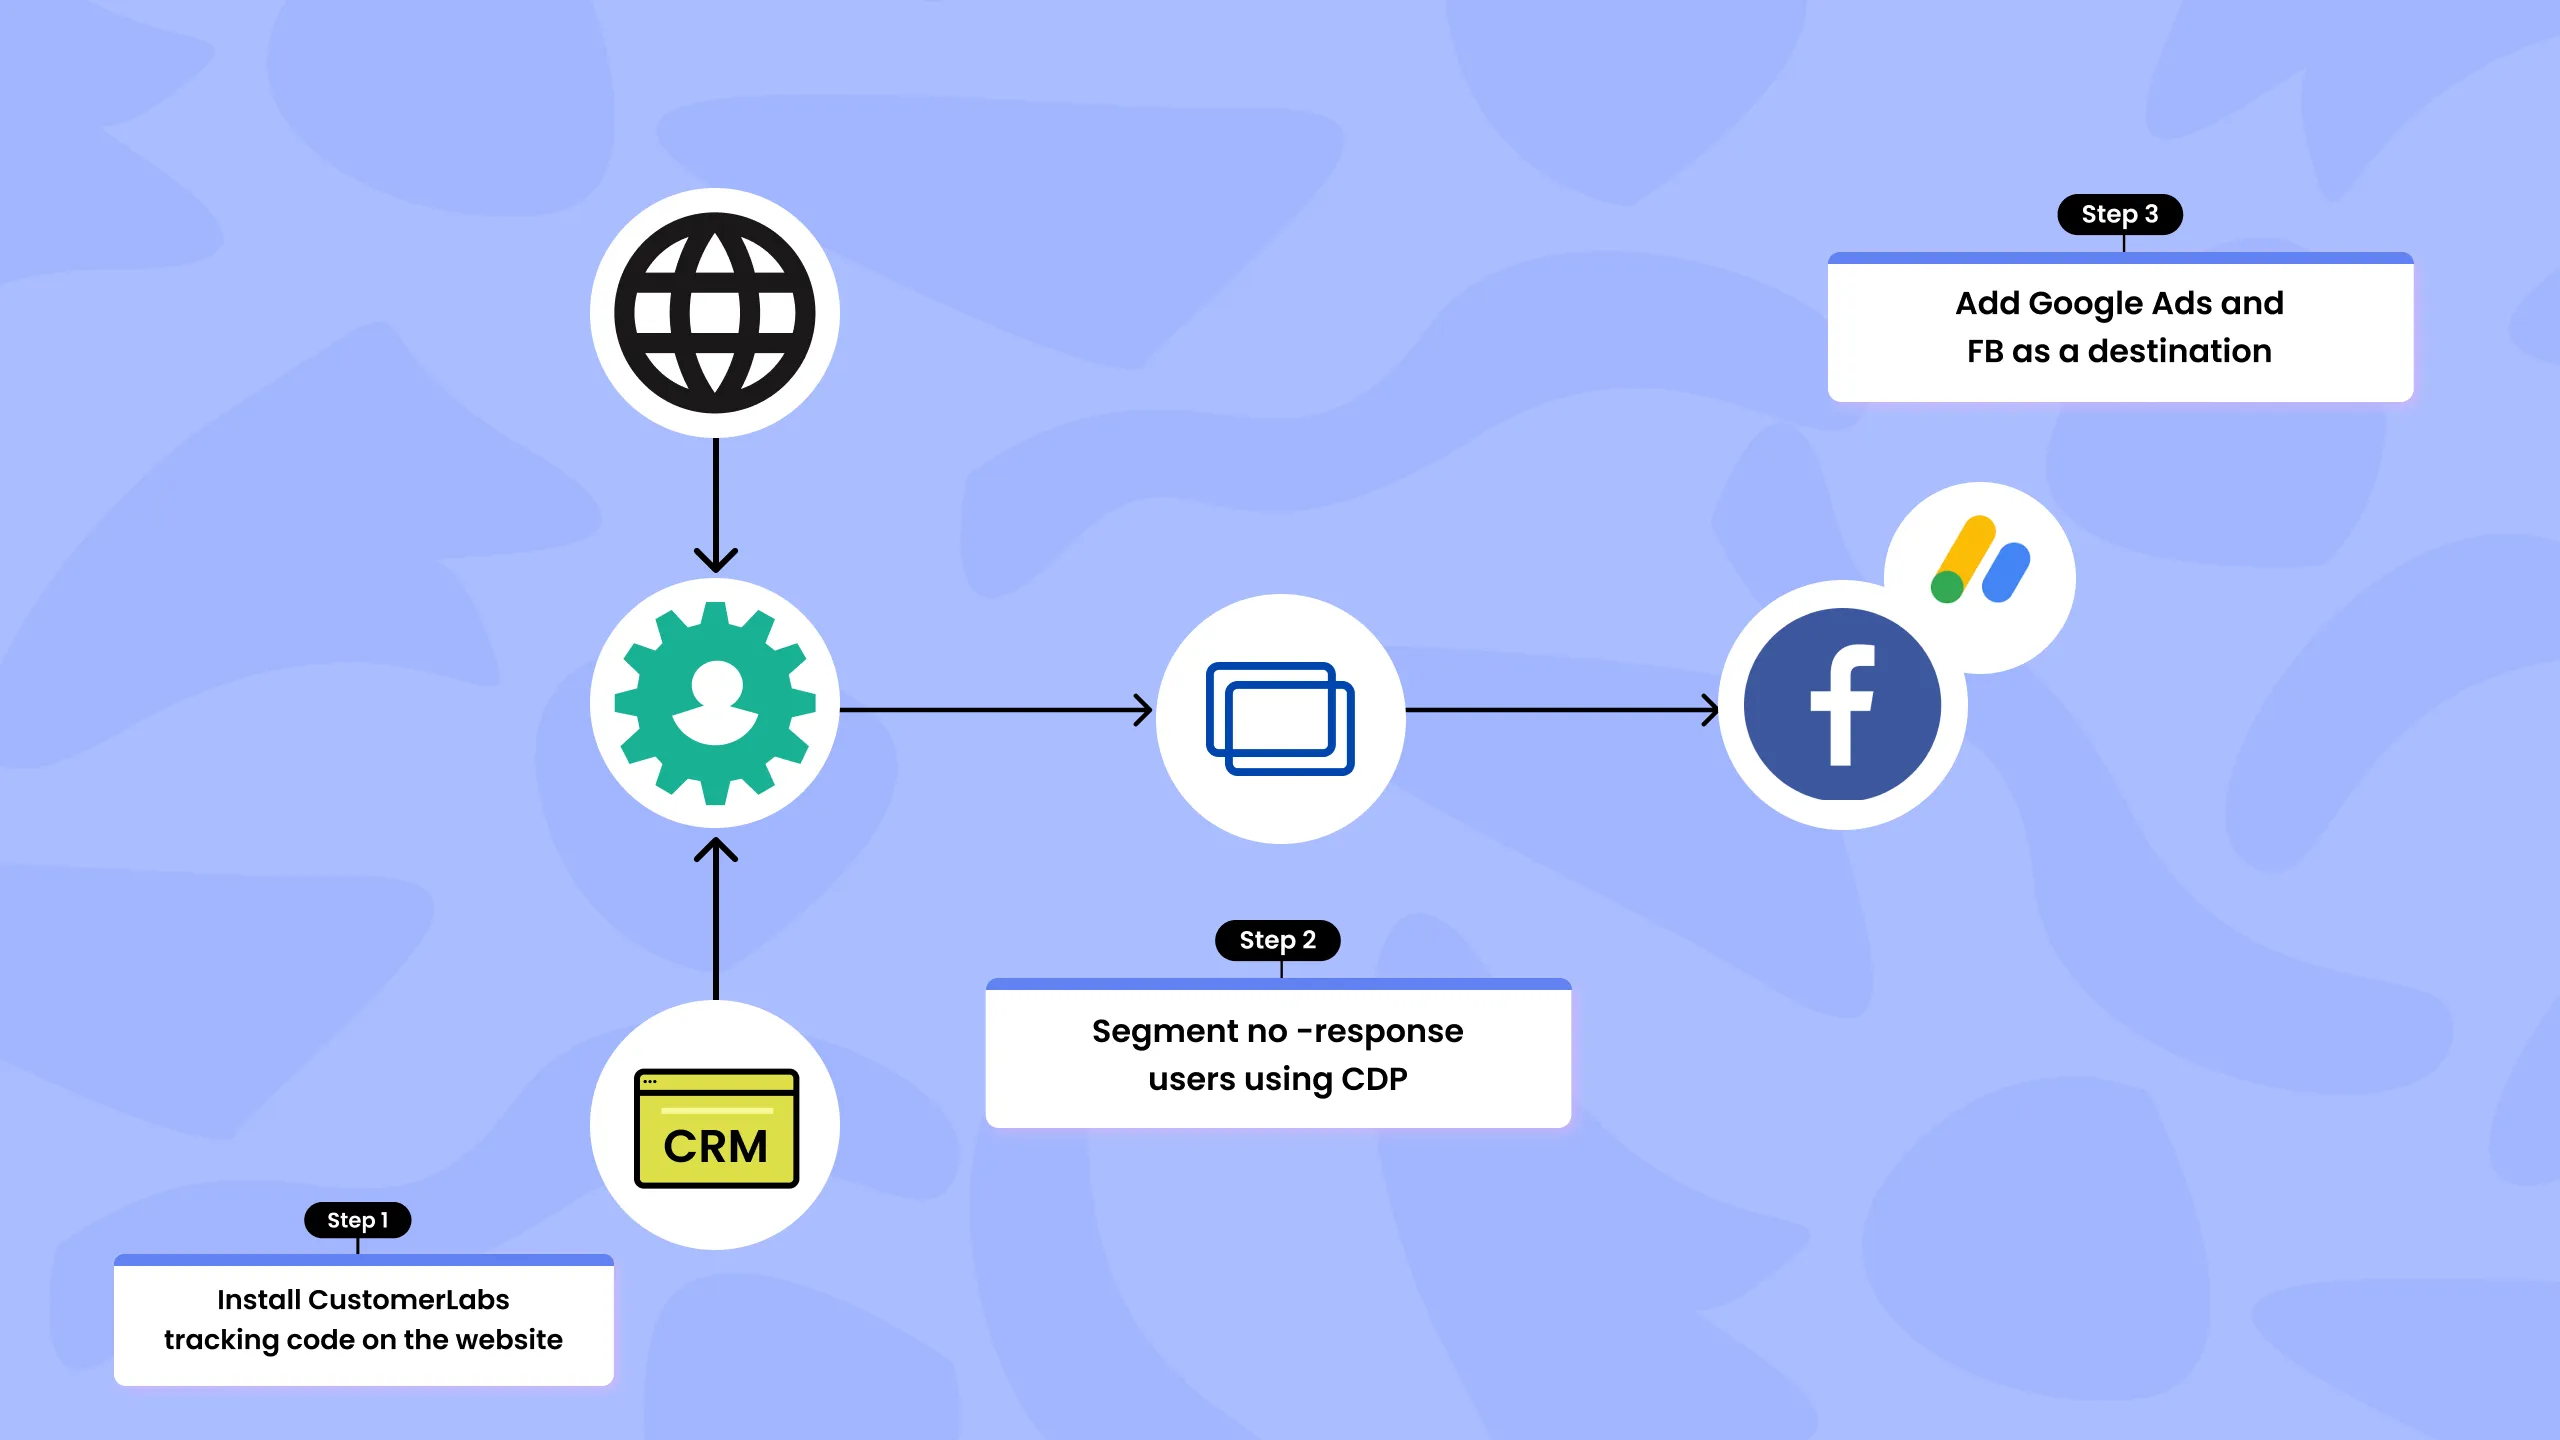
The 8 steps involved in this process are as follows,
-
Integrate CustomerLabs 1PD Ops with your CRM
-
This integration will enable the 1PD Ops system to seamlessly receive CRM data
-
The 1PD Ops will combine both online (website) and offline (CRM) user information using advanced ID resolution
-
With complete customer information inside CustomerLabs 1PD Ops, you can now create a segment named “No-response” for users who haven’t responded to your emails or calls
-
This segment will be updated as and when new users are added to this stage in your CRM
-
Add Facebook and Google as destination platforms in the 1PD Ops
-
CustomerLabs 1PD Ops will now send the created “No-response” segment to Facebook and Google Ads
-
Set up creative & personalized ads in Meta (formerly Facebook) and Google Ads to re-engage these users and bring them back into your marketing funnel
The Process
Step 1: Integrate CustomerLabs 1PD Ops with your CRM
This is another classic CRM + 1PD Ops use case. As always this playbook involves the integration of your website with your CRM system.
- See how you can integrate & set up event tracking in CustomerLabs 1PD Ops:
- Here’s the link to the quick CRM + CDP integration playbook
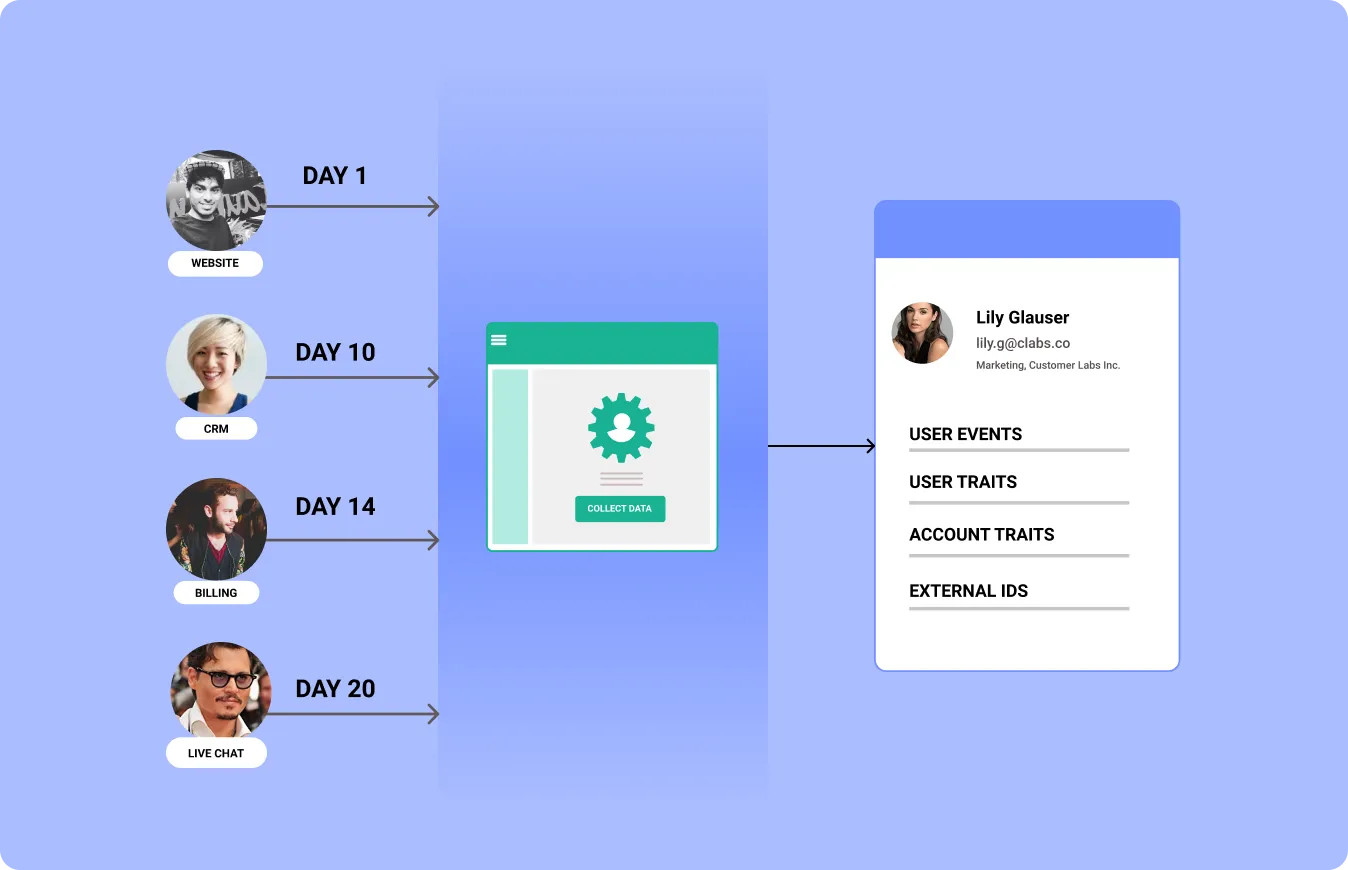
Step 2: Obtain a clean & unified single customer profile
With the Website + CRM + 1PD Ops integration complete, you will now be able to get a single user profile compiled across all these platforms by advanced Identity Resolution.
Step 3: Group all cold/non-responsive leads
Create a segment with customers that fall under the ‘cold leads’ category inside the 1PD Ops.

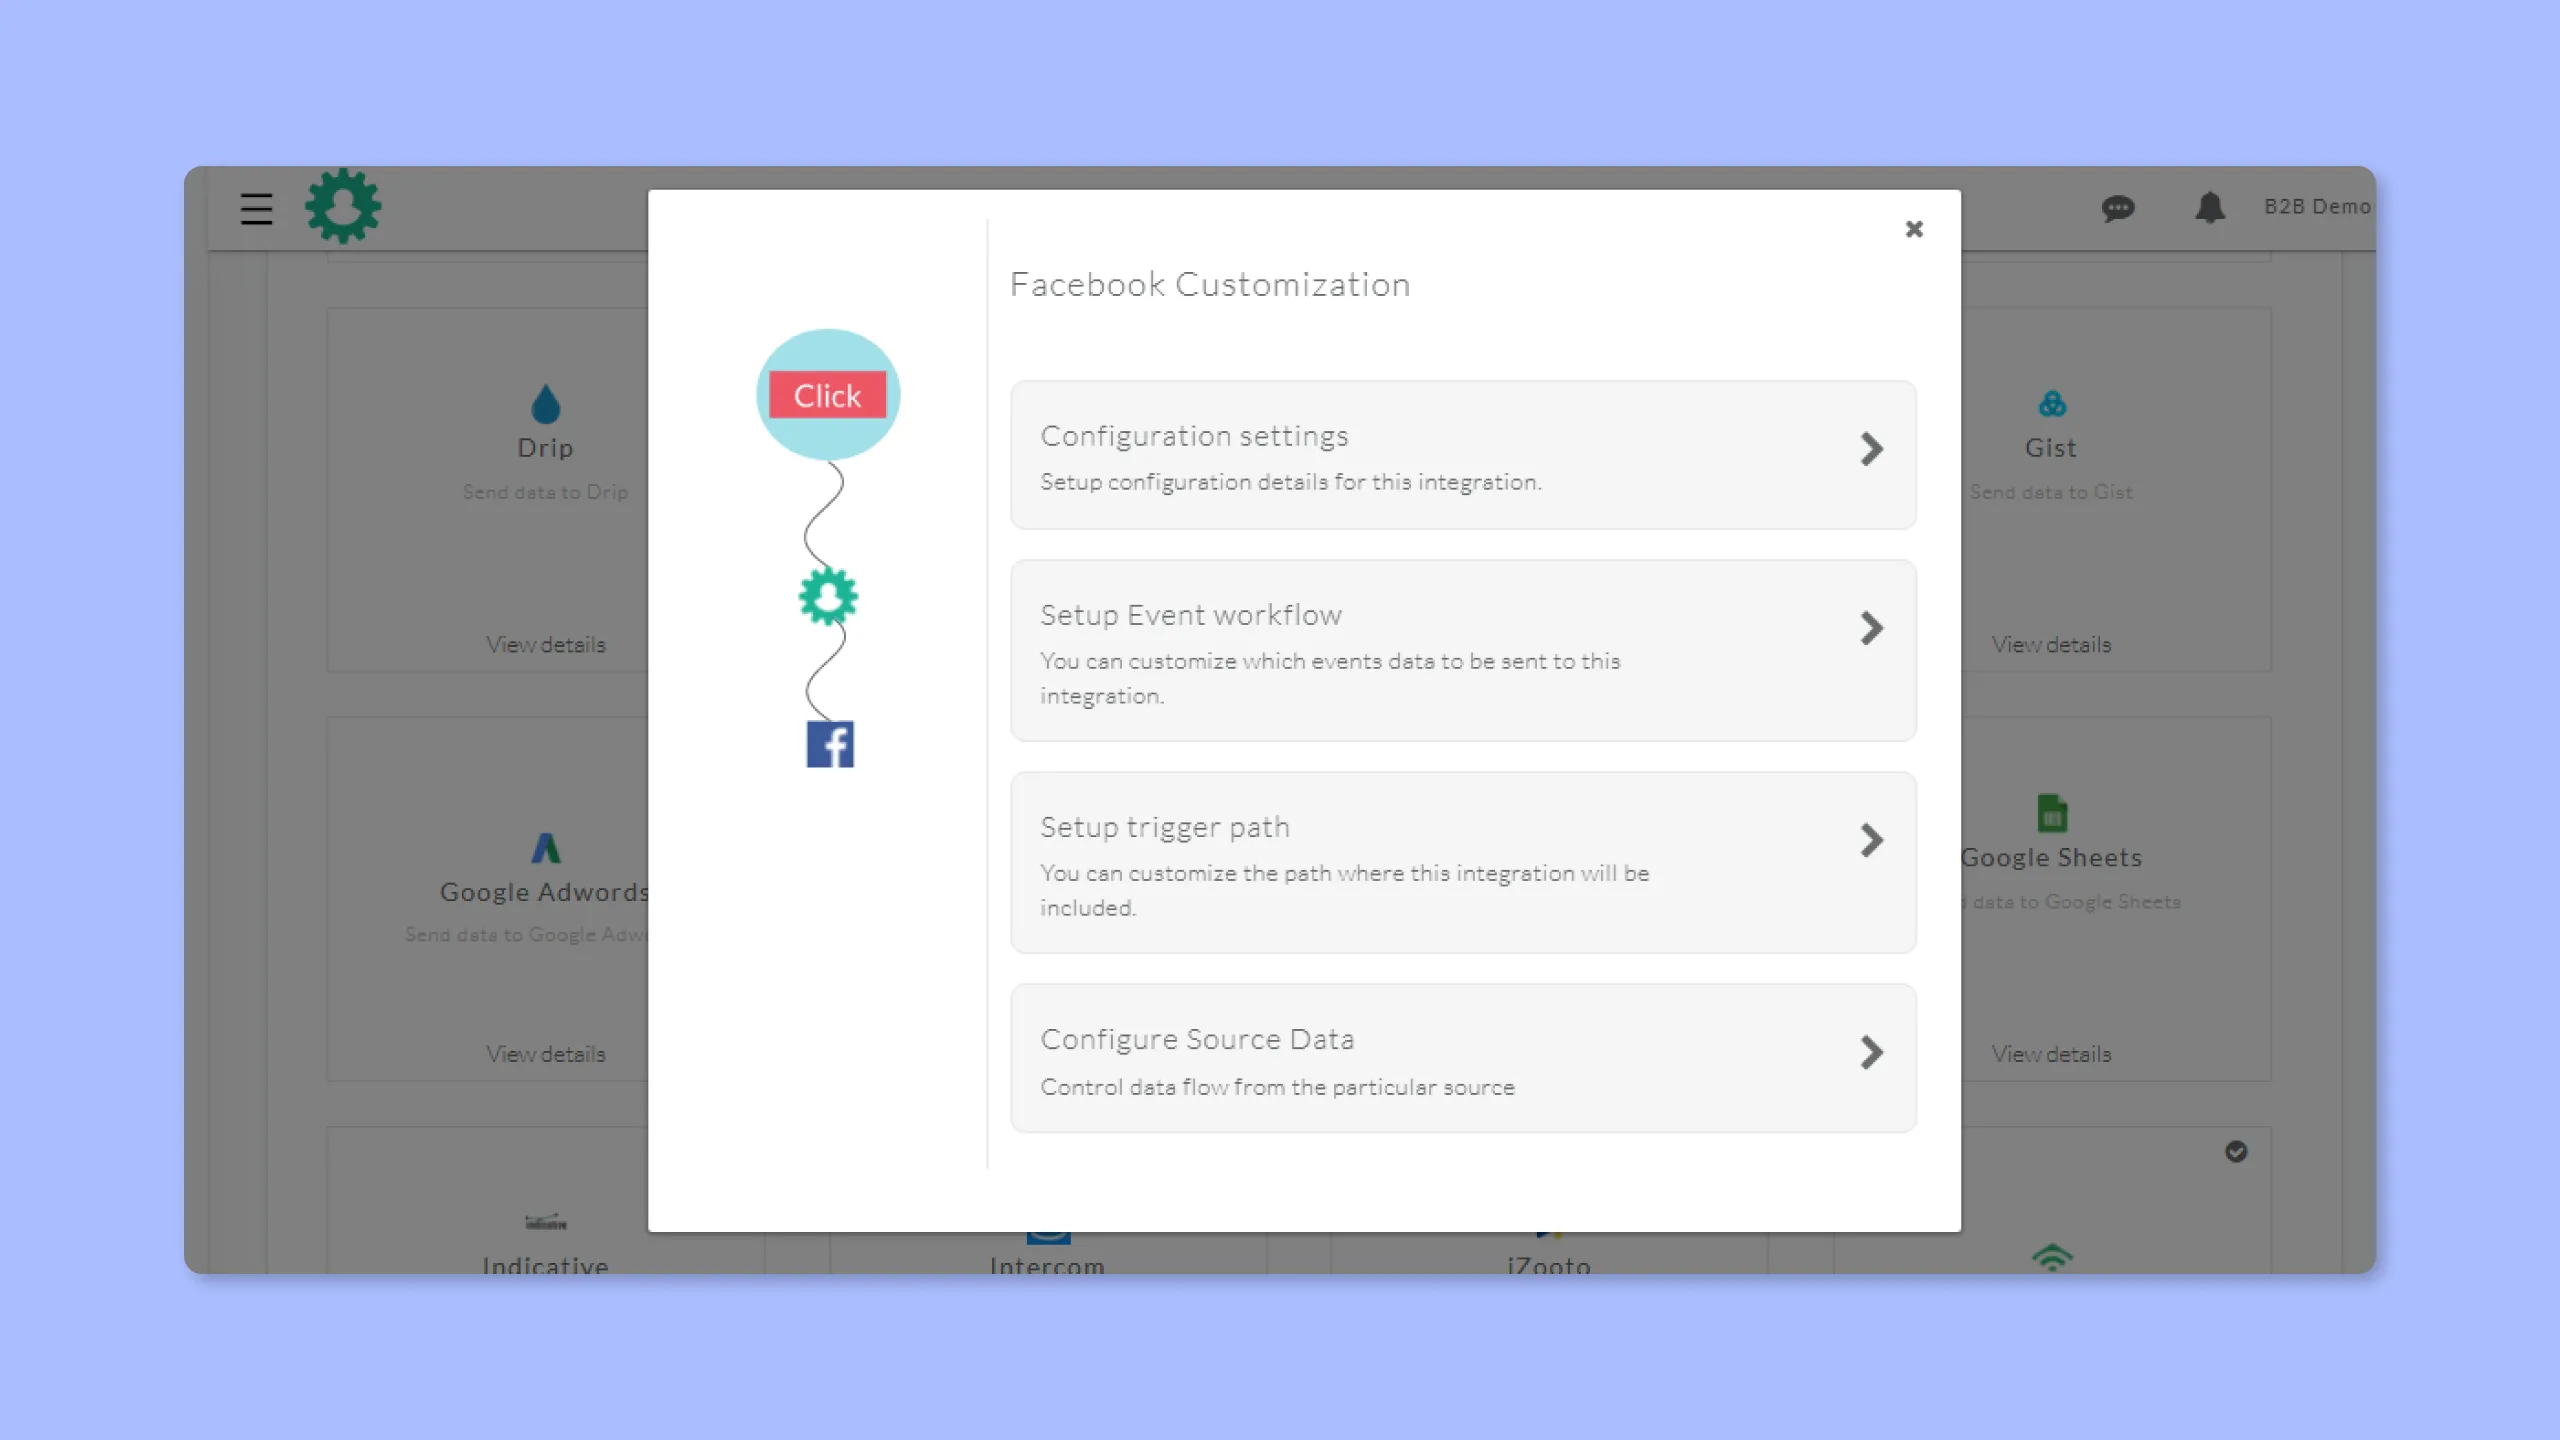
Step 4: Connect Facebook with the 1PD Ops
Add & activate Facebook as the first Destination in the 1PD Ops. This setup involves pasting the Facebook Pixel ID and authenticating your ad account. Post integration, create a custom audience list in Facebook. In this case, you create a custom audience list named “No-Response leads” in Facebook
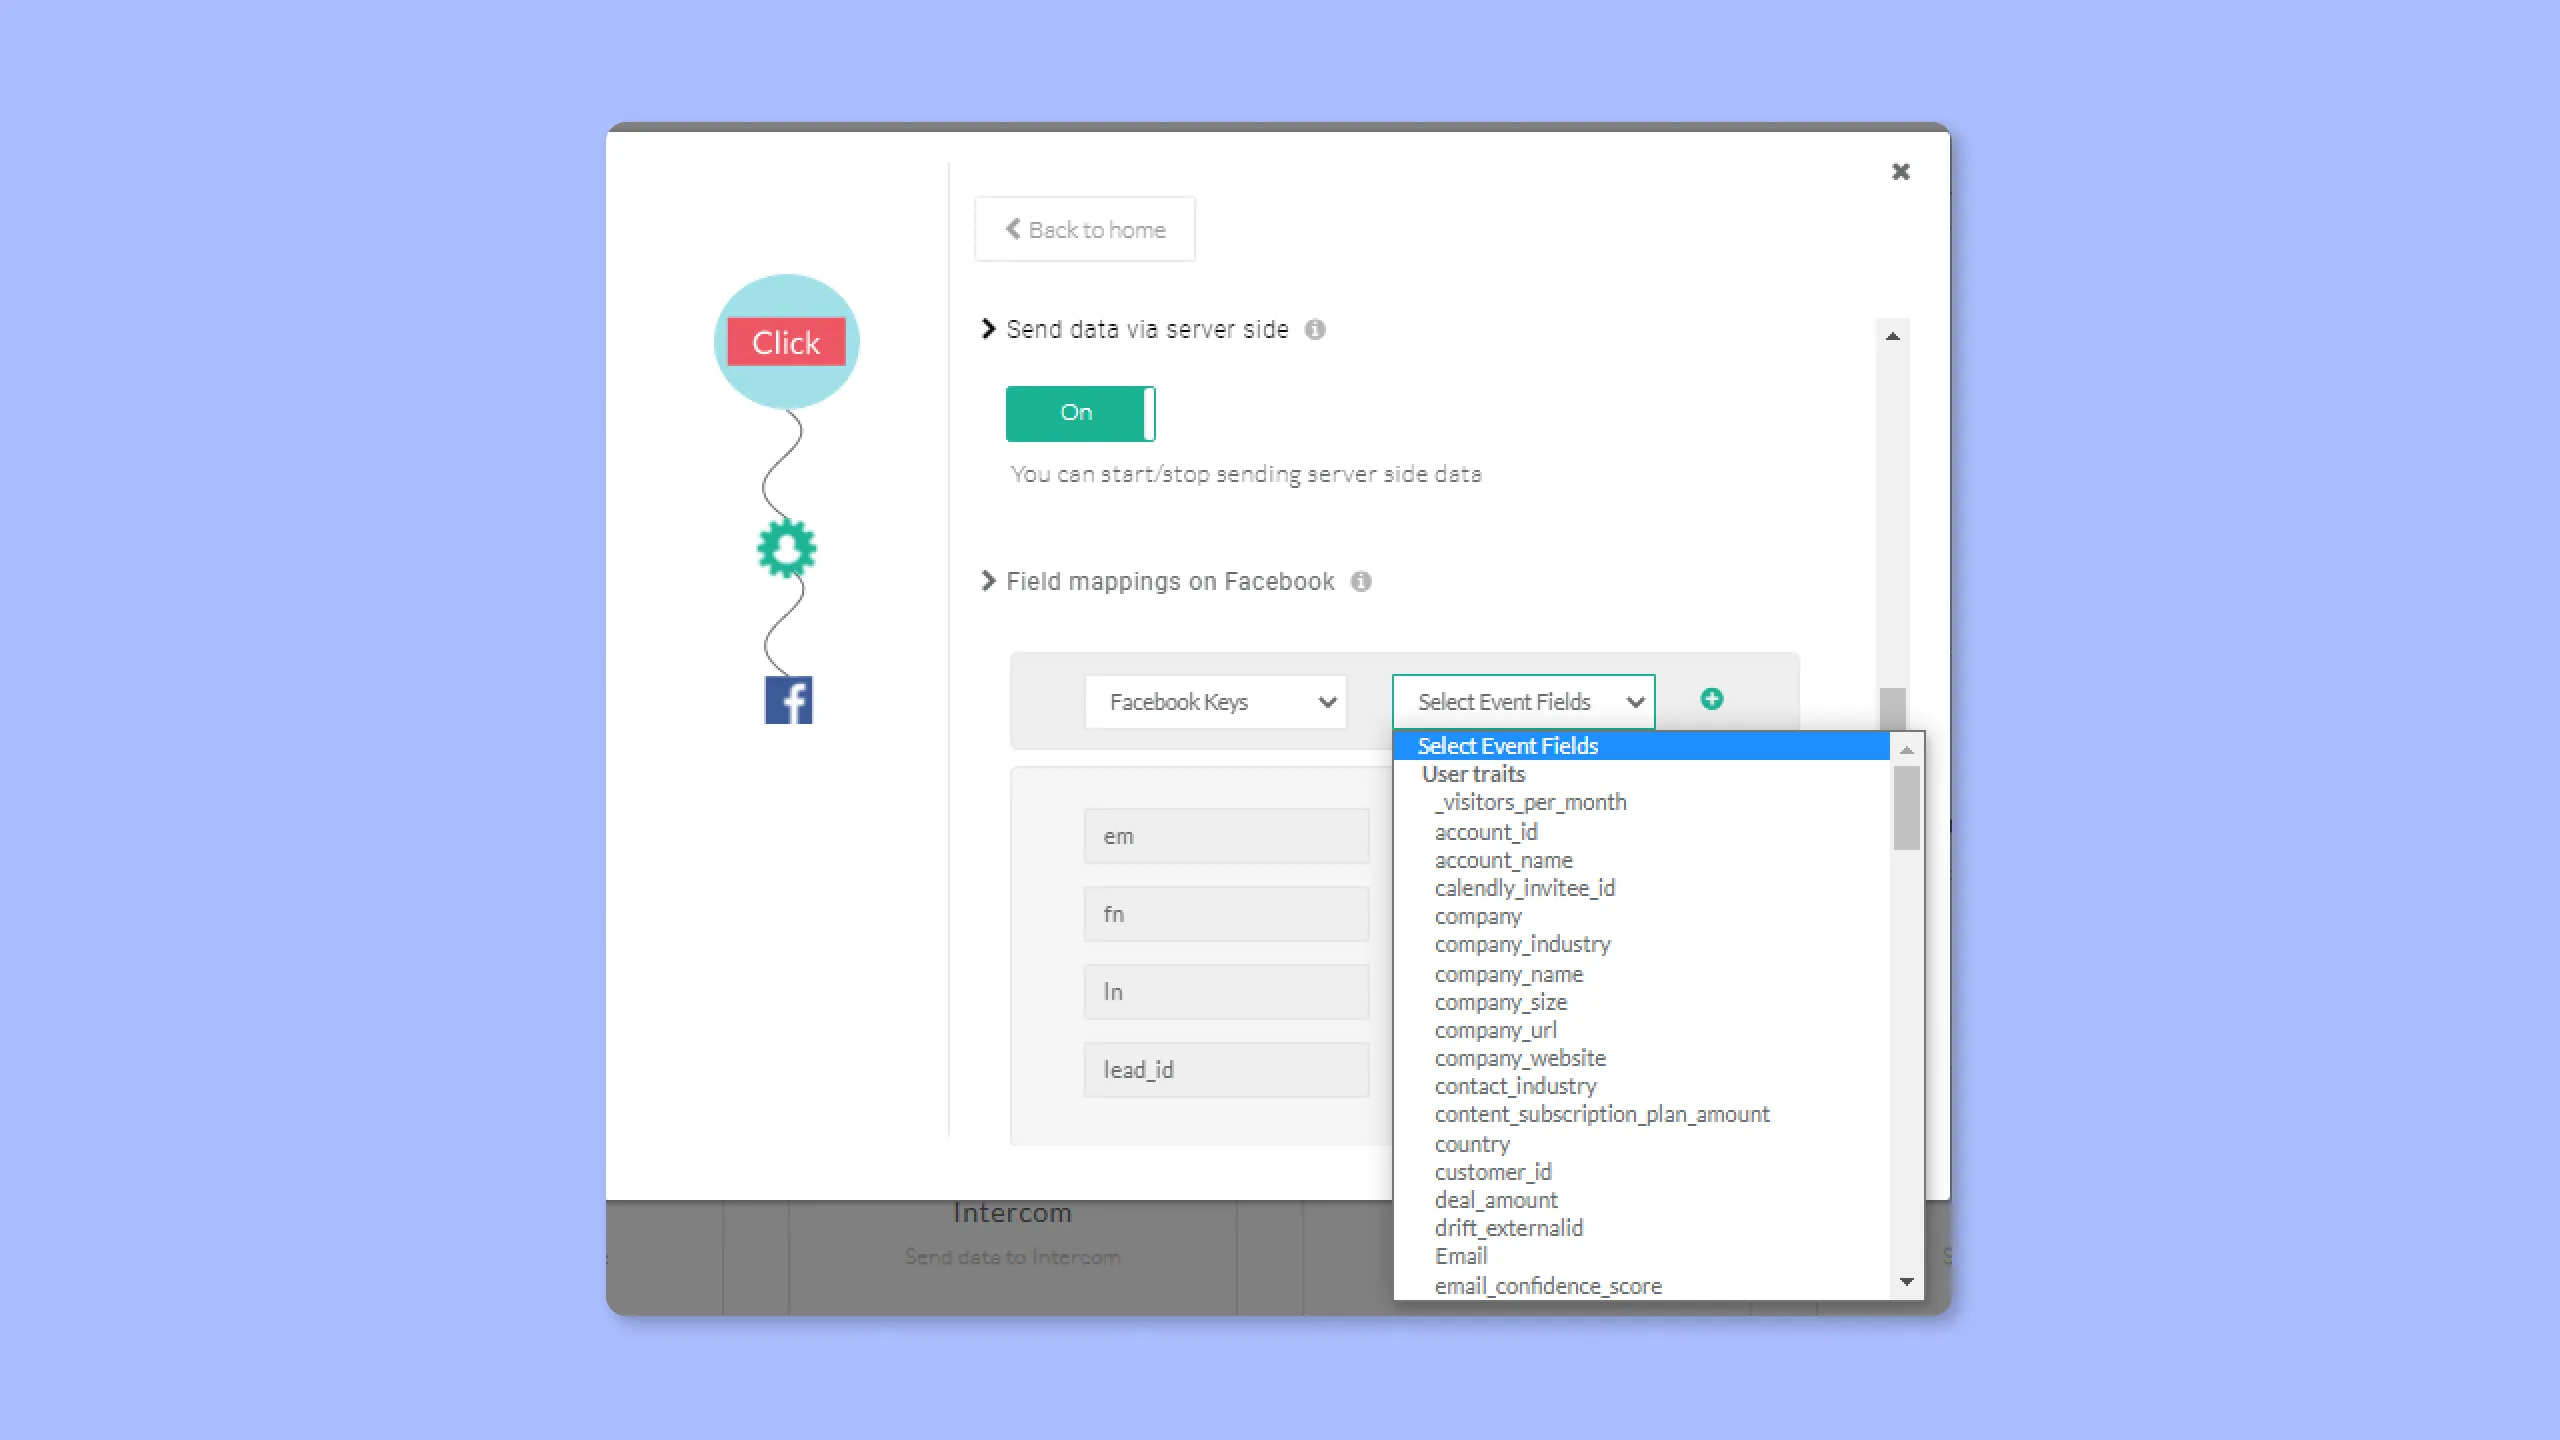
Step 5: Send user data to Facebook as a custom audience
Now, seamlessly sync the segment information (“No-Response”) from inside the 1PD Ops to the created custom audience list (“No-Response Leads”) in Facebook. The lead information will be updated in near real-time between the two systems.
Step 6: Create highly personalized Meta Ads / Facebook ads
Use the created custom audience list to create personalized ad copies as shown below for this scenario.
Step 7: Connect Google Ads with the 1PD Ops
You can also repeat the same process using Google Ads as well. Activate Google Ads as the second Destination in the 1PD Ops. On clicking “Authenticate Adwords” you will be redirected to your Google Login.
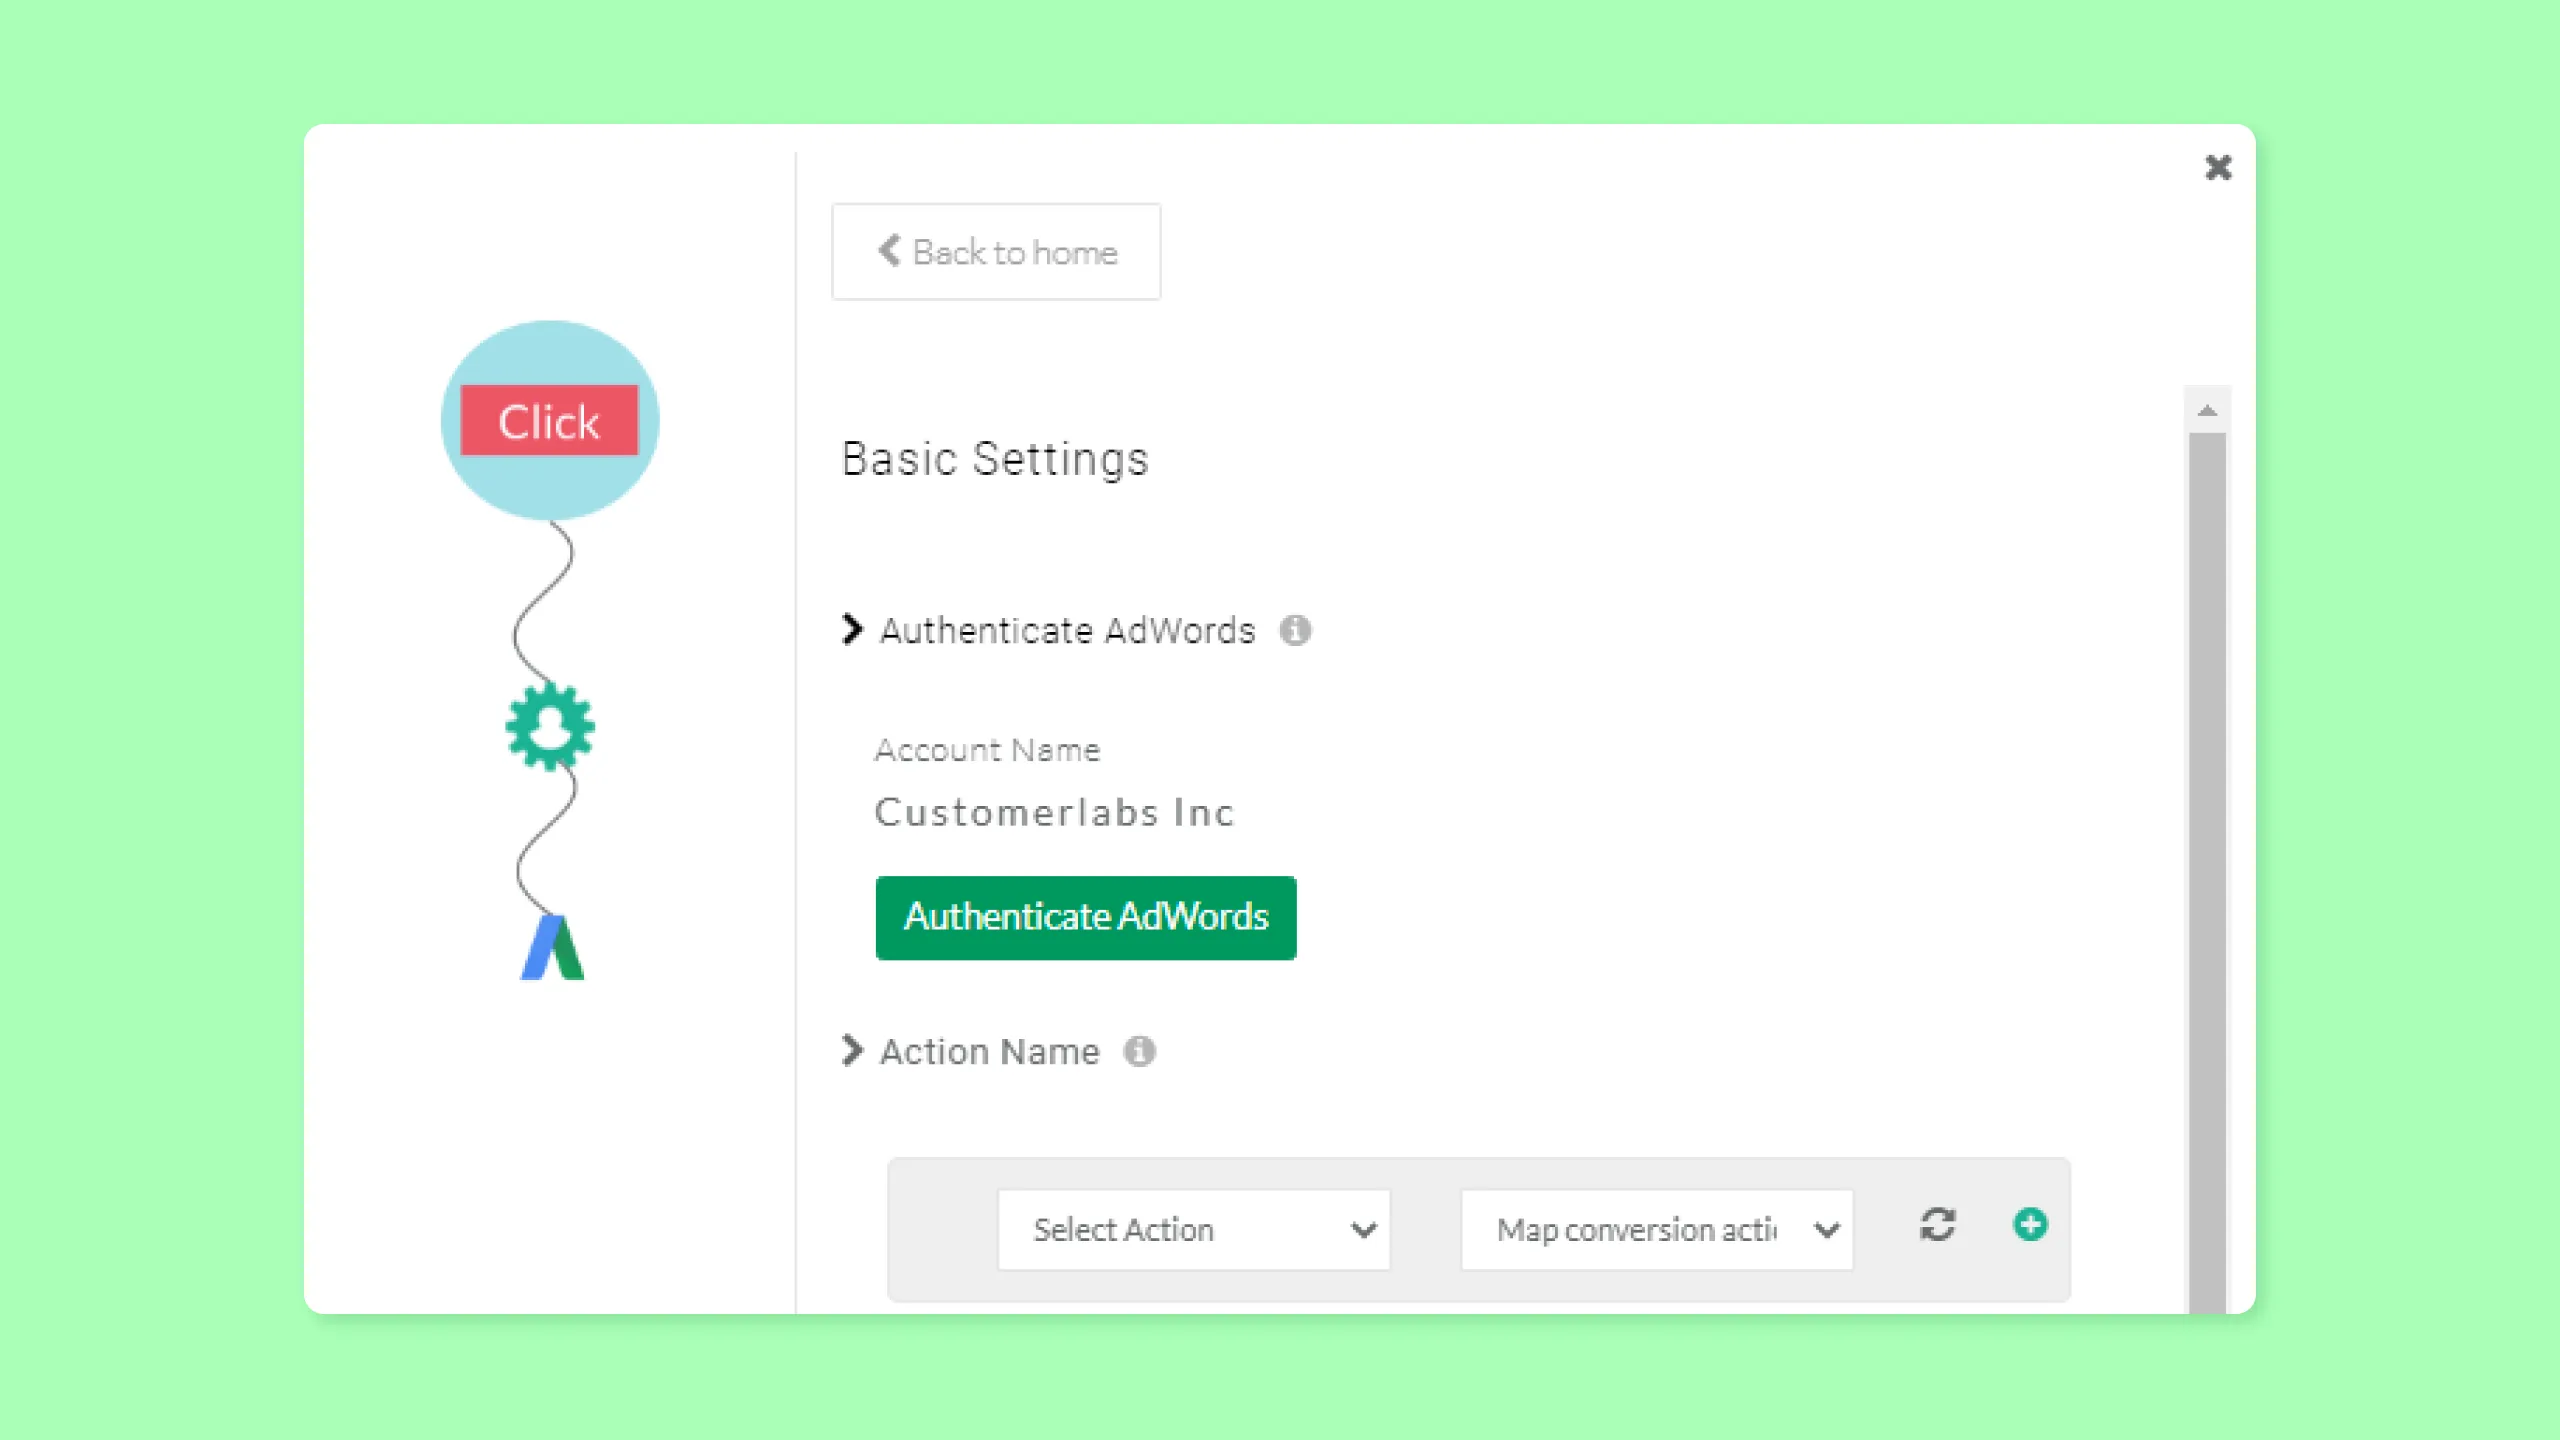
Select your Google Account and click “Allow”
Step 8: Send the data to Google Ads & deliver targeted ads
Post authentication, create a custom audience list in Google Ads
Sync the created “No-Response” segment in 1PD Ops to Google Ads with the click of a button
Advantage
- While you can come up with creative growth strategies, using this playbook you can re-engage your cold or unresponsive leads and add more leads to your marketing funnel