To answer your question. You can integrate Jotform Salesforce with their native setup.
But it comes with challenges, especially when you’re trying to scale campaigns. At that stage, you need high-quality, fully stitched conversion signals sent back to ad platforms.
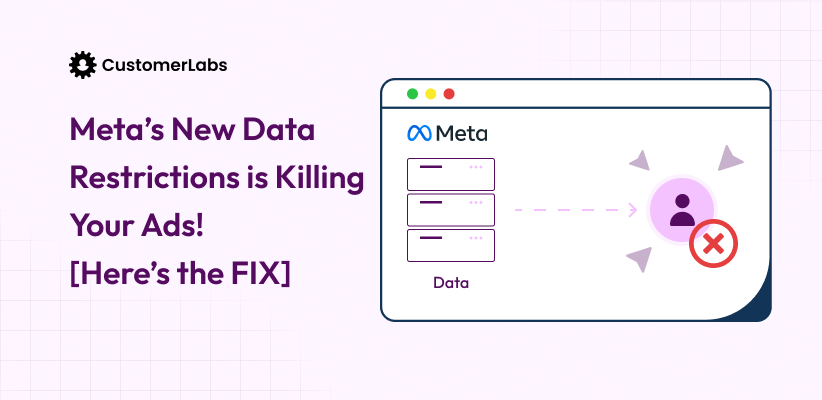
Most native setup generally captures identifiers (email, phone, sometimes the last GCLID) only at form fill.
Anything before that, like GBRAID/WBRAID (Google), FBP / FBC (Meta), ID’s from other ad platforms like TikTok, Snapchat, LinkedIn, Reddit, UTMs and campaign parameters, sometimes device/browser-level signals, anonymous behavior, earlier ad clicks, it doesn’t carry over.
This means, there are no cookies, attribution won’t happen. Hence the conversion signal sent back is usually tied to the last session, not the full journey.
This is where attribution breaks. And as marketers, we get stuck with a big question:
How do we accurately attribute leads when tools like Salesforce or Jotform don’t support identity resolution or stitching by default?
This where you will need a First-party data ops system that tells the entire story by using cookies, IDs through which data enrichment happens.
If you’re scaling and care about first-click vs last-click attribution, stitching these data points together becomes important. So that you close the feedback loop and tell which are the qualified leads to ad platforms as shown in the image below.

If you want to close the feedback loop, then integrate Jotform and Salesforce by following the steps below.
Don’t freak out. I hear your mind voice (“It does so much, the setup should be complicated😒”).
Not really. It is a very easy setup with no code, just a few toggles, let’s do it together.
How to Setup Jotform With Salesforce Using 1PD Ops?
This setup will basically split into two parts. First, we’ll connect Jotform to CustomerLabs and Second, Salesforce to CustomerLabs. Without waiting, let’s get into it.
How to Connect Jotform with CustomerLabs?
Step 1: Log in to CustomerLabs
- Open your browser and log in to CustomerLabs 1PD Ops.
- From the dashboard, navigate to Sources on the left sidebar.

Step 2: Connect the Jotform Source
- In the list of available sources, search for Jotform. Select Jotform and click Connect.

Step 3: Copy the Workflow URL
- After selecting Jotform, CustomerLabs generates a Webhook URL. Click “create source URL”
- Copy the generated URL; you’ll need it when configuring Jotform

- Change the name of the custom source as per the requirement and copy the workflow URL

Step 4: Configure Jotform Webhook
You need to send every form submission from Jotform to CustomerLabs using a webhook.
- Log in to your Jotform account. Edit the form you want to track.

- Go to Settings → Integrations → Webhooks.

- Paste the CustomerLabs Workflow URL you copied earlier.
- Save the webhook configuration. This connects the form to CustomerLabs and enables real-time submission data delivery.
Step 5: Build a Workflow in CustomerLabs
Once your source is connected and Jotform starts sending data, you need to configure how CustomerLabs processes it.
- Back in CustomerLabs, open the Jotform source.
- Under the Jotform source card, click Edit Workflow.

- Give your workflow a meaningful name (e.g., jotform_lead_submit).

Optionally, set a workflow delay if you have multiple workflows for the same source, this prevents data concurrency issues.
Step 6: Fetch Sample Data
- Submit a test entry through the Jotform form so CustomerLabs receives sample data.
- In the workflow setup, click Fetch New Data.

- Choose a sample that contains values and click on view details

Note: Avoid samples with null data. The sample will be used to configure filters and field mapping.
Step 7: Create Filter Conditions
- After selecting the sample, select Filter incoming data and click Create Filter Criteria.

- Set filter rules to ensure the workflow only processes relevant events (e.g., only submissions where “email” is present).

This helps avoid unwanted or incomplete payloads
Step 8: Configure Event & Field Mapping
This is a crucial step where you tell CustomerLabs what each piece of form data means.
- Go to Event Configuration.

- Event Name: Choose or create a custom event name (e.g., cl_jotform_submit).
- User Identity Mapping: Map identifiers such as email, phone, or a unique Jotform field (like a hidden cluid) to help unify user records.
- User Traits: Map Jotform form fields (e.g., first name, last name, email, phone) as user traits so CustomerLabs stores them in the profile.

- And hit save and save the workflow.
One part is done. We have successfully integrated Jotform with CustomerLabs. Now let’s move into the second part.

How to Connect Salesforce with CustomerLabs?
Step 1: Log in to CustomerLabs and Connect Salesforce
- Open your browser and log in to CustomerLabs 1PD Ops. Click Sources in the left sidebar.

- In the Sources panel, click Connect Source at the top right.
- Search for Salesforce, choose Salesforce

This opens the Sources list where you can connect various platforms.
Step 2: Install the Salesforce Managed Package
- To send data from Salesforce automatically, log in to the Salesforce instance where you want to forward data.
- Install the CustomerLabs Salesforce Managed Package; this package enables webhook flows and custom settings needed to send CRM data to CustomerLabs.

Note: You must have admin access in Salesforce to install managed packages.
Step 4: Configure Custom Settings in Salesforce
- In Salesforce, go to setup and search for Custom Settings.
- Find CustomerLabs Settings and click Manage. Click Edit.
- Switch back to CustomerLabs to copy the App ID shown on the Salesforce connection screen.
- Paste the App ID into the CustomerLabs Settings box in Salesforce. Click Save inside Salesforce.

This validates the connection and shares the required credentials.
Step 4: Set Remote Site and Webhook URL
- To allow Salesforce to send outbound messages, in Salesforce Setup, search for Remote Site Settings. Click New Remote Site.

- Enter any name (e.g., CustomerLabs_Source). And for Remote Site URL, paste: https://hook.customerlabs.co
- Ensure Disable Protocol Security is left unchecked. Tick Active and click Save.

This allows Salesforce to call out to CustomerLabs’ webhook endpoint.
- To setup workflows according to your scenario, click on the designated links below:
Set up a flow in Salesforce when a new account is: created (single object), created (related objects) and updated (single object).
- Building Workflows in CustomerLabs 1PD Ops
How to send data to CustomerLabs 1PD Ops when:
- a new account is created in Salesforce
- an account is updated in Salesforce
- an account is created along with opportunity (sending related objects)
Try this entire implementation using a 14-trial period. If you feel hindrance during the setup, our experts are just a call away
Now I’m gonna explain further why you should go with the setup and the benefits behind it.

Why is First-party Data Setup Essential for AdTech Stack Going Forward?
Imagine this.
A lead came in on Jan 5th from Meta. Your sales team calls them after a week, they don’t convert, and the lead goes cold.
End of story… right? Not really.
In February, that same person sees your retargeting ad, clicks it, visits your website again, and this time becomes an opportunity in your CRM.
Now here’s the real question, how will you know which campaign actually created that opportunity? Was it the Jan 5th lead ad? The Feb retargeting campaign? Or a Google search in between?
This is exactly where most marketers lose visibility.
Native platform tracking will show leads and clicks but it won’t reliably connect the full journey across time, devices, and touchpoints. And when cookies break, attribution becomes like a plain notebook like you saw in Harry potter (but here there’s no magic 🪄🔮)
If you want answers like:
- Which channel is generating more qualified leads — Google or Meta?
- Which campaign actually influenced the opportunity?
- Is it last-click or assisted conversion?
- Which ads are bringing customers who convert after 7–30 days?

You need first-party tracking infrastructure.
Because first-party cookies and server-side tracking store the user journey inside your own data layer.
And identity resolution helps in stitching every touchpoint, whether the user visits today, clicks an ad on Meta two months after, or enters into your site organically after 300 days, attribution will still be on point.
Not just that you can pull attribution inside the built-in analytics tools, CRM reports, or even Looker Studio without depending on platform-reported numbers as shown in the image below.

That’s why first-party setup is the future. Many bigger brands have already started executing campaign strategies based on their first-party data.
It’s the only way to build a future-proof adtech stack where revenue attribution is actually trustworthy.
Want to see how this setup works for your brand? Book a demo or start a free trial and we’ll help you get it live.